- Home
- Data Loss Prevention
- Data Loss Prevention for Jira

How to Setup the miniOrange Data – PII Scanner (DLP) for JIRA
The Data - PII Scanner (DLP) for Jira is a robust tool designed to strengthen data privacy & governance within JIRA environments. It thoroughly scans your entire instance to detect and report potential exposures of Personally Identifiable Information (PII), helping you mitigate risks before they escalate.
As data security/privacy becomes increasingly critical, the PII Scanner for Jira empowers you to take control of sensitive information, helping you safeguard data privacy and reduce the risk of data exposure. Let’s explore how to get started with this essential tool and strengthen your data protection efforts.
 Try it for free
Download and Installation
- Log in to your Jira Cloud instance as an administrator.
- Navigate to the Apps in the top left navigation bar of your Jira dashboard and click on the Explore more apps section.
- Search for Data - PII Scanner for Jira. Please note that this option is available only for users with Admin permissions.
- Click Try it free to begin the trial. Your trial will be valid for a period of 30 days.
Initial Configuration & API Setup
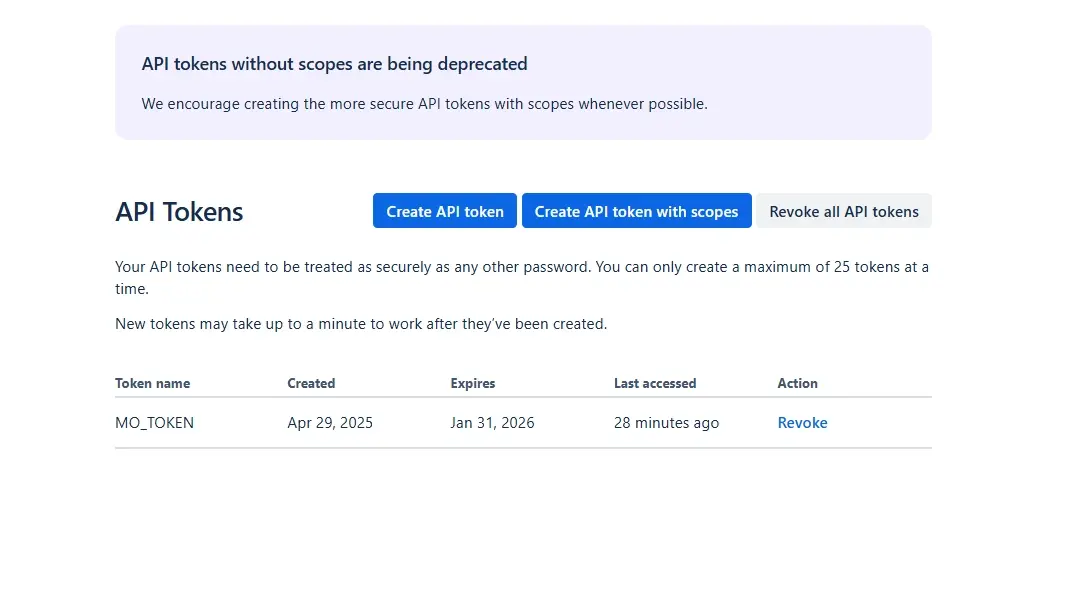
- To get started, go to the Configure Token tab in the app. To connect the plugin with your Atlassian instance, follow these steps to generate an Admin API Key:
- Open the Atlassian API Token Manager.
- Click Create API token without scopes, assign a clear name (e.g., MO_TOKEN), and set an expiration date.
- Tip: We recommend 12 months expiration for easier maintenance.
- Copy the generated token and paste it into the plugin settings.
- Enter the Admin Email. This must match the Atlassian account that created the token.
- Go to admin.atlassian.com.
- Select the site where the app is installed (e.g., your Atlassian organization).
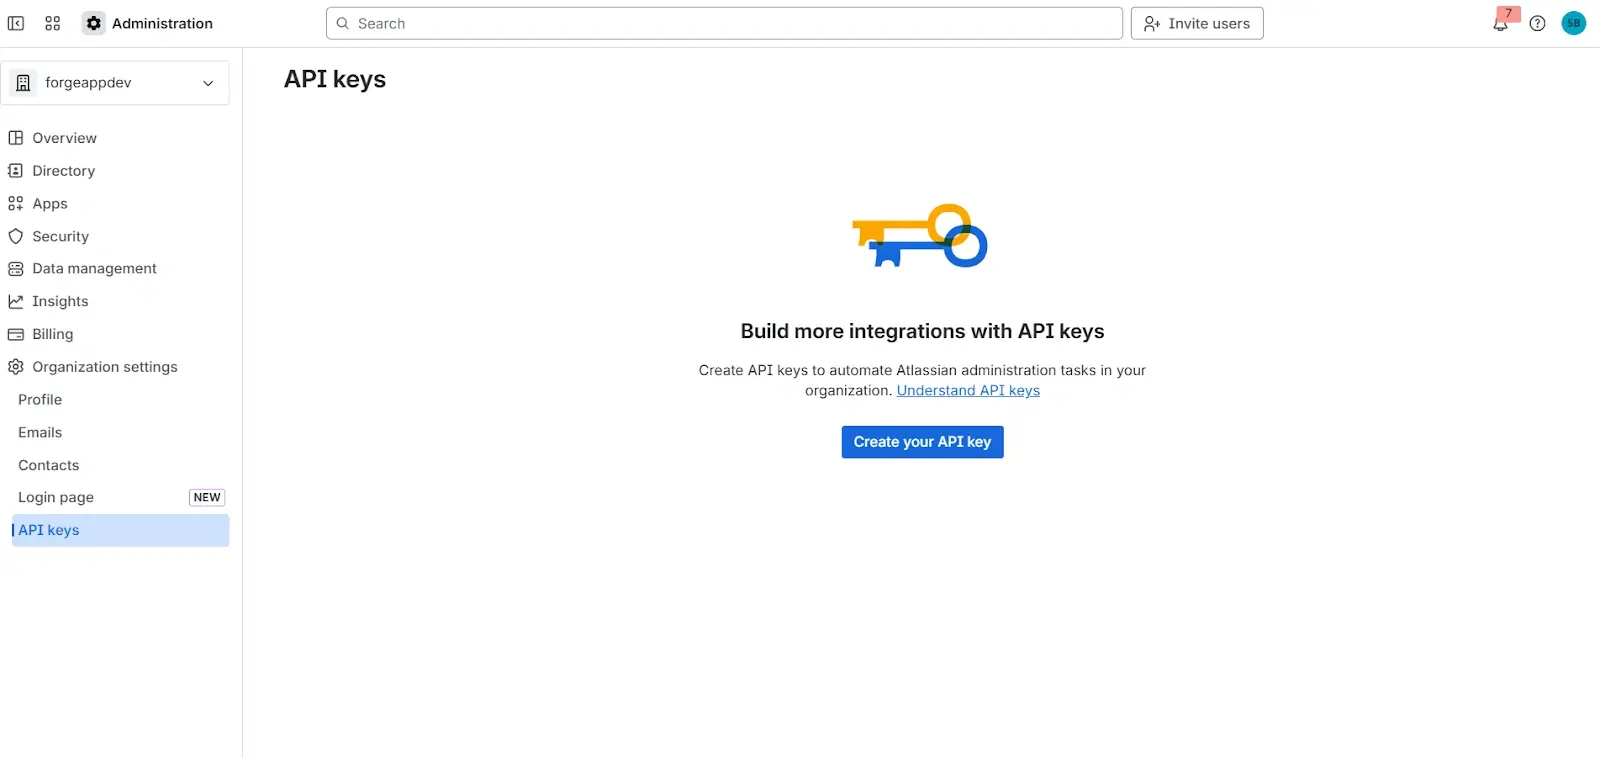
- Navigate to Settings → API Keys and click Create API key.
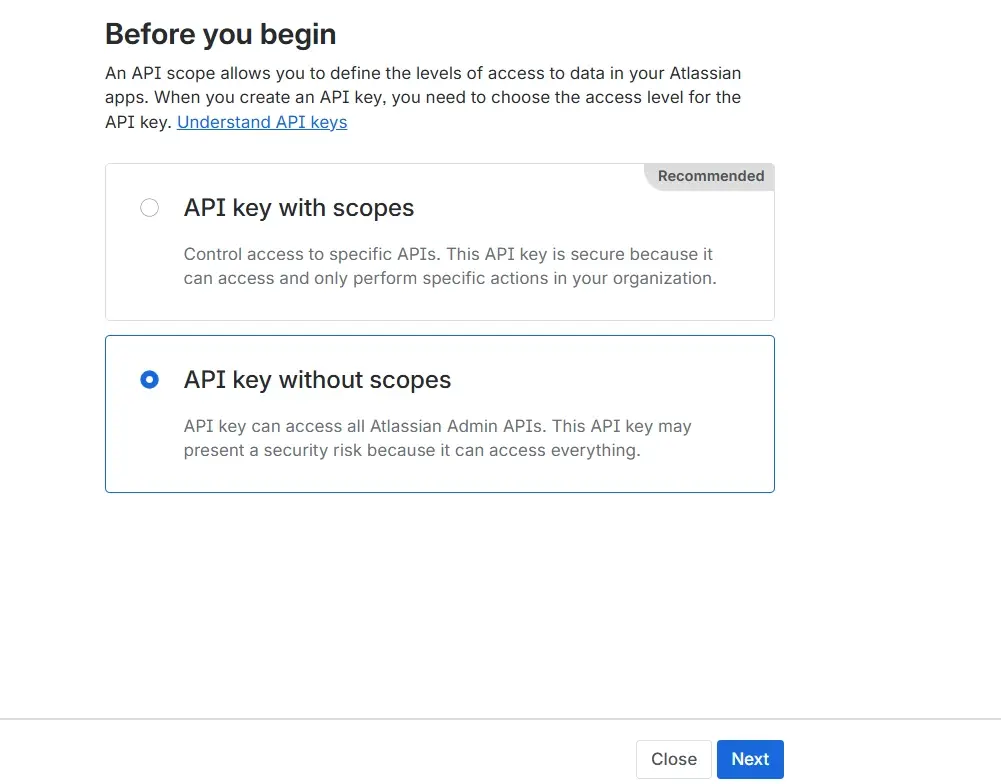
- Choose the API key without the scopes option, then click Next.
- Enter a name (e.g., MO_DLP_KEY) and set an expiration period.
- Tip: We recommend 12 months for easier maintenance. Copy the generated API key and paste it into the plugin configuration screen.
- Click Save after entering both the Admin Email and API Token to avoid errors.
1.1 : API Token Setup
1.2: API Key Setup
Get Started
This guide will get you up and running in just a few minutes. The Data - PII Scanner for Jira app is designed to automatically find and protect sensitive information within your Jira Projects and tickets. To use the app effectively, it's important to understand its three core components, which work together in a hierarchy:
Detection Rules
These are the fundamental building blocks. A rule tells the system
what to look for. For example, a rule could be a regular expression
that matches a Social Security Number.
Templates
A template is a reusable group of Detection Rules. For example, you
could create a "PII Compliance" template that contains the rules for
SSNs, credit cards, and phone numbers.
Policies
A policy is the final, actionable step. It takes one or more Templates
and applies an Action to them (e.g., "Redact Content"). You can turn
policies on and off. Only active policies are enforced during a scan.
Under Apps section in the top-Nav bar, You will find the app by the name Data - PII Scanner for Jira. This will only appear for Admins and not users.
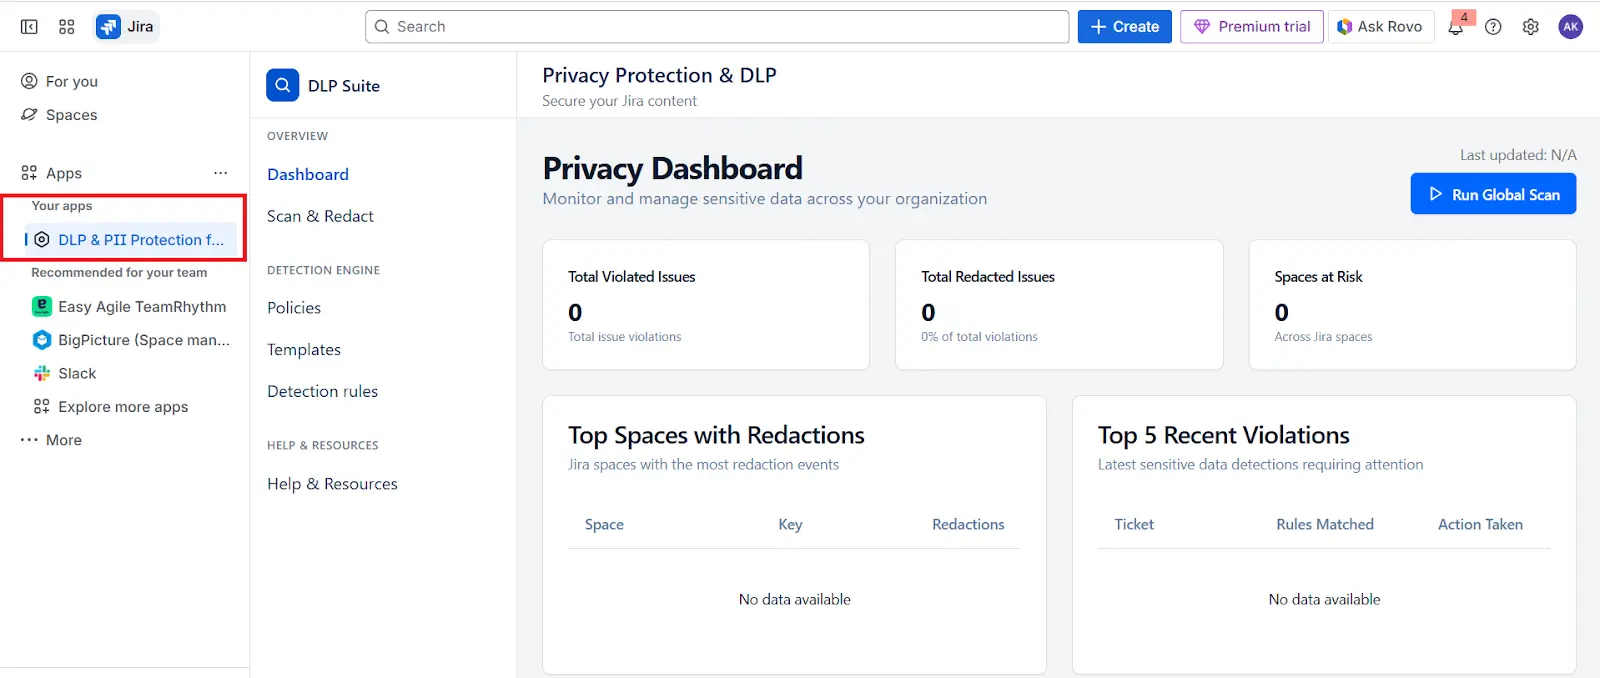
1: Review and add Your Detection Rules
Navigate to the Detection Rules page. Familiarize yourself with the pre-built rules or create a new custom rule for any specific data unique to your organization. We have a set of 80 pre-built rules set.
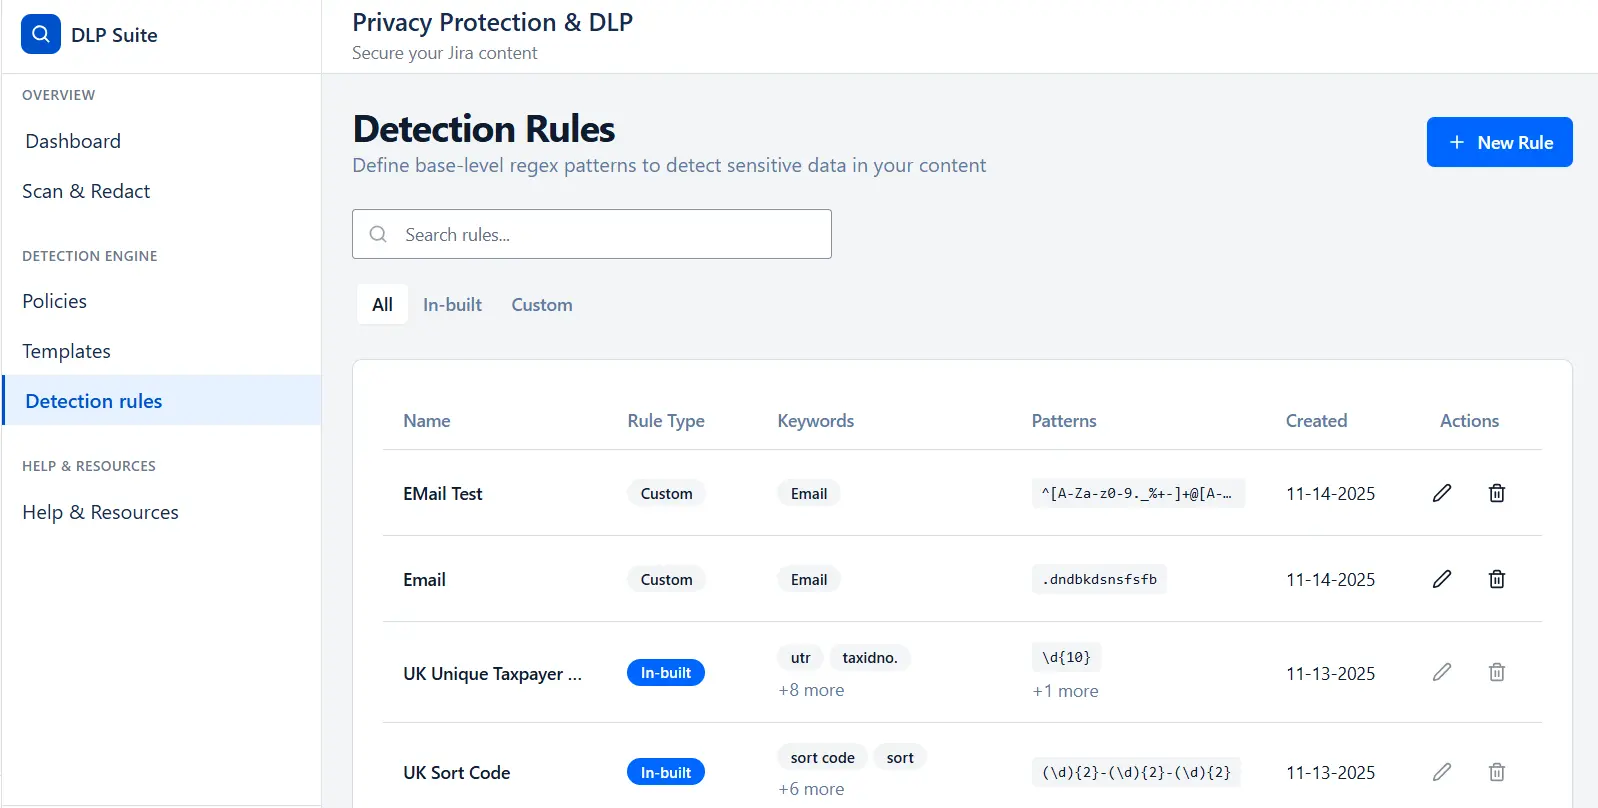
To create a New Rule Select Detection Rules Tab
- Click Detection rules to view existing rules and manage them.
- Click New Rule to start creating a new customized rule.
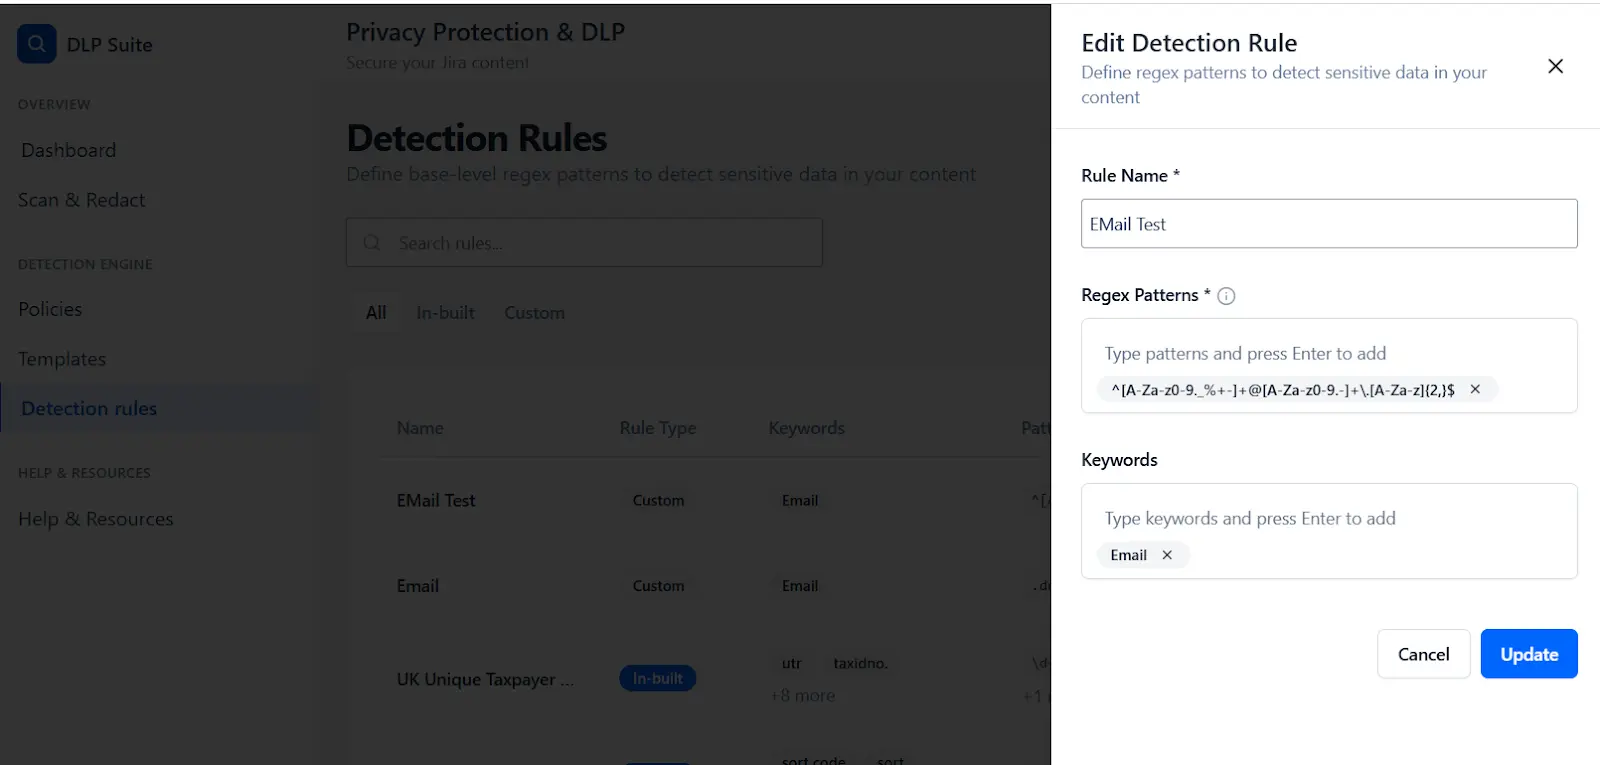
- Enter your rule name to identify the detection criteria and the pattern text to define what the rule should detect.
- Enter your keyword to associate with this detection rule then click Create to save the detection rule you configured. Your custom Detection rule is created and visible in the list.
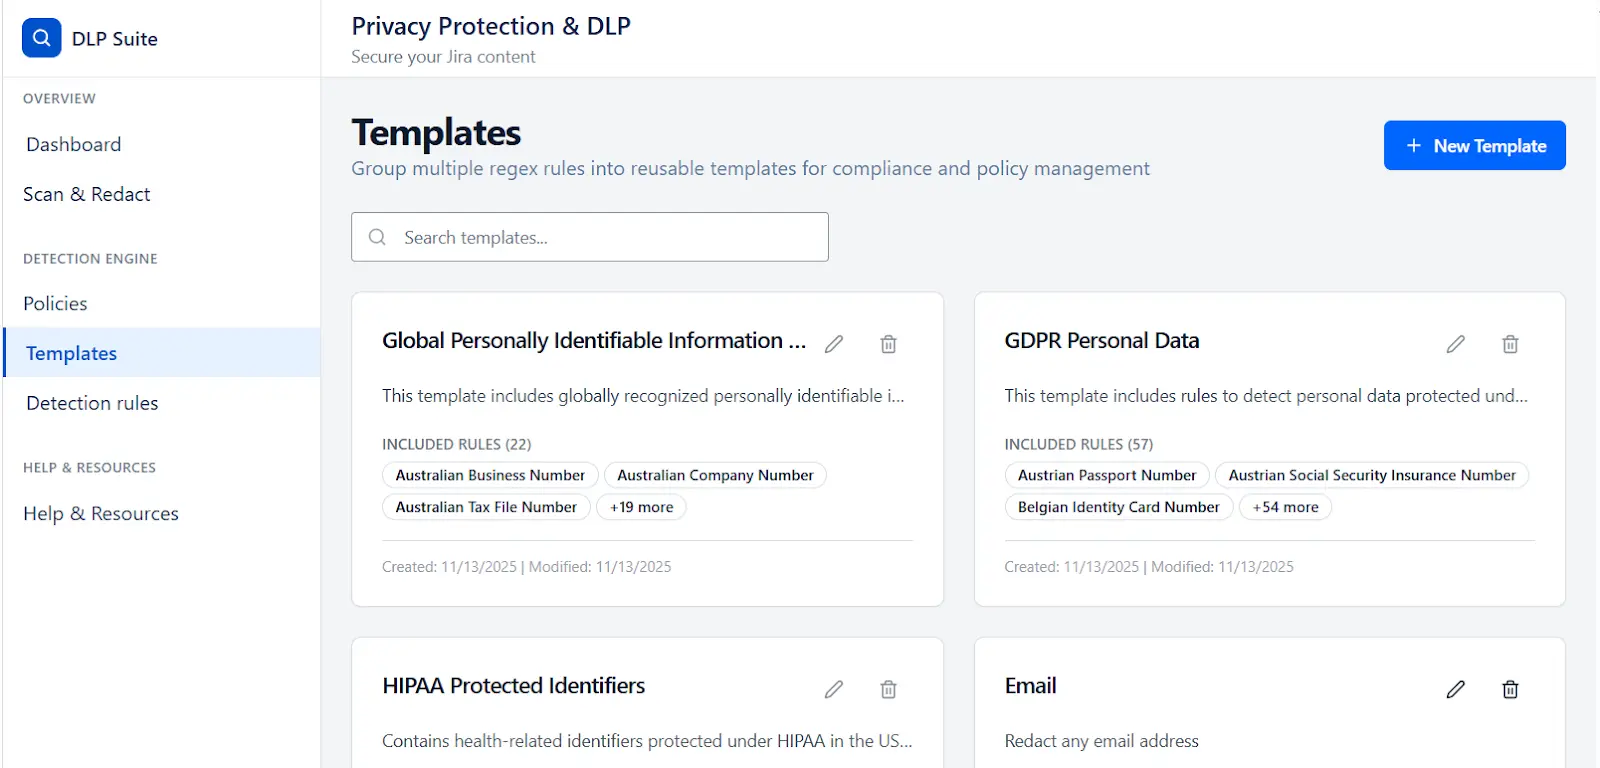
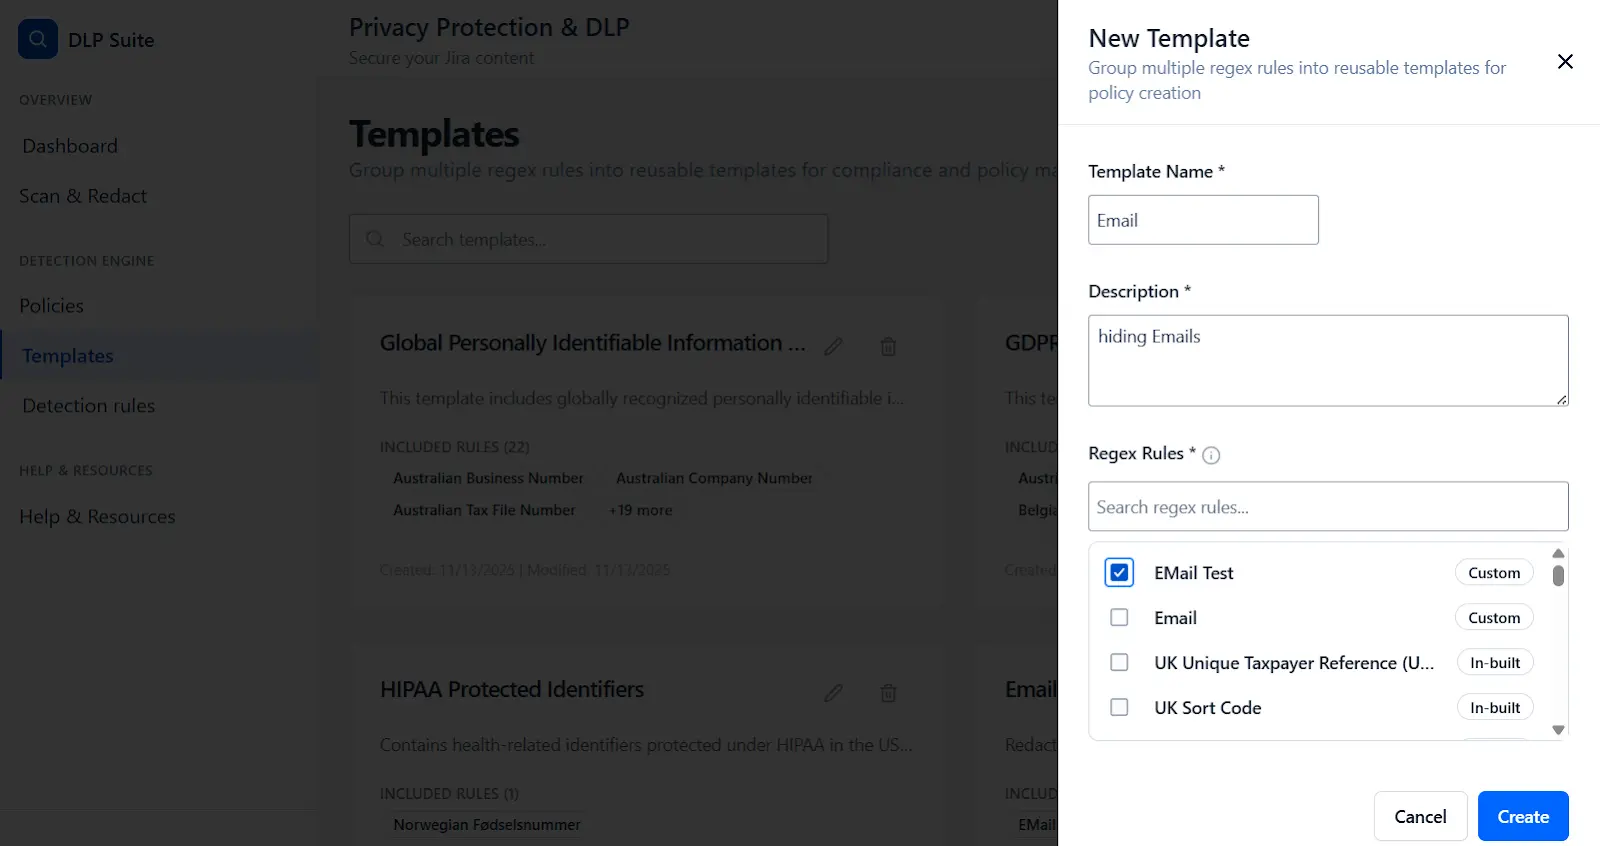
2: Create a Template
- Go to the Templates page and click New Template. Give it a name (e.g., "Confidential Project Data") and select the detection rules you want to include.
- You can create your own template, add the description to explain the template's purpose, and select the rules you would like to include in this template. Click Create to save the template you’ve configured.
3: Create and Activate a Policy
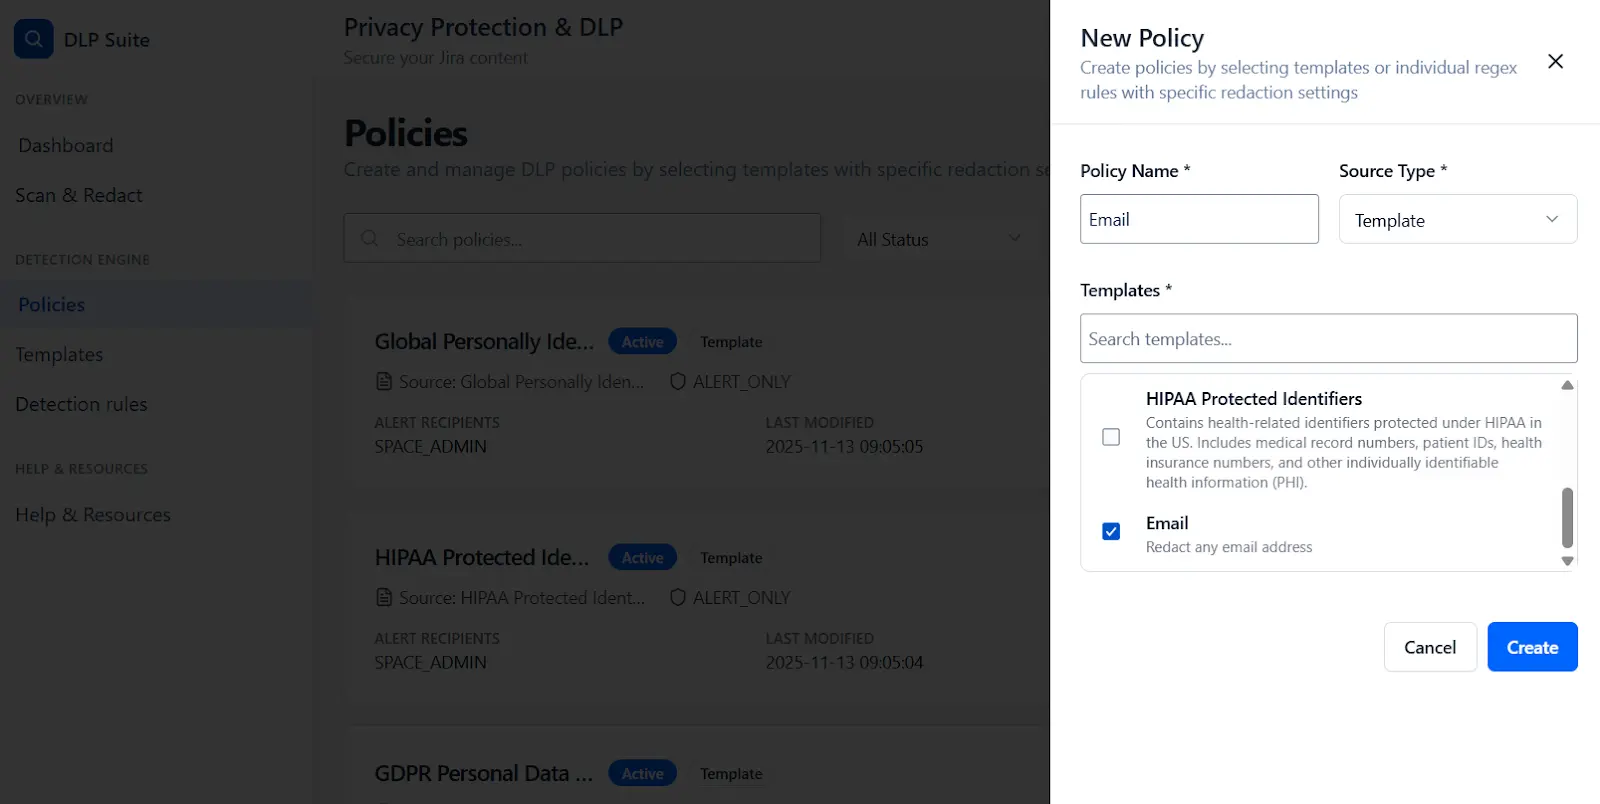
- Head to the Policies page and click New Policy.
- Add the template you just created, and most importantly, choose an action like Redact Content.
- After creating the policy, make sure you enable it using the toggle switch.
4: Run a Scan
- Go to the Scan & Redact page.Click the Run Global Scan button to start searching through all your Jira content based on your active policies.
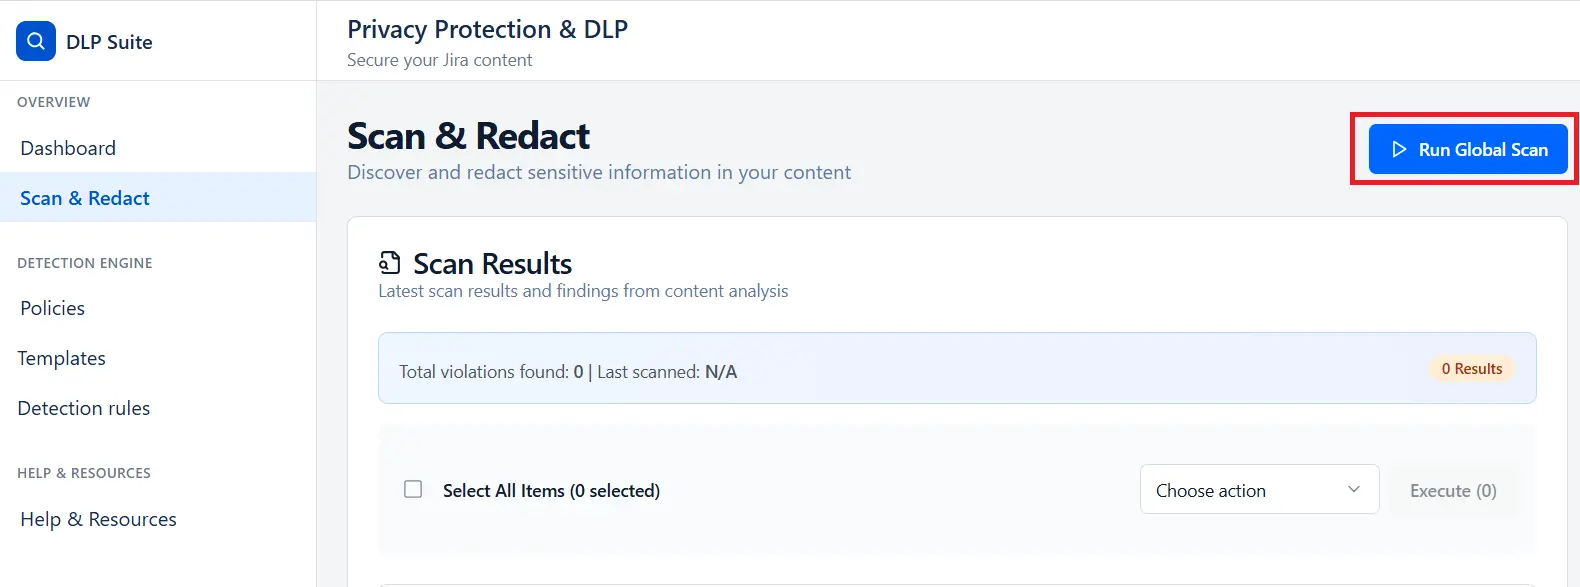
5: Review Results
As the scan progresses, results will appear. You can see which tickets contain violations and what was found. From here, you can select items and use the bulk action tools to manage them. You can then take the necessary action like hide or redact the specific information and accordingly take action.
You can now create and manage detection rules, templates and Templates in Jira to enhance data protection, privacy and governance on Cloud. Start by defining patterns and keywords, then associate templates to automate sensitive data redaction.
Additional Resources
Did this page help you?