- Home
- Data Loss Prevention
- Data Loss Prevention for Jira

How to Set Up the miniOrange Data – PII Scanner (DLP) for Jira
The Data - PII Scanner (DLP) for Jira is a robust tool designed to strengthen data privacy & governance within Jira environments. It thoroughly scans your instance to detect and report potential exposures of Personally Identifiable Information (PII), helping you mitigate risks before they escalate.
As data security/privacy becomes increasingly critical, the PII Scanner for Jira empowers you to take control of sensitive information, helping you safeguard data privacy and reduce the risk of data exposure. Let’s explore how to get started with this essential tool and strengthen your data protection efforts.
 Try it for free
Video Setup Guide
Download and Installation
- Log in to your Atlassian Admin Console and select your site.
- Now, in the left sidebar, scroll down to the Apps section. Under Apps, select Site, which will open the site settings page.
- In the site settings, navigate to Connected Apps → Explore apps. (Alternatively, you can go to the Atlassian Marketplace and search for the app.)
- Search for Data - PII Scanner for Jira.
- Click “Try it free” to begin a new trial of the app.
- Now, in the top menu bar, go to Apps.
- Locate the “Data - PII Scanner for Jira” app and click to open it.
1. Create a Detection Rule
A Detection Rule is used to define and flag sensitive information. It relies on regular expressions (regex) to determine if a specific type of data is present.
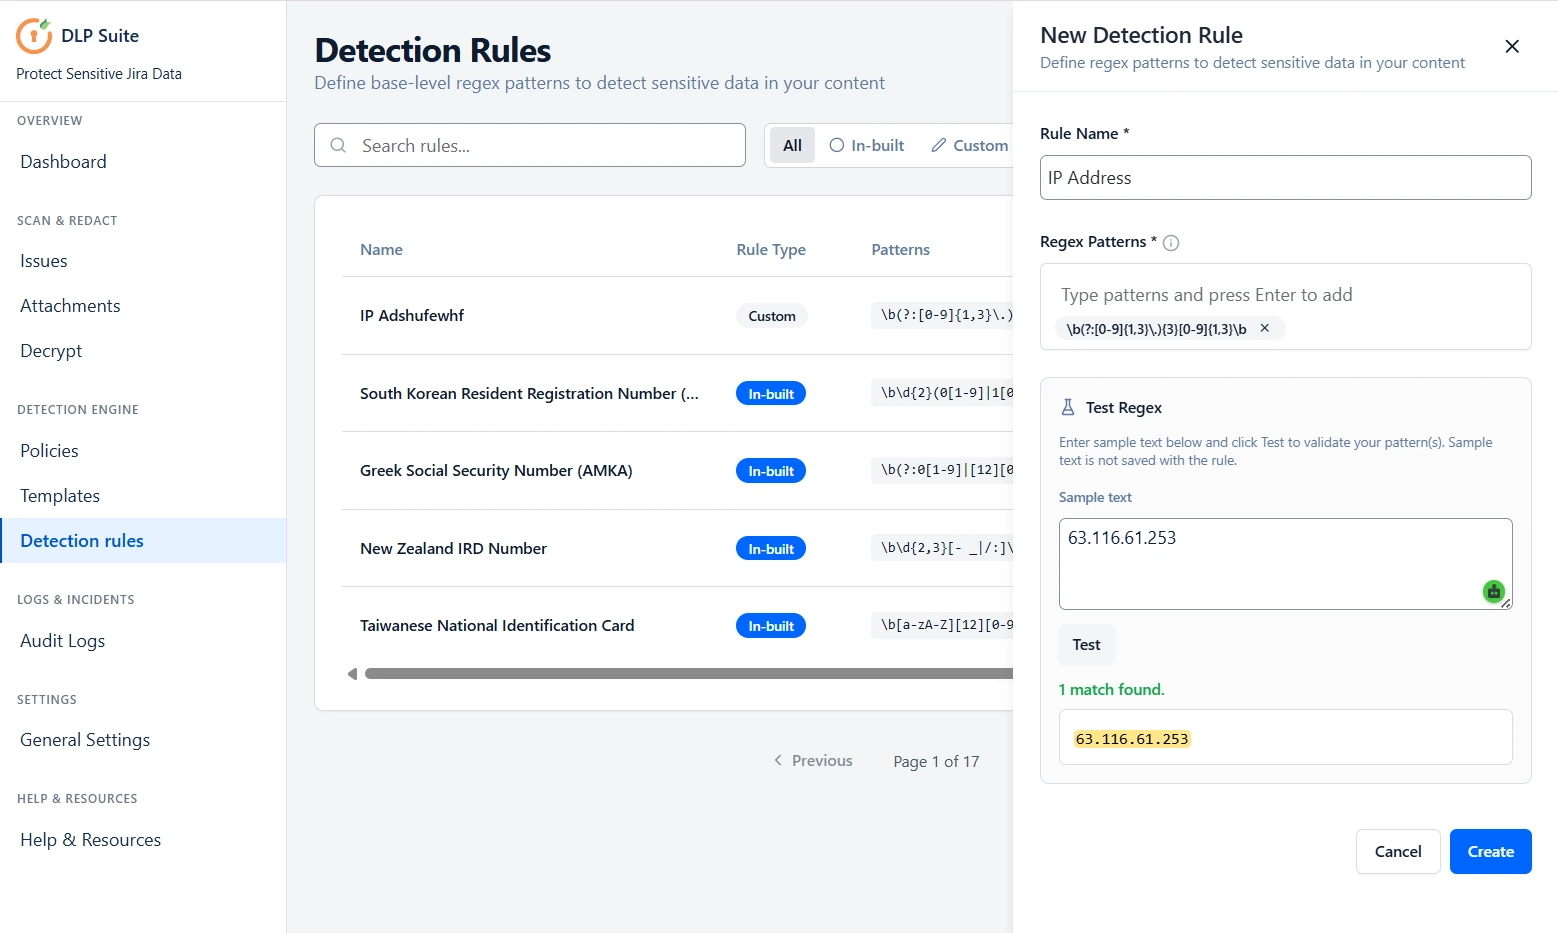
To create a Detection Rule:
- Navigate to Detection Engine > Detection Rules.
- The Detection Rules page displays the default Detection Rules available with the app.
- Click New Rule to create a custom Detection Rule.
- For this guide, we will create a Detection Rule to identify IP addresses.
- Enter a name for the Detection Rule.
- Enter the required Regex Pattern. Eg: \b(?:[0-9]{1,3}\.){3}[0-9]{1,3}\b
- Use the Test Regex option to verify the pattern.
- Enter sample data to test whether the regex correctly identifies the required data.
- Once the regex is verified, click Create.
Once created, the IP address Detection Rule will be available in the Detection Rules list and can be added to a Template.
2. Create a Template
A Template is a collection of Detection Rules grouped together based on a specific functionality or data protection requirement. Templates make it easier to manage multiple Detection Rules as a single configuration.
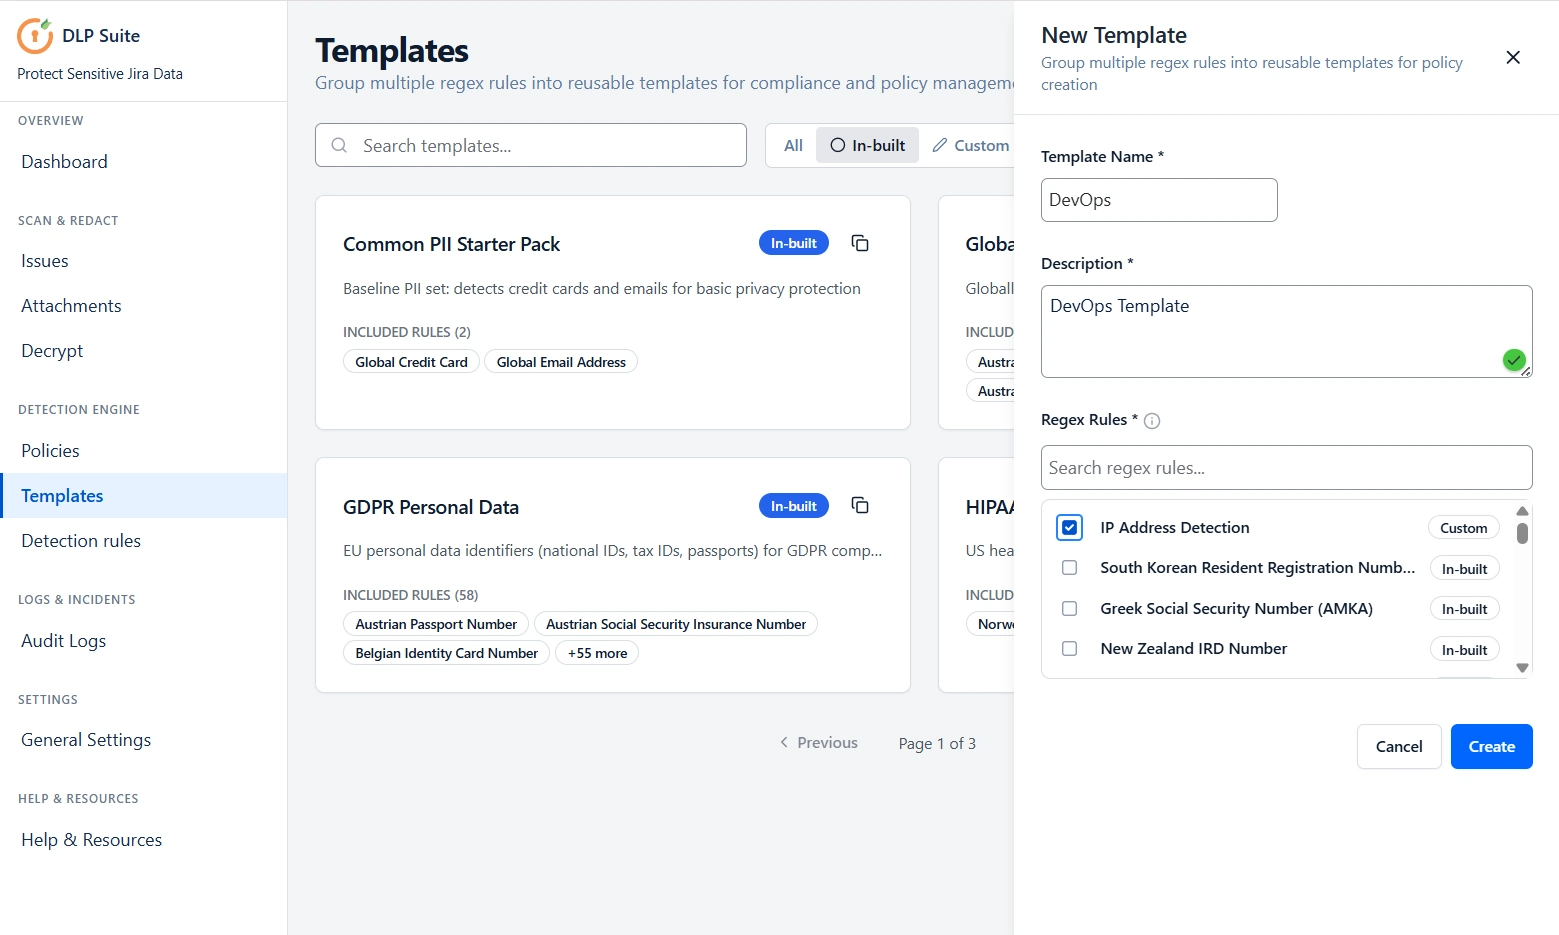
To create a Template:
- Navigate to Detection Engine > Templates.
- The Templates page displays the default Templates available with the app.
- Click New Template.
- Enter a name for the Template. For this guide, we will use the DevOps Template.
- Enter an appropriate description for the Template.
- Select the Detection Rules that you want to include in the Template.
- For this guide, we will select the IP Address Detection Rule created in the previous step.
- Click Create.
The DevOps Template is now created with the IP Address Detection Rule.
3. Create a Policy
A Policy dictates how the actual scan is executed and consists of one or more Templates.
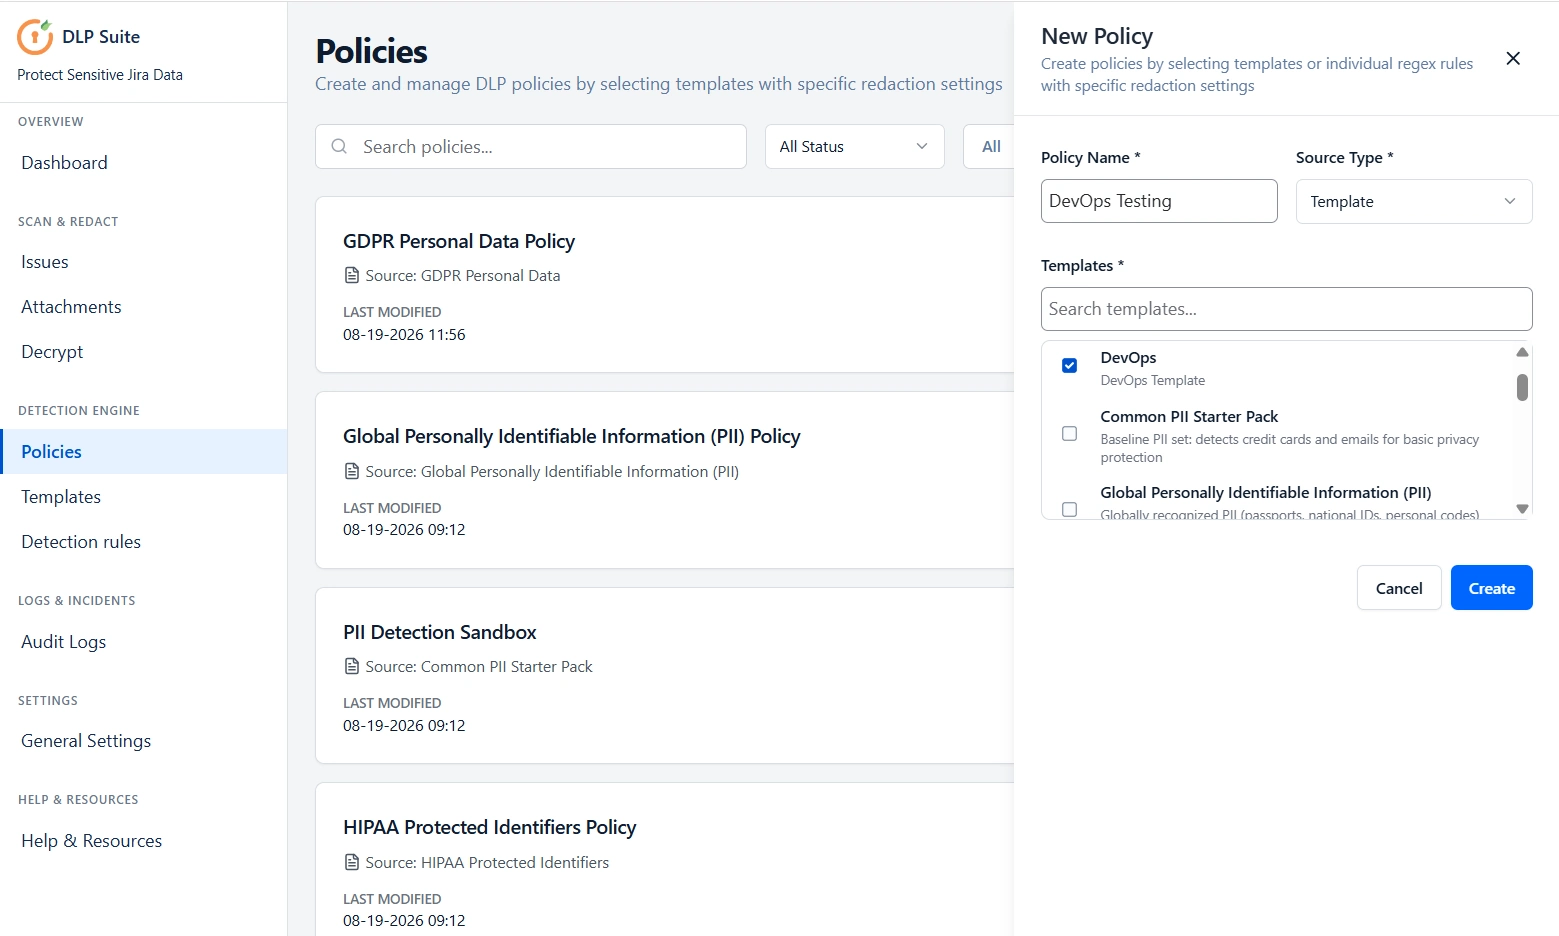
To create a Policy:
- Navigate to Detection Engine > Policies.
- The Policies page displays the default Policies available with the app.
- Click New Policy.
- Enter a name for the Policy.
- Select the Templates you want to include in the Policy.
- For this guide, we will add the DevOps Template created in the previous step.
- Click Create.
- The Policy is now configured with the IP address Detection Rule through the DevOps Template. It will be toggled on by default. You can choose to toggle other policies from the ones built in.
4. Run a Scan
Once the Policy is configured, you can use it to scan your Jira instance for sensitive data.
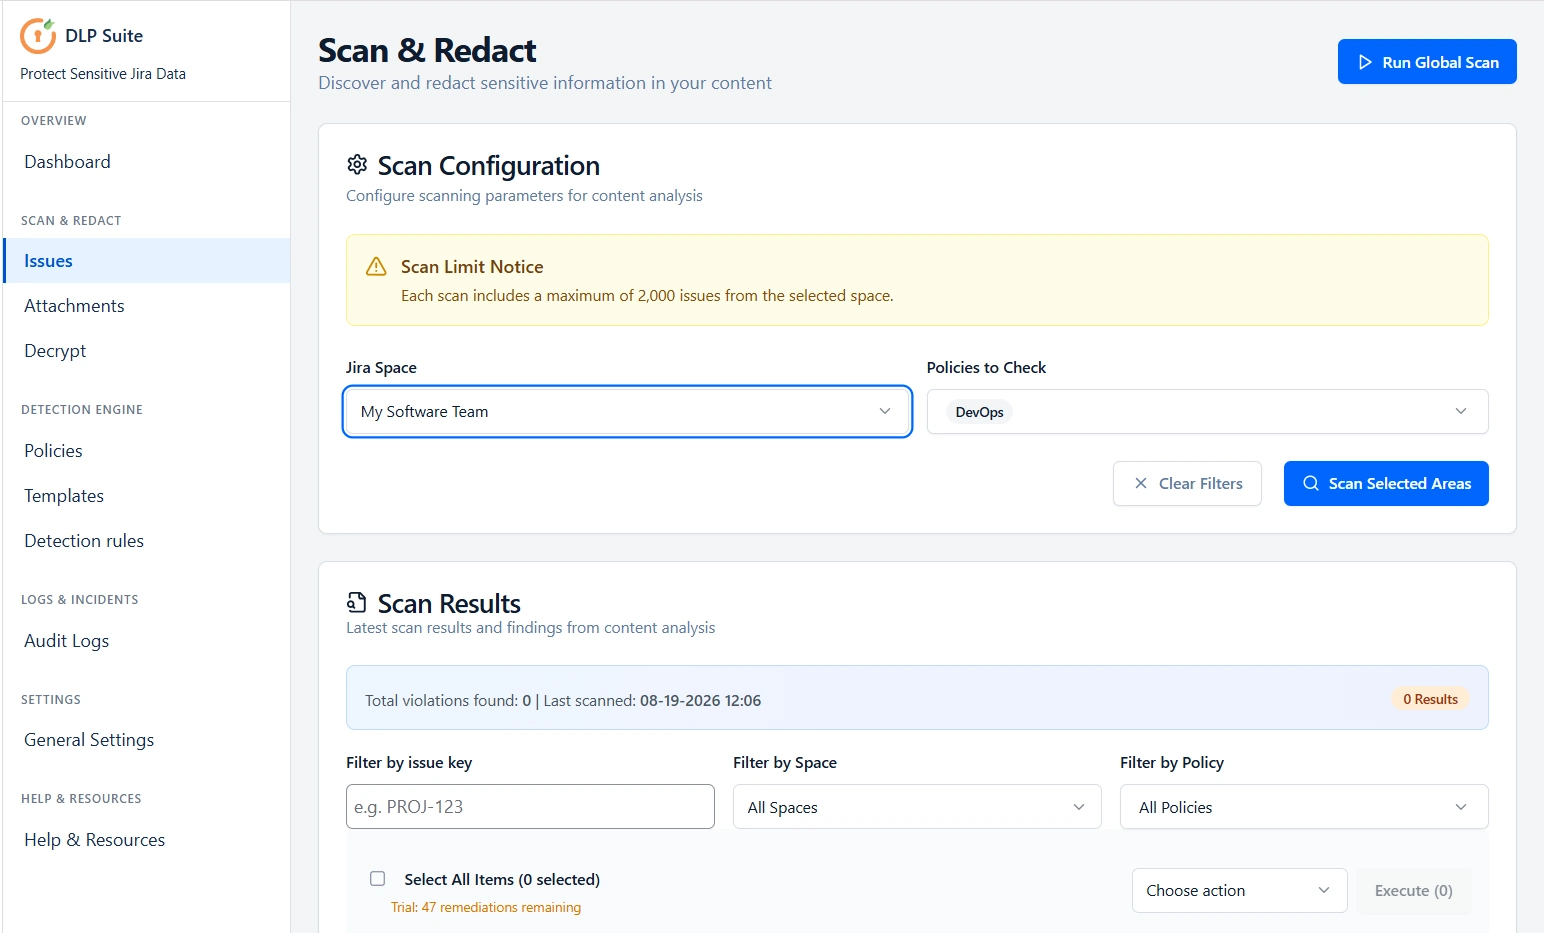
To run a scan:
- Navigate to Scan & Redact > Issues.
- Select the Policy configured in the previous step and the spaces you want to scan.
- Start the scan to analyze your Jira instance based on the selected Policy.
- The scan uses the Detection Rules included in the selected Policy to identify matching sensitive data.
5. Review Results
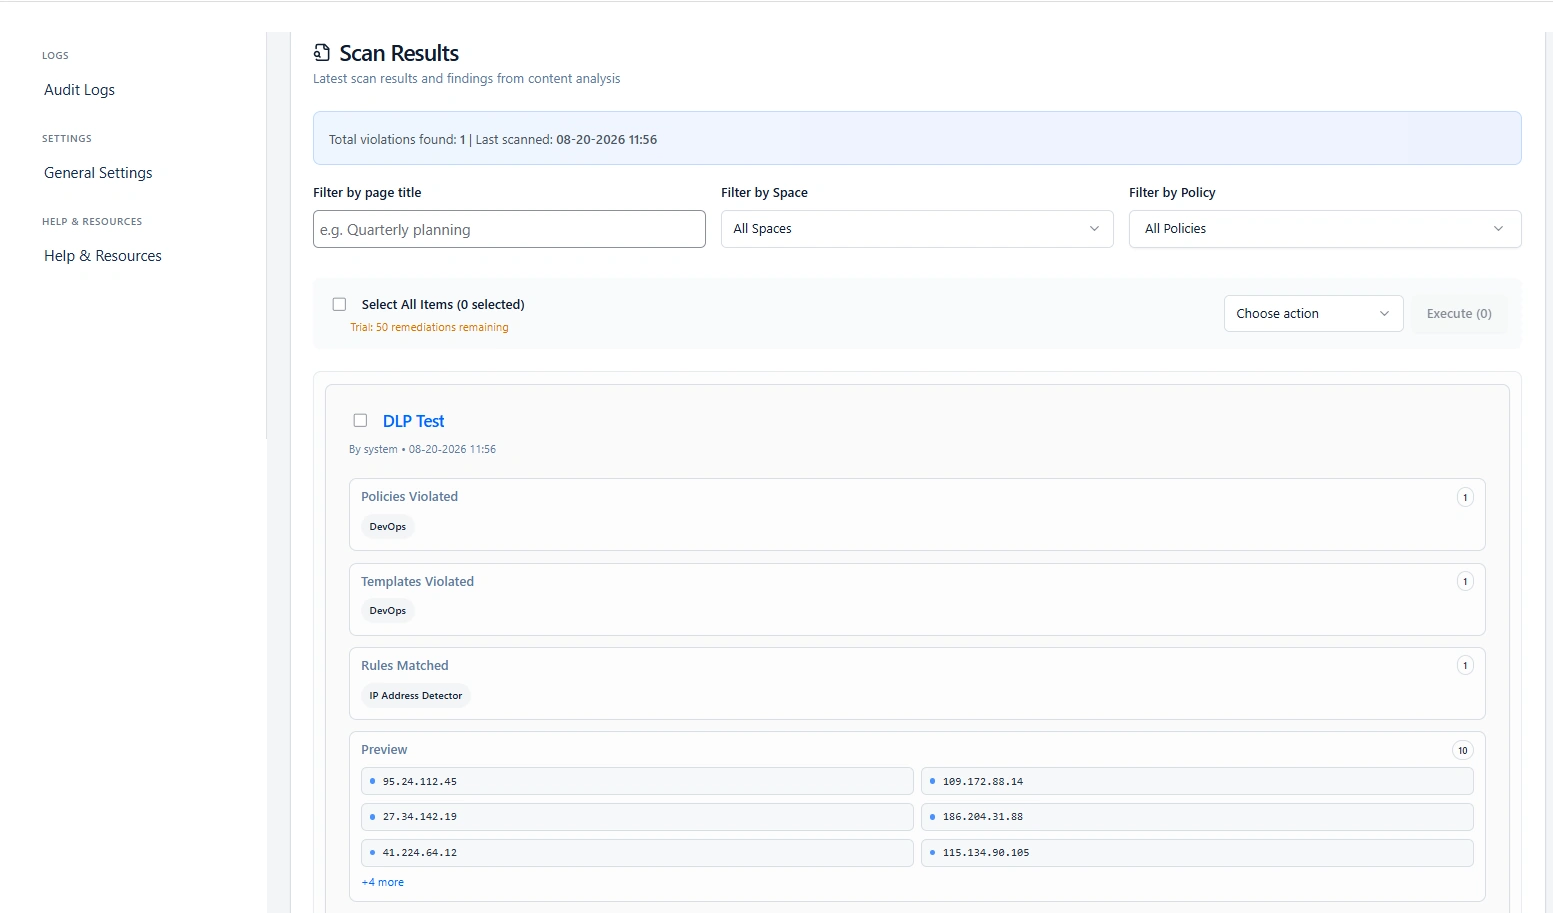
After the scan is completed, review the scan results to identify the data detected by the configured Detection Rules.
The results can be used to identify IP address violations and other sensitive data detected according to the Detection Rules included in the selected Policy.
Additional Resources
Did this page help you?