- Home
- SCIM Provisioning
- SCIM Provisioning Documentation
- miniOrange Users & Groups Provisioning for Jira Cloud with Okta

Jira Cloud Users & Groups Provisioning: Okta Sync Guide (REST API)
Users & Groups Provisioning for Jira synchronizes users, groups, and attributes from various identity providers (IdPs) with the Jira Cloud directory. You can manage users directly within your IdP, saving time and effort spent on manual provisioning while ensuring an up-to-date Atlassian directory.
 Try it for free
Before you begin
- You need admin access to both your Jira Cloud site and your Okta Admin Console.
Download and Installation
- Log into your Jira instance as admin.
- Under Apps section, click on Explore more apps.
- Search for miniOrange SCIM.
- Click Try it free to begin a new trial of the app.
- After installation, locate the miniOrange Users & Groups Provisioning For Jira app and click to open it.
1: Admin Setup Configuration
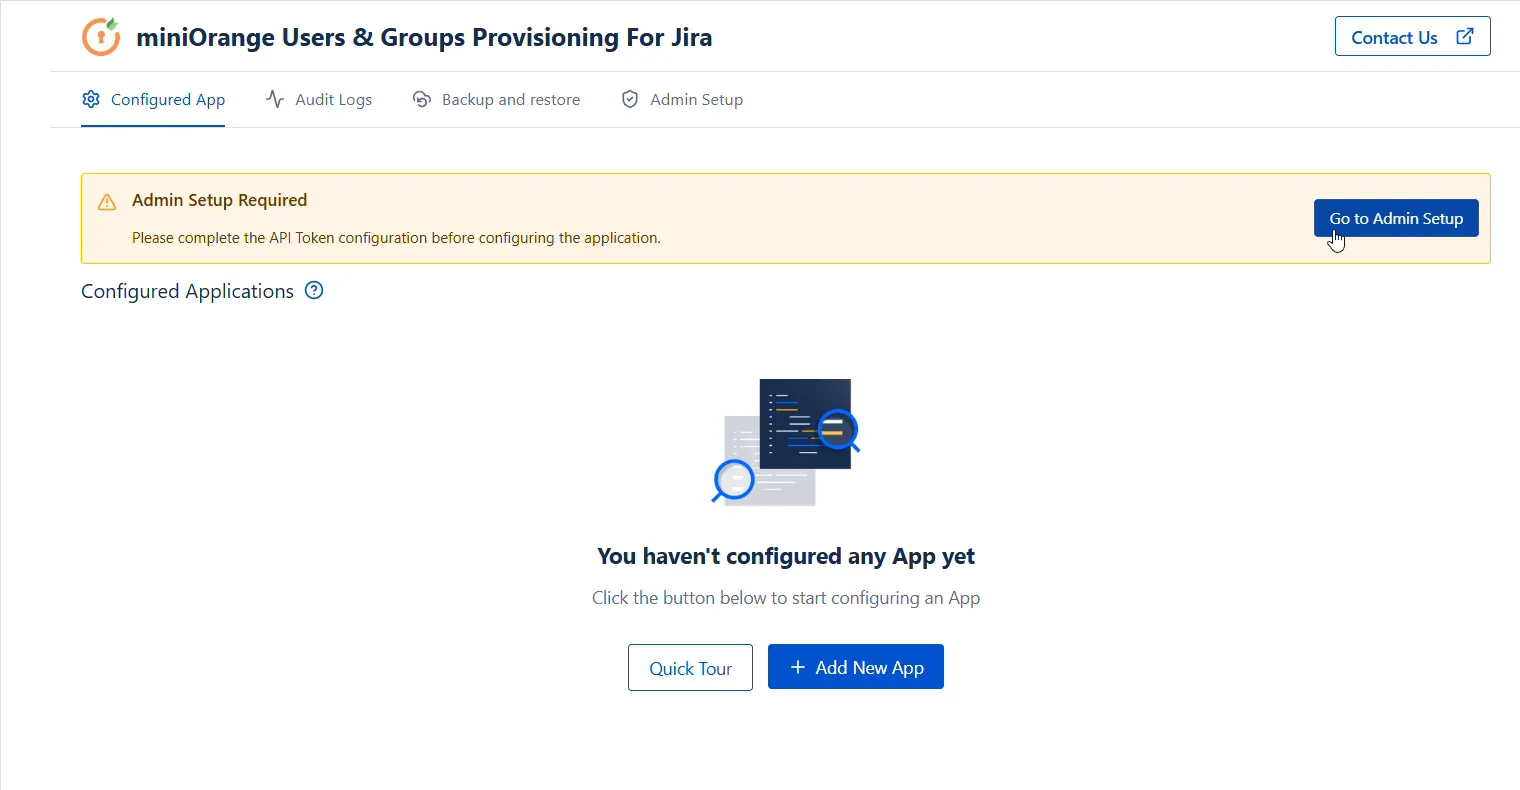
Upon installing the miniOrange Users & Groups Provisioning For Jira app, the admin needs to configure the Admin Token and API Key to complete the admin setup and start the provisioning process.
Part A: Configure Atlassian API Token
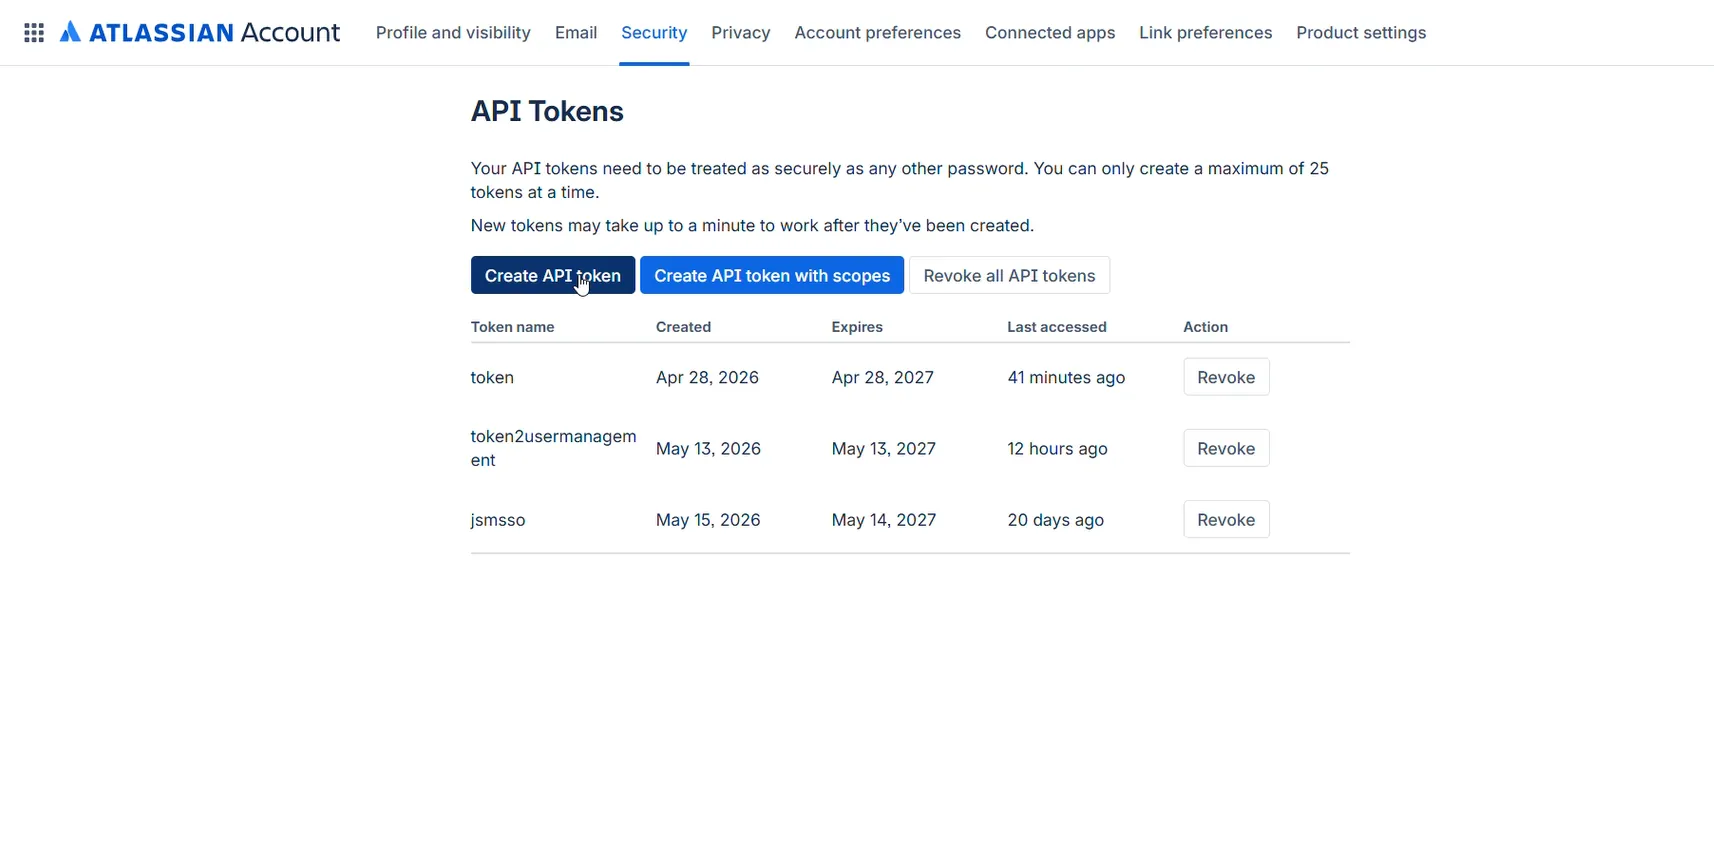
- Go to Atlassian Account and login with your admin account.
- Create API Token without scope and save at a safe place.
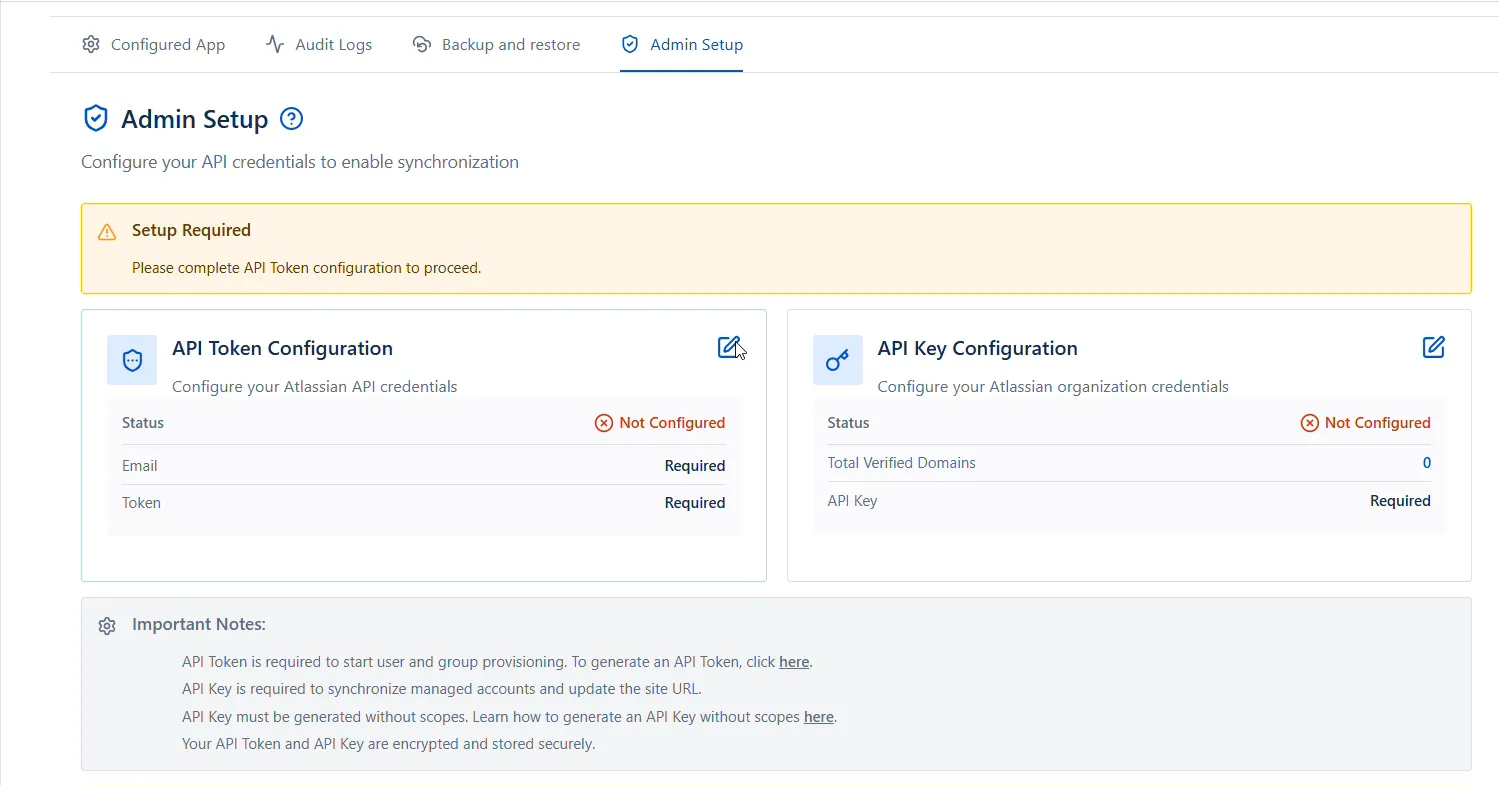
- Go to Admin Setup page inside plugin and edit API Token Configuration (using pencil button)
- Enter your Atlassian admin Email Address, API Token, and expiry date of API Token.
- Click on Save Token.
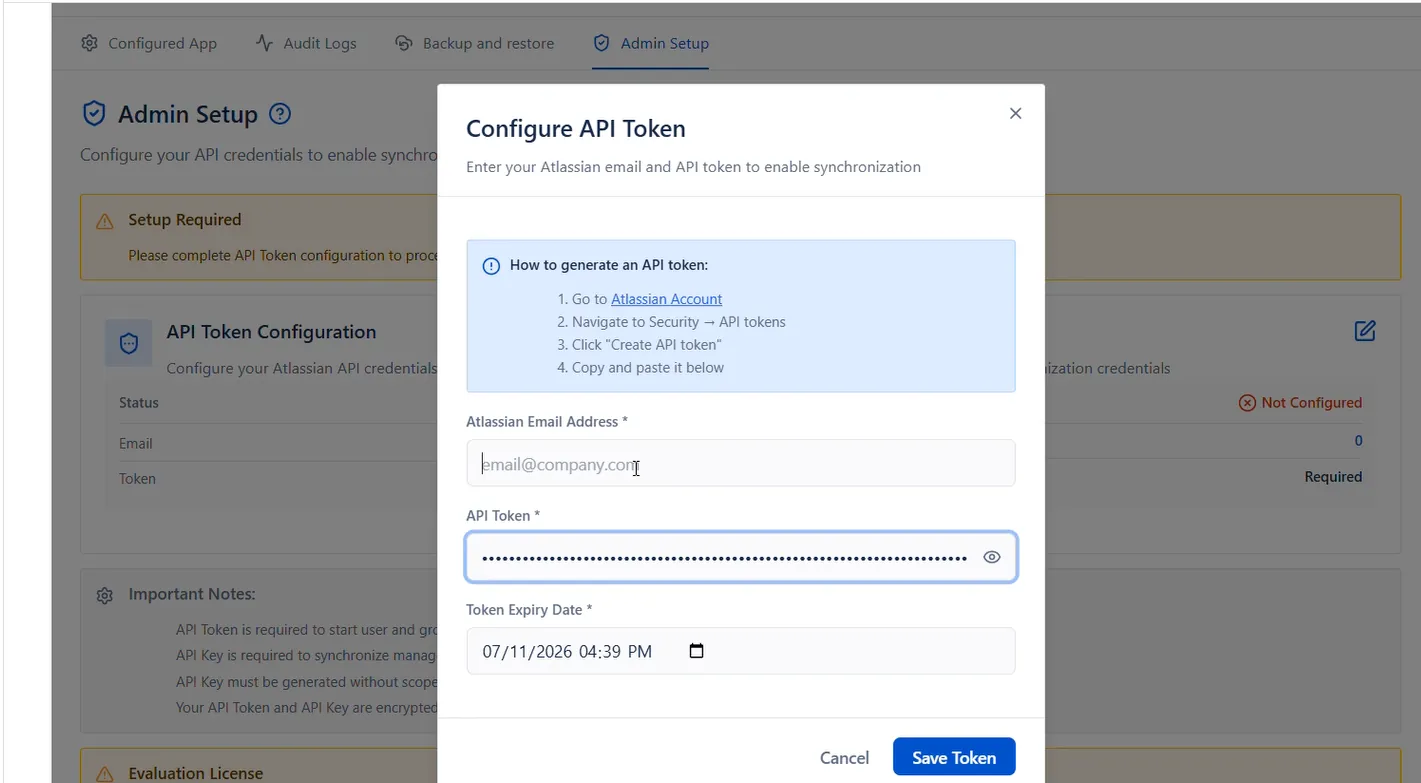
Part B: Configure Atlassian API Key
- Go to Atlassian Administration
- Select your organization if you have more than one.
- Navigate to Organization settings → API Keys
- Click "Create API Key" and select "API keys without scopes"
- Go to Admin Setup page inside plugin and edit API Key Configuration (using pencil button)
- Enter API Key and click on Save API Key button.
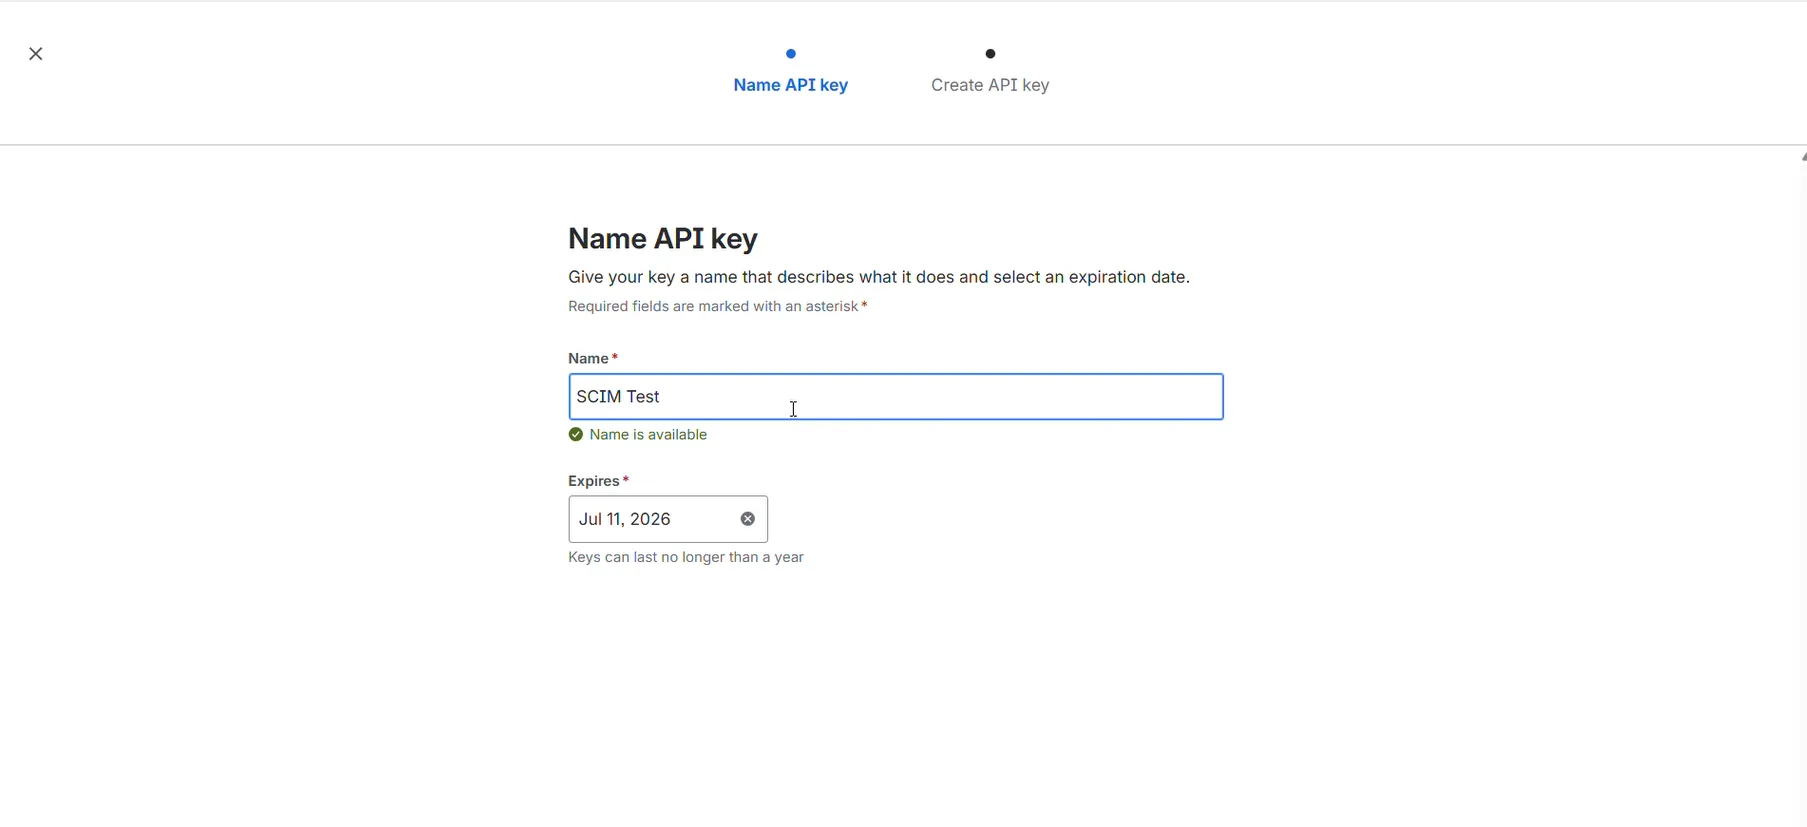
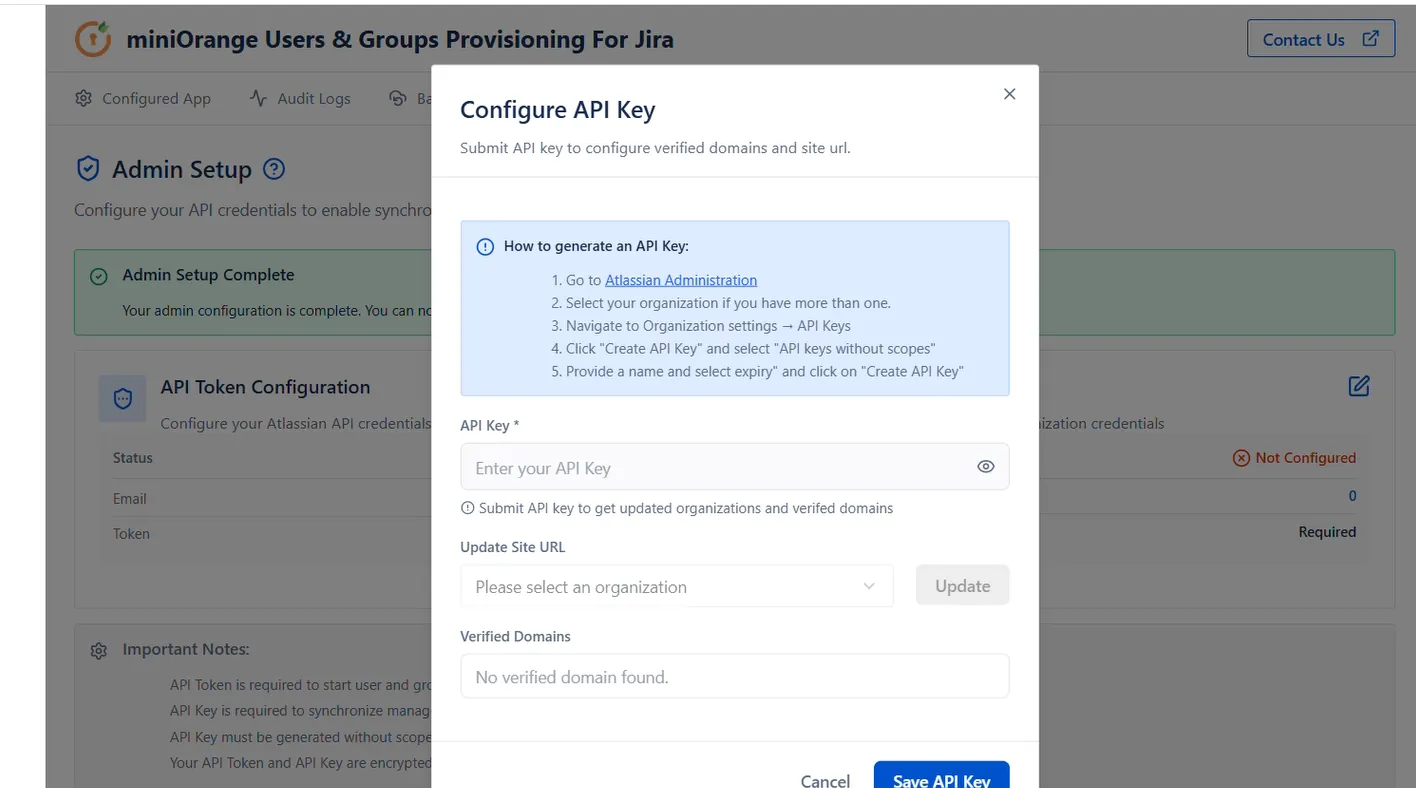
Once these configurations are fully processed, your core administrative setup is complete and ready for application configuration.
2: Set up Okta IDP
Now you can proceed to establish a connection with Okta.
 2.1 Generate an Okta API Token
Now you can proceed to establish a connection with Okta.
- Log in to your Okta organization as a user with administrator privileges.
- Note your Okta Domain URL from the browser address bar, for example https://example.okta.com. You will need this in Step 3.1.
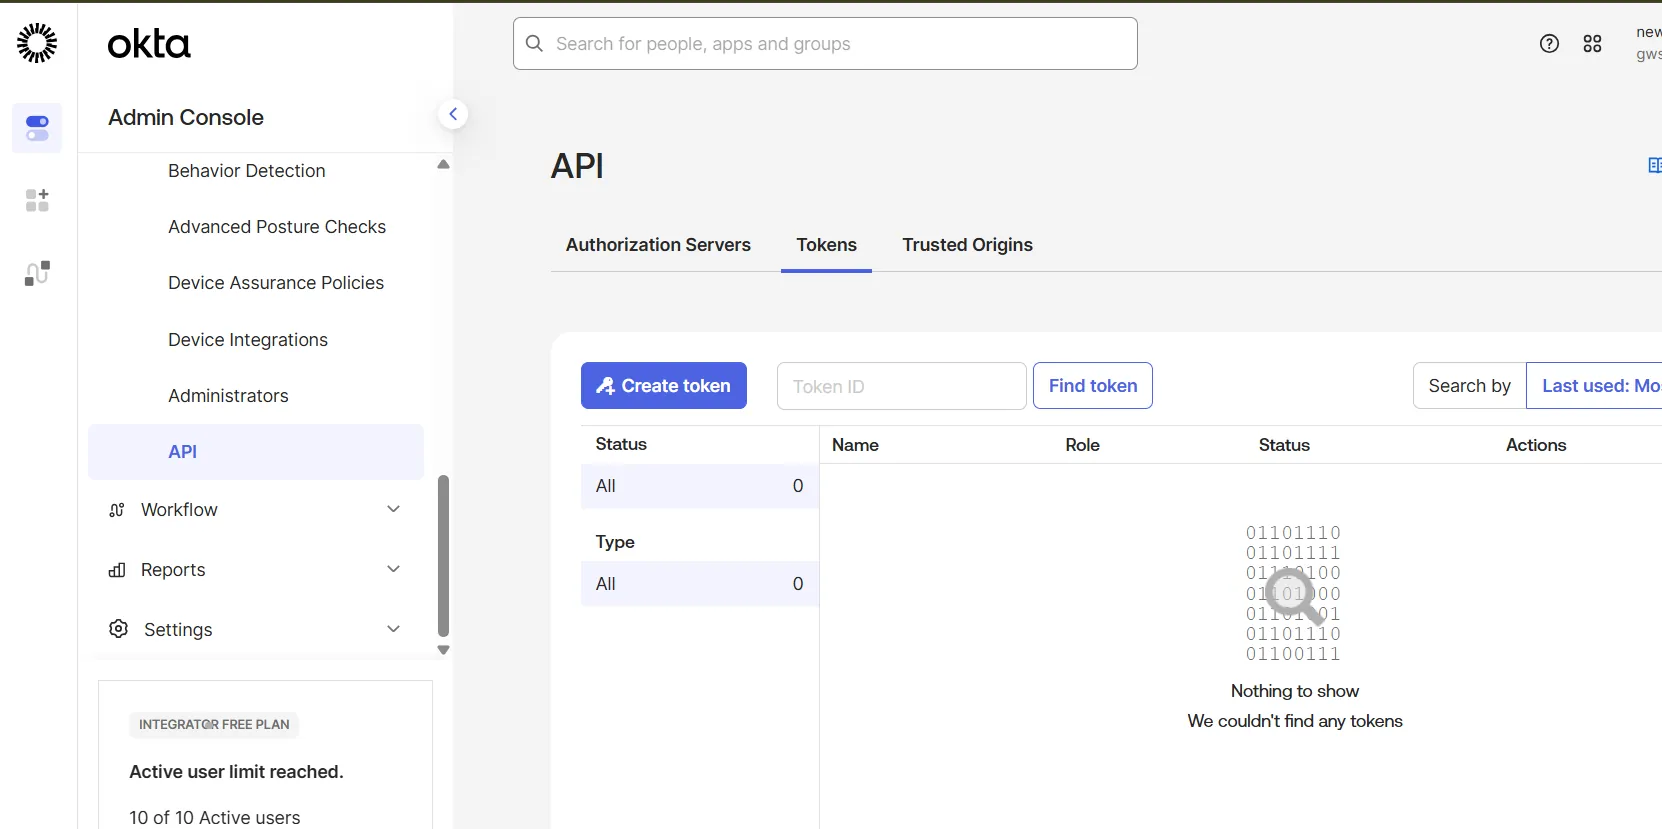
- In the Admin Console, navigate to Security → API and select the Tokens tab.
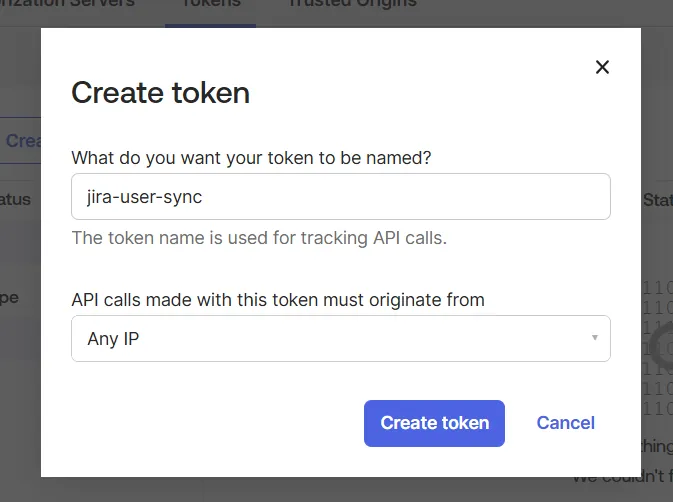
- Click Create Token, provide a meaningful name, and click Create Token.
- Copy the token value to your secure clipboard and keep it handy.
2.2 Create an Application in Okta (Optional)
By default, the app syncs your entire Okta directory. If you want to scope sync to only the users assigned to a specific Okta application, create one now.
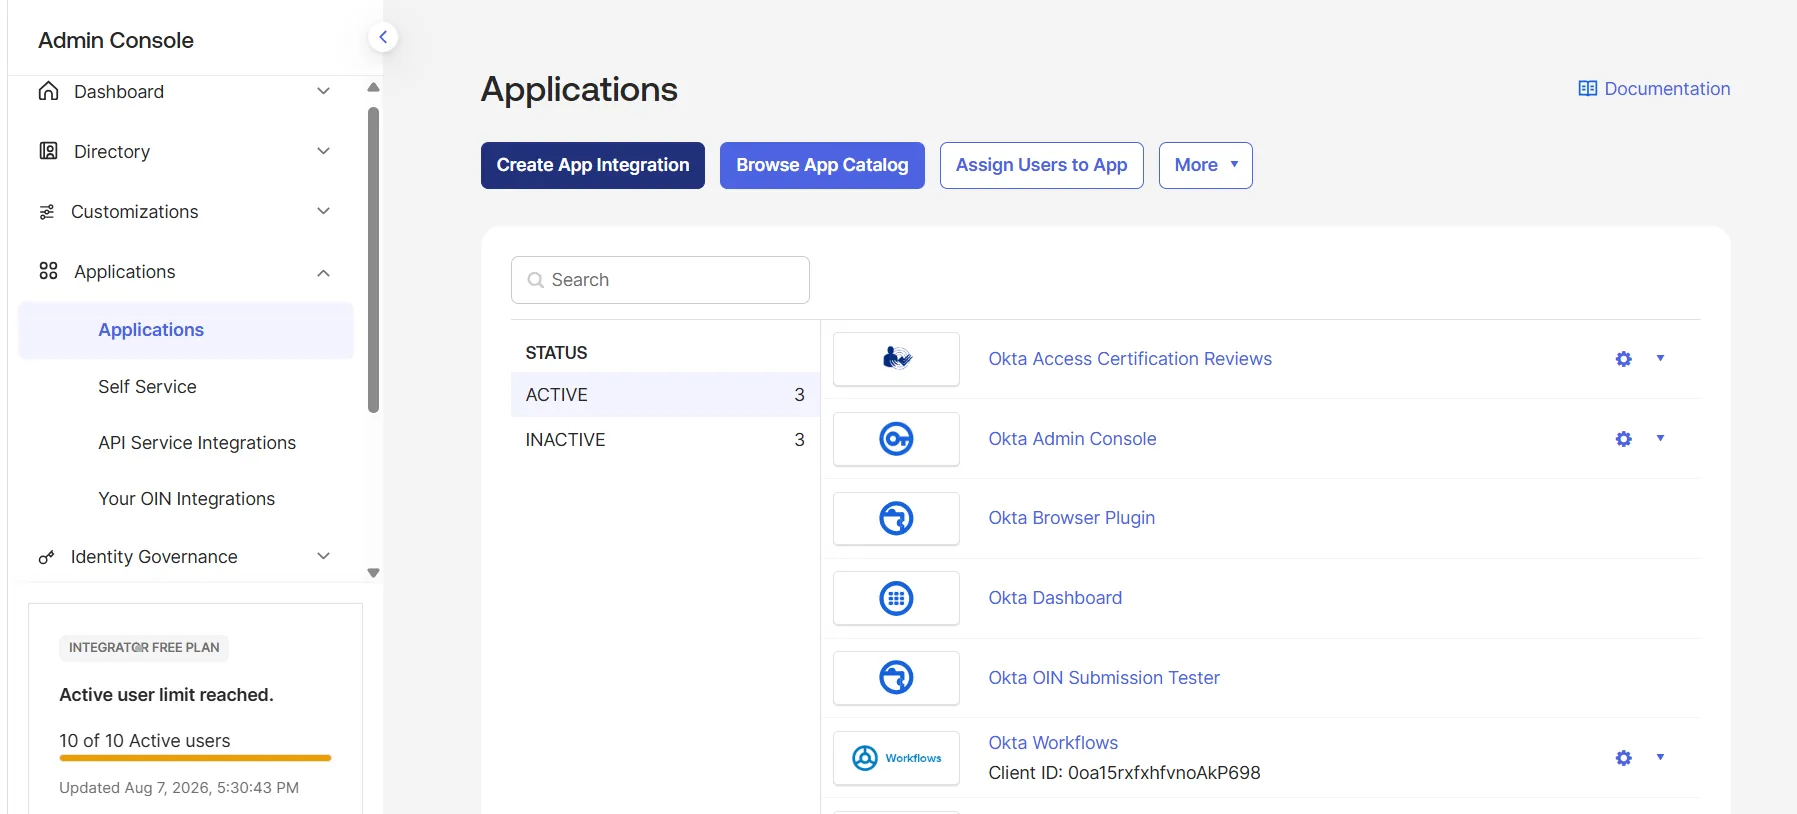
- In the Admin Console, navigate to Applications → Applications and click Create App Integration.
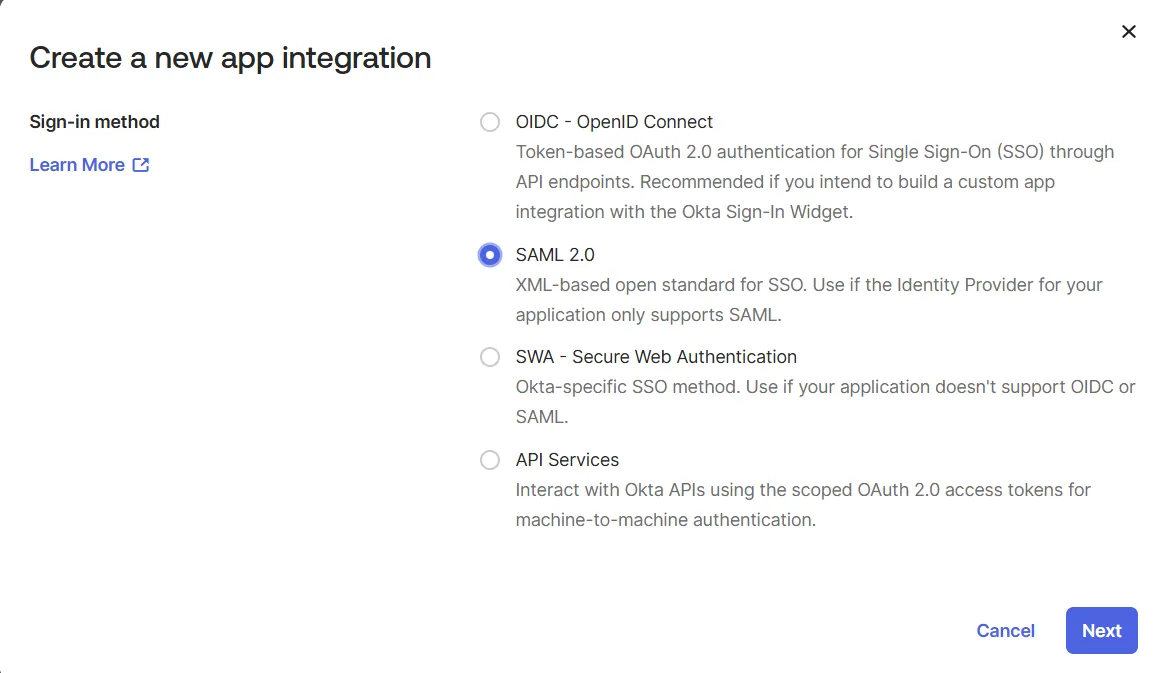
- Choose a sign-in method. SAML 2.0 or SWA – Secure Web Authentication both work well here, since this application is used only to group and assign users for provisioning, not for actual sign-in.
- Click Next.
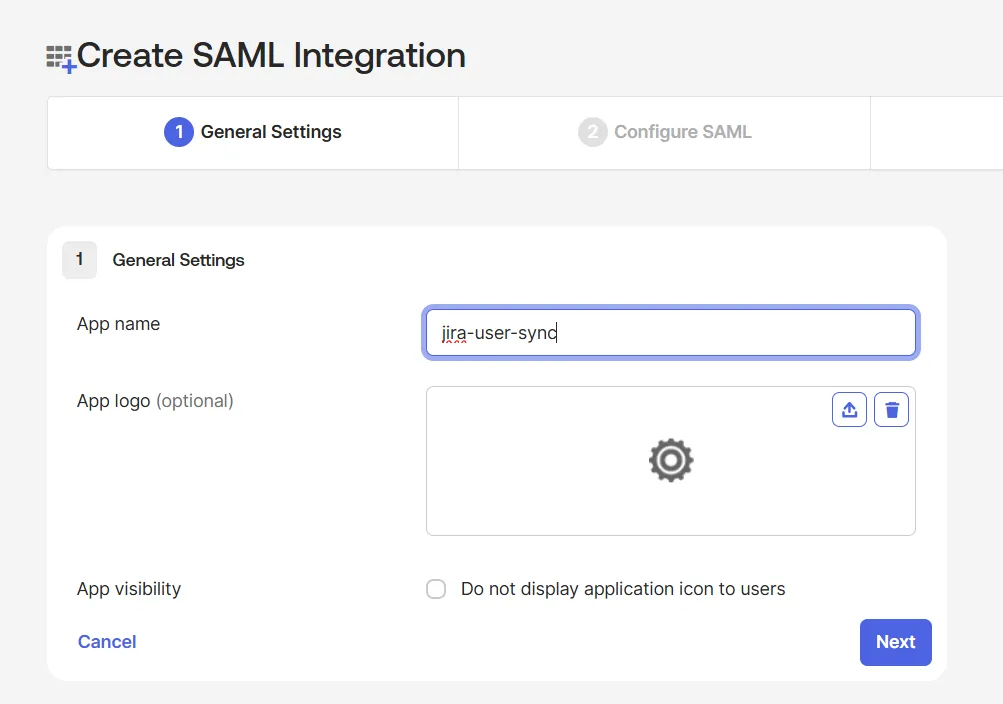
- Enter an App integration name that identifies its purpose (e.g. Jira REST Sync), then click Next.
- If you chose SAML 2.0, you'll land on the SAML Settings page next, under the General section. Two fields here are mandatory and must be filled in before you can save the app:
- Single sign-on URL
- Audience URI (SP Entity ID)
- Complete any remaining required fields for the selected sign-on method. Placeholder values are fine elsewhere, as the application won't be used for login.
- Click Finish (or Save) to create the application.
- Open the Assignments tab of the newly created application and assign the users or groups whose members you want synced to Jira.
- Copy the App ID from the browser URL, the string after /instance/ (e.g. 0oa1a2b3c4D5E6F7g8h9). You'll enter this in Step 3.4 to scope the sync to this application.
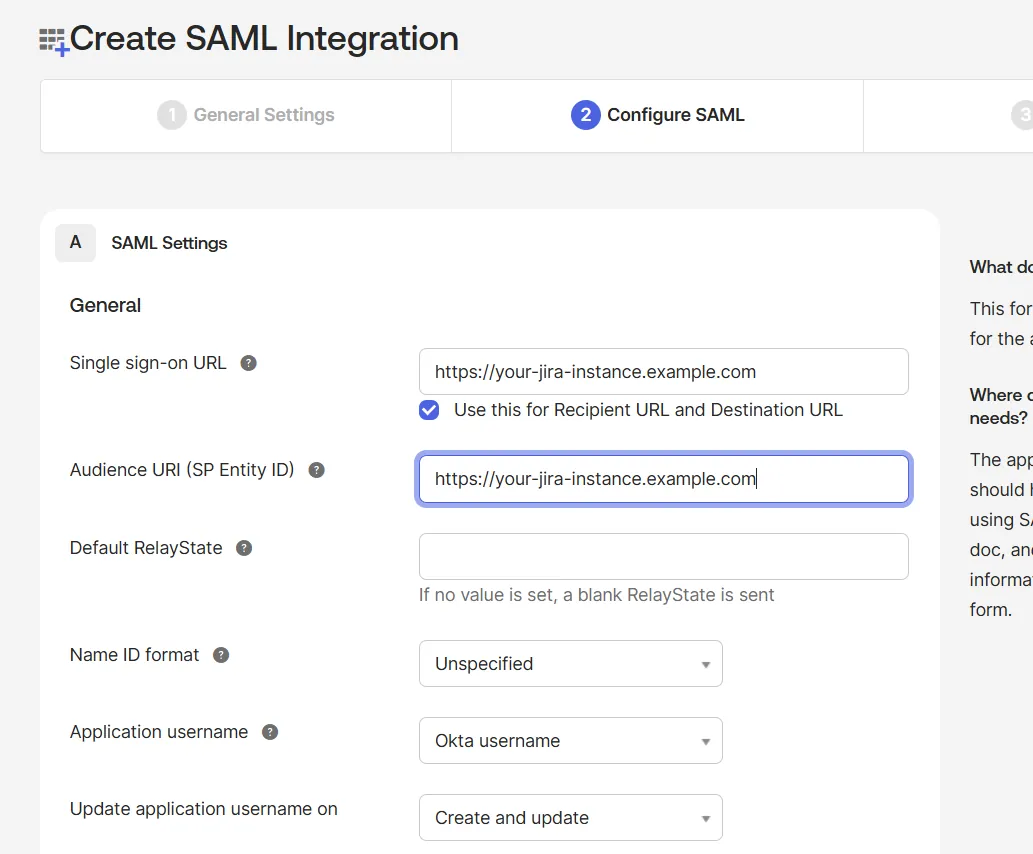
Enter your Jira host URL (e.g. https://yoursite.atlassian.net) in both fields. Leaving either blank will trigger a validation error ("The field cannot be left blank") and block you from proceeding. Since this application is only used to group and assign users for provisioning and not for actual sign-in, the exact value doesn't need to route anywhere real — the Jira host URL is a safe placeholder that satisfies both fields.
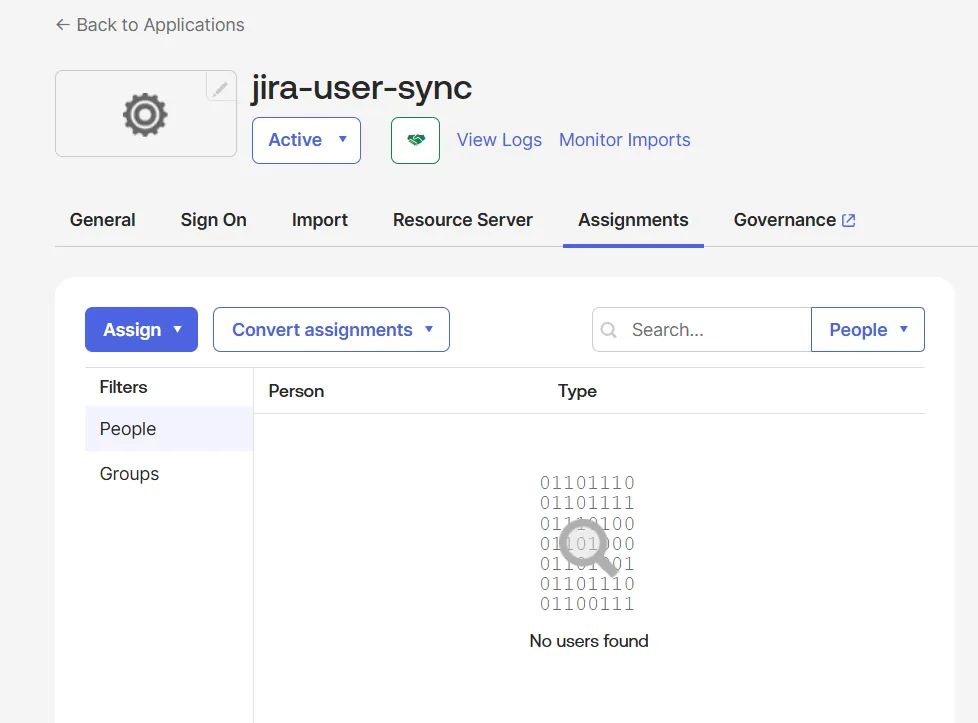
If you'd rather sync your entire Okta directory, skip this step.
3: Service Provider Configuration (Jira)
Now switch back to your Jira tab.
3.1 Application Configuration
- Navigate back to the Configured Application tab on the main dashboard and click the + Add New App button.
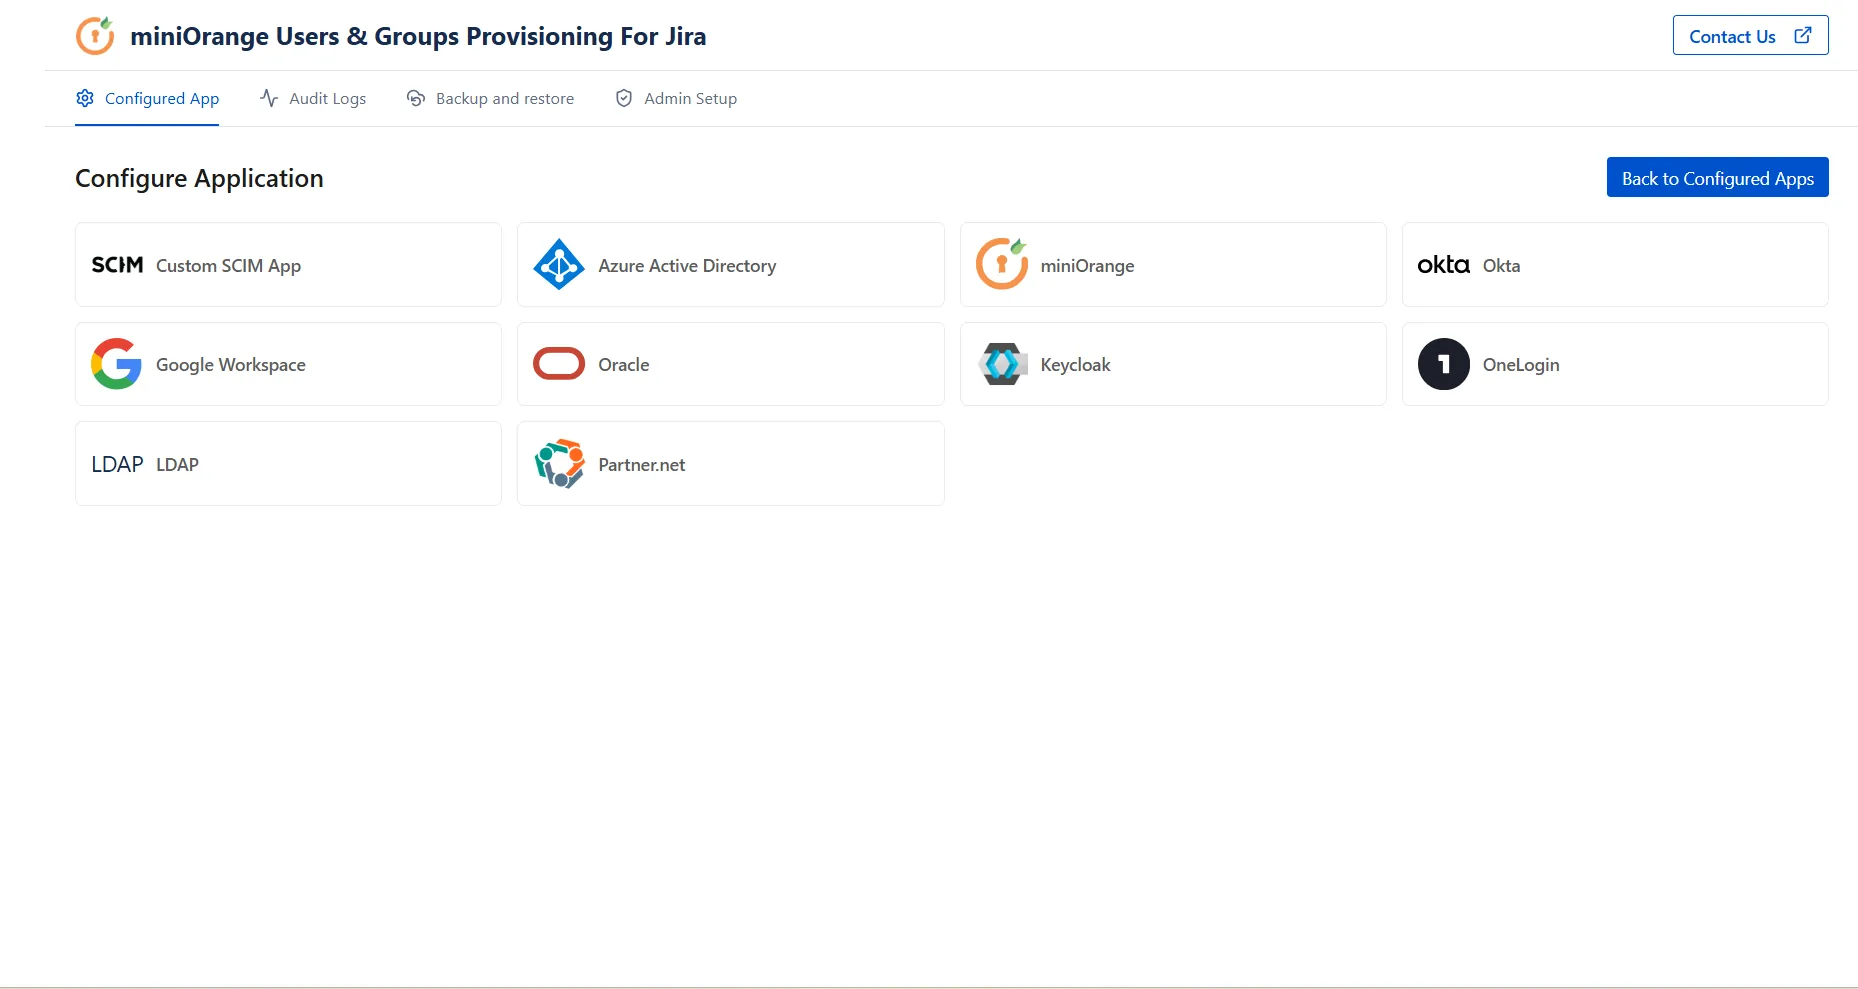
- From the Configure Application directory screen, locate and select Okta as your chosen provider.
In the Choose your integration method for Okta pop-up, select REST API and click Continue.
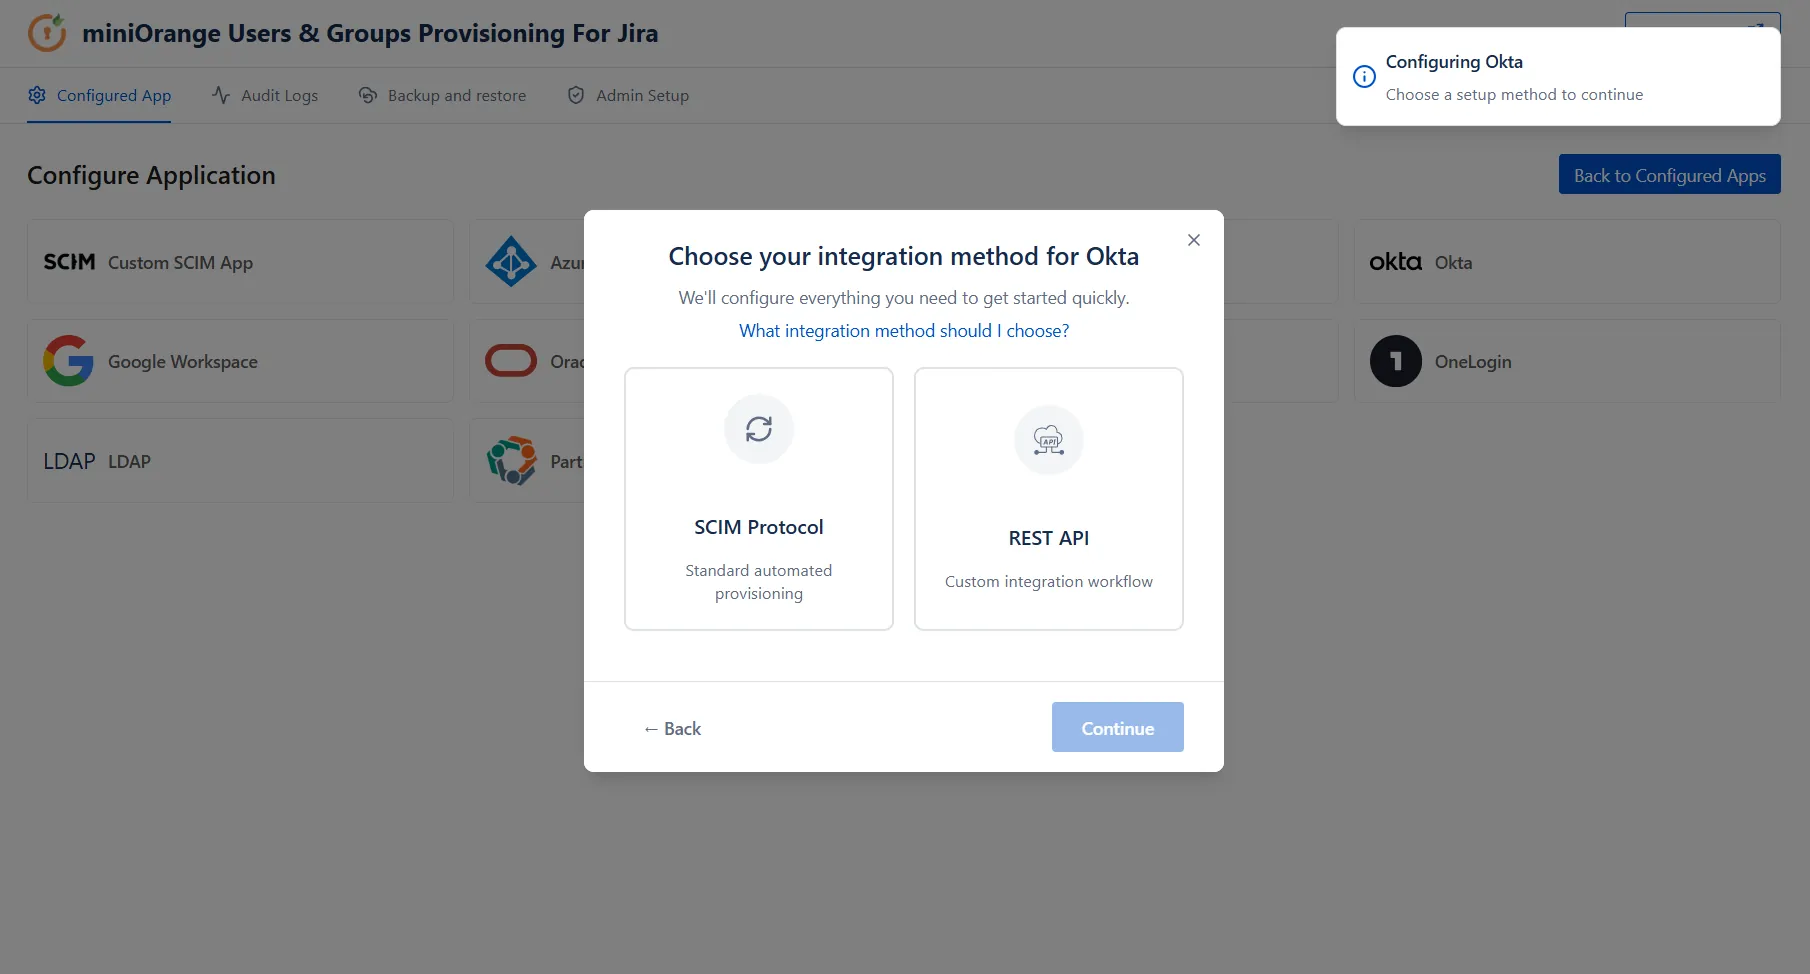
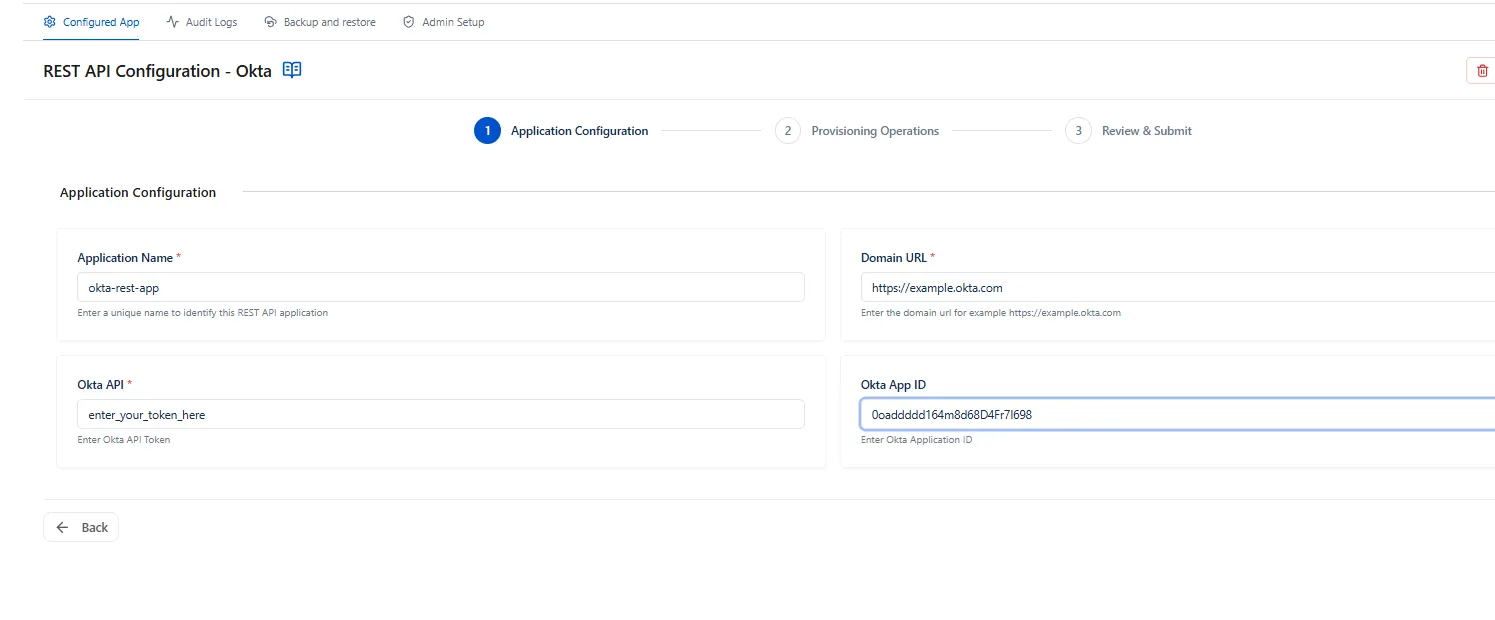
- In the App Configuration wizard, under Application Configuration, fill in the following:
- Application Name: Enter a unique name to identify this REST API application.
- Domain URL: Enter your Okta domain URL noted in Step 2.1. (e.g. https://example.okta.com).
- Okta API: Paste the API token generated in Step 2.1.
- Okta App ID (optional): Paste the App ID from Step 2.2 to limit the sync to users assigned to that Okta application. Leave blank to sync your entire Okta directory. [Screenshot 4: REST API Application Configuration step]
- Click Next to proceed.
3.2 Provisioning Operations
In the Provisioning Operations section, define your synchronization settings:
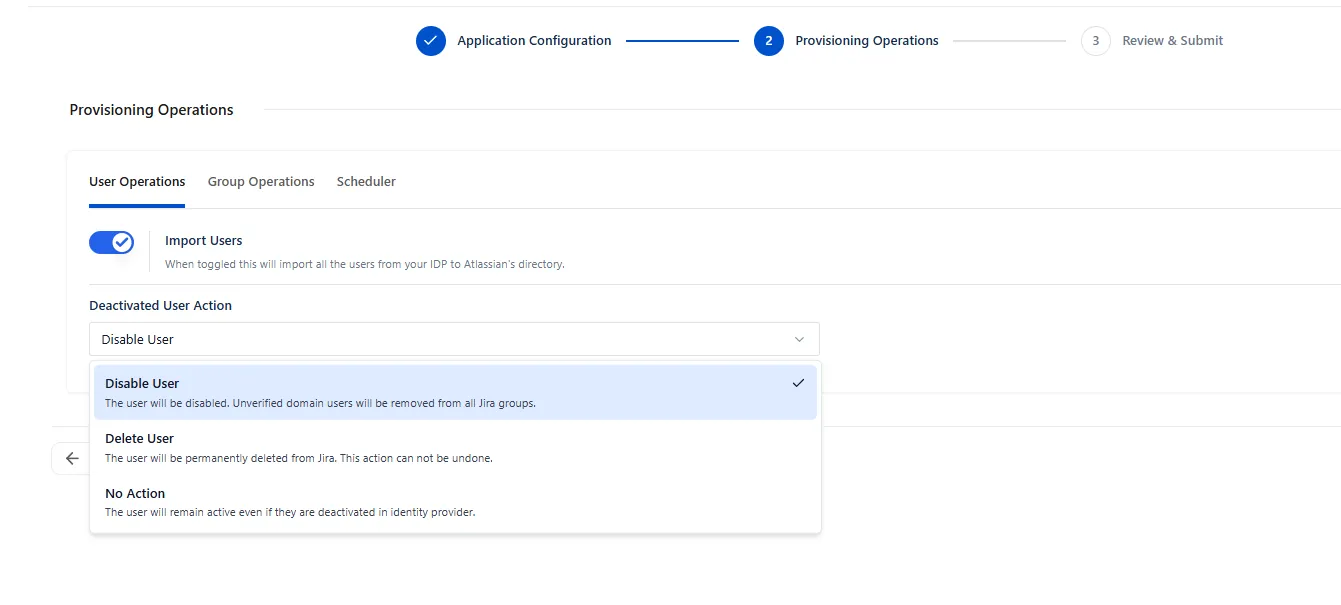
User Operations:
Ensure the Import Users toggle is switched ON. In the Deactivated User Action dropdown, select the action that should be taken in Jira when a user is unassigned or deactivated in Okta.
Group Operations:
- Switch to Group Operations and enable Import Groups.
- Group operations can be performed either with On-the-Fly Group Mapping or Manual Group Mapping.
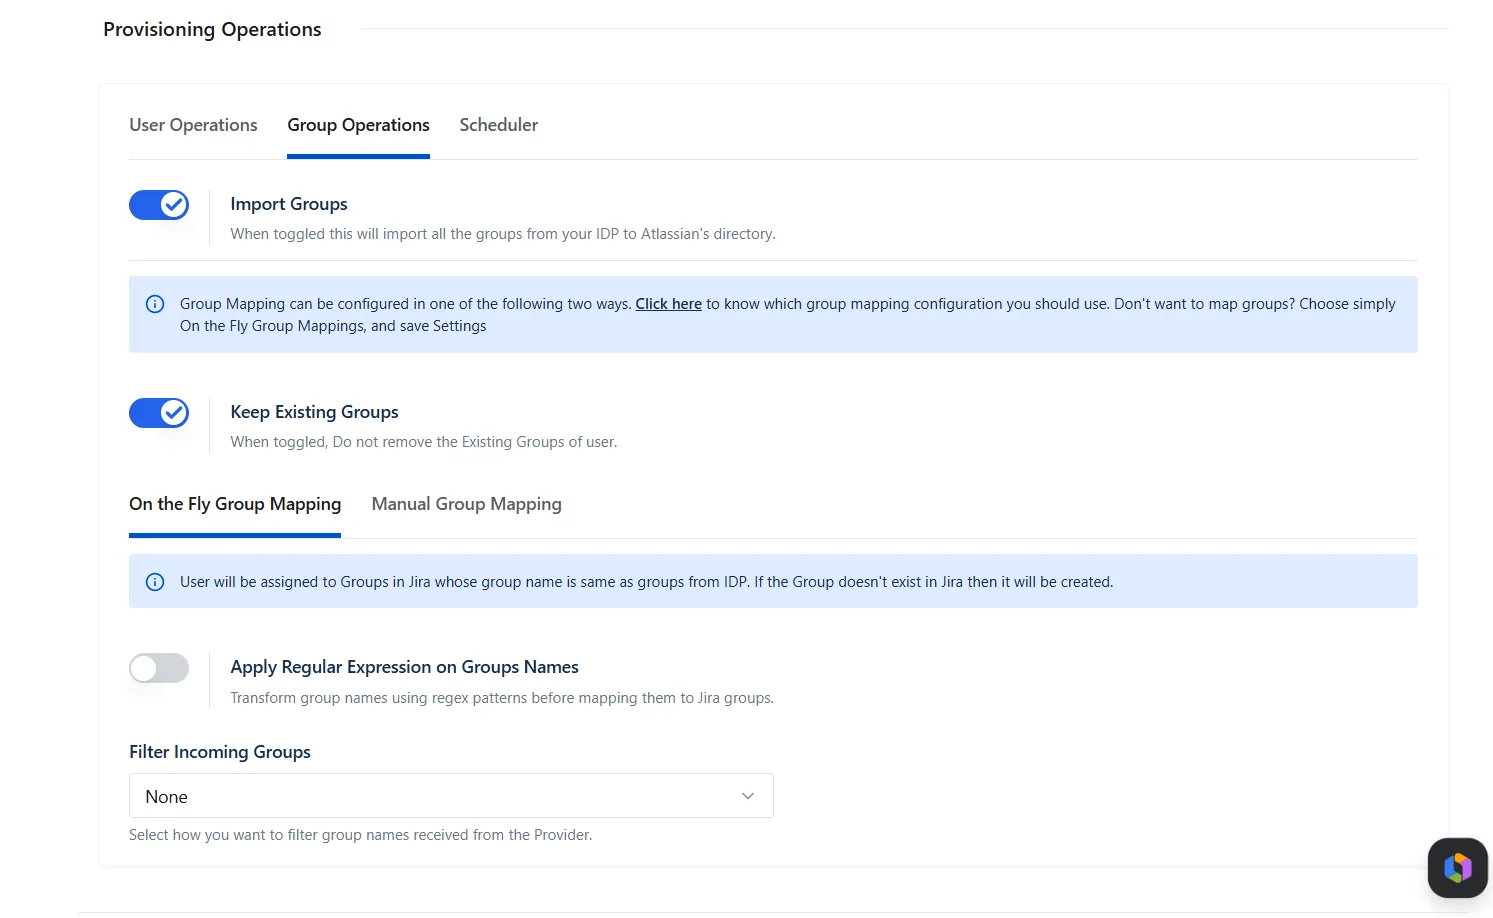
1. On the Fly Group Mapping:
- Select this tab to create groups dynamically as it is from IdP to Jira Cloud if they do not exist in Jira and map the users accordingly.
- You can enable the Apply Regular Expressions on Group Names option to transform group names using Regex patterns before mapping them to Jira groups.
- Under Filter Incoming Groups, you can configure how you want to filter group names received from the provider.
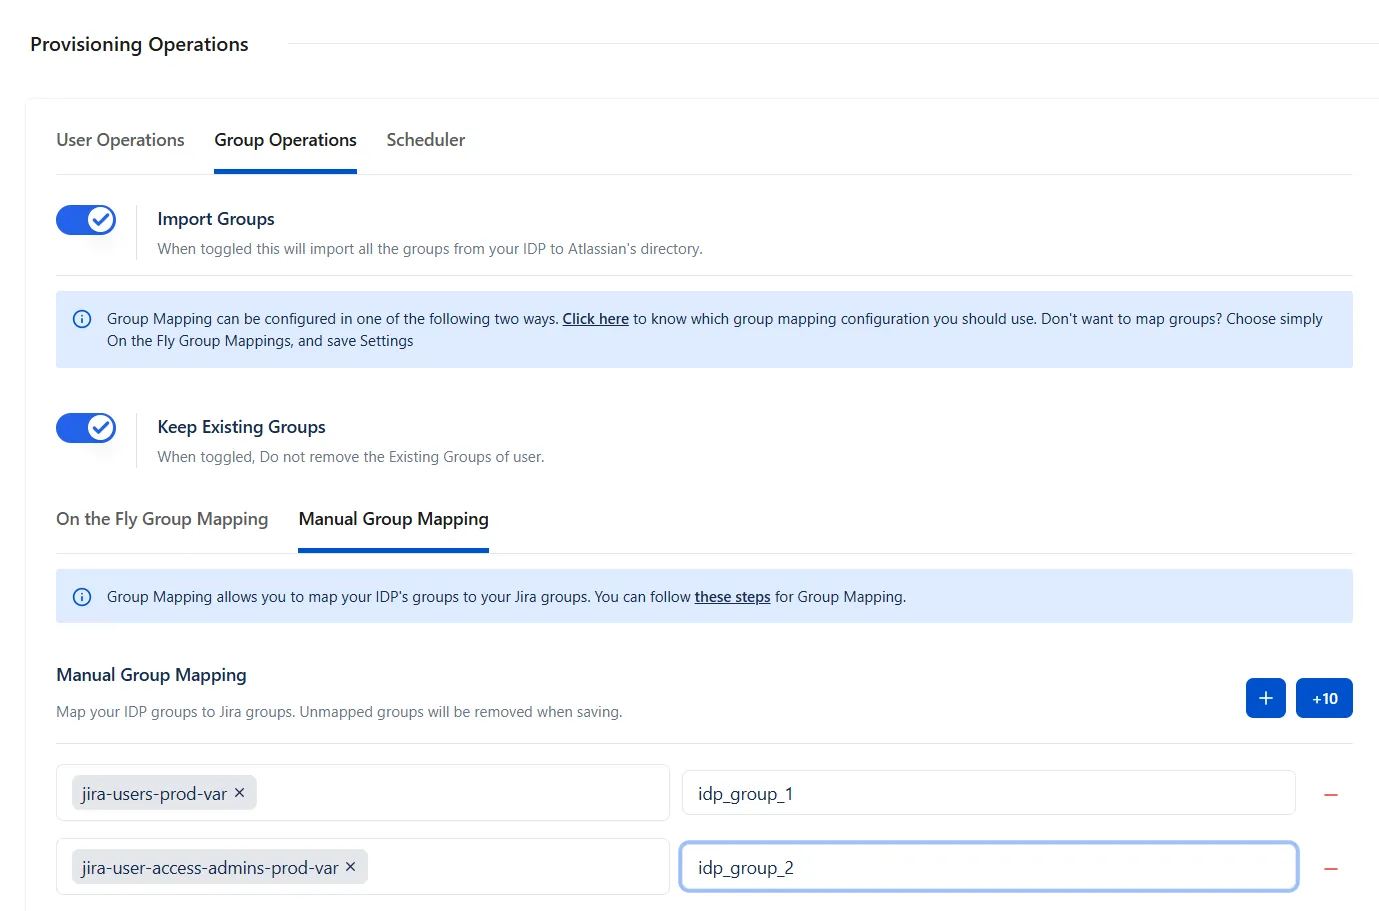
2. Manual Group Mapping:
To map groups from your IdP to Jira's native groups, select this tab. When the sync executes, the users from respective groups of the IdP will be mapped to Jira groups as per configuration.
Keep Existing Groups
This setting controls how a user's Jira group memberships are managed during user provisioning and deprovisioning operations performed by the Identity Provider (IdP).

Enabled:
For any new user added to IdP groups, it will be added to Jira groups. But if users are removed from IdP groups, Jira group memberships are preserved in the Jira directory.
- Current Jira groups: jira-software-users, jira-administrators
- Groups received from Okta: developers, employees
- Resulting Jira groups: jira-software-users, jira-administrators, developers, employees
No existing Jira group memberships are removed.
Disabled:
During provisioning, deprovisioning, or user unassignment, all existing Jira group memberships are removed except those specified in the Exclude Groups list. During provisioning, the user is subsequently assigned only to the groups received from the Identity Provider (IdP).
- Current Jira groups: jira-software-users, jira-administrators, support-team
- Groups received from Okta: developers, employees
- Excluded groups: jira-administrators
- Resulting Jira groups after provisioning: jira-administrators, developers, employees
After provisioning, the groups jira-software-users and support-team are removed because they are not received from the IdP and are not included in the exclusion list.
Exclude Groups: Use the Exclude Groups option to specify Jira groups that should never be removed during provisioning or deprovisioning operations, such as jira-administrators or org-admins. These groups will always be retained regardless of the user's group assignments in the IdP.
Scheduler Option:
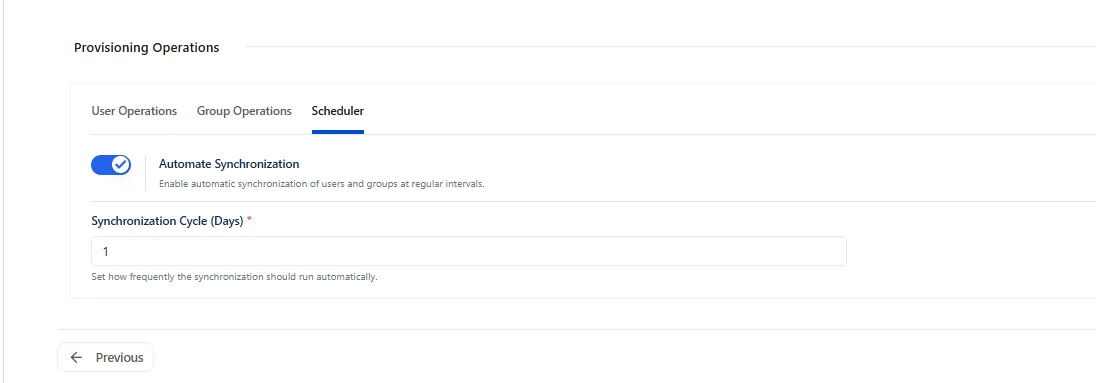
To enable dynamic data synchronization at scheduled intervals, switch to the Scheduler tab, set Automate Synchronization to ON and define the processing interval by entering the desired number of days in the Synchronization Cycle (Days) field.
3.3 Review and Save Configuration
- On the Review & Submit summary page, review your details across the Application Configuration and Provisioning Operations summary tables to make sure everything looks right.
- Click the Save Configuration button in the bottom right corner.
3.4 Run the Synchronization
- Return to the Configured App Tab.
- Click Synchronize on your Okta app.
- When the sync completes,verify the new and updated users under Jira’s user management section.
- If you set a scheduler in Step 3.2, no manual action is needed for future syncs.
3.5 Verification
- The app profile will appear on your main dashboard.
- Under the actions column for your new entry, run a sync (or wait for the scheduled cycle if the Scheduler is enabled).
- In Jira, navigate to User Management and confirm that users and groups from Okta appear in the directory. You can also review sync activity under the Audit Logs tab of the Plugin app.
The miniOrange Users & Groups Provisioning For Jira app is now successfully set up with Okta via REST API.
Did this page help you?