- Home
- Identity Governance, Auditing & Access Control via JSM
- Identity Governance, Auditing & Access Control via JSM with Slack

How to Set Up the Identity Governance, Auditing & Access Control via JSM with Slack
This guide explains how to create a Slack App, configure the required permissions, and obtain the credentials needed to connect your Slack workspace to the provisioning system.
The Identity Governance, Auditing & Access Control via JSM is an advanced solution that helps you to simplify and automate access request workflows across your organization.
Instead of relying on manual request and approval steps, the app enables:
- End users can submit access requests through the JSM portal.
- Automated routing of approval workflows based on predefined rules.
- Instant provisioning actions once approvals are complete.
By automating these processes, the Identity Governance, Auditing & Access Control via JSM ensures secure, policy-driven, and audit-ready access management across your tech ecosystem.
 Try it for free
Pre-requisites
Before you begin, ensure that:
- You are a Workspace Admin or Workspace Owner of the Slack workspace.
- You have access to the Slack API portal: https://api.slack.com/apps
- Admin access to Jira Service Management (JSM): Required to configure workflows, custom fields, and automation rules.
- You are on a Slack Enterprise Grid plan.
1: Create a Slack App
Follow these steps:
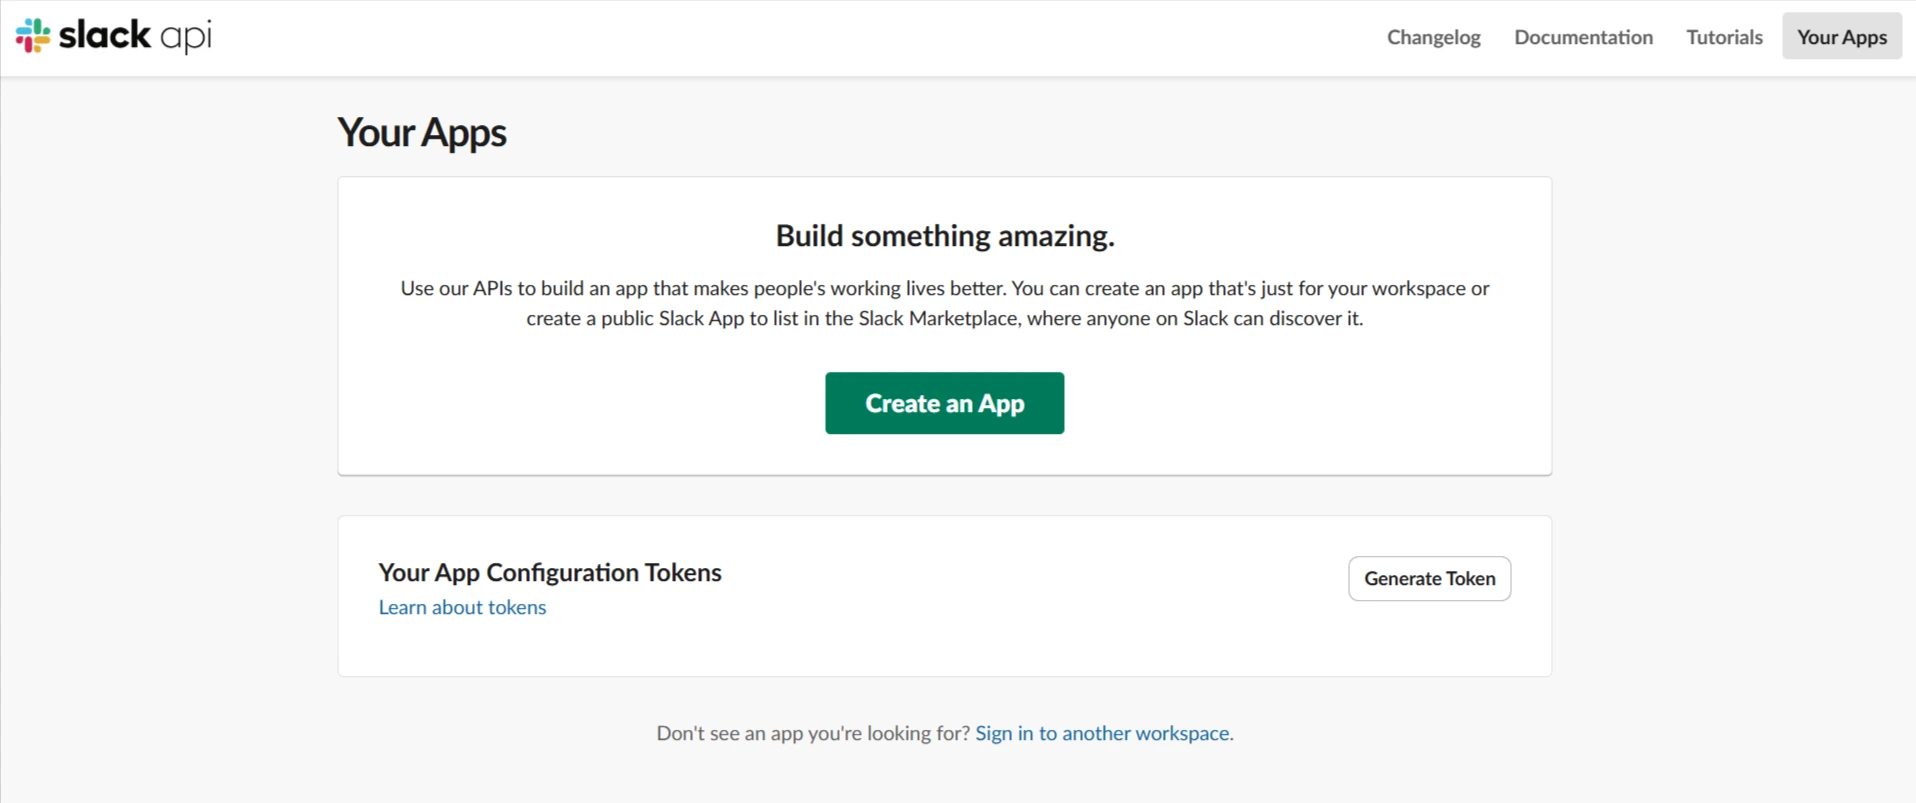
- Open https://api.slack.com/apps.
- Click Create New App.
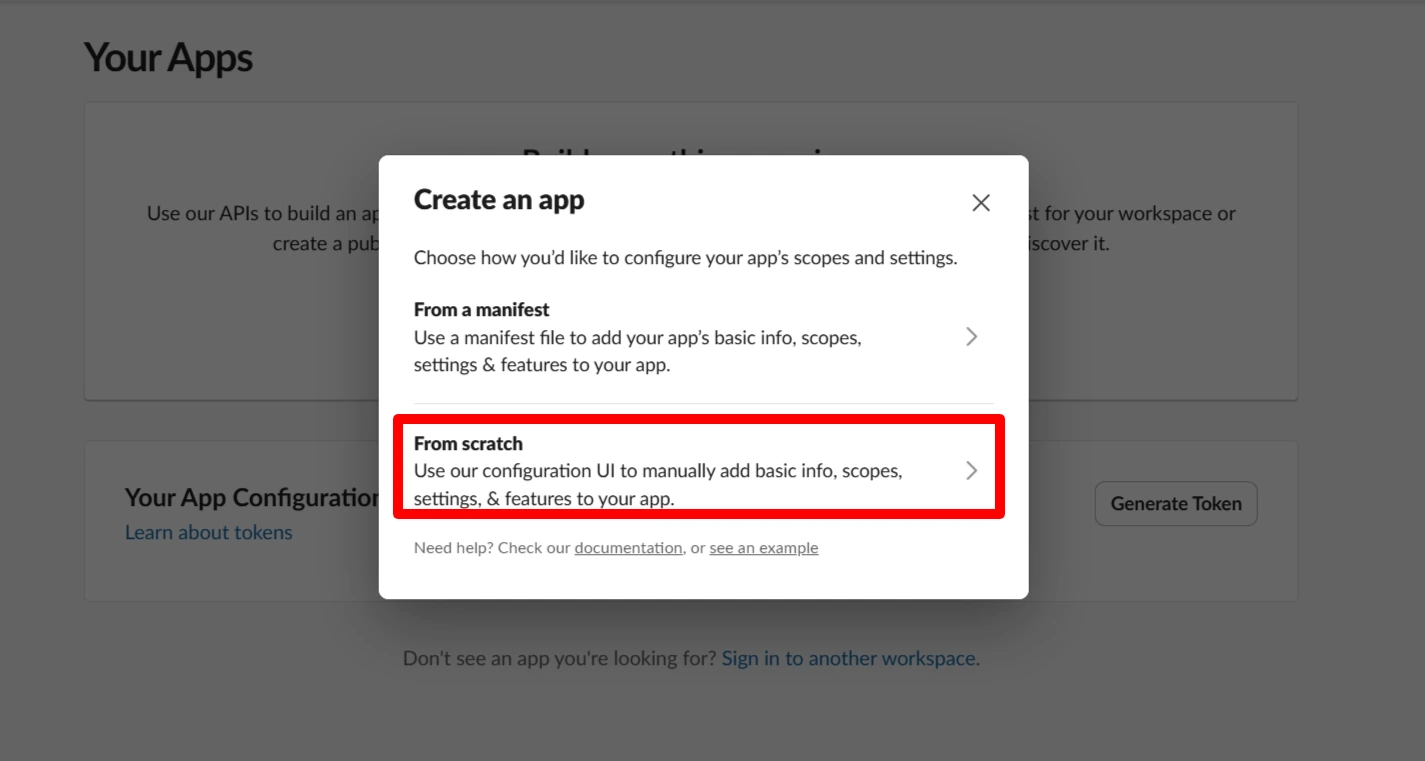
- Select From scratch.
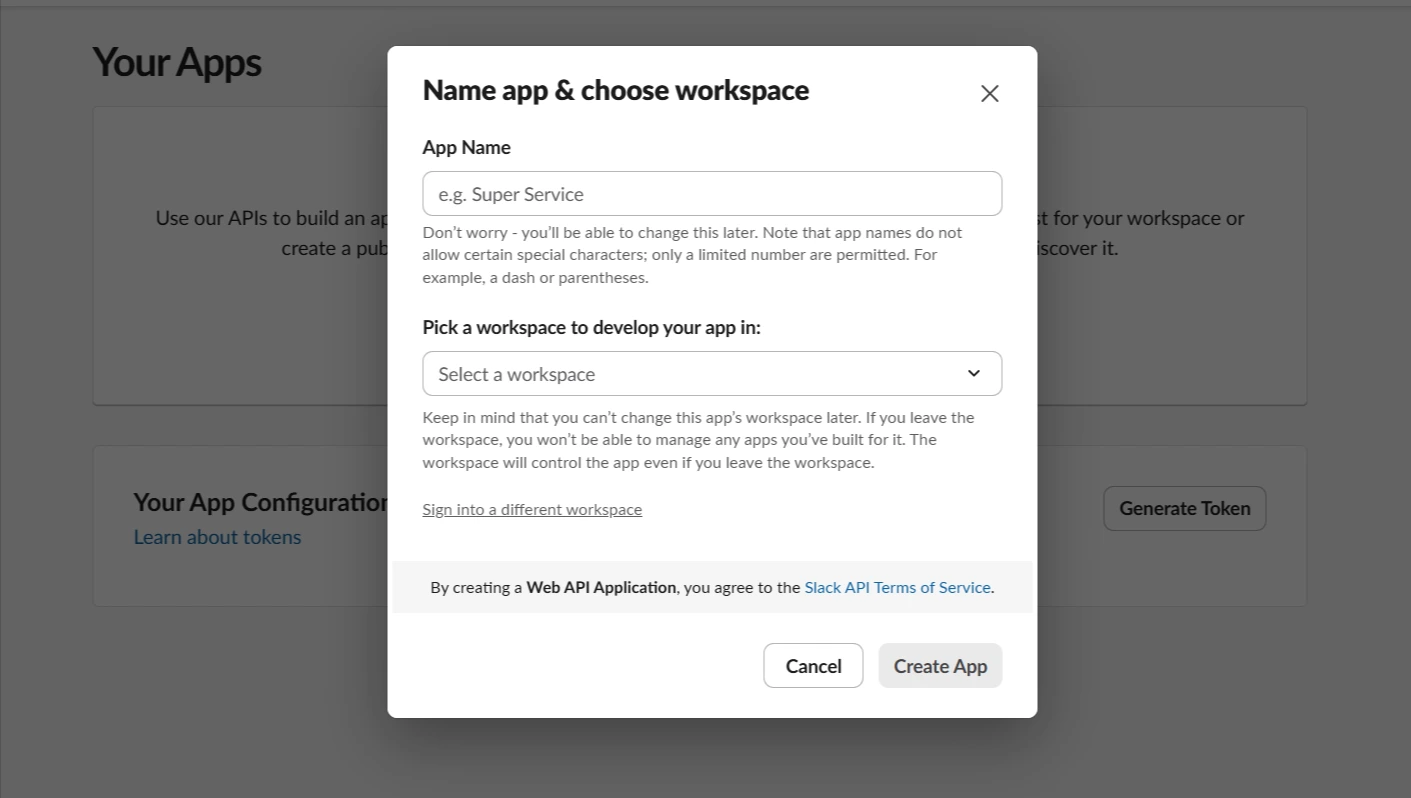
- Enter an application name (for example, Access Governance Provisioning).
- Select the Slack workspace where the application will be installed.
- Click Create App.
2: Configure Bot Token Scopes
Follow these steps:
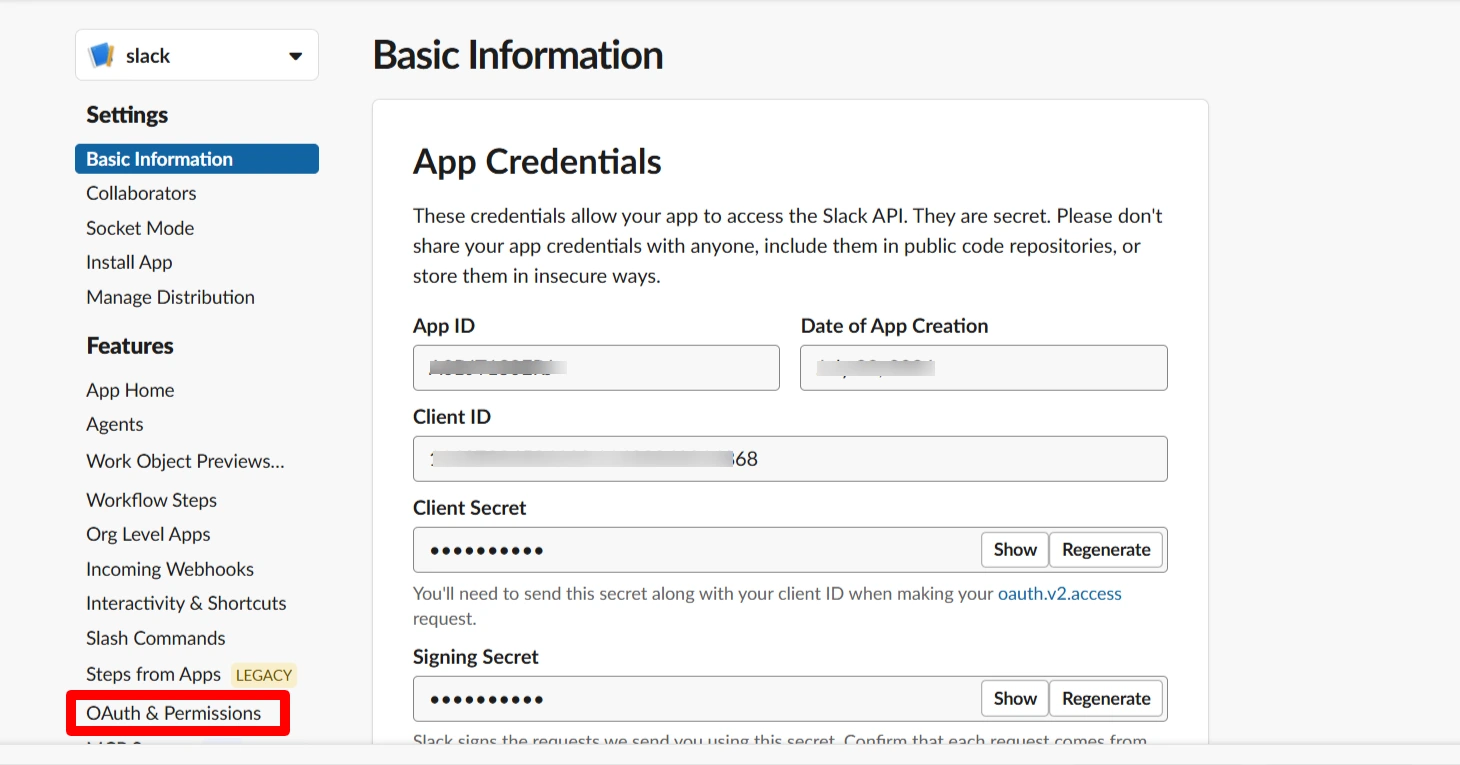
- Open the newly created application.
- From the left navigation menu, select OAuth & Permissions.
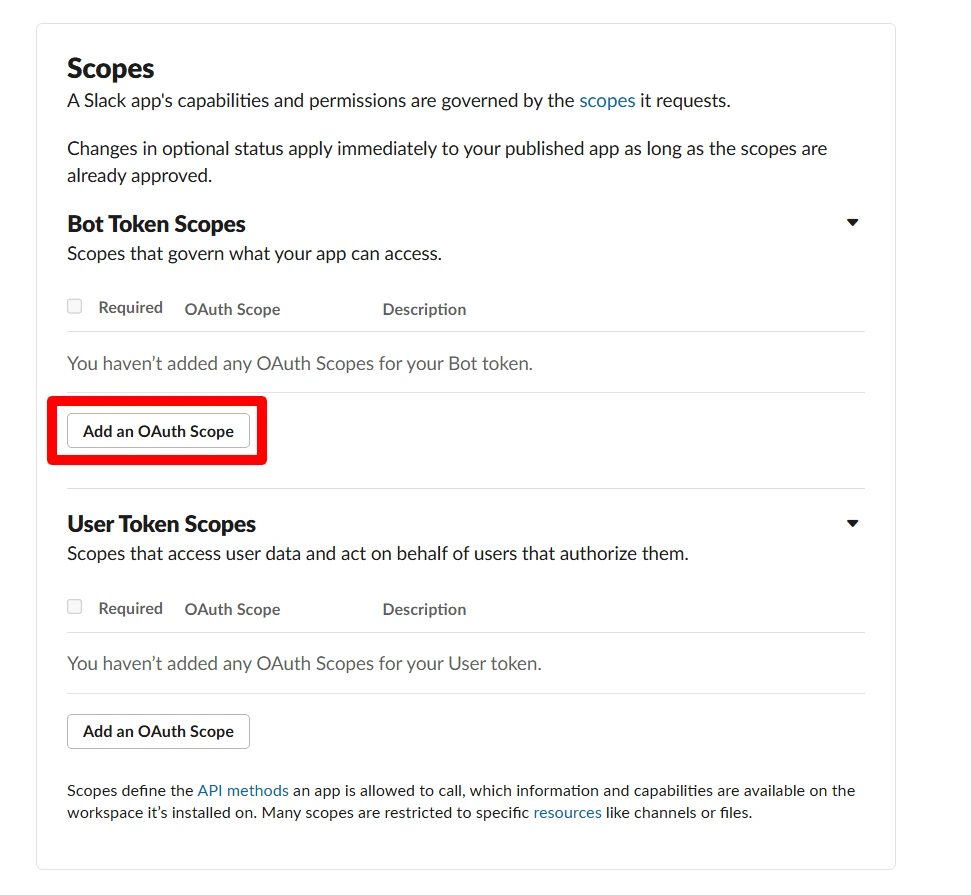
- Scroll to the Scopes section.
- Under Bot Token Scopes, click Add an OAuth Scope.
-
Add the following scopes:
-
Scope Purpose admin.users:write Invite users to the workspace users:read.email Retrieve Slack user IDs using email addresses channels:read Read public channel information groups:read Read private channel information channels:manage Add users to public channels groups:write Add users to private channels Note: The admin.users:write scope is only available for Slack Enterprise Grid.
-
3: Install the App
Follow these steps:
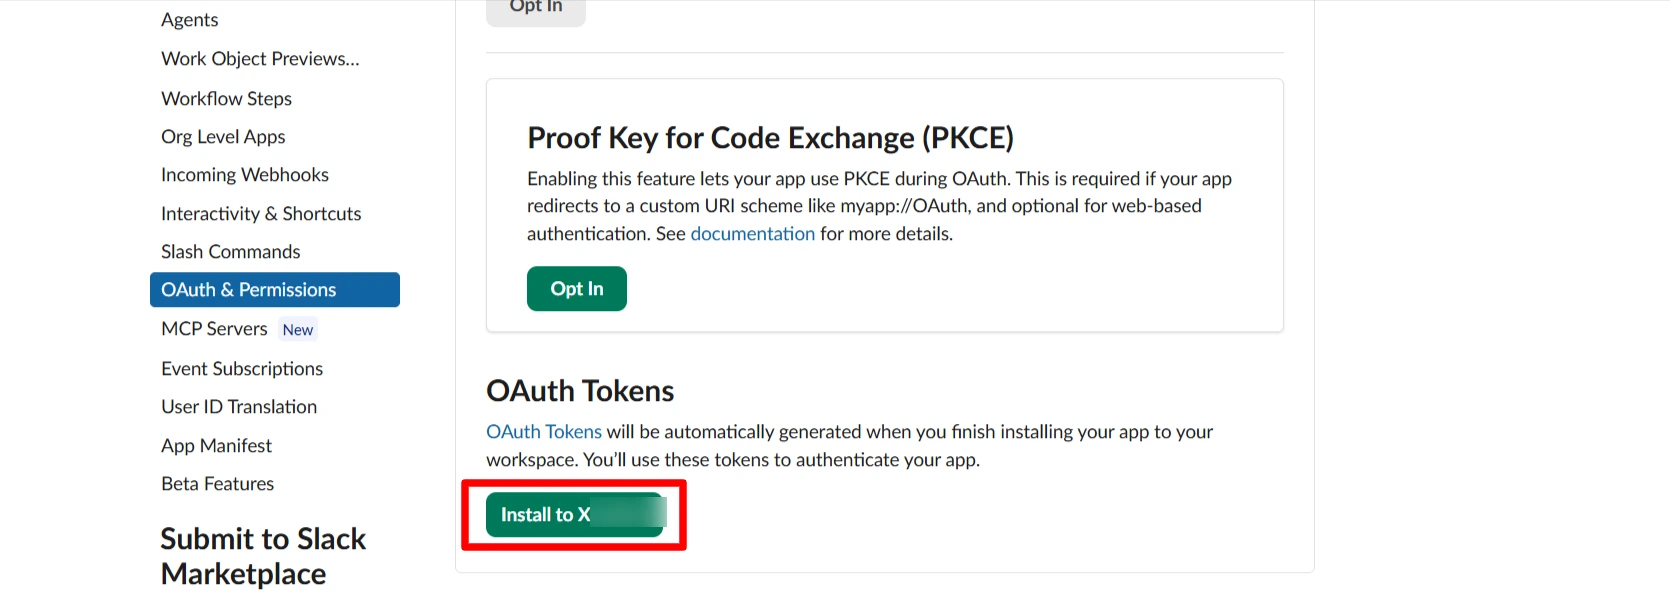
- Navigate to OAuth & Permissions.
- Click Install to Workspace.
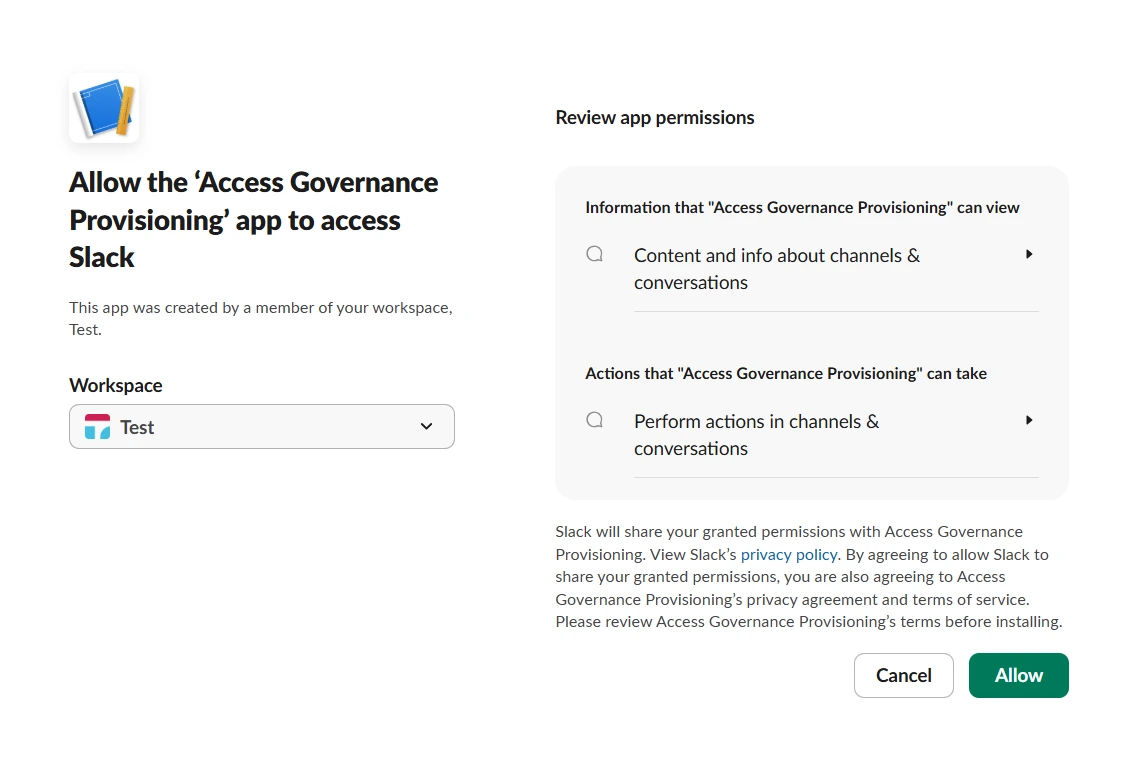
- Review the requested permissions.
- Click Allow.
- After installation, Slack displays a Bot User OAuth Token.
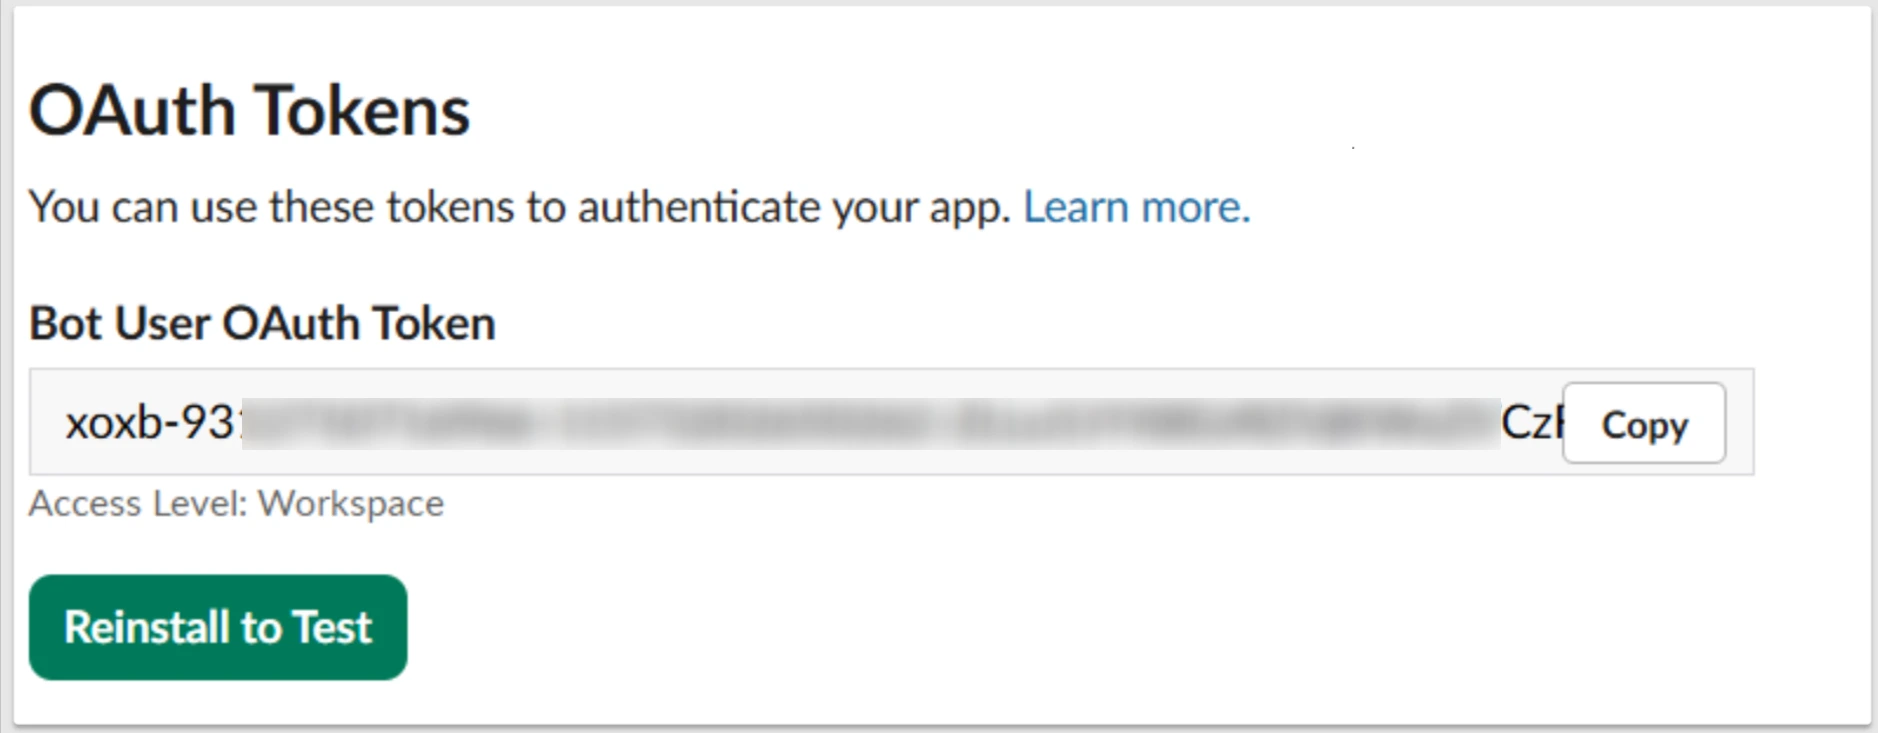
Example:
xoxb-123456789012-XXXXXXXXXXXXXXXXXXXXXXXX
Copy and securely store this token. This token will be required when configuring Slack in the provisioning system.
4: Obtain the Workspace Team ID
The provisioning system requires the Slack Workspace Team ID.
From the Slack URL
- Open Slack in a web browser.
- The URL will look similar to:
https://app.slack.com/client/T0123ABCDEF/C0123456789
The value beginning with T is the Team ID.
Example:
T0123ABCDEF
Copy this value.

5: Configure Slack in the Provisioning System
-
When adding Slack as an application, provide the following
information:
-
Configuration Field Value Bot Token (apiToken) Bot User OAuth Token (xoxb-...) Team ID (directoryId) Slack Workspace Team ID (T...)
-
- Save the configuration after entering both values.
6: Test the Connection
After saving the configuration:
- Open the Slack application configuration.
- Click Test Connection.
- The provisioning system validates the Bot Token using Slack's auth.test API.
- A successful response confirms that the integration has been configured correctly.
Supported Operations
-
The Slack integration currently supports the following operations:
-
Operation Description Invite User Sends an invitation to a user's email address to join the Slack workspace Add User to Channel Adds an existing user to one or more public or private channels using channel names
-
Configure Automation Rules for Slack
With the connection saved, configure automation rules to define how access requests are routed, approved, and provisioned:
Did this page help you?