Part 1: Setup miniOrange with Atlassian Access
Step 1. Setup miniOrange as an Identity Provider
- Login into miniOrange Admin Console.
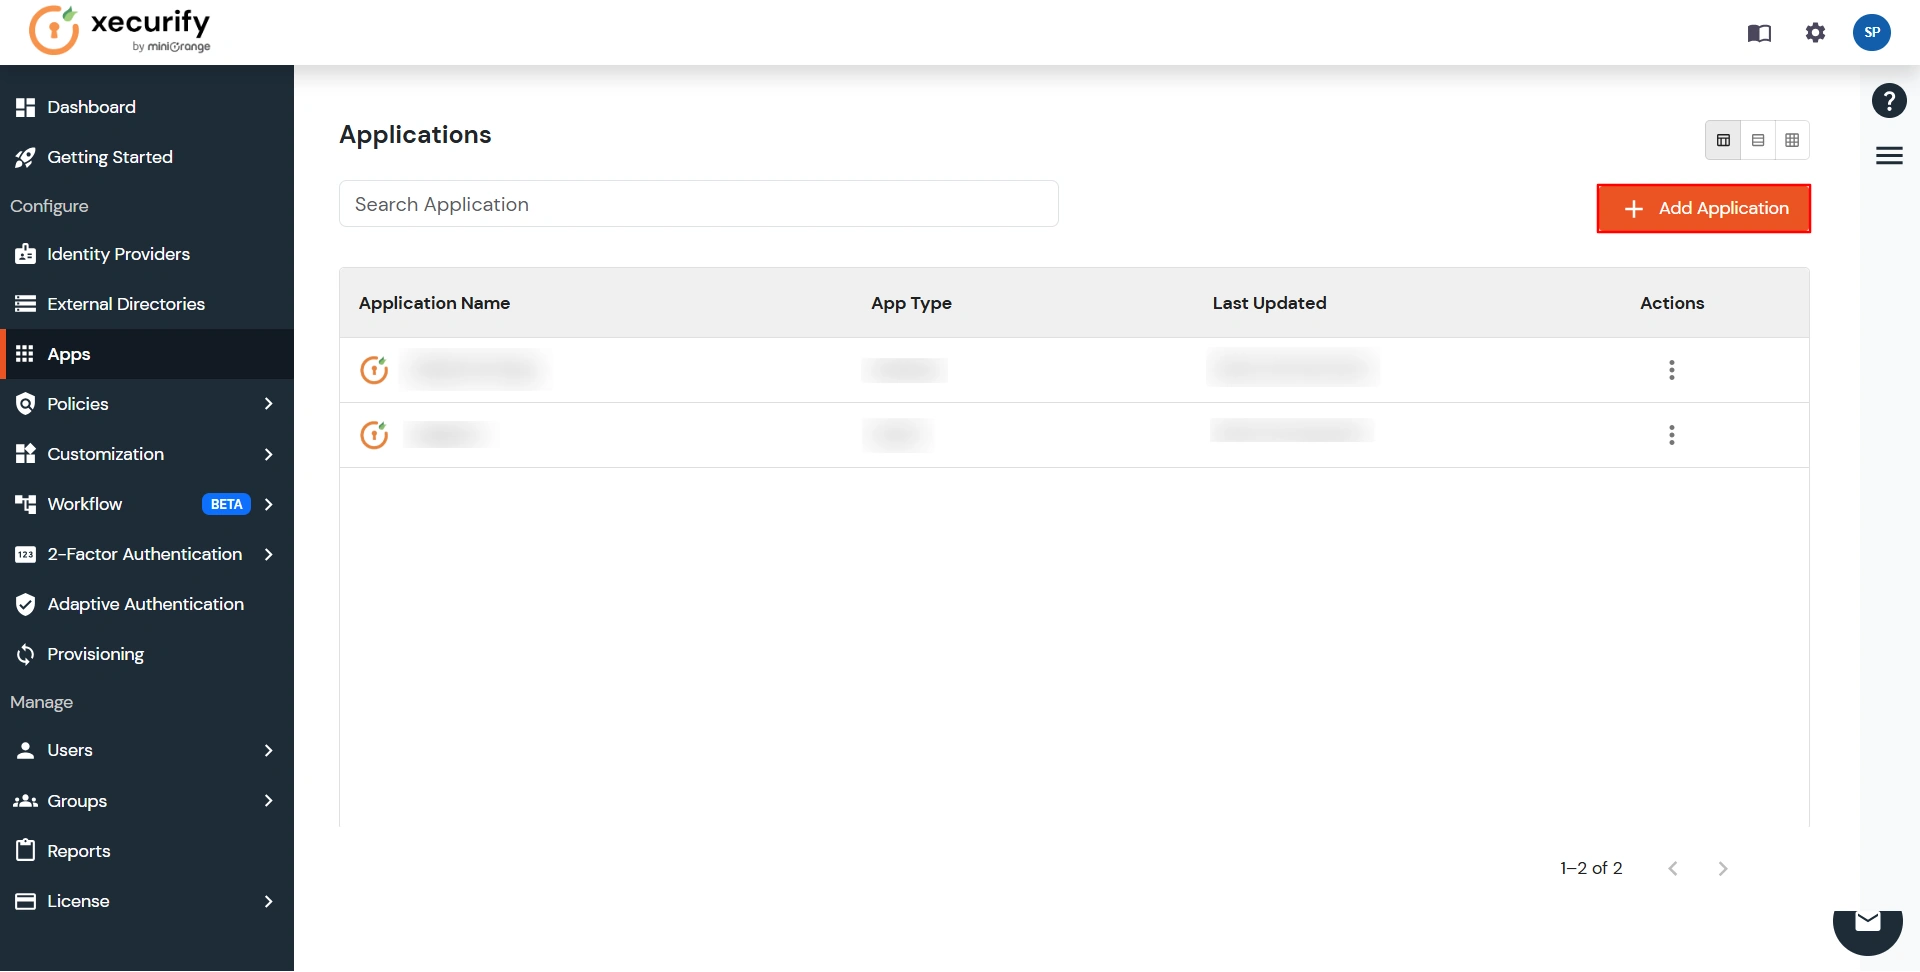
- Go to Apps and click on the Add Application button.
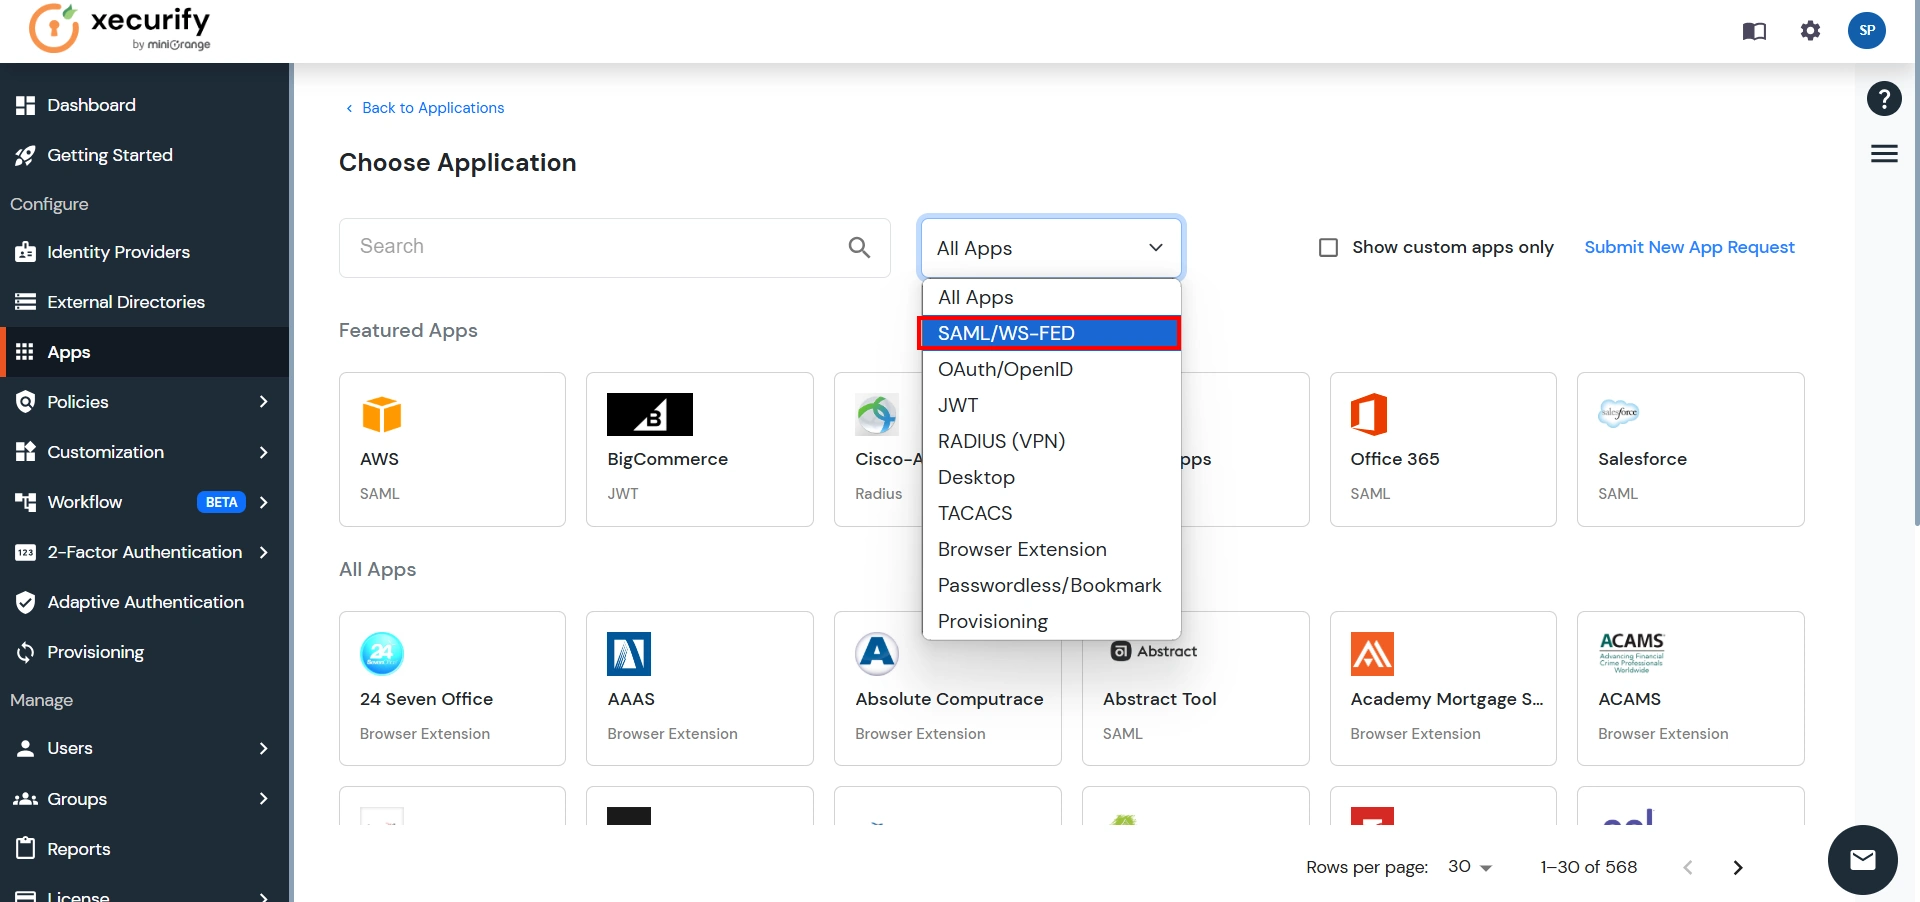
- In Choose Application Type click on All Apps dropdown and select SAML/WS-FED application type.
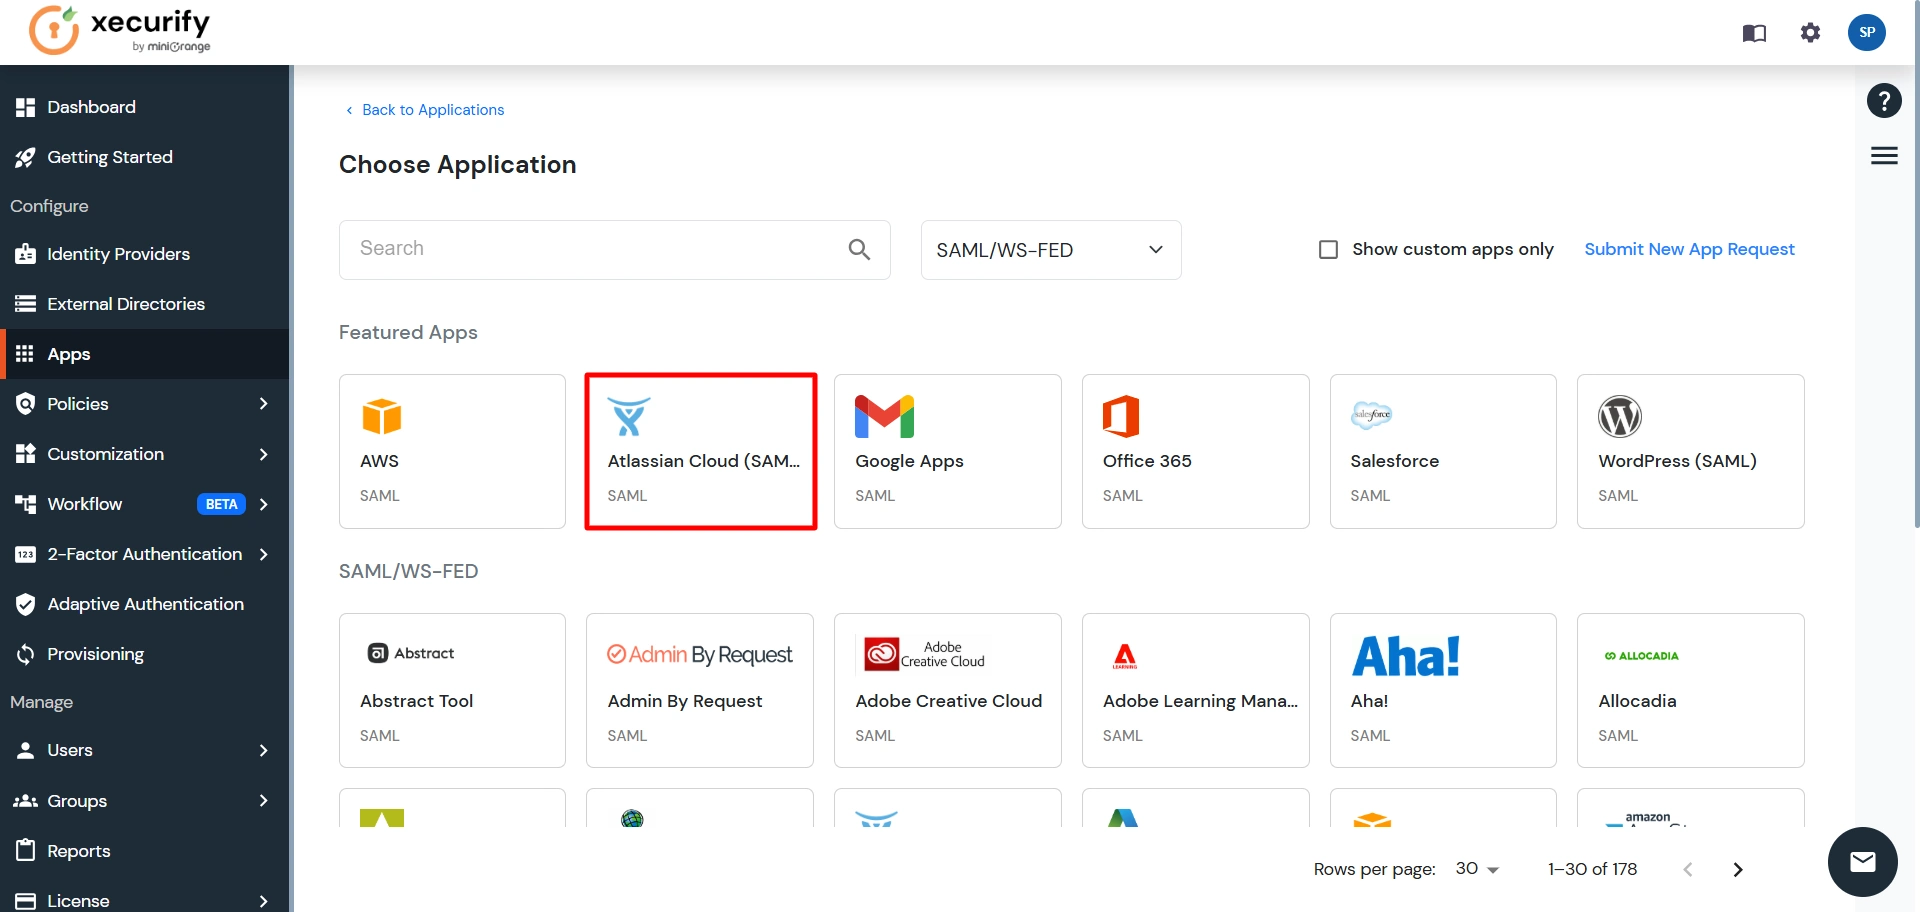
- Search for Atlassian Cloud (SAML) in the list.
- Enter the following values in the respective fields, you will receive these values after creating an app in Atlassian access. Refer this step.
- Also make sure that Sign Response & Sign Assertion both options are turned ON. Then click on the Save button.
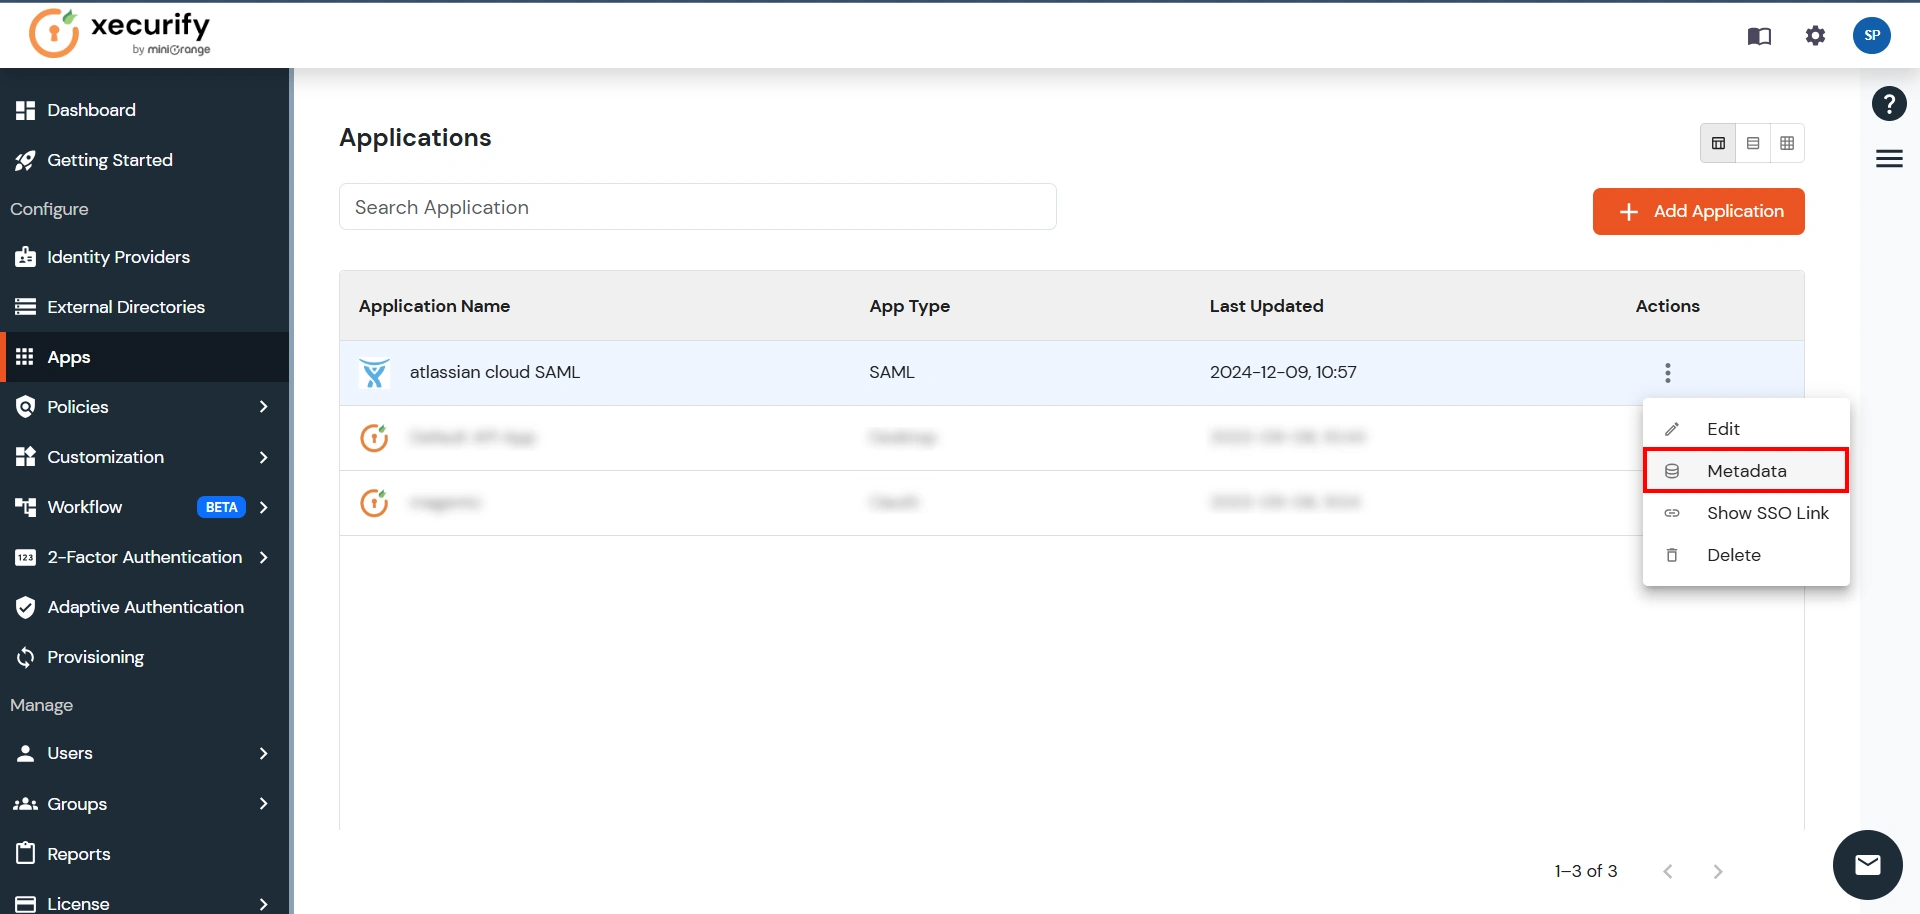
- Once the App is successfully Created, Select that App and then click on Metadata option to get app’s Metadata.
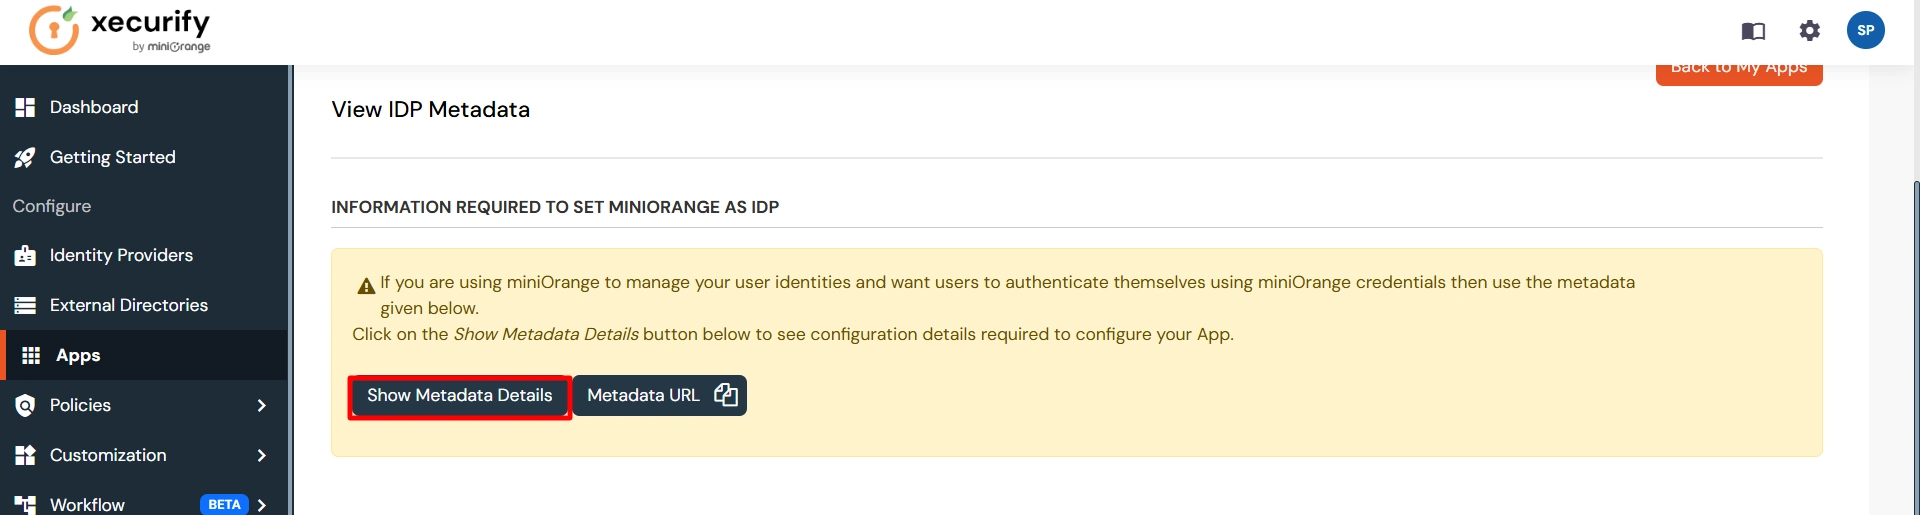
- Since we are using miniOrange as a Brokering Service in this solution, Go to Information required to authenticate via external idp section as highlighted, and Click on Show Metadata Details.
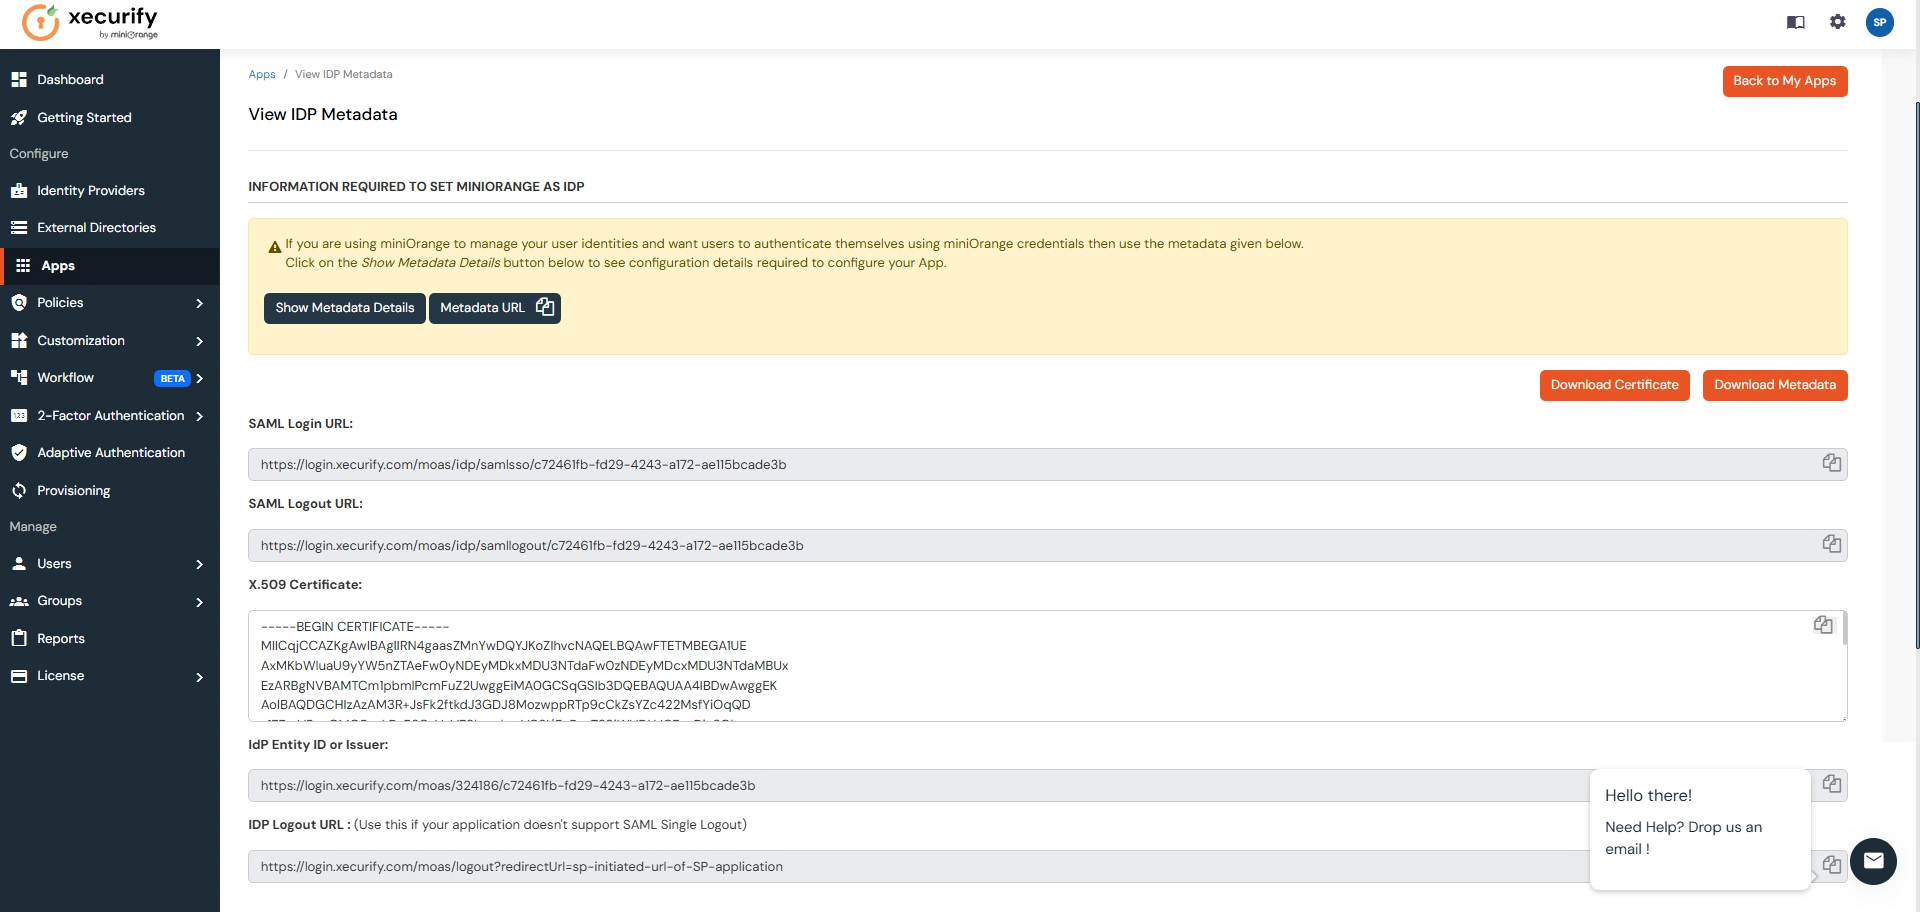
- After clicking on the Show Metadata Details button you can see the metadata details.
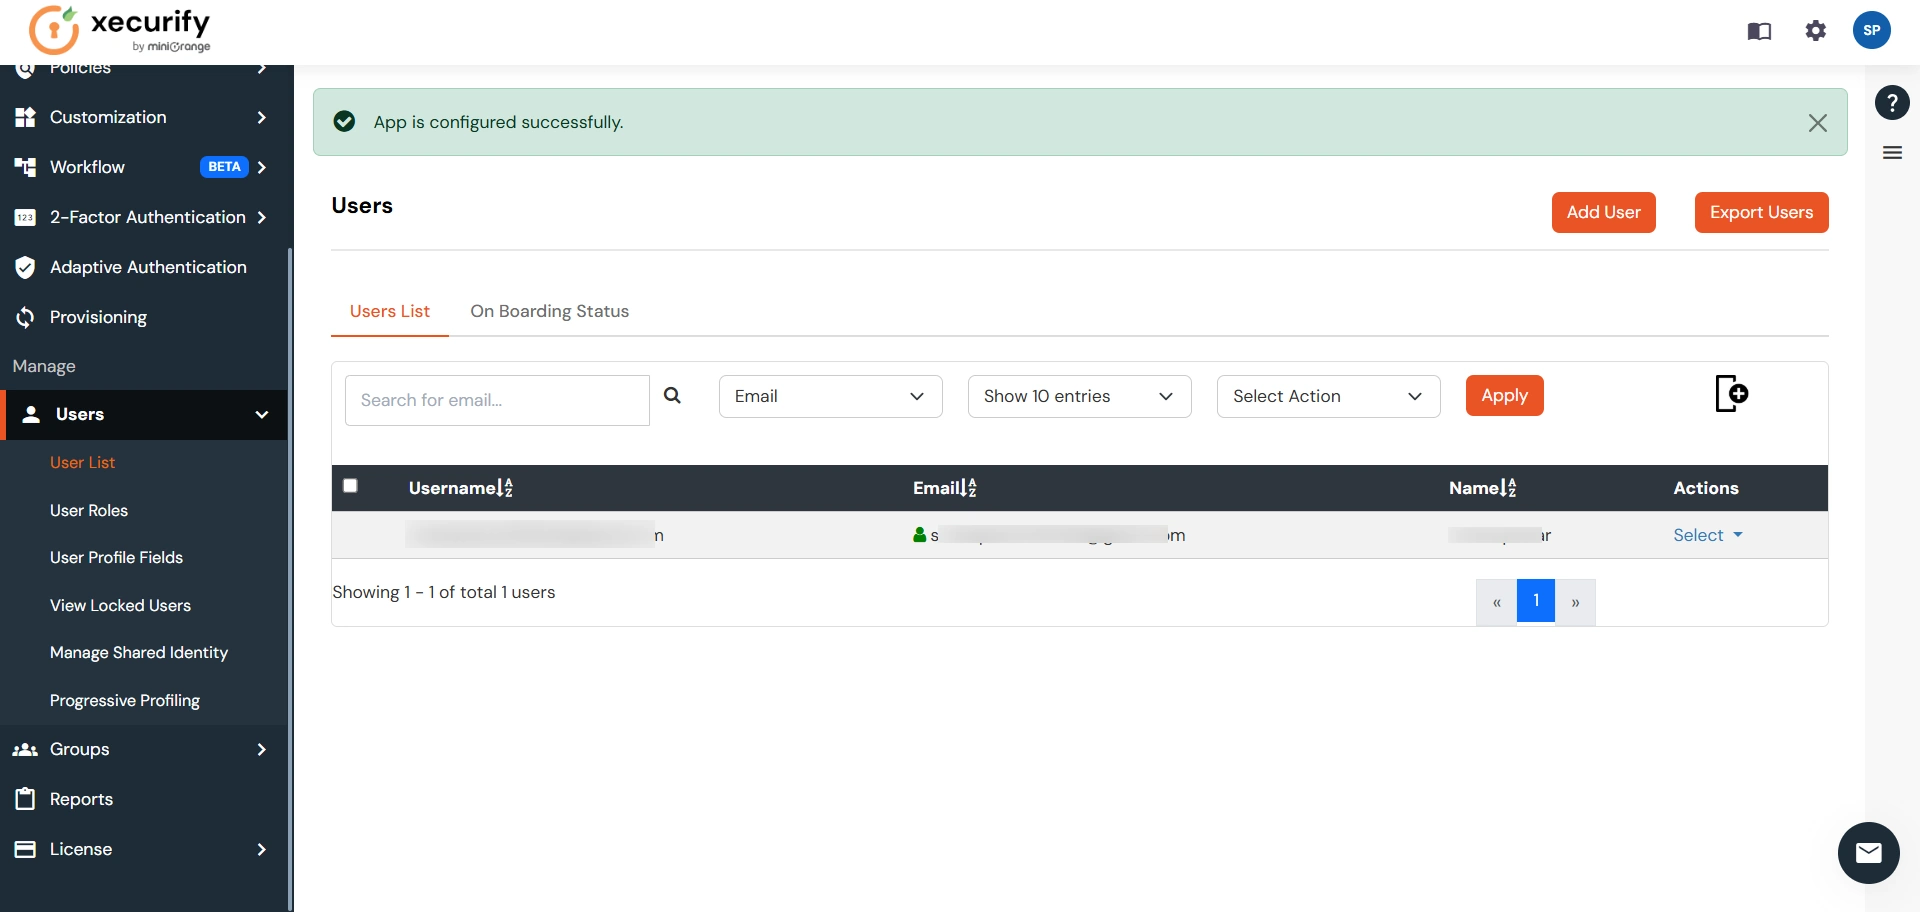
- In the left sidebar hover on Users then click on Users List
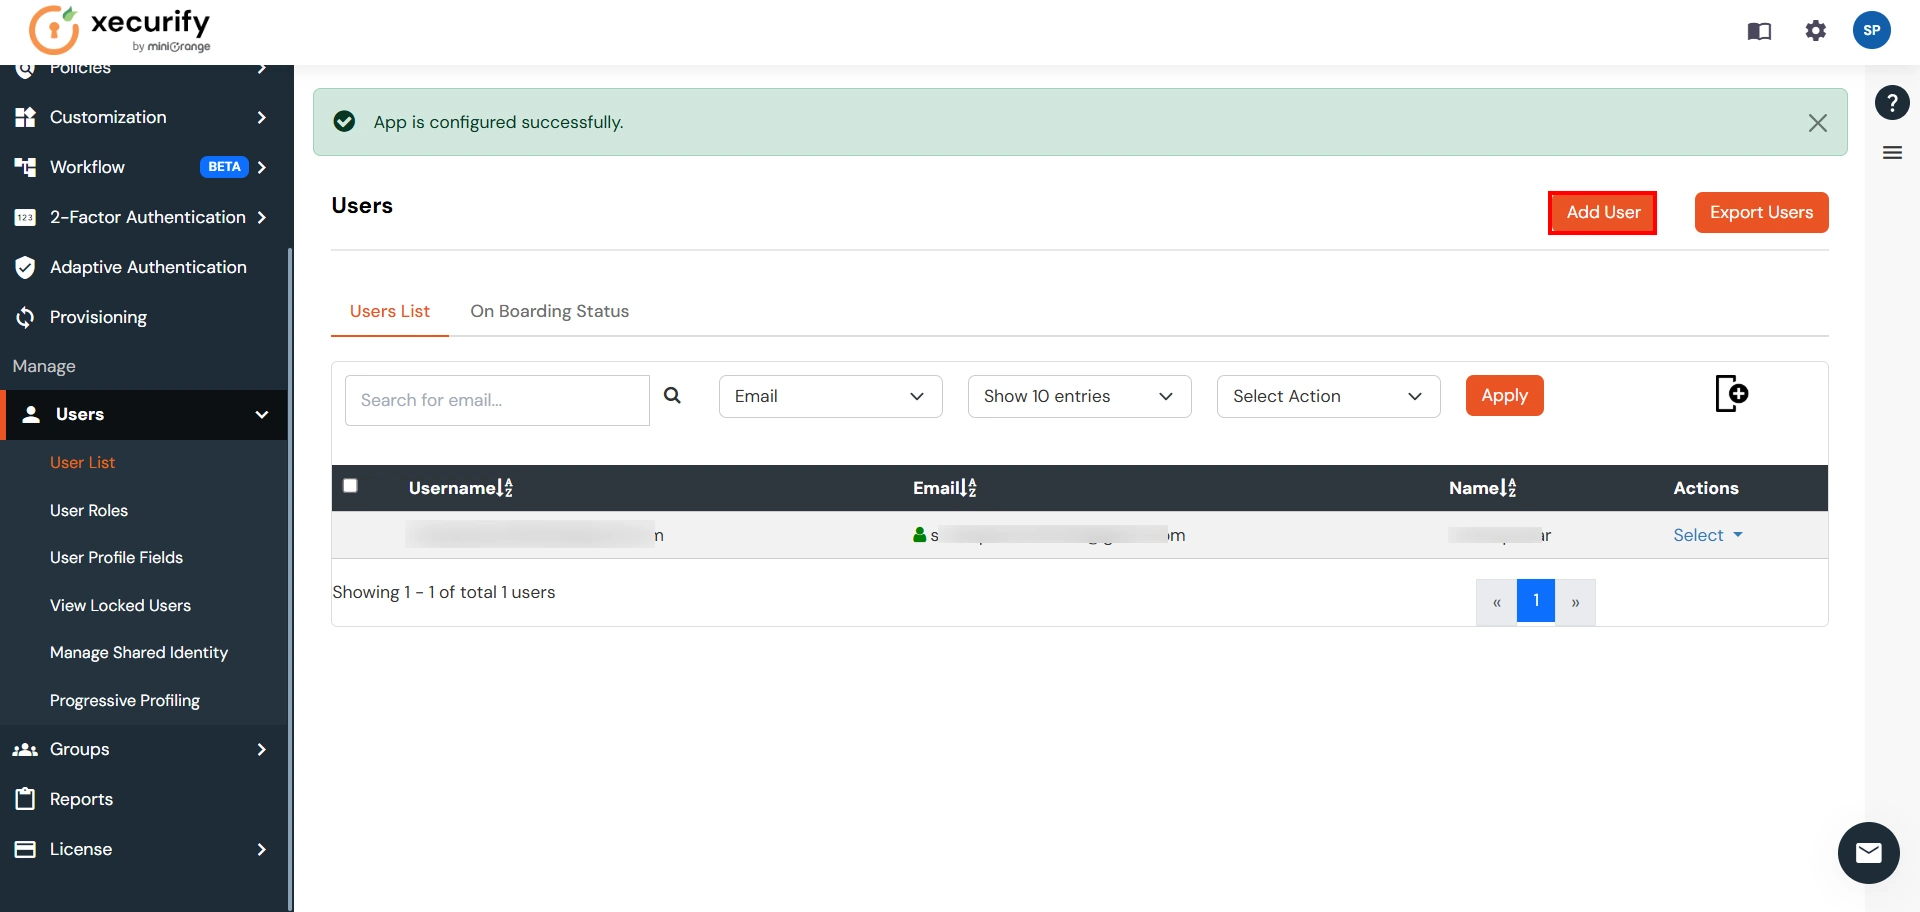
- Click on Add User and enter details to enforce Single Sign On(SSO) on that user.
| Custom Application Name | Any name would be fine |
| SP Entity ID or Issuer | You will receive after configuring Atlassian Access App |
| ACS URL | You will receive after configuring Atlassian Access App |
You will need these details while configuring an
Atlassian
Access app.
Make sure that the user created here will also exist in the Atlassian Cloud.
Step 2. Setup Atlassian Cloud
- Now login to Atlassian Cloud Admin Console.
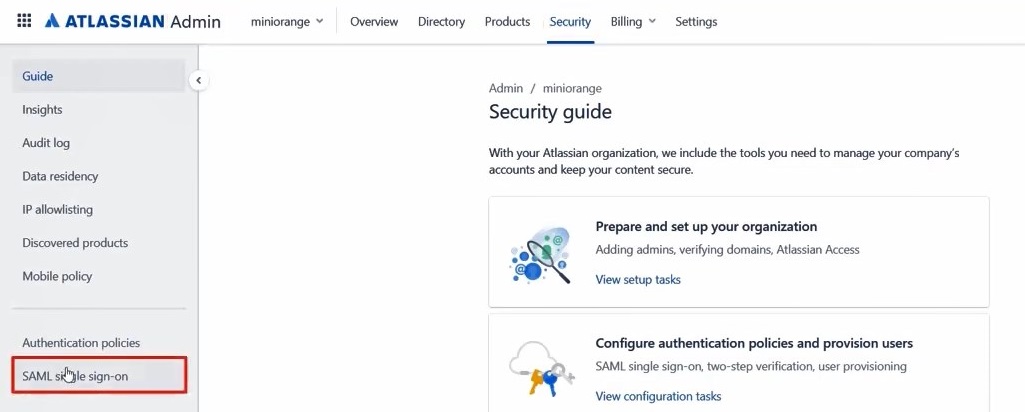
- Select your organization and then select the Security tab. Click on SAML Single Sign-On from the left sidebar.
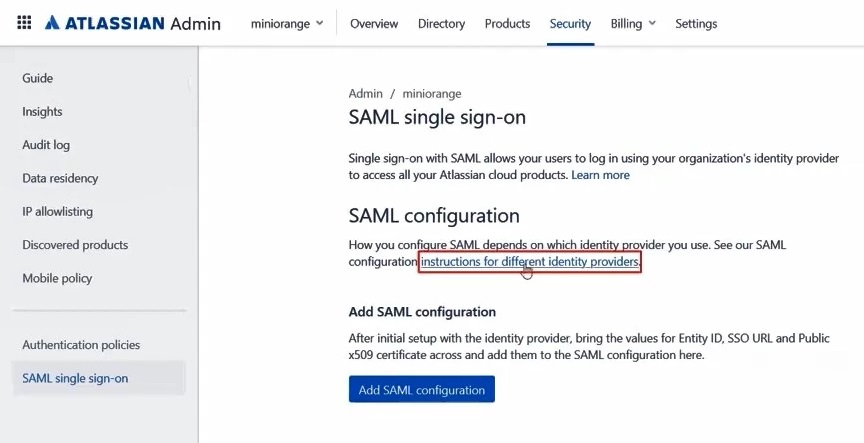
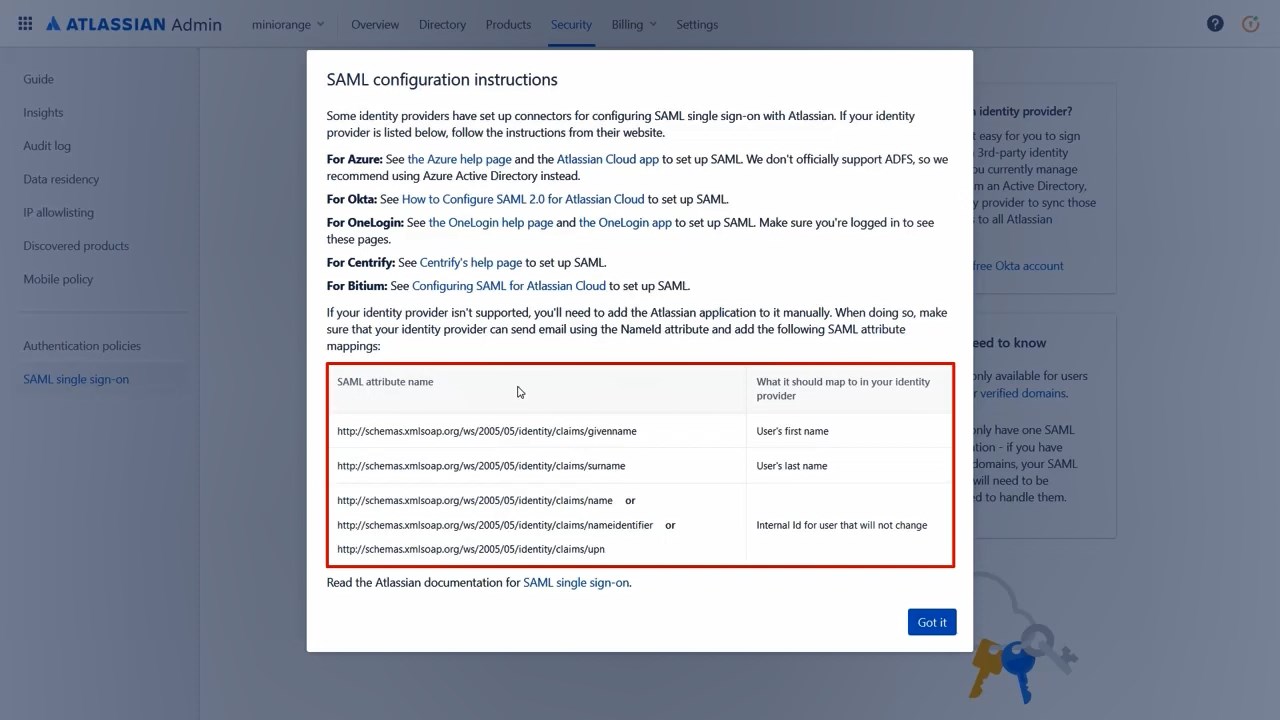
- You can click on Instructions for different Identity Providers. It provides a help page for specific IDP and Attribute Names for Attribute Mapping.
- Here you will get the SAML Configuration Instructions for different identity providers as listed. Click on Got it.
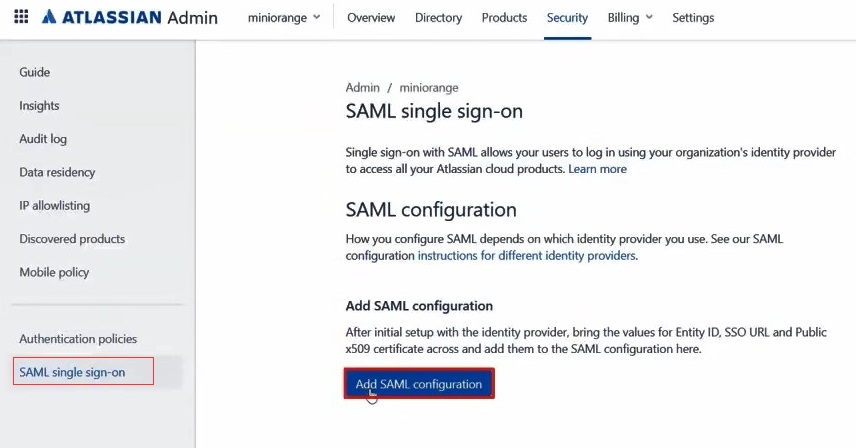
- Click on Add SAML Configuration.
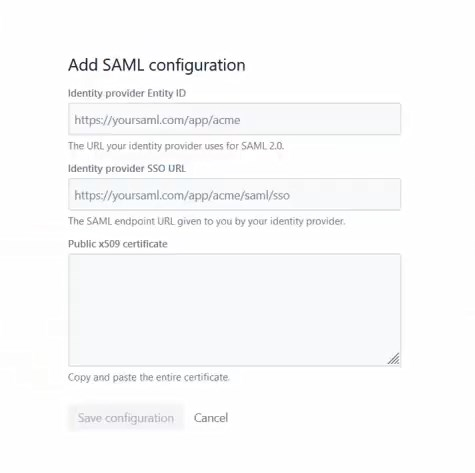
- You will be redirected to the Add SAML Configuration window. Enter IDP Entity ID, SSO URL and the public certificate. Click on the Save Configuration button.
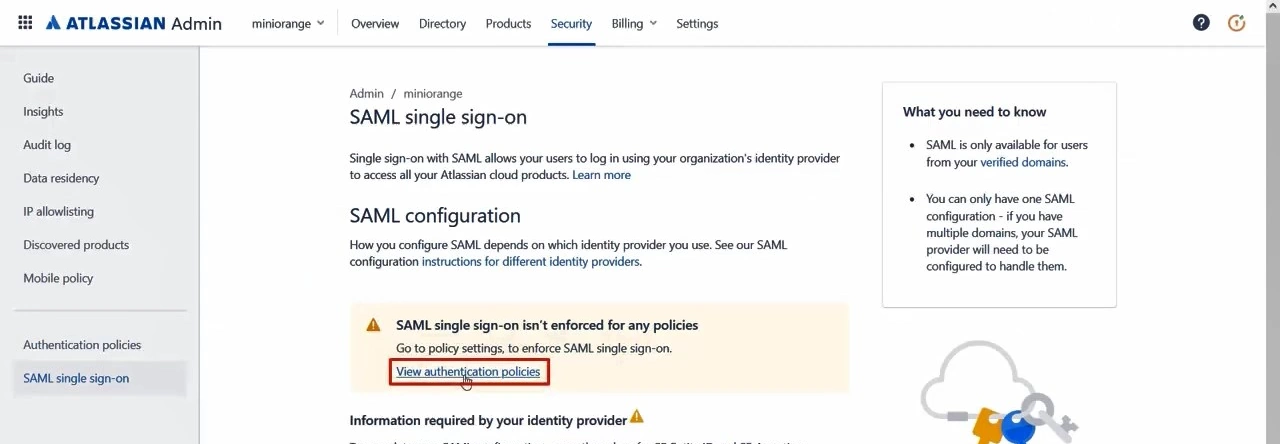
- Now you will be shown SP Entity ID & SP ACS URL as shown below. These details will be needed in miniOrange app configuration. Now set up the Authentication Policies by clicking on the View Authentication Policies.
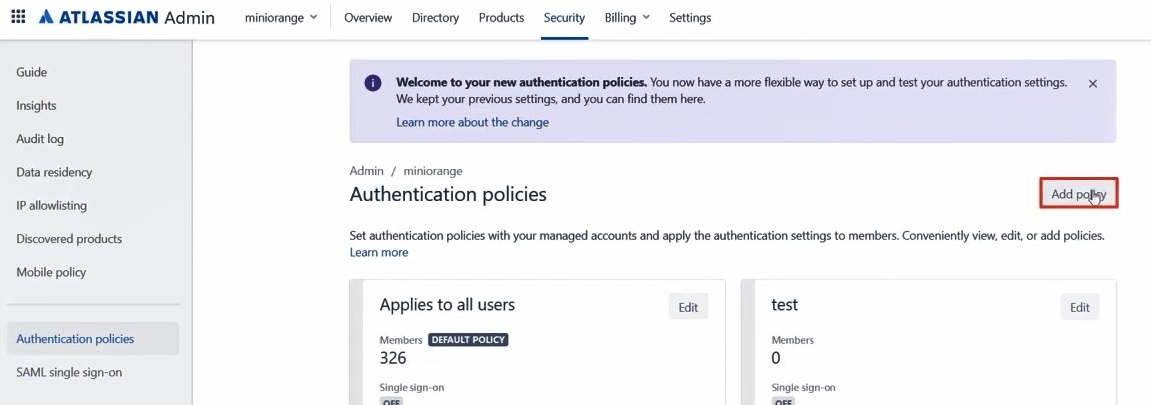
- Click on Add Policy.
- Enter the policy name and add the policy.
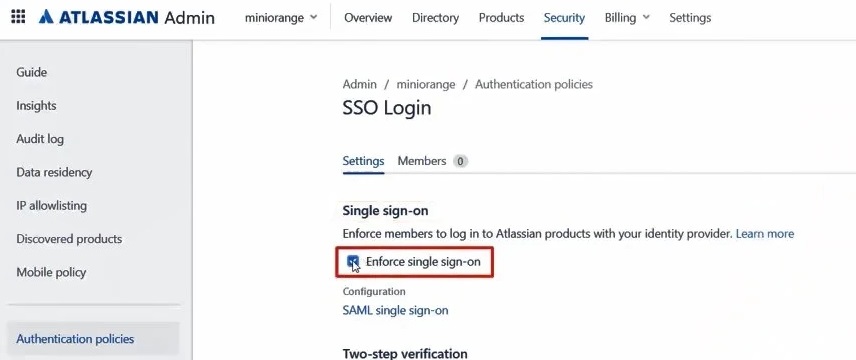
- Now under Single Sign-On, click on Enable Single Sign-On.
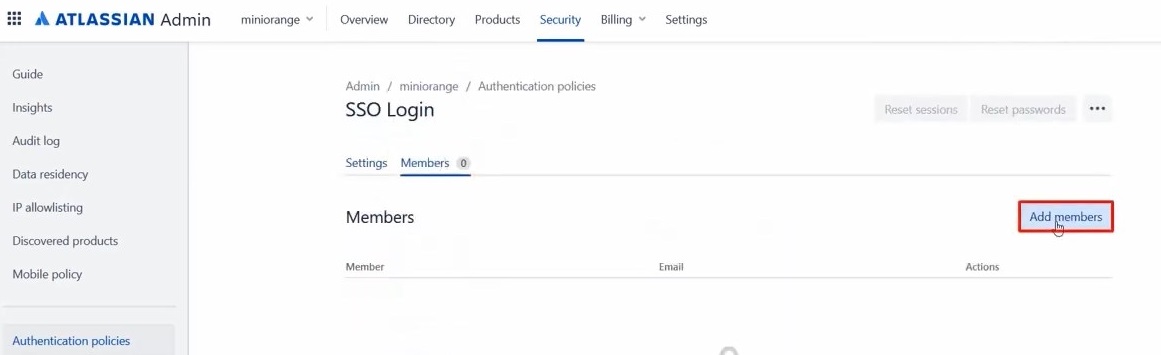
- Then click on the Members tab besides the settings tab and click on Add Members.
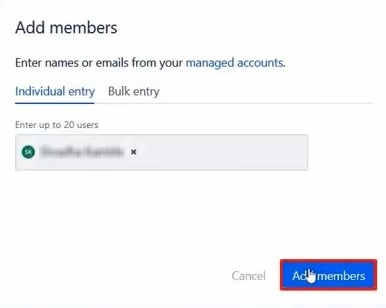
- Enter details and click on Add Members.
You will get these details in the metadata details section after configuring the miniorange
app. Refer this step
The Single Sign On(SSO) will work only for Added Members.
The user must be present in both Atlassian and miniOrange.
Step 3. Test Atlassian Cloud - miniOrange Configuration
- Go to Atlassian Login Page.
- Enter email and click on Continue. Then you will be redirected to miniOrange Login Page
- After logging into miniOrange, you will be successfully logged into Atlassian Cloud Dashboard
Now, you will be able to Login to your Atlassian Dashboard using miniOrange
Credentials.
If you do not have any IDP, you can always go with miniOrange IDP.
If you do not have any IDP, you can always go with miniOrange IDP.


