User Sync & Group Sync app provisions user and group information from OneLogin to Crowd. Users, groups, and directory details can be provisioned using SCIM. SCIM provisioning works based on events performed on IDP. This way the administrator only needs to manage user accounts in OneLogin. This reduces the administration time required to create users and groups in Atlassian modules such as OneLogin.
- Log into your Crowd instance as an admin.
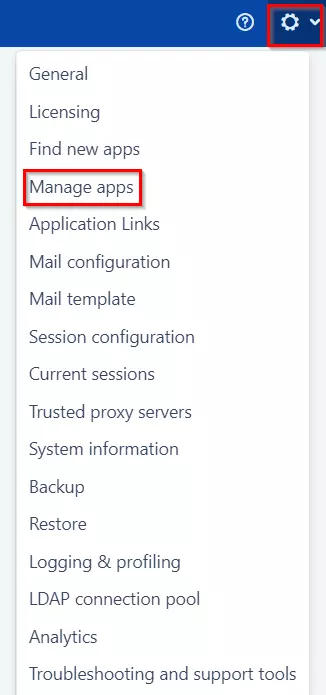
- Navigate to the Administration menu and Click Manage Apps.
- Click Find new apps or Find new add-ons from the left-hand side of the page.
- Locate SCIM for Crowd via search and click on install.
- Login to miniOrange Admin console.
- Navigate to License > Manage License > Release and Download .
- Download the jar file from the Download link.
- Now, click on the View License button to get the license key.
- Log in to the Crowd Admin console.
- Navigate to Administration > Manage Apps.
- Click on the Upload App and upload the jar file.
- Now, click on the Configure button. You will be asked to verify the miniOrange credential and a license key.
Plugin Activation
C.a Plugin Activation with Online License- Navigate to Crowd Admin Console → Manage Apps.
- Click on the Configure button of the miniOrange Crowd SCIM plugin.
- Log in with your miniOrange account. Once authenticated, you will be prompted to enter the license key.
- Enter the license key and click on the verify button.
- You will be provided license for activation.
- Navigate to Crowd Admin Console → Manage Apps.
- Click on the Configure button of the miniOrange SCIM plugin.
- Click on Choose File button under the Upload your license File here section.
- Upload the license key and click on the Verify button.
Step 1: Get SCIM Client Details
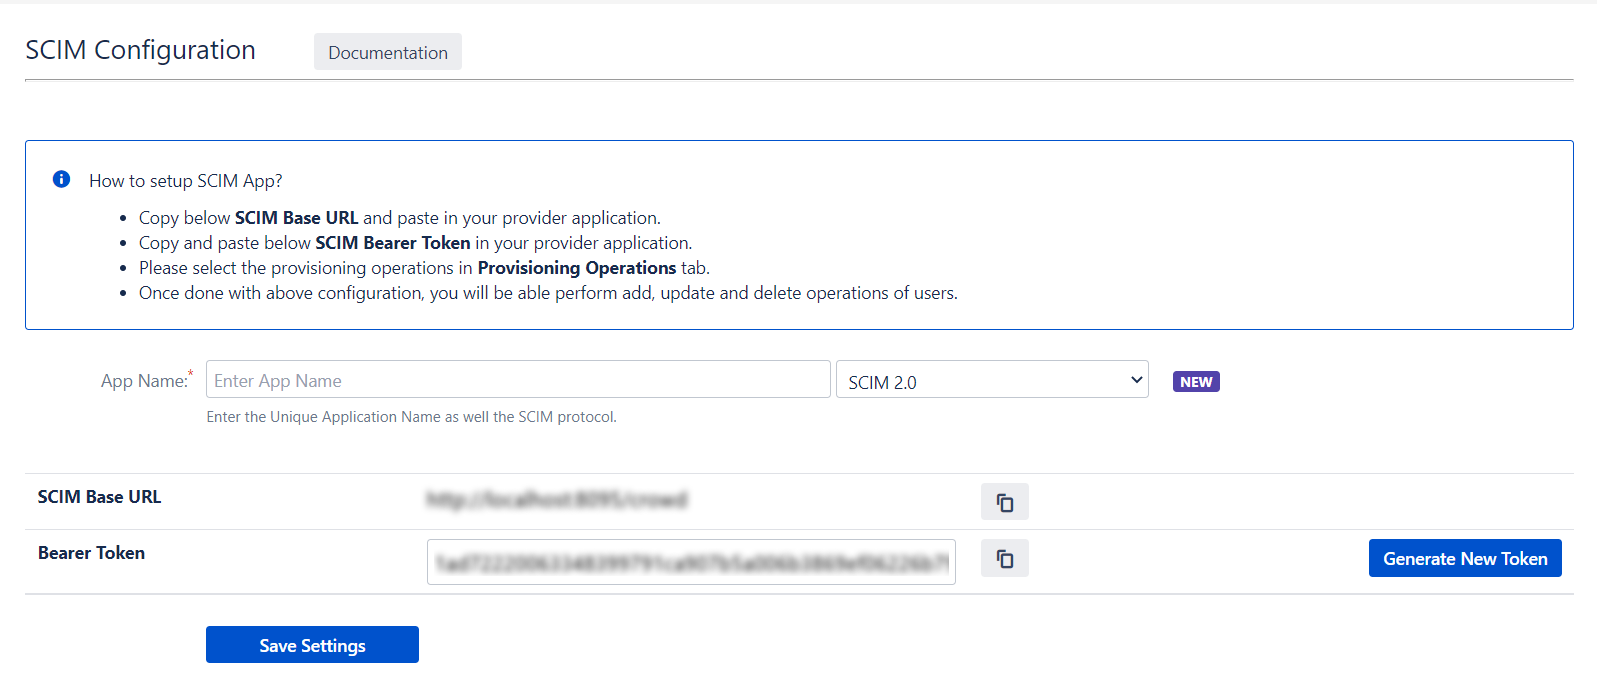
- In the SCIM configuration, Please enter App Name and click on the Save Settings button. Copy the SCIM Base URL and SCIM Bearer Token, these will be used later to configure the SCIM application on OneLogin.
Step 2: Setup OneLogin SCIM Configurations
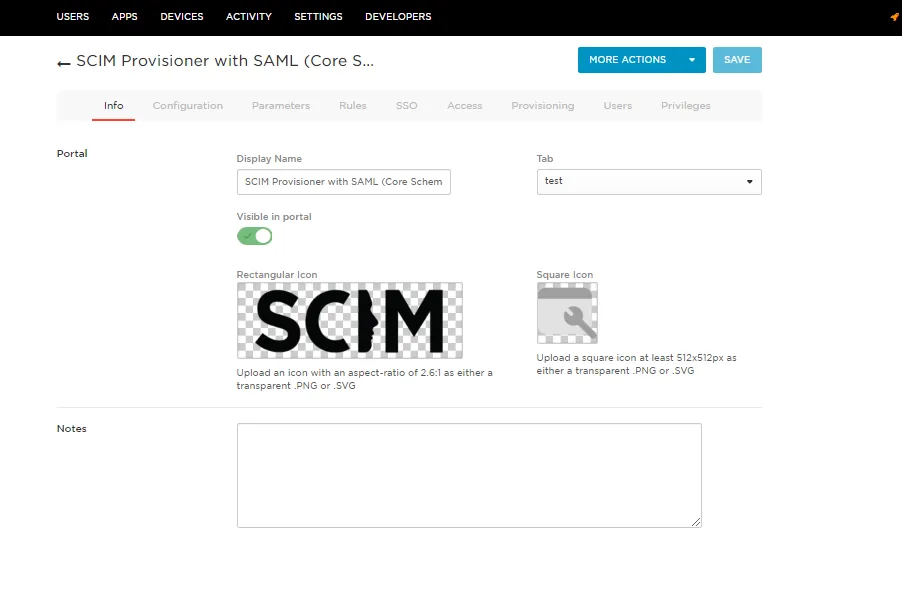
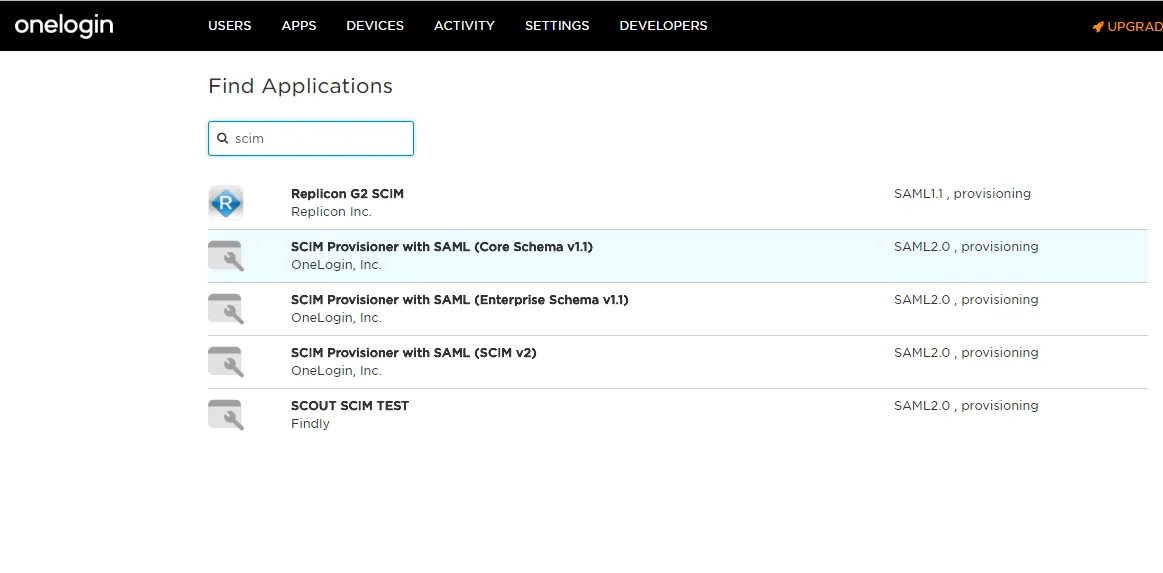
- Log in to your Onelogin Portal. Add SCIM Provisioner with SAML.
- Start configuring it by adding Display Name.
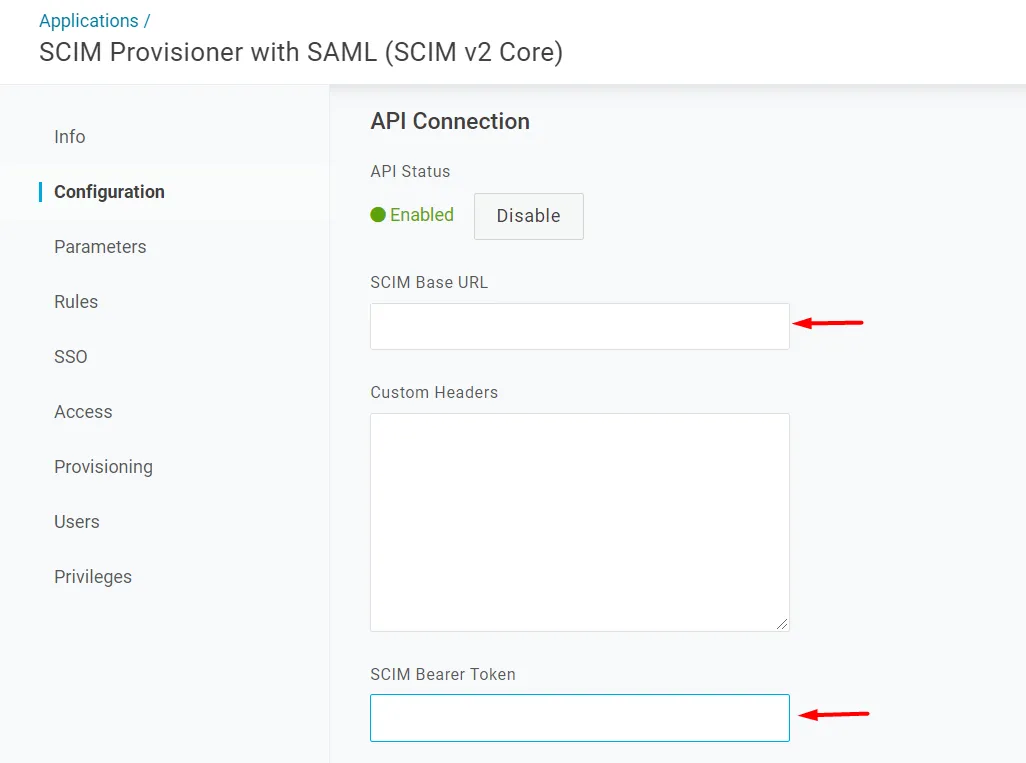
- Go to Configuration Tab. Enter SCIM Base URL, SCIM Bearer Token (which you will find in Step 1 above).
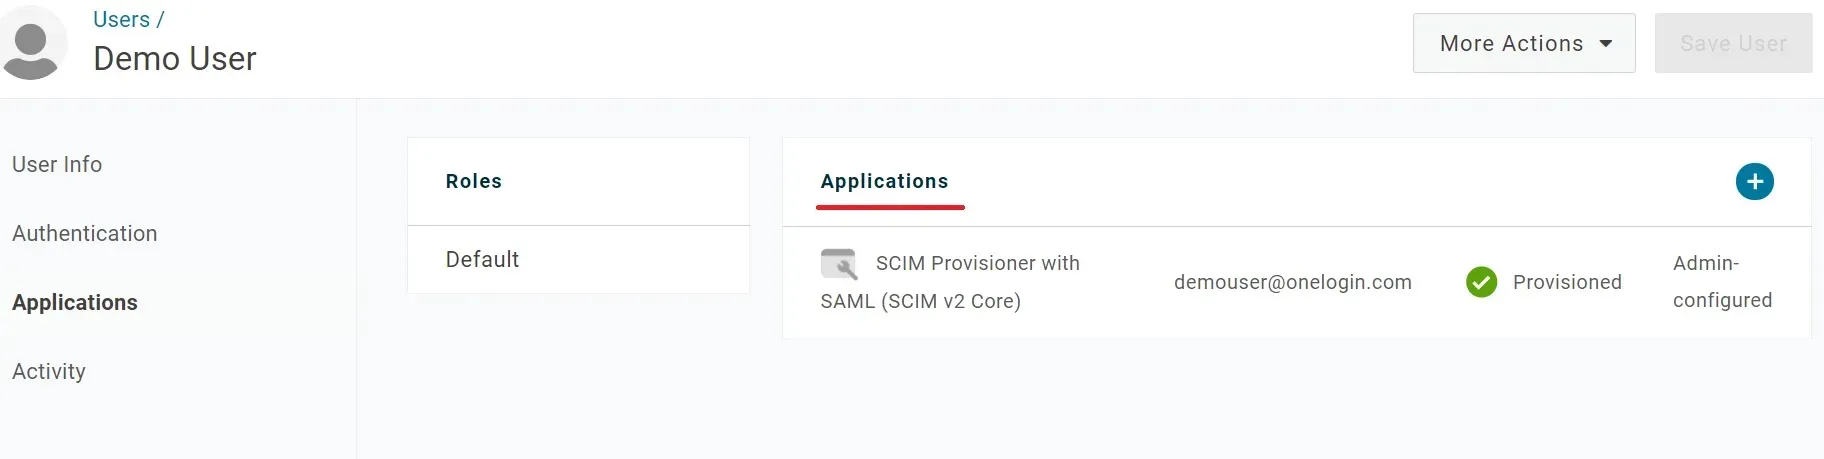
- Enable provisioning from SCIM Provisioner with SAML application.
- Approve the provisioning request. On success, status will change to 'provisioned'.

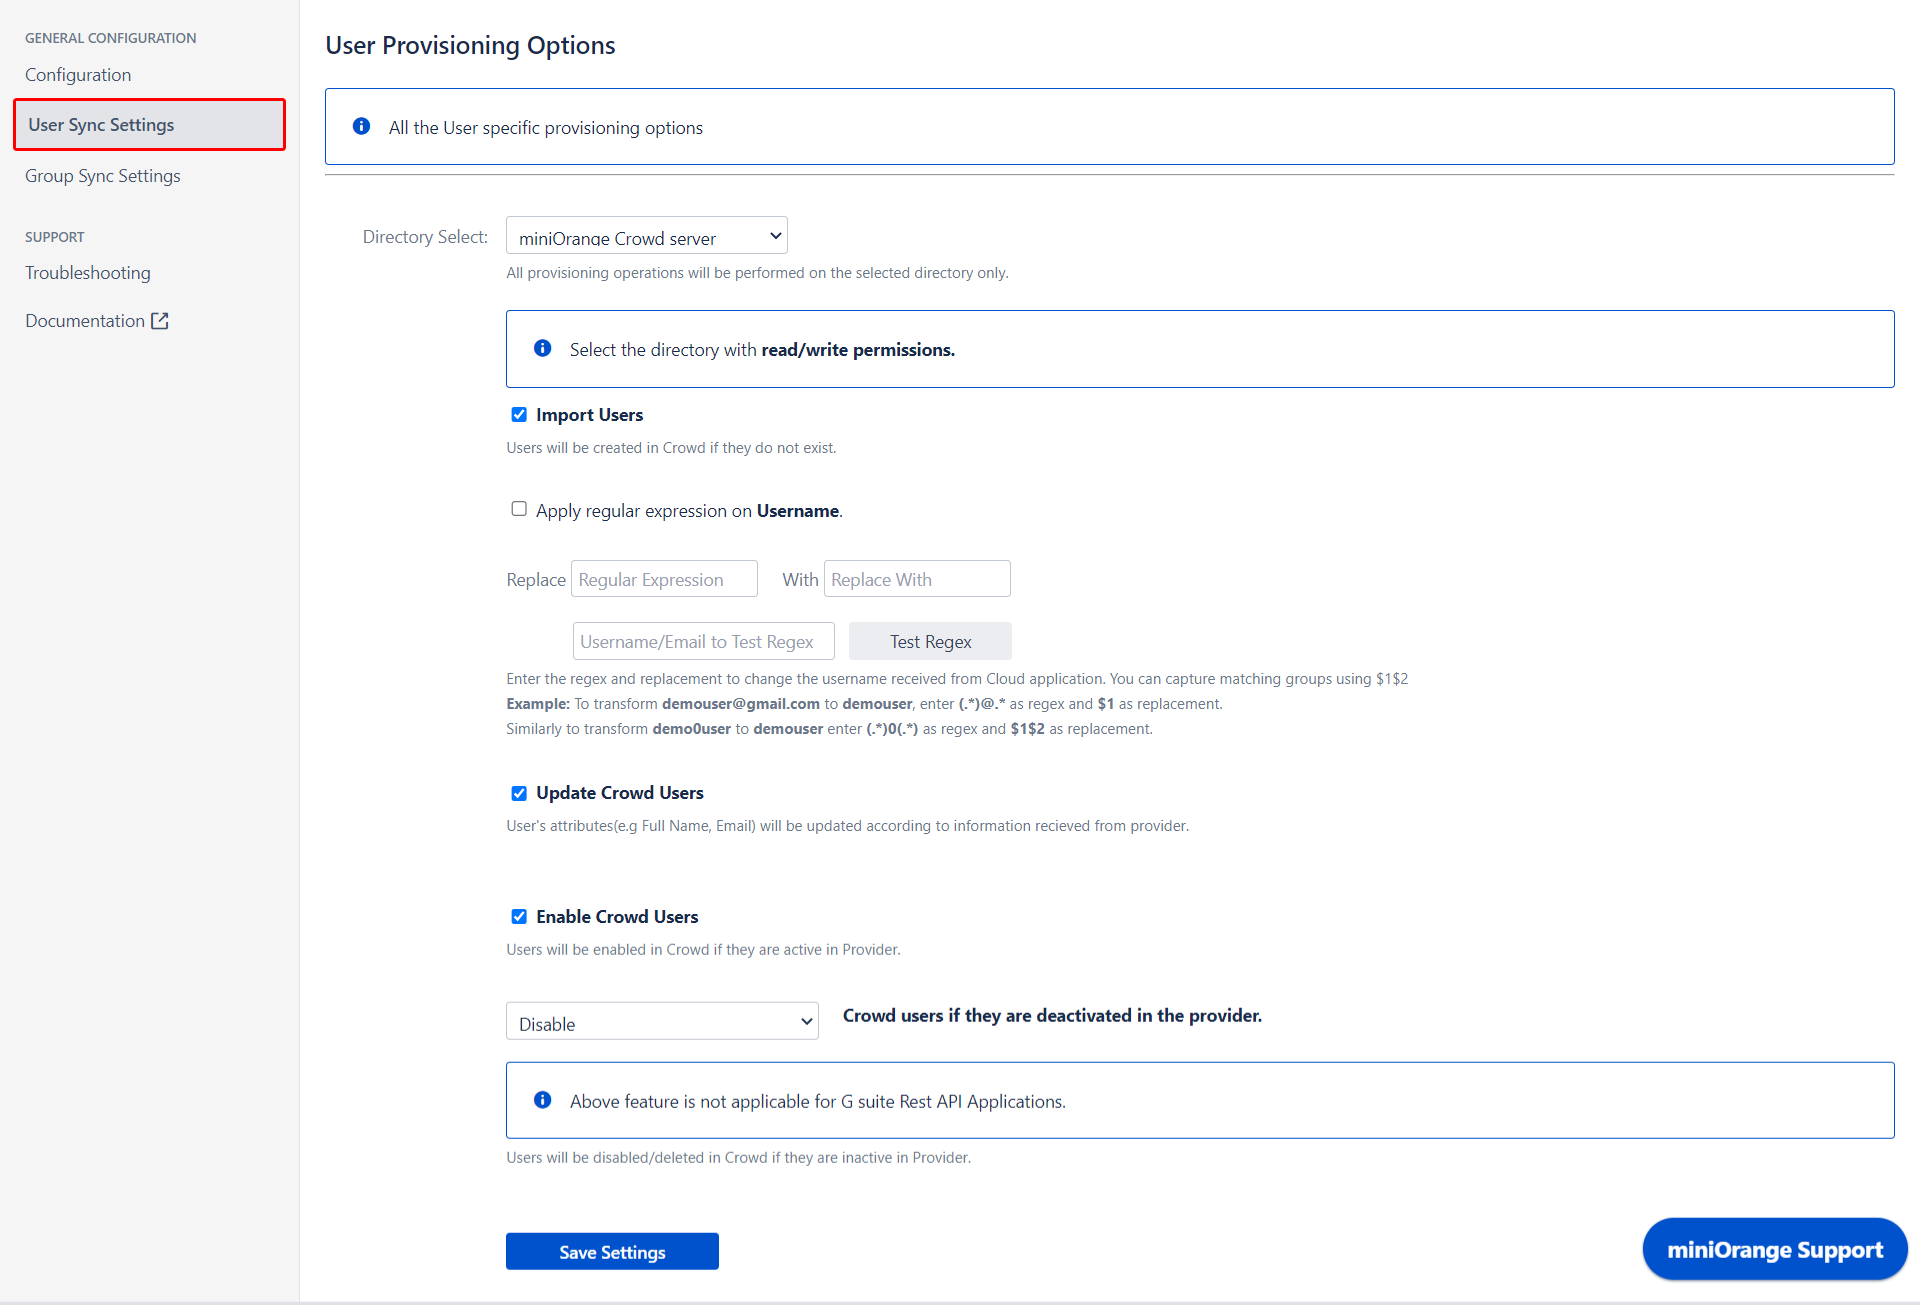
Step 3: User Sync Settings
- Select the User Sync Settings tab from the left sidebar. Here you can configure different settings for user creation and updating.
- You can select the directory, enable or disable user import, and update the process..
- The user can be automatically enabled or disabled here based on IDP configuration.
- You also have the option to set Default Project Lead and Default Component Lead.
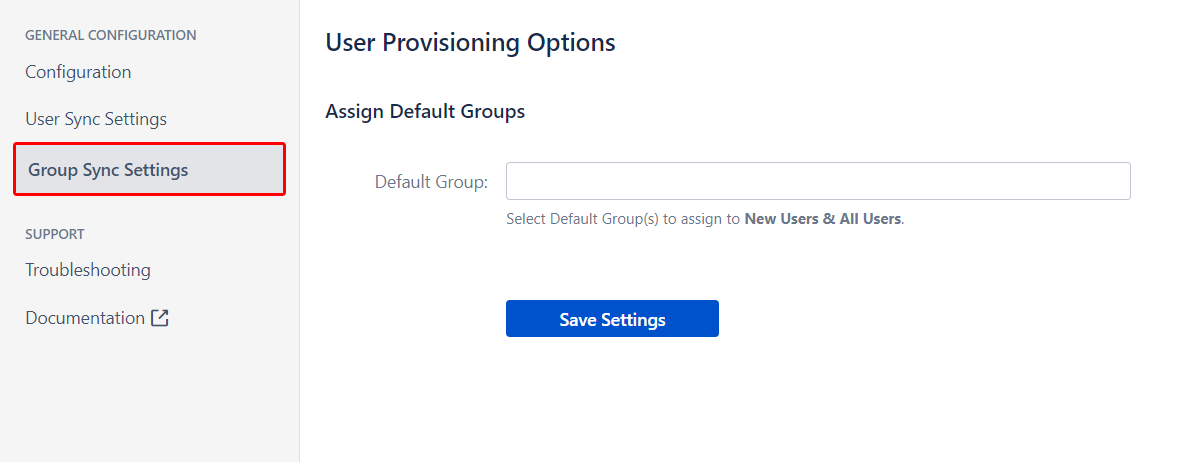
Step 4: Group Sync Settings
- Select the Group Sync Settings tab from the left sidebar. Here you can configure different settings for group creation and group mapping.
- Here you can configure Default groups for new and all users.
Recommended Add-Ons

Two Factor Authentication
Enable 2FA/MFA for users & groups and let users configure 2FA during their first login.
Know MoreJira SAML SSO
Jira SAML SSO application enables SSO for Jira Software and Jira Service Desk.
Know MoreJira OAuth/OIDC SSO
Secure your Jira Service Management with OAuth/OpenID Connect SSO.
Know MoreAdditional Resources
Bitbucket Git Authentication App | Kerberos/NTLM Apps | Word/PDF Exporter | WebAuthn | SonarQube SSO | Jenkins SSO
If you don't find what you are looking for, please contact us at support-atlassian@miniorange.atlassian.net or raise a support ticket here.