Step 1: Set Up Ping One as Identity Provider
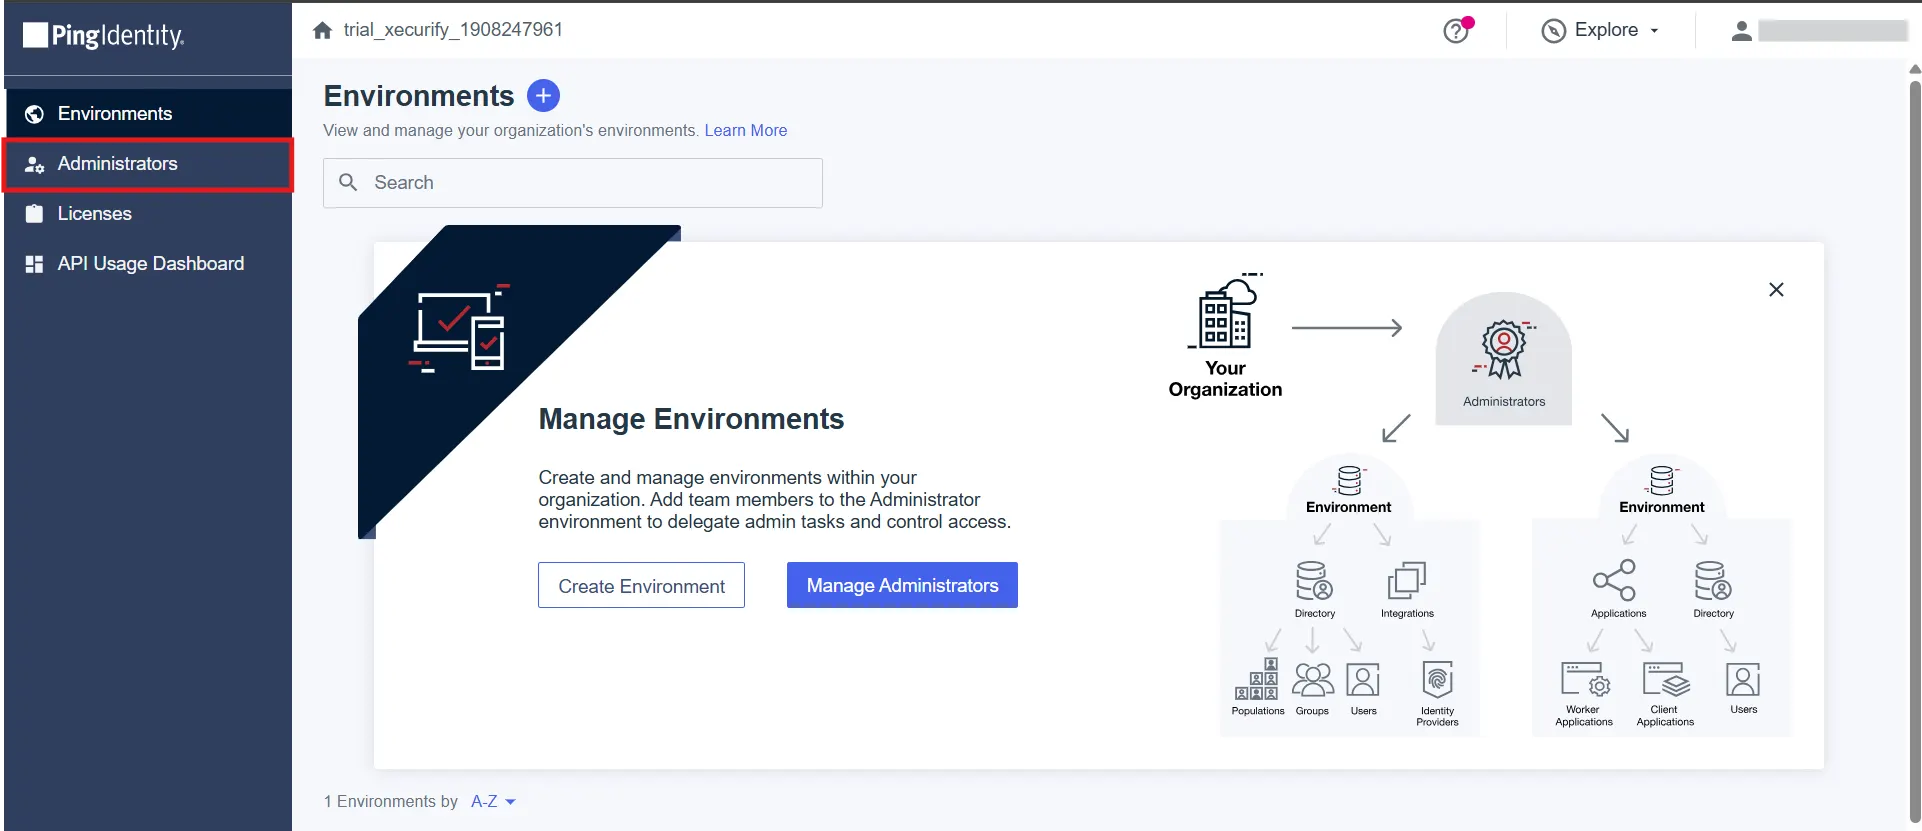
- Log in to PingIdentity Admin and then navigate to Administrators Section.
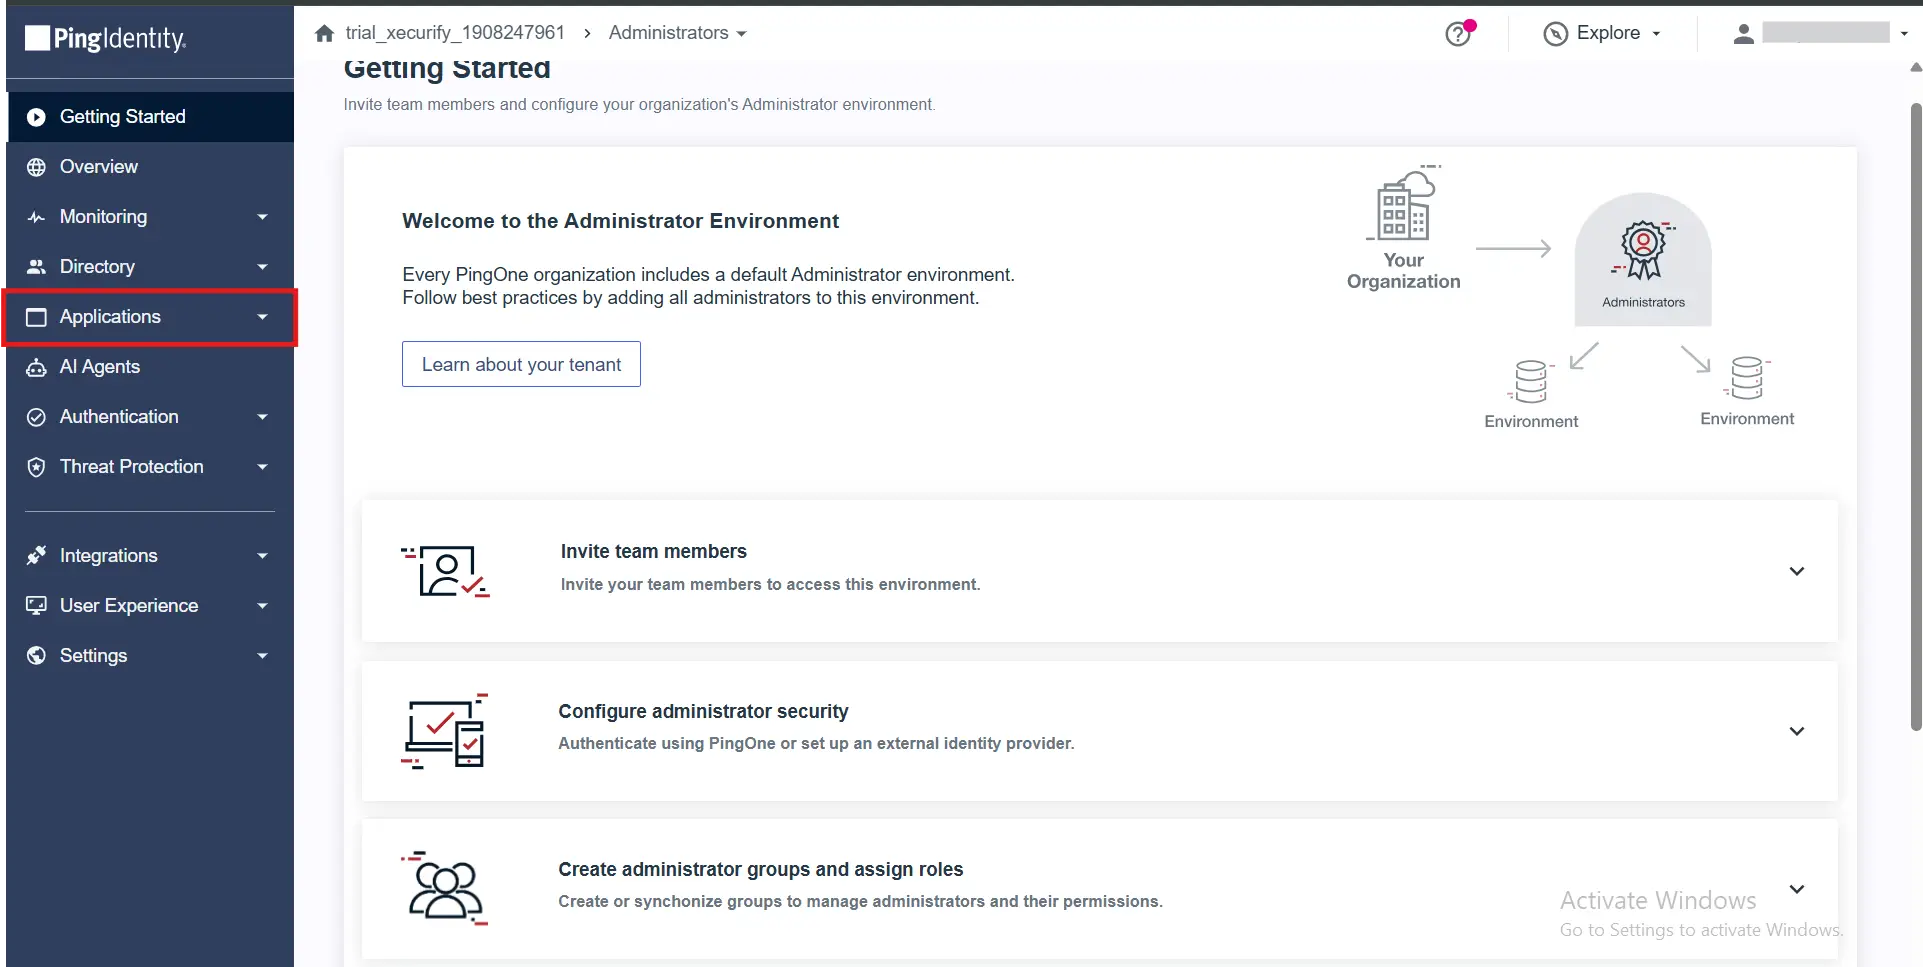
- On your Dashboard menu, click on Application.
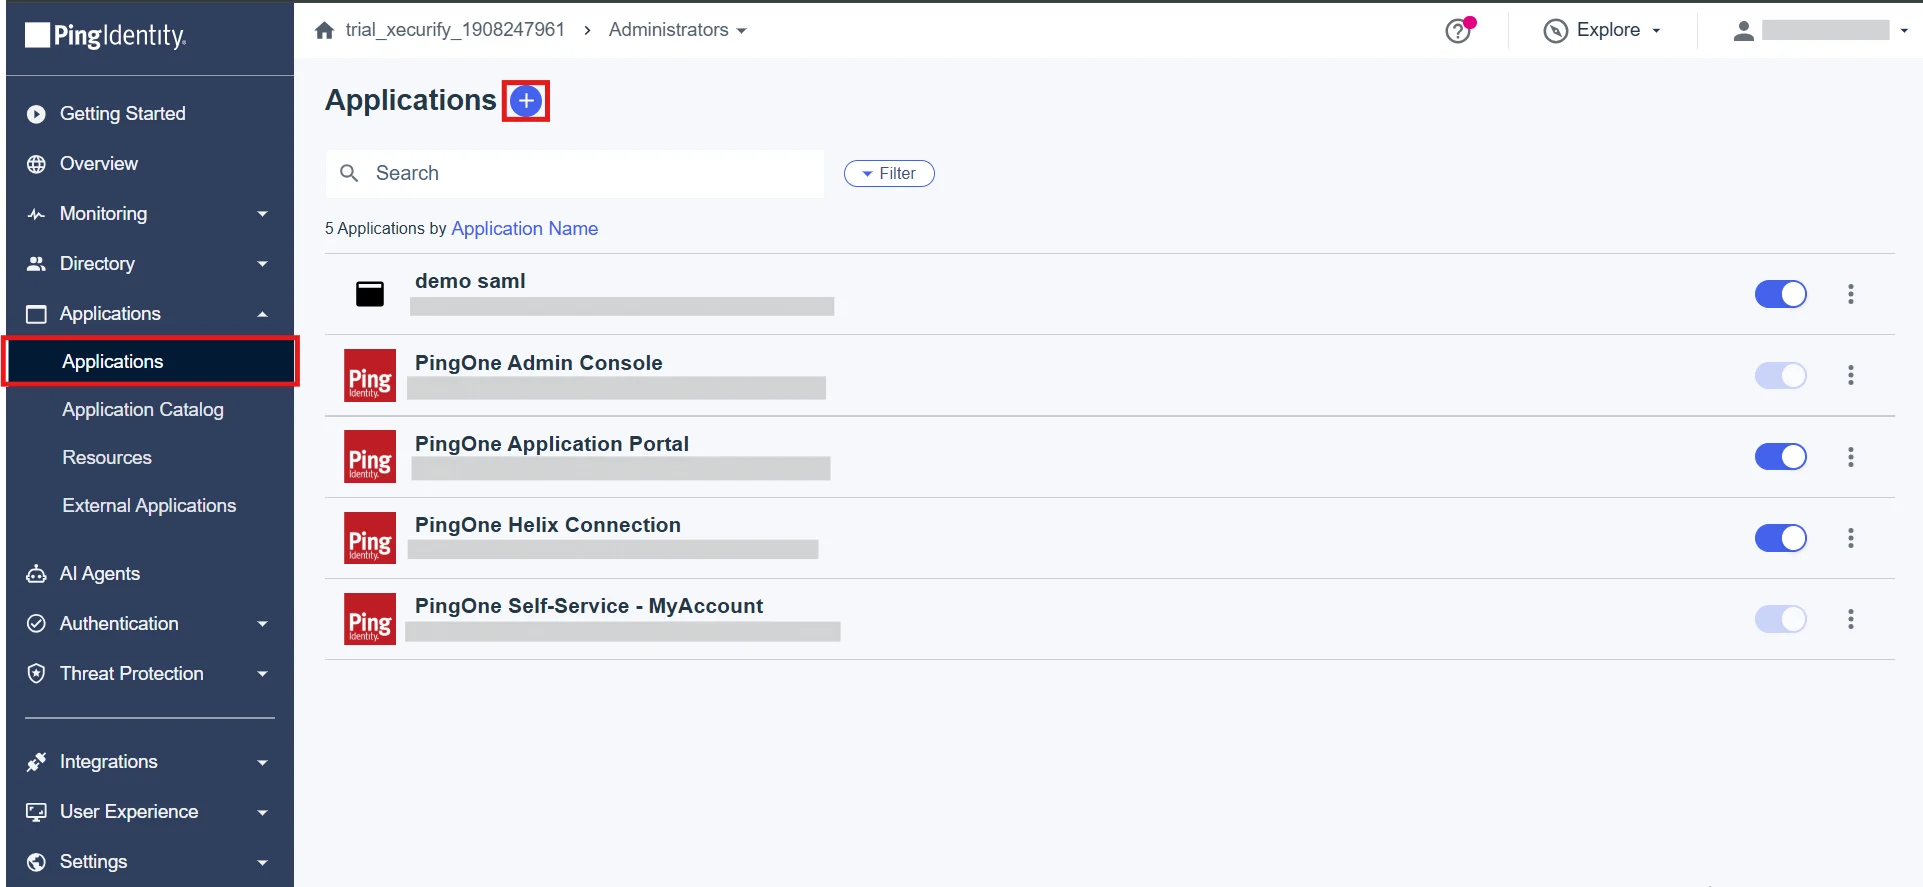
- In the Applications menu, Click on Application and to create an application click on the + icon beside its name.
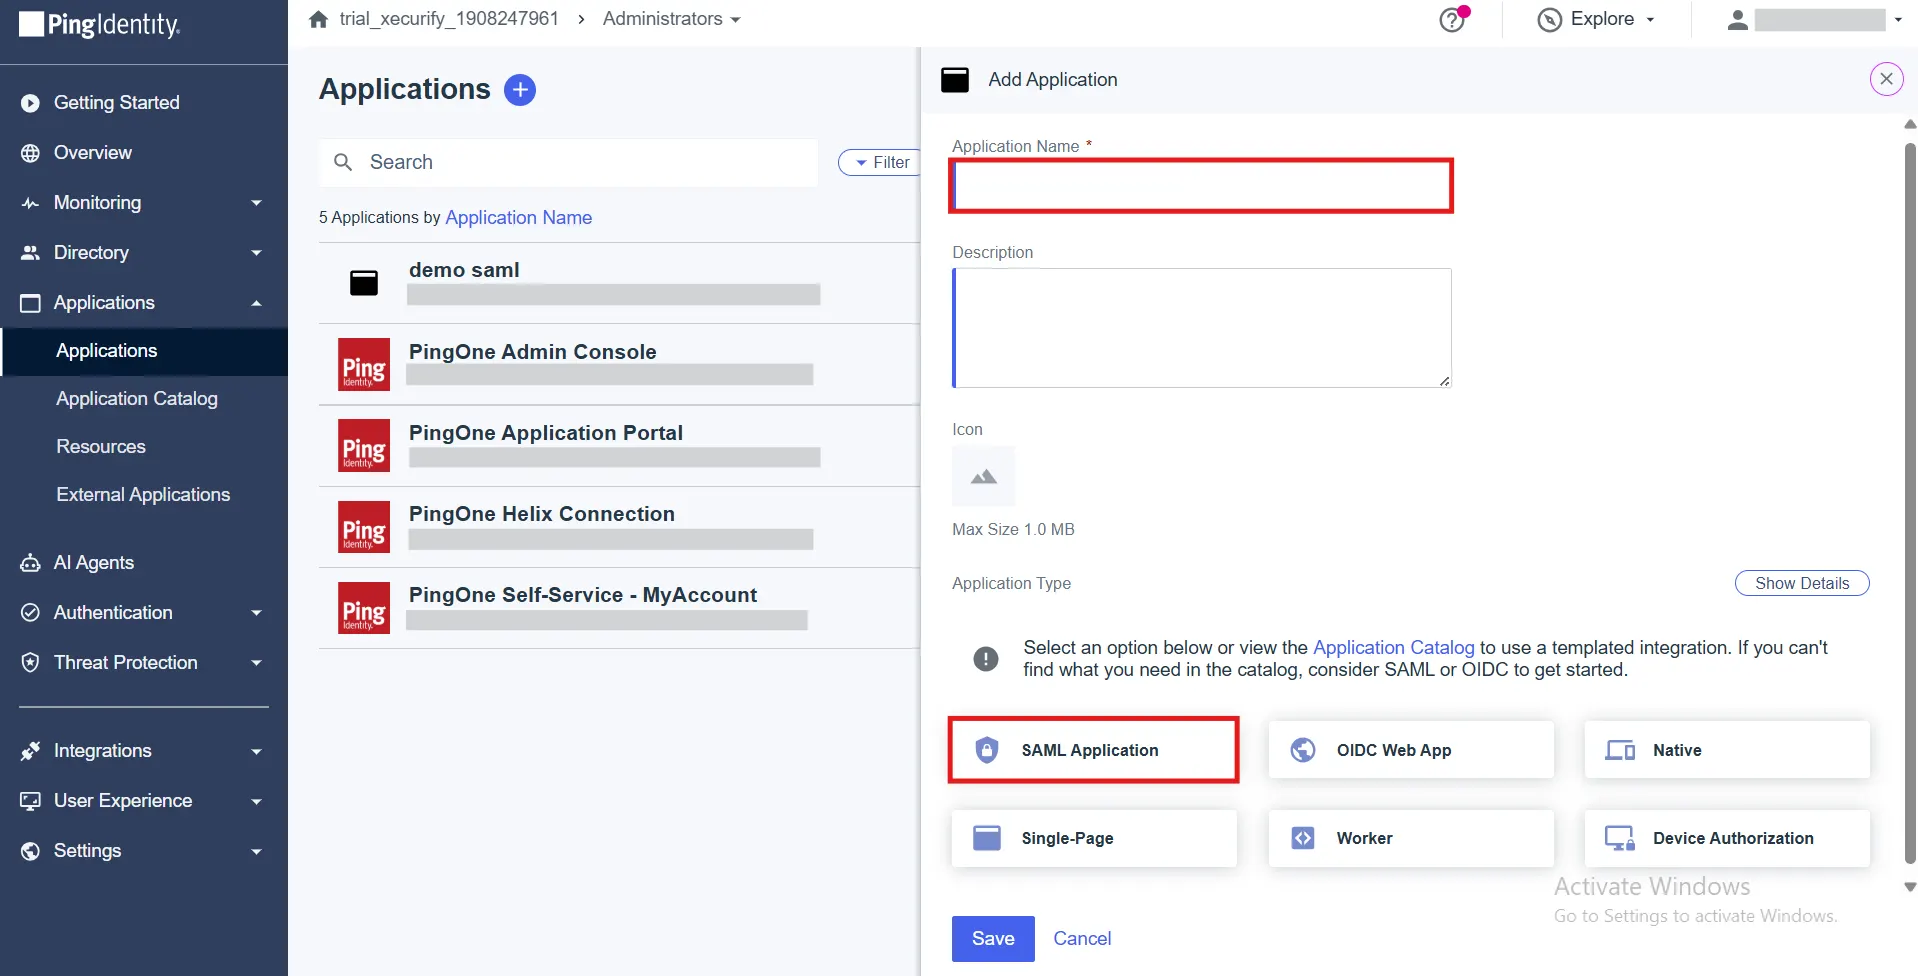
- Provide appropriate Application Name and choose the Application Type as SAML. Click on Save button.
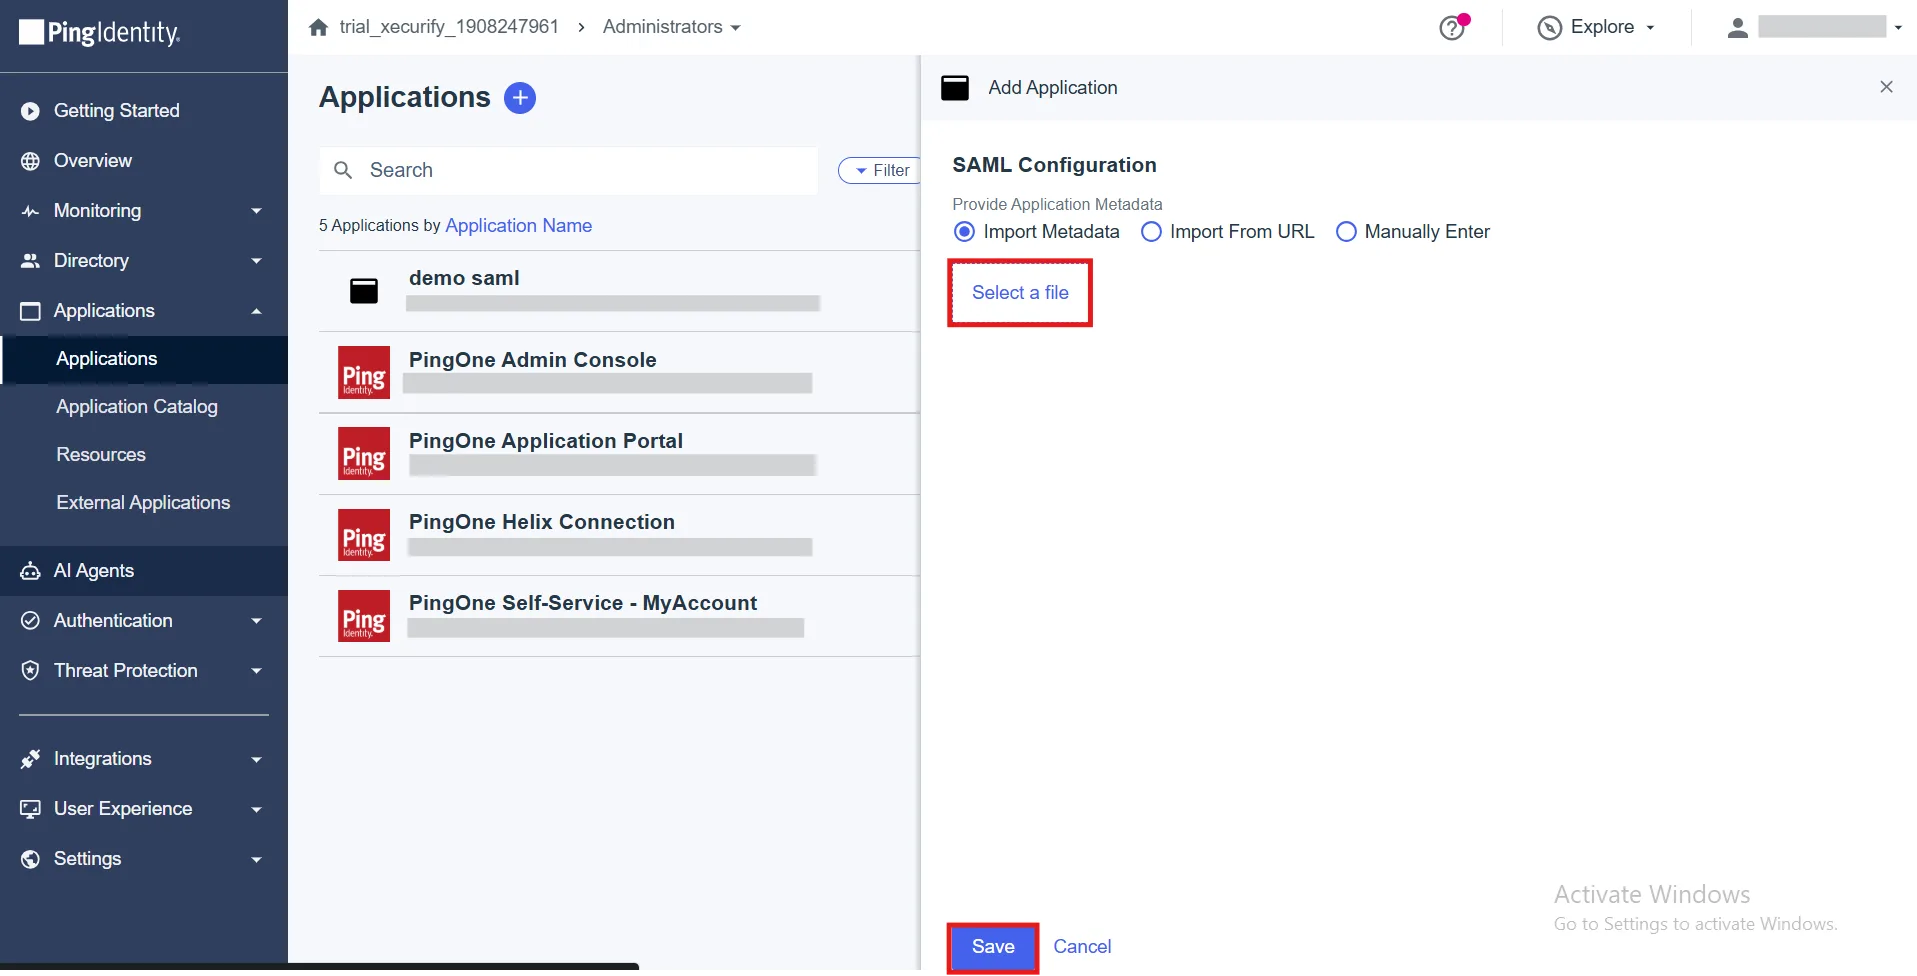
- For the SAML configuration you need to get the Entity ID and ACS URL from miniOrange SAML Single Sign-On Plugin.
- Go to miniorange SAML Single Sign-On PluginService Provider Info tabDownload Metadata. Now, upload it to the Ping One.
- Navigate to Import from Metadata tab, and upload downloaded Metadata file in import Metadata section.
- Click on Save.
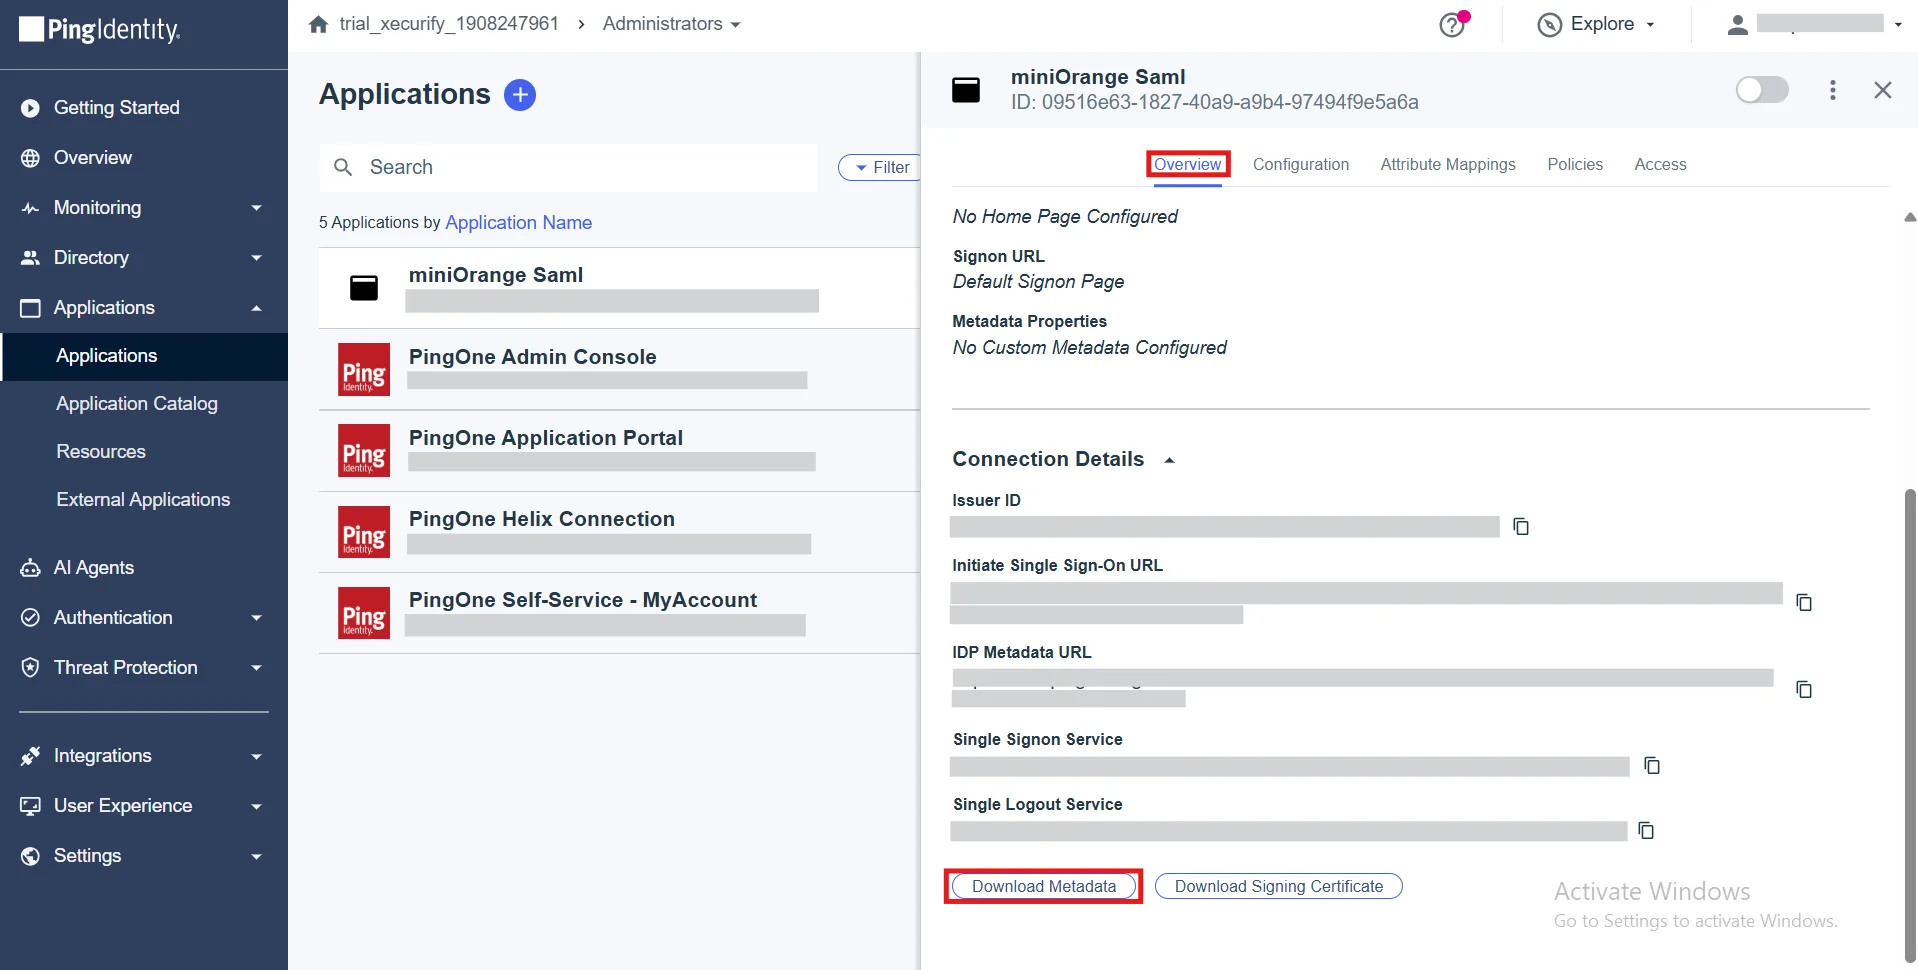
- Now go to configuration tab and click on Download Metadata button to download IDP metadata. Keep it handy as it will be used in furthur steps.
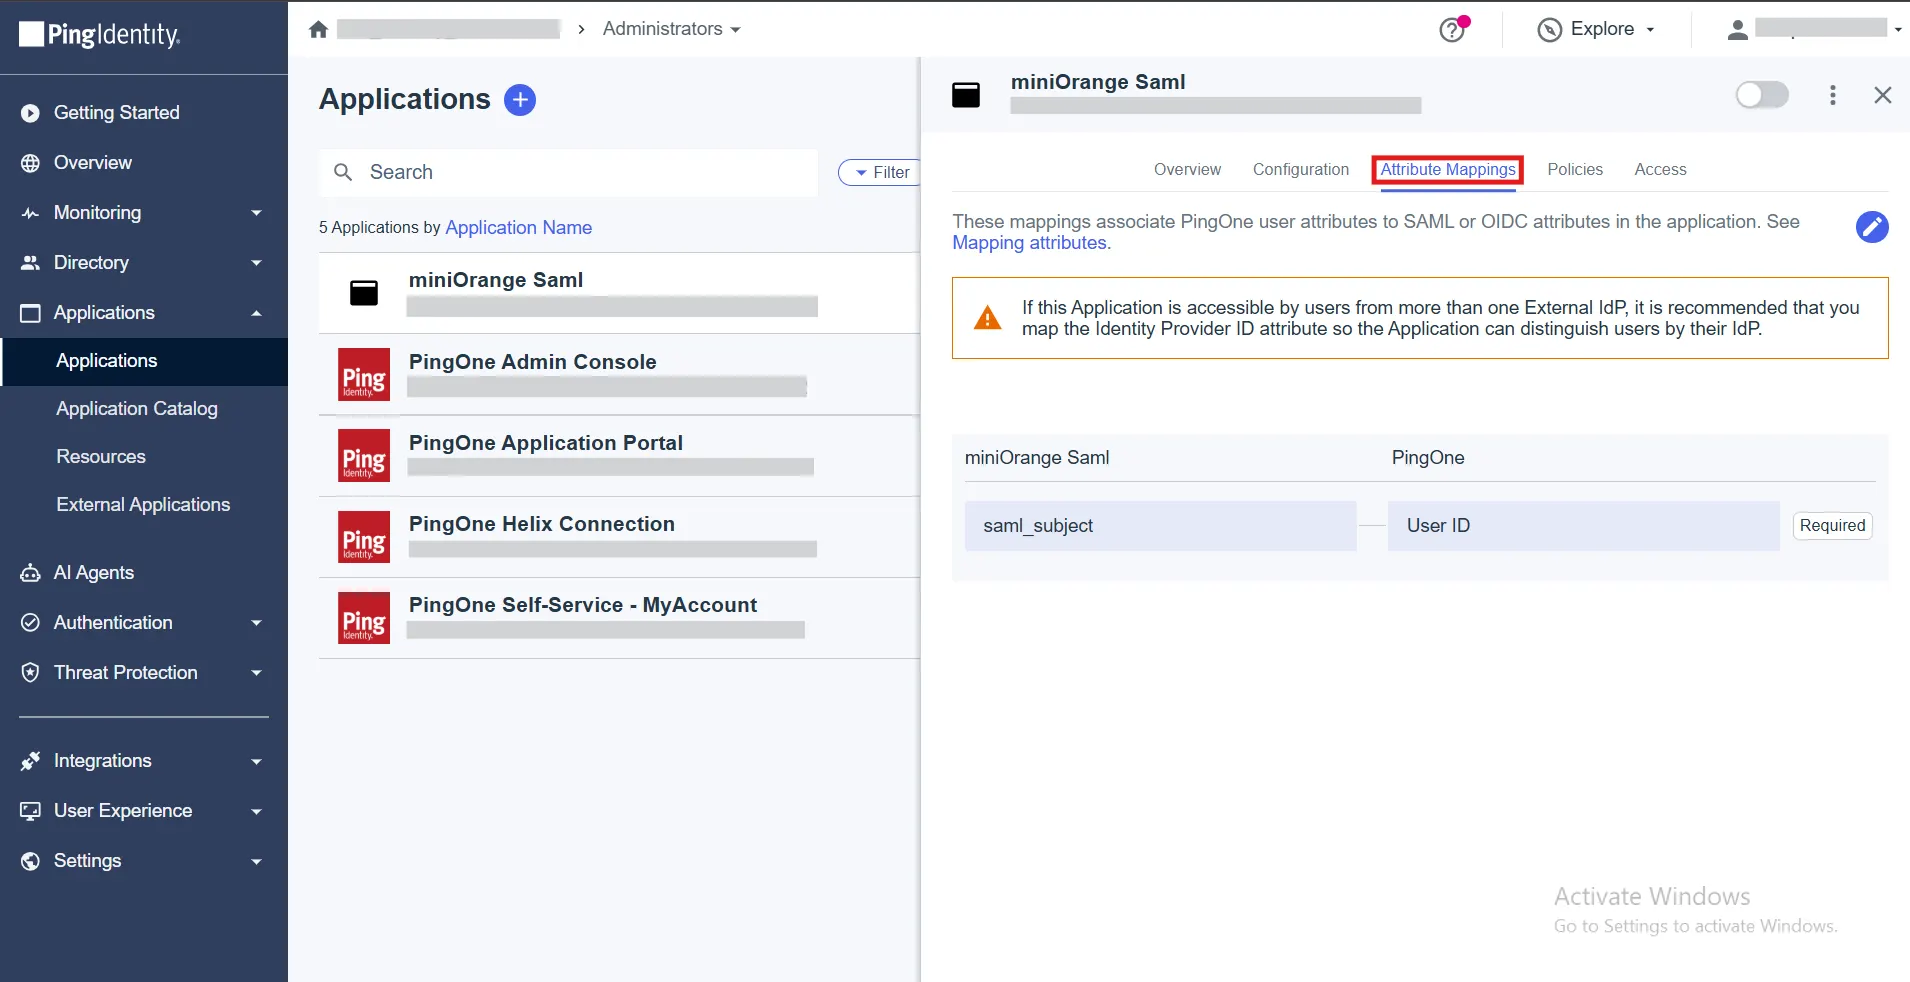
- Navigate to Attribute Mappings tab and map the attributes as necessary for the application.
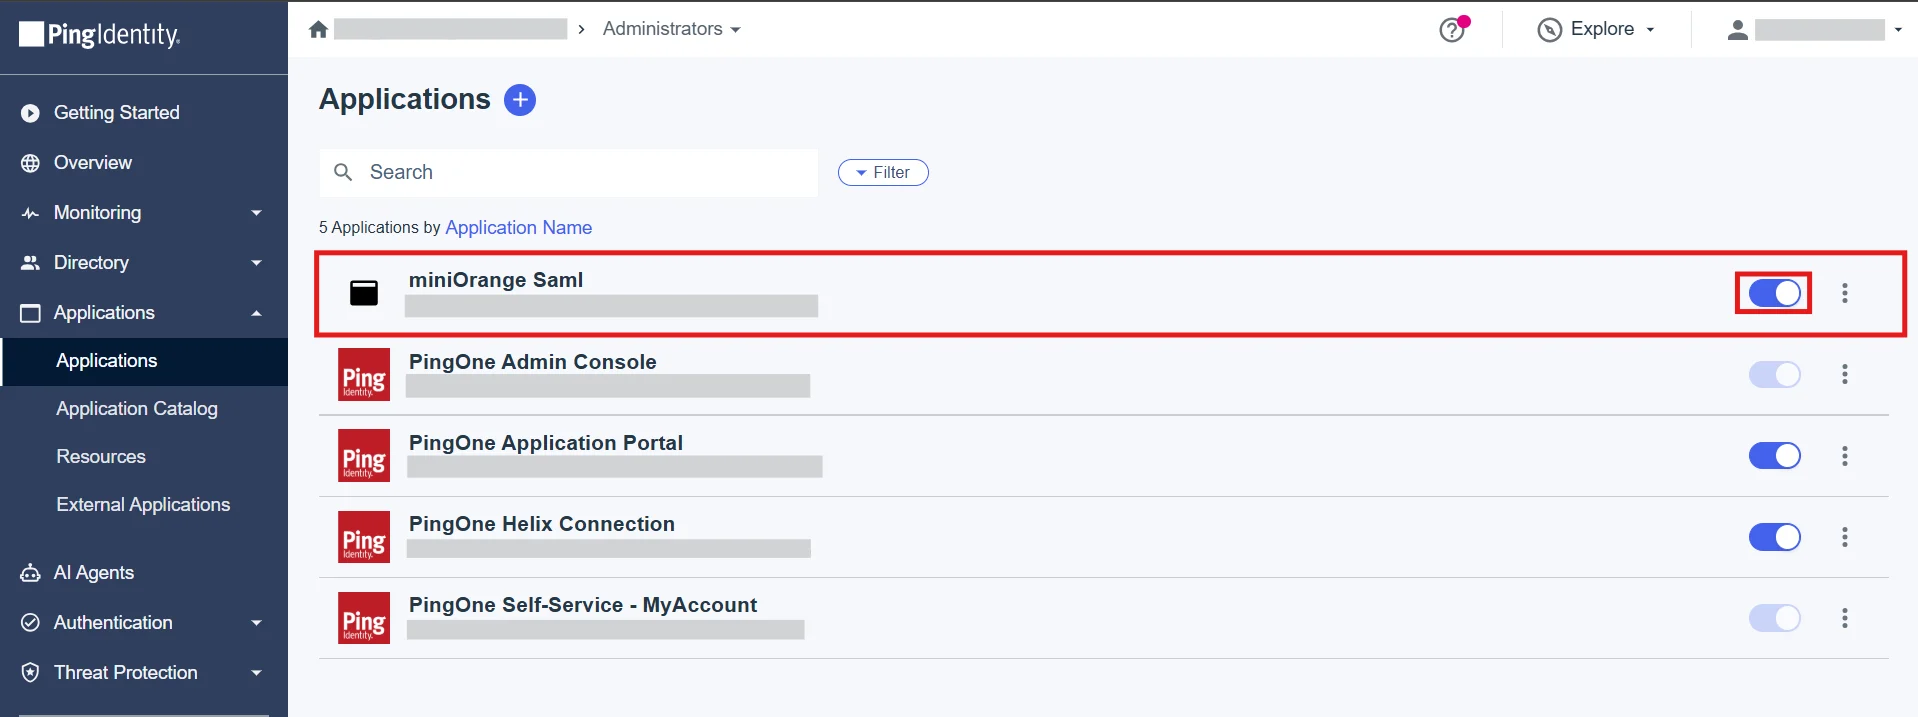
- Save your Application and on the Application Dashboard and enable the “User Access” button next to your application name.