You can now allow External Customers to login into Jira Service Management (previously Jira Service Desk or JSD) via SSO! Integration with various customer portals like Atlassian Service Management and access tickets with the help of SSO Integration with Helpdesks.
Download And Installation
- Log into your Jira instance as an admin.
- Navigate to the settings and Click on Apps.
- Locate SSO integration with Helpdesks.
- Click on free trial to begin a new trial SSO integration with Helpdesks.
- On menu bar click on Apps. Locate SSO integration with Helpdesks to start configuring SSO for customers.
Part 1: SAML SSO Setup
Step 1. Setup JSM SSO as Service provider
- You will need to create an application on your IDP for JSM SSO. As an example, let's take Okta as an IDP. As per your needs, you can choose any IDP.
- Log into Okta Admin Console. For developer account, switch to Classic UI to configure app.
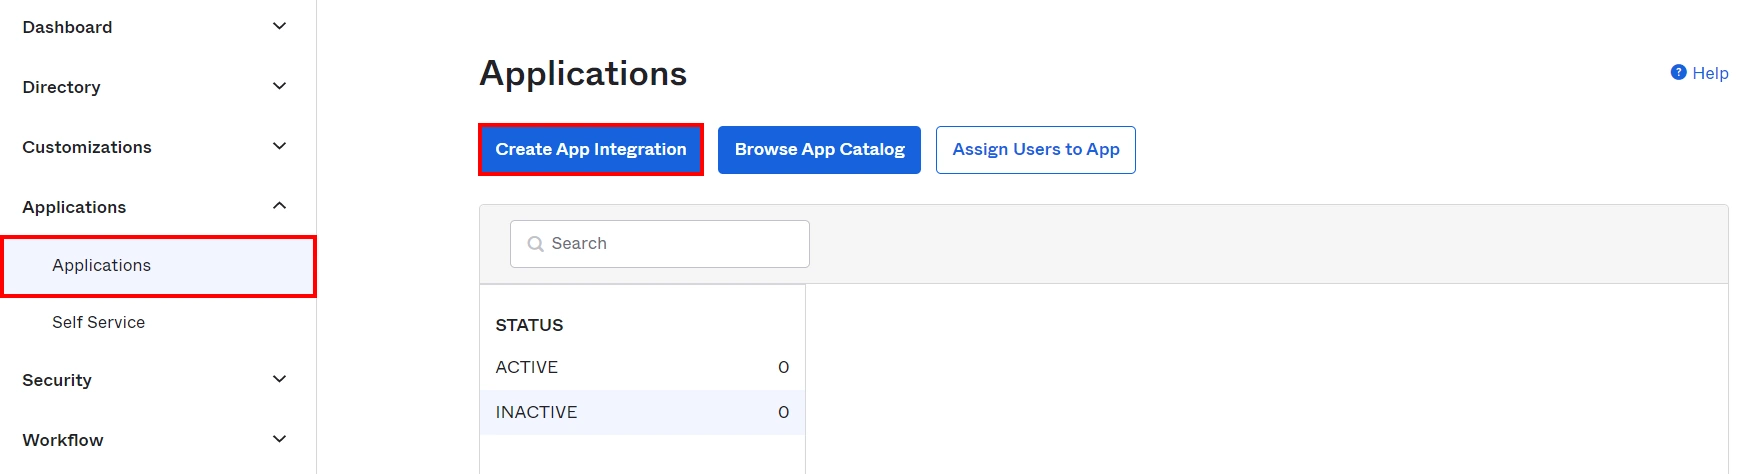
- Go to the Application from the left menu and then click on Create App Integration.
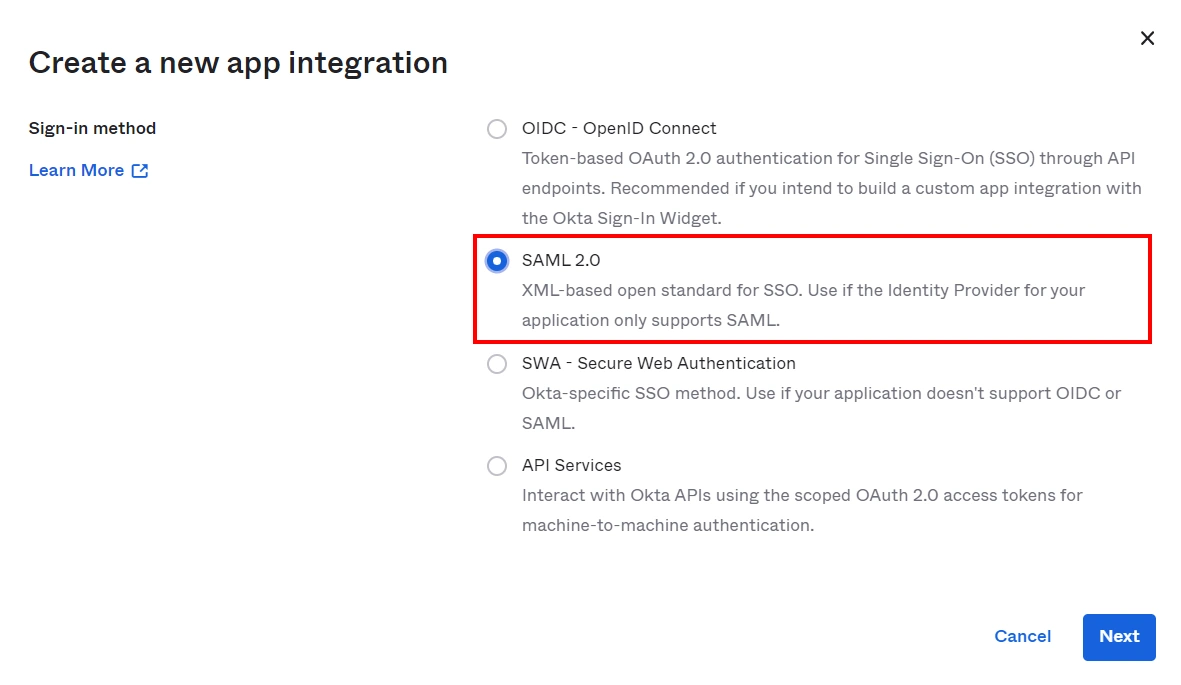
- Select SAML 2.0 as Sign on method.
- Click on Create.
- In General Settings, enter App Name and click on Next.
- In SAML Settings, enter the following:
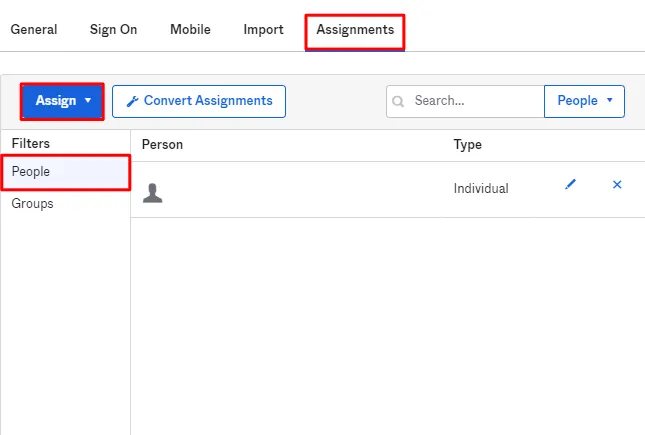
- After creating and configuring the app go to the Assignment Tab in Okta.
- Here we select the peoples and groups you want to give access to log in through this app. Assign this to the people/group you would to give access to.
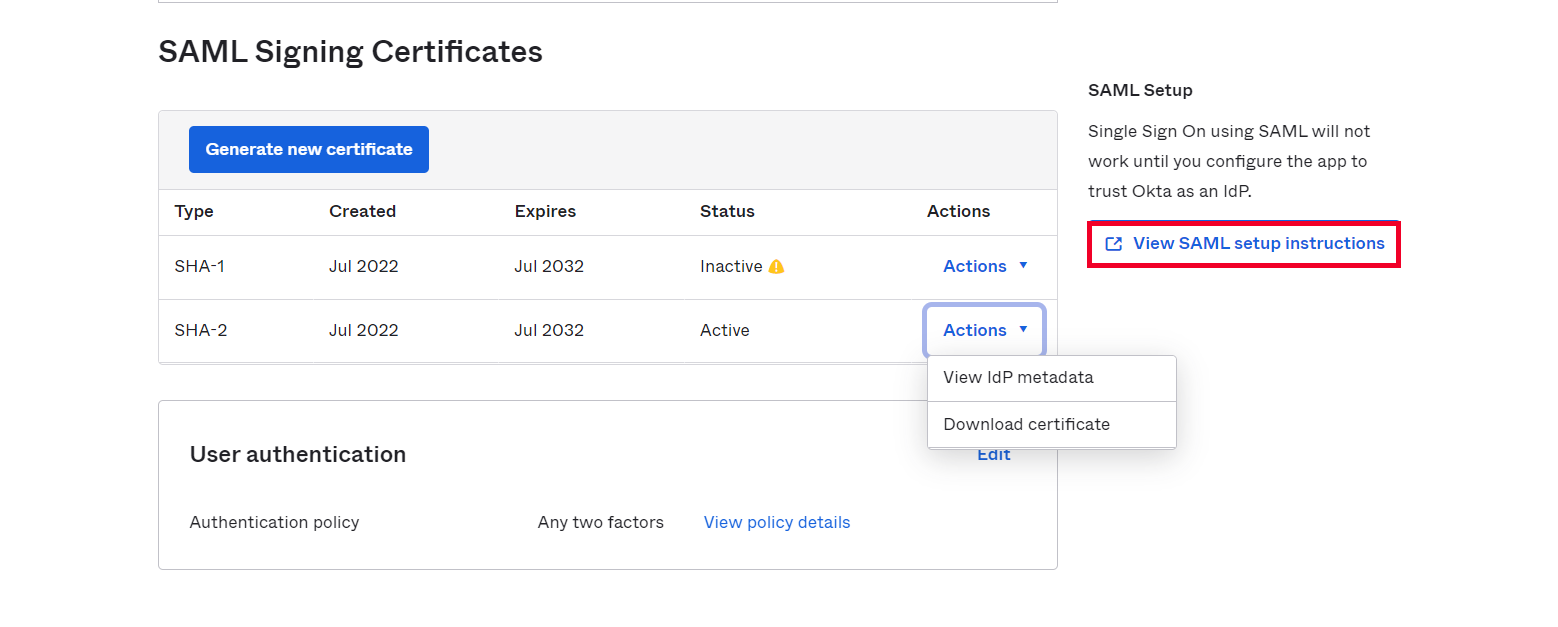
- After assigning the people/groups to your app, go to Sign On tab.
- Click on View Setup Instructions to get the SAML Login URL (Single Sign on URL), Single Logout URL, IDP Entity ID and X.509 Certificate. You will need this to configure the Service Provider.
- Click on Import from Metadata tab.
- Enter IDP name.
- Enter IDP metadata URL: Enter your metadata URL
- Click Import
- IDP Entity ID
- Single Sign On URL
- Single Logout URL
- X.509 Certificate
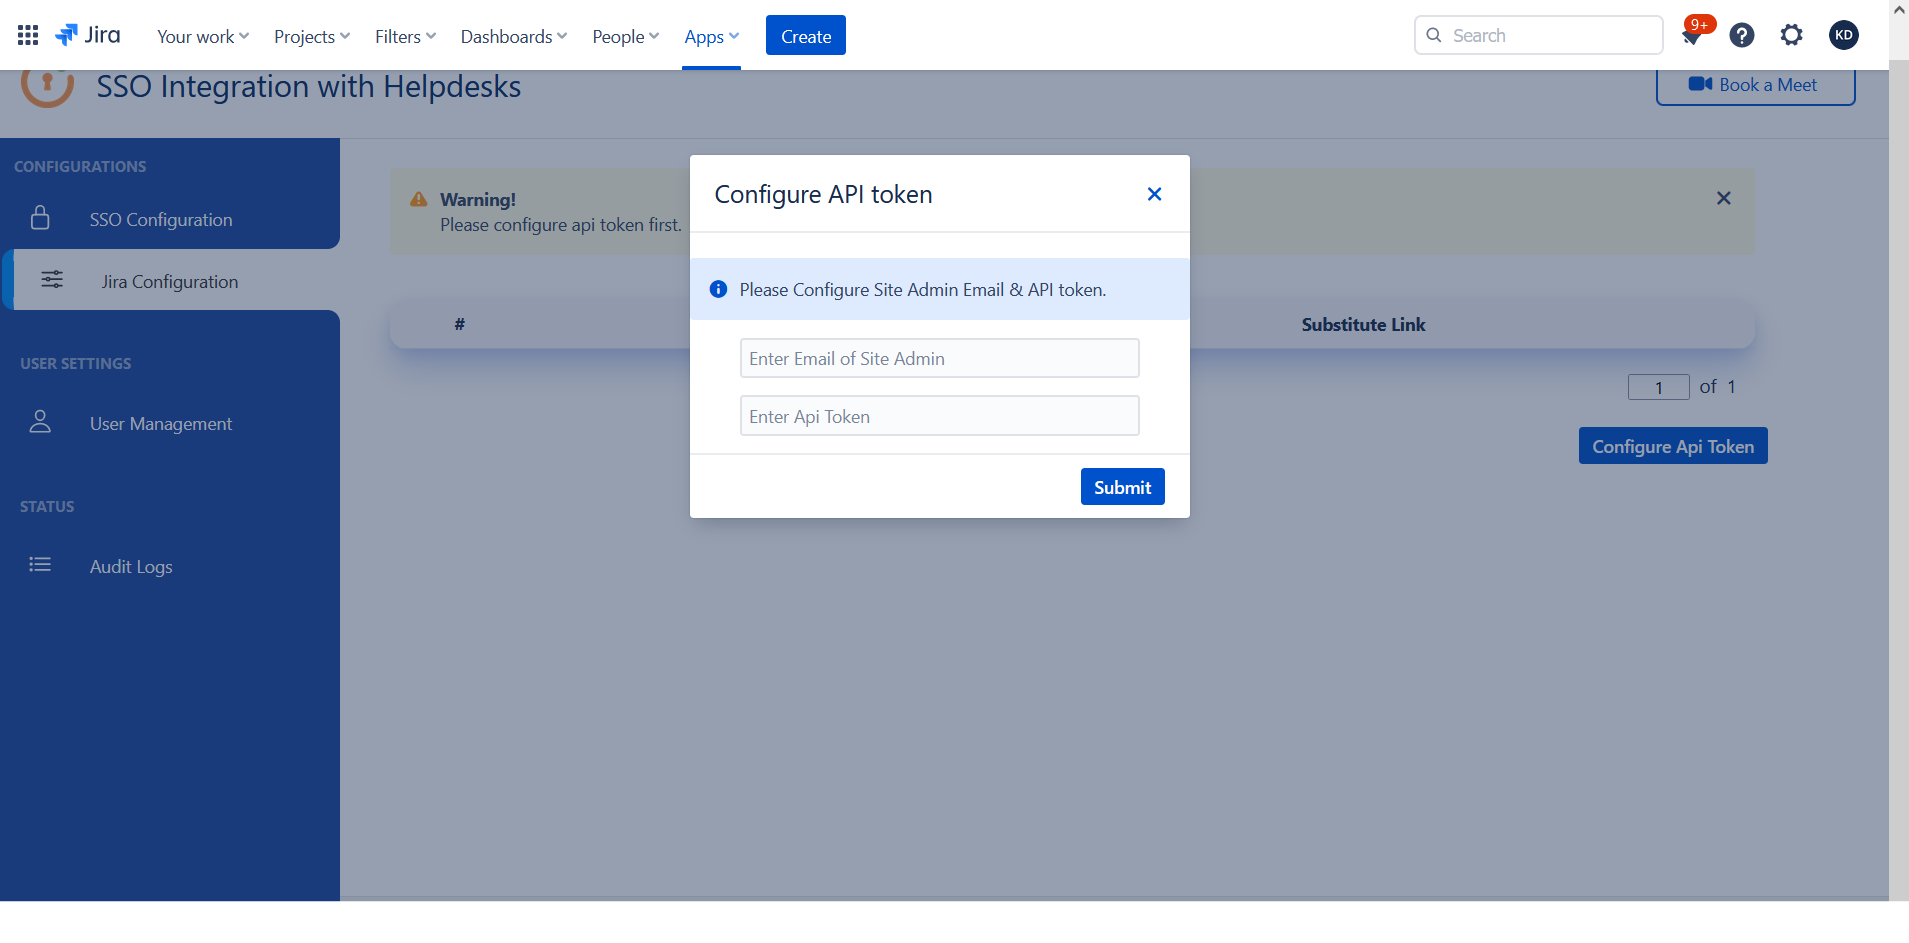
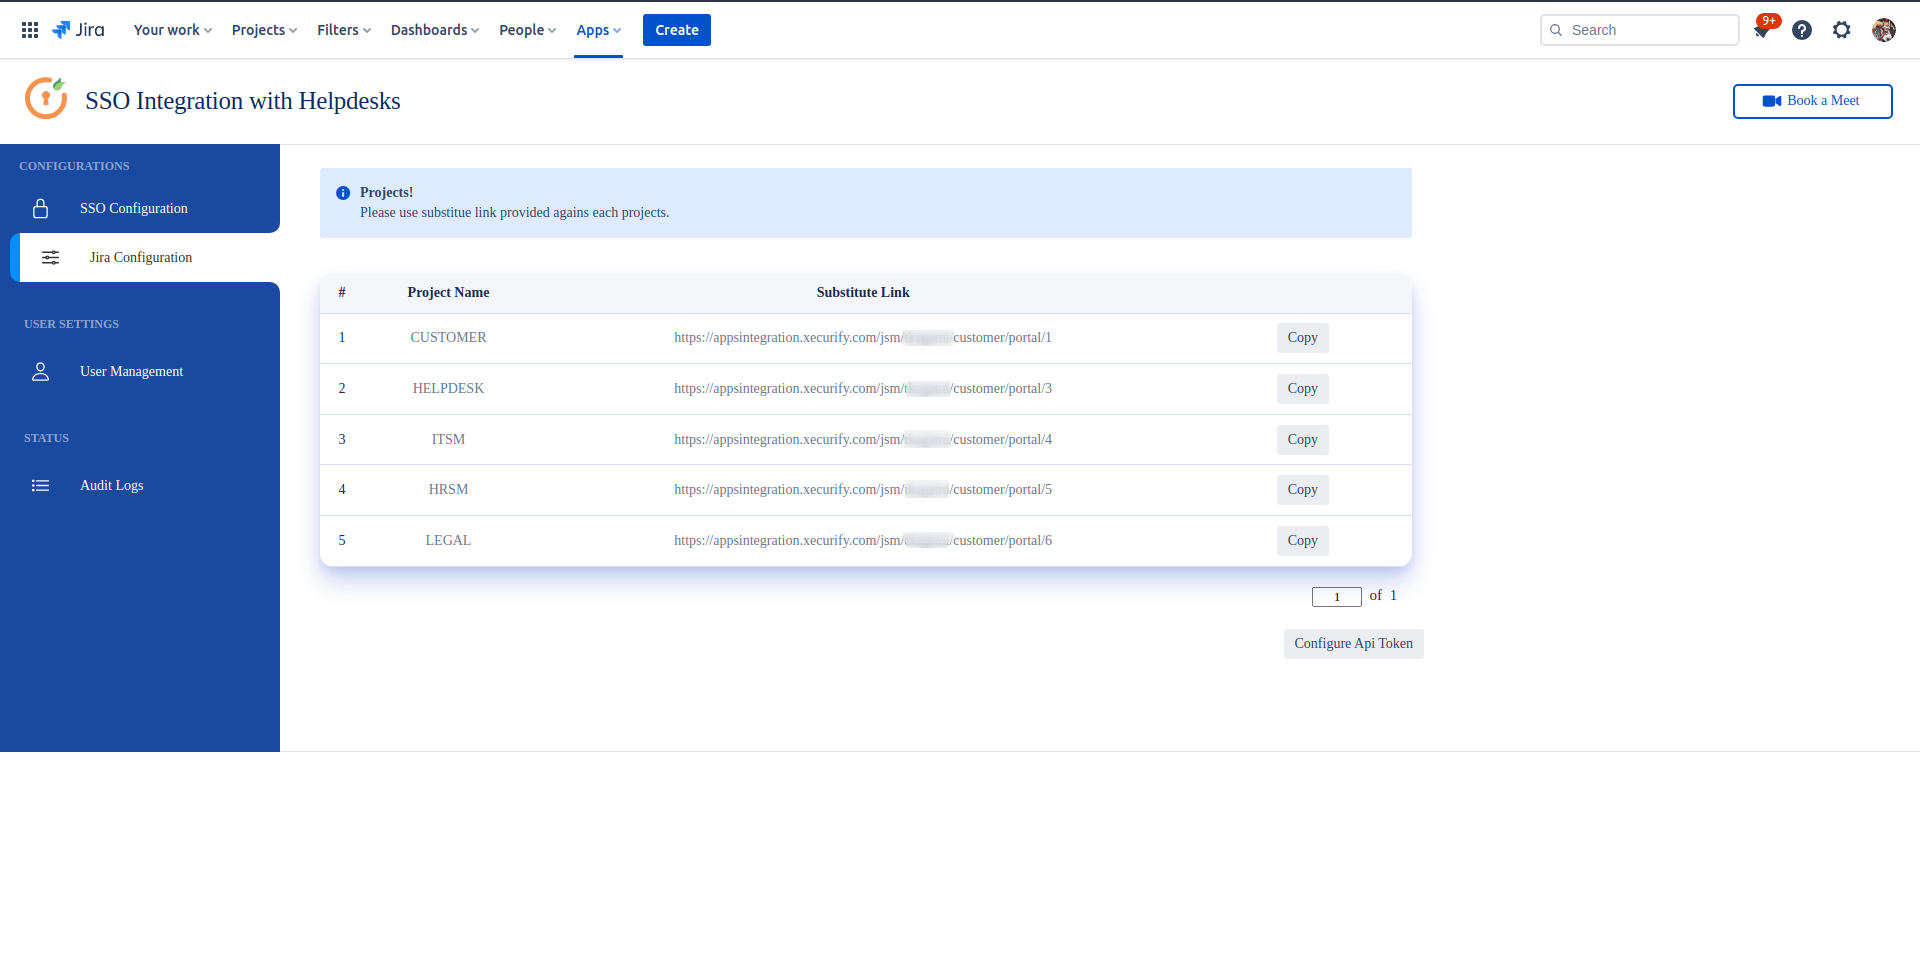
- Click on the Configure API Token and configure the Service Account API token with the email.
- After successful configuration of API token all the service desk projects with respective links will be displayed. These substituted links will be used by customers for accessing particular projects with SSO.
 Configuring Okta as IdP
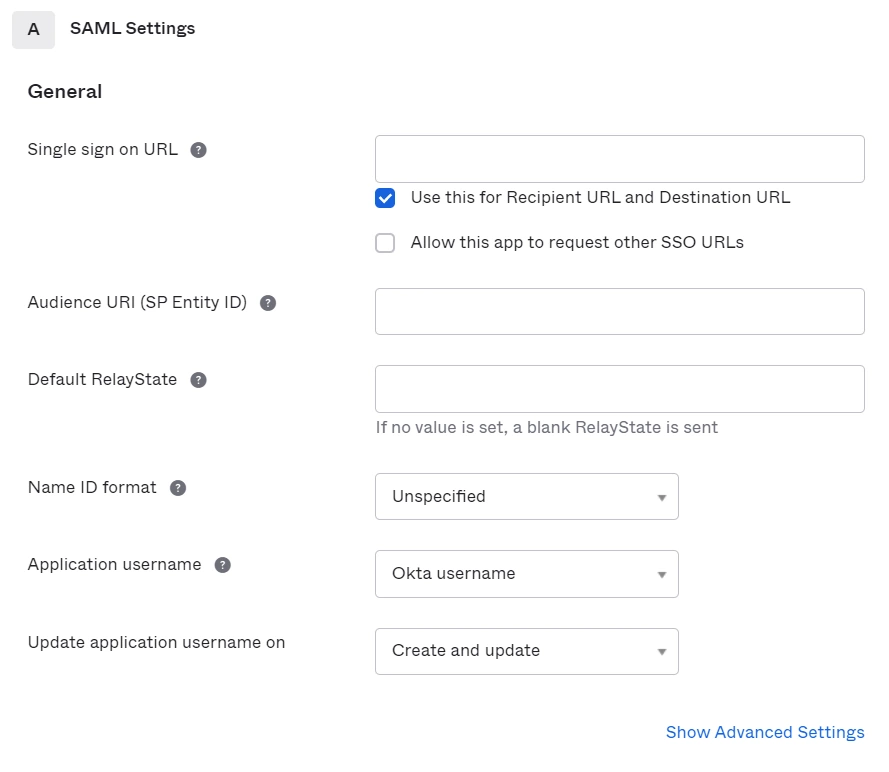
| Single Sign On URL | Enter ACS (AssertionConsumerService) URL from the SP Configuration tab of the module. |
| Audience URI (SP Entity ID) | Enter SP Entity ID / Issuer from the SP Configuration tab of the module. |
| Name ID Format | Select E-Mail Address as a Name Id from dropdown list. |
| Application Username | Okta username. |
Assigning Groups/People
Step 2. Configure your Identity Provider in JSM SSO
A. By Metadata URL :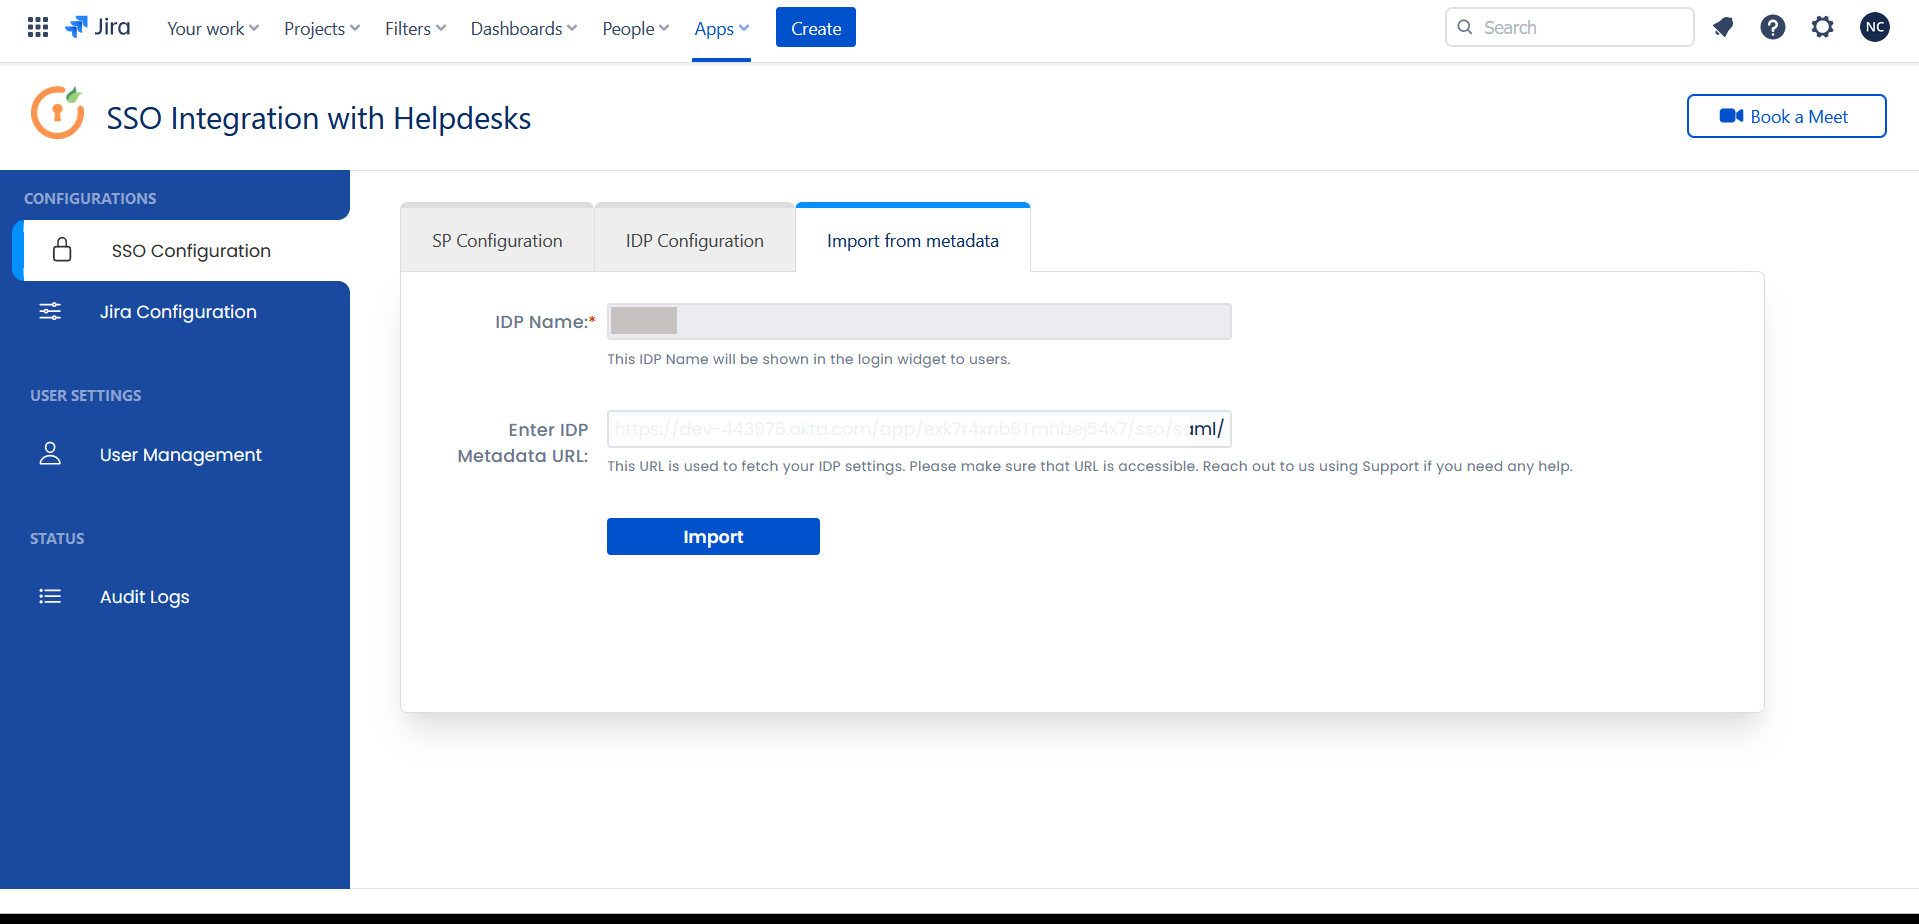
To configure the IDP manually, you will need to have the following details from your IDP's metadata.
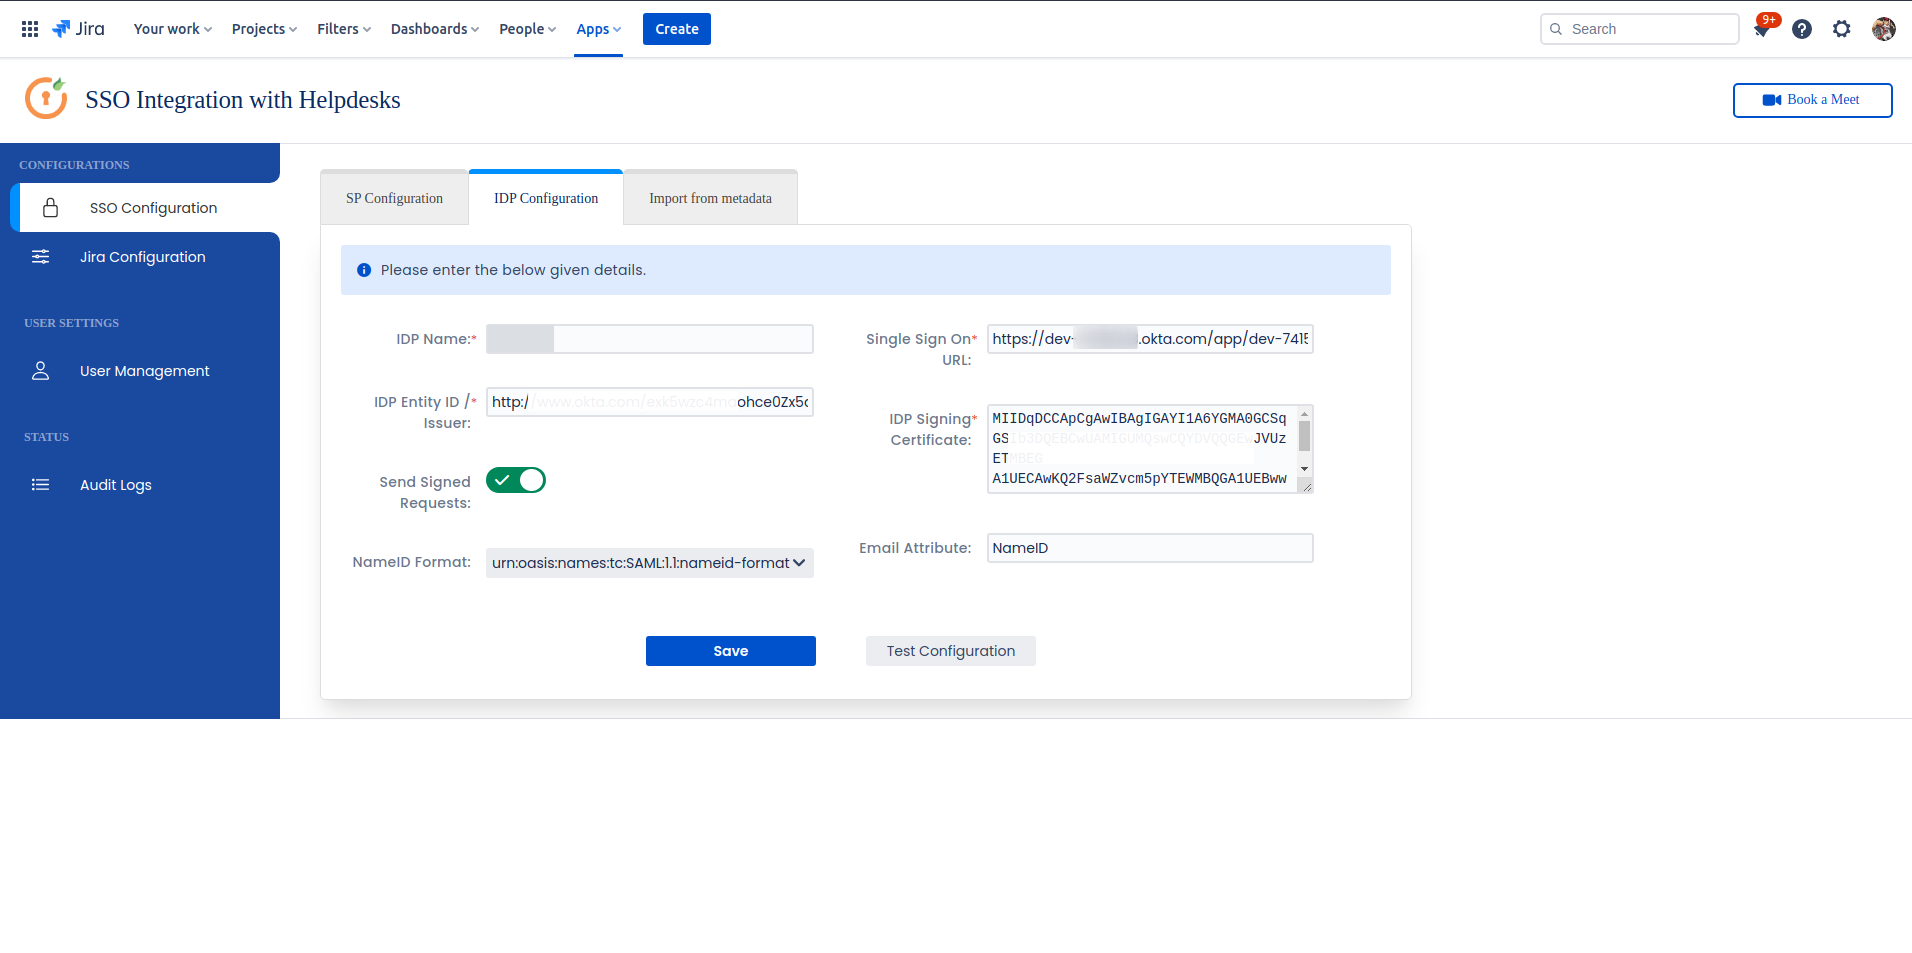
Once you have added the IDP metadata, click on Save. If the IDP has been added successfully, Click on the Test Configuration button to test if the IDP was added successfully.
Part 2: Integrate Atlassian HelpDesk with JSM SSO
 Hi! Do you need help with this guide?
Thank you for your response. We will get back to you soon.
Something went wrong. Please submit your query again

Recommended Add-Ons

Two Factor Authentication
Enable 2FA/MFA for users & groups and let users configure 2FA during their first login.
Know MoreUser Sync SCIM Provisioning
Synchronize users, groups & directory with SCIM & REST APIs for Server/DC.
Know MoreAPI Token Authentication
Secure your JIRA Data Center/Server REST API using API Tokens.
Know MoreBitbucket Git Authentication App | Kerberos/NTLM Apps | Word/PDF Exporter | WebAuthn | SonarQube SSO | Jenkins SSO
If you don't find what you are looking for, please contact us at support-atlassian@miniorange.atlassian.net or raise a support ticket here.


