The first step is to set the branding, this configuration is necessary to display the login page with your company domain instead of the default miniOrange domain. You can follow this guide to setup your branding.
Once your branding is set now we can go ahead and add your Okta OAuth/OIDC application, to do so follow the below steps:-
1: Setup Okta as an Identity Provider in miniOrange
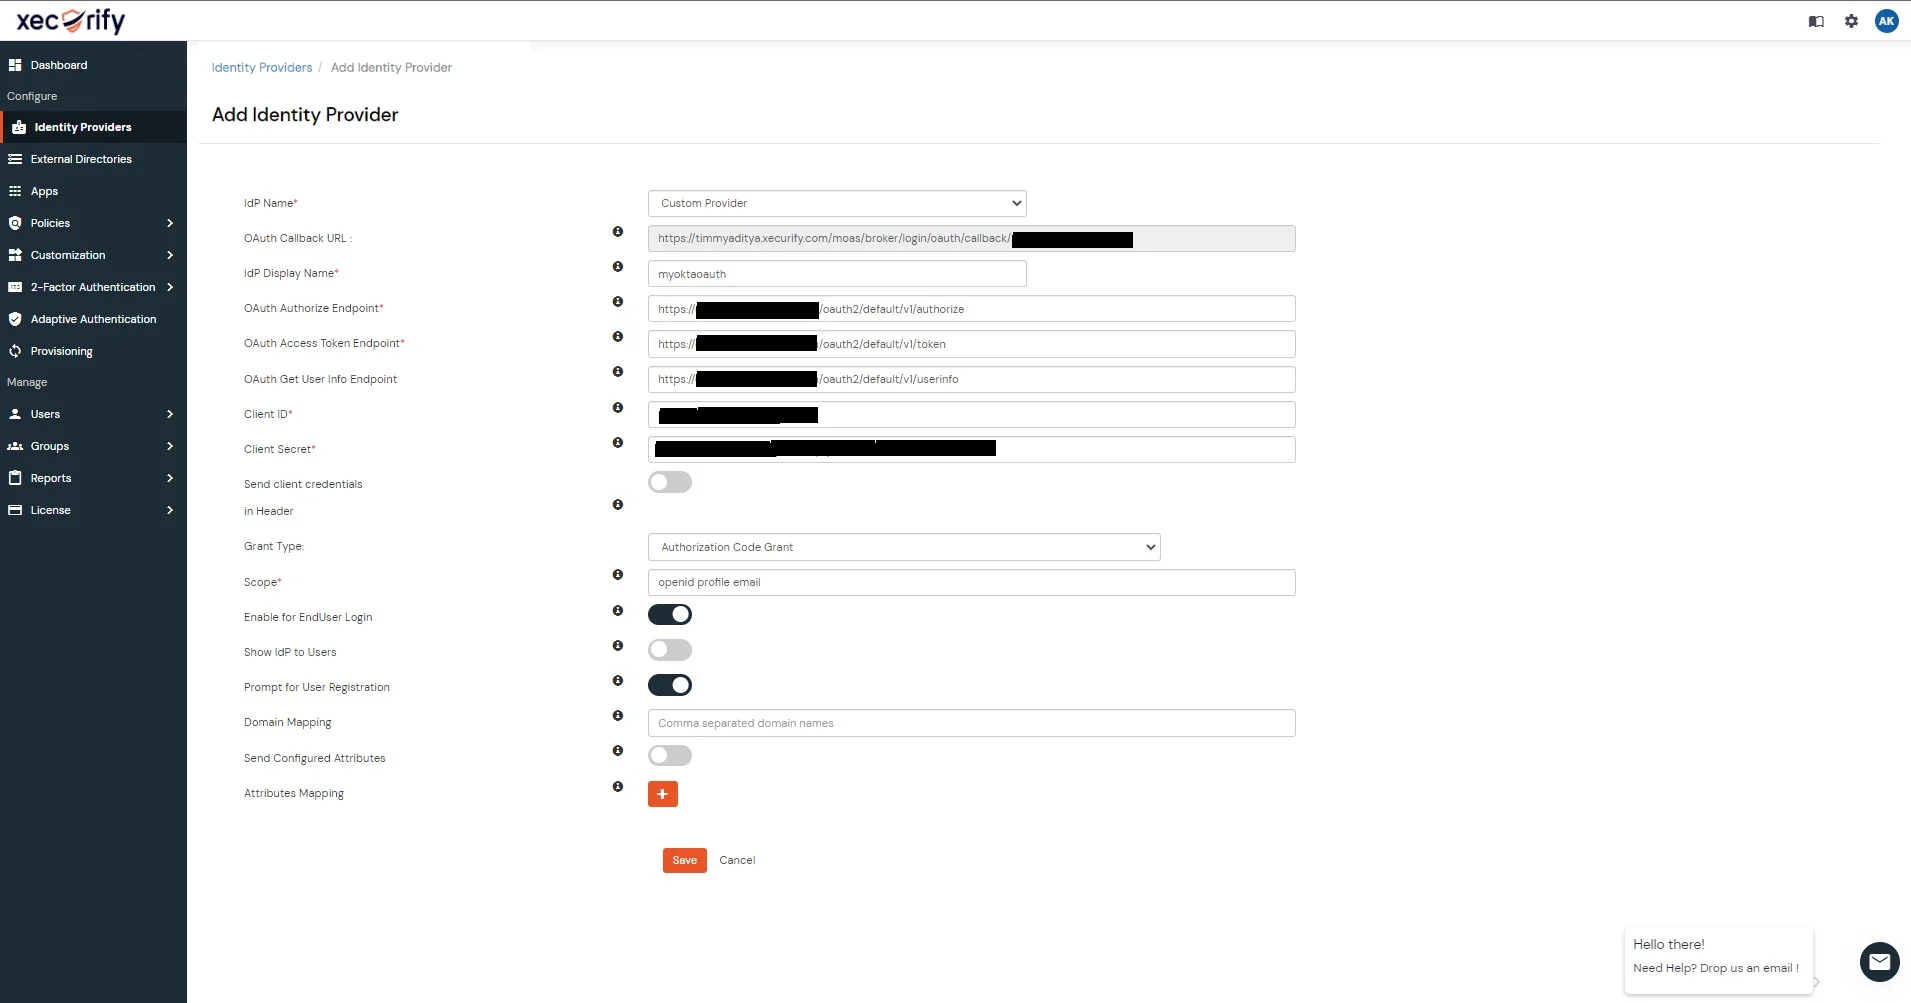
- Navigate to Identity Providers tab.
- Click on Add Identity Provider.
- Choose OAuth2.0 from the tab items.
- Choose Custom Provider from the IDP Name dropdown list.
- Enter the display Name for your Identity Provider.
- Now, you’ll need to enter the OAuth Authorize Endpoint, OAuth Access Token Endpoint and OAuth Get User Info Endpoint.
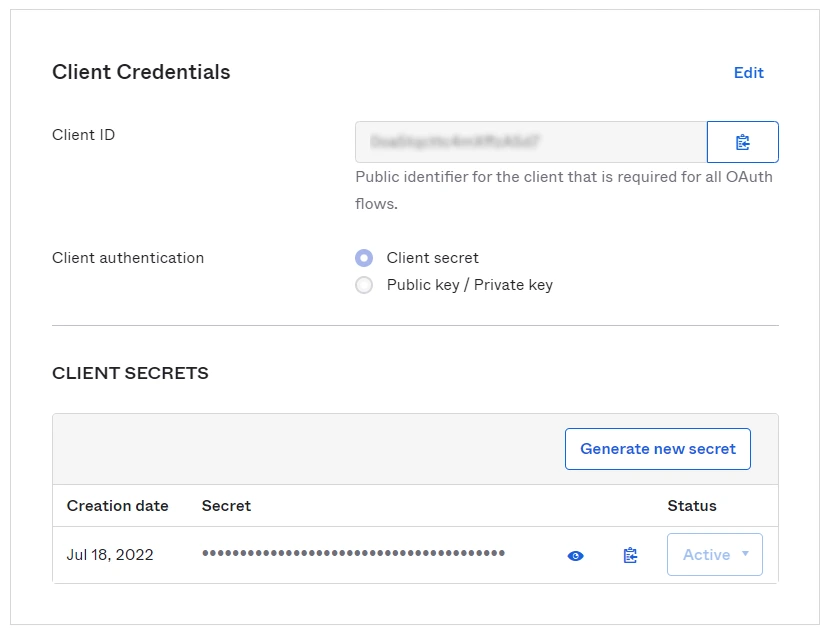
- Copy your Client ID and Client Secret from your Okta application and paste it at respective input box.
- Choose Authorization Code Grant in the Grant Type Option.
- Enter openid profile email in the Scope input box.
- Check the Enable for EndUser Login option.
- Copy the OAuth Callback URL, you’ll need to enter this in your Okta Application.
- Click on save.
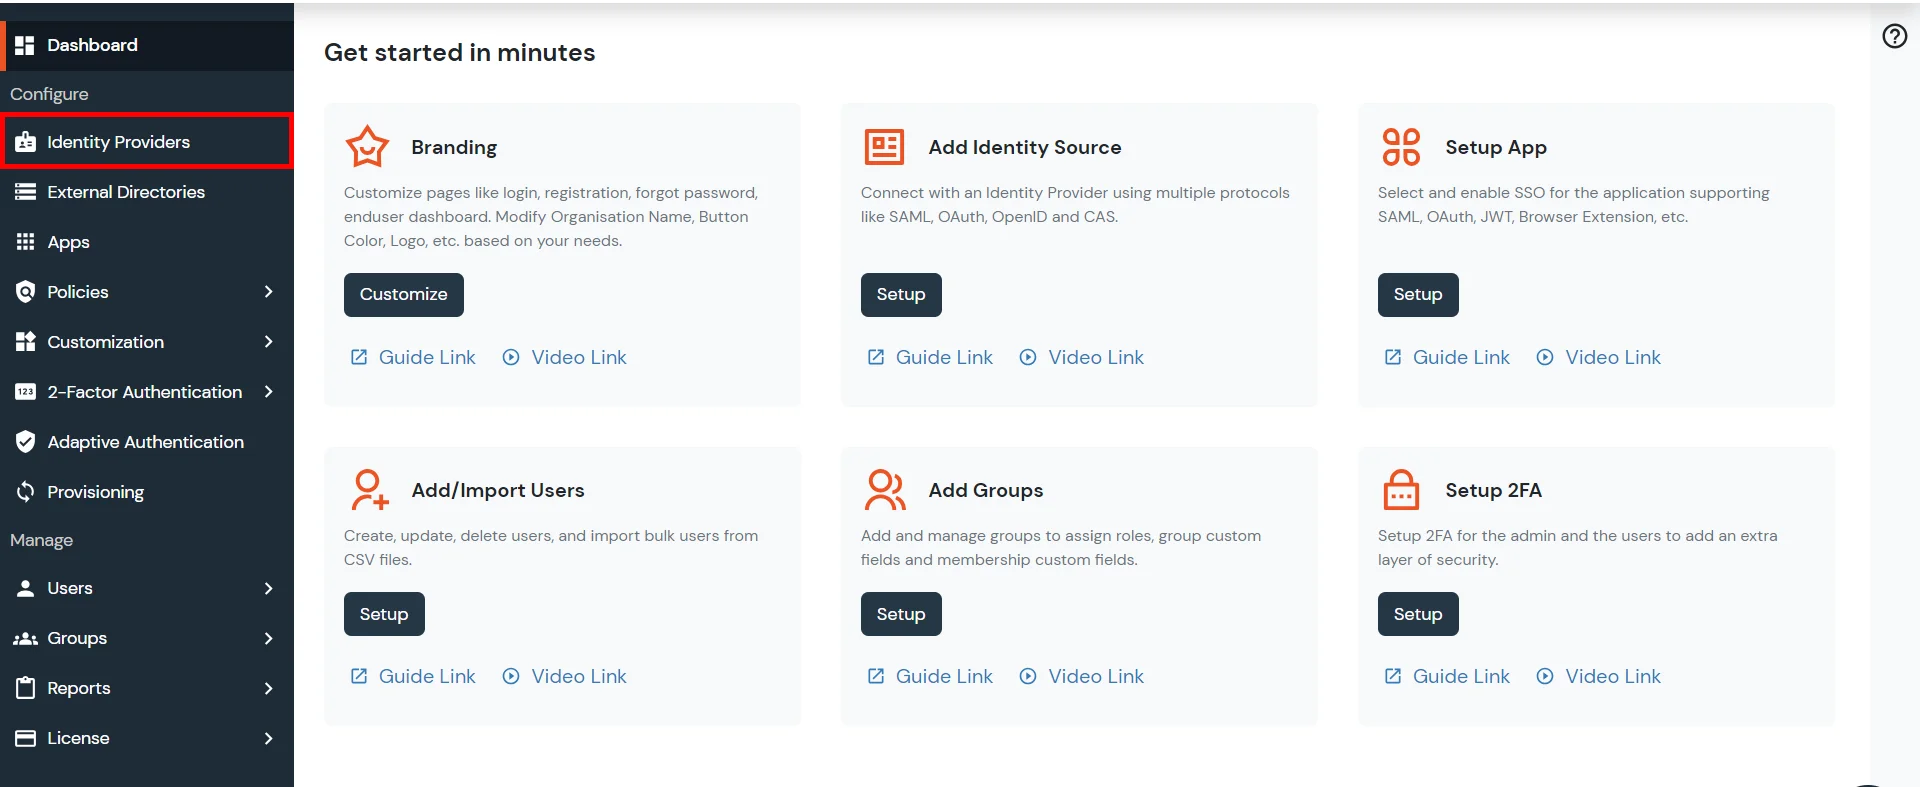
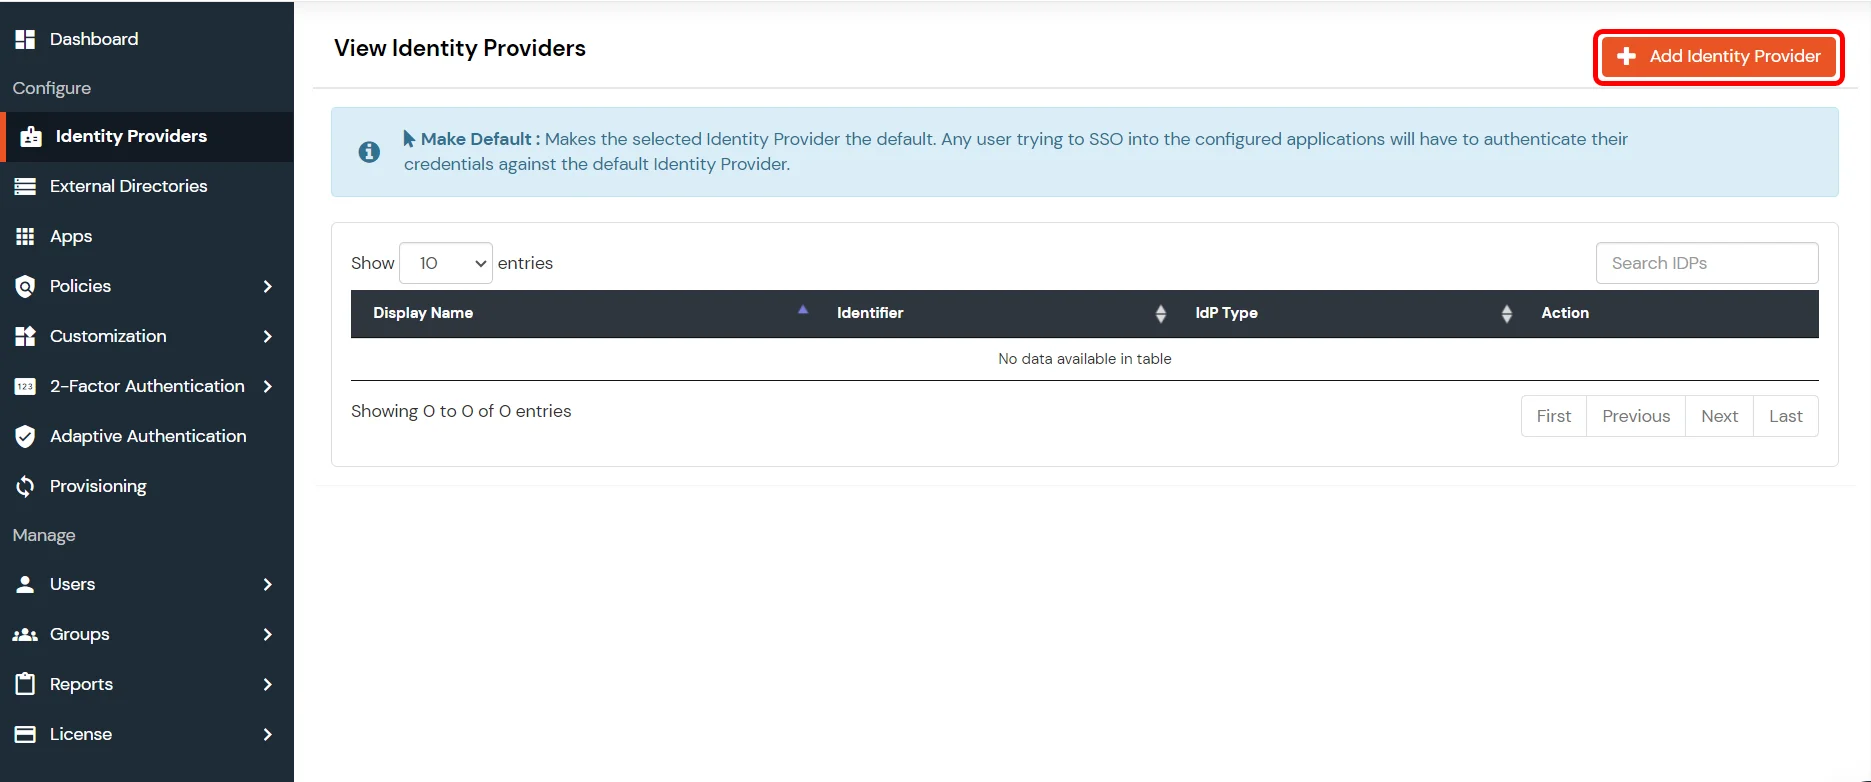
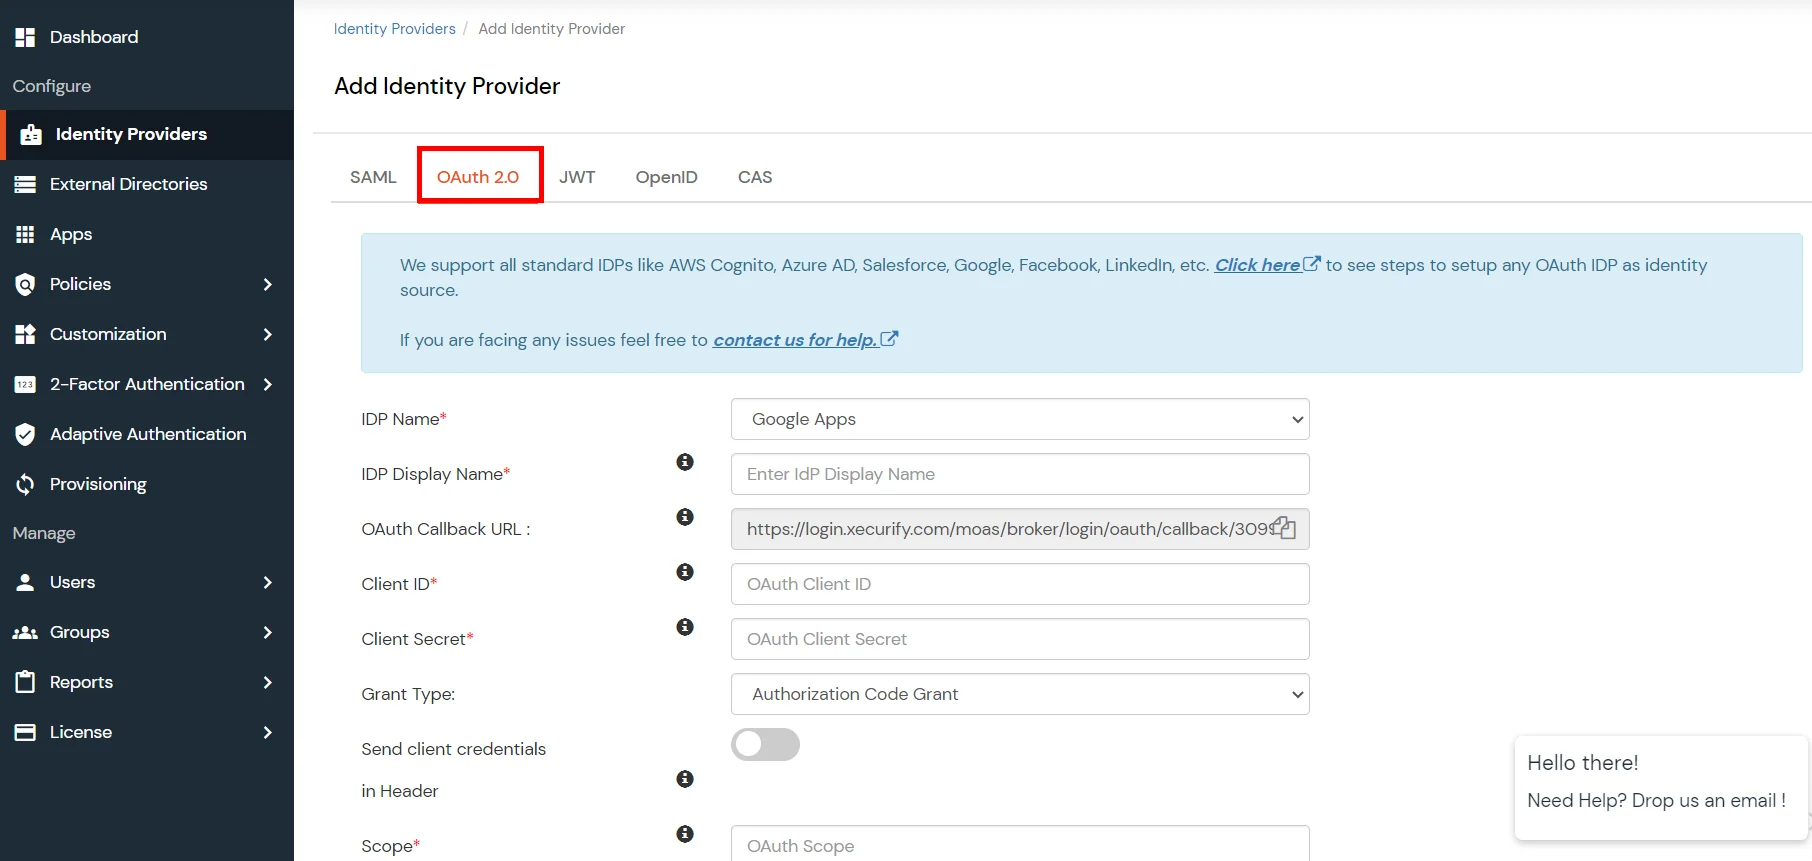
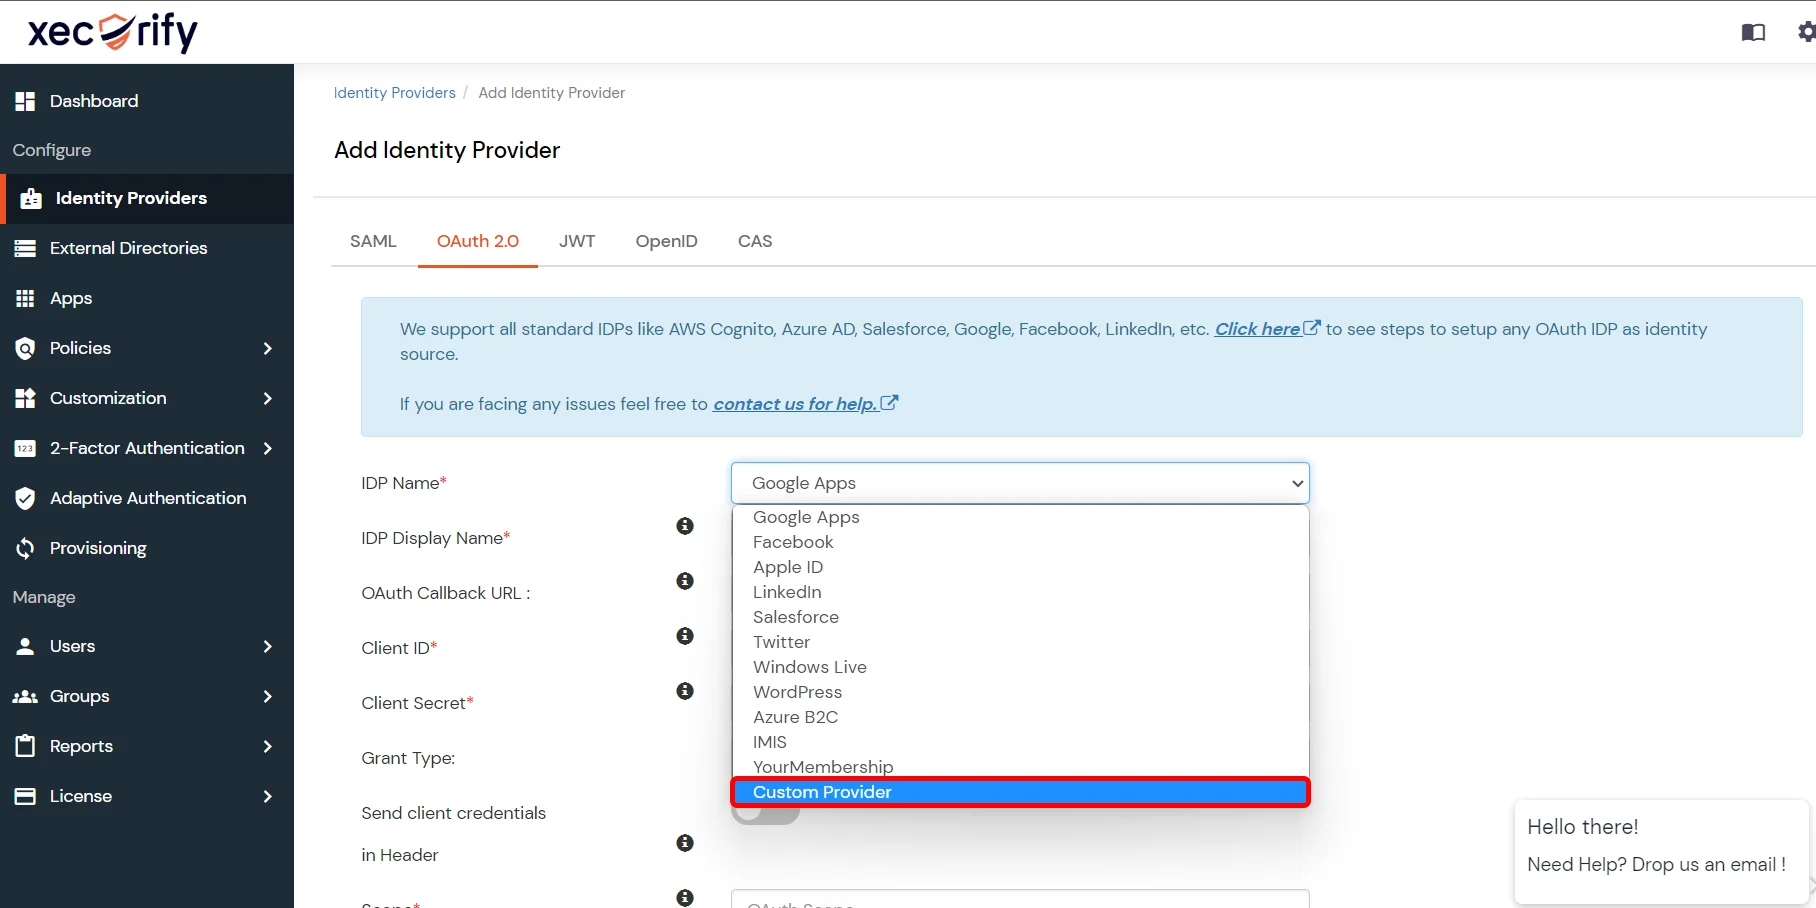
- OAuth Authorize Endpoint: https://${yourOktaDomain}/oauth2/default/v1/authorize
- OAuth Access Token Endpoint: https://${yourOktaDomain}/oauth2/default/v1/token
- OAuth Get User Infor Endpoint:https://${yourOktaDomain}/oauth2/default/v1/userinfo
2: Setup Okta as OAuth Provider
- First of all, go to https://www.okta.com/login and log into your Okta account.
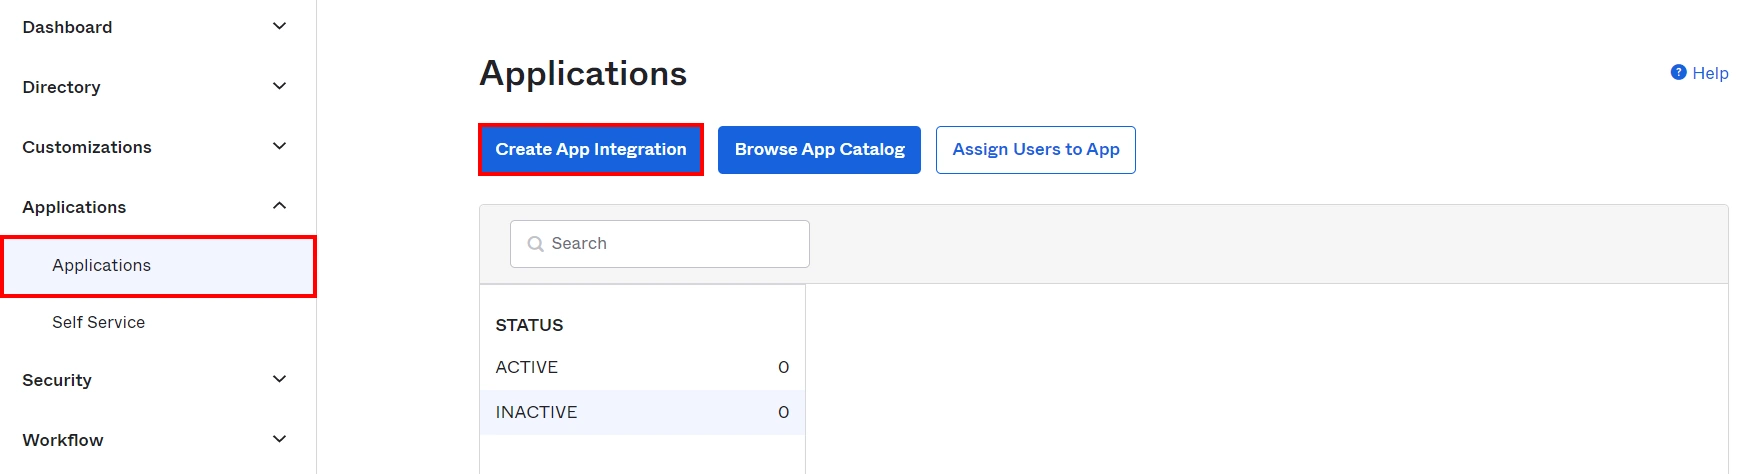
- Switch to Classic UI to configure app.
- Go to the Application from the left menu and then click on Create App Integration.
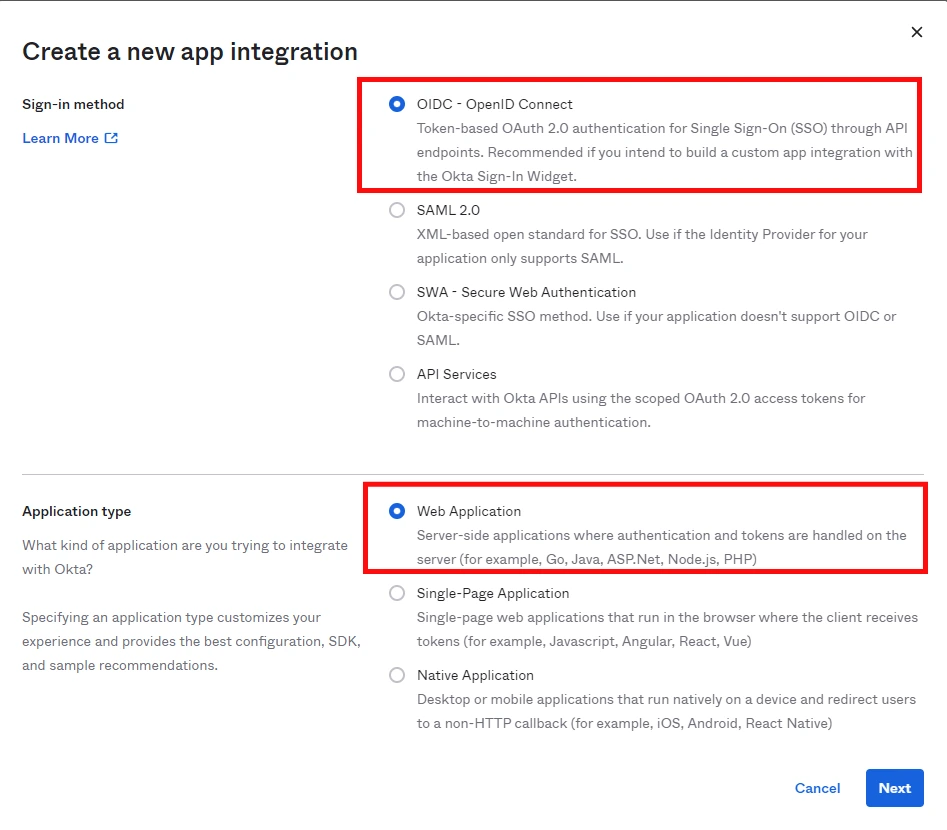
- Choose OIDC OpenID Connect as Sign on method, Web as platform, and click on Next.
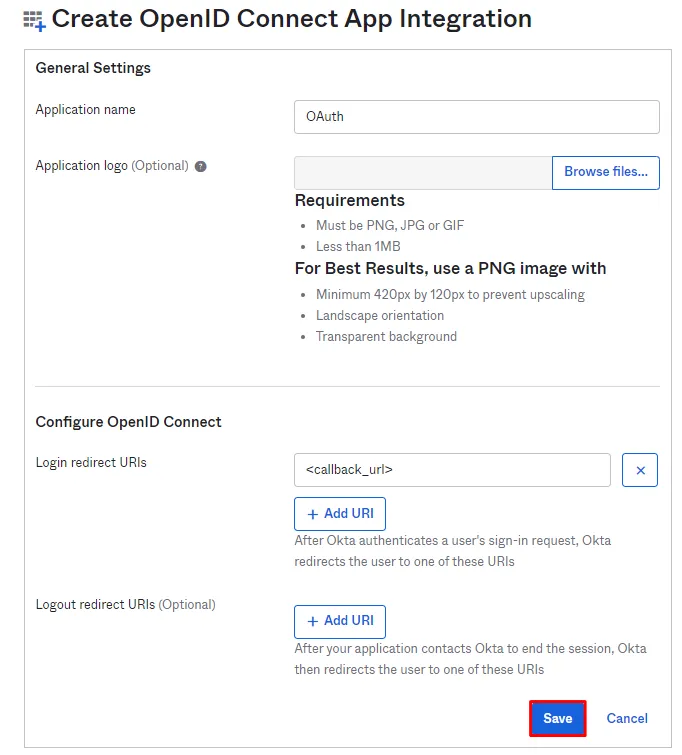
- You will be redirected to the app details page. Enter Application name and Login Redirect URIs. paste the callback URL copied from miniOrange dashboard to configure Login Redirect URL. Click on Save.
- You will be brought to My Web App details page. Here you can find Client ID and Client Secret, which you'll need to enter in miniOrange dashboard while setting up the OAuth Identity Provider.

3: Test The Connnection
- Navigate to the Identity Provider section.
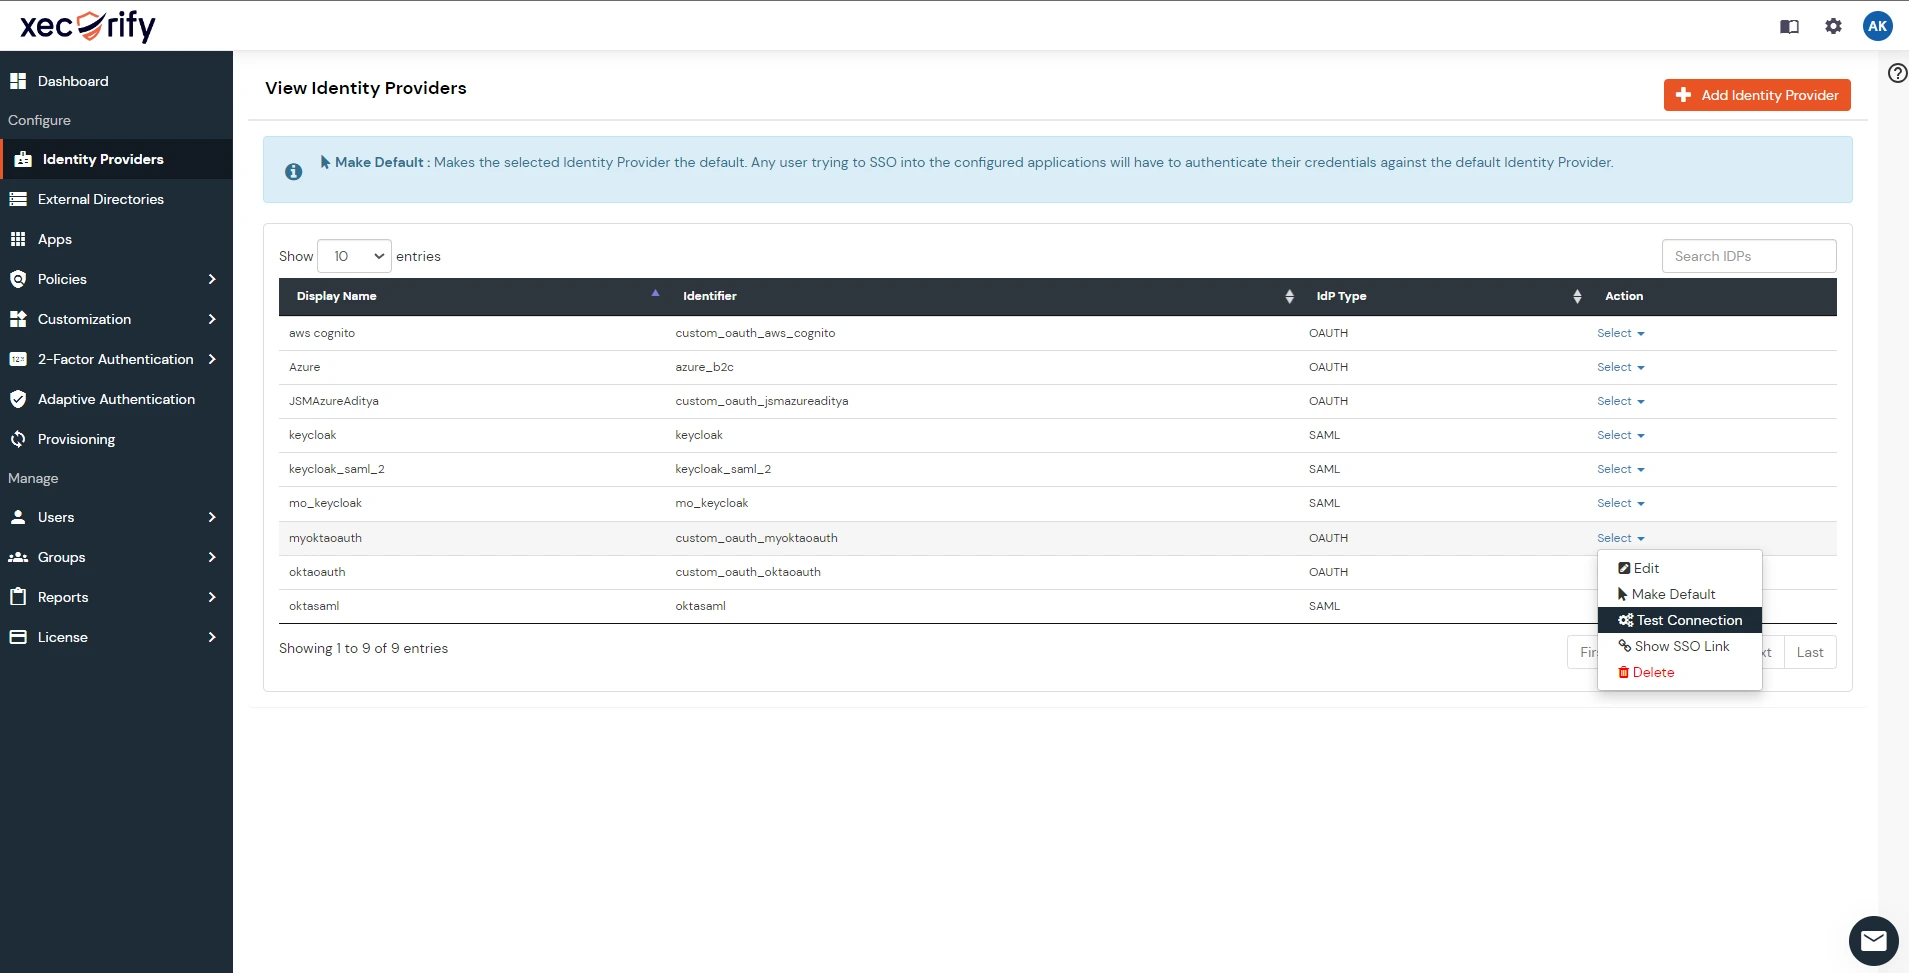
- Choose the select option and click on Test connection for the respective IDP.
- You should see a successful response along with the Attributes.
- Now, you can proceed creating an Application in from our miniOrange dashboard.
4: Create an Application in miniOrange
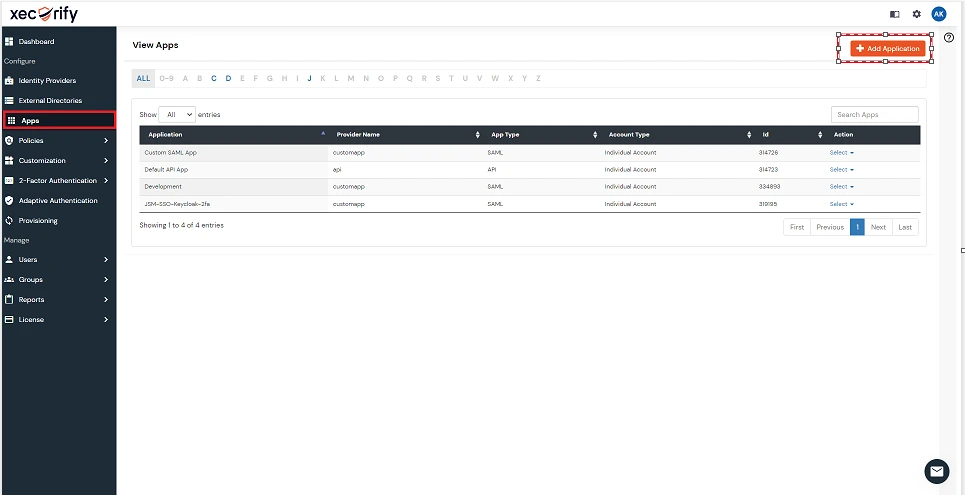
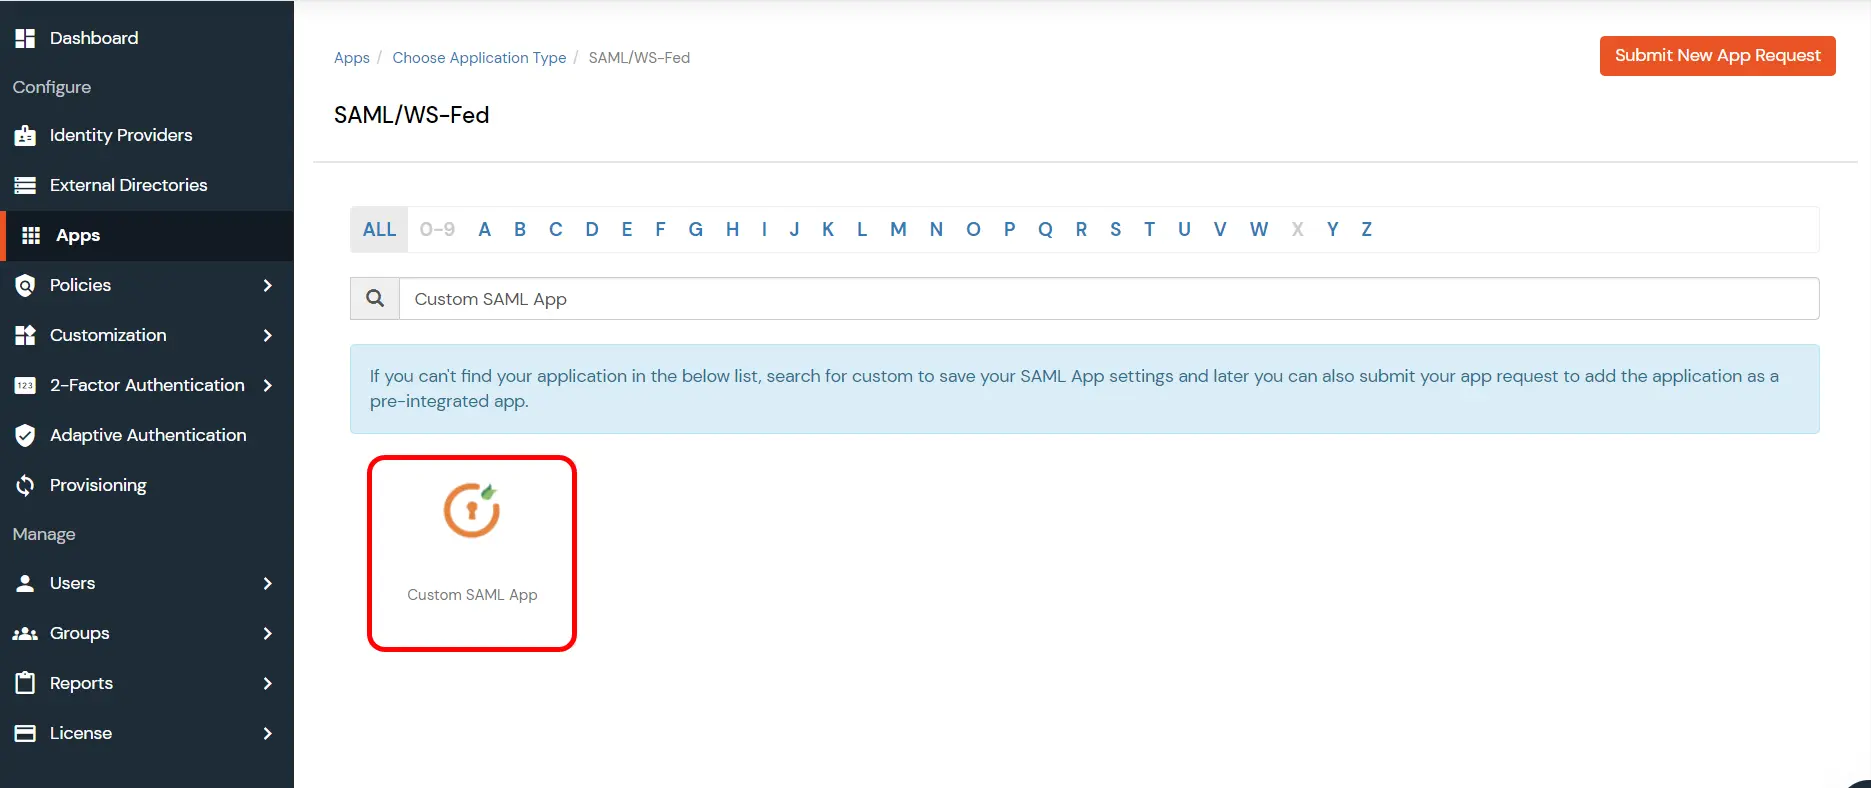
- Navigate to the Apps tab.
- Click on Add Application.
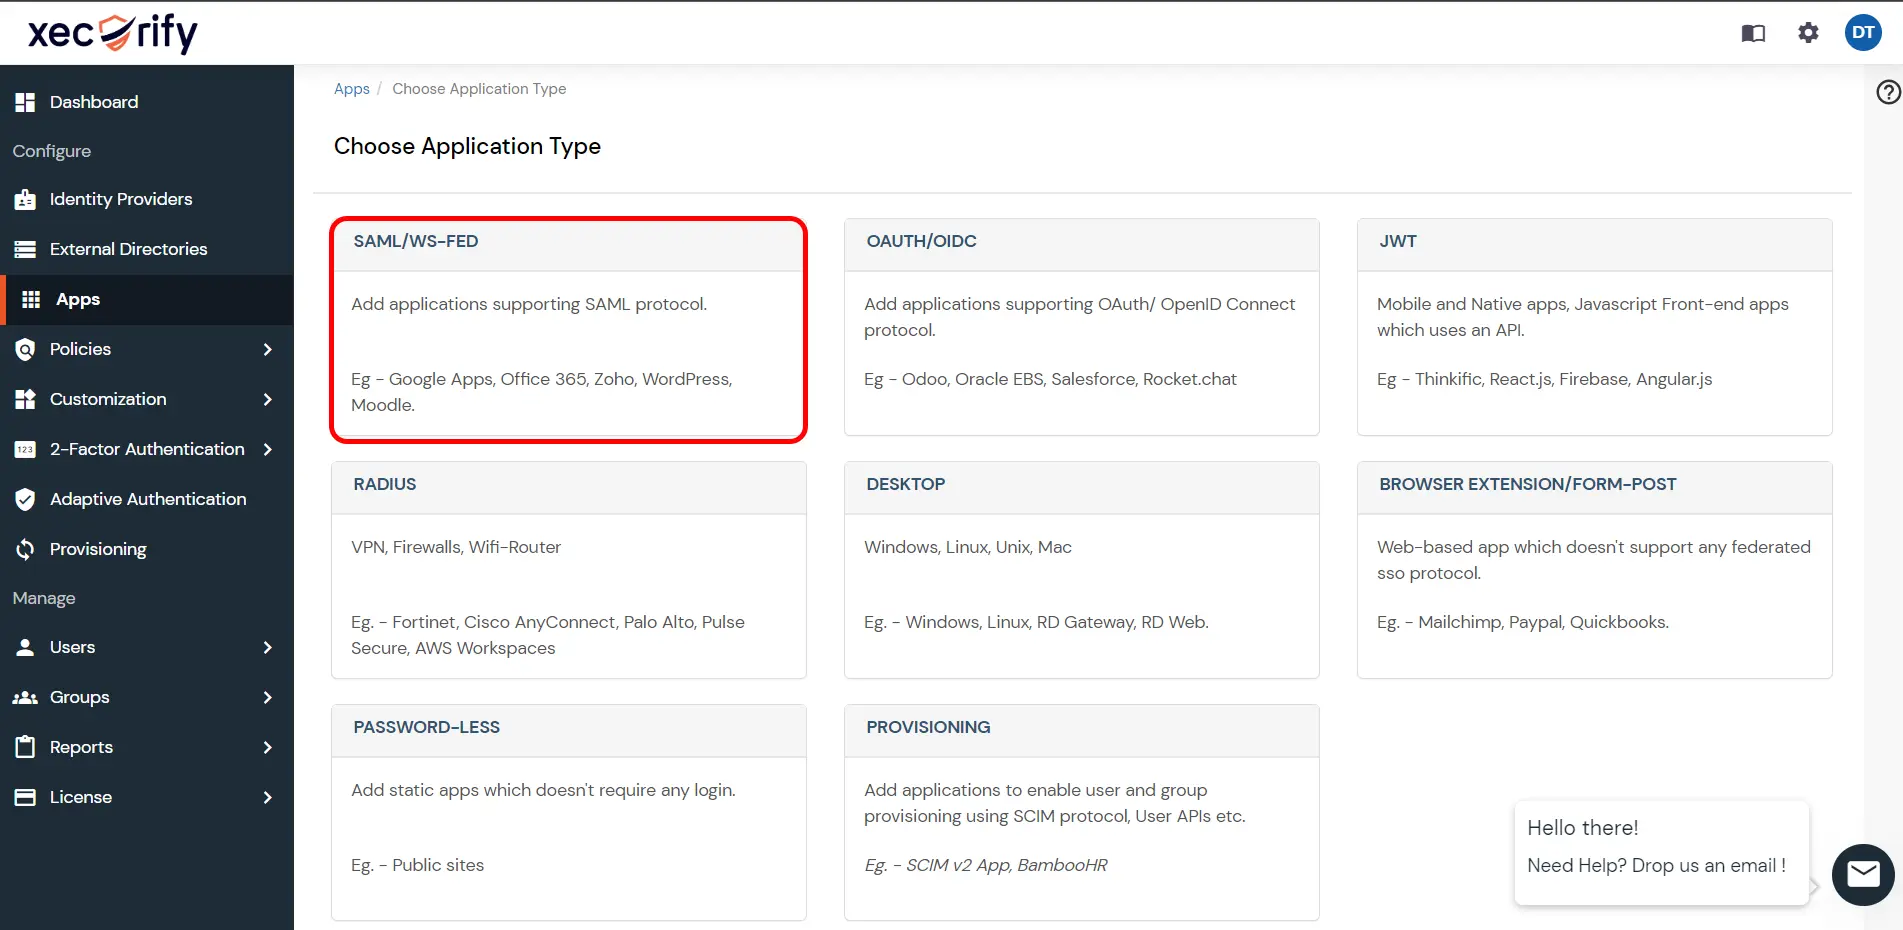
- Select SAML/WS-FED application type.
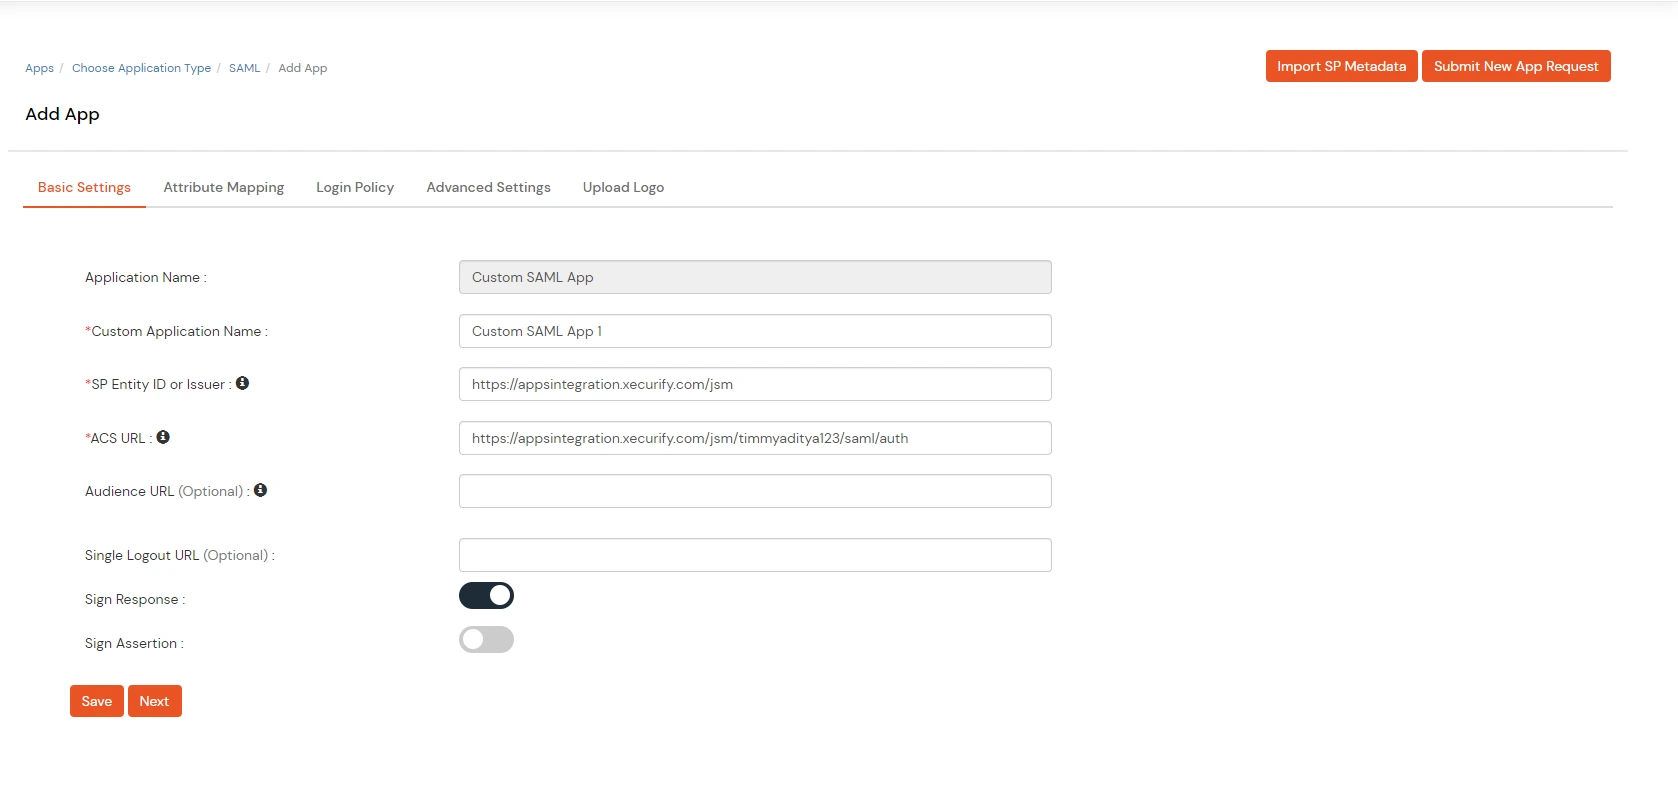
- Enter Custom SAML APP.
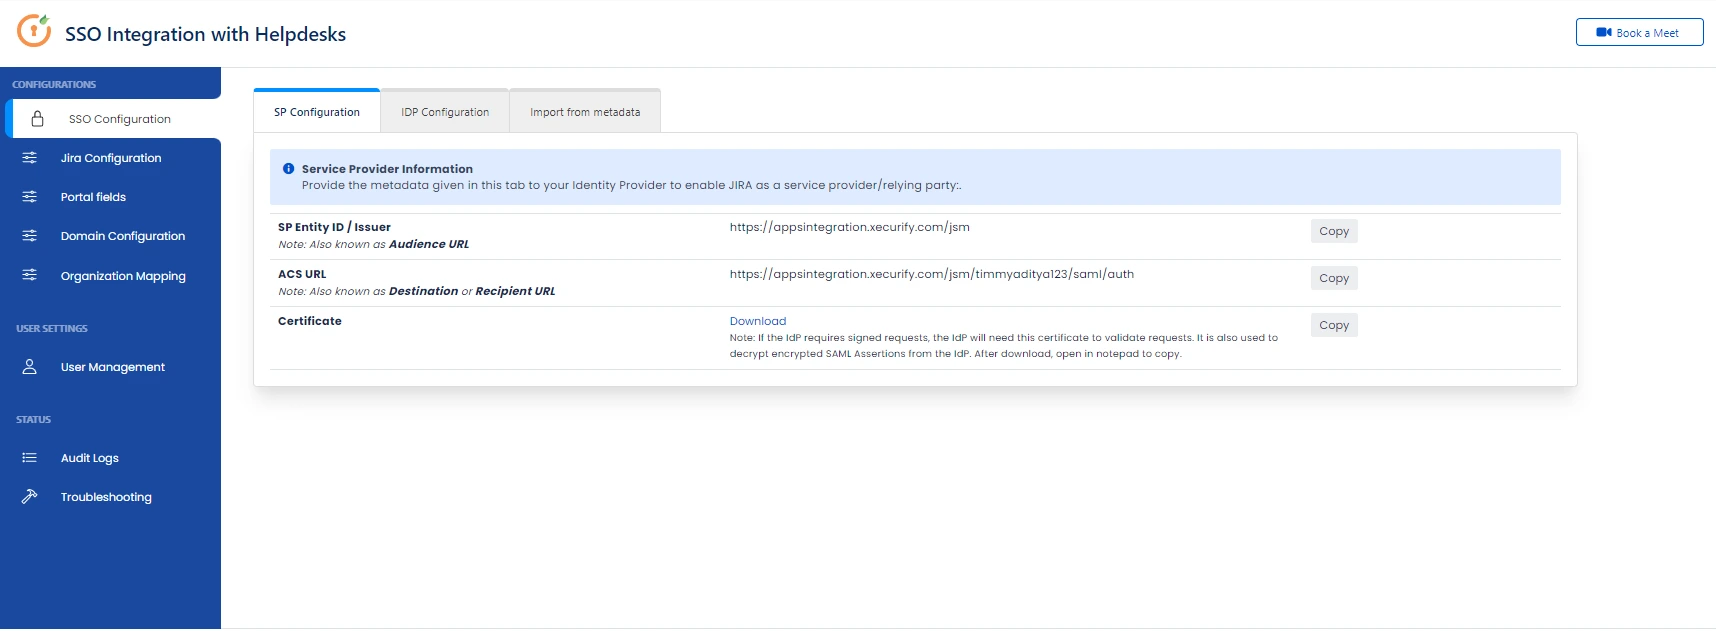
- Copy the SP Entity ID and ACS Url from the SSO configuration tab provided in the SSO Integration with Helpdesk plugin.
- Paste the SP Entity Id and ACS URL as shown in the below image.
- Click on Save.
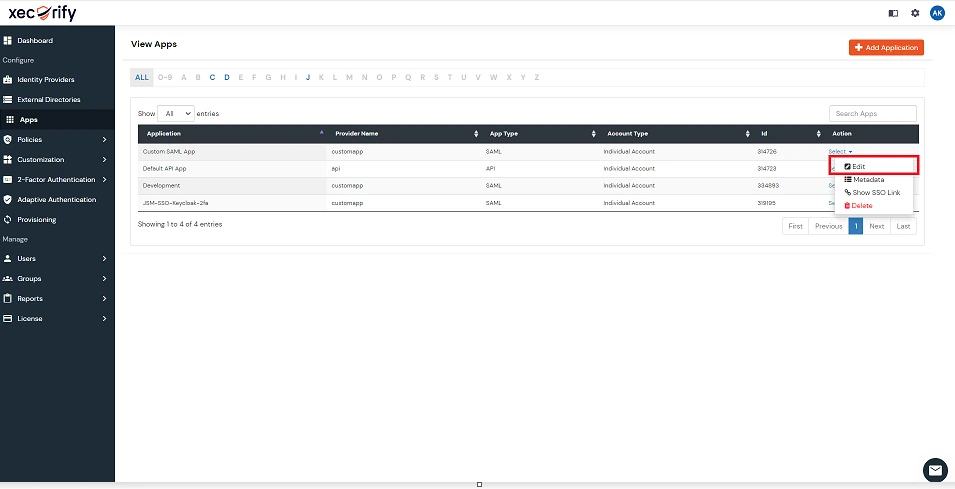
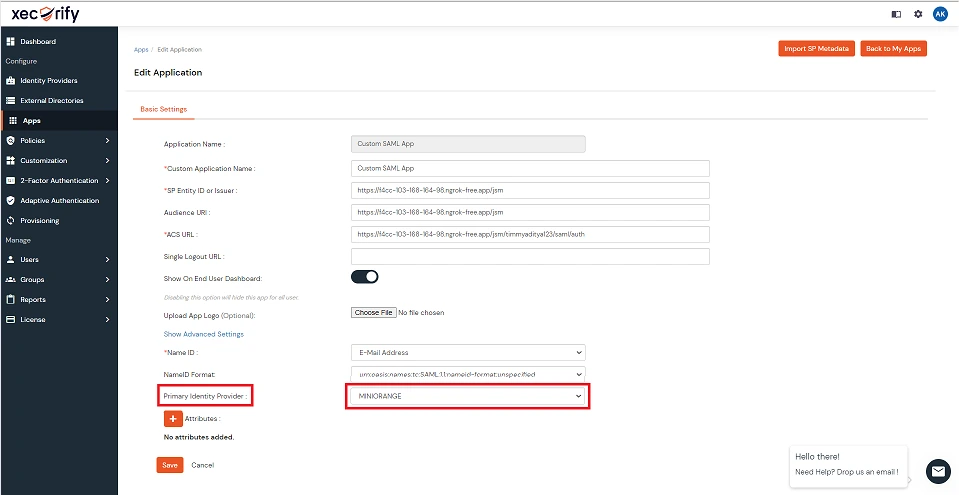
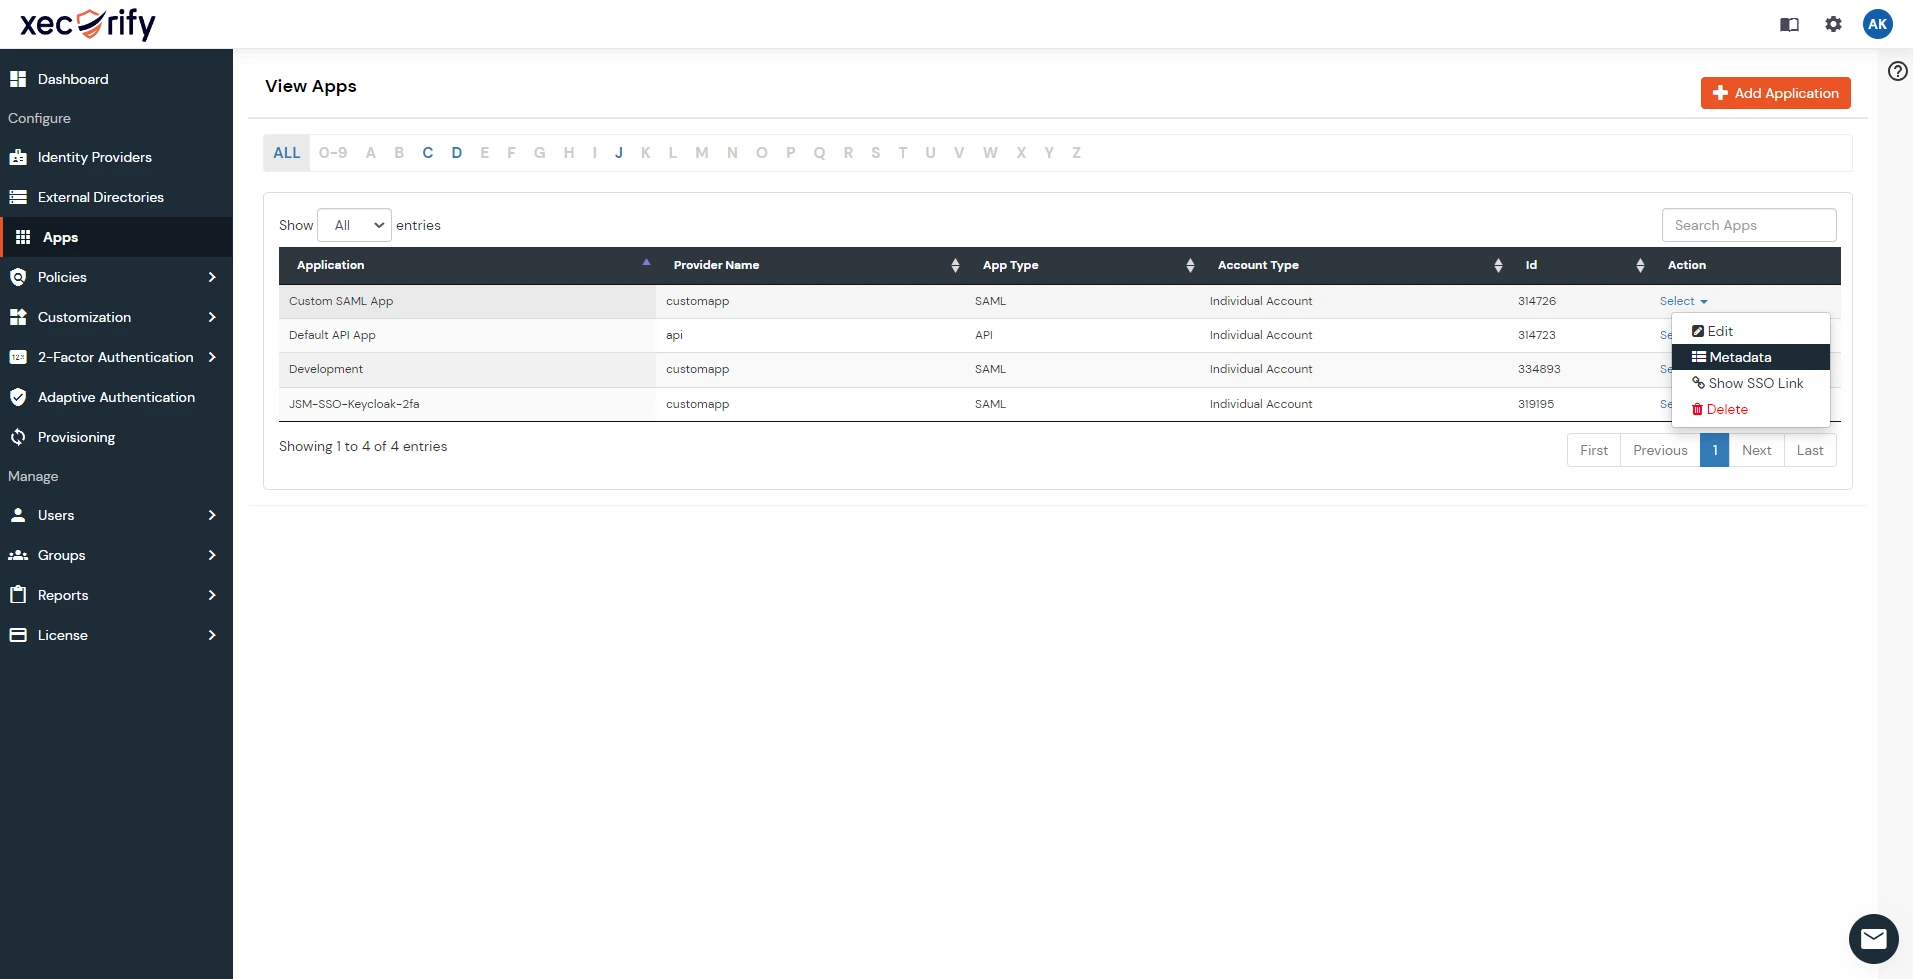
- Now, click on the edit option from the list of IDP as shown in the below image.
- Change the Primary Identity Provider to Okta (Identity provider name) from the dropdown.
5: Configure the SSO Integration With Helpdesk
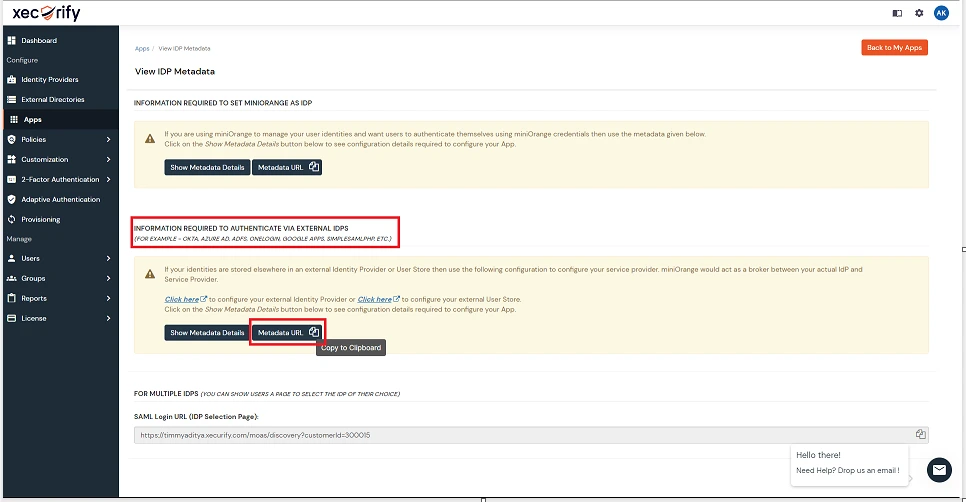
- Navigate to the Metadata option provided for the option you just created in the miniOrange dashboard.
- Click on the metadata URL button as shown in the below image, you will be redirected to the new tab copy the URL.
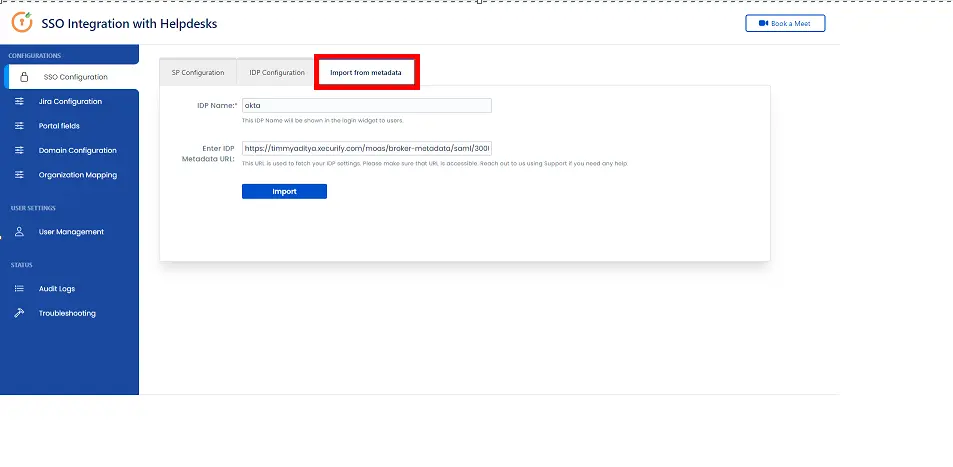
- Navigate to SSO Integration with Helpdesk plugin and click on the Import Metadata option, paste the URL you copied in the previous step.
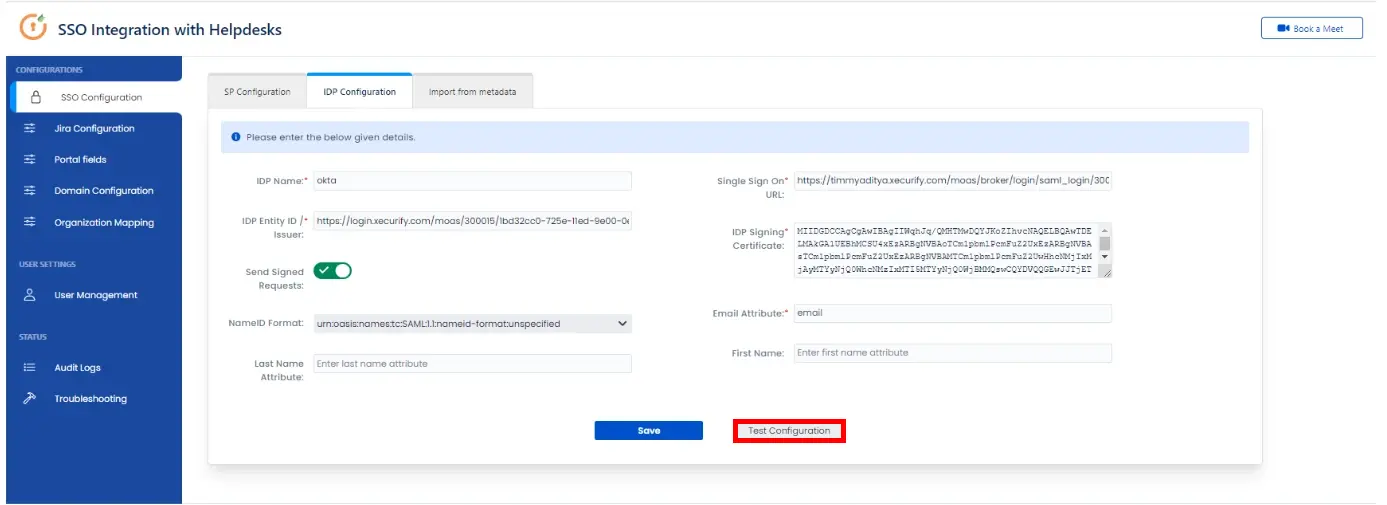
- Click on Test configuration.
- You will be redirected to choose the IDP you want to be authenticated with, once you select the IDP you will be redirected to the IDP’s login page. Upon successful authentication you will see a success response containing the configured Attributes.
Recommended Add-Ons

Jira SAML SSO
Jira SAML SSO application enables SSO for Jira Software and Jira Service Desk.
Know MoreUser Sync SCIM Provisioning
Synchronize users, groups and directory with SCIM and REST APIs for Server DC.
Know MoreCrowd Bulk User Management
It allows to manage users in Crowd and Automatically and efficiently deactivate users.
Know MoreBitbucket Git Authentication App | Kerberos/NTLM Apps | Word/PDF Exporter | WebAuthn | SonarQube SSO | Jenkins SSO
If you don't find what you are looking for, please contact us at support-atlassian@miniorange.atlassian.net or raise a support ticket here.


