Step 3: User Sync Settings
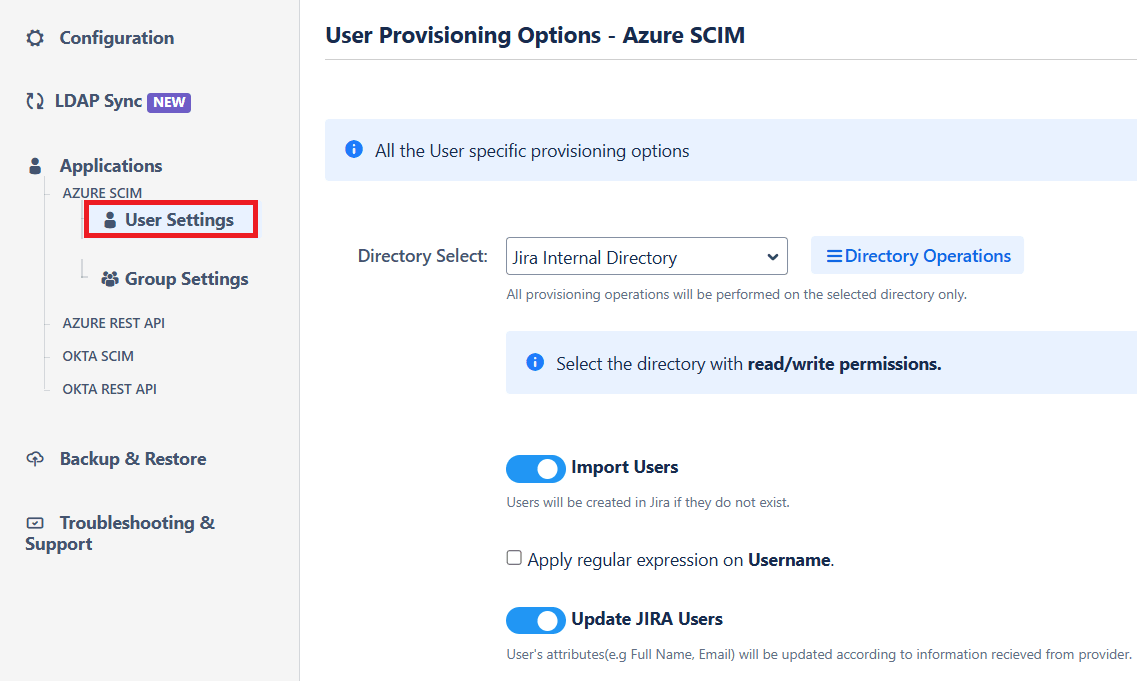
- Select the User Sync Settings tab from the left sidebar. Here you can configure different settings about user creation and updation.
- You can select the directory, enable or disable user import, update process.
- The user can be automatically enabled or disabled here based on IDP configuration.
- You also have an option to set Default Project Lead and Default Component Lead.
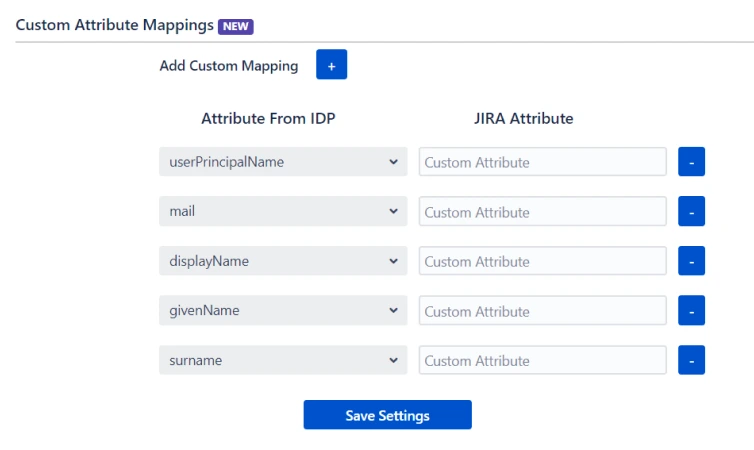
- Attribute mapping enables you to map your attributes sourced from the IDP to Jira attributes. Through this section you can map your jira attributes to the attributes coming from IDP. By default, username attribute corresponds to the username/userPrincipalName attribute, email corresponds to the email/mail attribute, and displayName corresponds to the full name attribute. However, if you want to map these jira attributes with other attributes coming from IDP, you can use this feature to change the attribute mapping configurations.
- User sync also supports mapping of custom attributes. Here, you can create custom attributes and automatically assign values to them from the IDP (Identity Provider). Select the desired attributes from the IDP that you want to display in Jira and provide a name for the custom attributes to be shown in Jira.
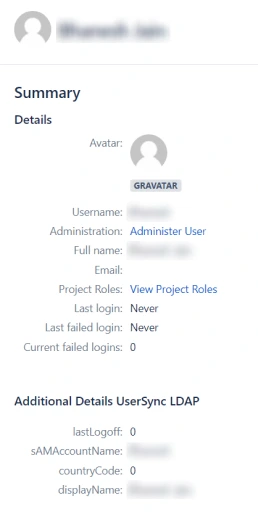
- Custom fields will be displayed in the user profile section as shown below

Step 4: Group Sync Settings
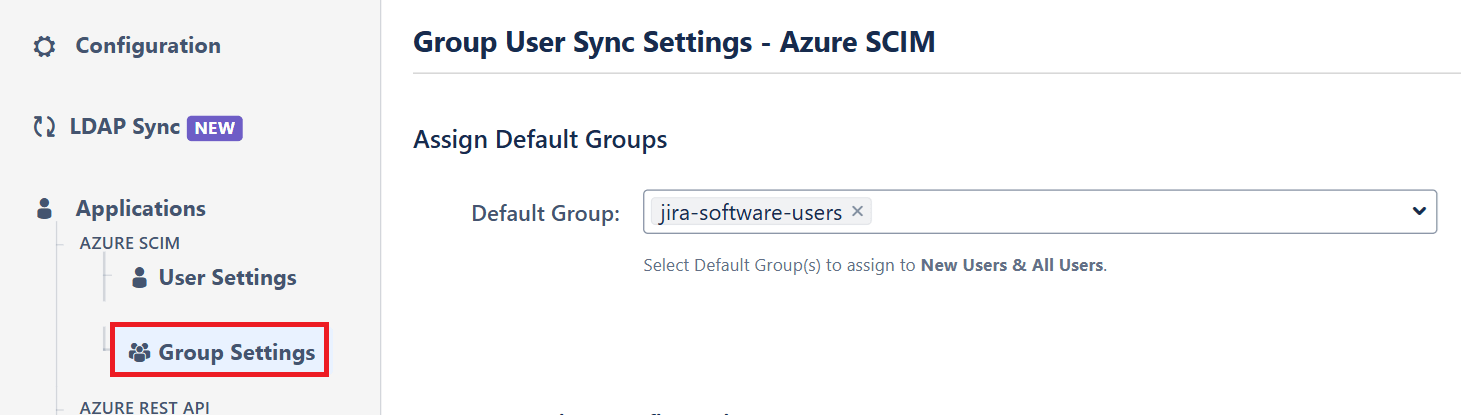
- Select the Group Sync Settings tab from the left sidebar. Here you can configure different settings about group creation and group mapping.
- Here you can configure Default groups for new and all users.
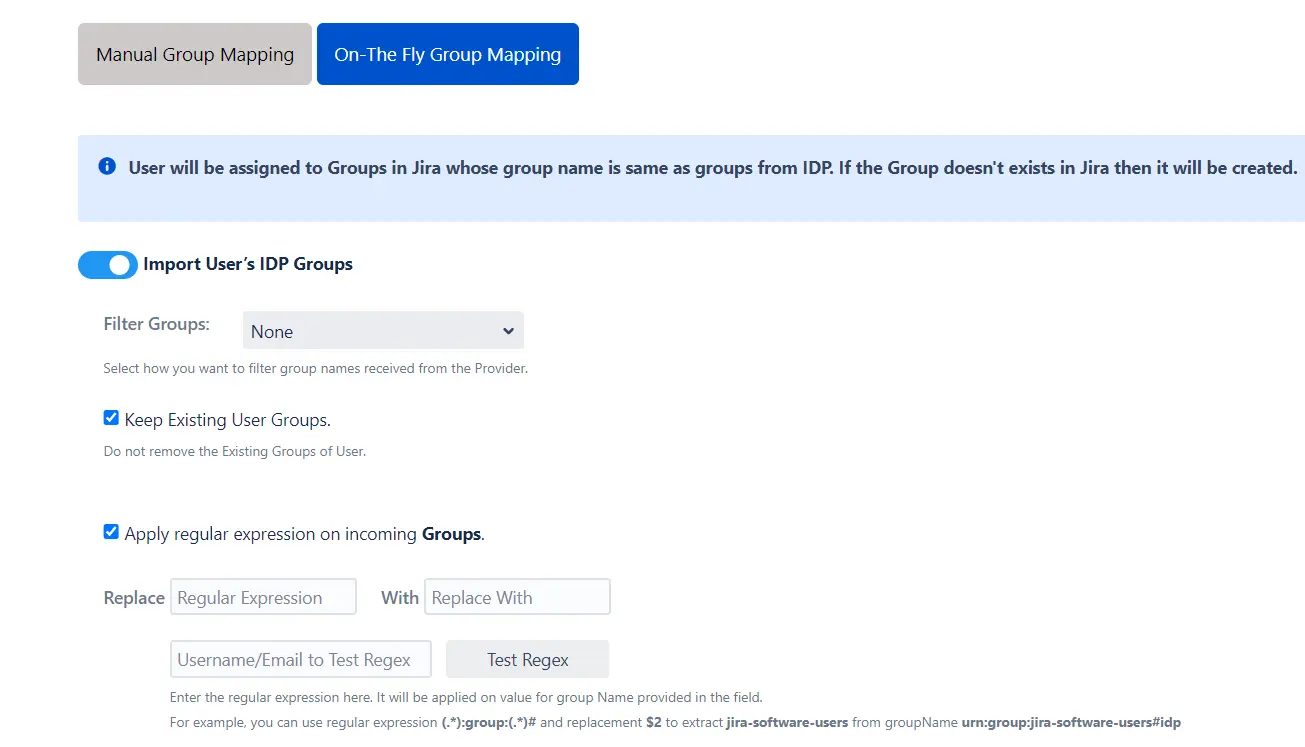
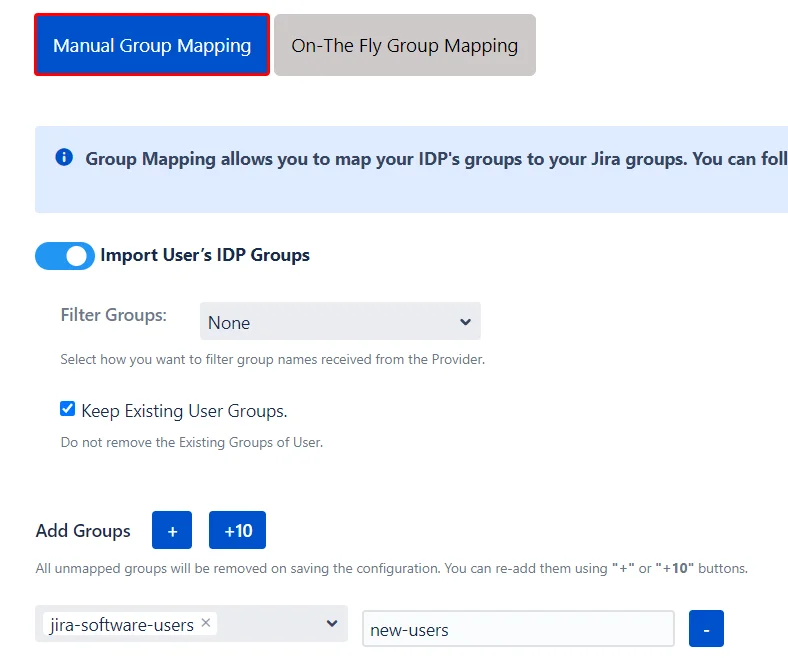
- You can set Manual Group Mapping or On-The Fly Group Mapping.
- Here users will be assigned to groups in Jira whose group name is the same as groups from IDP. If the group doesn't exist in Jira then it will be created.
- You can configure to keep the existing user groups, filter groups and apply regular expressions on the groups.
- Here you can manually map Jira groups with the groups from IDP.
- You can also configure to import IDP groups, filter groups and whether to keep existing users or not.
1. On-The Fly Group Mapping -
2. Manual Group Mapping -
Step 5: Multiple IDPs
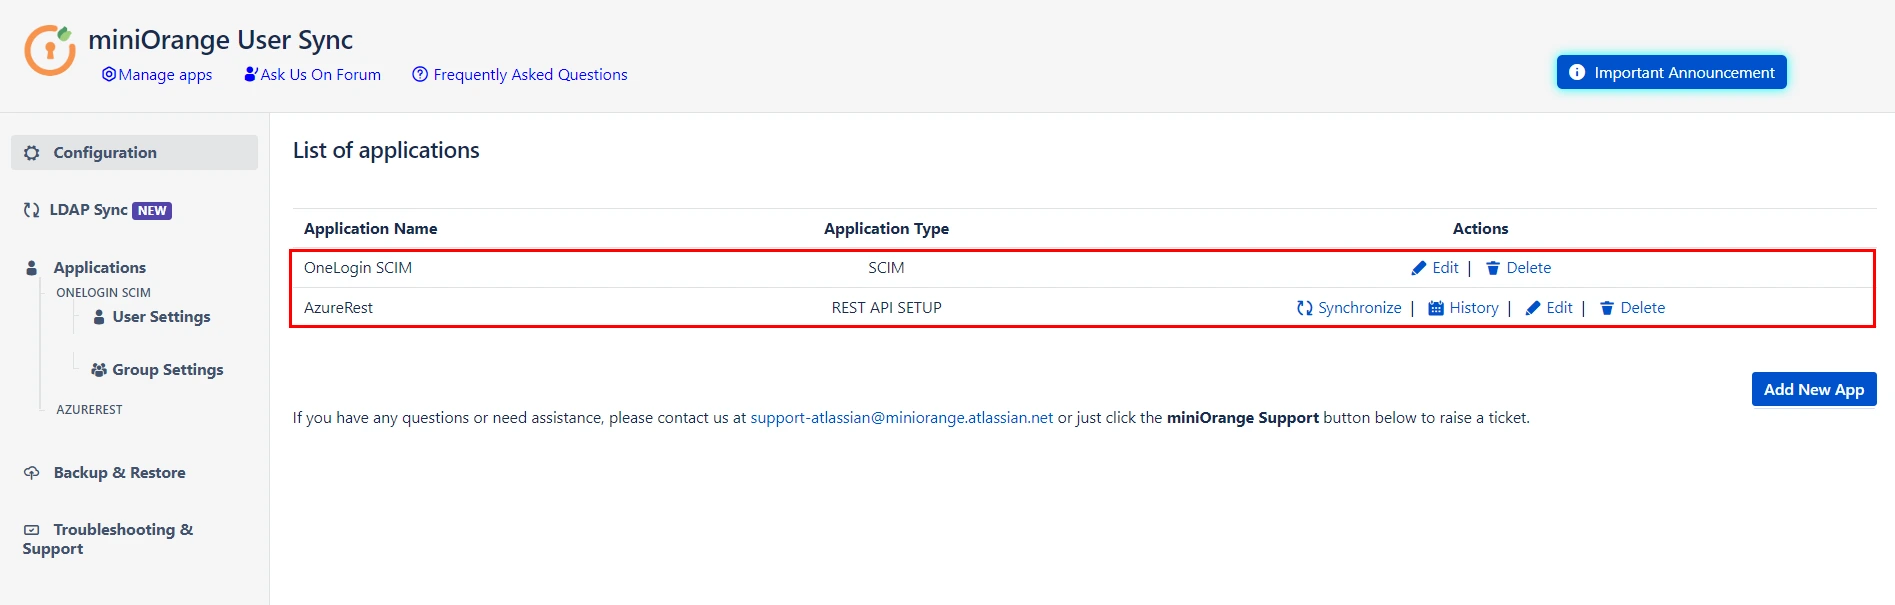
- The plugin allows for configuring SCIM provisioning on your SP (Service Provider) to accommodate your specific use case. To add another IDP, simply navigate to the "Configured IDPs" section. Select on Add new App to configure multiple provisioning connections.
Step 6: Sync History
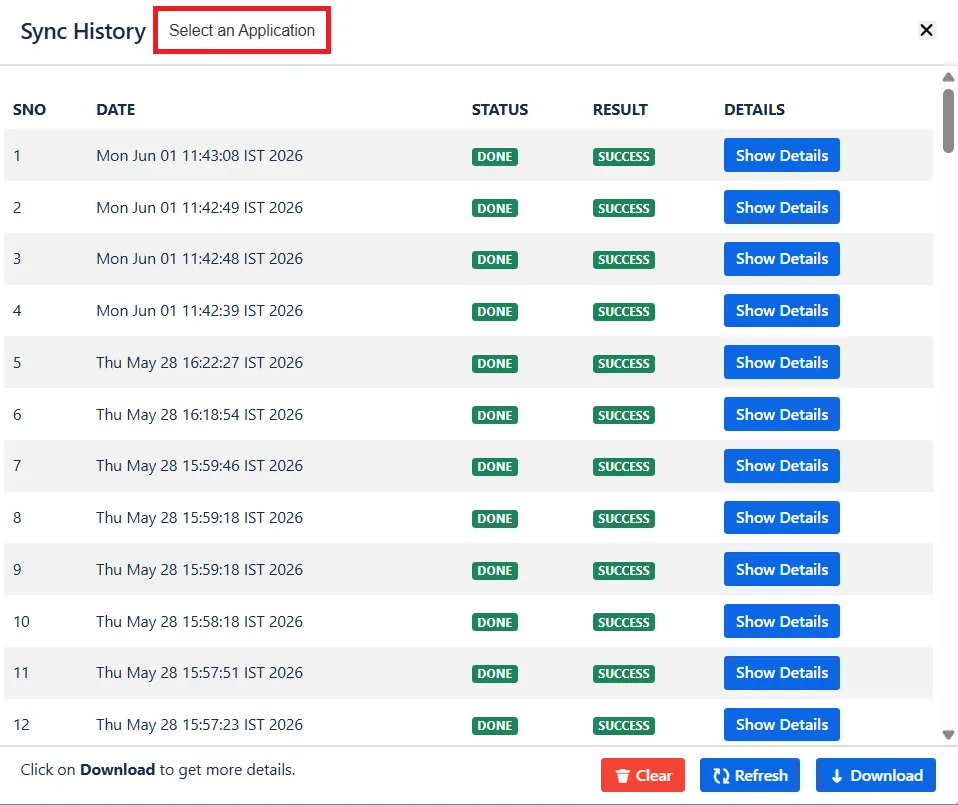
- For every SCIM operation(User and Group Sync), you will see the logs under the 'Sync History' button. Here, you can select your specific application to view the logs.