How to Restrict Access to Asana using CASB Solution
Restricting access to Asana helps protect sensitive business information, maintain data privacy, and prevent unauthorized users from accessing your digital workspace. In this guide, we'll show you the step-by-step process to implement a miniOrange CASB to restrict access to your favorite Asana.
Step 1: Sign up with miniOrange CASB
Step 2: Configure your Identity Provider
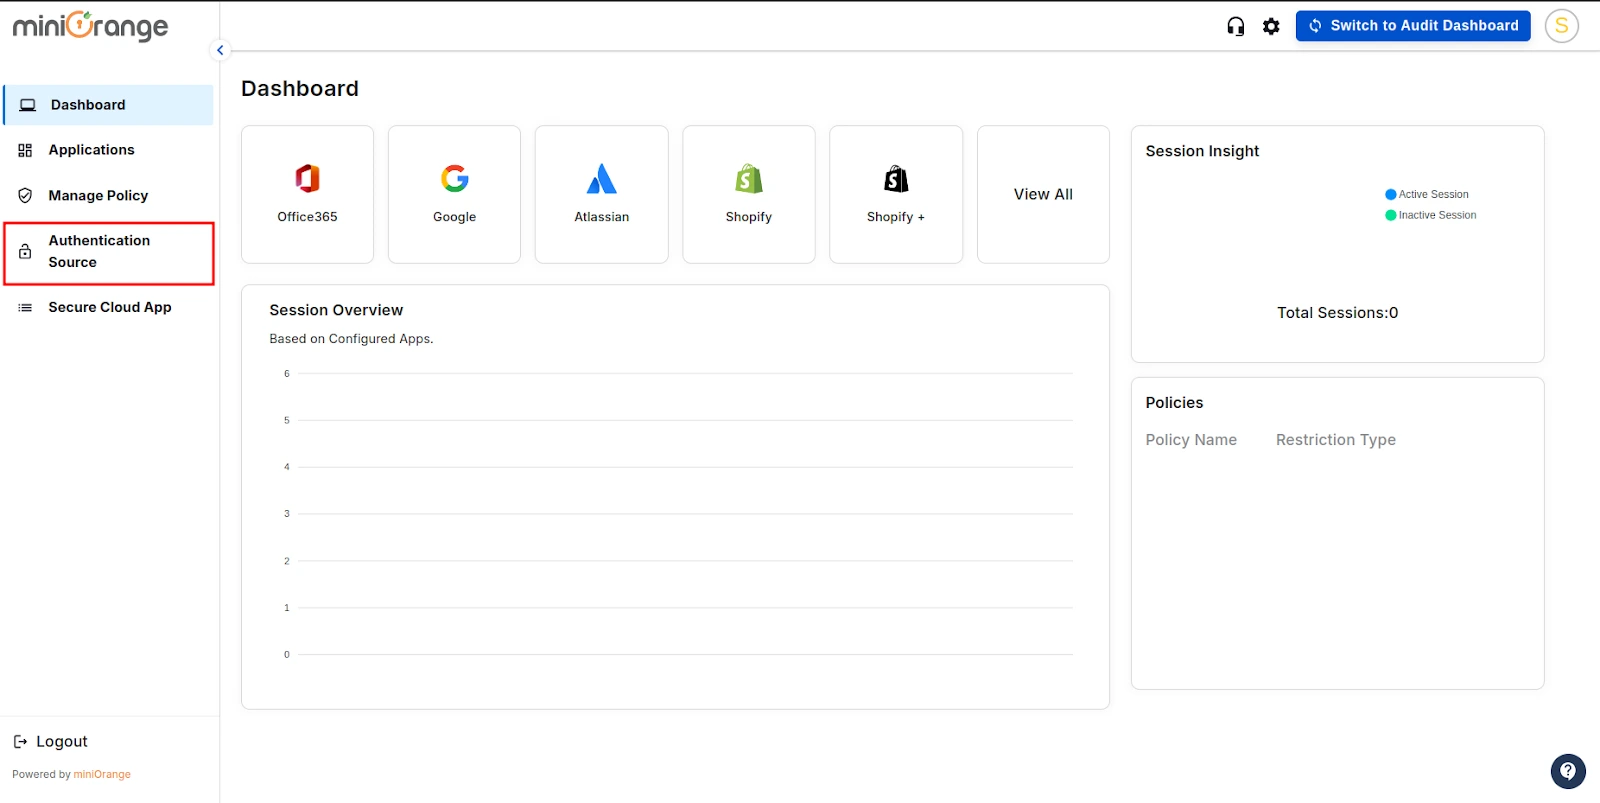
- Sign in to miniOrange IAM using the same credentials as the CASB dashboard and navigate to the Apps section.
(In this guide, we are using miniOrange as the IDP, but you can contact us at uemsupport@xecurify.com to set up your preferred IDP.)
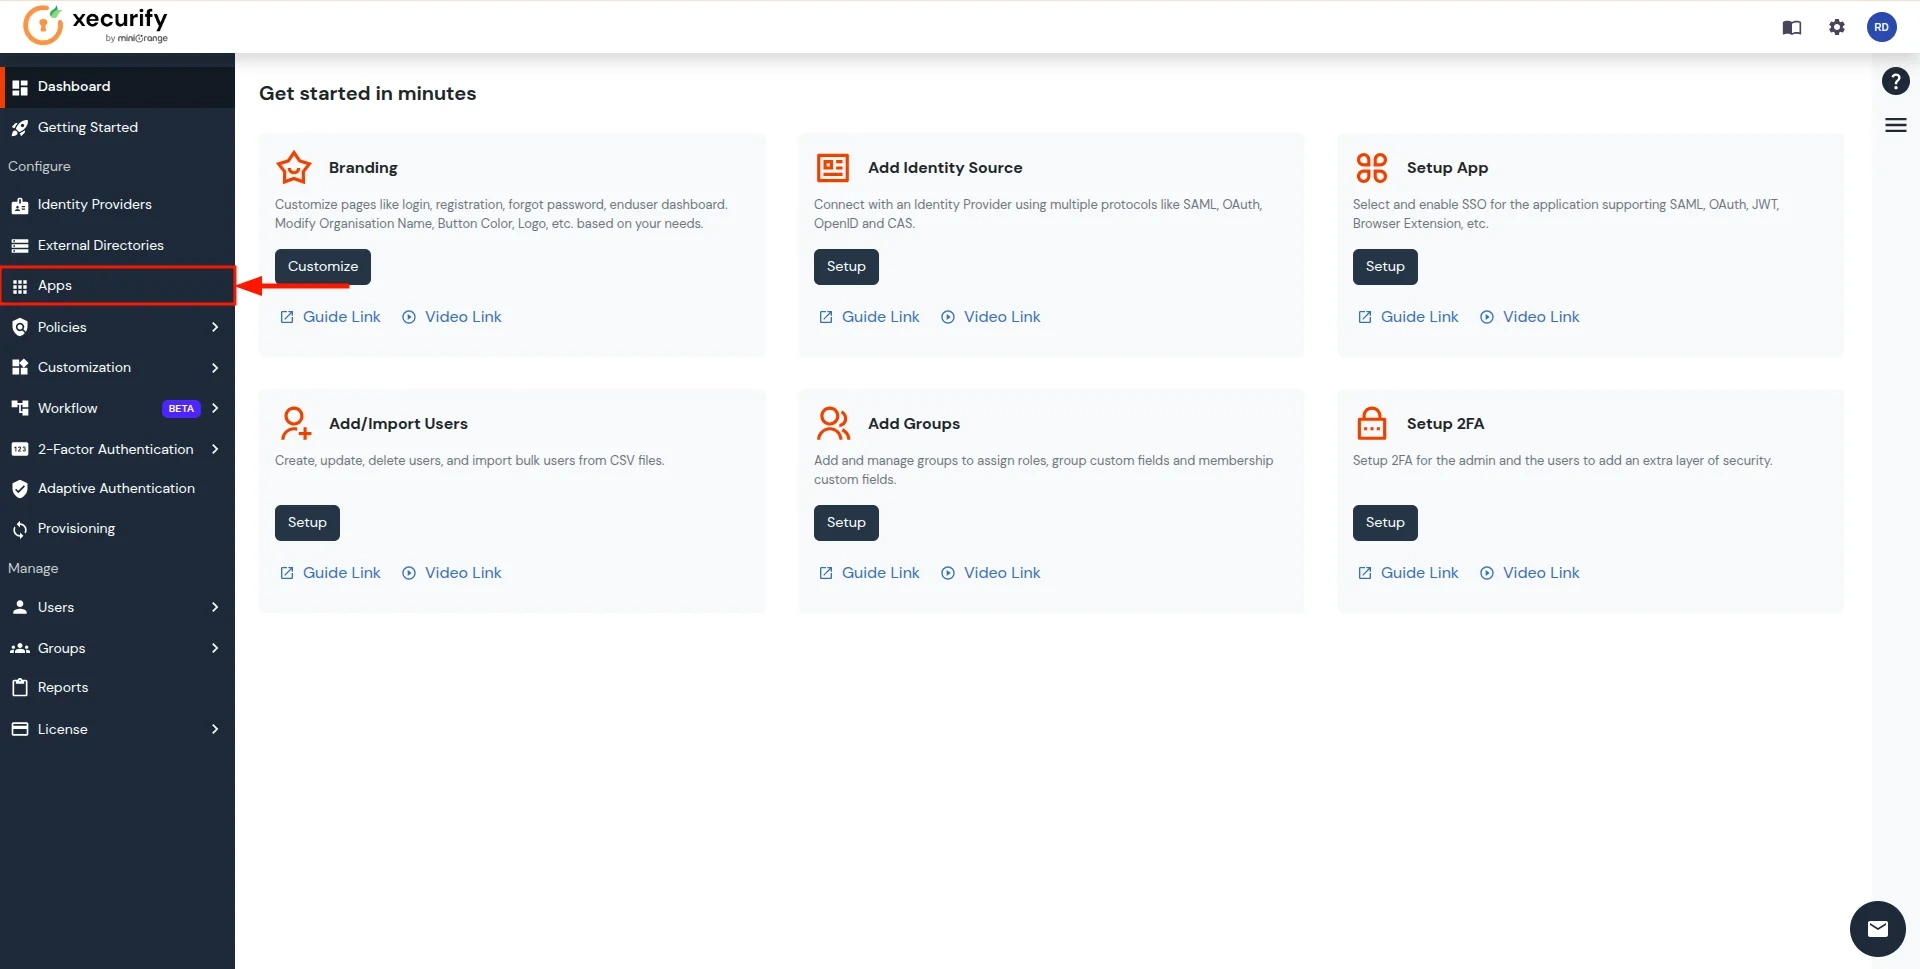
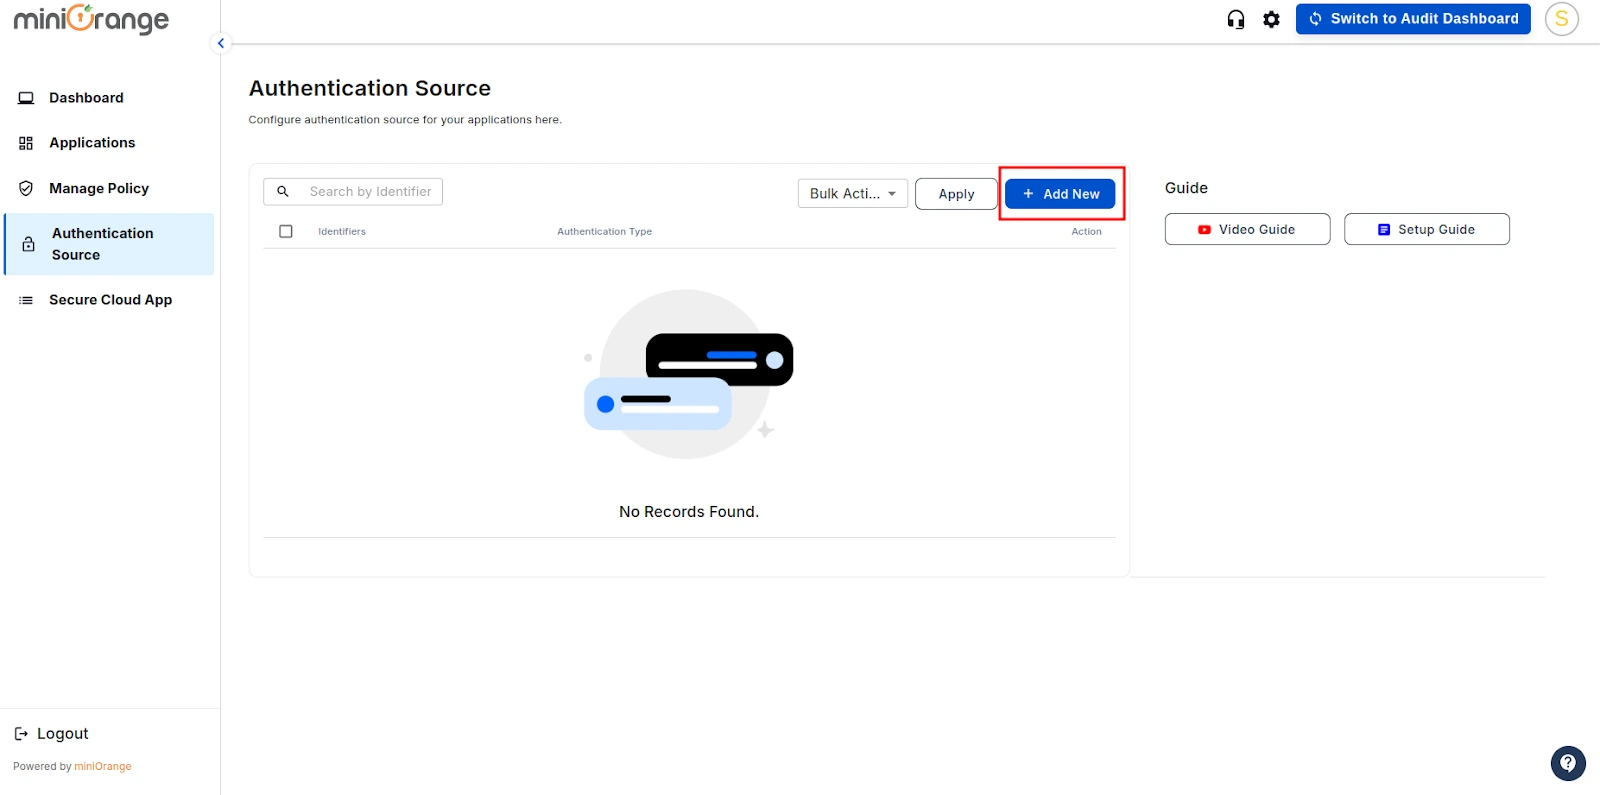
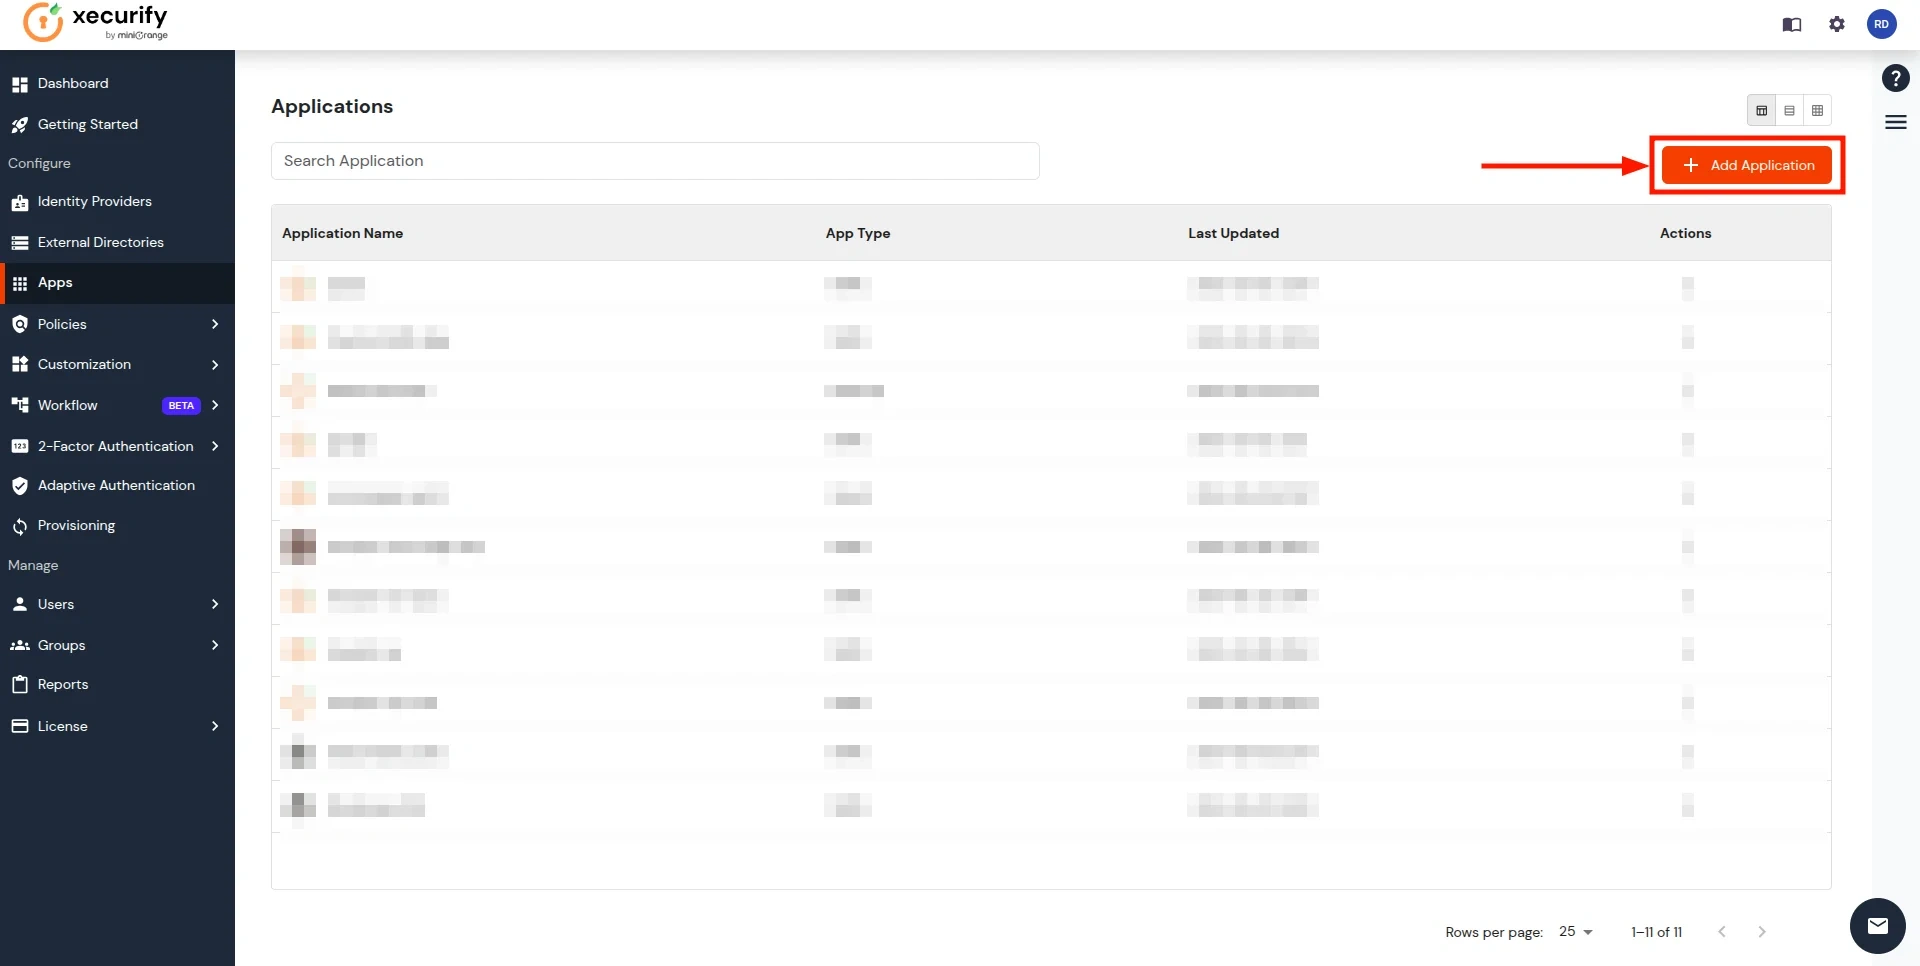
- You will see a list of all configured applications. Click Add Application to create a new one.
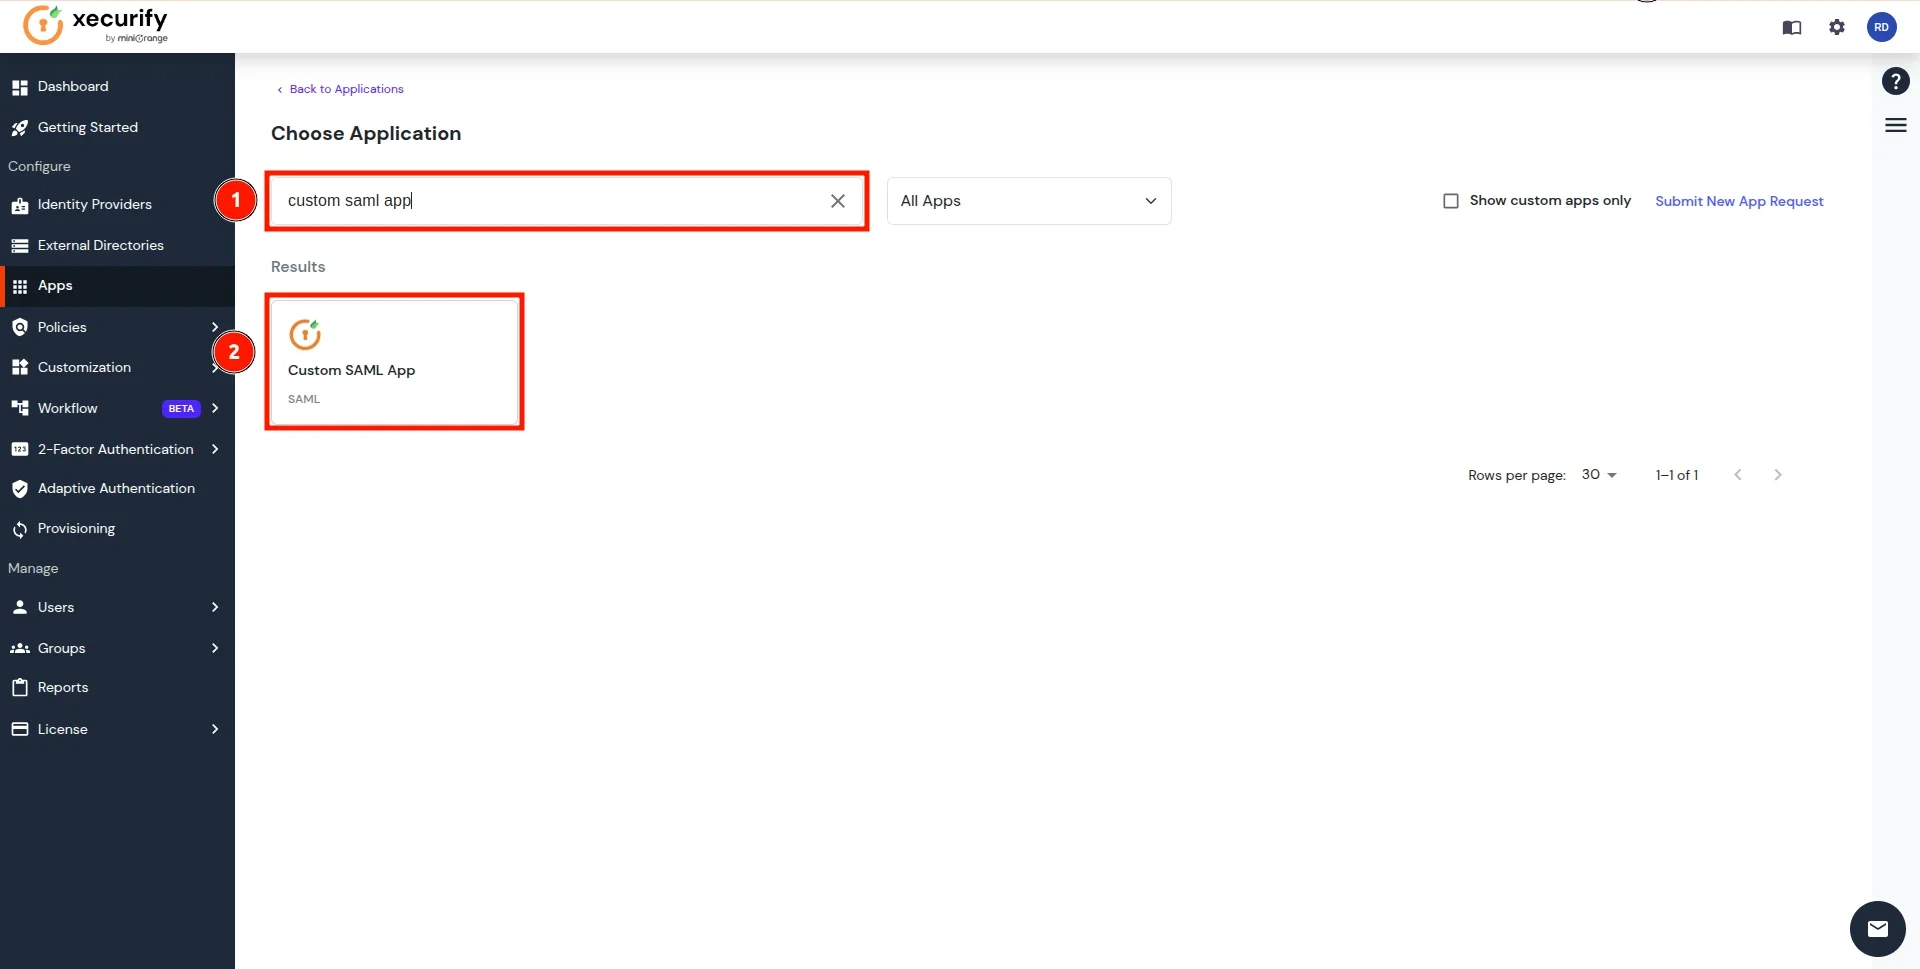
- Search for the Custom SAML App in the search box and click on it.
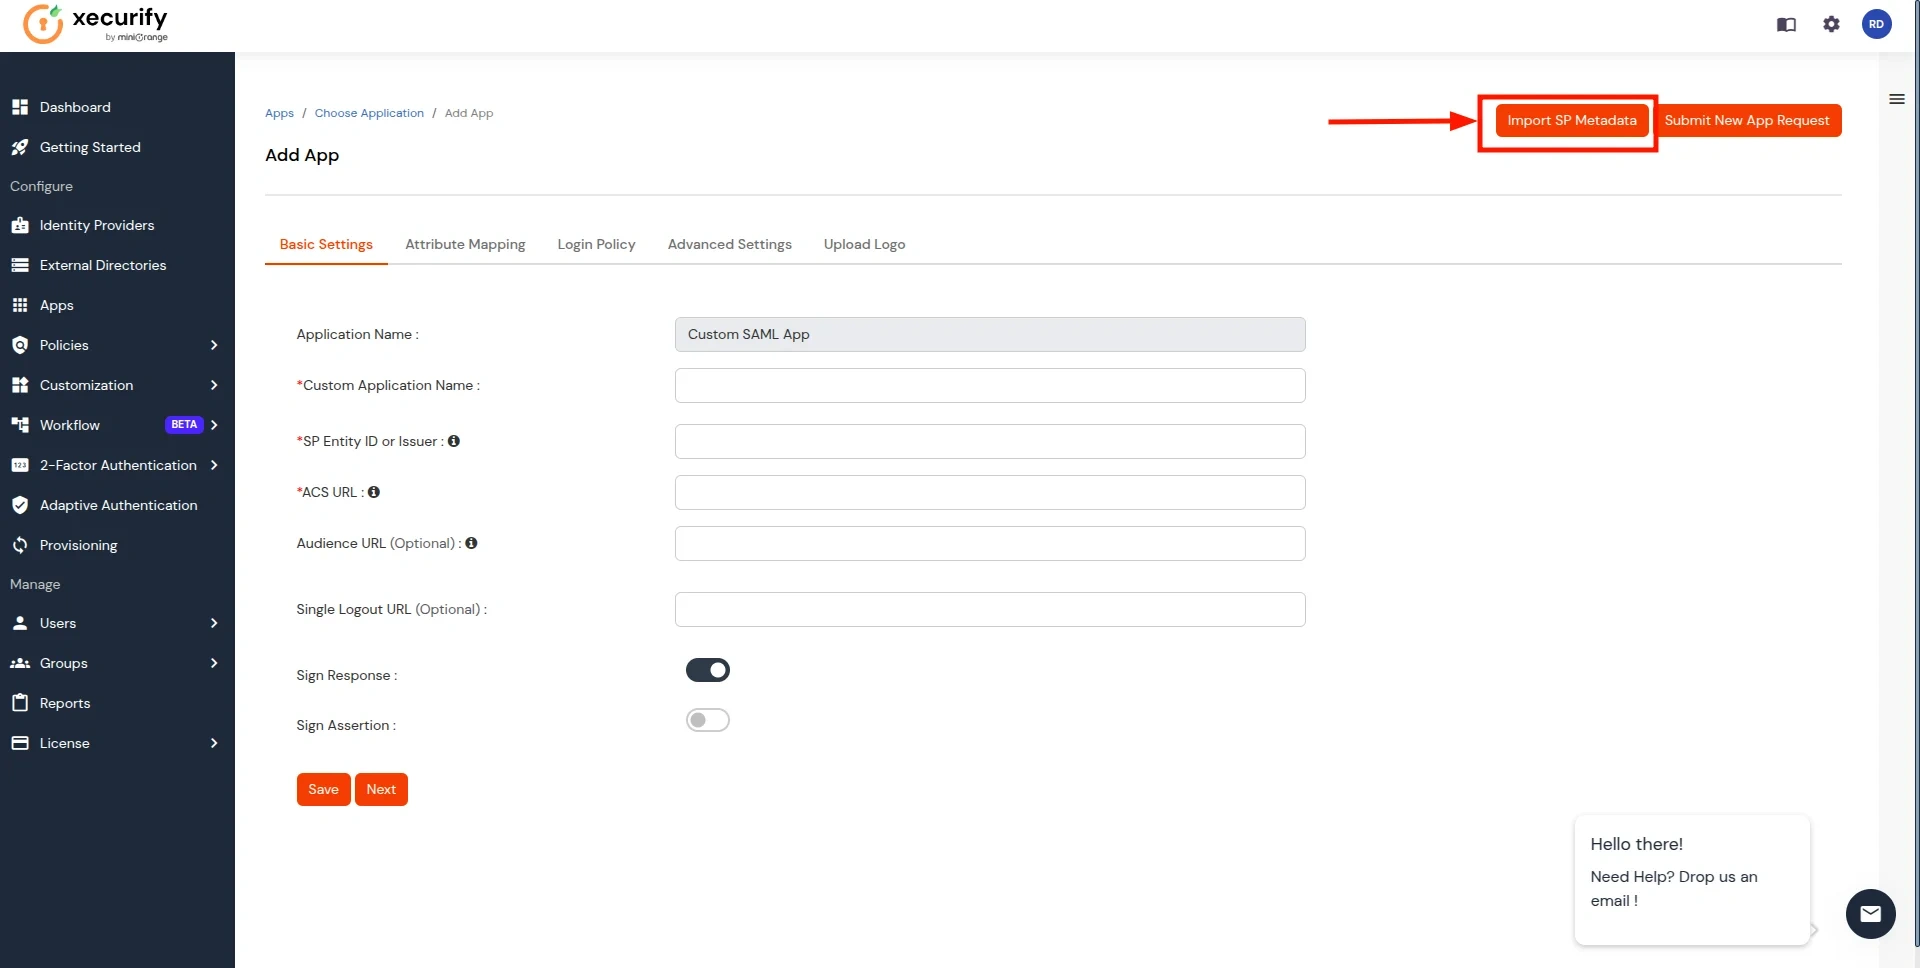
- Enter a custom application name and click on the Import SP Metadata button in the right corner.
- Add the App Name, and select the file option in SP Metadata. Next, click on the Choose File button. Select the file downloaded in Step 1 and click on Import Button.
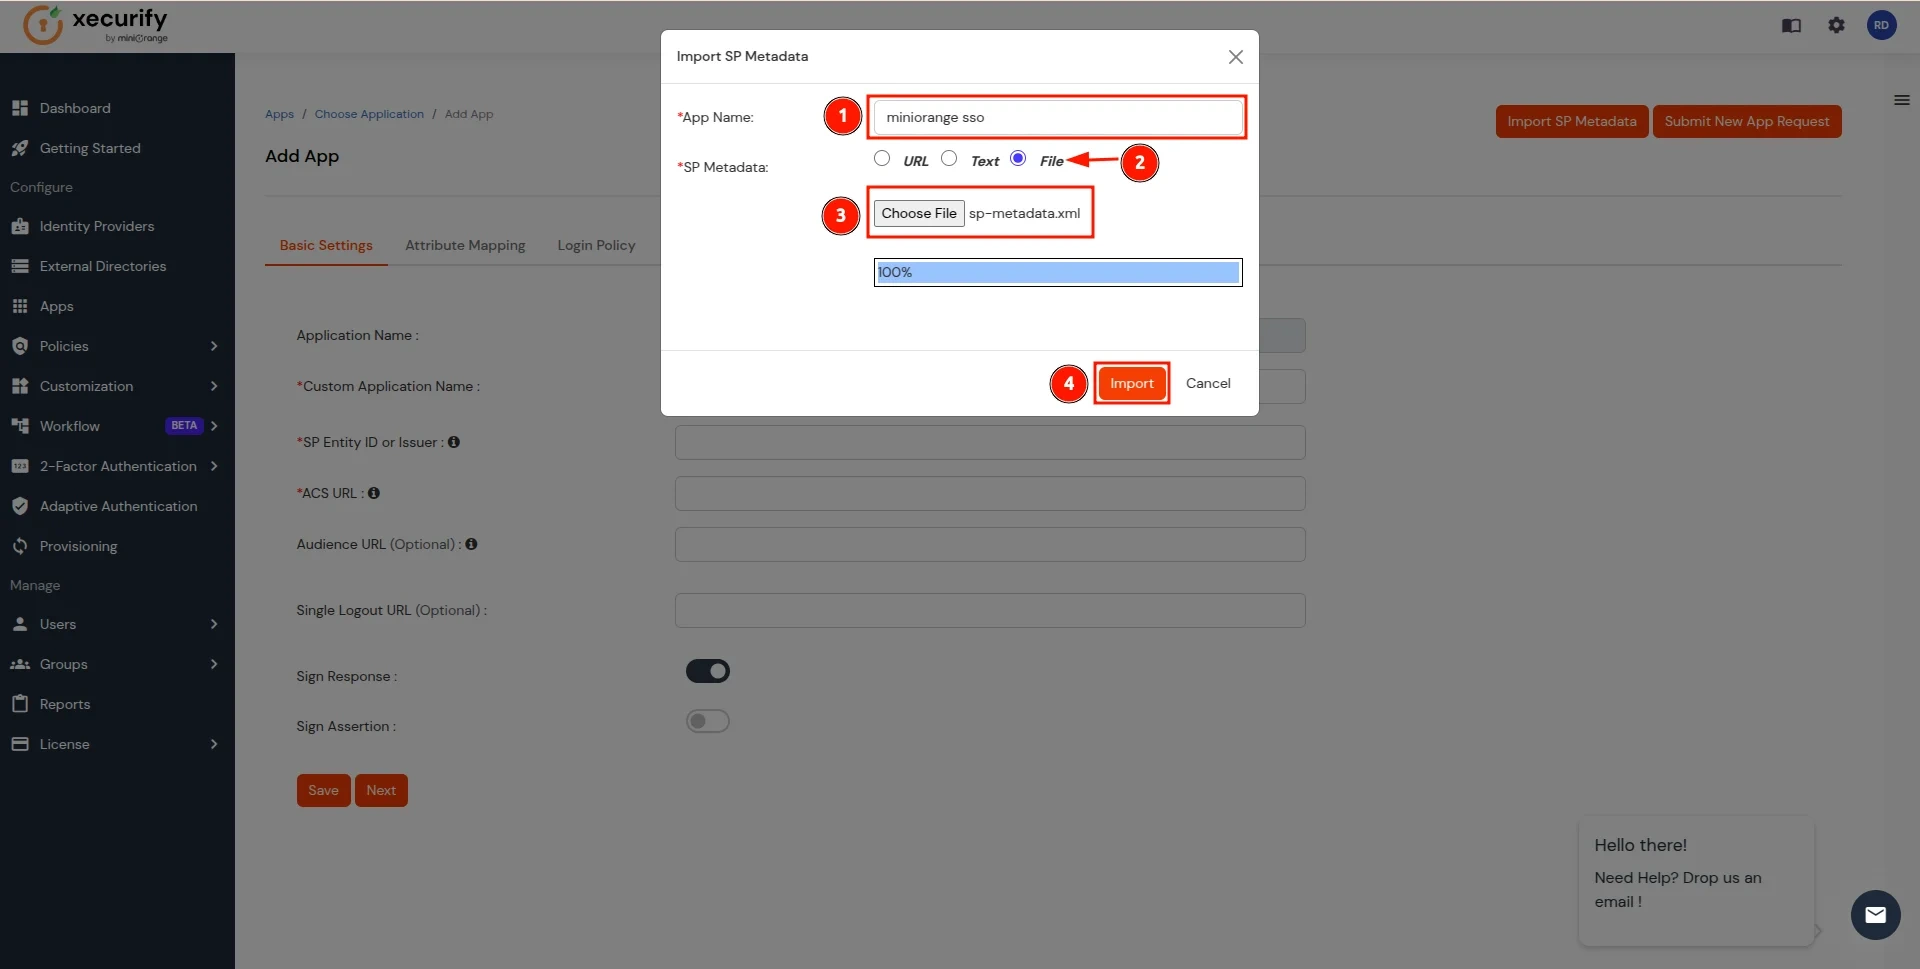
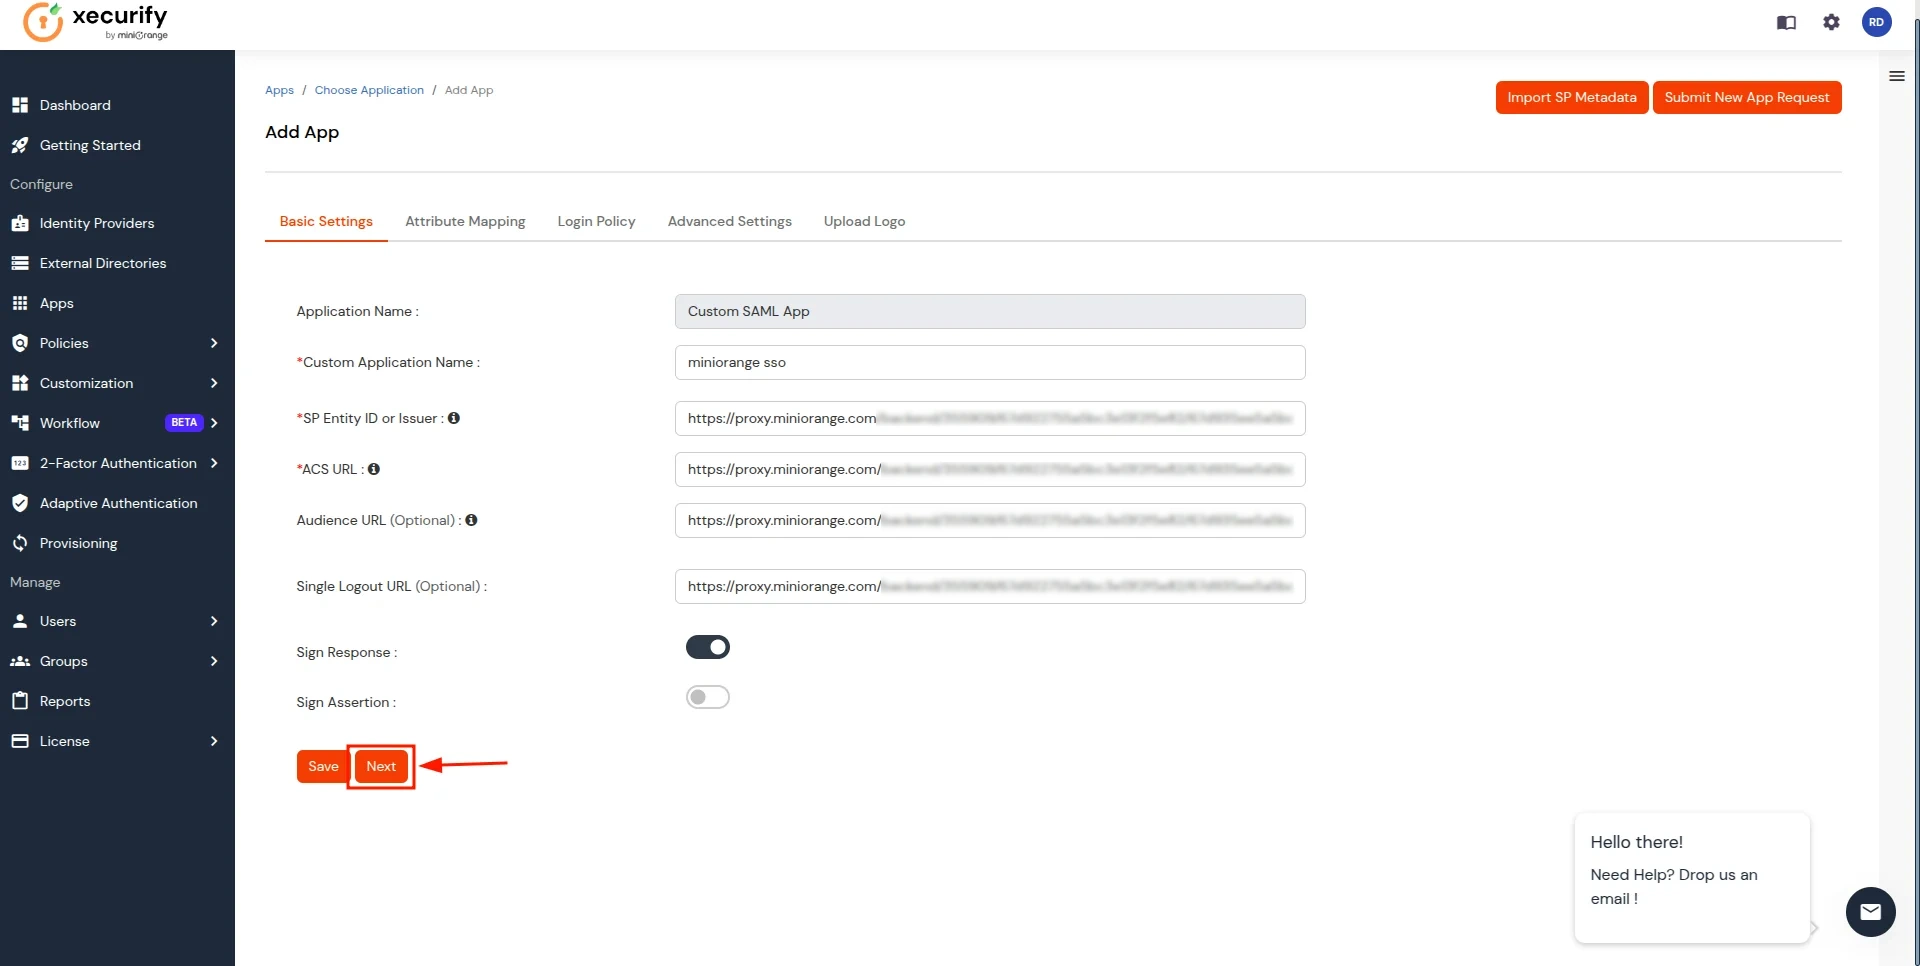
- After the file is successfully uploaded, Click on Next Button.
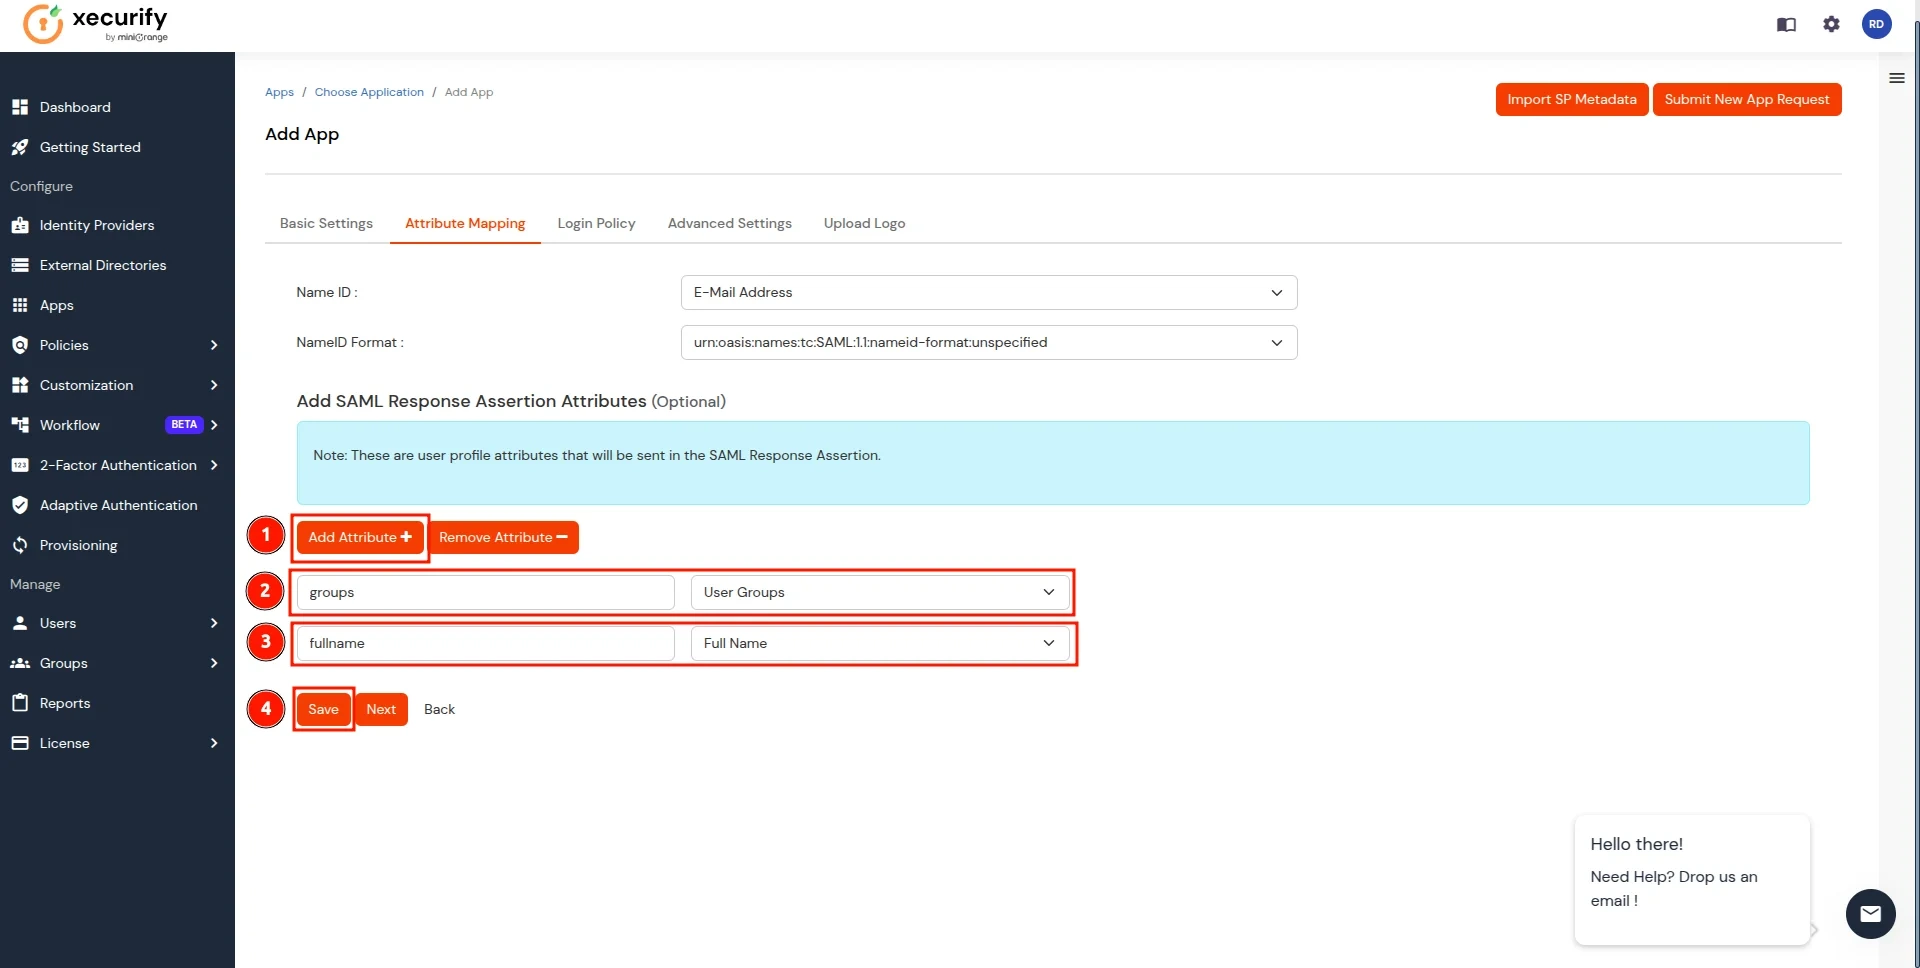
- In the Attribute Mapping section, follow these steps:
- Click on the Add Attribute button.
- Enter groups as the Attribute Name and select User Groups as the Attribute Value.
- Add another attribute by clicking Add Attribute again.
- Enter fullname as the Attribute Name and select Full Name as the Attribute Value.
- Click on the Save button to apply the changes.
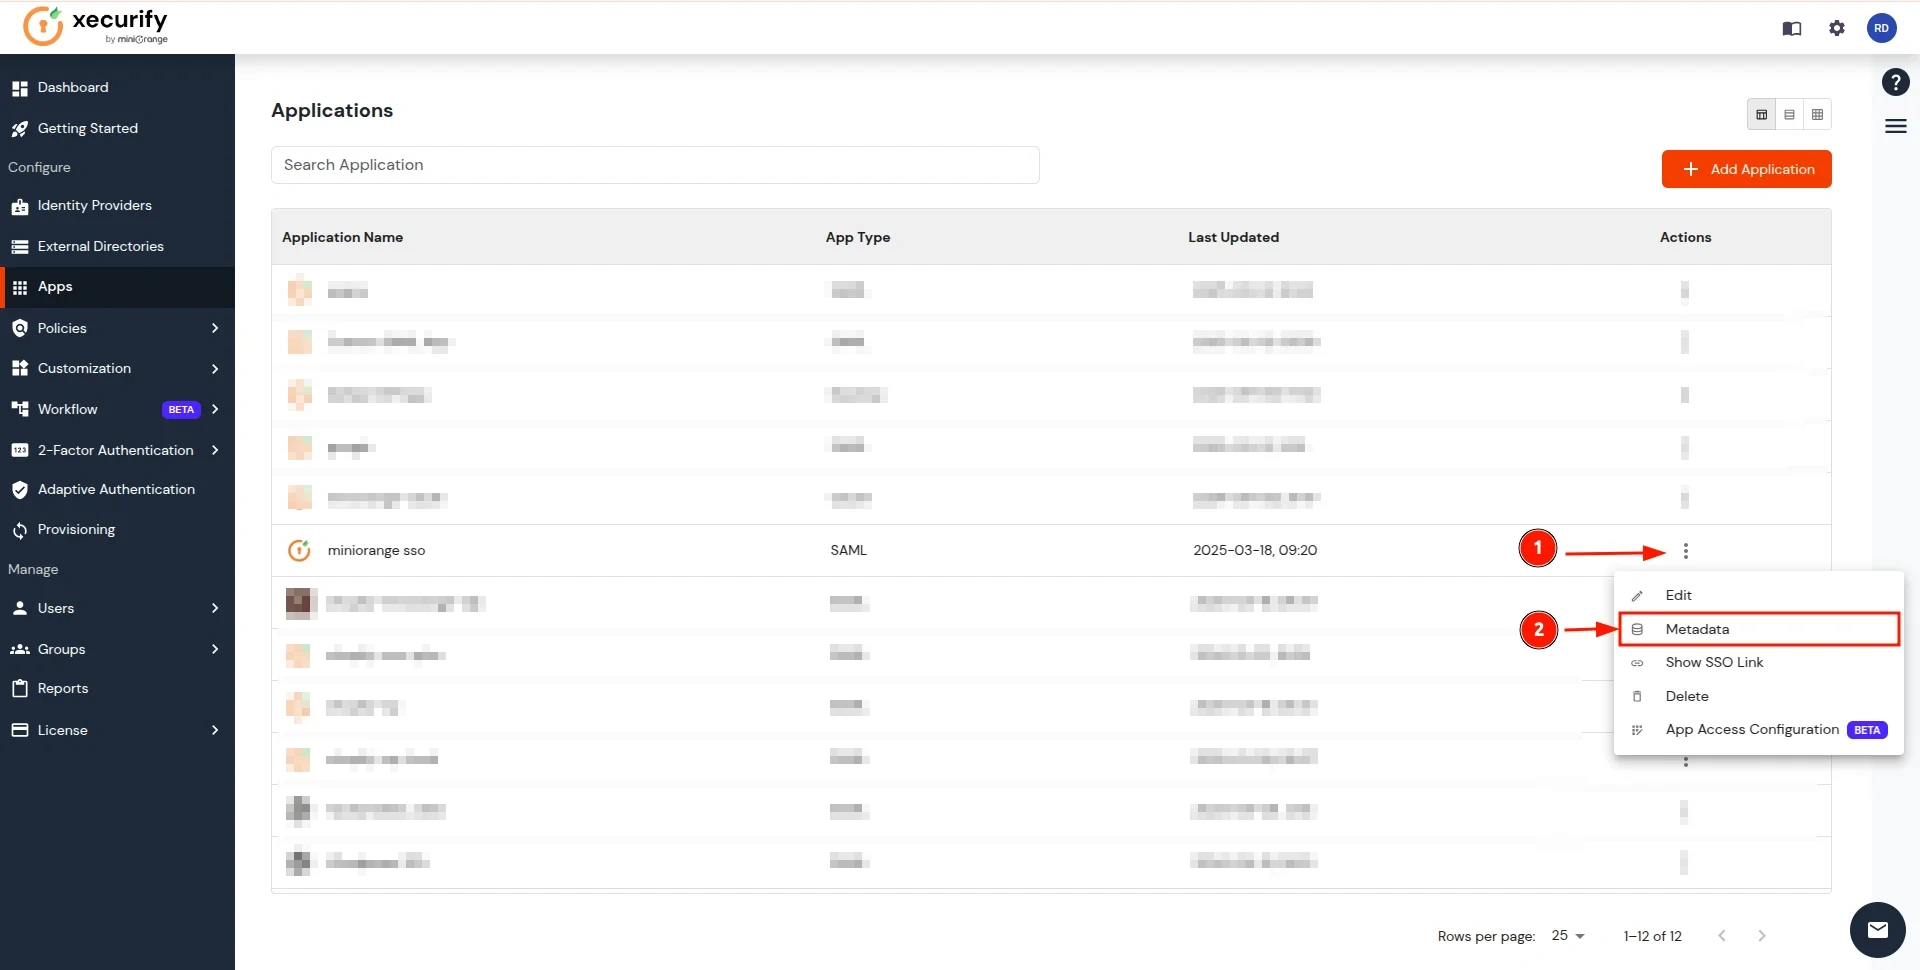
- Now you will be redirected to the Applications, screen where your configured application will be listed. Click on the three dots next to the application and select the Metadata option.
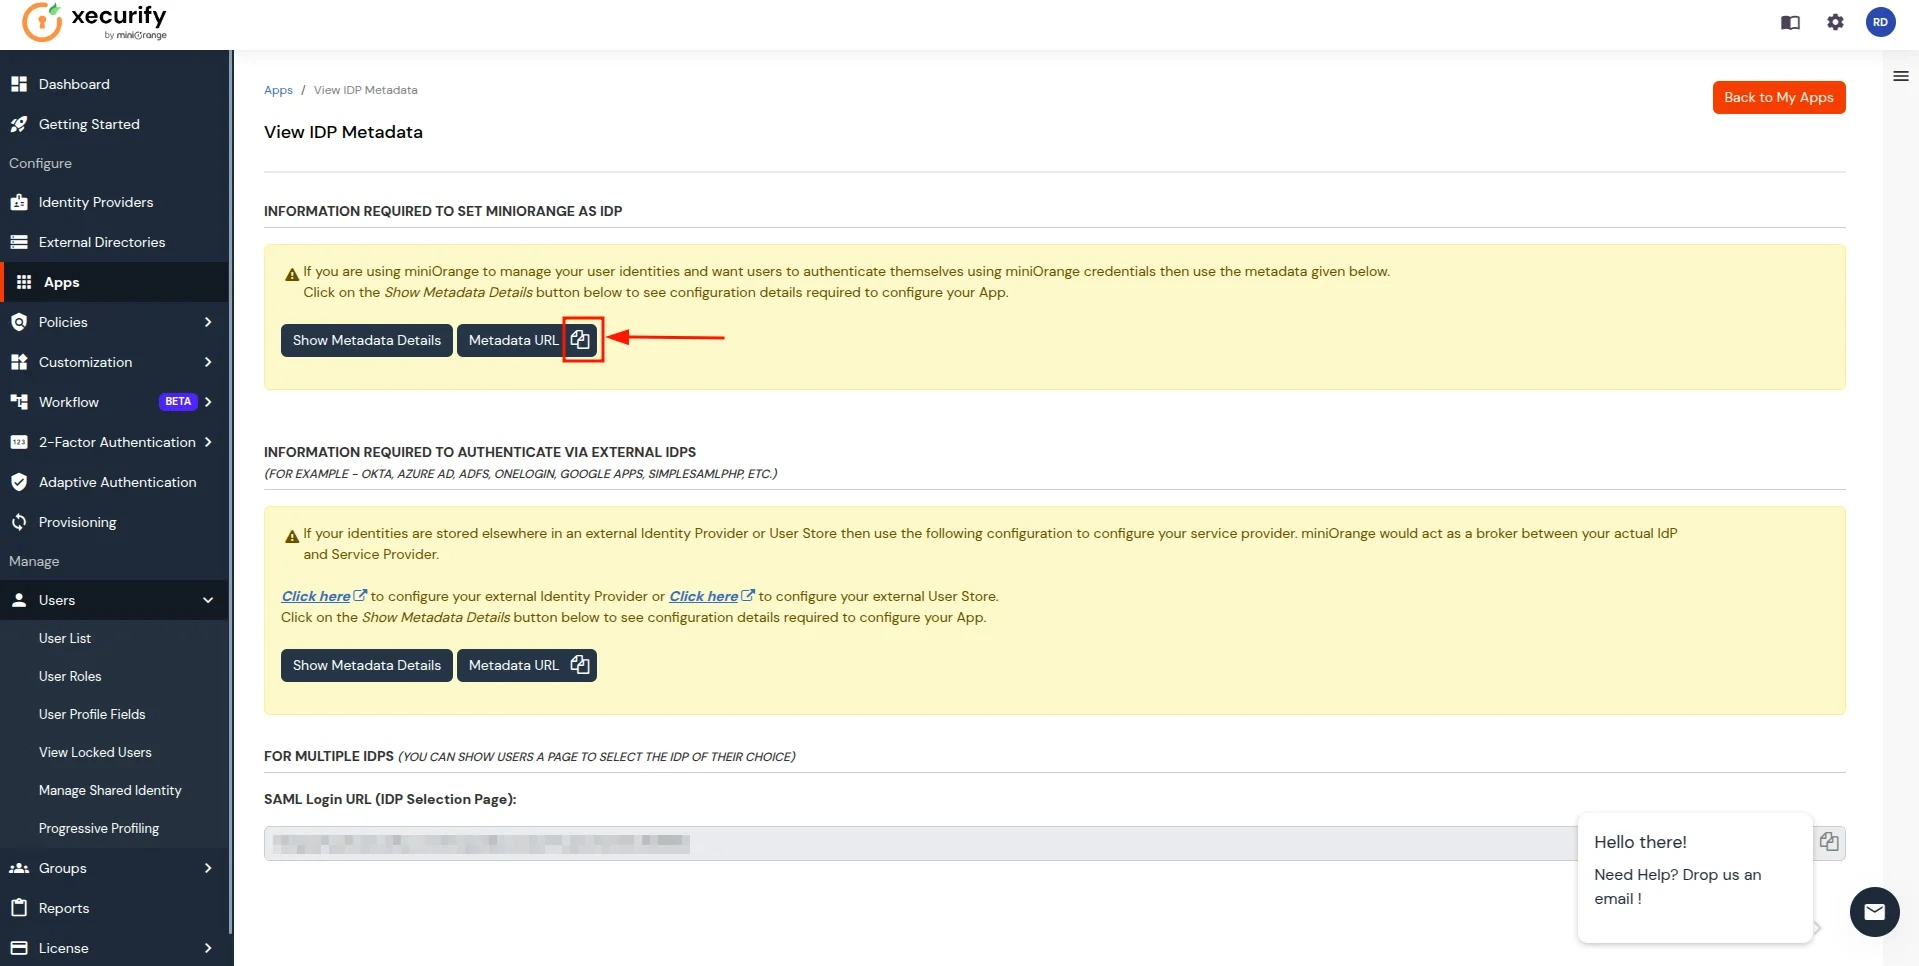
- In the View IDP Metadata section, click on the copy to clipboard next to the Metadata URL to copy it.
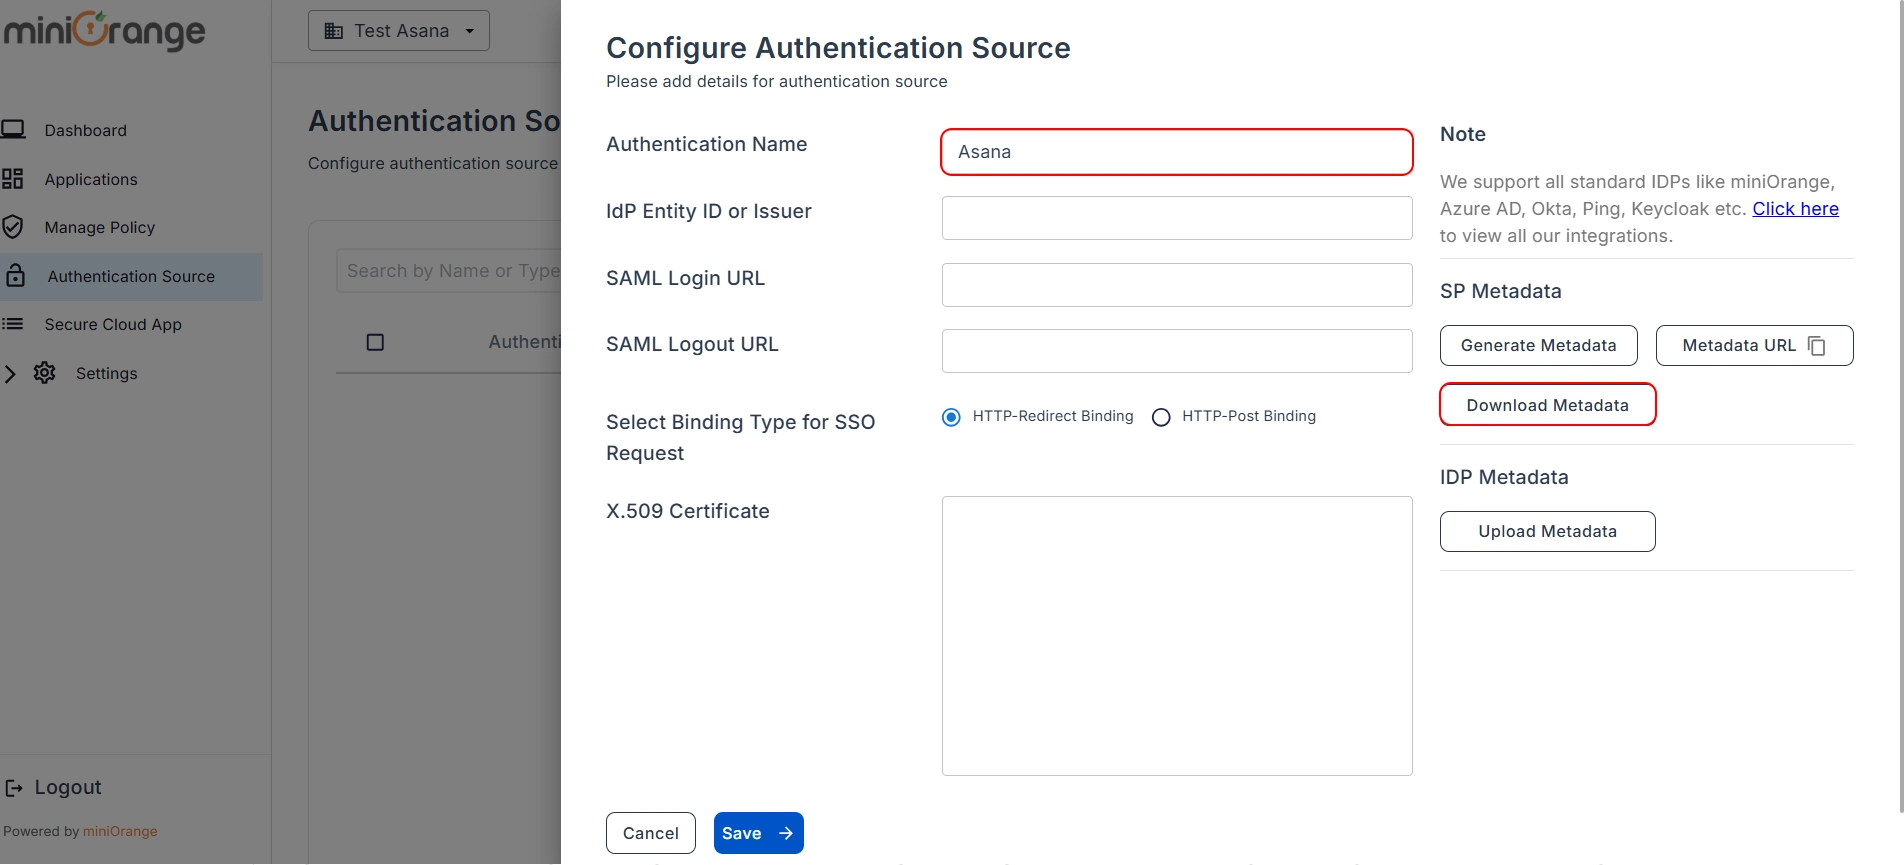
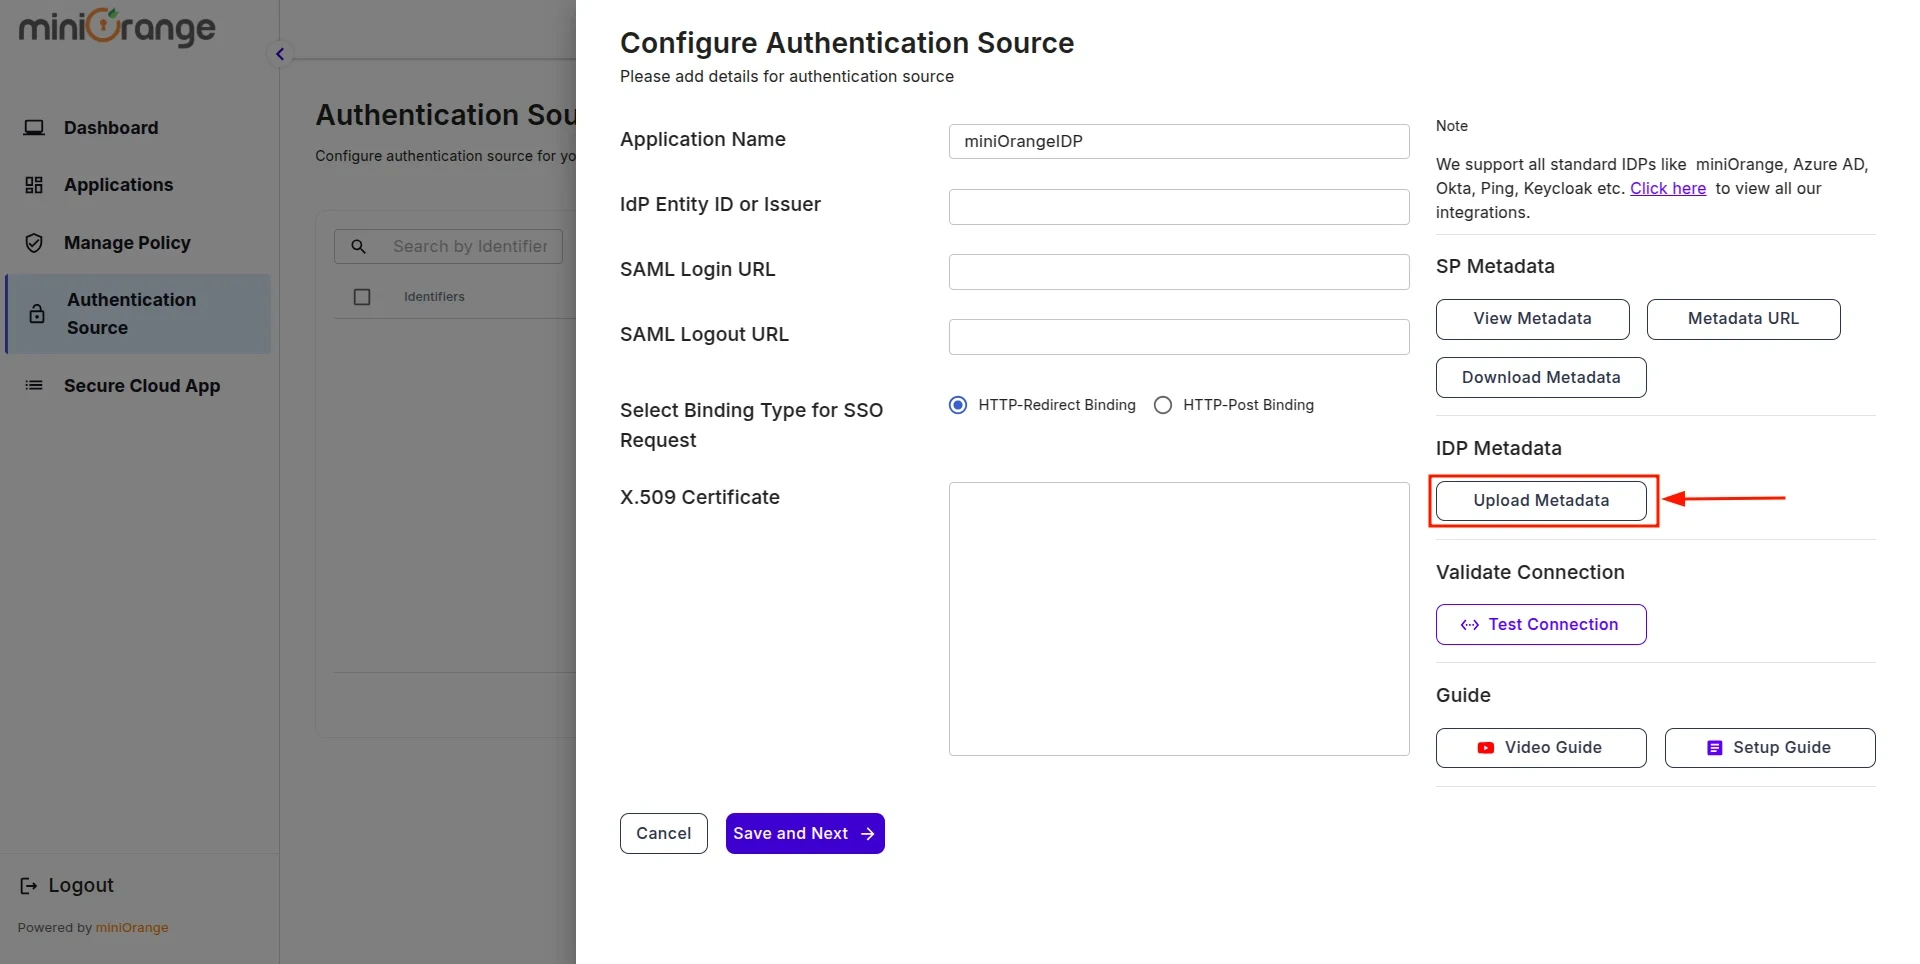
- Return to the CASB Dashboard tab, in the Configure Authentication Source section, locate the IDP Metadata section, and click on Upload Metadata.
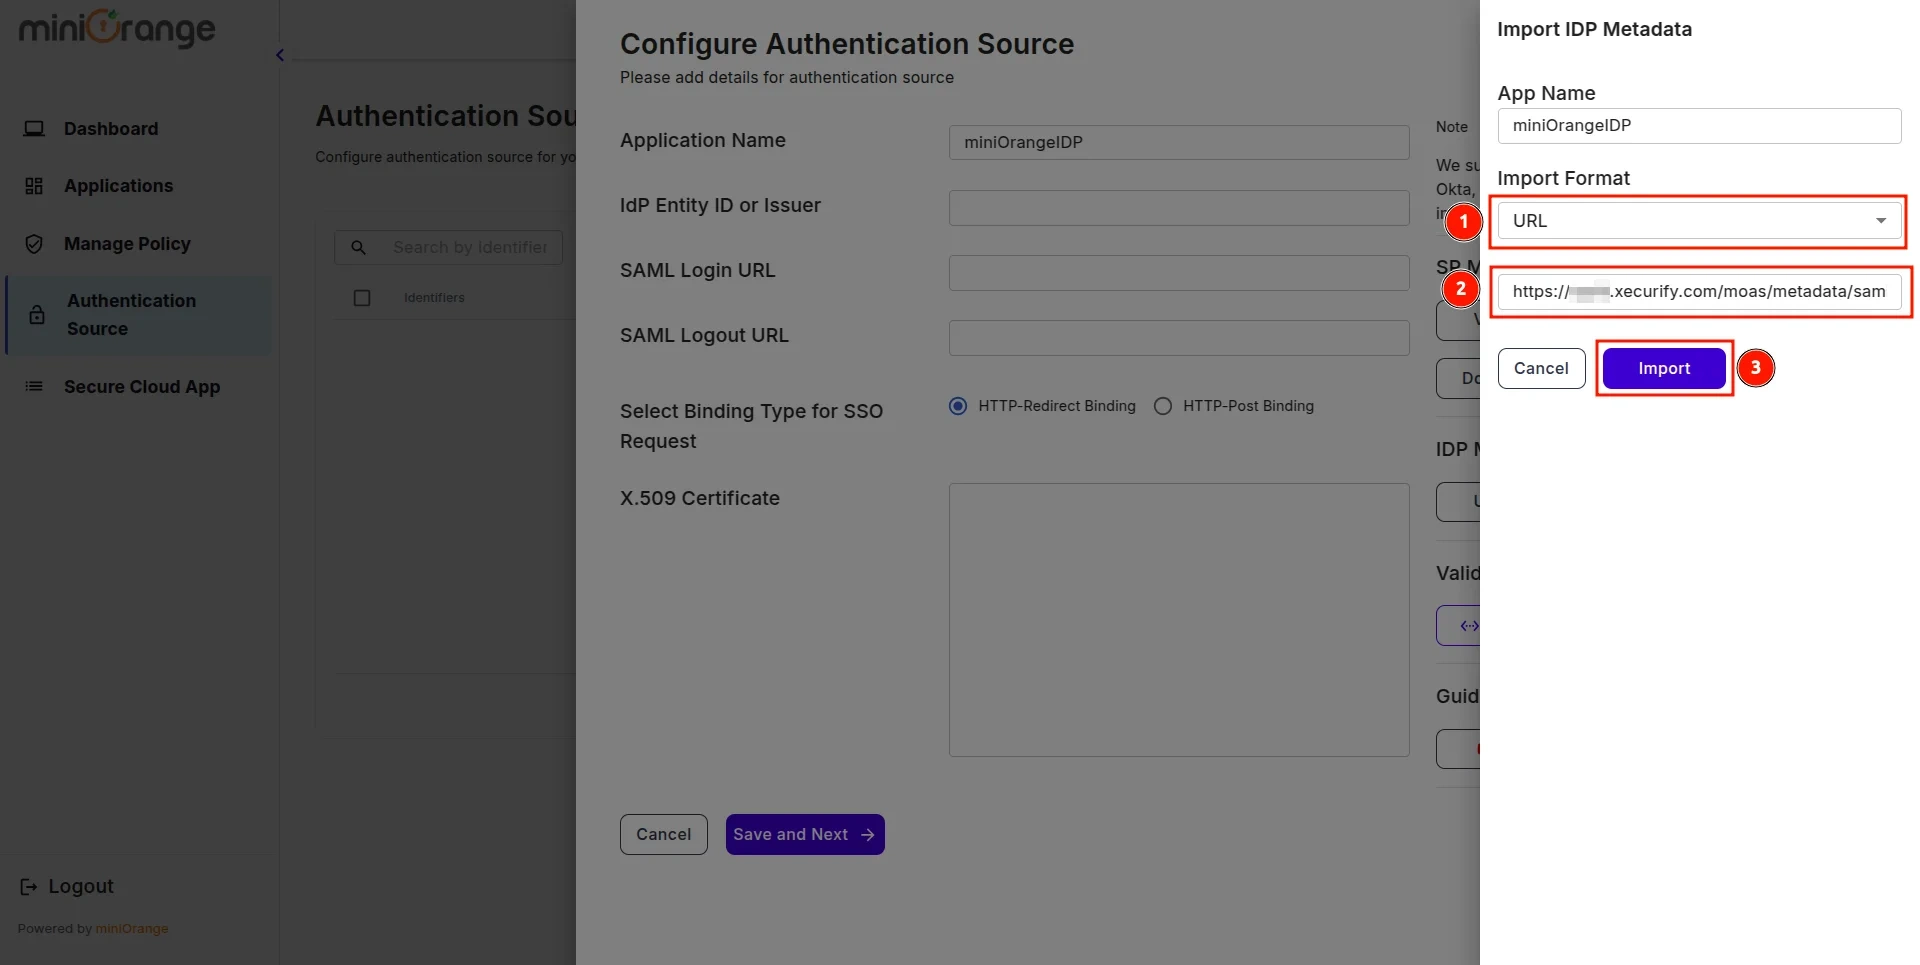
- In Import IDP Metadata, select Import Format as URL, add IDP Metadata url copied from miniOrange IDP, and click the Import button.
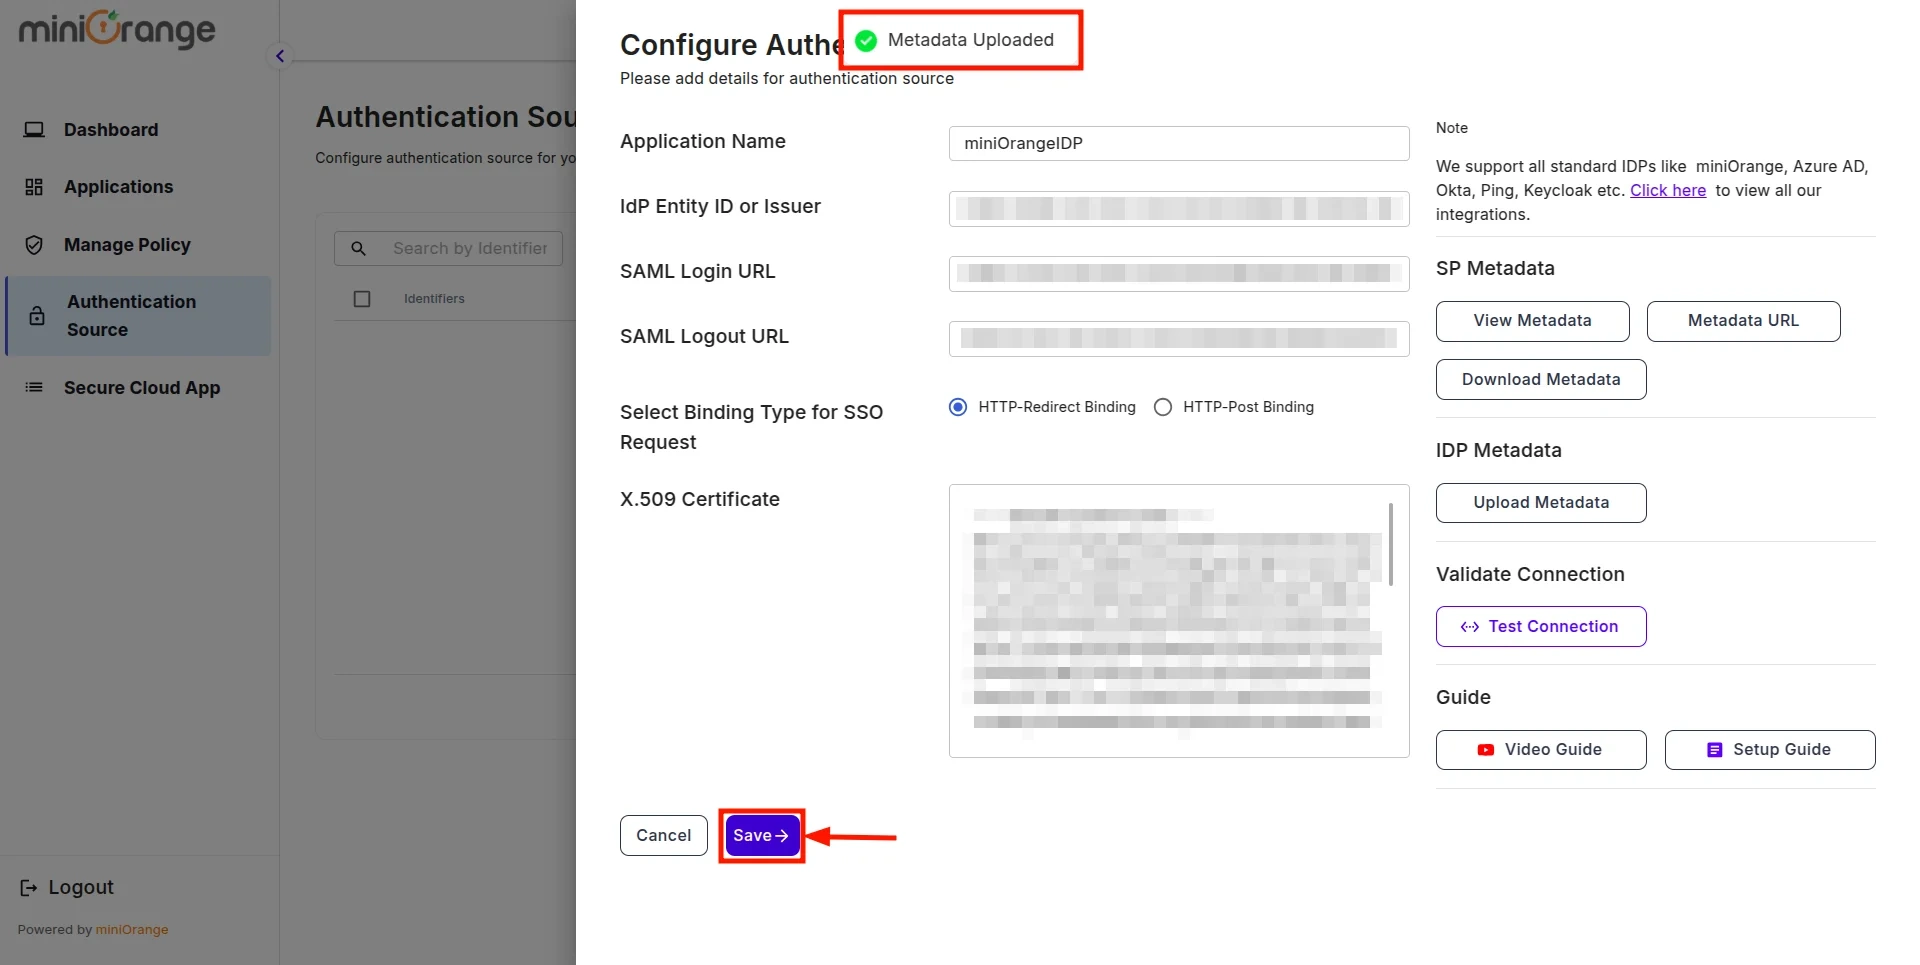
- A prompt will appear confirming that the metadata has been uploaded successfully. Click Save to finalize the configuration.
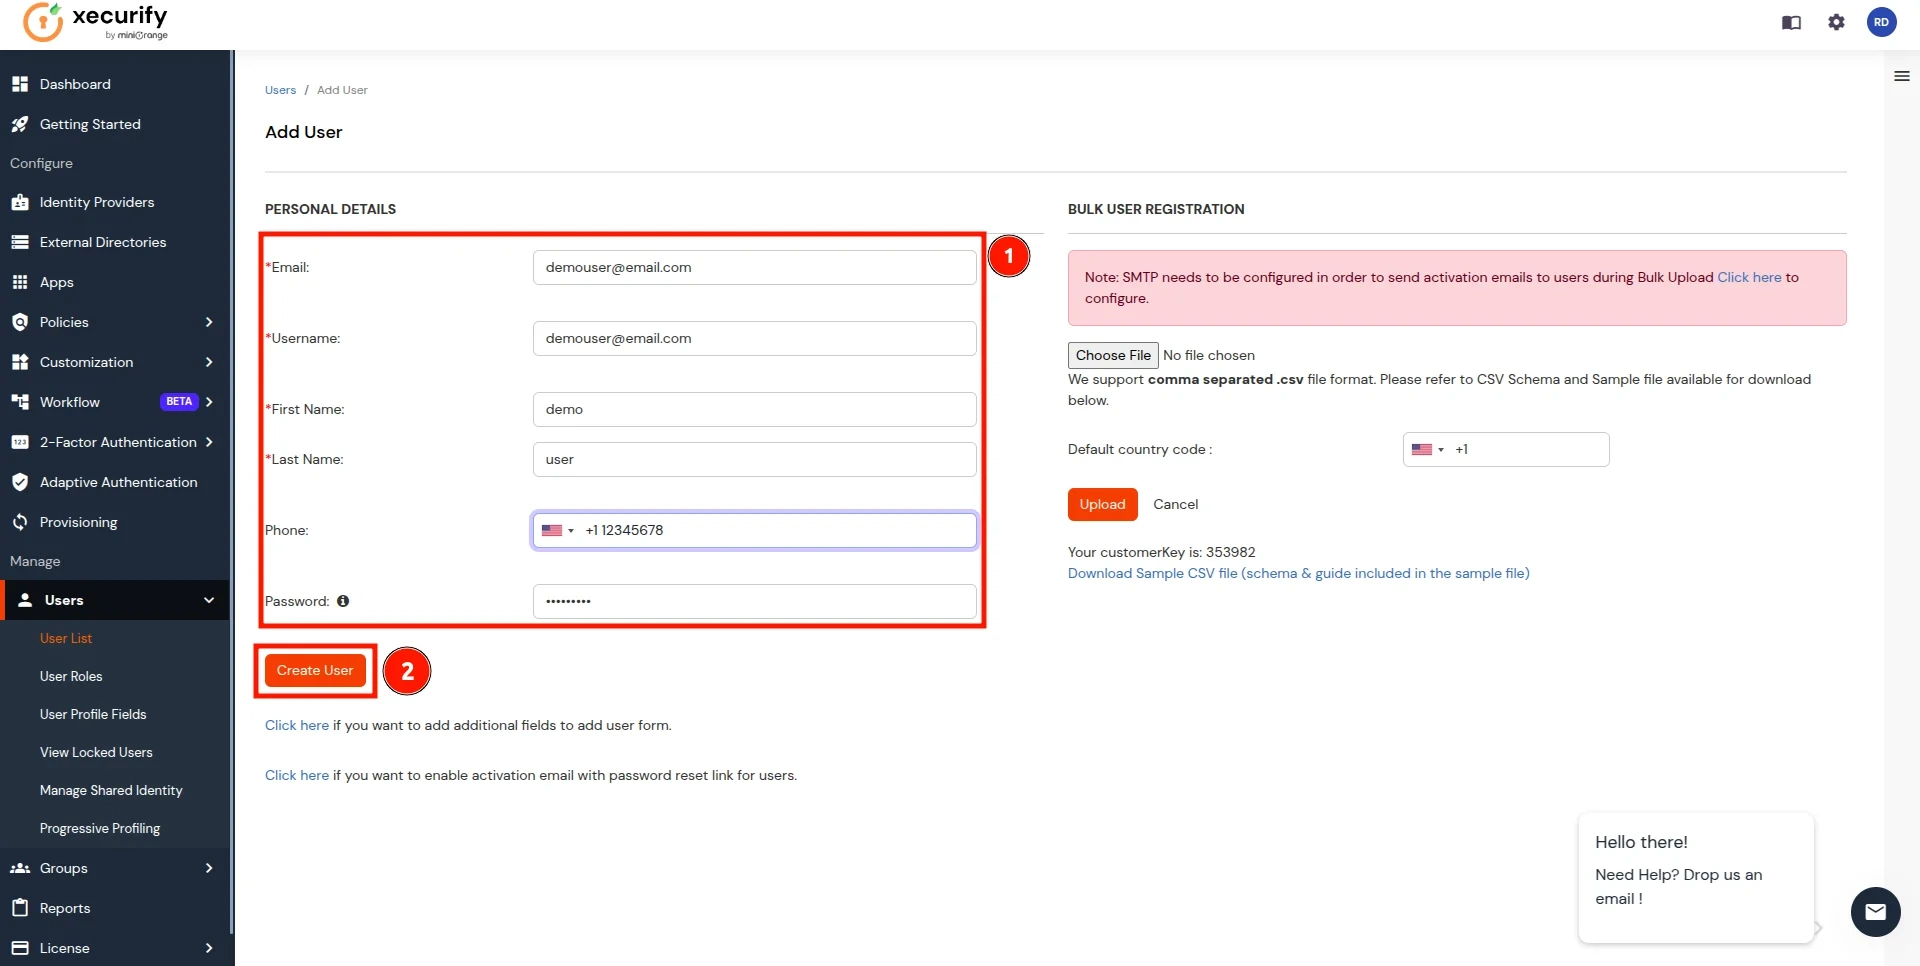
- Now, return to miniOrange IDP, click on the Users tab in the navigation menu on the left and select User List.

- In the Add User page, add the user's personal details like Email, Username, First Name, Last Name, Phone and Password and click on the Create User Button. (To add multiple users, use Bulk User Registration feature)
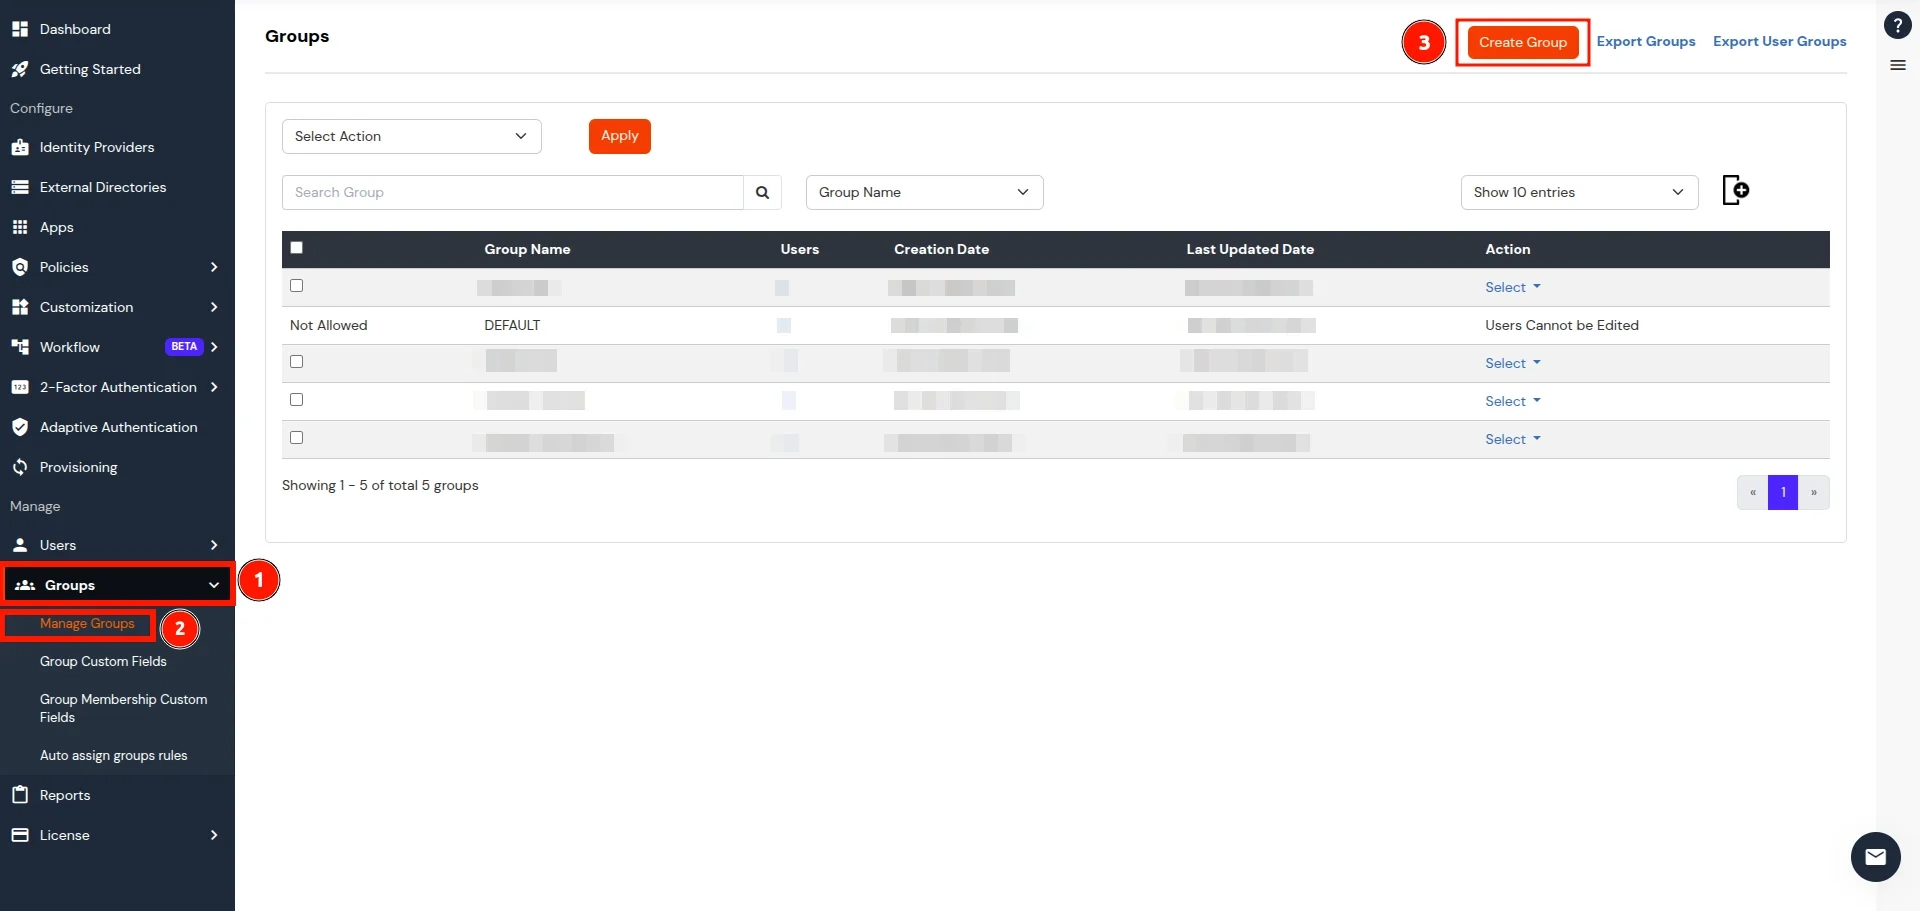
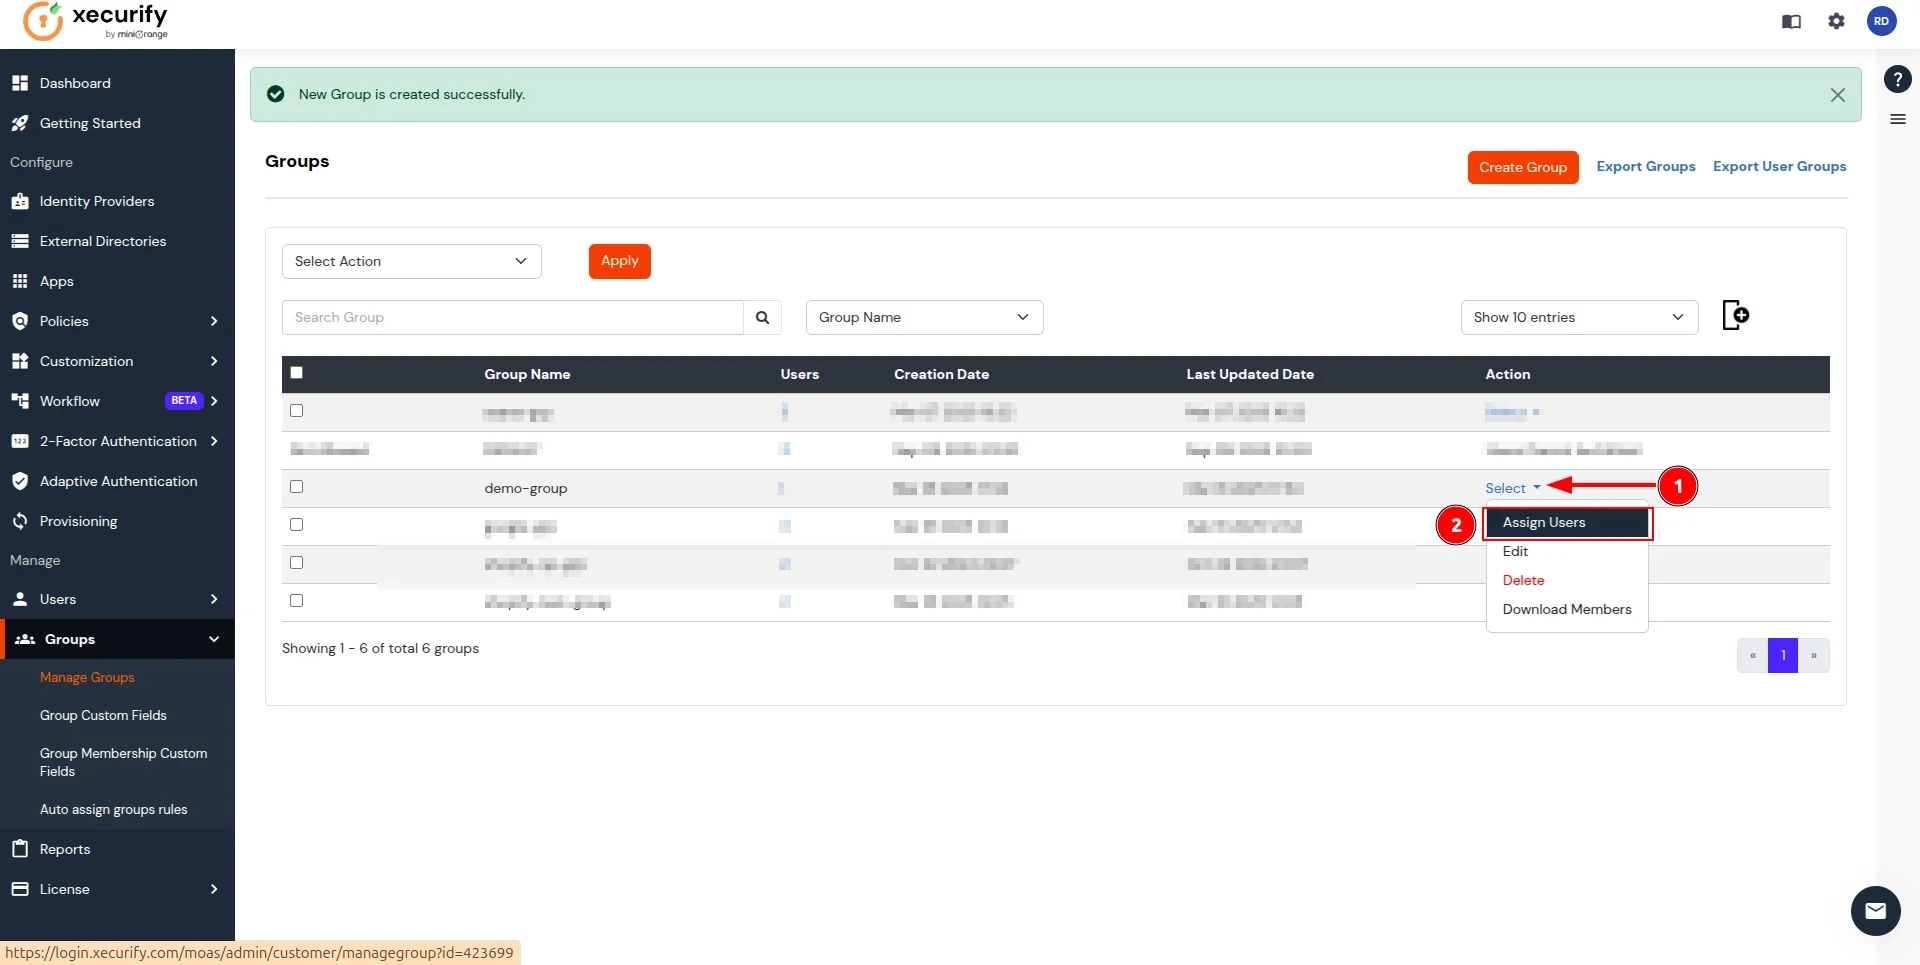
- Now, go to the Groups tab, select Manage Groups, and click on the Create Group button.
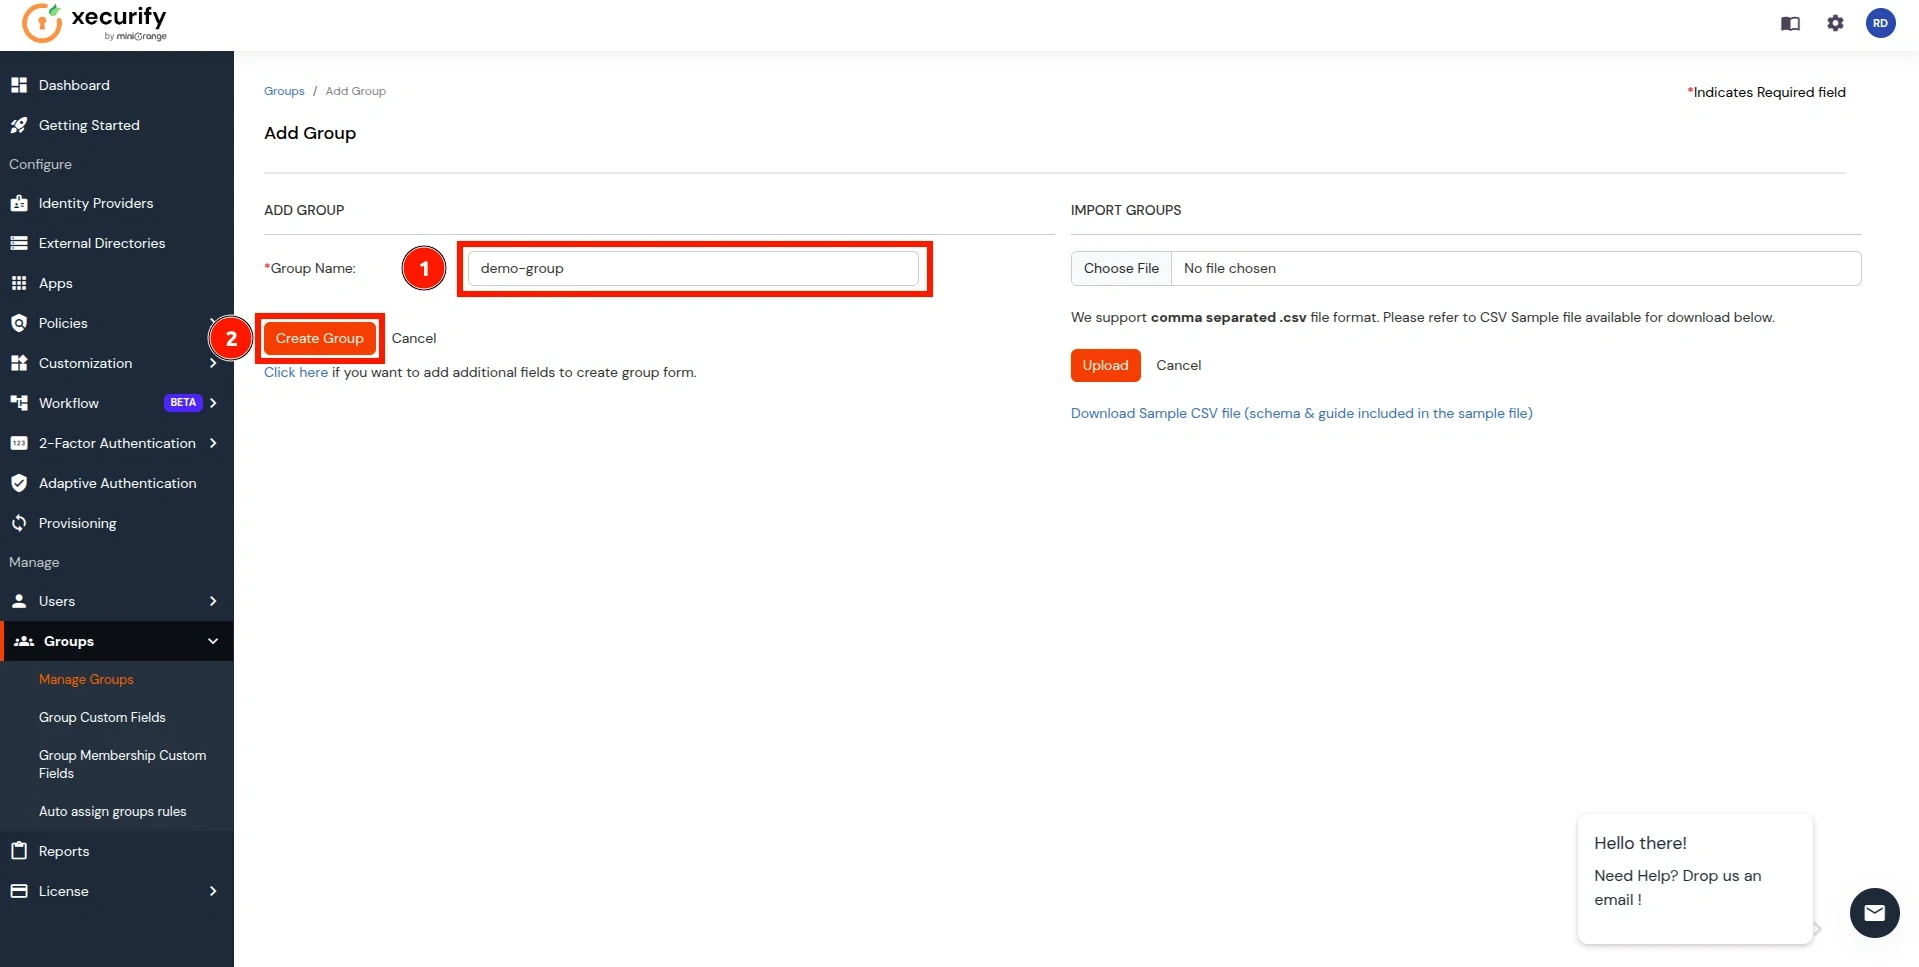
- In the Add Group section, enter a name for the group in the Group Name field and click on the Create Group button.
- In the Manage Groups section, search for the newly created group and click on the select button next to it. Click on Assign Users option in the dropdown.
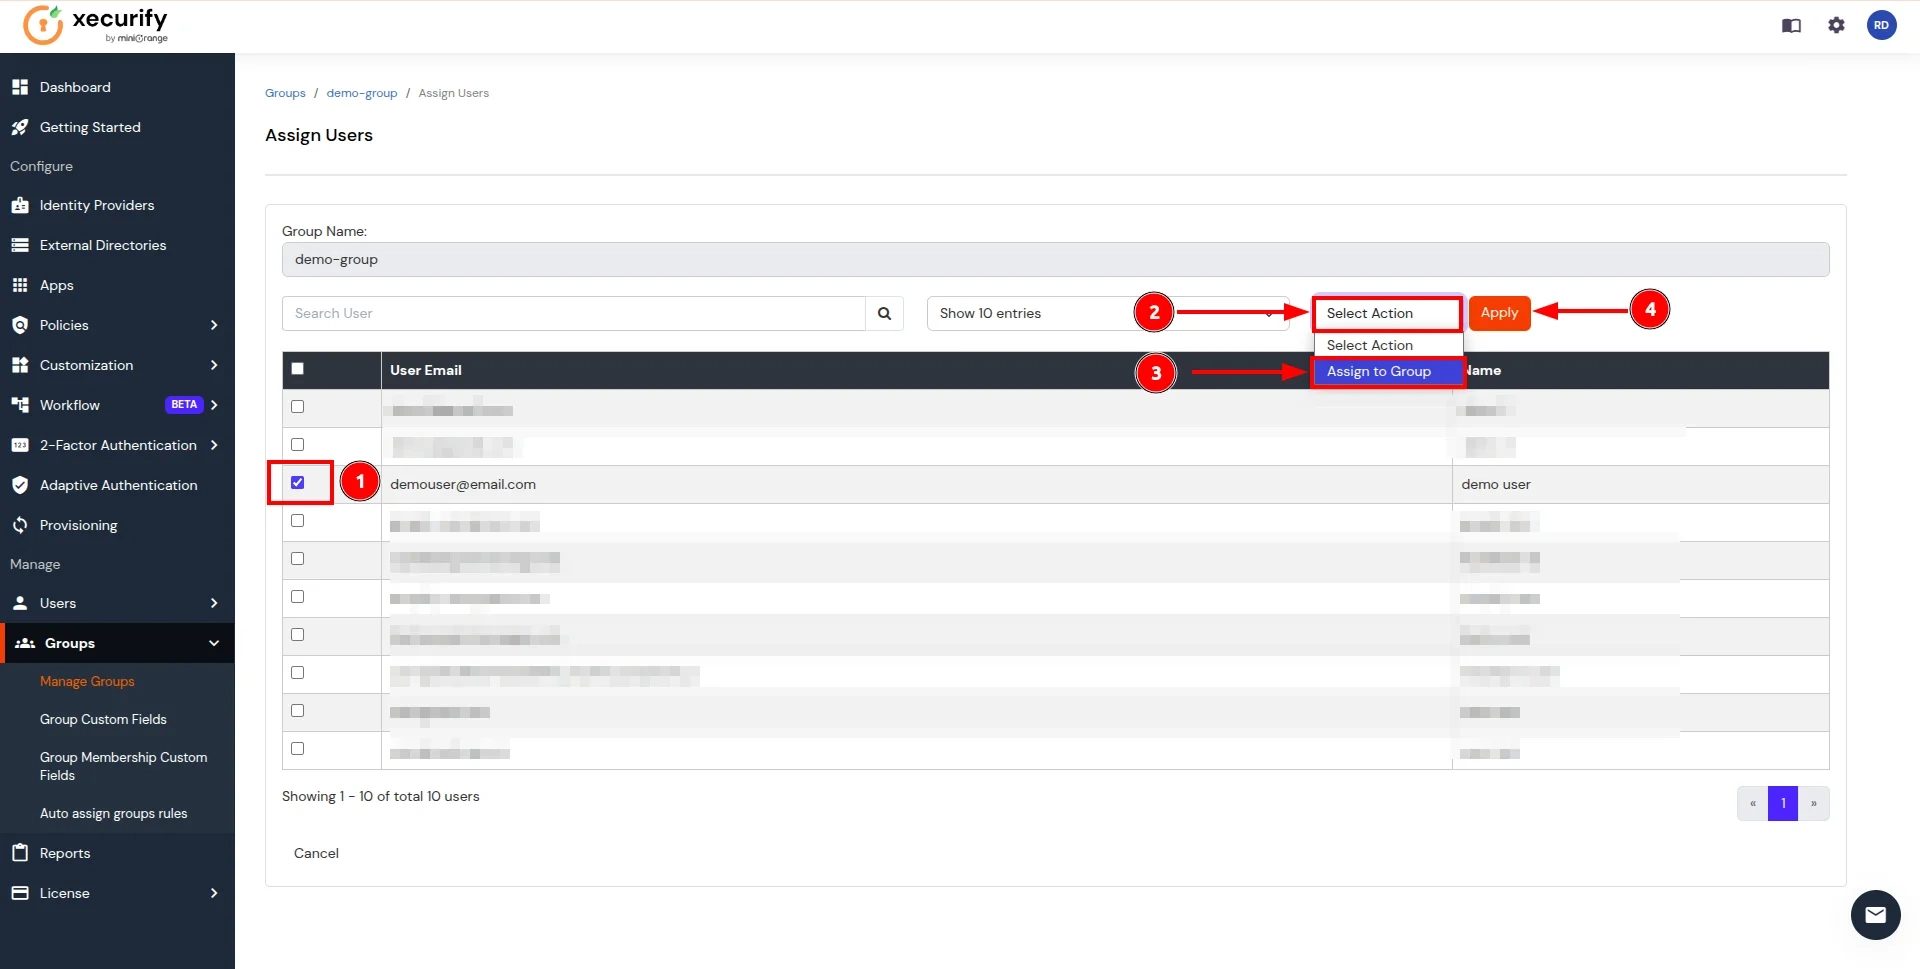
- On the Assign Users page, follow these steps:
- select the checkbox for the user created in here.
- Click on the Select Action button and choose Assign to group.
- Click Apply to add users to the group.
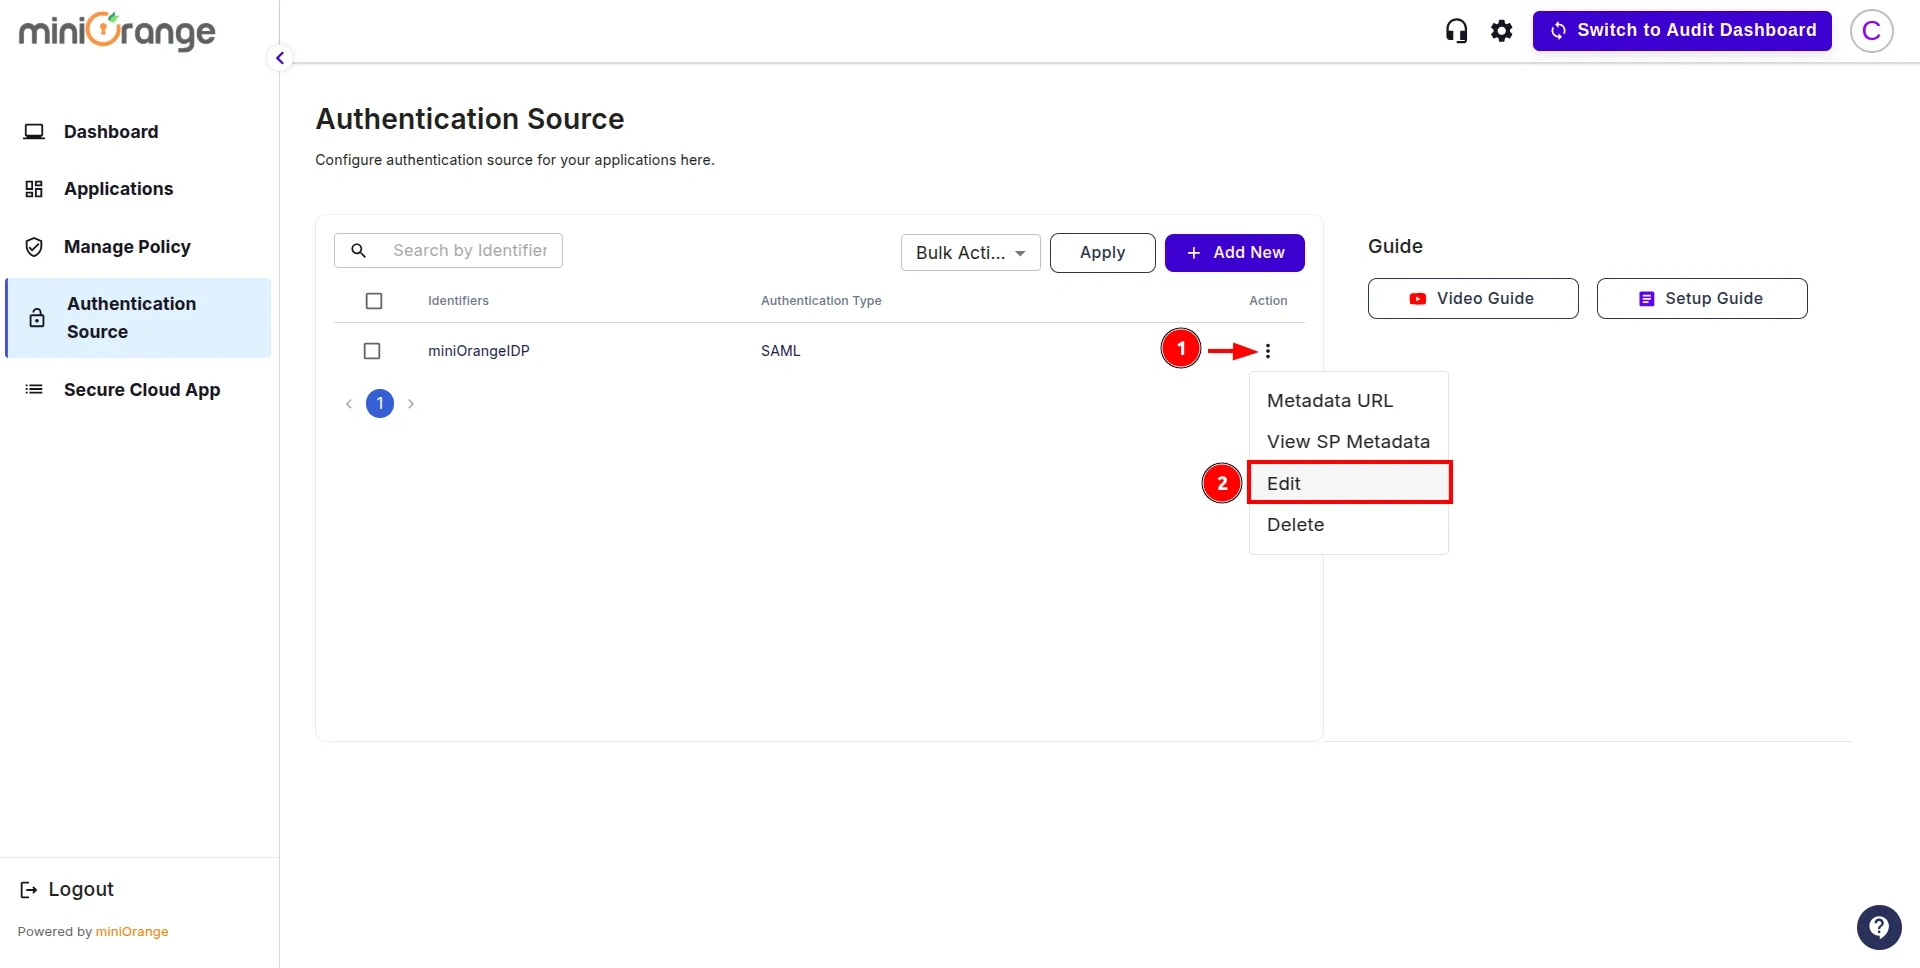
- Now, return to the CASB Dashboard and click on Edit in the action button for the Authentication Source.
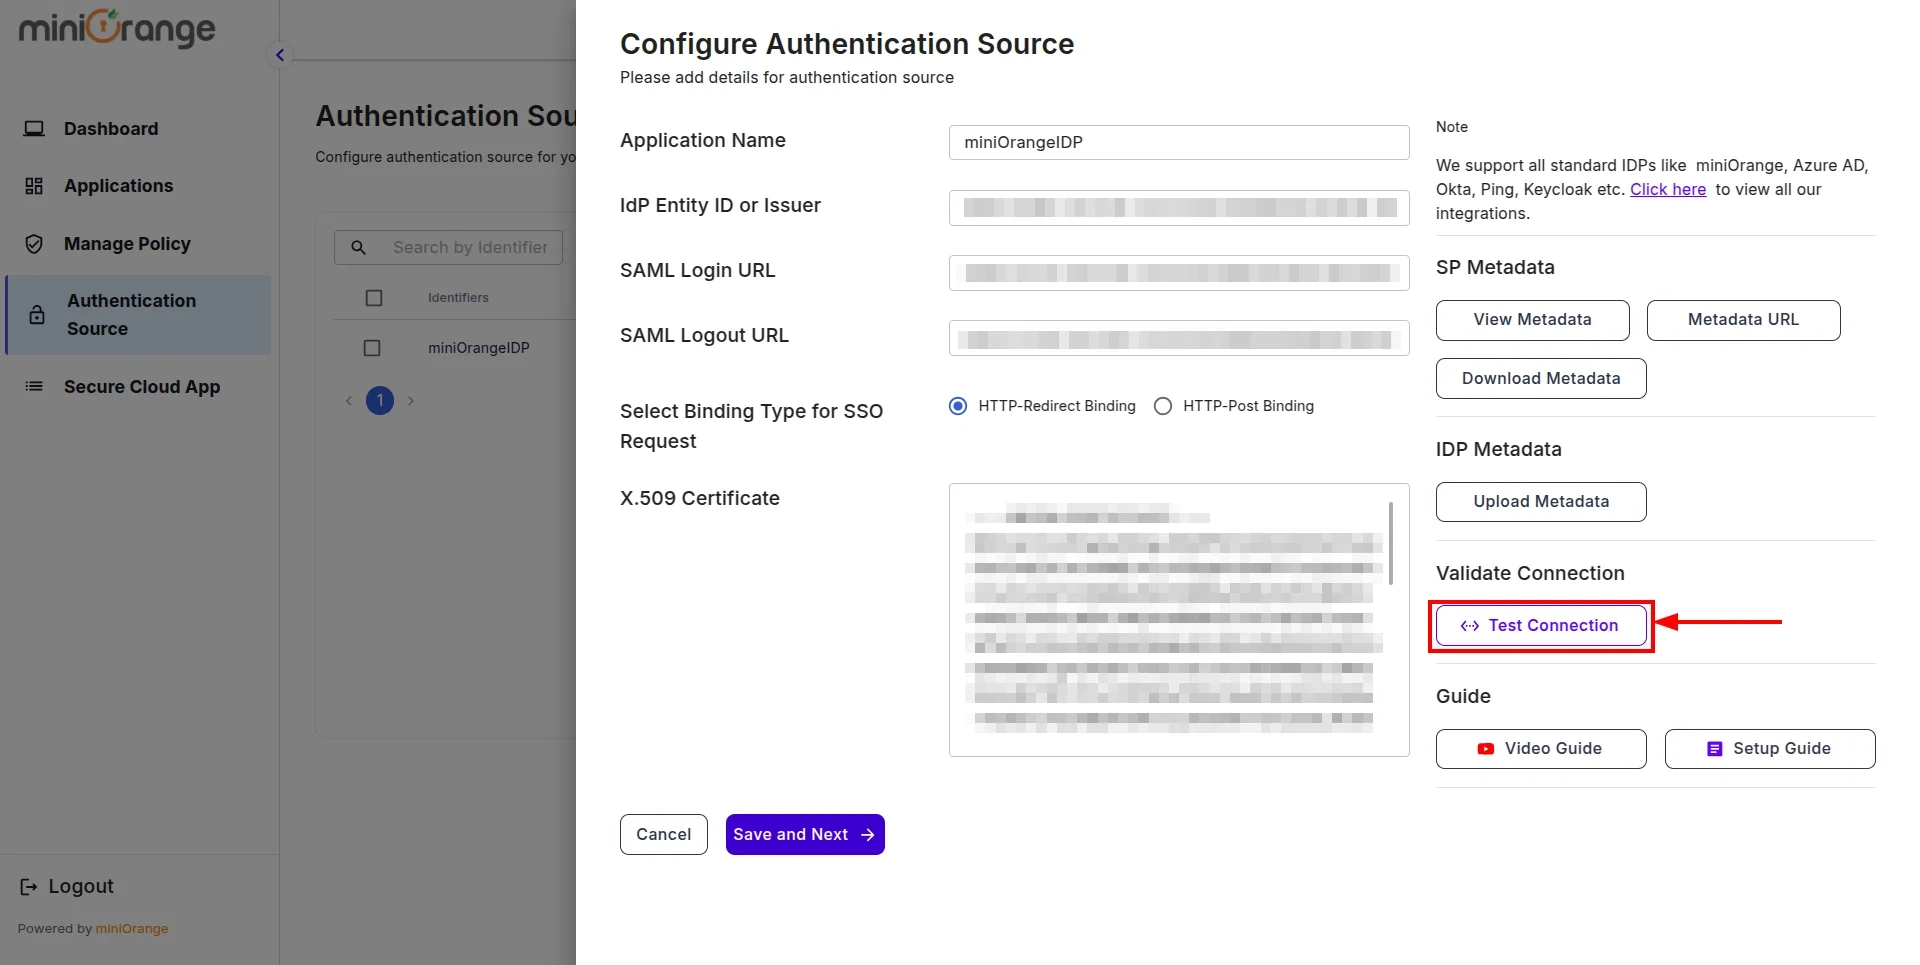
- Click on the Test Connection button.
- You will be redirected to the miniOrange IDP Sign-In screen. Enter the credentials for the user added in the previous steps.
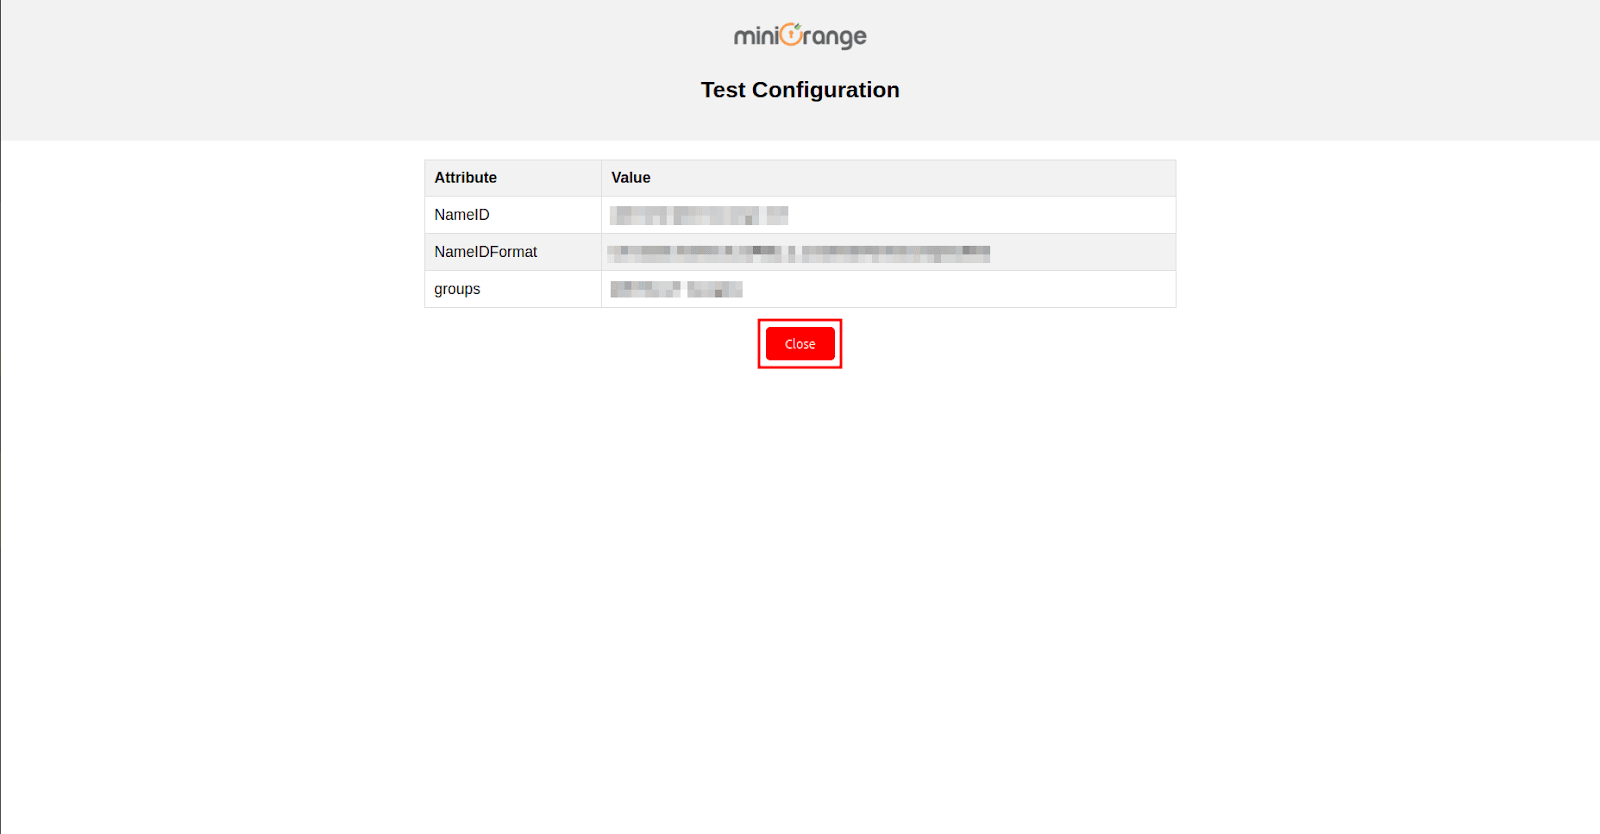
- After successful authentication, you will see a screen displaying Test Connection Details. On the left side, you will find attribute keys, and on the right side, their corresponding values.
Step 3: Configure Asana in CASB
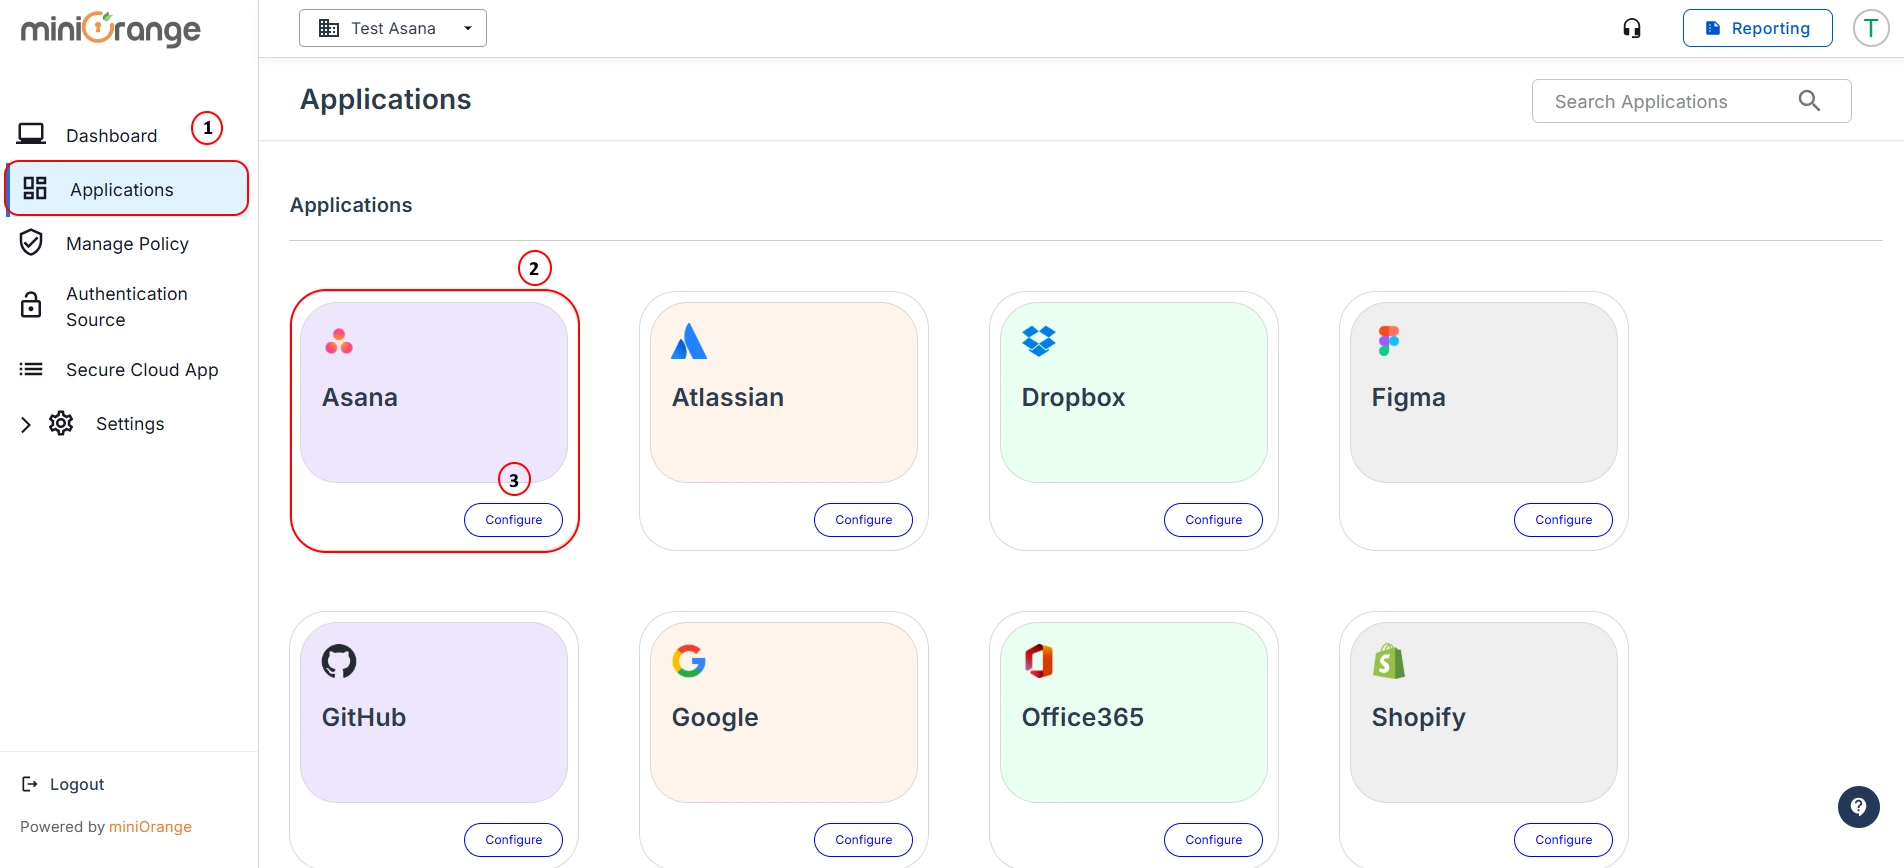
- Once this is done, navigate to the Applications section from the sidebar, go to Asana, and click on Configure.
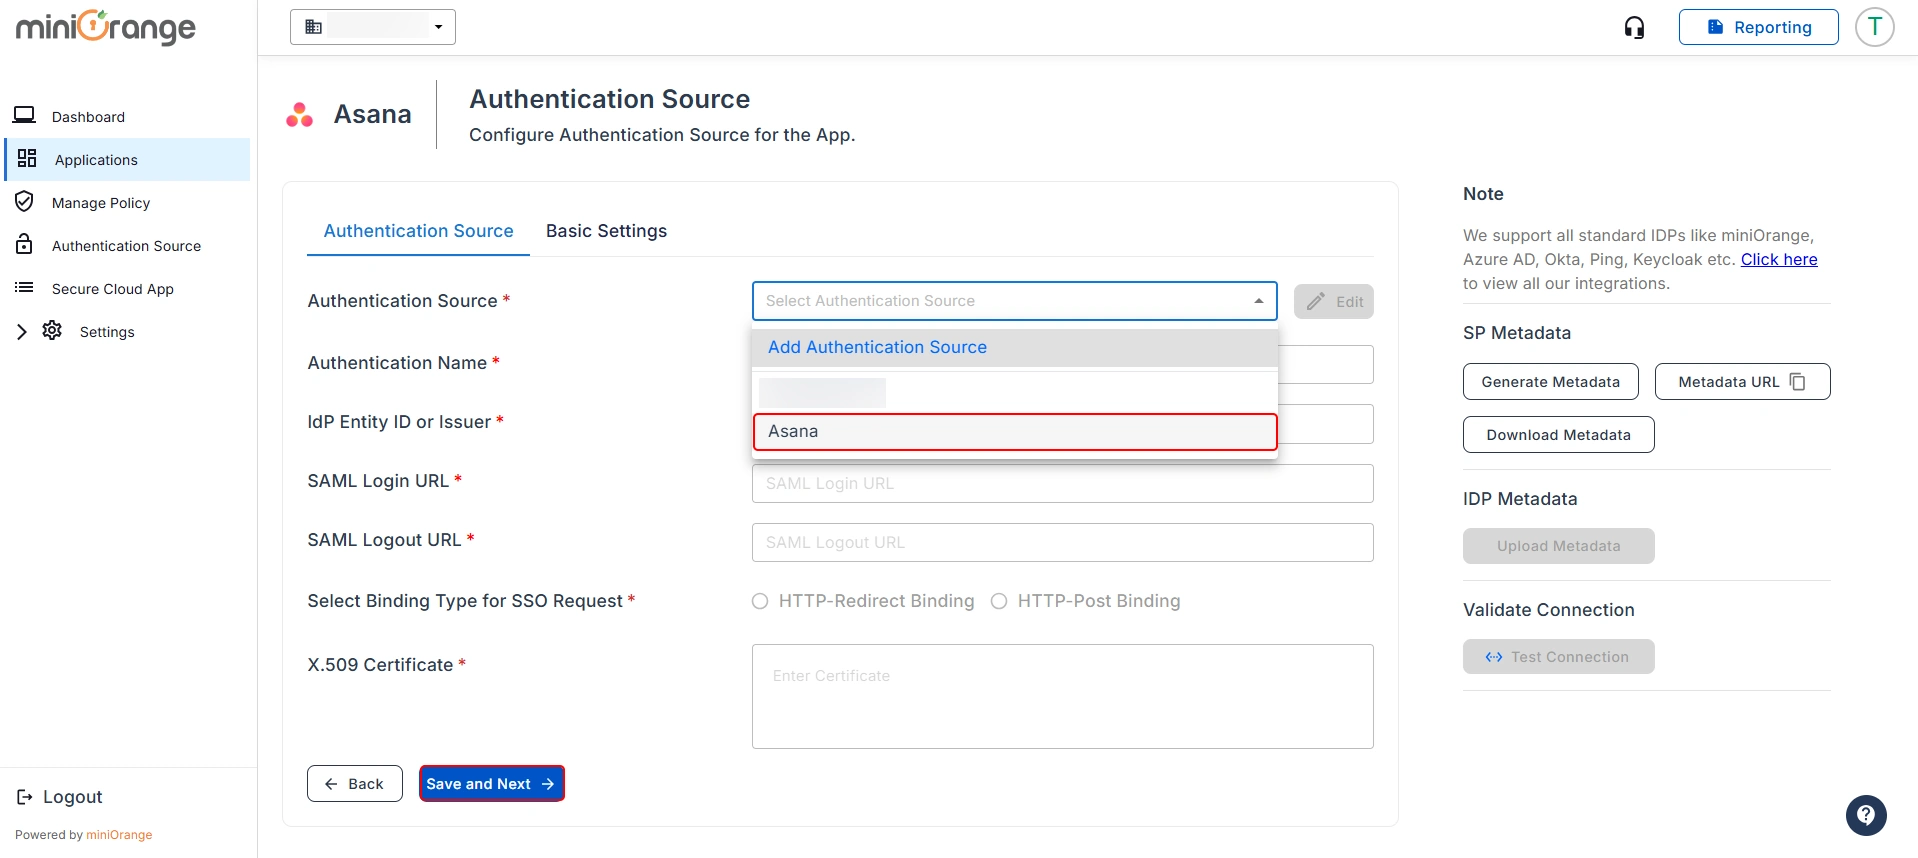
- In this section, open the Authentication Source dropdown, select the authentication source you created earlier, and click Save and Next.
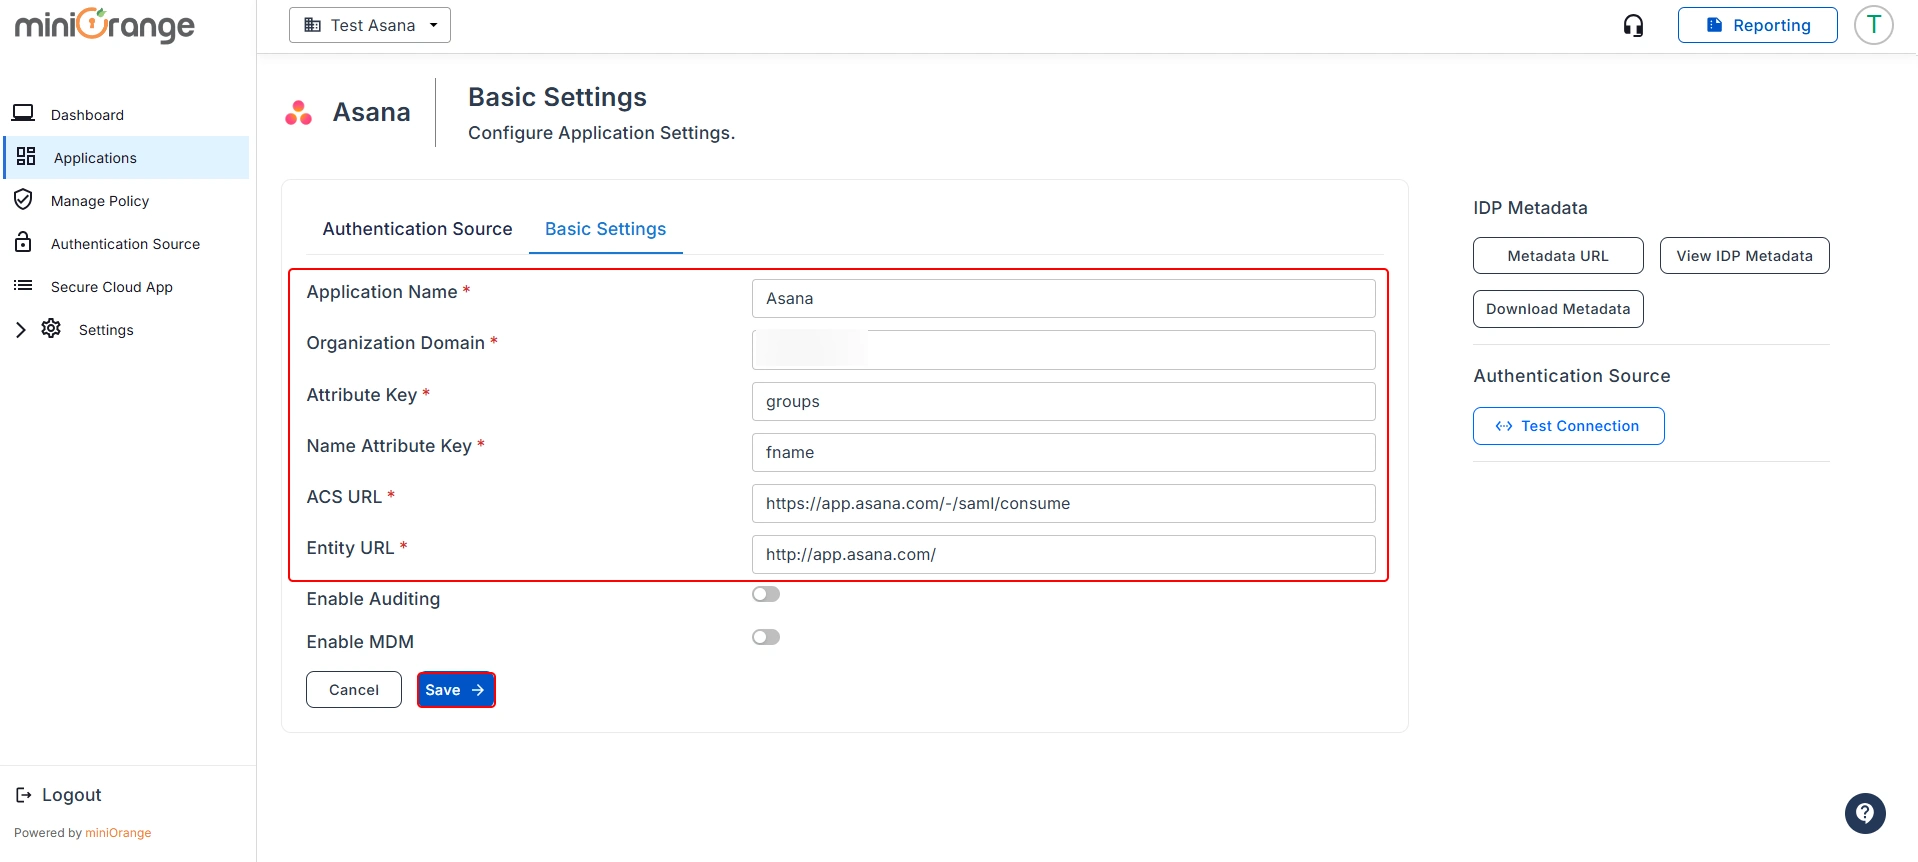
- Now, you will be redirected to the Basic Settings section. Fill in the following details to configure the Asana Application:
| Organization Name: |
Enter the name of your organization. |
| Organization Domain: |
Enter your organization's domain on Asana. |
| Attribute Key: |
Enter the Group Attribute Key for the app, which you have configured in the IDP under the SAML attribute section. |
| Name Attribute Key: |
Enter the attribute names, such as fname, lname, etc., that you have configured in the earlier steps in the SAML Attributes section. |
| Enter ACS URL: |
Enter the Asana Entity URL as : https://app.asana.com/-/saml/consume |
| Enter Entity URL: |
Enter the Entity ACS URL as : http://app.asana.com/ |
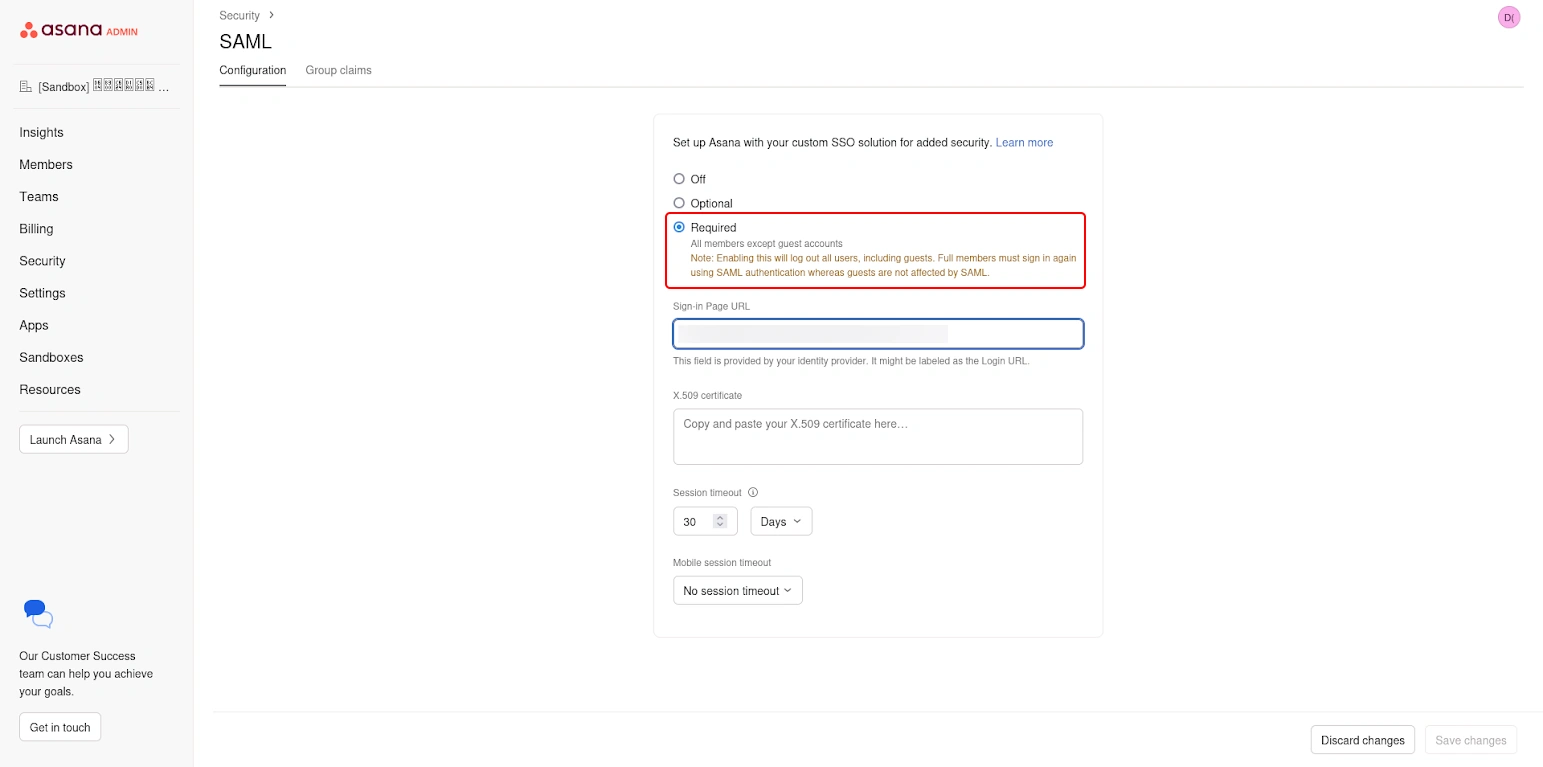
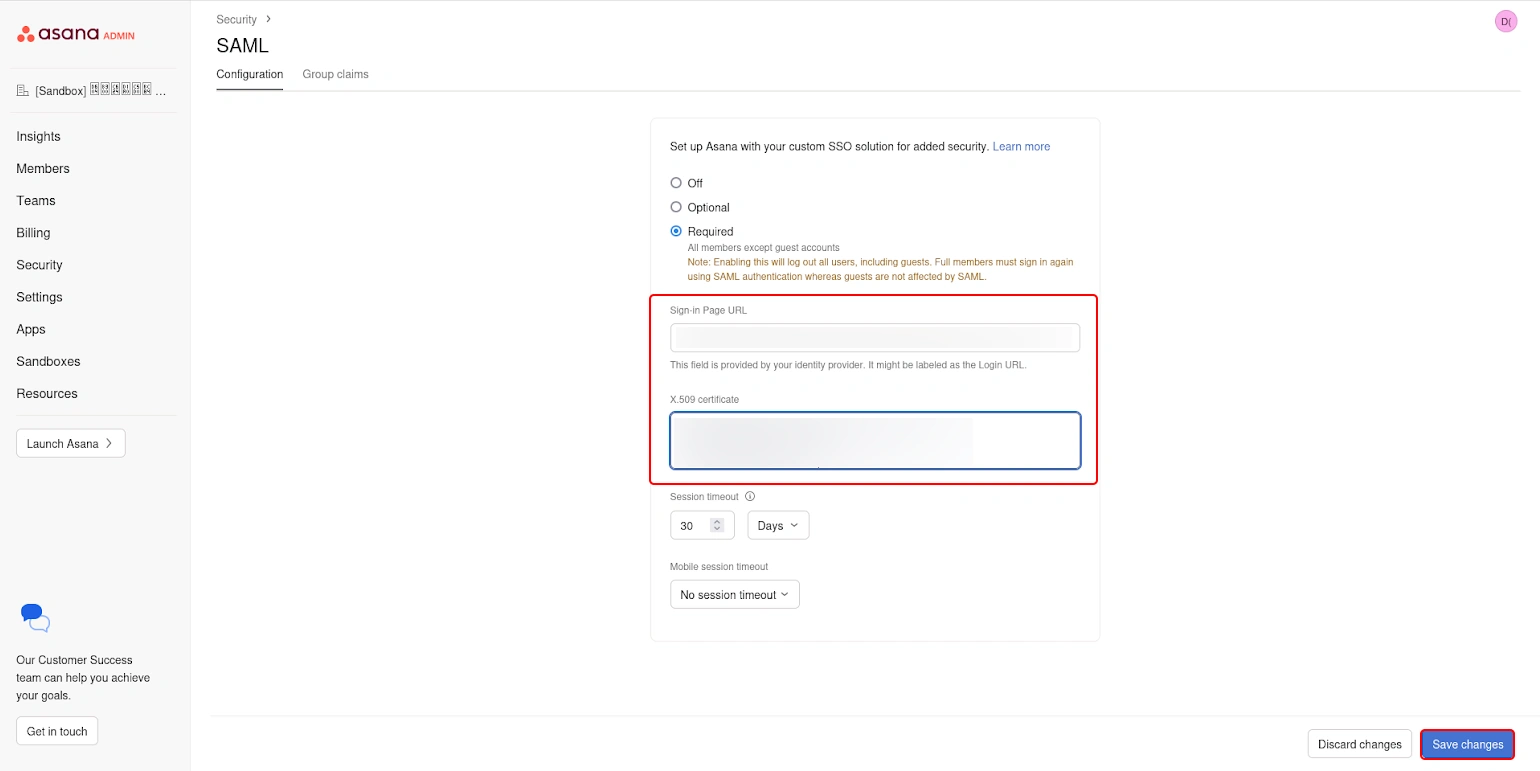
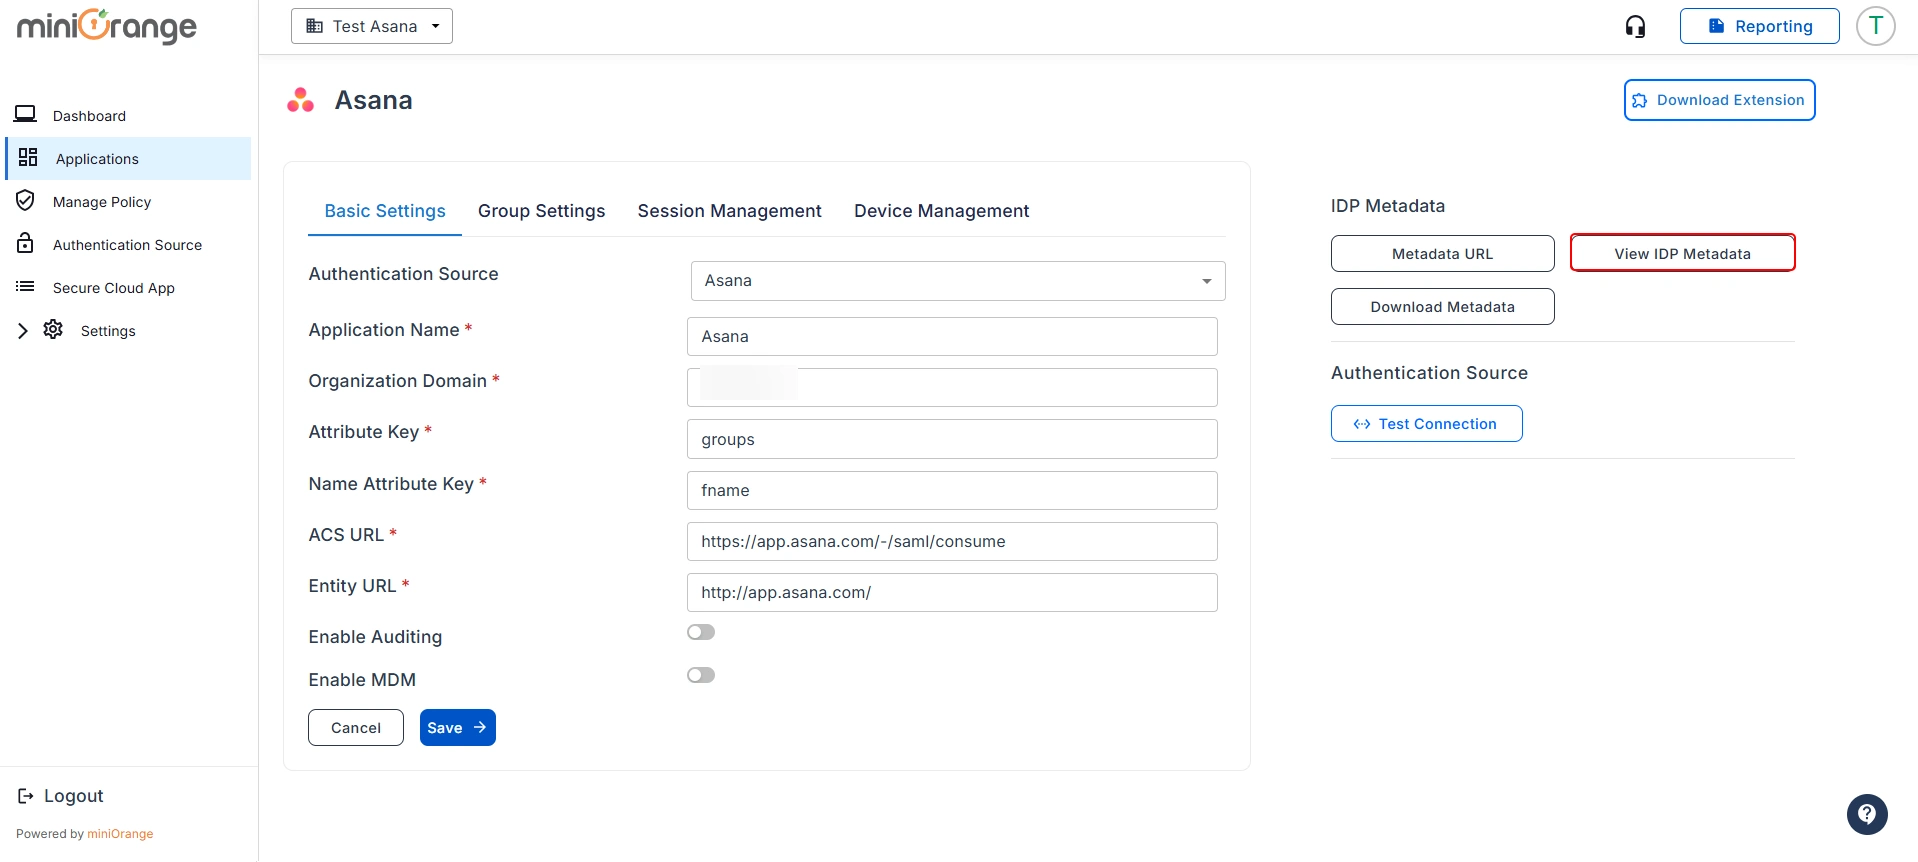
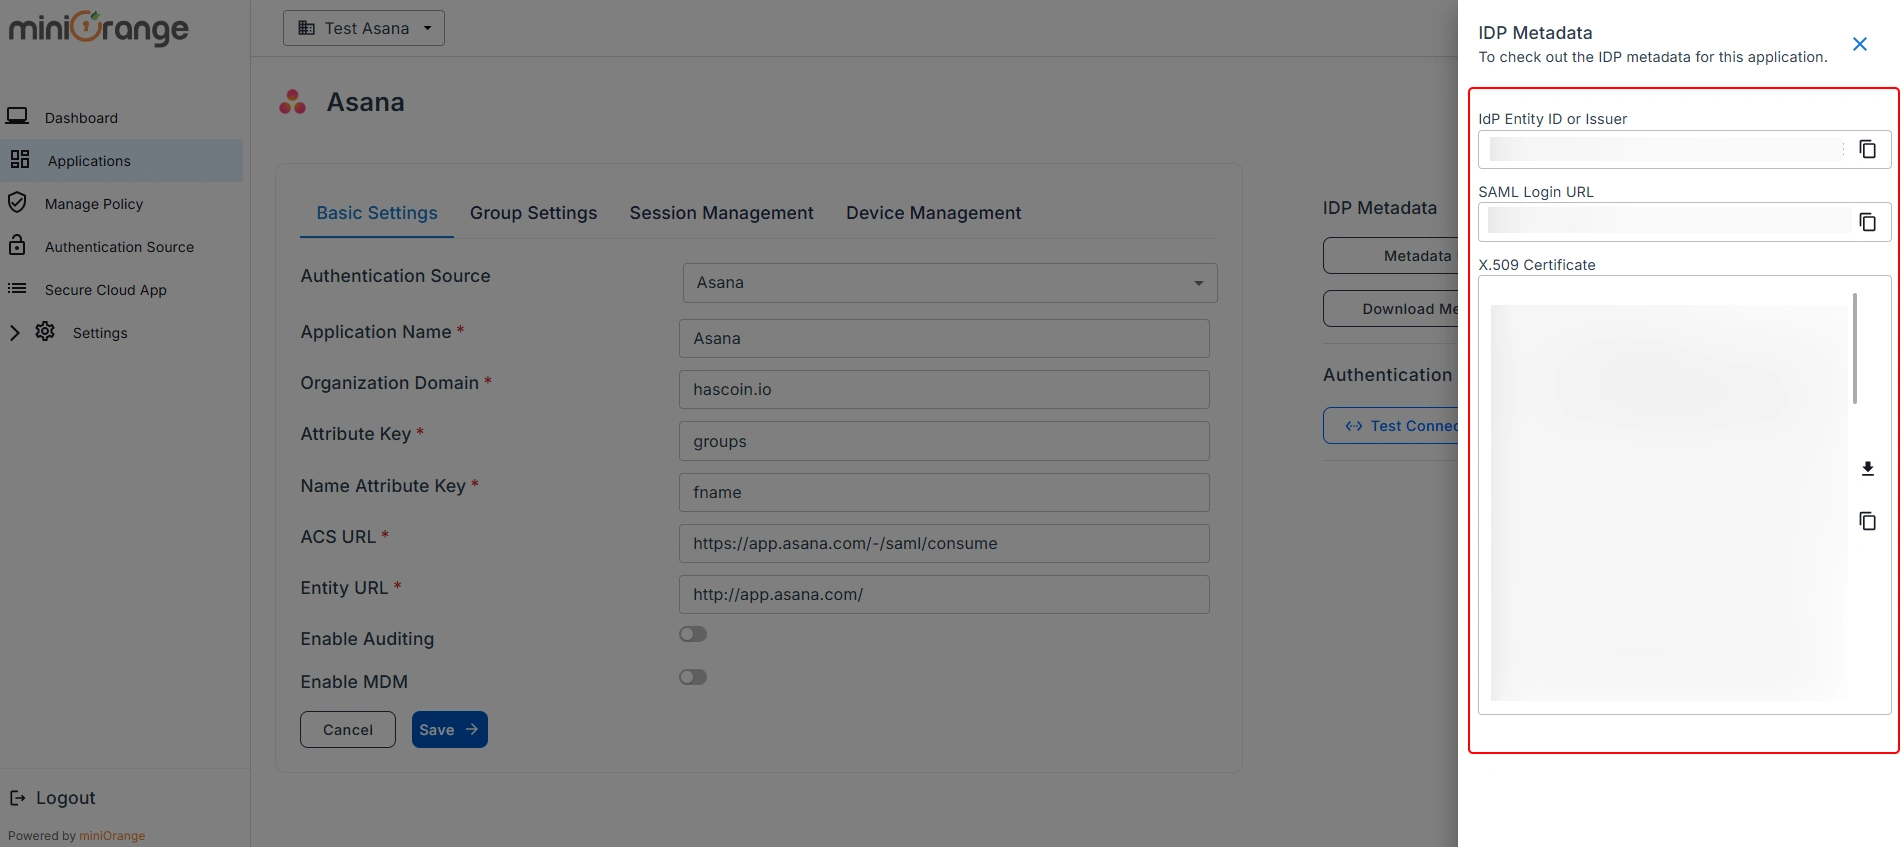
- After saving the details, you will see the screen below. Click on View IDP Metadata and keep the SAML Login URL and X.509 Certificate handy, as they will be required for configuration in Asana.
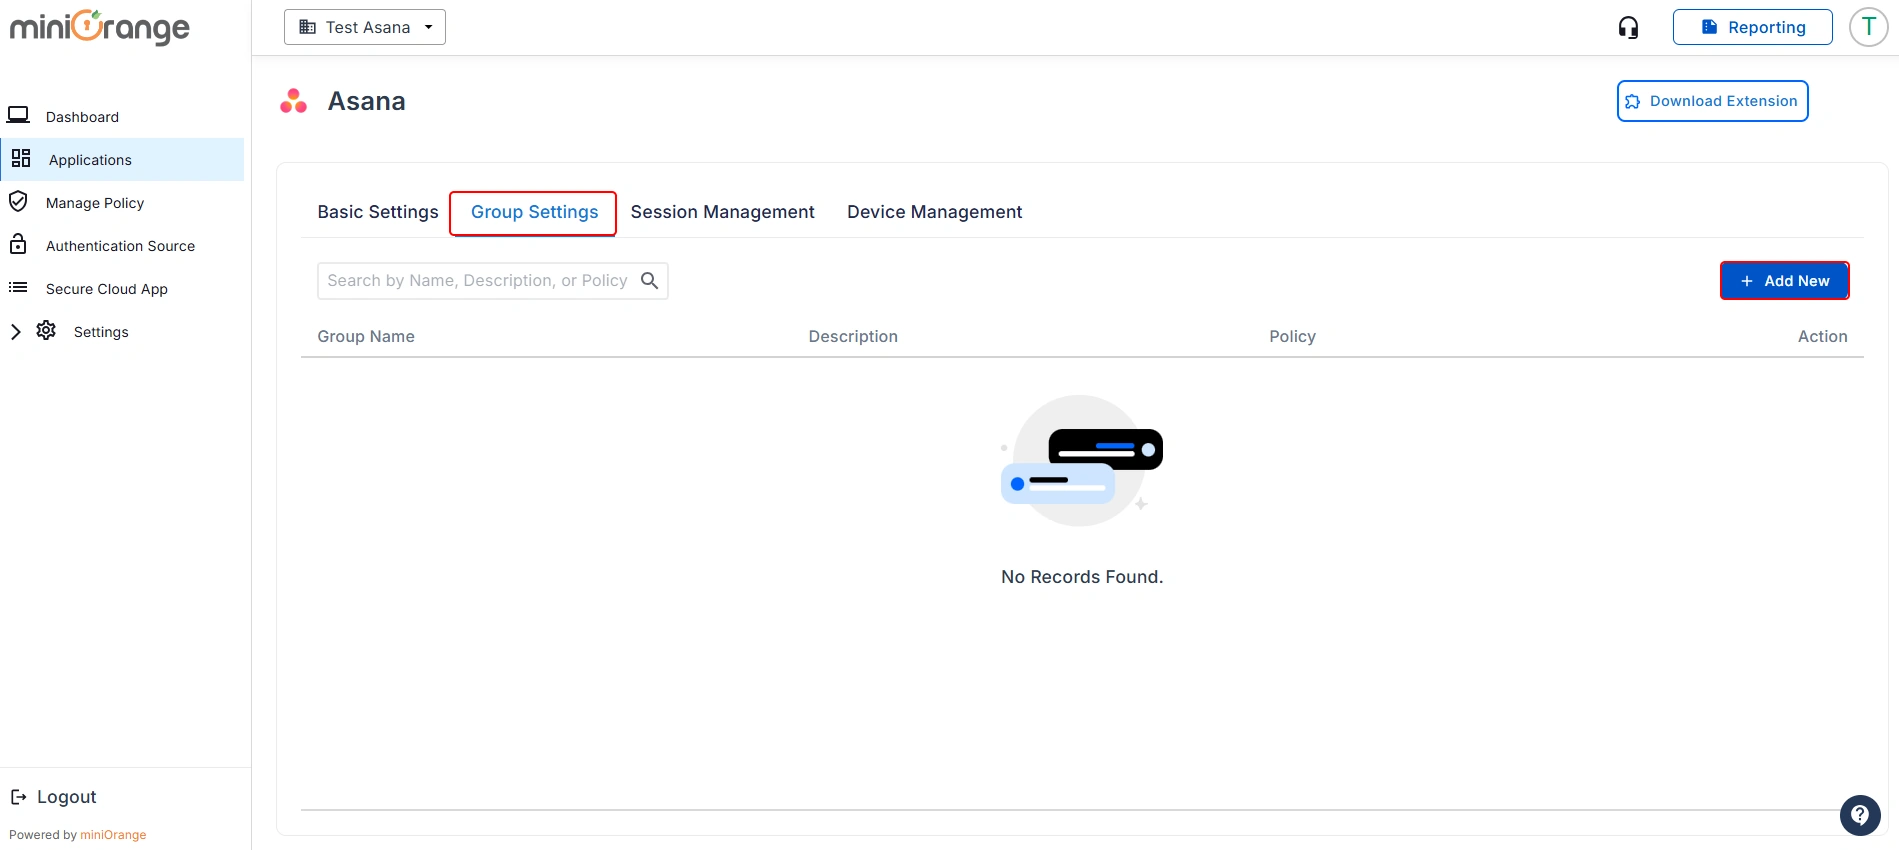
Step 4: Configure Group Settings
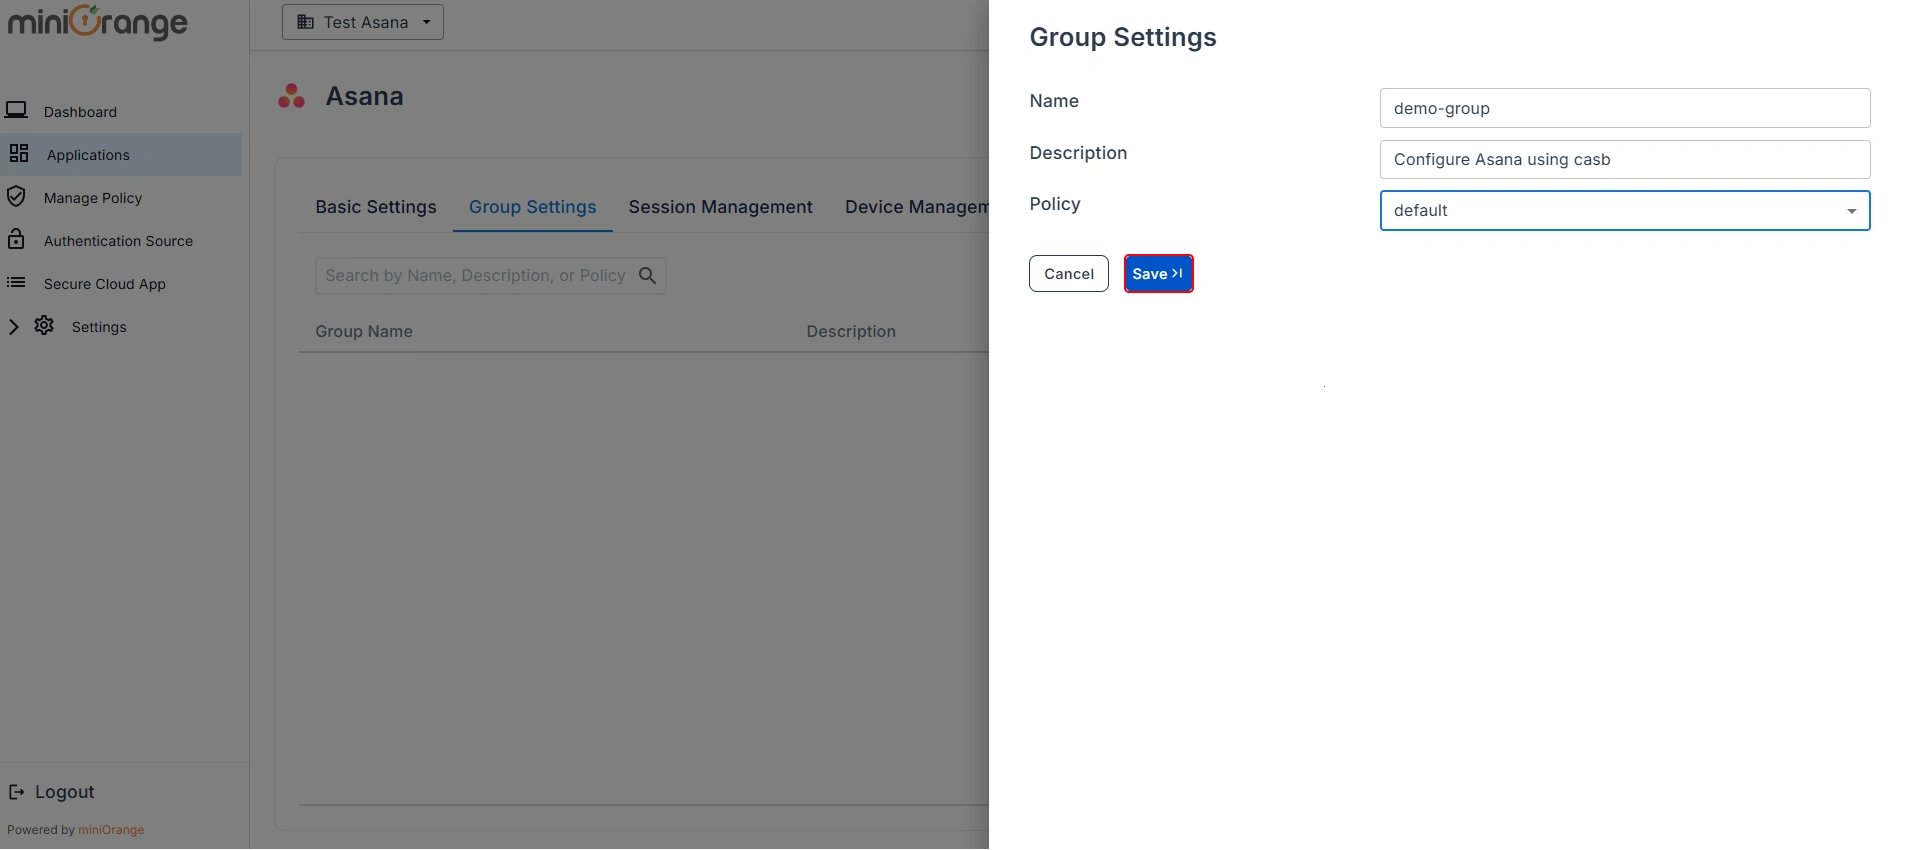
- Now, you will be redirected to the Group Settings section. Click Add New to create a new group.
- In the Group Settings section, provide the group name the same as the one you created earlier in miniOrange IDP, enter a description and select the required policy. You can also create a custom policy using the Manage Policy tab as per your requirements.
- Once done, click on Save button.
- You have successfully completed admin configuration for the Cloud Access Security Broker (CASB) with Asana.
- Now, let's move forward with the User Onboarding Process. Follow the CASB extension guide to complete the setup.
External References
miniOrange CASB offers a wide variety of security features with flexible scalability, all available at the most affordable price to all types of businesses. Start by signing up now!