- Home
- SCIM Provisioning
- SCIM Provisioning Documentation
- miniOrange Users & Groups Provisioning for Jira Cloud with LDAP Directory

Jira Cloud Users & Groups Provisioning: LDAP Directory Sync
miniOrange Users & Groups Provisioning for Jira synchronizes users, groups, and attributes from various identity providers (IdPs) with the Jira Cloud directory. You can manage users directly within your IdP, saving time and effort spent on manual provisioning while ensuring an up-to-date Atlassian directory.
 Try it for free
Pre-requisites
- You need admin access to both your Jira Cloud site and Identity Provider Admin Console (e.g., LDAP here)
Download and Installation
- Log into your Jira instance as admin.
- Under Apps section, Click on Explore more apps.
- Search for miniOrange SCIM.
- Click “Try it free” to begin a new trial of the app.
- After installation, Locate the “miniOrange Users & Groups Provisioning For Jira” app and click to open it.
1: Admin Setup Configuration
Upon installation of miniOrange Users & Groups Provisioning For Jira app, admin needs to configure Admin token and API Key in order complete admin setup and start provisioning process.
Part A: Configure Atlassian API Token
- Go to Atlassian Account and login with your admin account
- Create API Token without scope and save at a safe place.
- Go to Admin Setup page inside plugin and edit API Token Configuration (using pencil button)
- Enter your Atlassian admin Email Address, API Token, and expiry date of API Token.
- Click on Save Token.
Part B: Configure Atlassian API Key
- Go to Atlassian Administration
- Select your organization if you have more than one.
- Navigate to Organization settings → API Keys
- Click "Create API Key" and select "API keys without scopes"
- Go to Admin Setup page inside plugin and edit API Key Configuration (using pencil button)
- Enter API Key and click on Save API Key button.
Once these configurations are fully processed, your core administrative setup is complete and ready for application configuration.
2: Configure LDAP Connection
Now, you can configure your LDAP directory as the source for user and group synchronization.
 2.1 Application Configuration
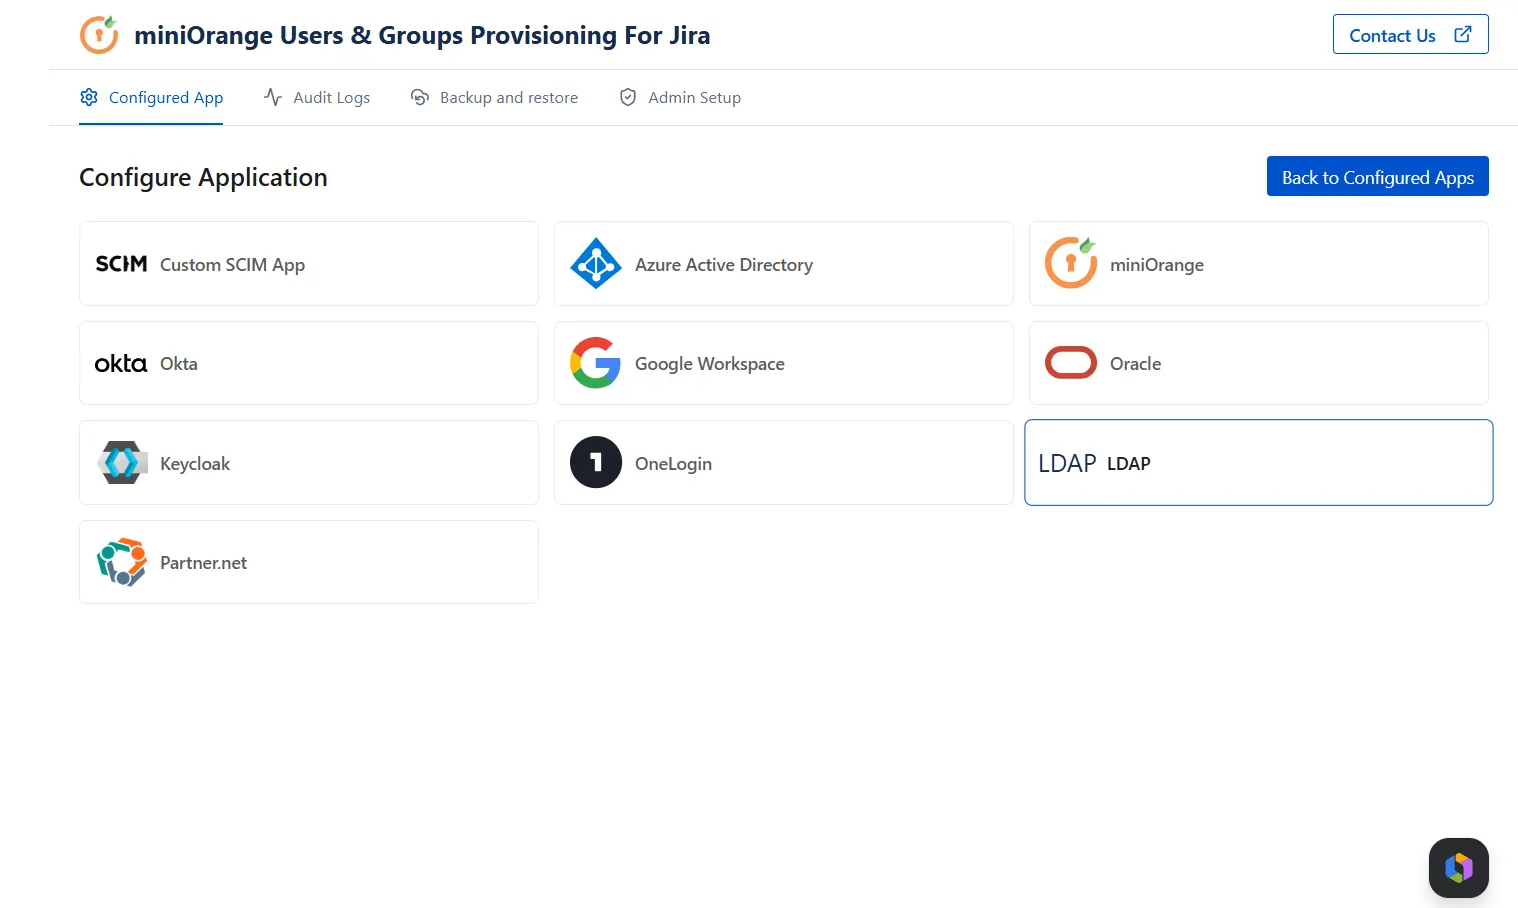
- Navigate back to the Configured Application tab on the main dashboard and click the + Add New App button.
- From the Configure Application directory screen, locate and select LDAP as your chosen provider.
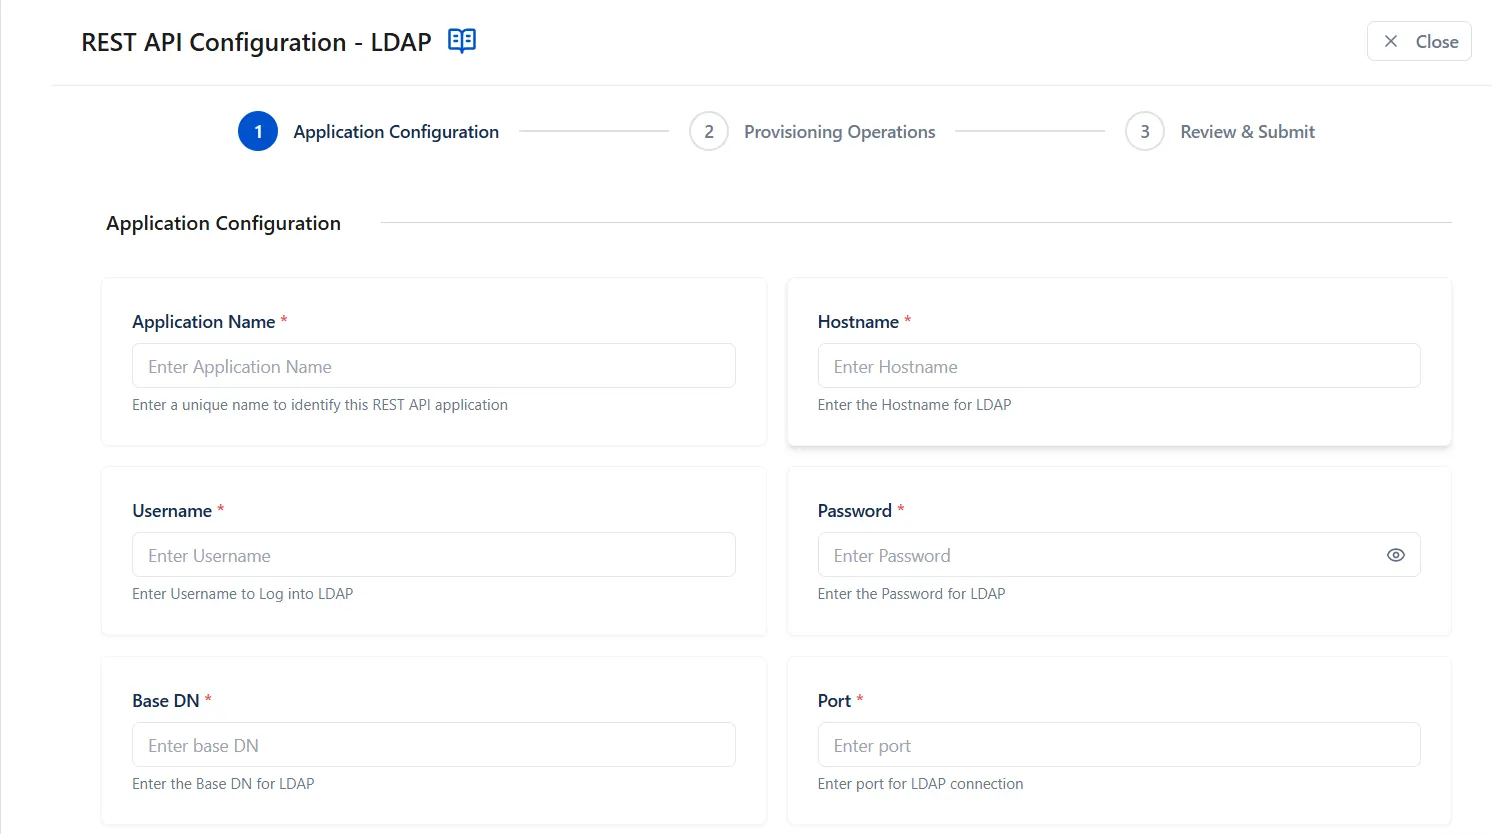
- In the REST API Configuration - LDAP wizard, enter the following details:
- Application Name: Enter a unique name to recognize this specific REST API configuration profile.
- Hostname: Enter the target IP address or server domain name for your directory server.
- Username: Input the primary administrative account DN or login email used to bind and execute lookups against the LDAP Directory.
- Password: Type the secure credential associated with your administrative username.
- Base DN: Specify the explicit root search path defining the organizational units and components where your active user directories reside.
- Port: Input the corresponding communication port required for your LDAP network path connection.
- Click the Next button to validate your connection parameters and proceed.
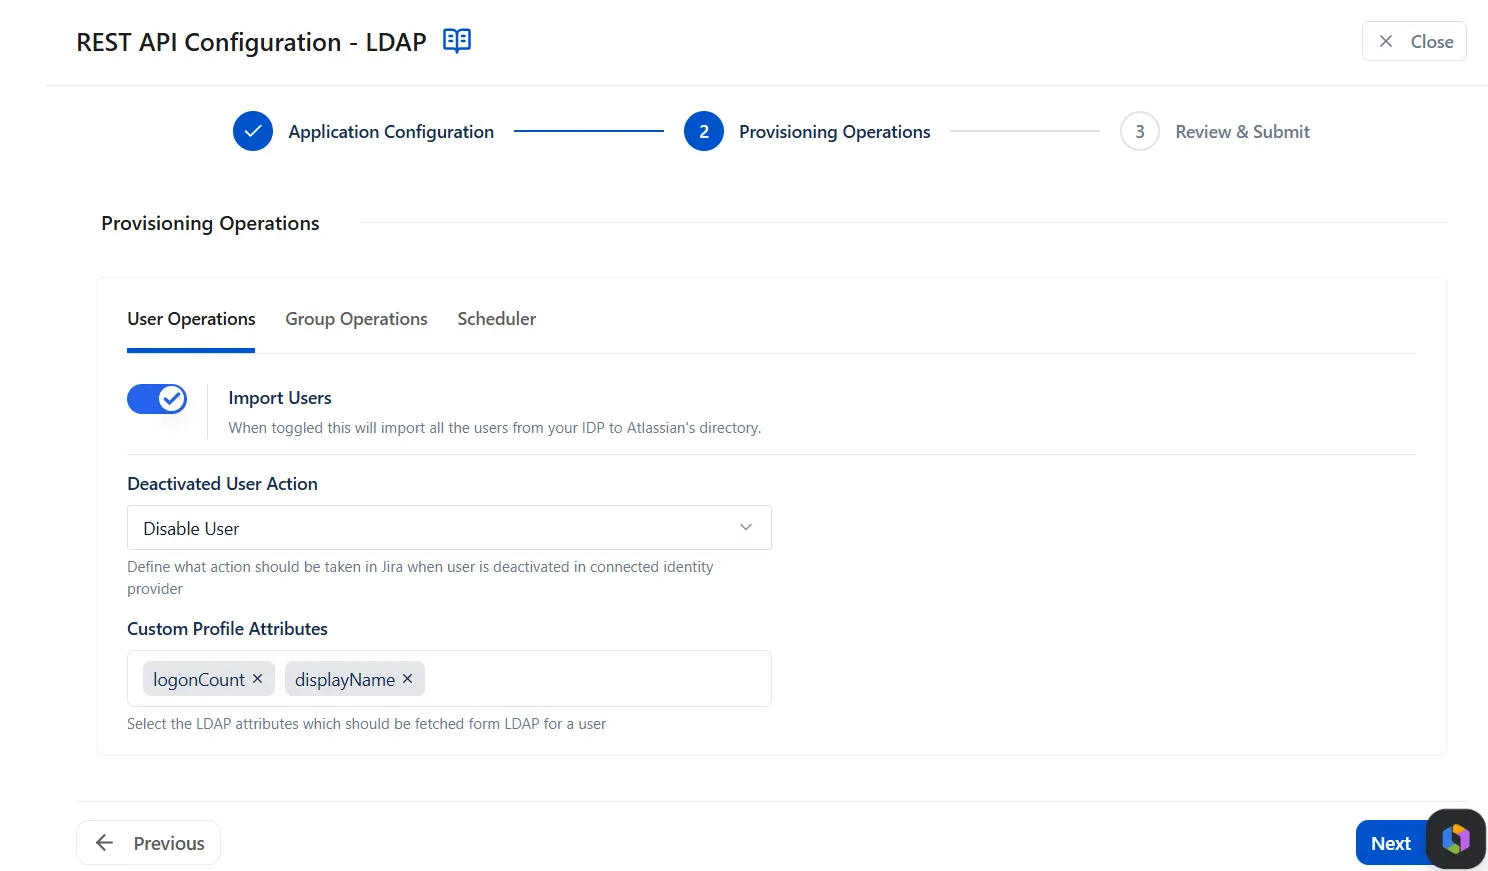
2.2 Provisioning Options
- User Operations: Enable Import Users to create users automatically if they do not exist in Jira. From the Deactivated User Action dropdown menu, select the action that should be taken when a user is unassigned or deactivated in your directory. In Custom Profile Attributes, choose and map granular schemas from your LDAP source directory during inbound cycles.
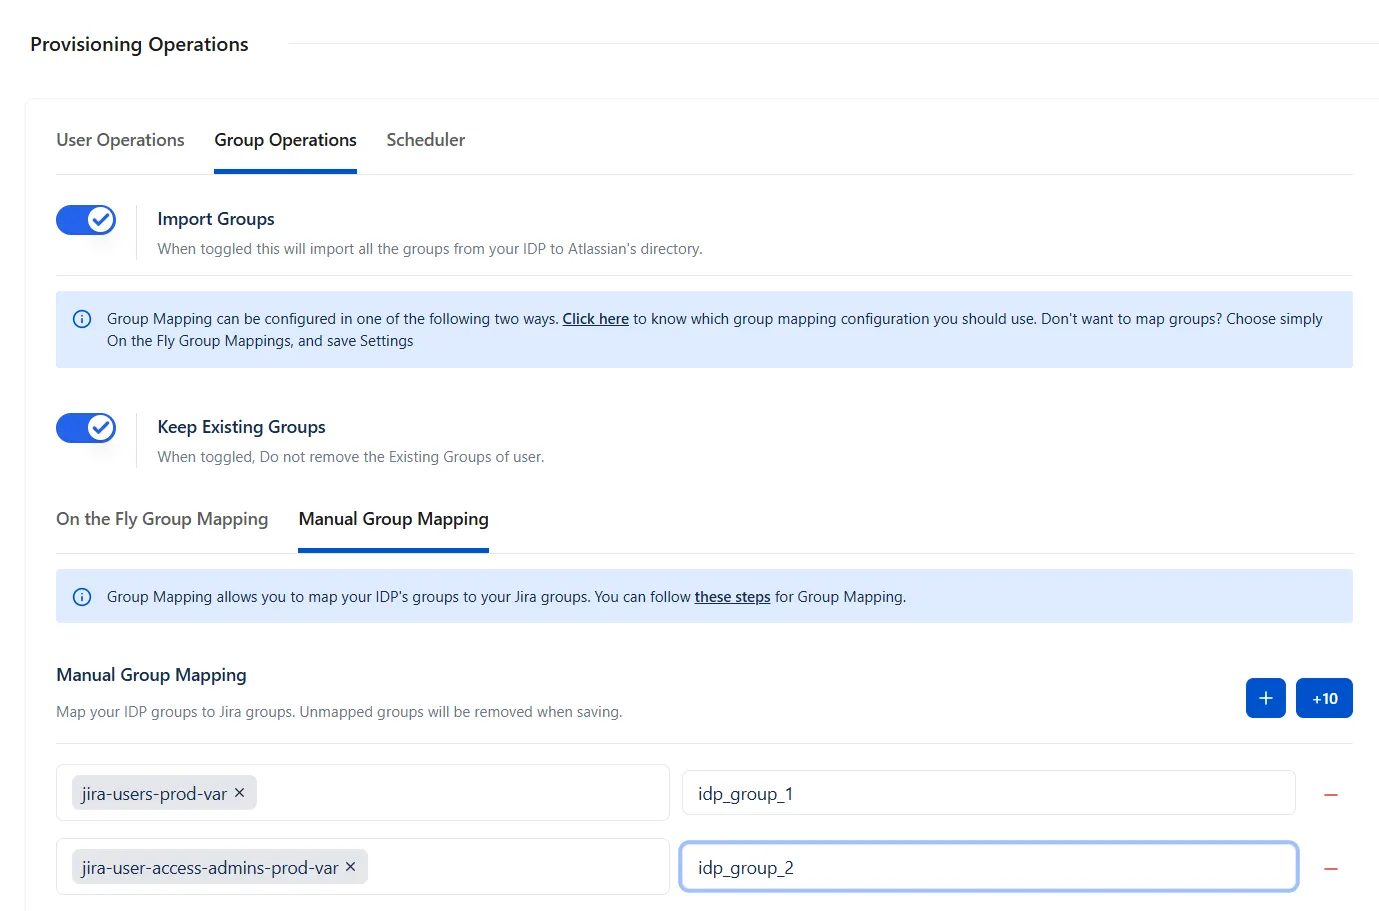
- Group Operations: Switch to Group Operations and enable Import Groups.
- Group operations can be performed either with On-the-Fly Group Mapping or Manual Group Mapping.
-
On-the-Fly Group Mapping: Select this tab to create
groups dynamically as they are from the IdP to Jira Cloud if
they do not exist in Jira and map the users accordingly.
You can enable the Apply Regular Expressions on Group Names option to transform group names using Regex patterns before mapping them to Jira groups.
Under Filter Incoming Groups, you can configure how you want to filter group names received from the provider. - Manual Group Mapping: To map groups from your IdP to Jira’s native groups, select this tab. When the sync executes, the users from respective groups of the IdP will be mapped to Jira groups as per configuration.
- Current Jira groups: jira-software-users, jira-administrators
- Groups received from IdP: developers, employees
- Resulting Jira groups: jira-software-users, jira-administrators, developers, employees
- Current Jira groups: jira-software-users, jira-administrators, support-team
- Groups received from IdP: developers, employees
- Excluded groups: jira-administrators
- Resulting Jira groups after provisioning: jira-administrators, developers, employees
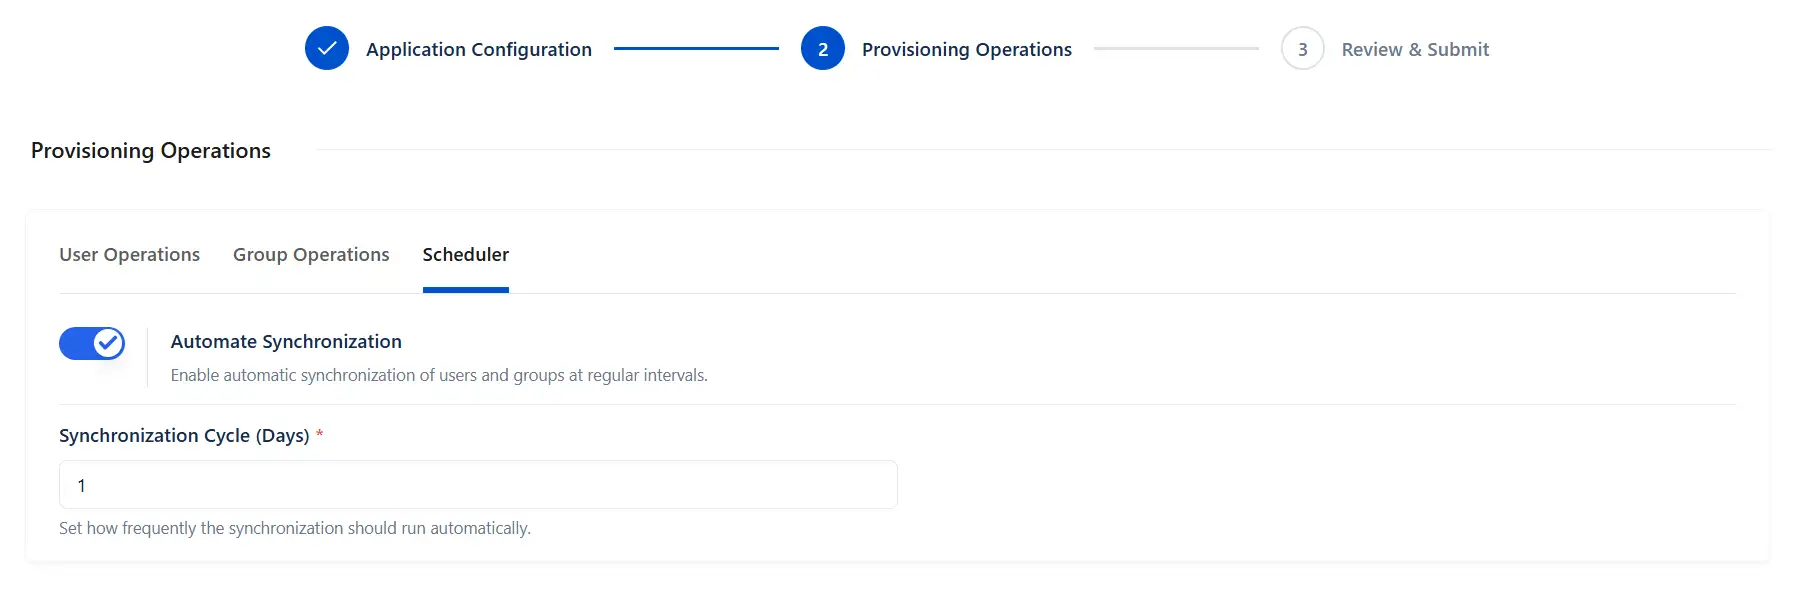
- Scheduler Option: To sync the data dynamically on defined intervals, you can toggle Automate Synchronization to ON. Input your target processing interval frequency inside the Synchronization Cycle (Days) text field.
- Click Next to review your configuration.
In the Provisioning Operations section:
Keep Existing Groups
This setting controls how a user's Jira group memberships are managed during user provisioning and deprovisioning operations performed by the Identity Provider (IdP).

Enabled
For any new user added to IdP groups, it will be added to Jira groups. But if users are removed from IdP groups, Jira group memberships are preserved in the Jira directory.
Example:
No existing Jira group memberships are removed.
Disabled
During provisioning, deprovisioning, or user unassignment, all existing Jira group memberships are removed except those specified in the Exclude Groups list. During provisioning, the user is subsequently assigned only to the groups received from the Identity Provider (IdP).
Example:
After provisioning, the groups jira-software-users and support-team are removed because they are not received from the IdP and are not included in the exclusion list.
Exclude Groups: Use the Exclude Groups option to specify Jira groups that should never be removed during provisioning or deprovisioning operations, such as jira-administrators or org-admins. These groups will always be retained regardless of the user's group assignments in the IdP.
2.3 Review & Submit
- Once satisfied with the setup overview, click the Save Configuration button in the bottom-right corner to save your integration profile.
The miniOrange Users & Groups Provisioning For Jira app is now successfully set up.
Did this page help you?
