User Sync & Group Sync app sync user and group information from Google Apps to Jira Cloud. This way the administrator only needs to manage user accounts in Google Apps. This reduces the administration time required to create users and groups in Atlassian modules such as Jira Cloud.
Download and Installation
- Log into your atlassian instance as admin.
- Navigate to the settings menu and Click Manage Apps.
- Click on Find new apps .
- Locate miniOrange User and Group Sync app.
- Click Try free to begin a new trial or Buy now to purchase a license.
- Enter your information and click Generate license when redirected to MyAtlassian.
- Click Apply license.
Step 1: Setup Google Apps SCIM Configurations
- Log in to Google API console with administrator privileges.
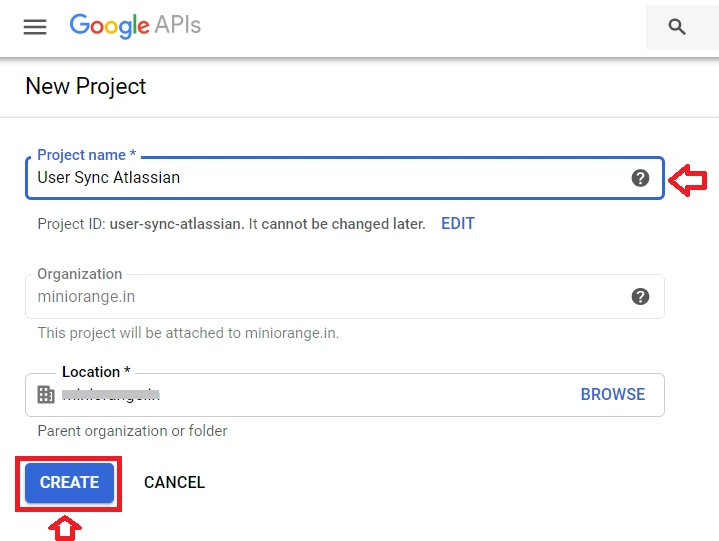
- Click on NEW PROJECT.
- Enter name for Your project and click on create.
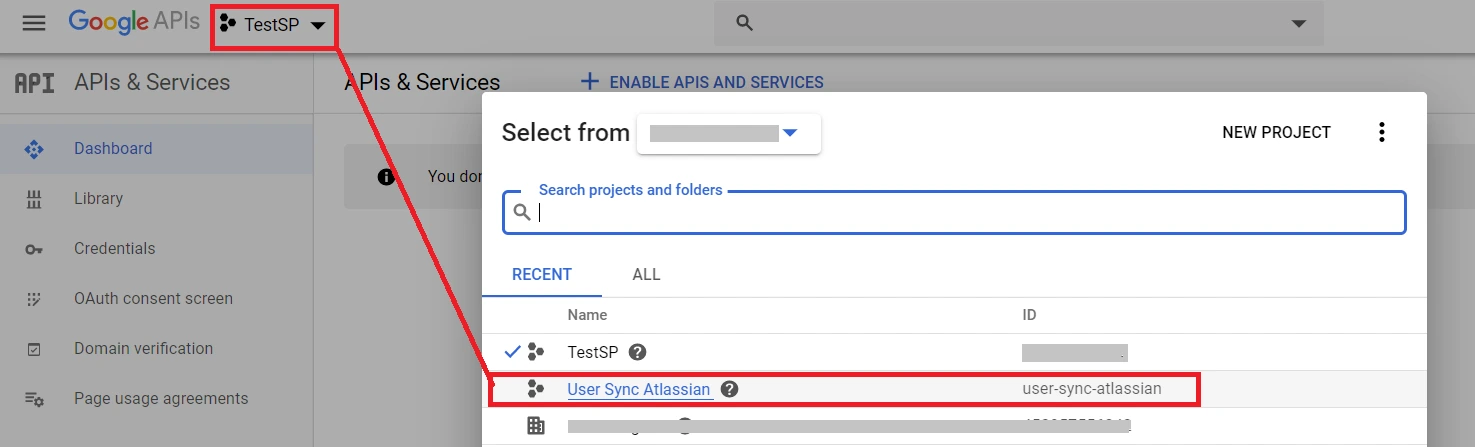
- Now, select newly created project from drop-down.
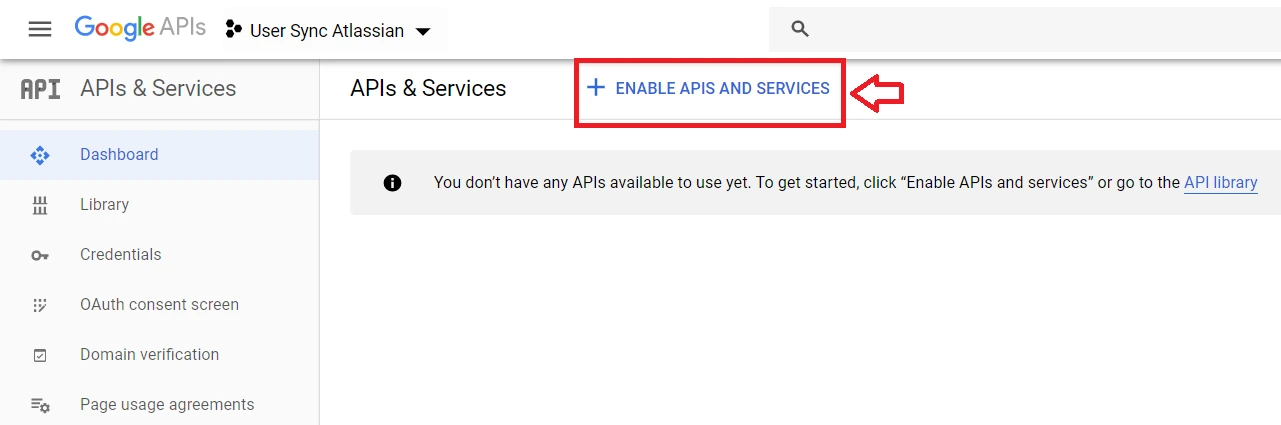
- Click on ENABLE APIS AND SERVICES.
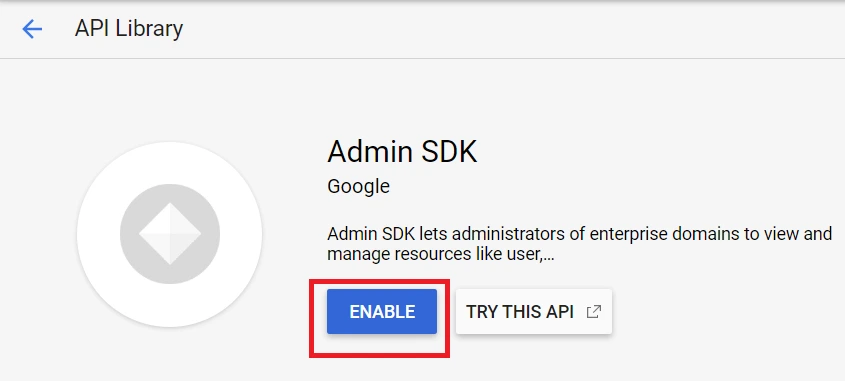
- Search for Admin SDK ,Now click on enable.
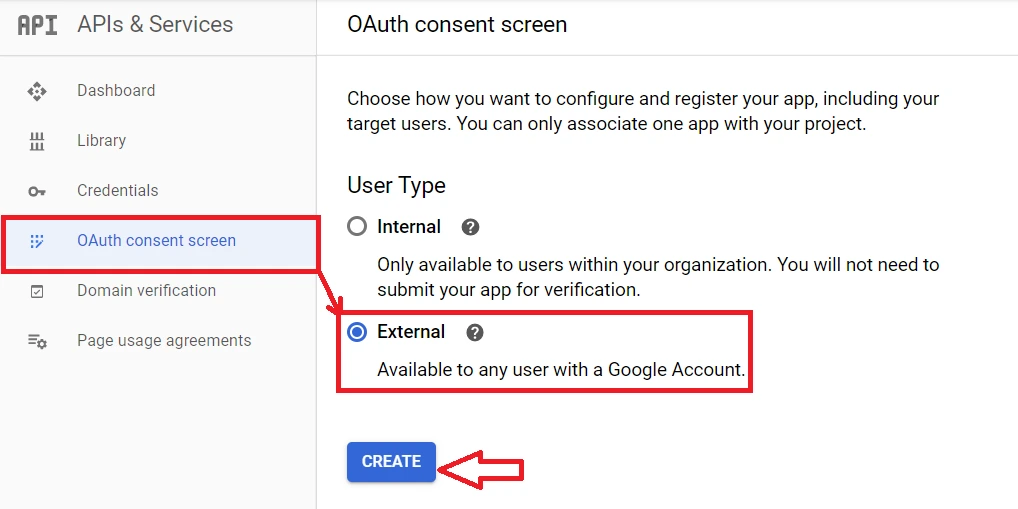
- Navigate to OAuth consent screen in the left panel.Select User Type External and enter app name User provisioning.
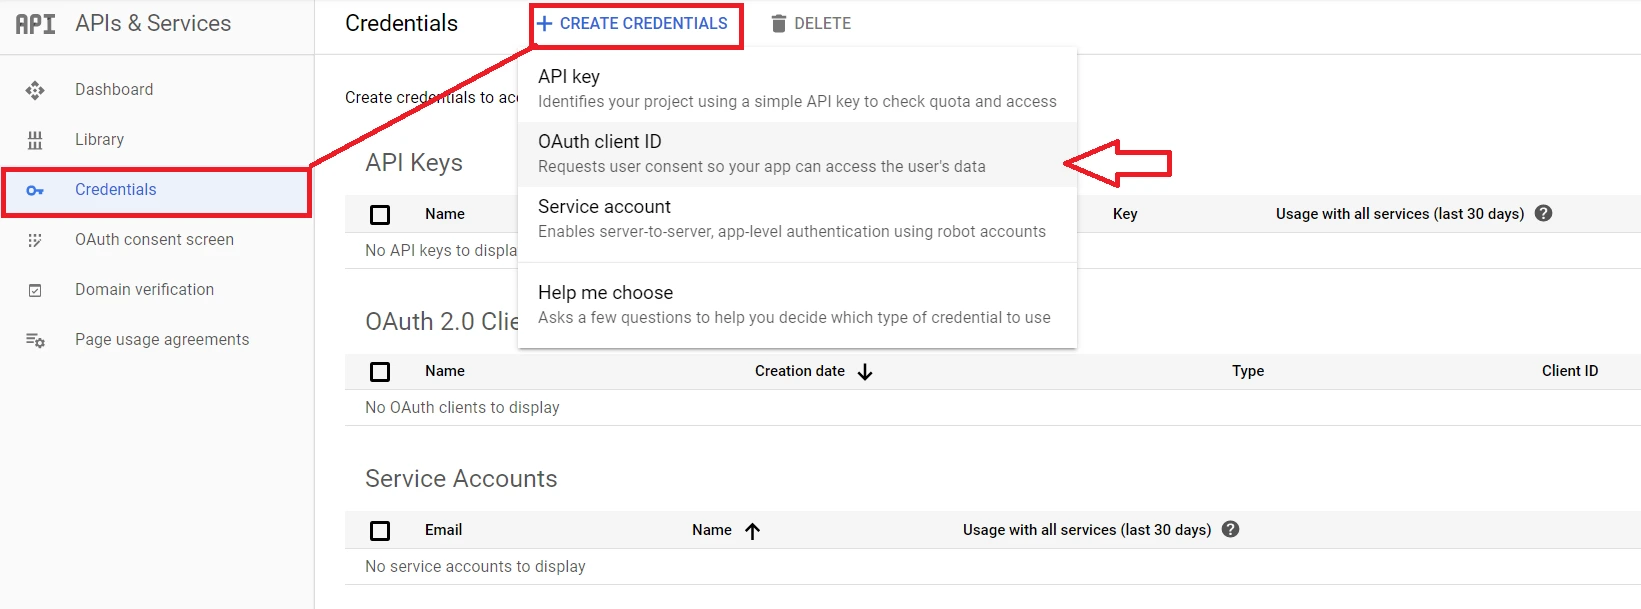
- Now, click on Credentials in the left panel.
- Select Create credentials ⇒ OAuth Cleint Id..
- Select Web application.
- Enter Authorized redirect URIs. Eg. <server-base-url>/plugins/servlet/usersync/callback. Replace <server-base-url> with your Atlassian module Server BaseURL.
- Now click on create.
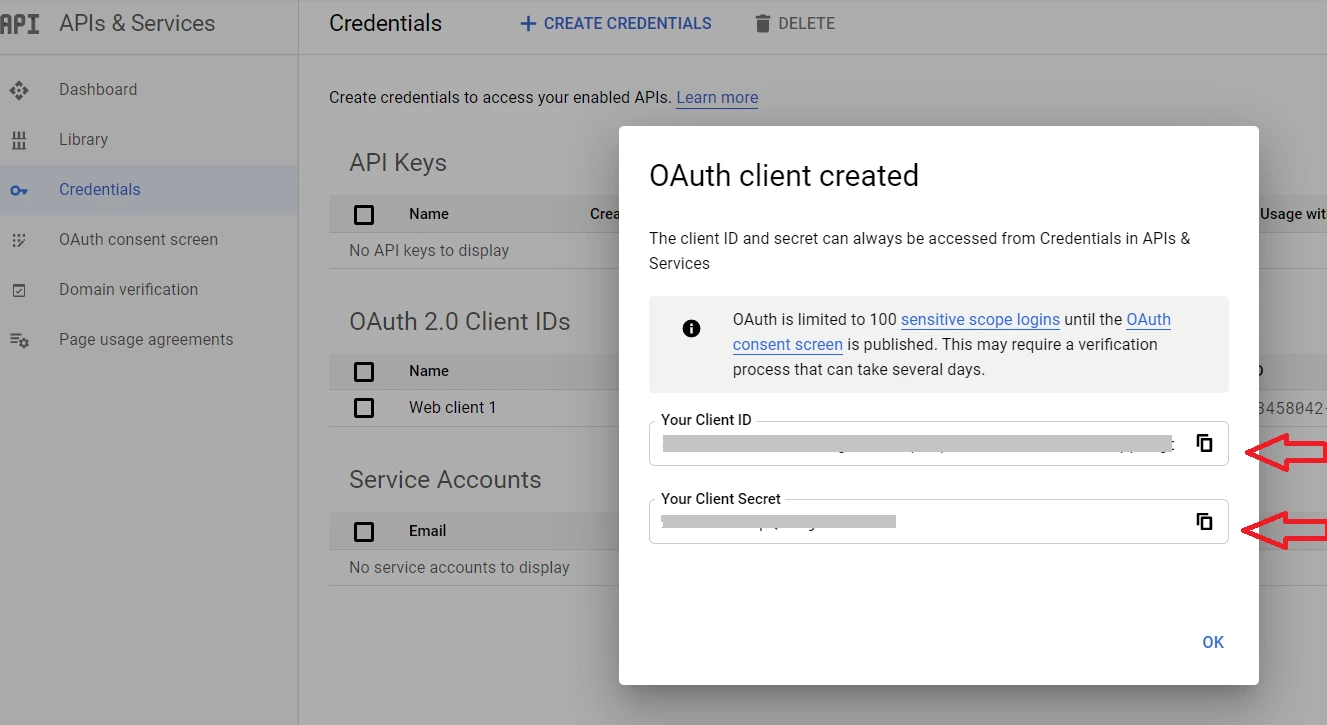
- Copy Client ID and Client Secret.This will be required while Configuring User Sycn app.

Step 2: Configure API token
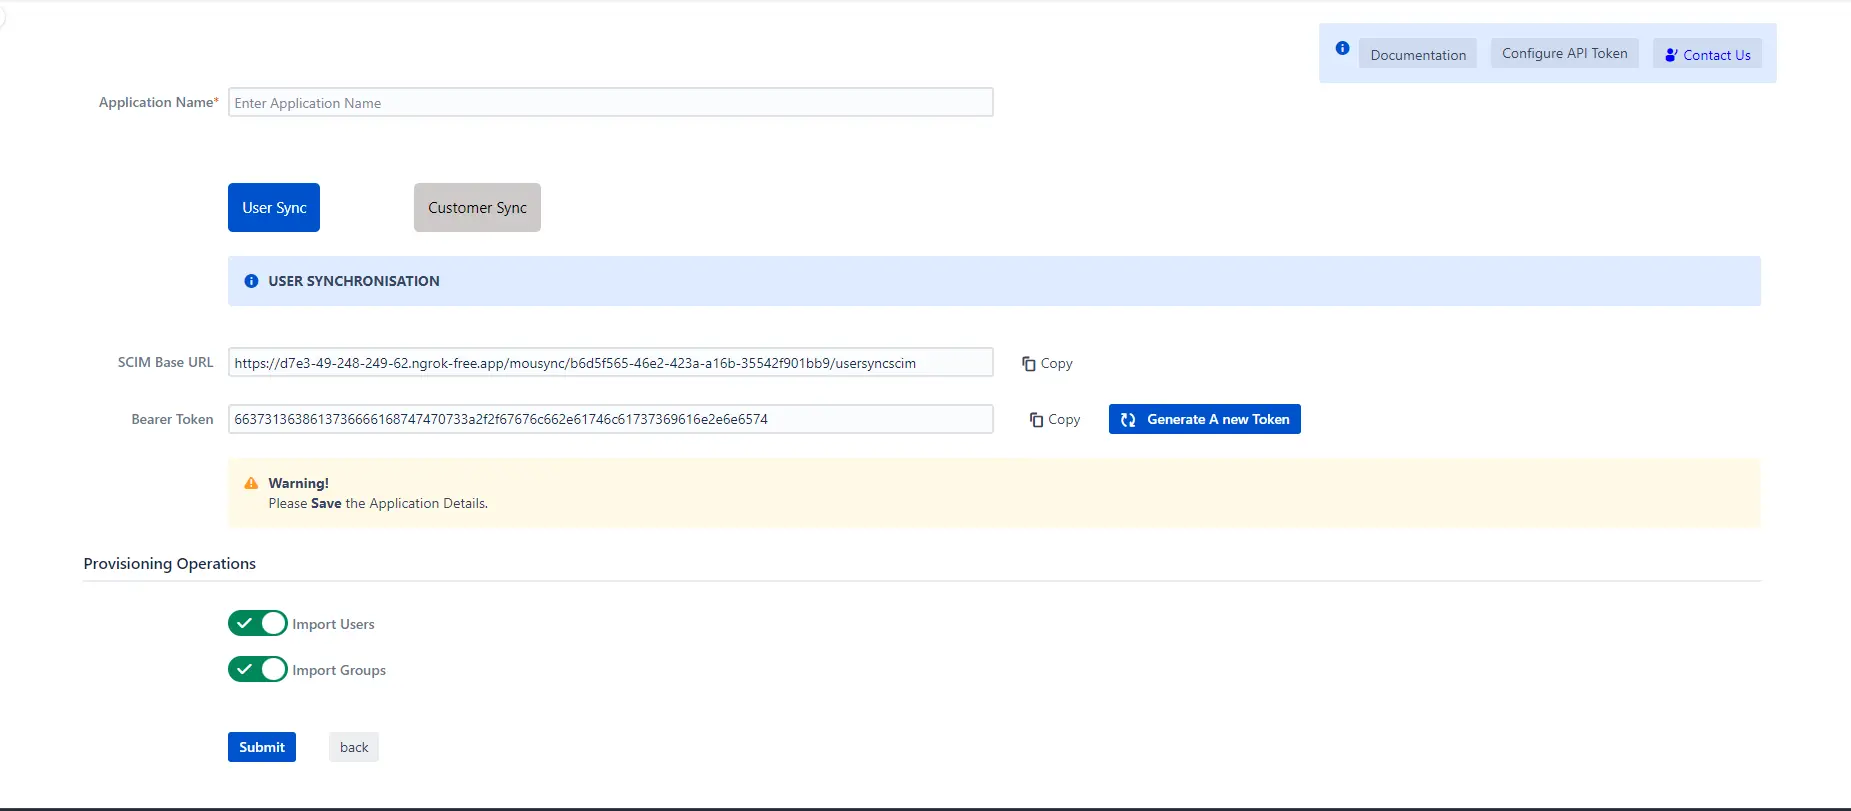
2.1: User Sync
- Setup API Token by clicking Configure API Token button.
- Enter your Admin Email
- Generate your own API token. Please refer this document here .
- Please enter Application Name and click on Submit button. Copy the SCIM Base URL and SCIM Bearer Token, these will be used later to configure SCIM application on miniOrange IDP.
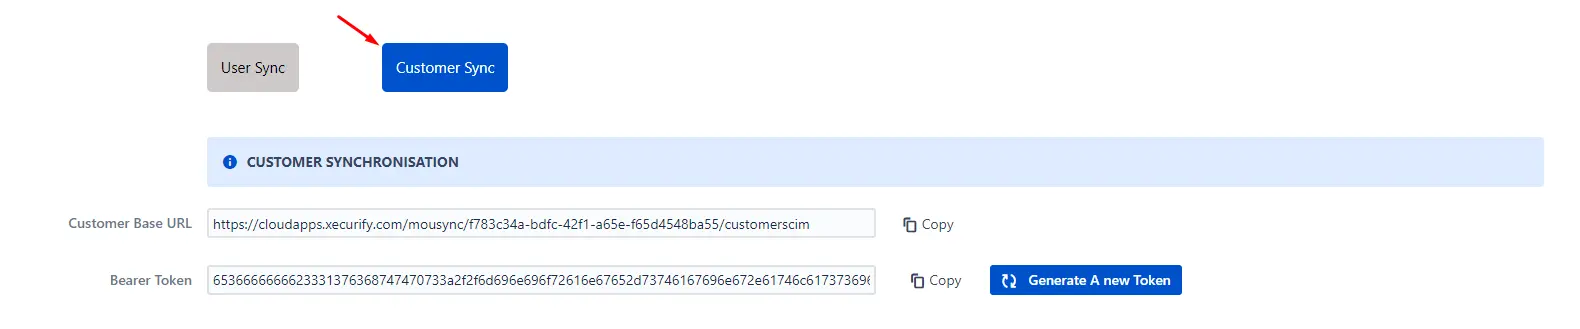
2.2: Customer Sync
- In the Configuration tab, please select the IDP provider.
- Select the Customer Sync option.
- In the SCIM configuration, Please enter the App Name and click on the Save Settings button. Copy the Customer Base URL and Customer Bearer Token, these will be used later to configure the SCIM application on the IDP provider.
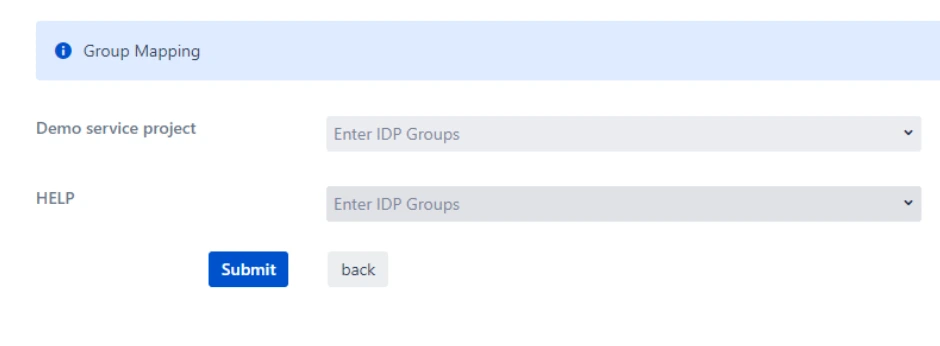
- In the Group Mapping setting add the group from which you want to give permission to the project.
eg:- If you have a private Project name:- Demo service project and you have IDP group name:- Jira-Service-group. So if we provision user who has Jira-Service-group assigned in Plugin group mapping, he will get access to the portal of Demo Service Project.
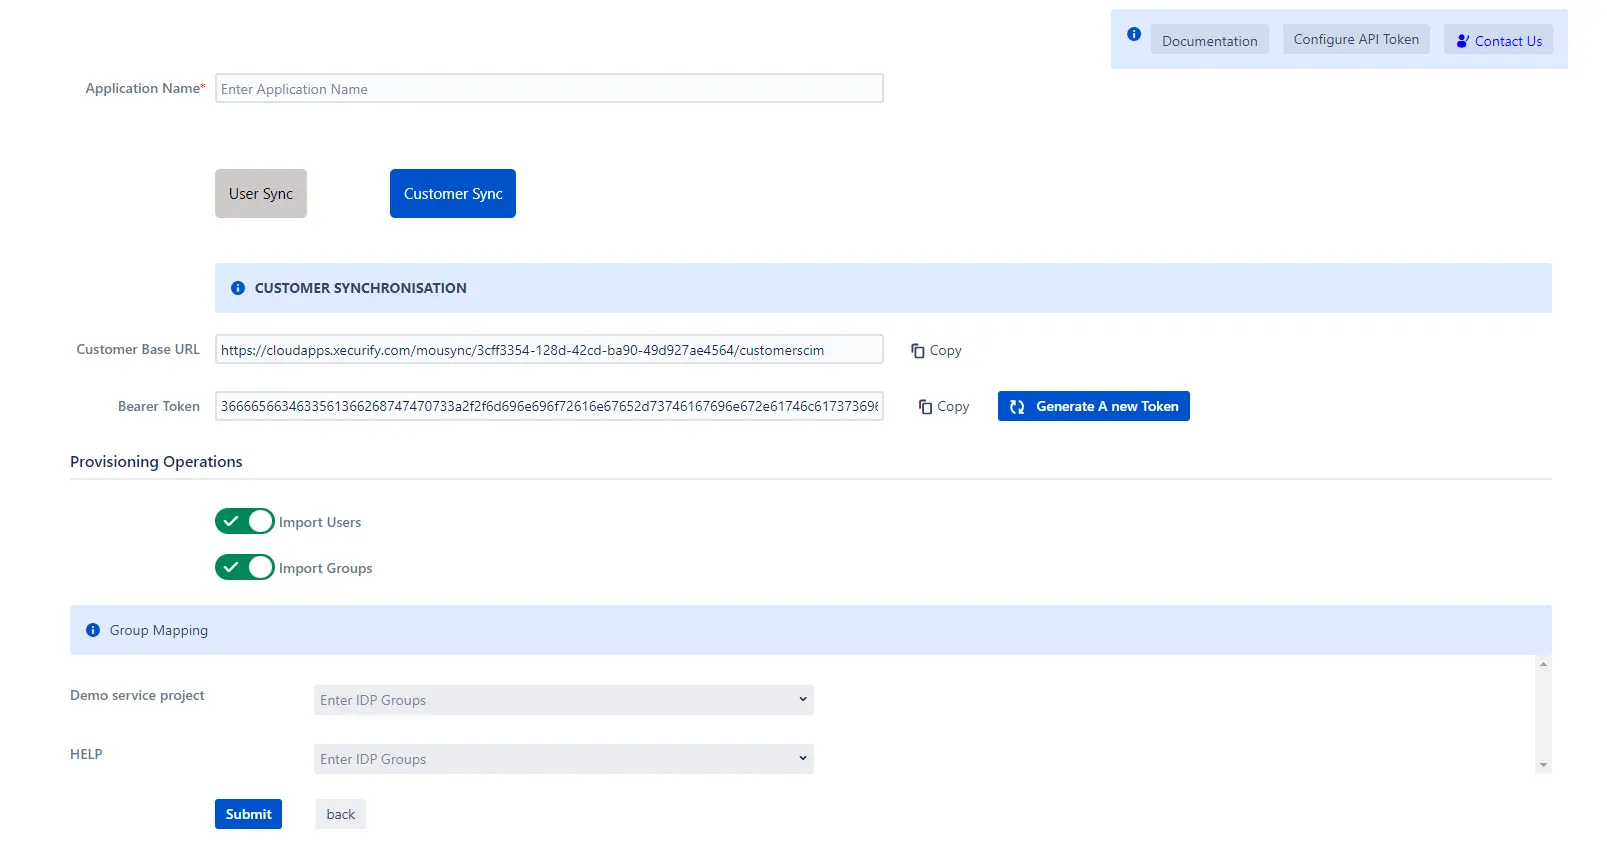
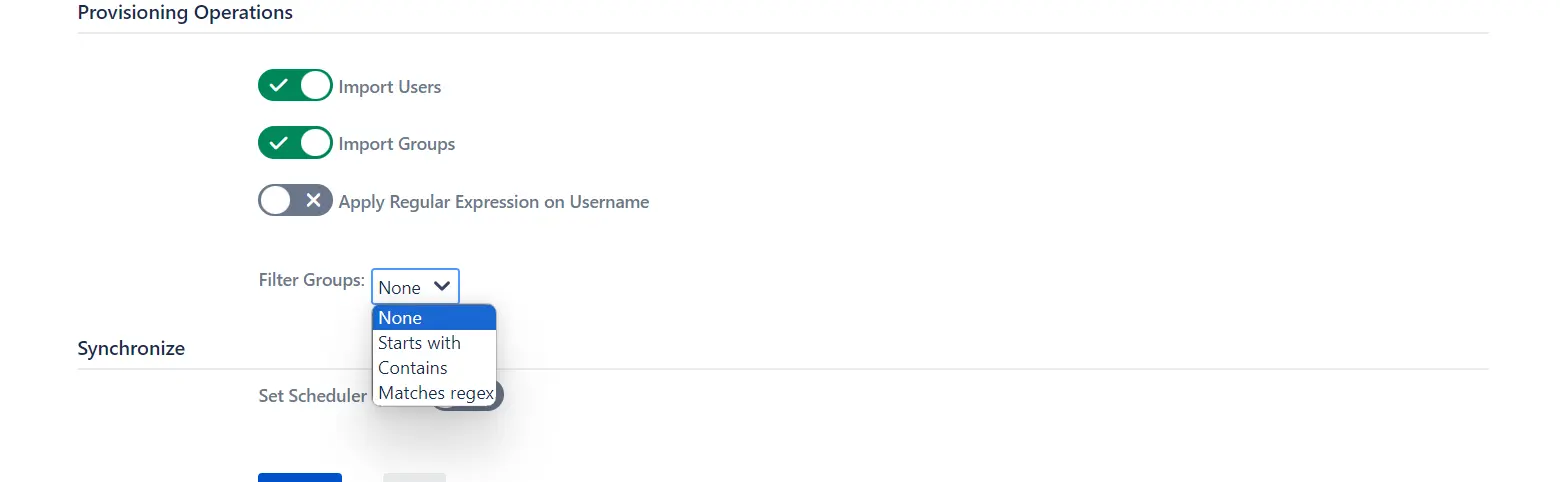
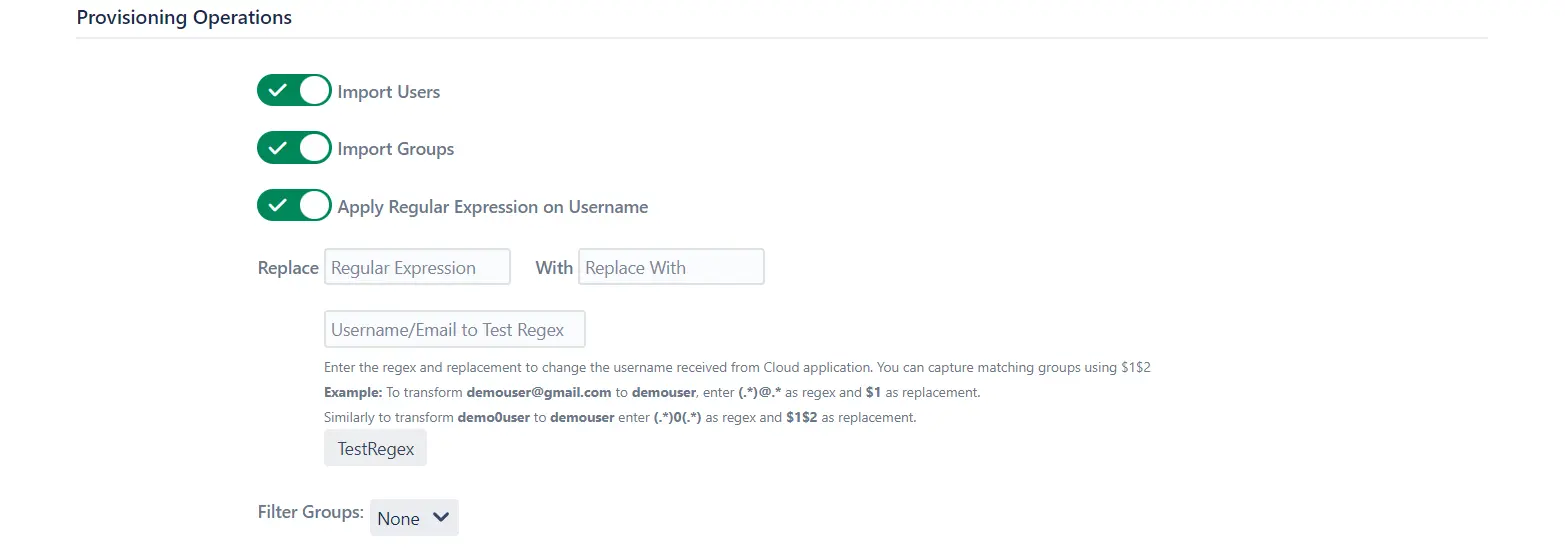
Step 3: Provisioning Operations
- Enable Import Users option to create users automatically if they do not exist in Jira.
- Enable Import Groups option to create groups automatically if they do not exist in Jira.
- Enable Apply Regular Expression on Username to apply regular expression on users and filter groups accordingly.
- Click on Submit.
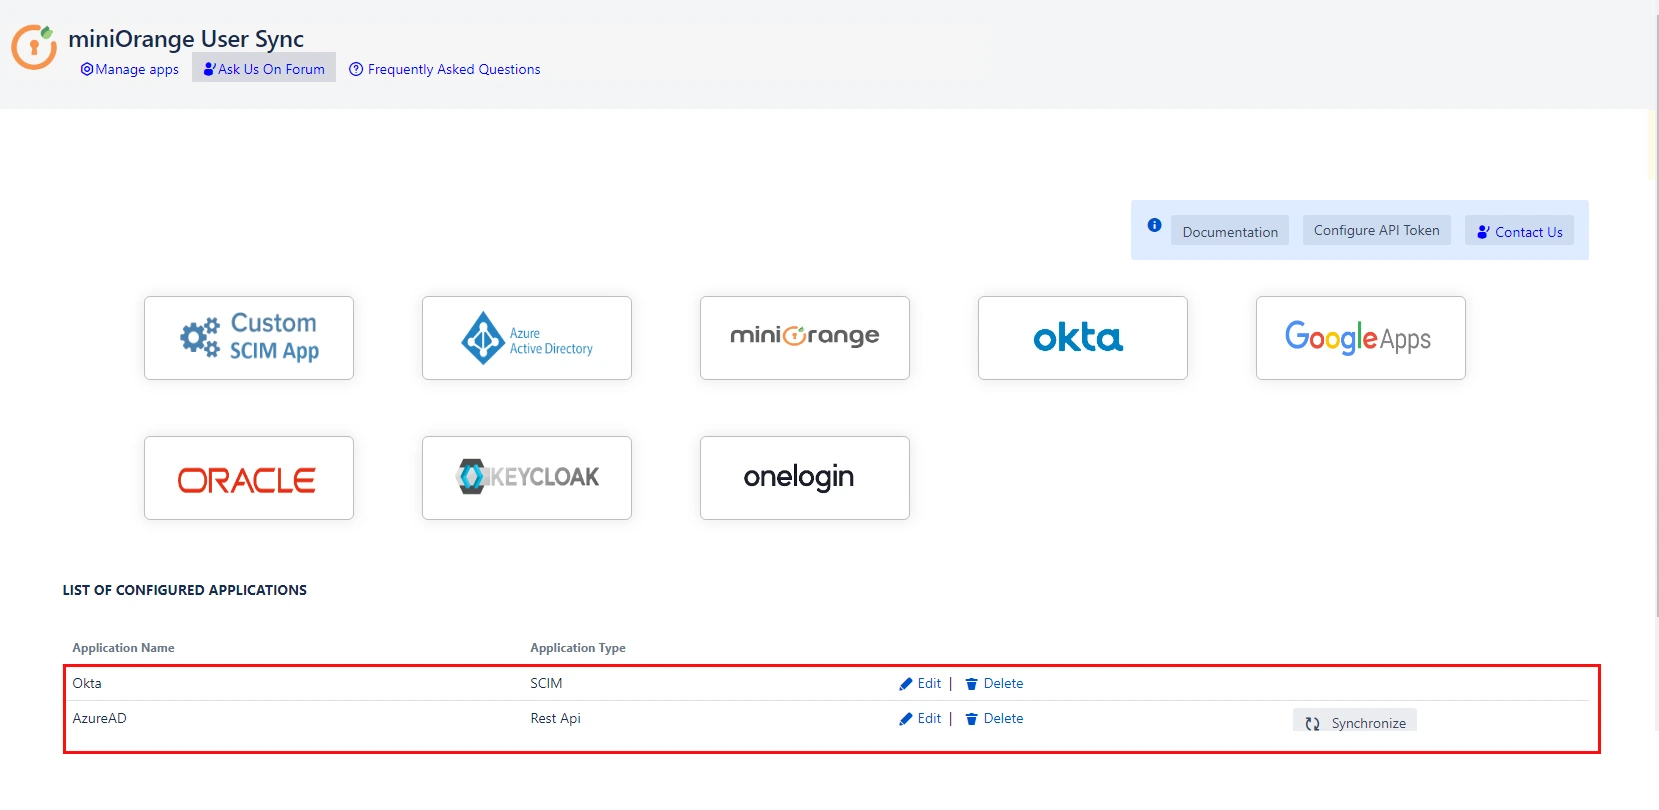
Step 4: Multiple IDPs
- The plugin allows for configuring multiple IDPs on your SP to accommodate your specific use case. To add another IDP, simply navigate to the "Configured IDPs" section.
Recommended Add-Ons

Two Factor Authentication
Enable 2FA/MFA for users & groups and let users configure 2FA during their first login.
Know MoreJira SAML SSO
Jira SAML SSO application enables SSO for Jira Software and Jira Service Desk.
Know MoreJira OAuth/OIDC SSO
Secure your Jira Service Management with OAuth/OpenID Connect SSO.
Know More
Our Other Apps:
SAML SSO Apps
|
OAuth Apps
|
Crowd Apps
|
2FA Apps
|
REST API Apps
|
User Sync Apps
|
Bulk User Management
|
Secure Share
|
Bitbucket Git Authentication App | Kerberos/NTLM Apps | Word/PDF Exporter | WebAuthn | SonarQube SSO | Jenkins SSO
Bitbucket Git Authentication App | Kerberos/NTLM Apps | Word/PDF Exporter | WebAuthn | SonarQube SSO | Jenkins SSO
If you don't find what you are looking for, please contact us at support-atlassian@miniorange.atlassian.net or raise a support ticket here.