- Home
- Identity Governance, Auditing & Access Control via JSM
- Set Up the Identity Governance, Auditing & Access Control via JSM with AWS

How to Set Up Identity Governance, Auditing & Access Control via JSM with AWS
This guide walks you through configuring AWS IAM credentials inside the Identity Governance, Auditing & Access Control via JSM app so that it can automatically provision and deprovision users, manage group memberships, and enforce lifecycle policies, all from within Jira.
This step-by-step guide will help you integrate AWS within the app.
App Overview
The Identity Governance, Auditing & Access Control via JSM is an advanced solution built on Jira Service Management (JSM) to simplify and automate access request workflows across your organization.
Instead of relying on manual request and approval steps, the app enables:
- End users to submit access requests through the JSM portal.
- Automated routing of approval workflows based on predefined rules.
- Instant provisioning actions once approvals are complete.
By automating these processes, the Identity Governance, Auditing & Access Control via JSM ensures secure, policy-driven, and audit-ready access management across your tech ecosystem.
 Try it for free
Video Setup Guide
Pre-requisites
Before you begin, make sure you have the following:
- Admin access to Jira Service Management (JSM): Required to configure workflows, custom fields, and automation rules.
- Admin access to AWS: Needed to authorize integrations and manage access provisioning.
1: Login as an IAM user in your AWS instance such that you can manage users and policies
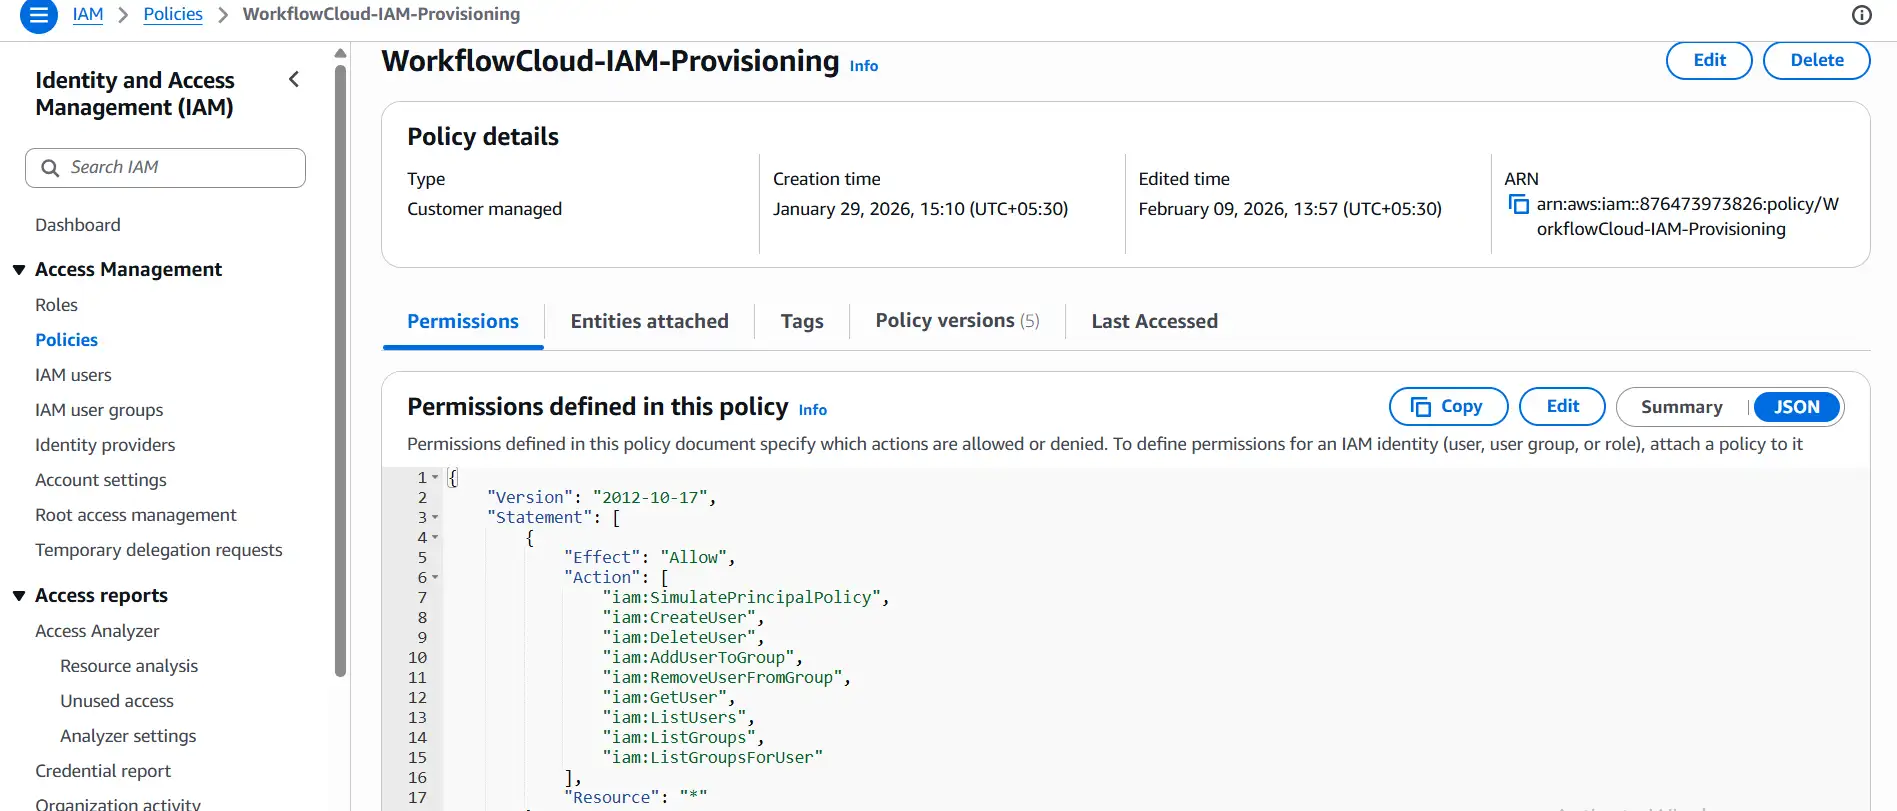
A. Create a Custom IAM Policy
- Navigate to IAM → Policies.
- Click Create policy.
- Select the JSON tab.
- Remove any existing content and paste the policy JSON shown below.
- Click Next.
- Enter a policy name, for example: AutomatedProvisioningPolicy.
- Review the policy and click Create policy.
Policy JSON
{
  "Version": "2012-10-17",
  "Statement": [
    {
      "Effect": "Allow",
      "Action": [
        "iam:SimulatePrincipalPolicy",
        "iam:CreateUser",
        "iam:DeleteUser",
        "iam:AddUserToGroup",
        "iam:RemoveUserFromGroup",
        "iam:GetUser",
        "iam:ListUsers",
        "iam:ListGroups",
        "iam:ListGroupsForUser"
      ],
      "Resource": "*"
    }
  ]
}
Why iam:SimulatePrincipalPolicy in json provided above is
required:
This permission is used to safely validate whether the attached IAM user to it has the required permissions. It evaluates permissions without creating or modifying any AWS resources. Without it, the Test Connection step will fail.
Optional: Restrict Policy by Users or Groups
You can limit which IAM users and groups the policy can manage. These restrictions are recommended for production environments.
1: Restrict by Username Pattern, Add a Condition block to limit actions to usernames matching a prefix, e.g.
          app-*:
          "Condition": {
            "StringLike": {
              "iam:UserName": "app-*"
            }
          }
2: Restrict by Specific IAM Groups (Recommended), Replace the wildcard Resource with explicit group ARNs:
          {
            "Effect": "Allow",
            "Action": [
              "iam:AddUserToGroup",
              "iam:RemoveUserFromGroup"
            ],
            "Resource": [
              "arn:aws:iam::123456789012:group/Admins",
              "arn:aws:iam::123456789012:group/Developers"
            ]
          }
Replace 123456789012 with your actual AWS Account ID.
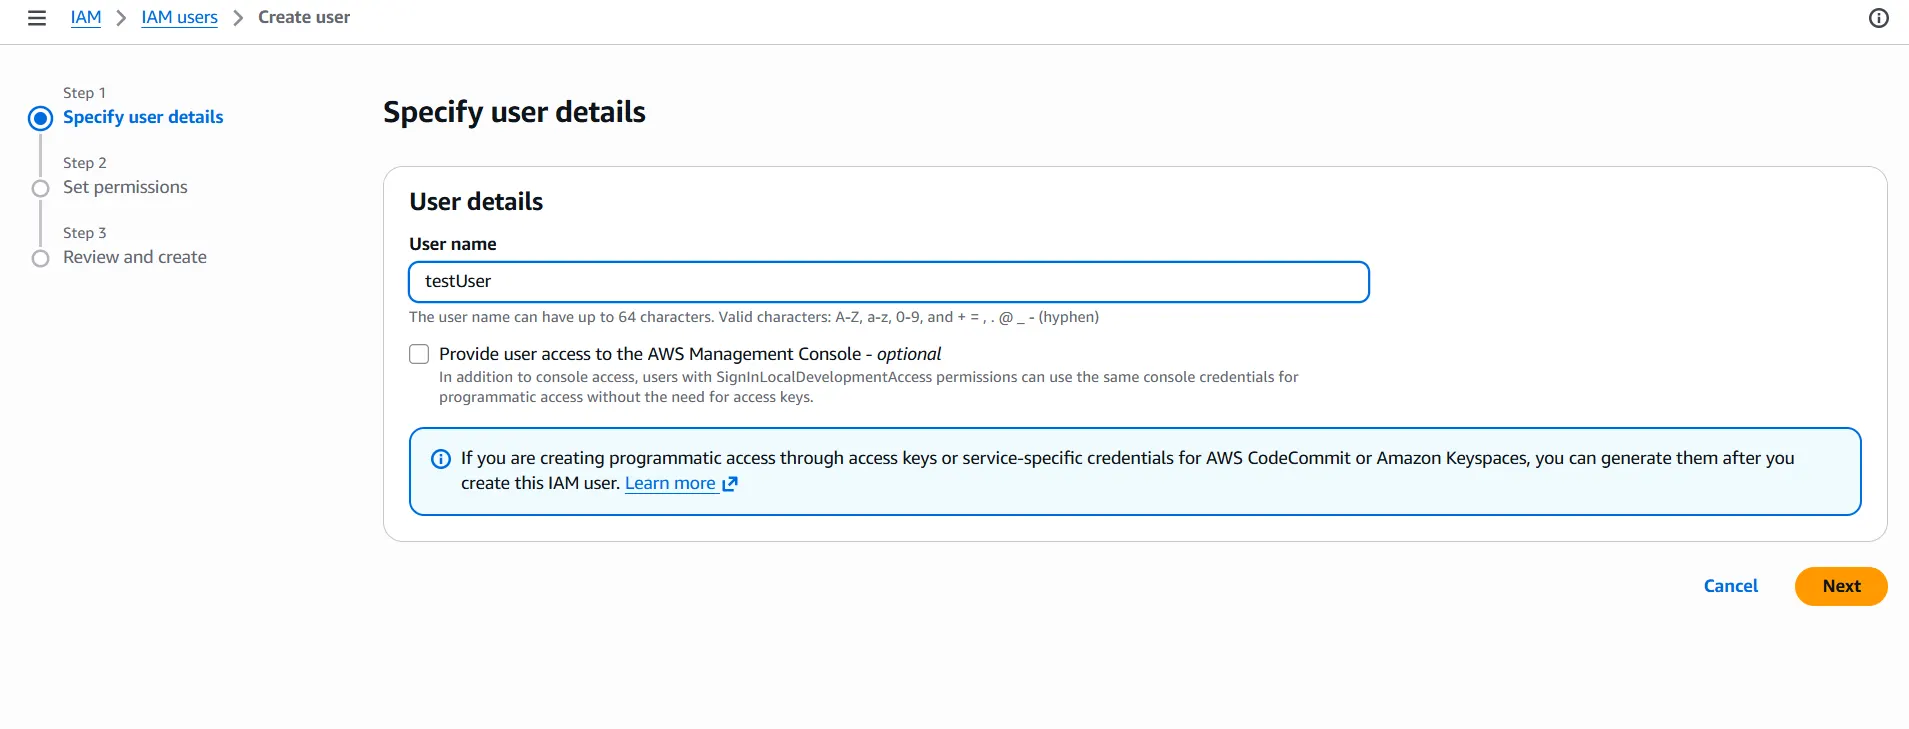
B. Create a Dedicated IAM User
Create a non-admin IAM user used exclusively for automated provisioning actions.
- Log in to the AWS Management Console.
- Navigate to IAM → Users.
- Click Create user.
- Enter a username, for example:
provisioning-user. - Do not enable "Provide user access to the AWS Management Console".
- Click Next.
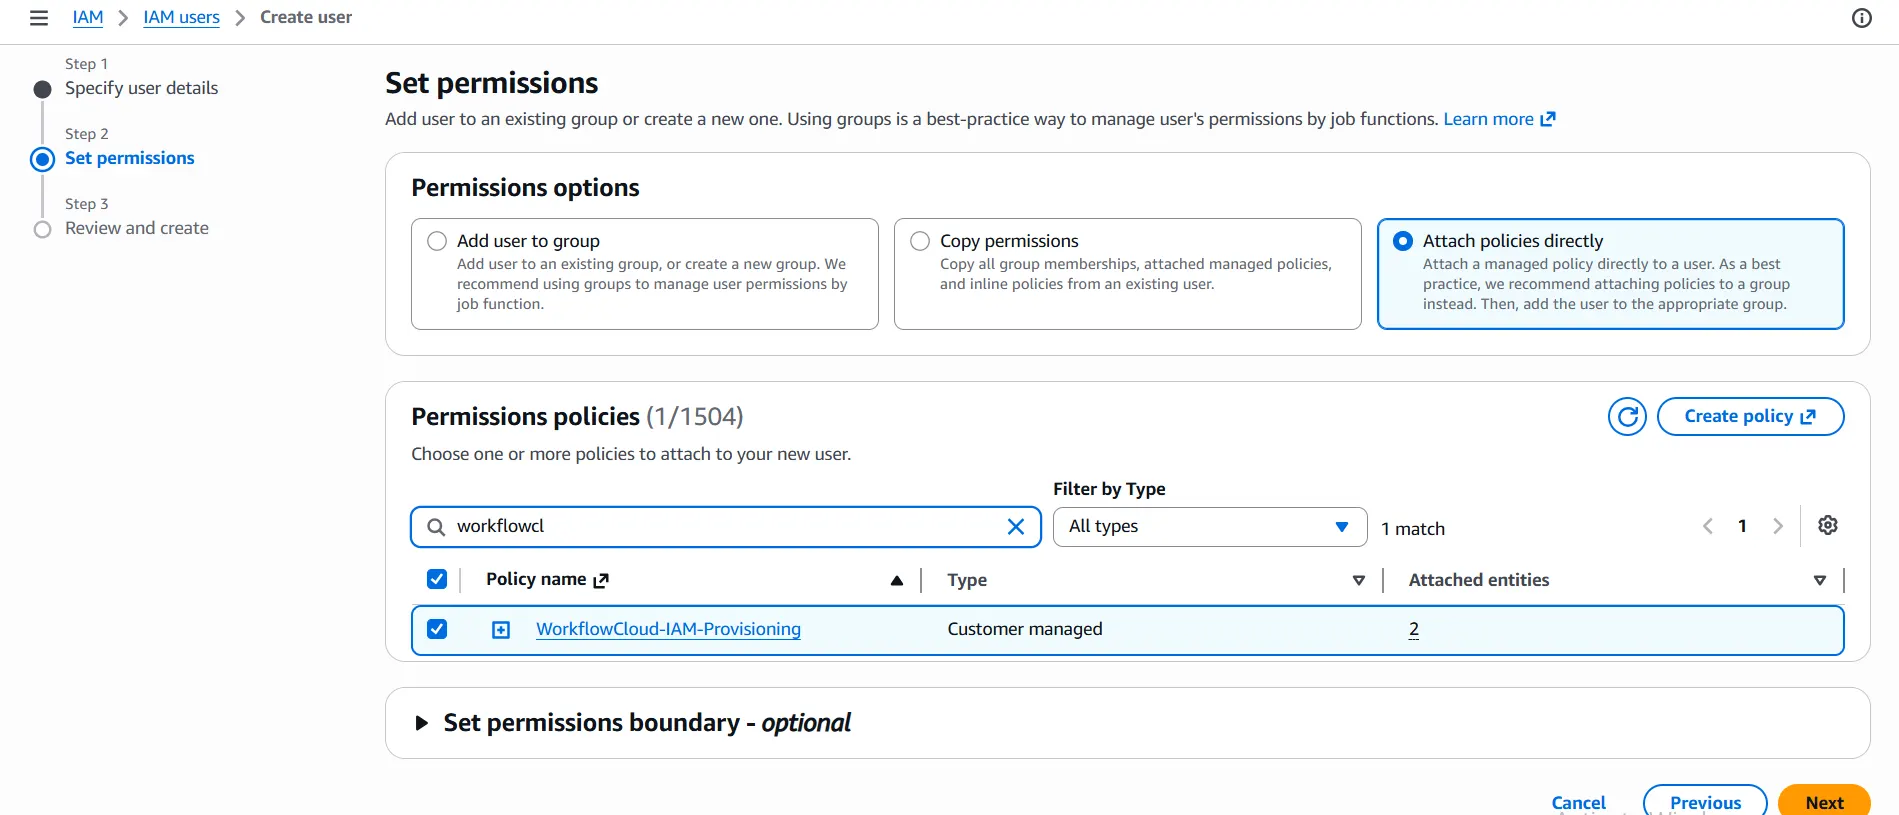
- Under Set permissions, choose Attach policies directly.
-
Search for and attach the custom policy created in Step 1 (e.g.
AutomatedProvisioningPolicy). - Review and click Create user.
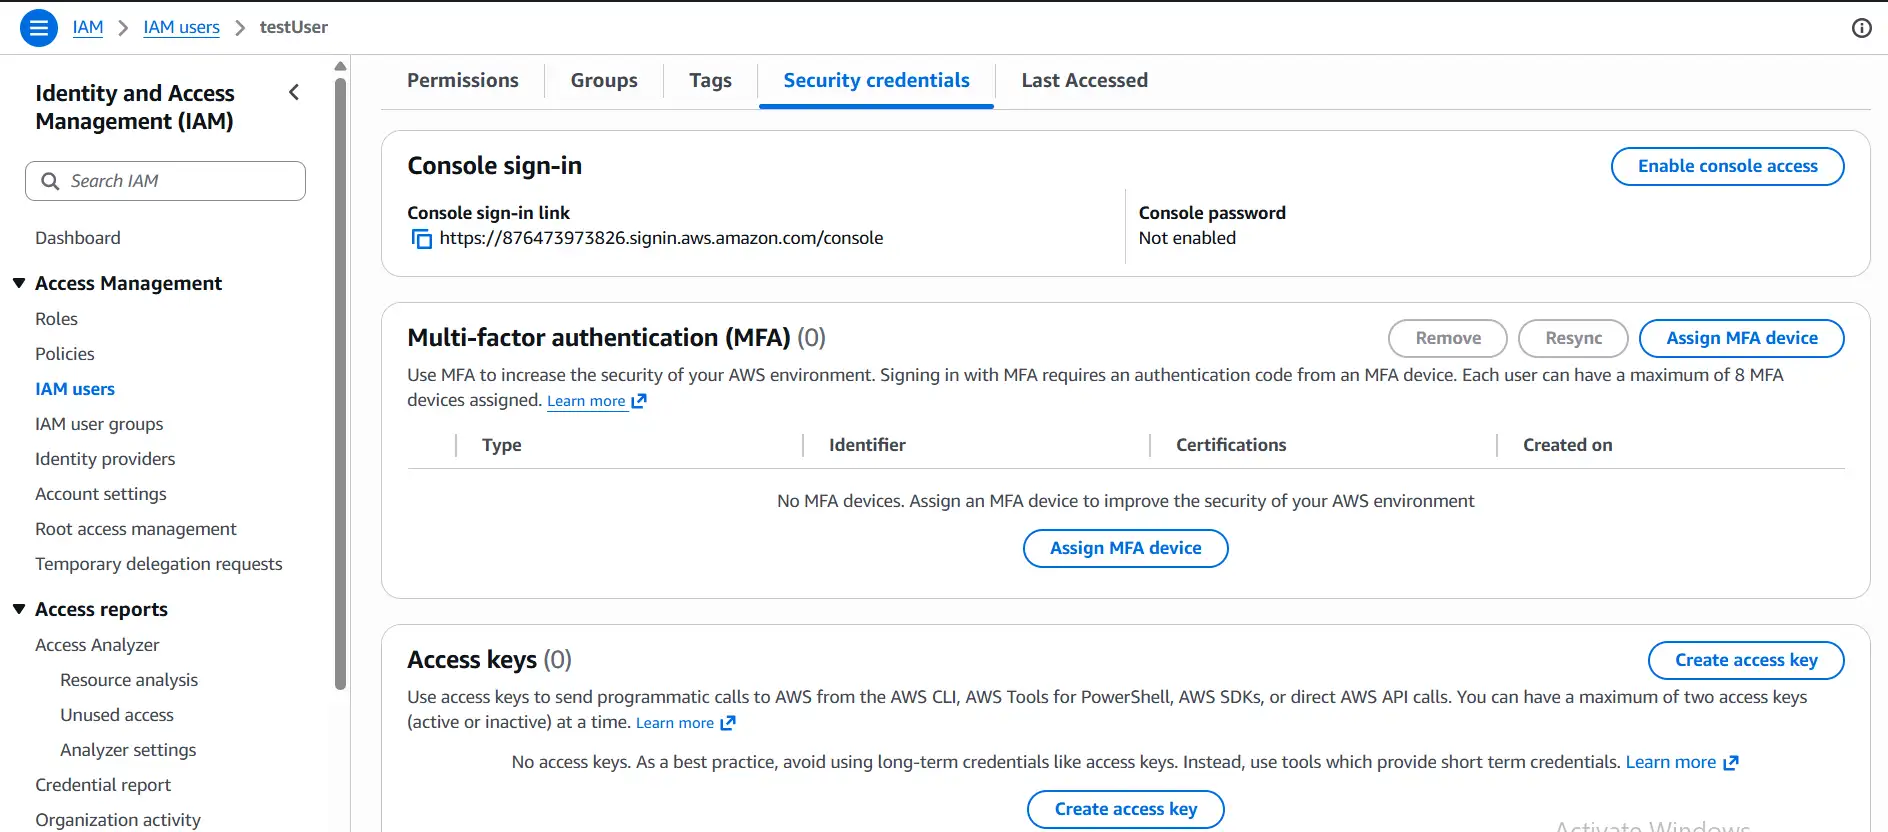
C. Create Access Keys for the IAM User
Generate programmatic credentials to allow the app to perform provisioning actions.
- Navigate to IAM → Users.
- Select the IAM user created in Step 2.
- Open the Security credentials tab.
- Click Create access key.
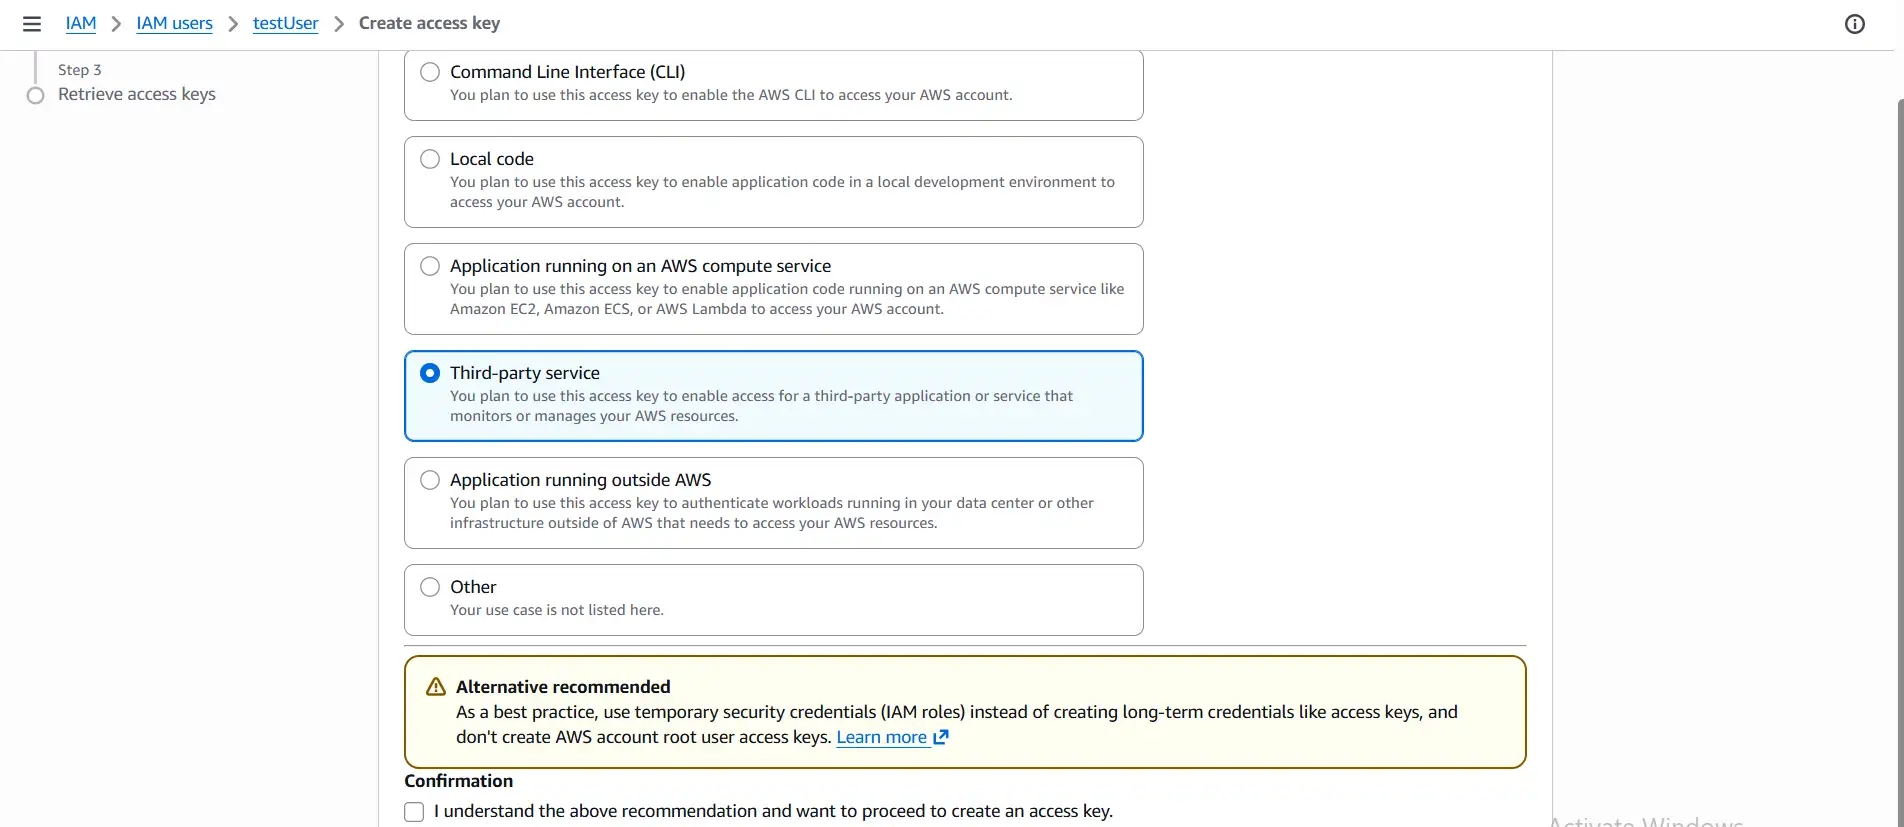
- Select Third-party service as the use case.
- Click Create access key.
- Copy and securely store the Access Key ID and Secret Access Key.
2: Connect AWS IAM to the Identity Governance, Auditing & Access Control via JSM
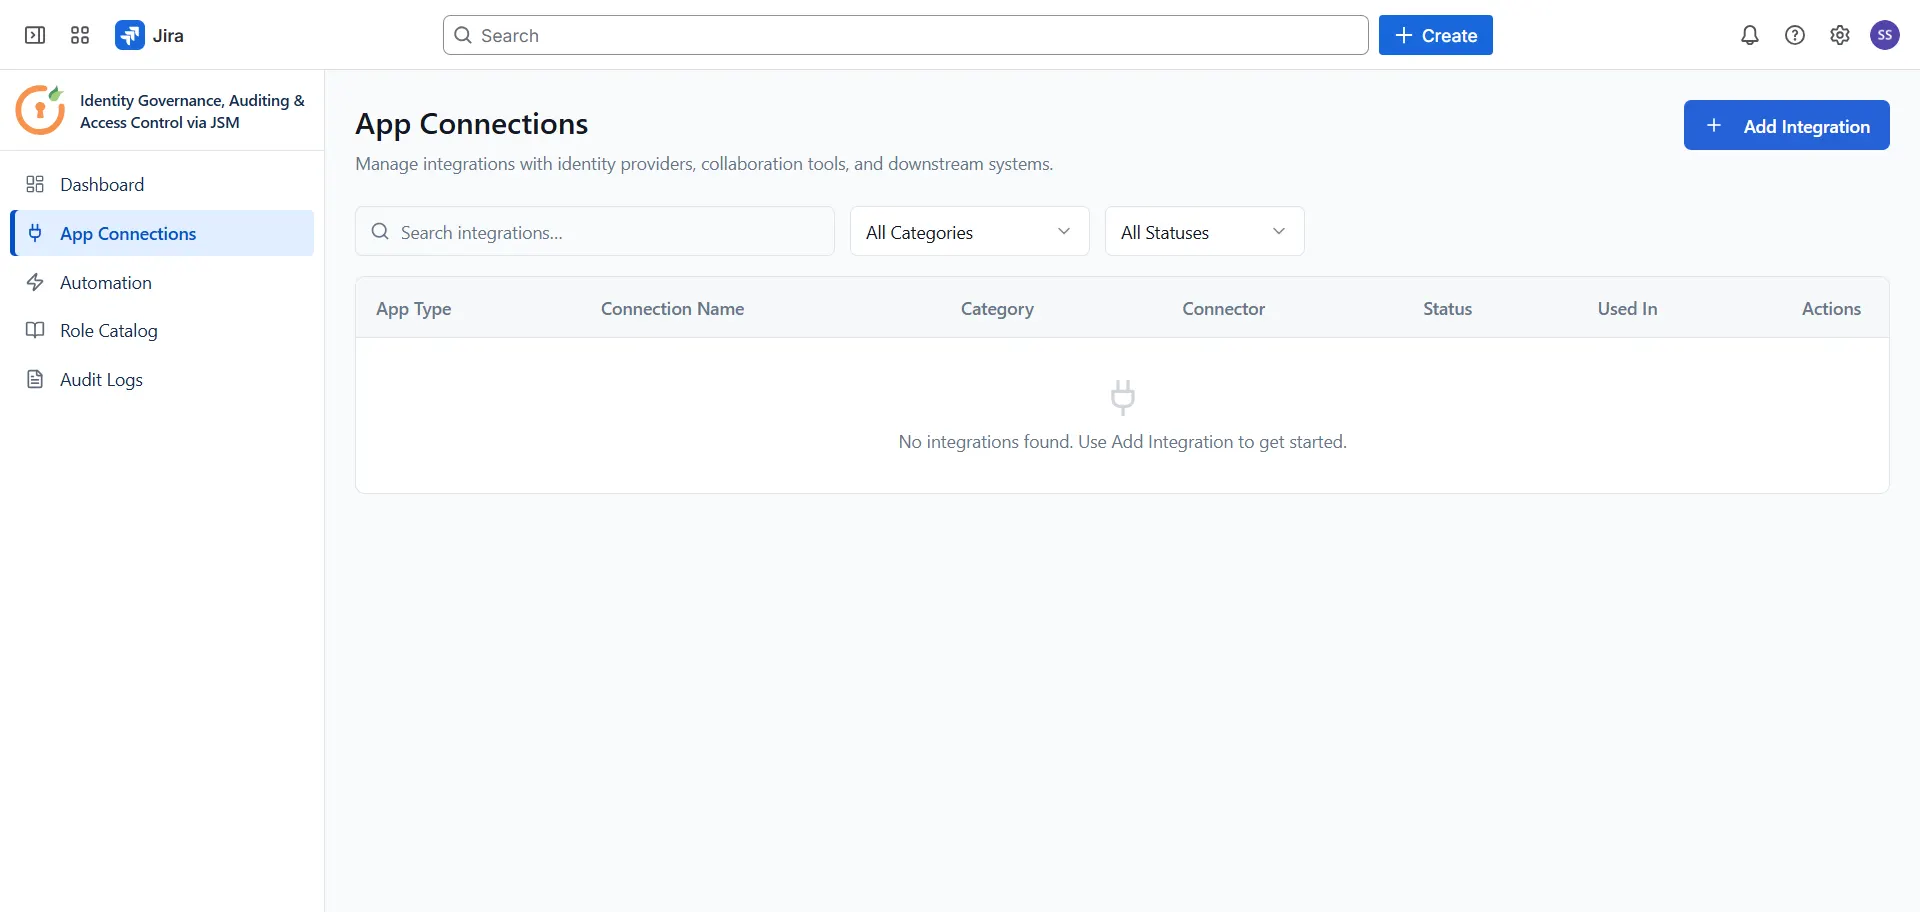
After creating the IAM user and generating access keys, open the Identity Governance, Auditing & Access Control via JSM app and navigate to App Connections from the sidebar. Click + Add Integration and select AWS from the list. Enter the following details in the Connect AWS panel:

- Connection Name: A friendly name to identify this AWS connection for other admins (e.g., "My AWS").
- Access Key: The Access Key associated with your IAM user. This key is generated from the AWS Console under IAM → Users → your user → Security credentials → Create access key.
- Secret Key: The Secret Key linked to your Access Key (shown only when the access key is created).
- Account ID: Your 12-digit AWS account ID.
- Region: The AWS region code where your IAM users are managed (e.g., us-east-1, eu-west-1). Leave blank to use the default.
- Application Admin: Select a licensed Atlassian user who will manage this connection.
Once all fields are filled in, click Connect AWS to save the integration.
Configure Automation Rules for AWS
Now that AWS is connected, configure automation rules to define how access requests are routed, approved, and provisioned in AWS . Follow the guides below to set up each rule type:
Did this page help you?
