- Home
- Identity Governance, Auditing & Access Control via JSM
- Integrate Atlassian Bitbucket Cloud with Identity Governance App

Integrate Atlassian Bitbucket Cloud with the Identity Governance, Auditing & Access Control App
The Atlassian Bitbucket Cloud integration connects your Bitbucket workspace to the Identity Governance, Auditing & Access Control App, enabling automated access provisioning, group assignments, and employee onboarding, via Jira Service Management (JSM).
 Try it for free
Pre-requisites
- Your Bitbucket Cloud workspace must be linked to the same Atlassian organization as your Jira instance (shared user directory).
-
Your workspace must use Unified User Management (UUM). To confirm
this:
- Go to your workspace settings → Access Management → Users and Groups.
- You should see Manage Users and Groups (which redirects to Atlassian administration).
- If you instead see User groups directly on bitbucket.org, your workspace is on the legacy user-management model and is not supported by this integration yet. Reach out to miniOrange support for assistance before proceeding.
- The admin account used for this connection must belong to the org-admins group.
Download and Installation
- Log in to your Atlassian Admin Console and select your site.
- Now, in the left sidebar, scroll down to the Apps section. Under Apps, select Site, which will open the site settings page.
- In the site settings, navigate to Connected Apps → Explore apps. (Alternatively, you can go to the Atlassian Marketplace and search for the app.)
- Search for miniOrange Identity Governance, Auditing & Access Control App.
- Click “Try it free” to begin a new trial of the app.
- Now, in the top menu bar, go to Apps.
- Locate the “Identity Governance, Auditing & Access Control App” app and click to open it.
Step 1: Add the Bitbucket Integration
- Open the Identity Governance, Auditing & Access Control App.
- Navigate to App Connections from the sidebar.
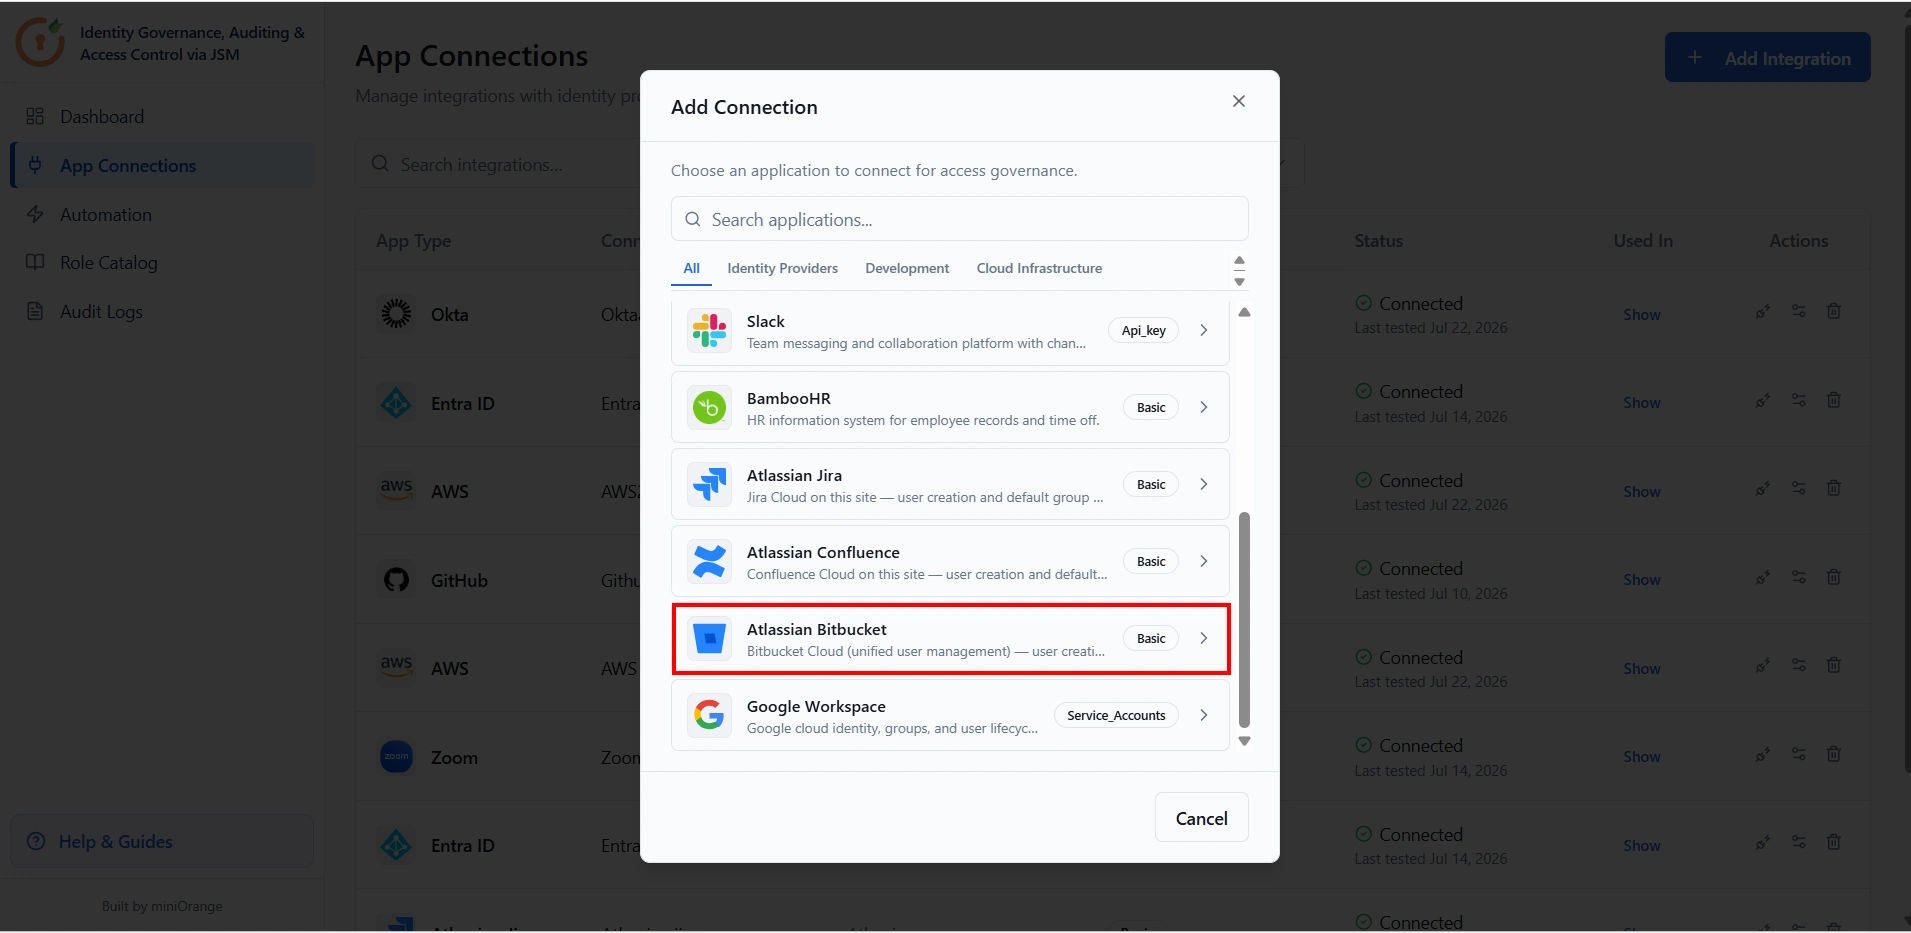
- Click + Add Integration and select Atlassian Bitbucket from the list.
Step 2: Enter the Connection Details
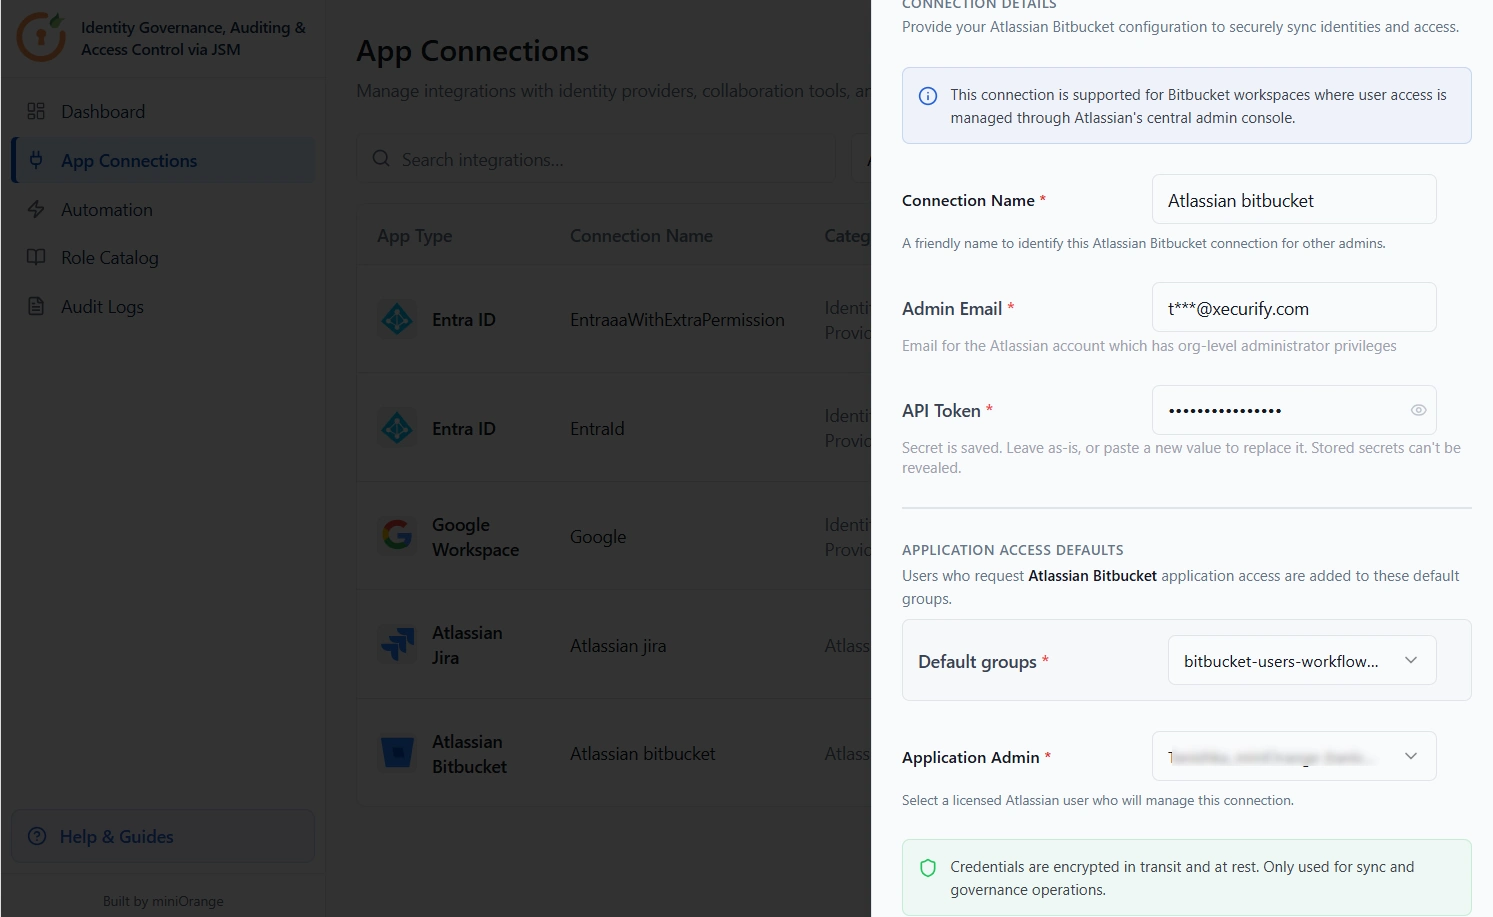
Enter the following details in the Connect Atlassian Bitbucket panel:
- Connection Name: Enter a label so that this connection can be identified by other admins (e.g., “Corporate Bitbucket”).
- Admin Email: Email address of the Atlassian account used for provisioning. Must belong to the org-admins group.
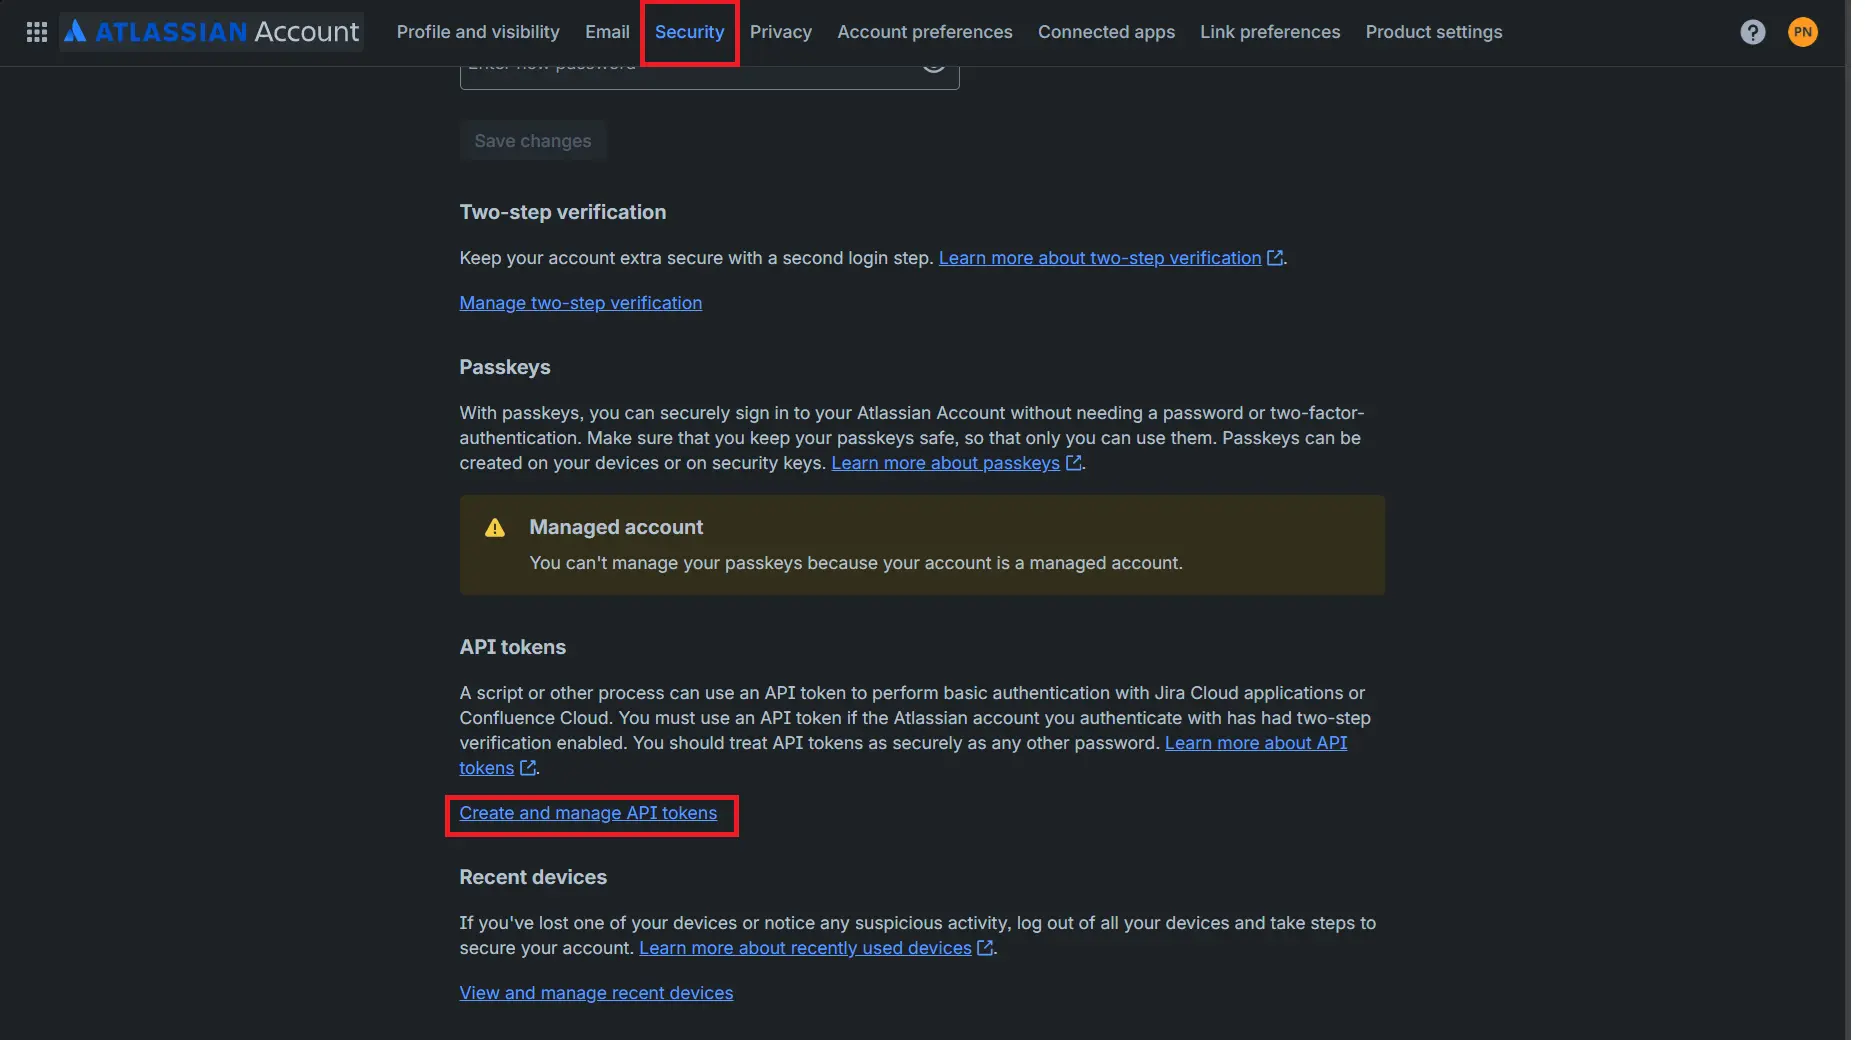
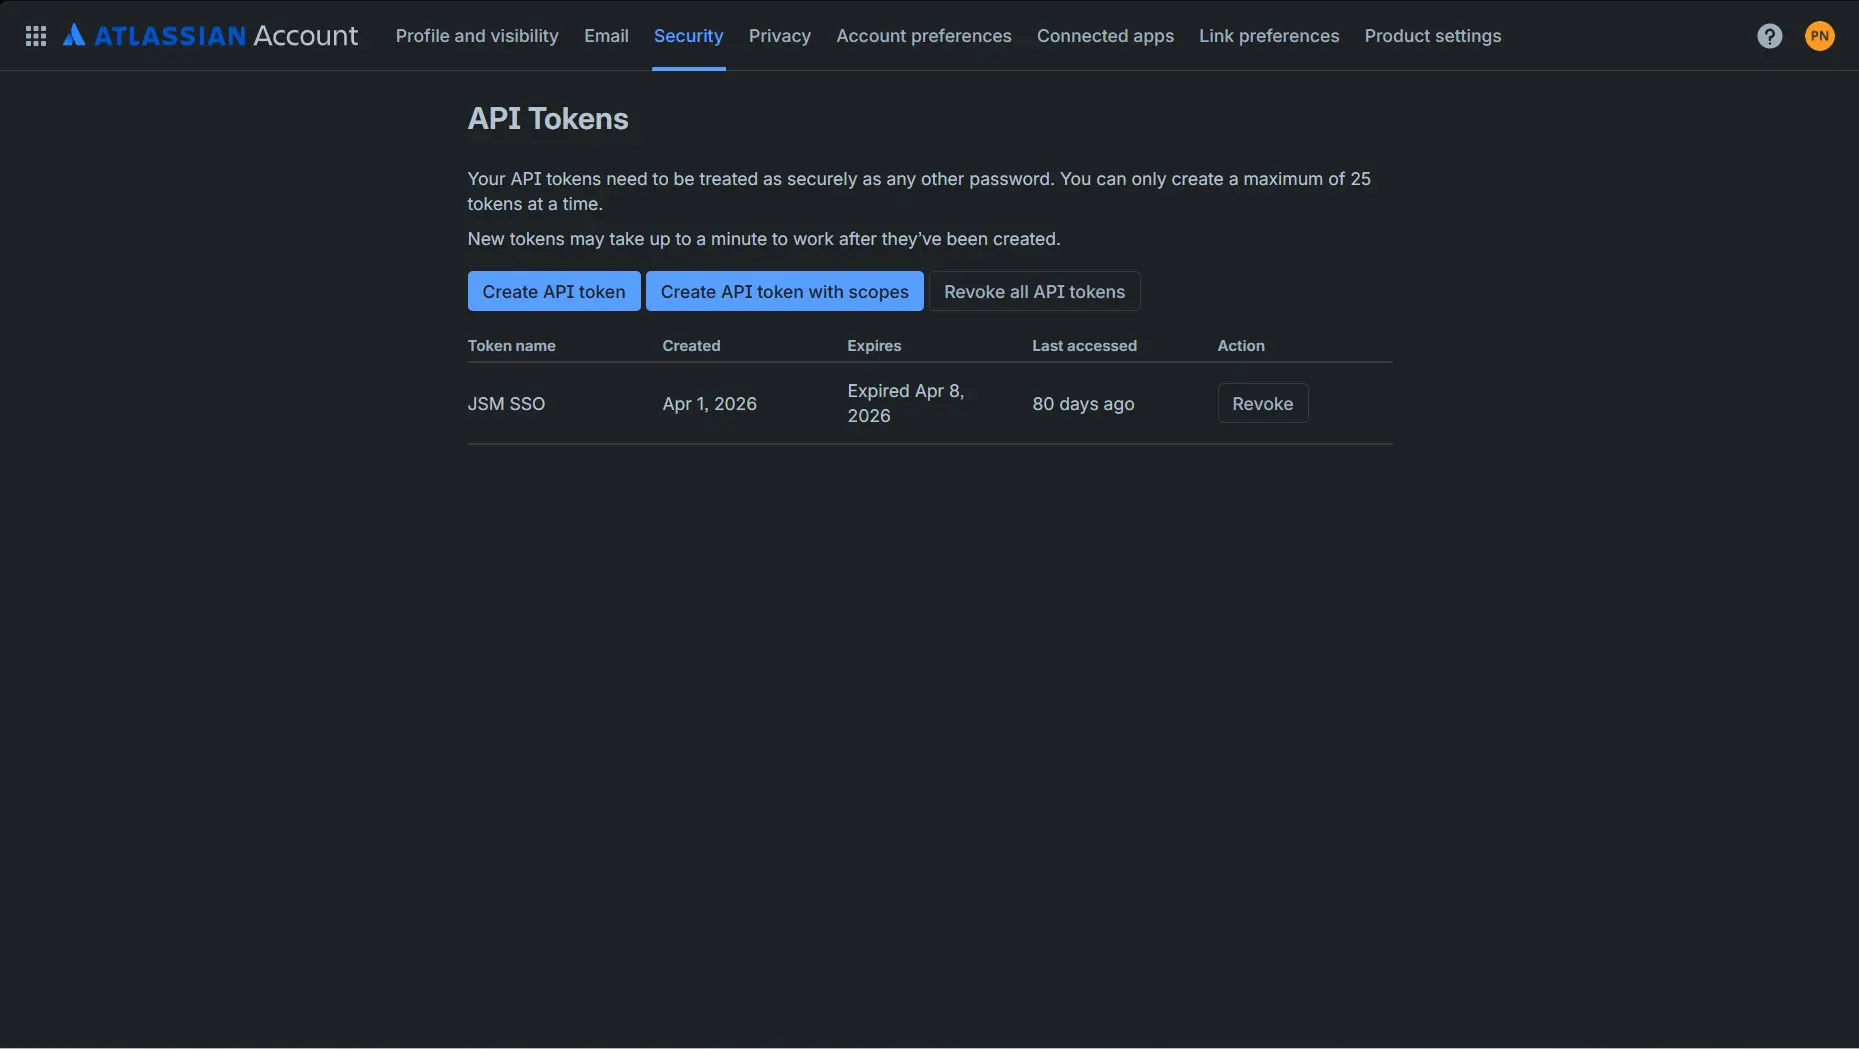
- API Token: The API token for the admin account selected above. Generate one at id.atlassian.com → Security → API tokens → Create API Token
- Application Admin: Select a licensed Bitbucket user who will manage this connection.
-
Default Groups: Select the group from the group list that new
Bitbucket users will be added to upon provisioning — To find the available
groups:
- Navigate to https://admin.atlassian.com.
- Select the appropriate organization.
- Go to Directory → Groups.
- Apply the Application filter and select Bitbucket.
- Select and add the default group.
Recommendation: treat any rule that grants membership in an
admin-tier group (e.g., bitbucket-admins-{workspaceSlug}) as a
privileged access group requiring approval, since workspace admin permissions
cascade to every project and repository in the workspace.
Note: Credentials are stored in Forge encrypted storage and
are used solely for sync and provisioning operations.
Once all fields are filled in, click Connect Atlassian Bitbucket to save the integration.
Next Steps: Configure Automation Rule
With the connection saved, configure automation rules to define how access requests are routed, approved, and provisioned:
Did this page help you?
×
![]()


