- Home
- Identity Governance, Auditing & Access Control
- Set Up the Identity Governance, Auditing & Access Control via JSM with Tableau Cloud

How to Set Up Identity Governance, Auditing & Access Control via JSM with Tableau Cloud
This guide walks you through configuring Tableau Cloud credentials inside the Identity Governance, Auditing & Access Control via JSM app so that it can automatically provision and deprovision users, manage group memberships, and enforce lifecycle policies — all from within Jira.
This step-by-step guide will help you integrate Tableau Cloud within the app.
App Overview
The Identity Governance, Auditing & Access Control via JSM is an advanced solution built on Jira Service Management (JSM) to simplify and automate access request workflows across your organization.
Instead of relying on manual request and approval steps, the app enables:
- End users can submit access requests through the JSM portal.
- Automated routing of approval workflows based on predefined rules.
- Instant provisioning actions once approvals are complete.
By automating these processes, the Identity Governance, Auditing & Access Control via JSM ensures secure, policy-driven, and audit-ready access management across your tech ecosystem.
 Try it for free
Pre-requisites
Before you begin, make sure you have the following:
- Admin access to Jira Service Management (JSM): Required to configure workflows, custom fields, and automation rules.
- Site Administrator access to Tableau Cloud: Needed to create a Personal Access Token and authorize the integration.
1: Prepare a Tableau Cloud user for automated provisioning
A. Identify (or create) a dedicated Tableau Cloud user for this integration
We recommend using a dedicated service-account user for this connection rather than a personal admin's account, so access can be managed and revoked independently of any individual employee.
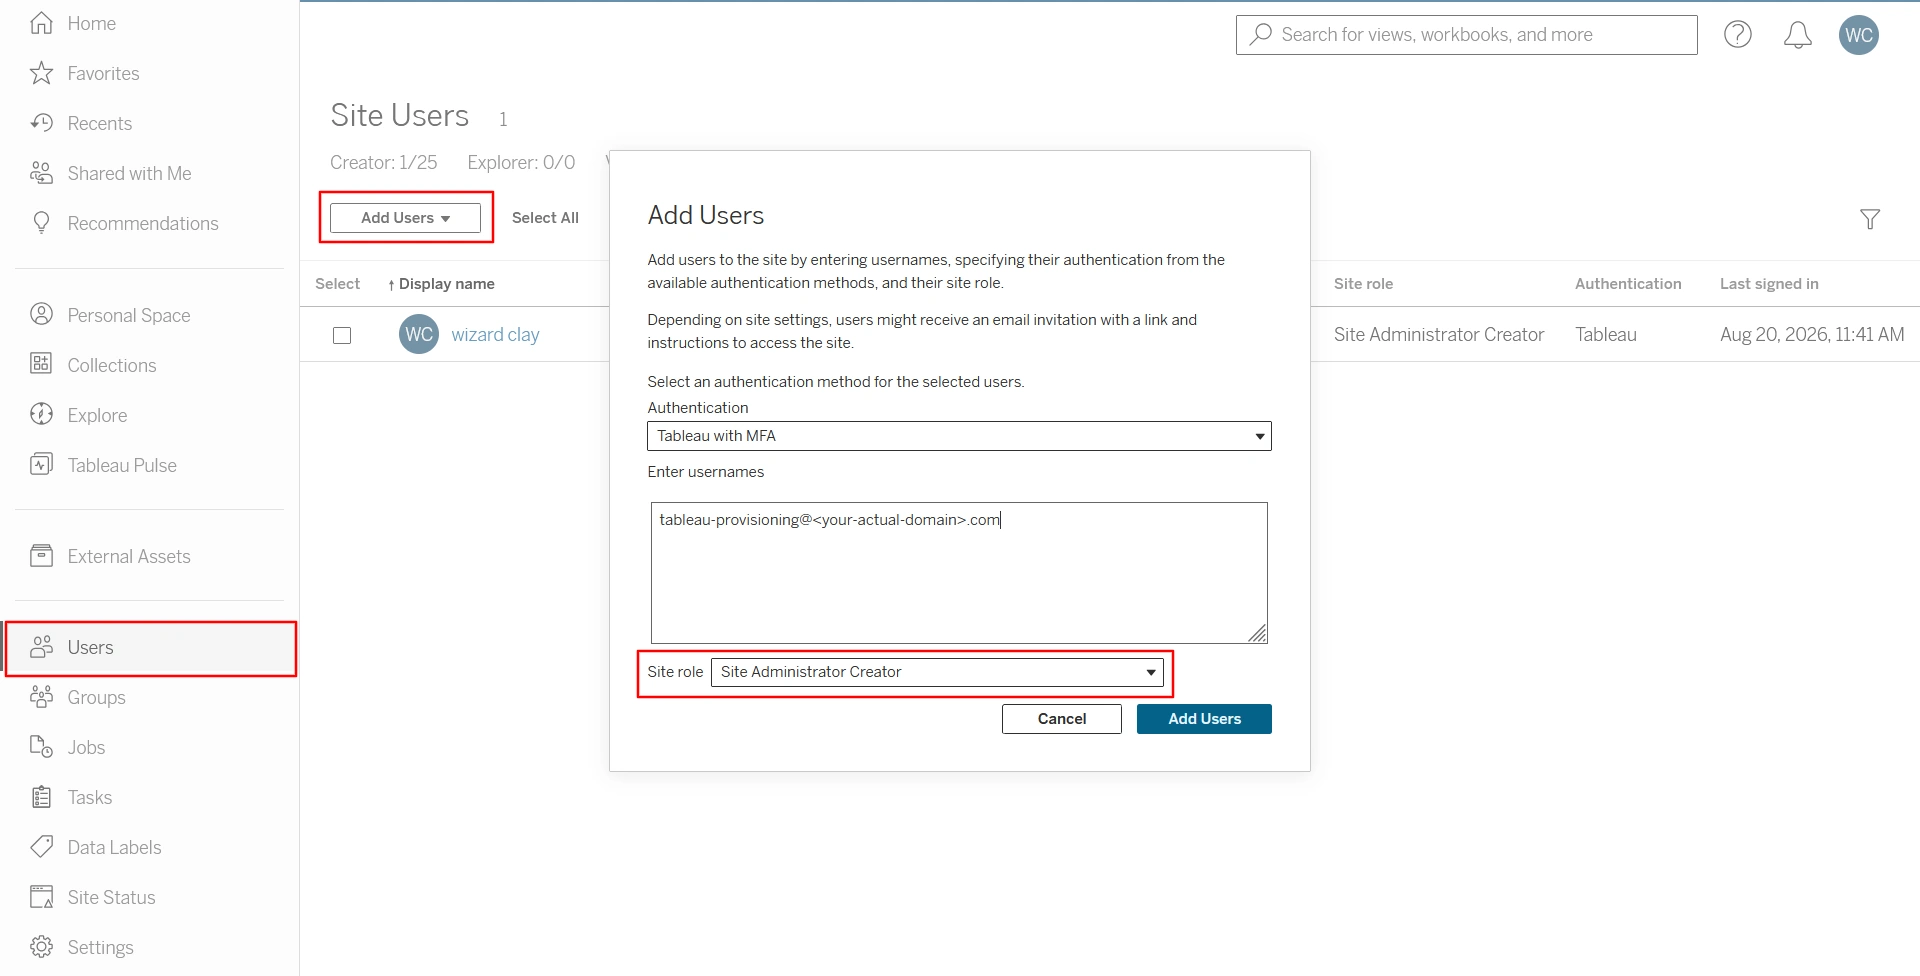
- Log in to Tableau Cloud as a Site Administrator.
- Navigate to Users in the left navigation.
-
If a dedicated automation user doesn't already exist, create one
(e.g.
provisioning-user@yourcompany.com).
Set the user's Site role to either:
- Site Administrator Explorer, or
- Site Administrator Creator
B. Create a Personal Access Token (PAT)
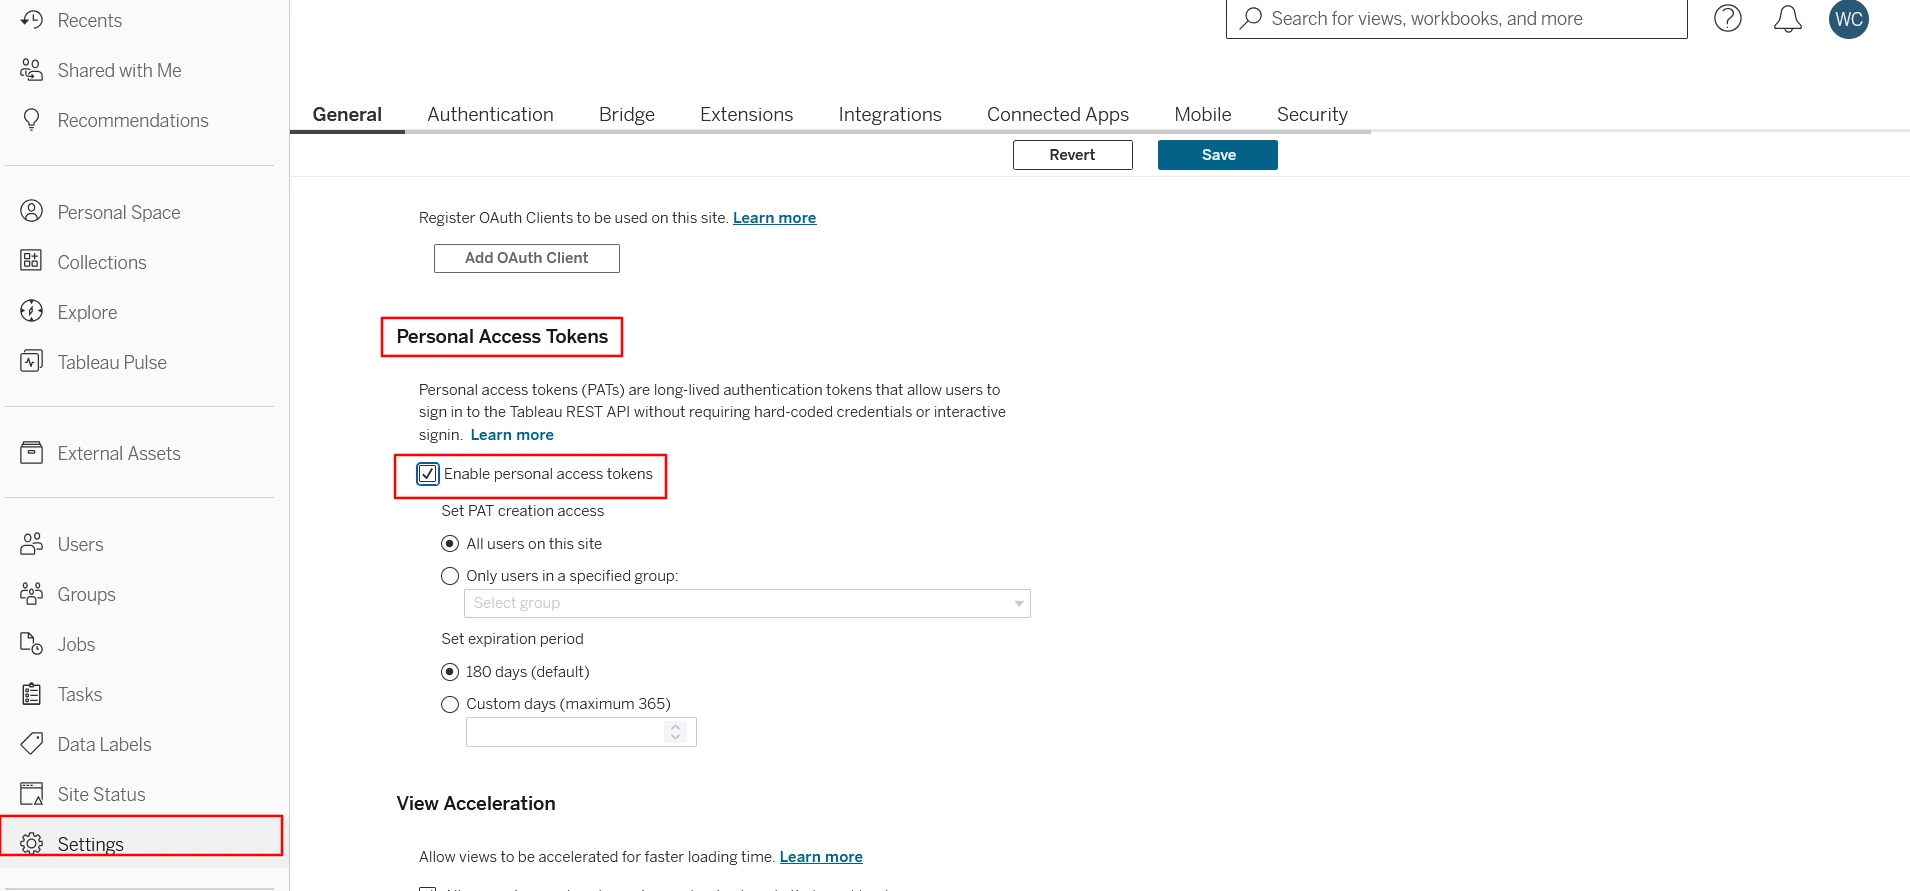
Personal access tokens let the app sign in to the Tableau REST API without requiring interactive login or hard-coded passwords.
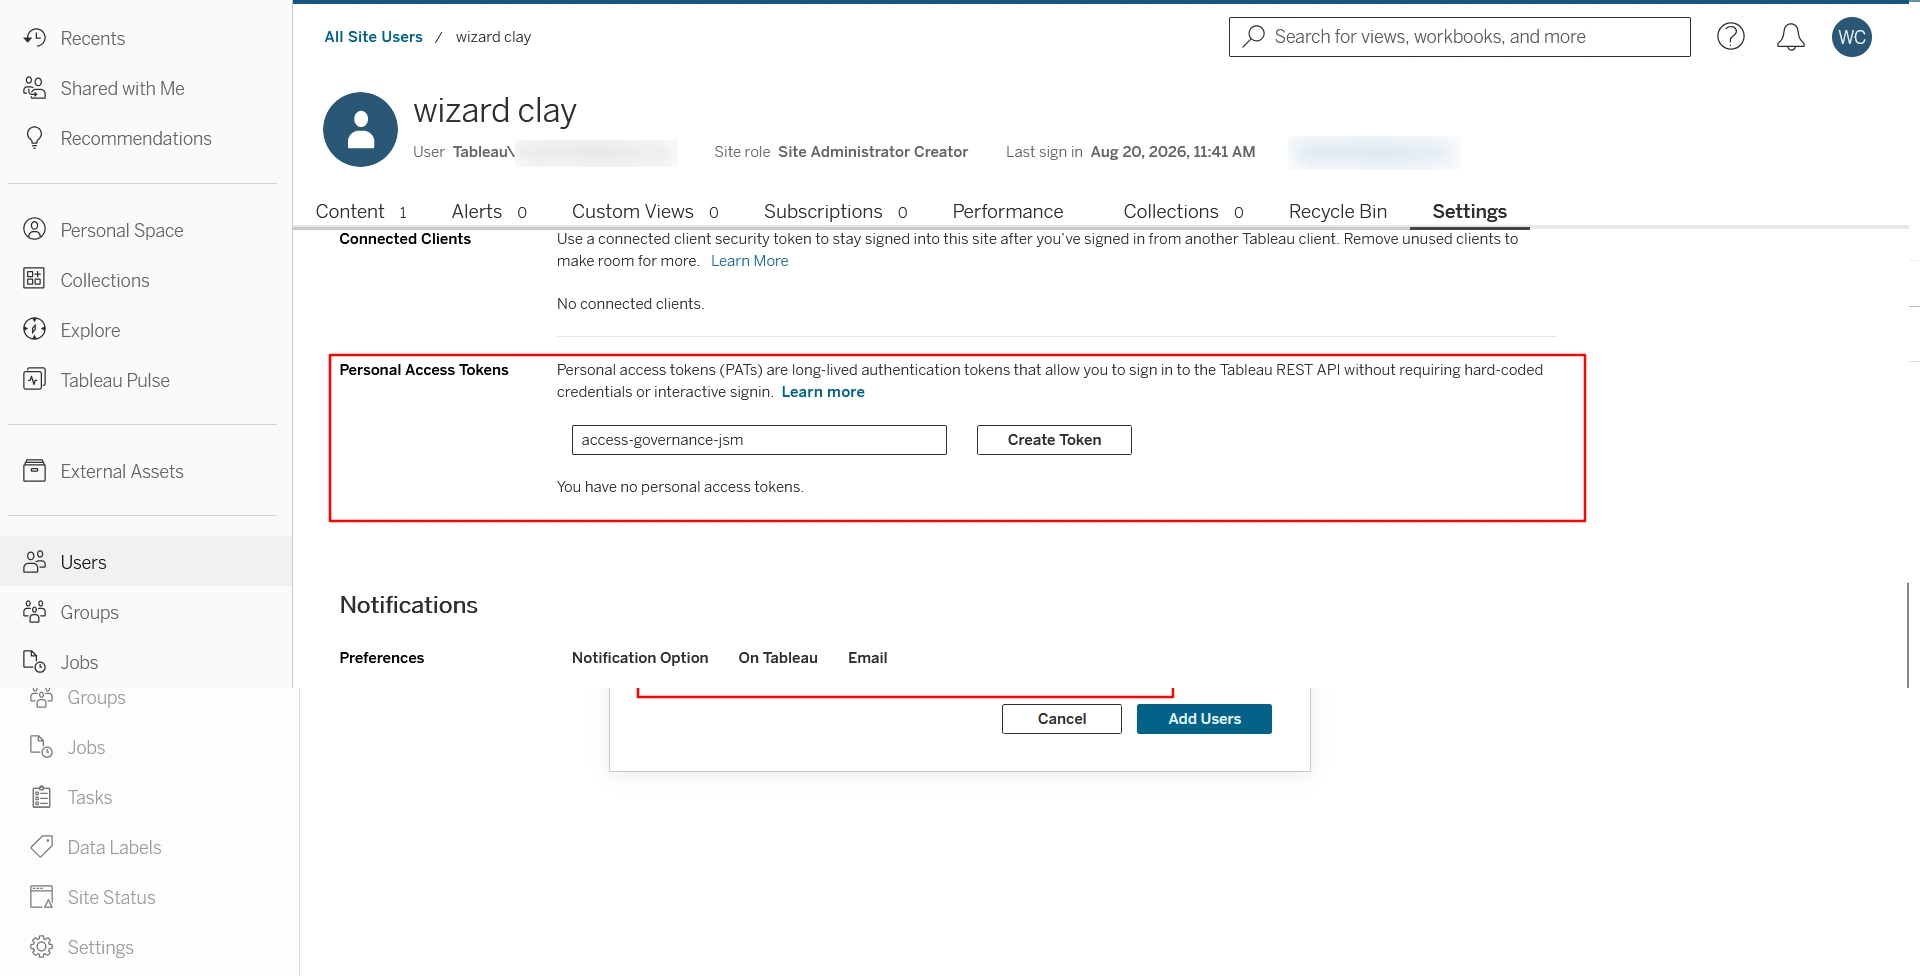
- While signed in as the dedicated user, click the profile icon in the top-right corner.
- Click My Account Settings.
- Scroll to the Personal Access Tokens section.
-
Enter a Token Name, e.g.
access-governance-jsm. - Click Create new token.
- Copy and securely store the token secret shown in the dialog.
C. Note your Tableau Cloud URL and Site Content URL
You'll need both of these for Step 2. The easiest way to get them is directly from your browser's address bar while logged into Tableau Cloud.
With Tableau Cloud open in your browser, look at the address bar. It will look like:
https://prod-in-a.online.tableau.com/#/site/acmecorp/users
-
Tableau Cloud URL — everything before
/#/site/:
https://prod-in-a.online.tableau.com -
Site Content URL — the identifier right after
/site/, before the next/:
acmecorp
If you're on the Default site, your URL won't have a
/site/ segment at all — leave this field blank.
2: Connect Tableau Cloud to the Identity Governance, Auditing & Access Control via JSM
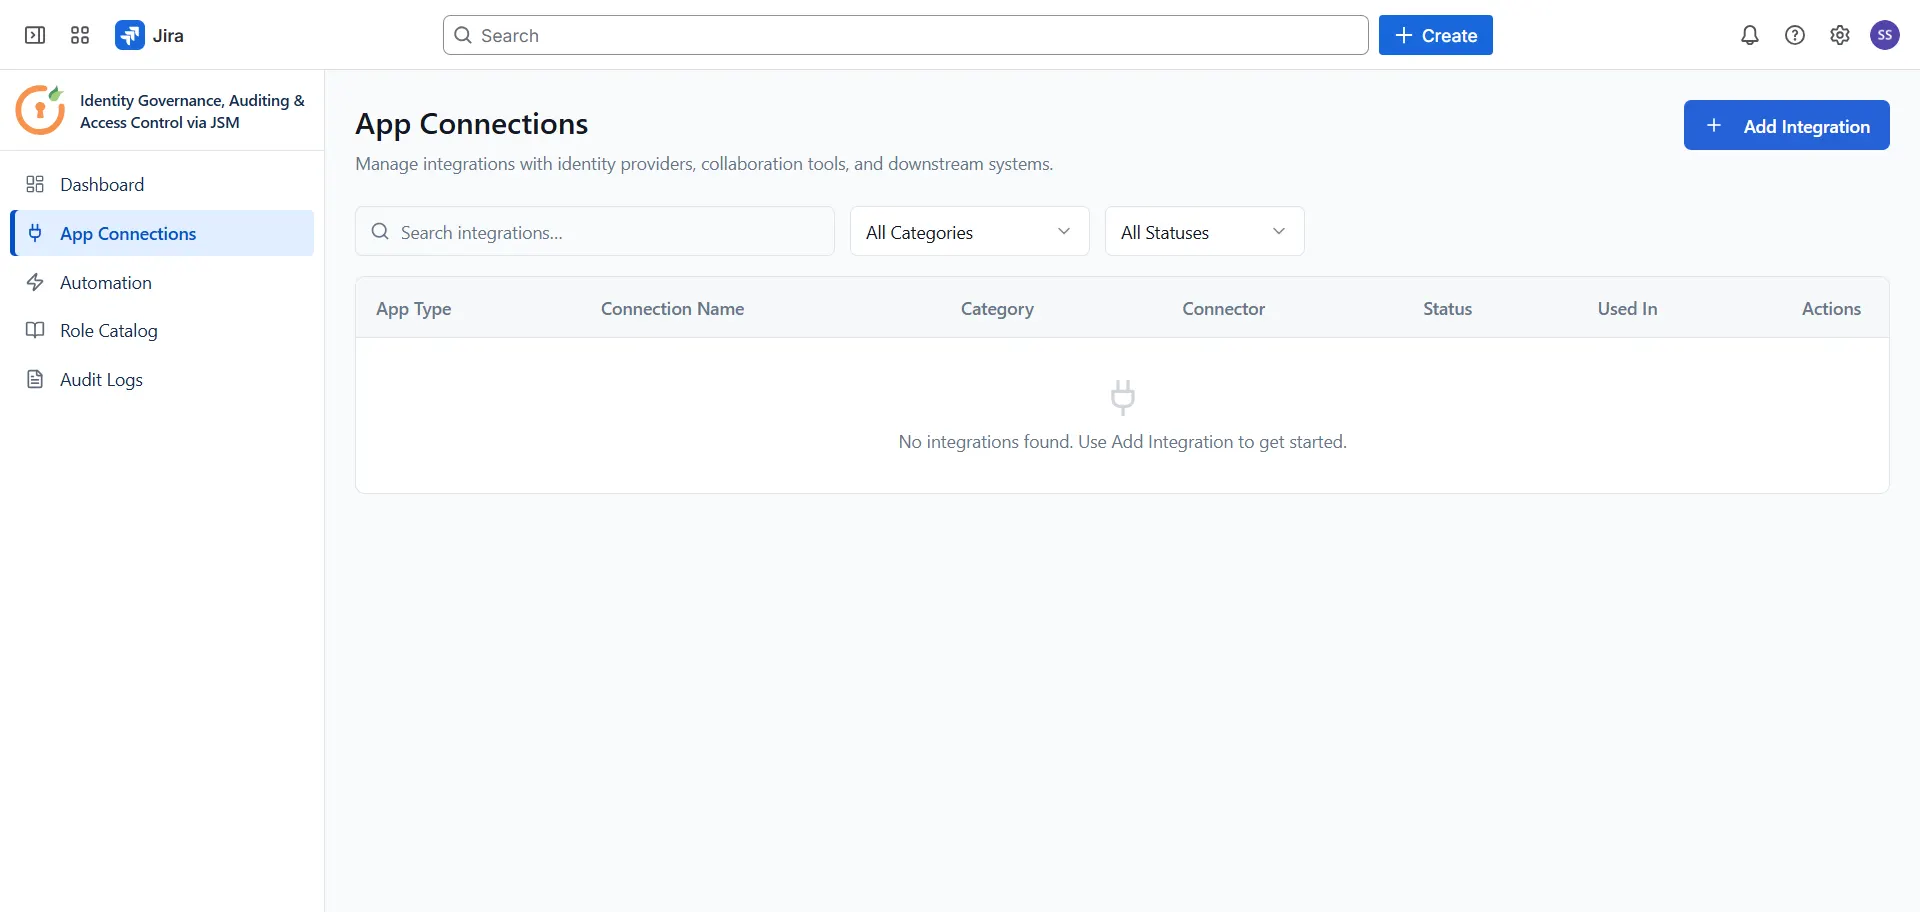
After creating the dedicated user and generating a Personal Access Token, open the Identity Governance, Auditing & Access Control via JSM app and navigate to App Connections from the sidebar. Click + Add Integration and select Tableau Cloud from the list. Enter the following details in the Connect Tableau Cloud panel:
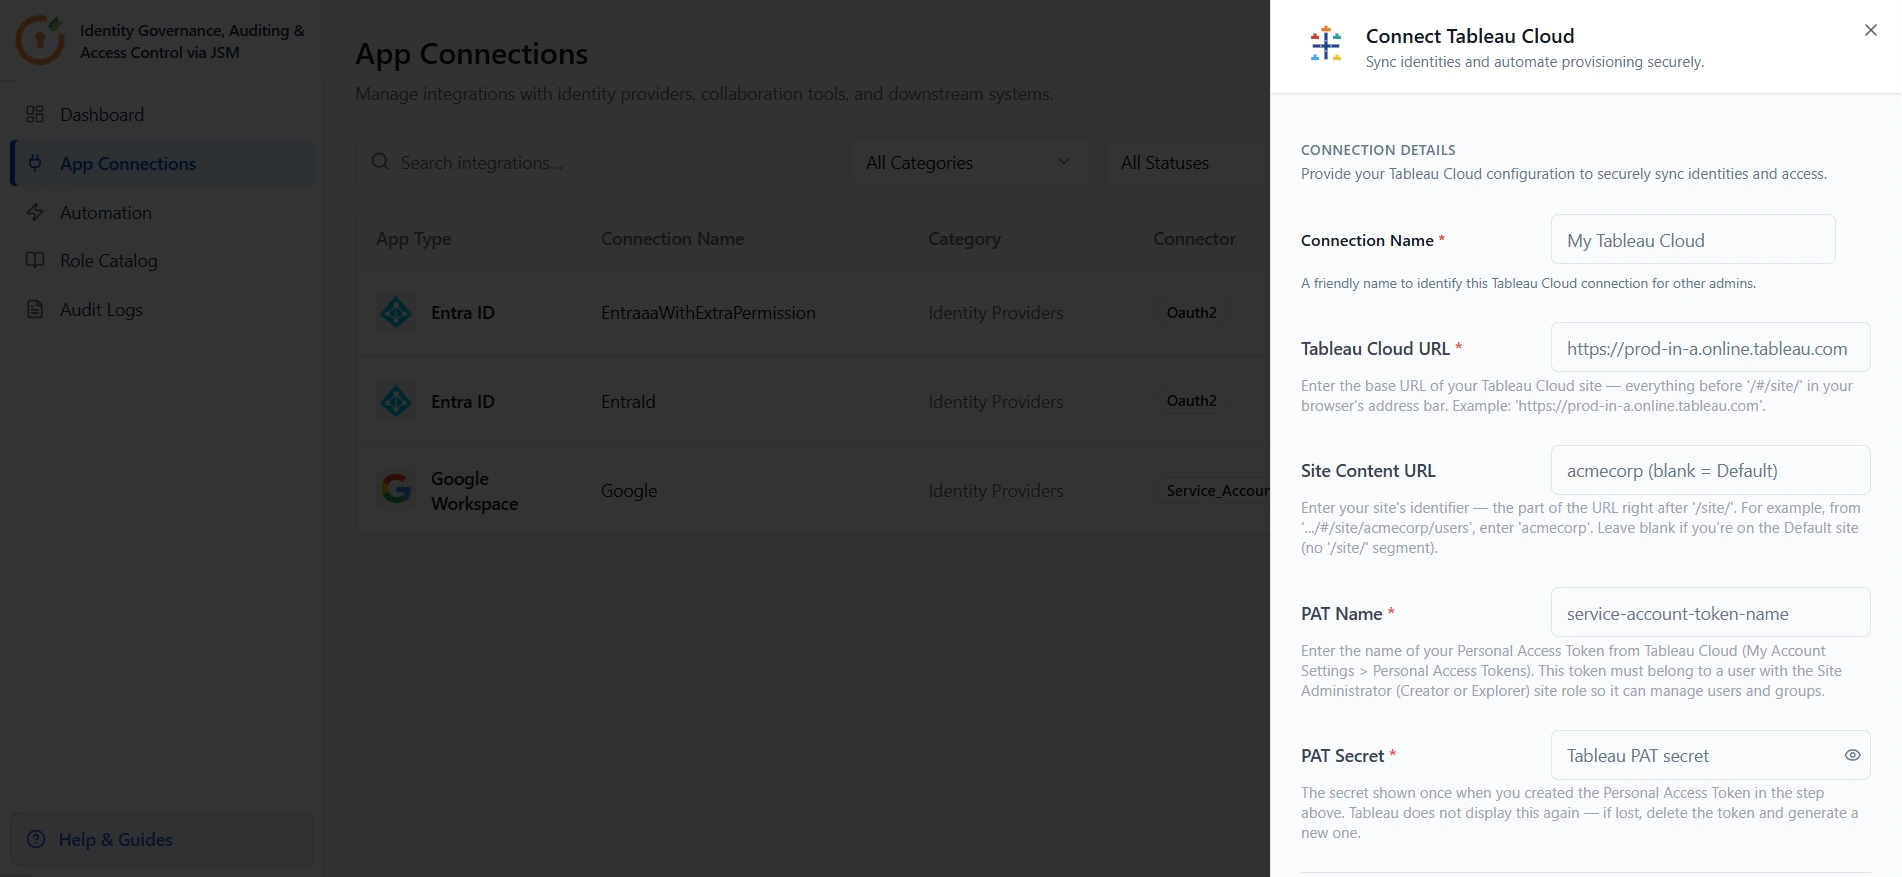
-
Connection Name: A friendly name to identify this connection
for other admins (e.g.,
Company Tableau Cloud). -
Tableau Cloud URL: The base URL of your Tableau Cloud site —
everything before
/#/site/.... Example:https://prod-in-a.online.tableau.com. Do not include any path or query string. -
Site Content URL: The site identifier from your URL (e.g.
acmecorp). Leave blank if you're using the Default site. - PAT Name: The name of the Personal Access Token created in Step 1B.
- PAT Secret: The token secret you copied when the PAT was created. Tableau never shows this again — if you don't have it, go back to Step 1B and generate a new one.
- Application Admin: Select a licensed Atlassian user who will manage this connection.
Once all fields are filled in, click Connect Tableau Cloud to save the integration.
Configure Automation Rules for Tableau Cloud
Now that Tableau Cloud is connected, configure automation rules to define how access requests are routed, approved, and provisioned. Follow the guides below to set up each rule type:
Did this page help you?