- Home
- Automate Access Request & Review For Zoom
- Automate Access Request & Review with Zoom

How to Automate Access Request & Review with Zoom
Here’s a step-by-step guide to walk you through how to set up the Automate Access Request & Review with Zoom.
App Overview
The Automate Access Request & Review For Zoom is an advanced solution that helps you to simplify and automate access request workflows across your organization.
Instead of relying on manual request and approval steps, the app enables:
- End users can submit access requests through the JSM portal.
- Automated routing of approval workflows based on predefined rules.
- Instant provisioning actions once approvals are complete.
By automating these processes, the Automate Access Request & Review For Zoom ensures secure, policy-driven, and audit-ready access management across your tech ecosystem.
 Try it for free
Video Setup Guide
Pre-requisites
Before you begin, make sure you have the following:
- Admin access to Jira Service Management (JSM): Required to configure workflows, custom fields, and automation rules.
- Admin access to Zoom portal: Needed to authorize integrations and manage access provisioning.
1: Create or Log In to a Zoom Account
Follow these steps:
- Open the following URL: https://zoom.us/myhome
- Create a new account if you do not already have one. Log in using an account with Owner or Admin privileges.
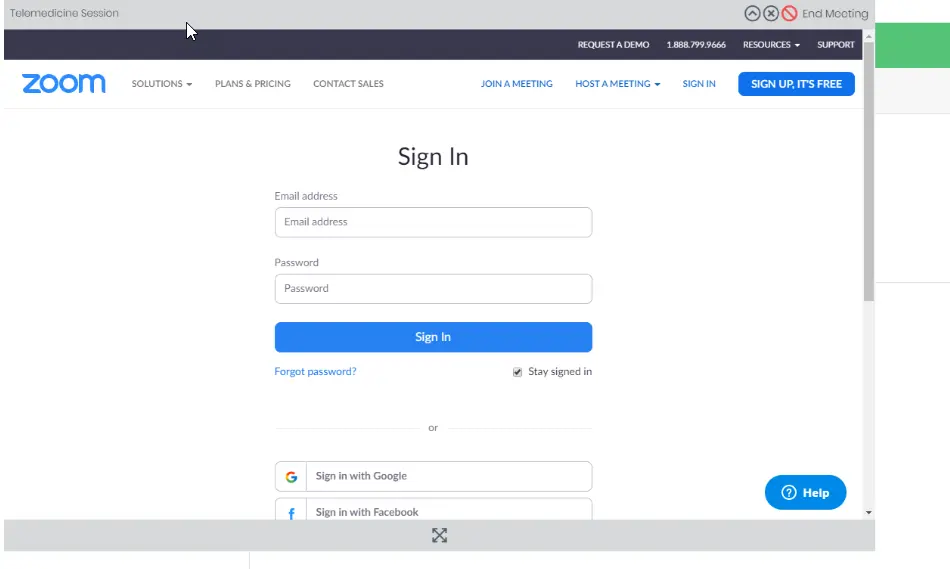
Reason
Only Admin or Owner accounts can access the App Marketplace and configure API applications. Paid Zoom plans are required for admin API usage.
Free accounts may return the following response when calling APIs:
{ "code": 200, "message": "No privilege." }
2: Open the Zoom App Marketplace
Follow these steps:
- Navigate to the following path after logging in: Admin → Advanced → App Marketplace
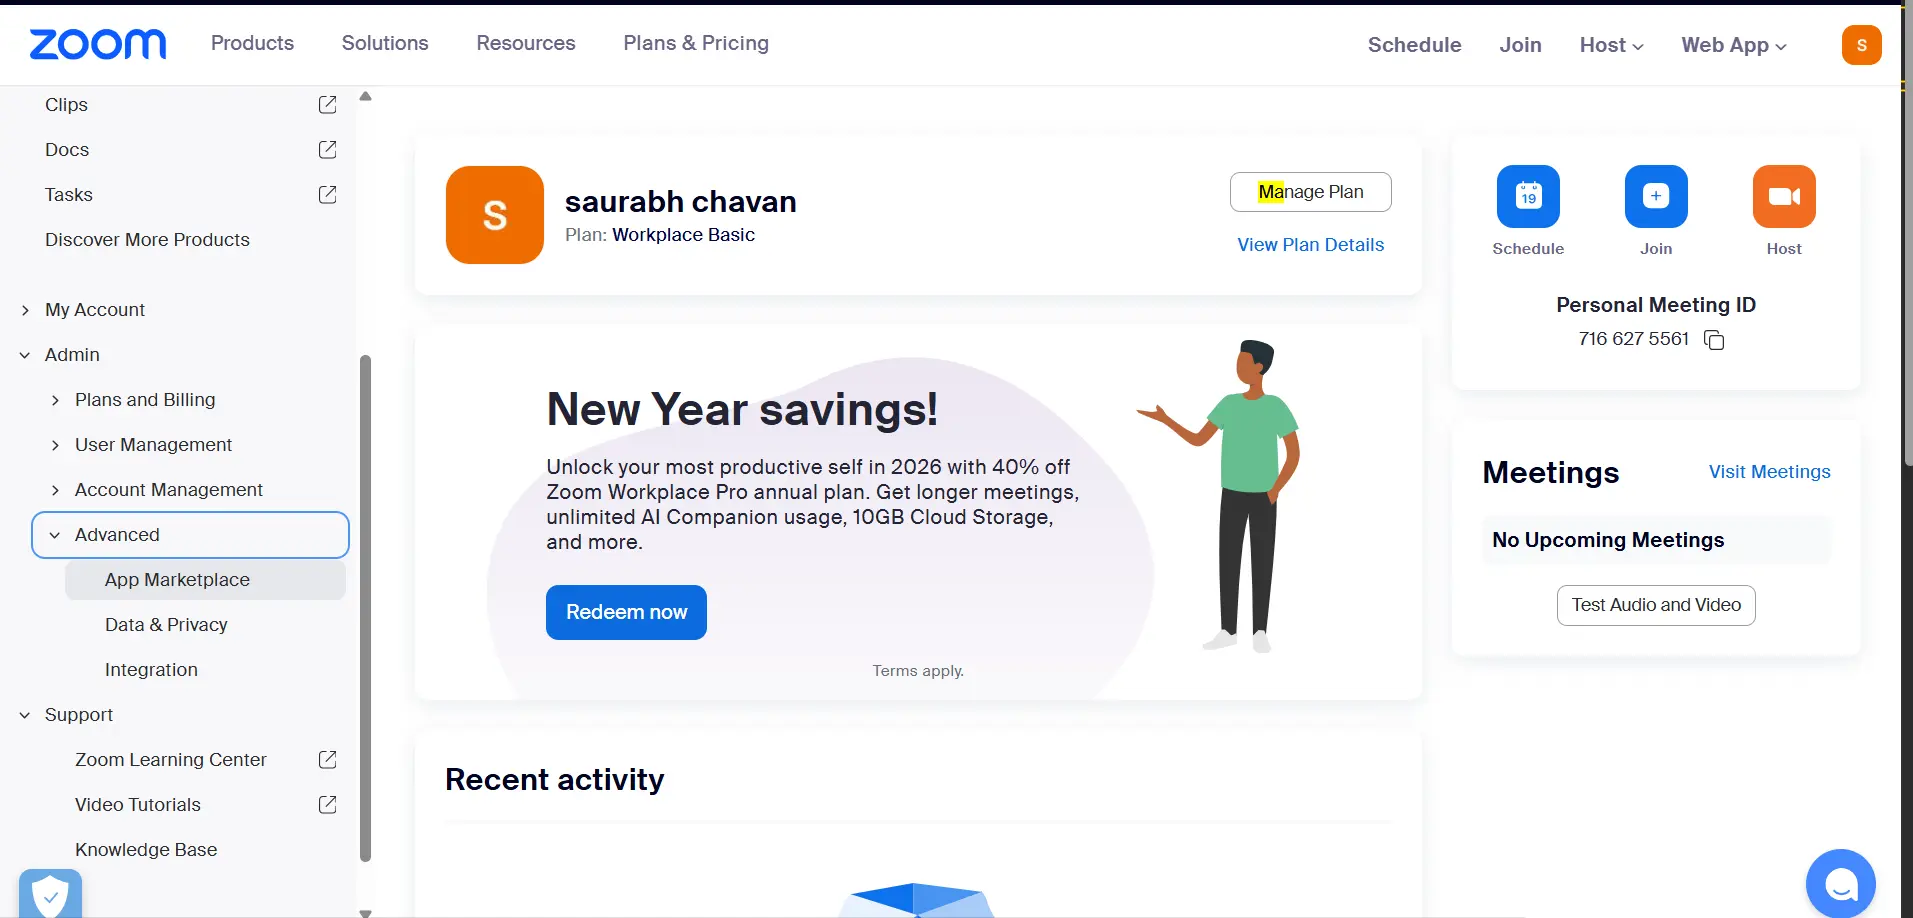
Reason
OAuth applications can only be created inside the Zoom App Marketplace. It serves as the control center for API integrations.
3: Create a New Application
Follow these steps:
- In the top-right corner of the App Marketplace, select: Develop → Build App
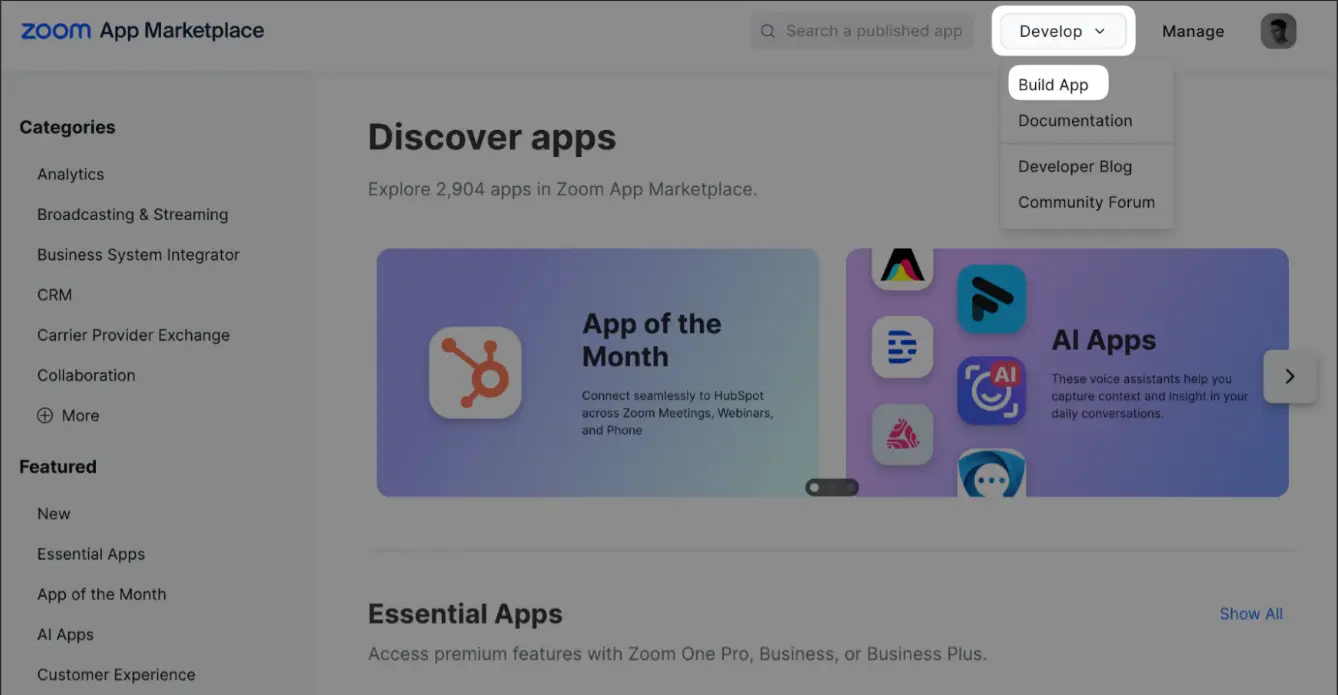
Reason
This step starts the creation of a new OAuth application that will be used for API integration.
4: Select Application Type
Follow these steps:
- Choose the following option: Server-to-Server OAuth App
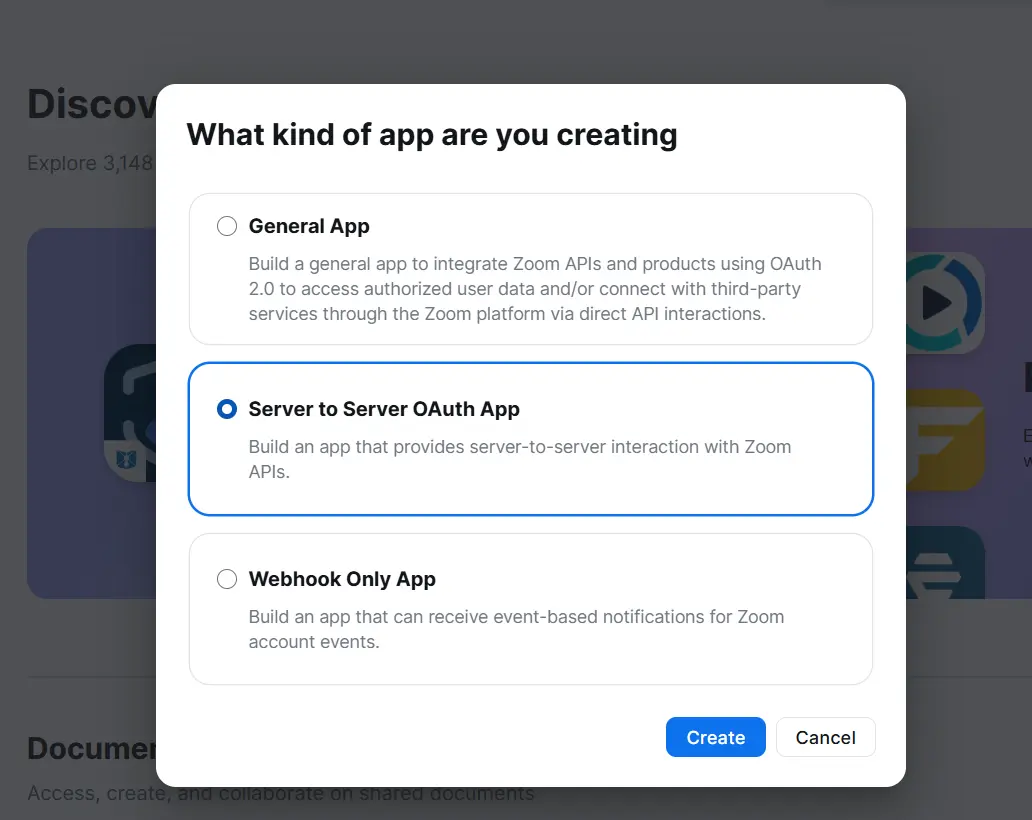
Reason
Server-to-Server OAuth is designed for backend integrations. It does not require a user login flow or consent screen. It is suitable for automation, provisioning, and administrative workflow systems.
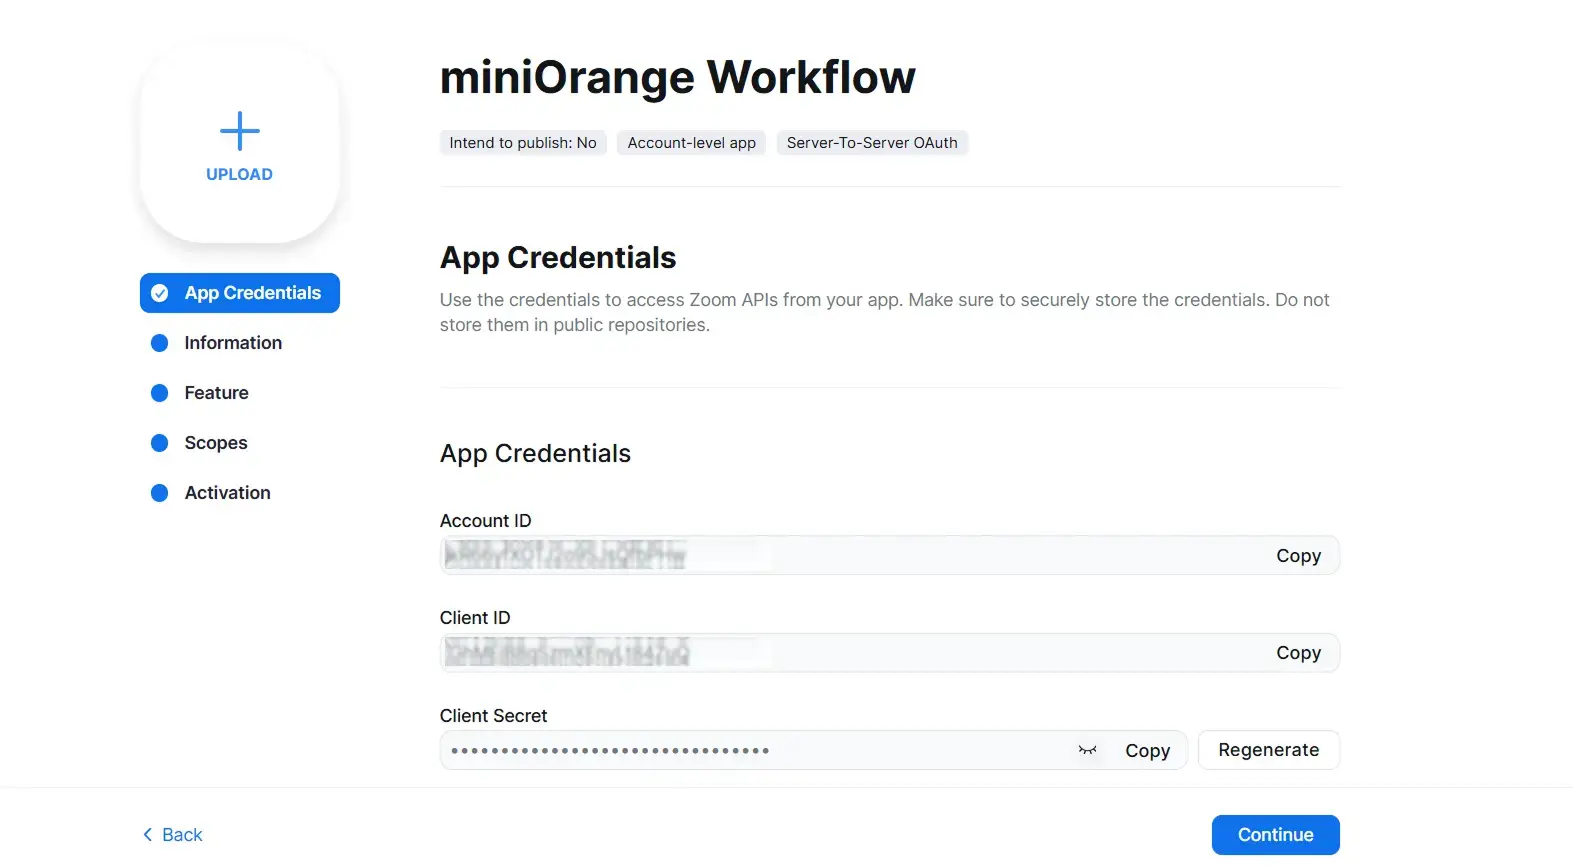
5: Retrieve Application Credentials
Follow these steps:
- After creating the application, note the following credentials:
- Client ID
- Client Secret
- Account ID
-
These credentials are required to generate an access token using the
following endpoint:
POST https://zoom.us/oauth/token - Based on the scopes you configured, Zoom generates a token for your app using these credentials. This token authorizes the app to perform user-related operations through the Zoom API.
- Store these credentials securely. Do not expose the Client Secret in frontend applications.
- Select Continue to proceed.
6: Add Required Scopes
Follow these steps:
- Navigate to: Scopes → Add Scopes
- Add Administrator to the Group
- Add Assistance to User
- Add member to Groups
- Create User
- Delete user
- Remove a group’s administrator
- Remove group’s members
- Remove users Assistance
- Update groups member
- Update user
- Update user’s password
- View a group
- Add a member to a Division
- View Divisions
- View Groups
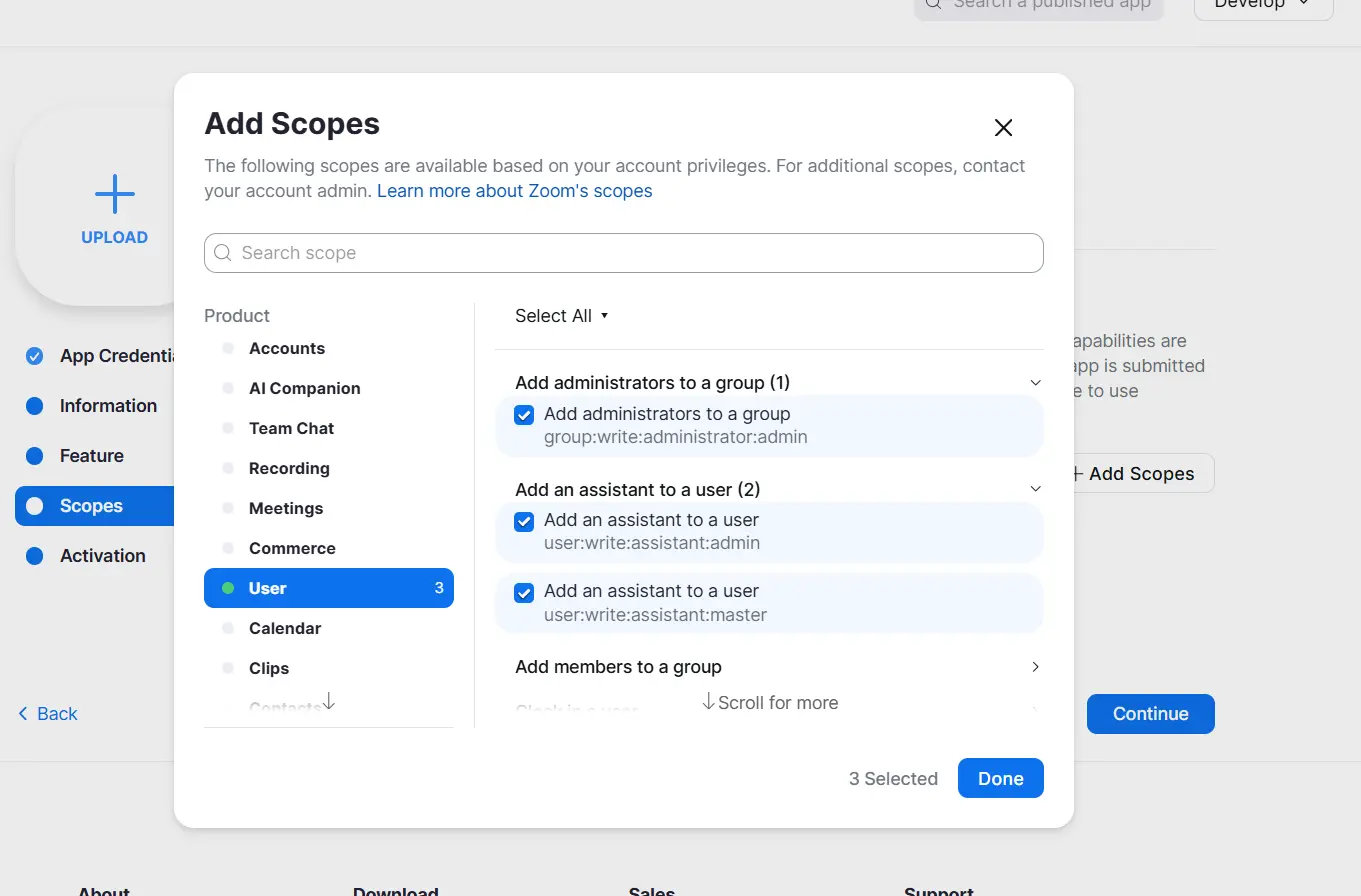
Add the following scopes:
Reason
Scopes define the permissions available to the application. Without the required scopes, API requests may fail even if a token is generated.
7: Activate the Application
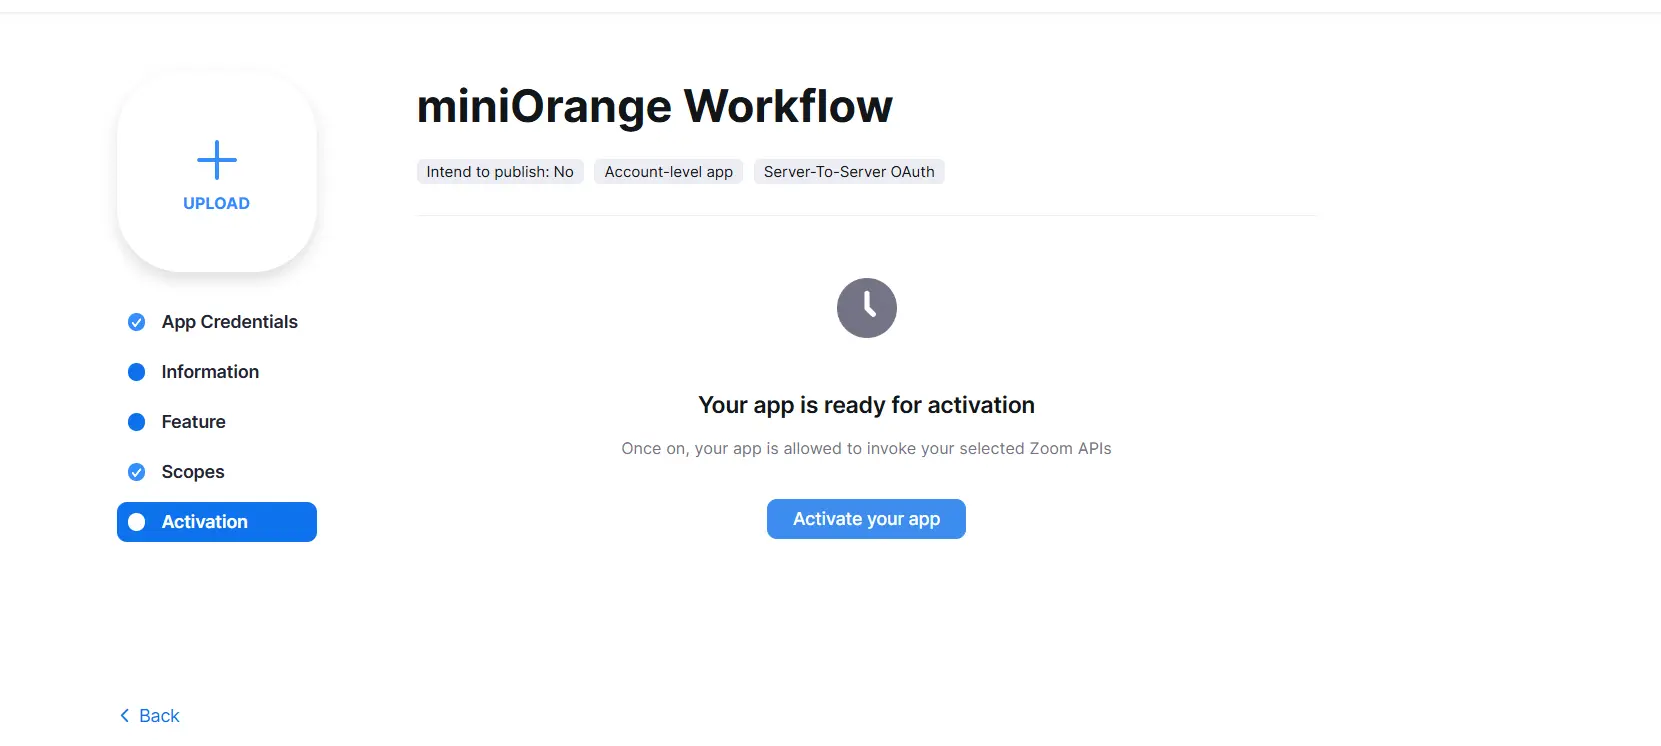
Follow these steps:
- After completing the configuration, select: Activate your App
Reason
Activation is required for the application to function correctly. Without activation, tokens may generate but administrative API operations may fail.
8: Connect Zoom to the Automate Access Request & Review App
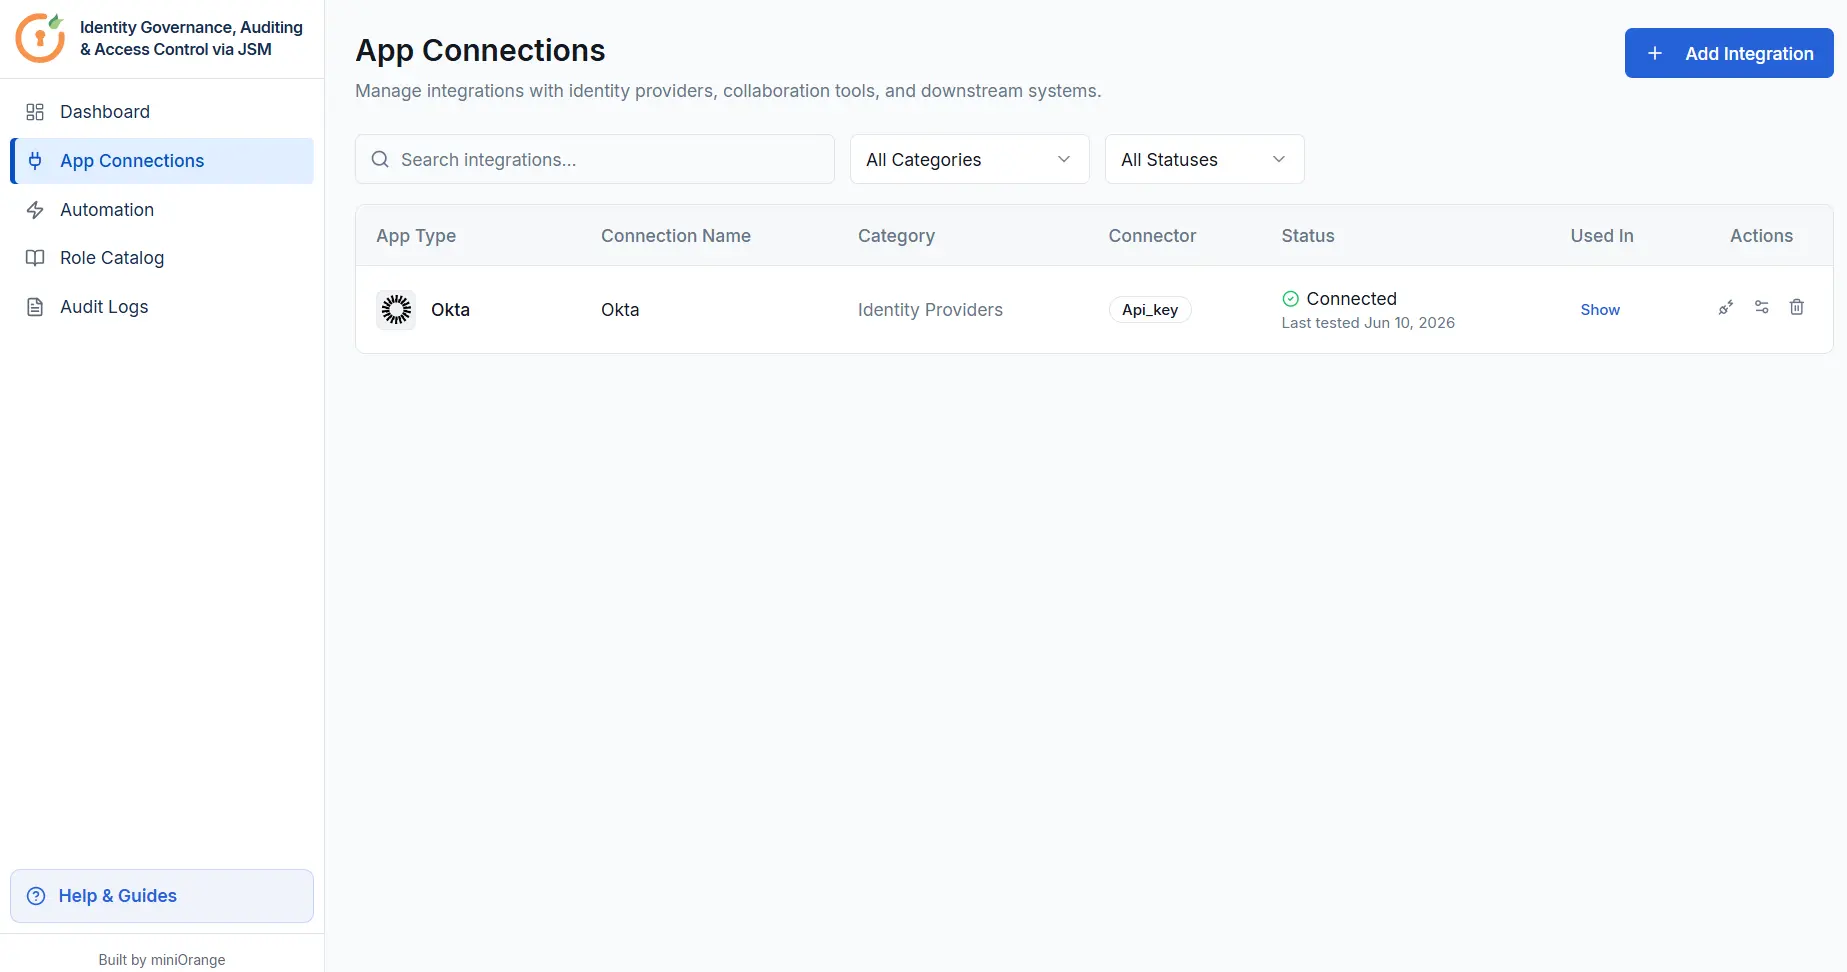
- In the Automate Access Request & Review For Zoom app, select App Connections from the left sidebar, then select + Add Integration in the top-right corner.
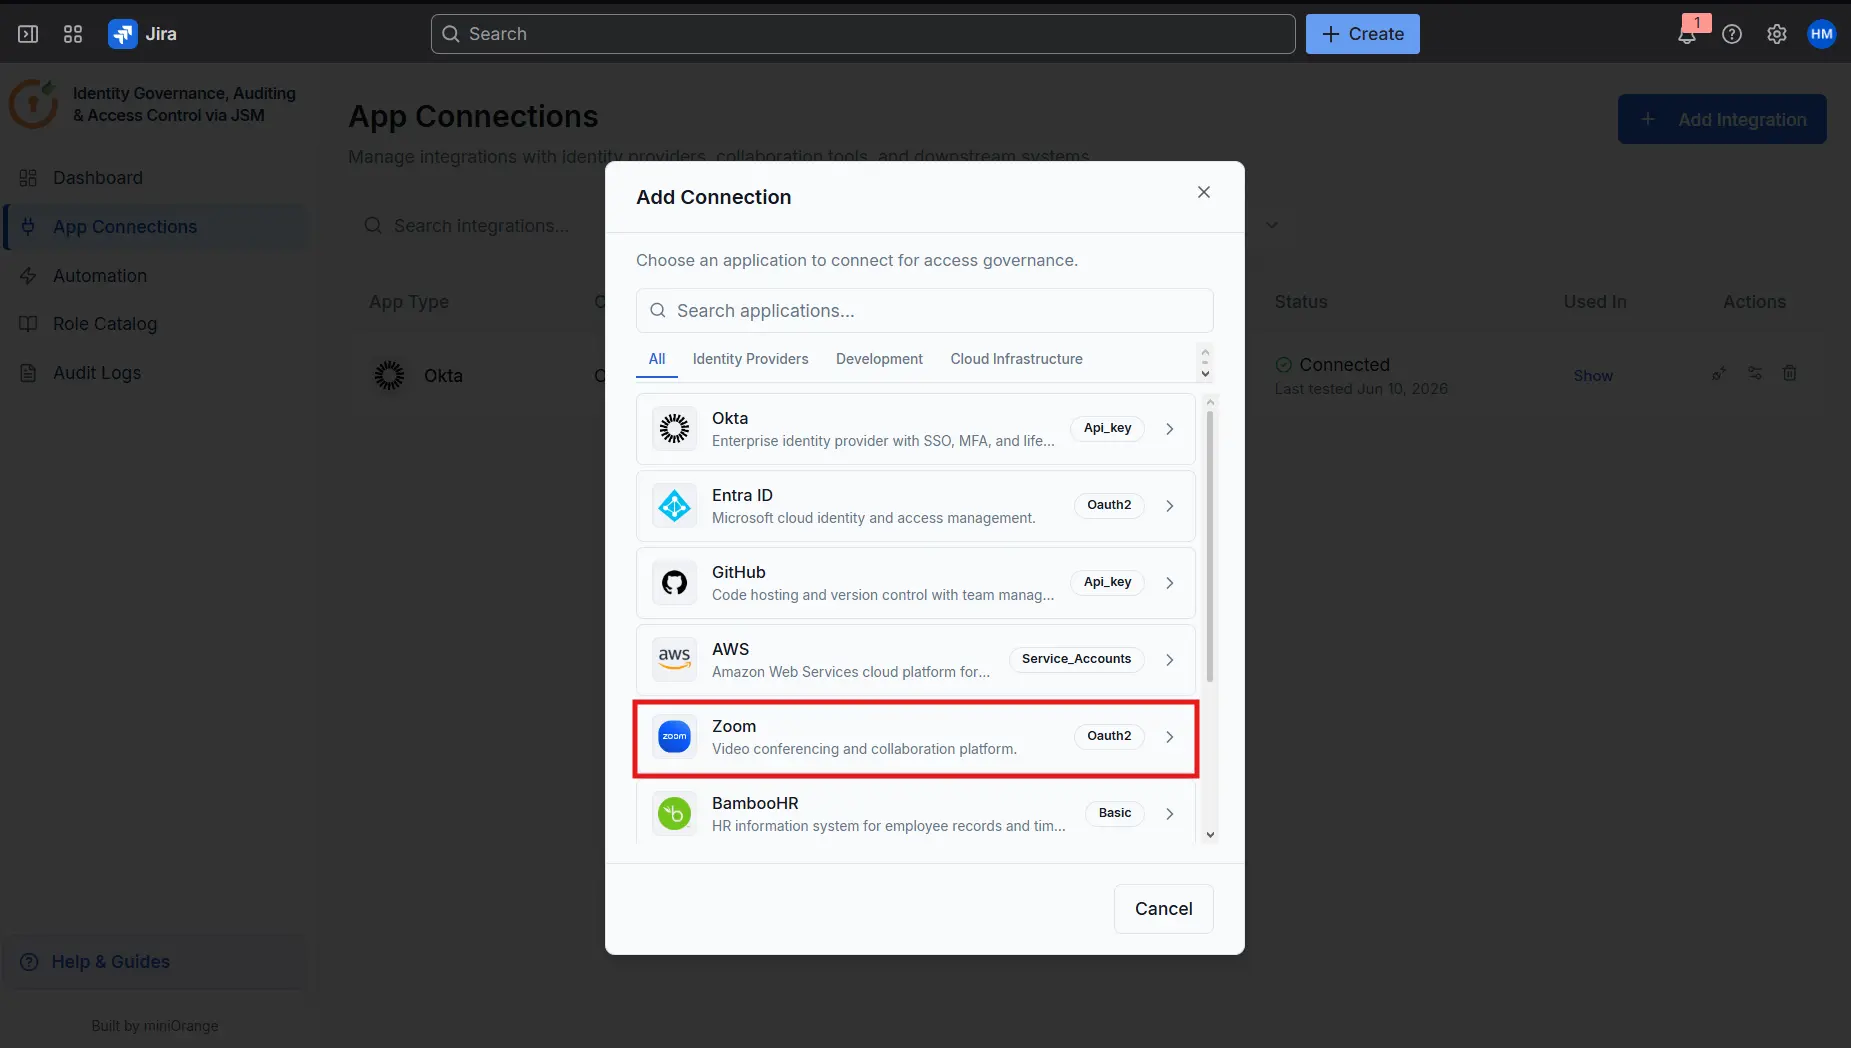
- In the Add Connection panel, search for or scroll to Zoom (listed under Identity Providers, tagged Oauth2) and select it.
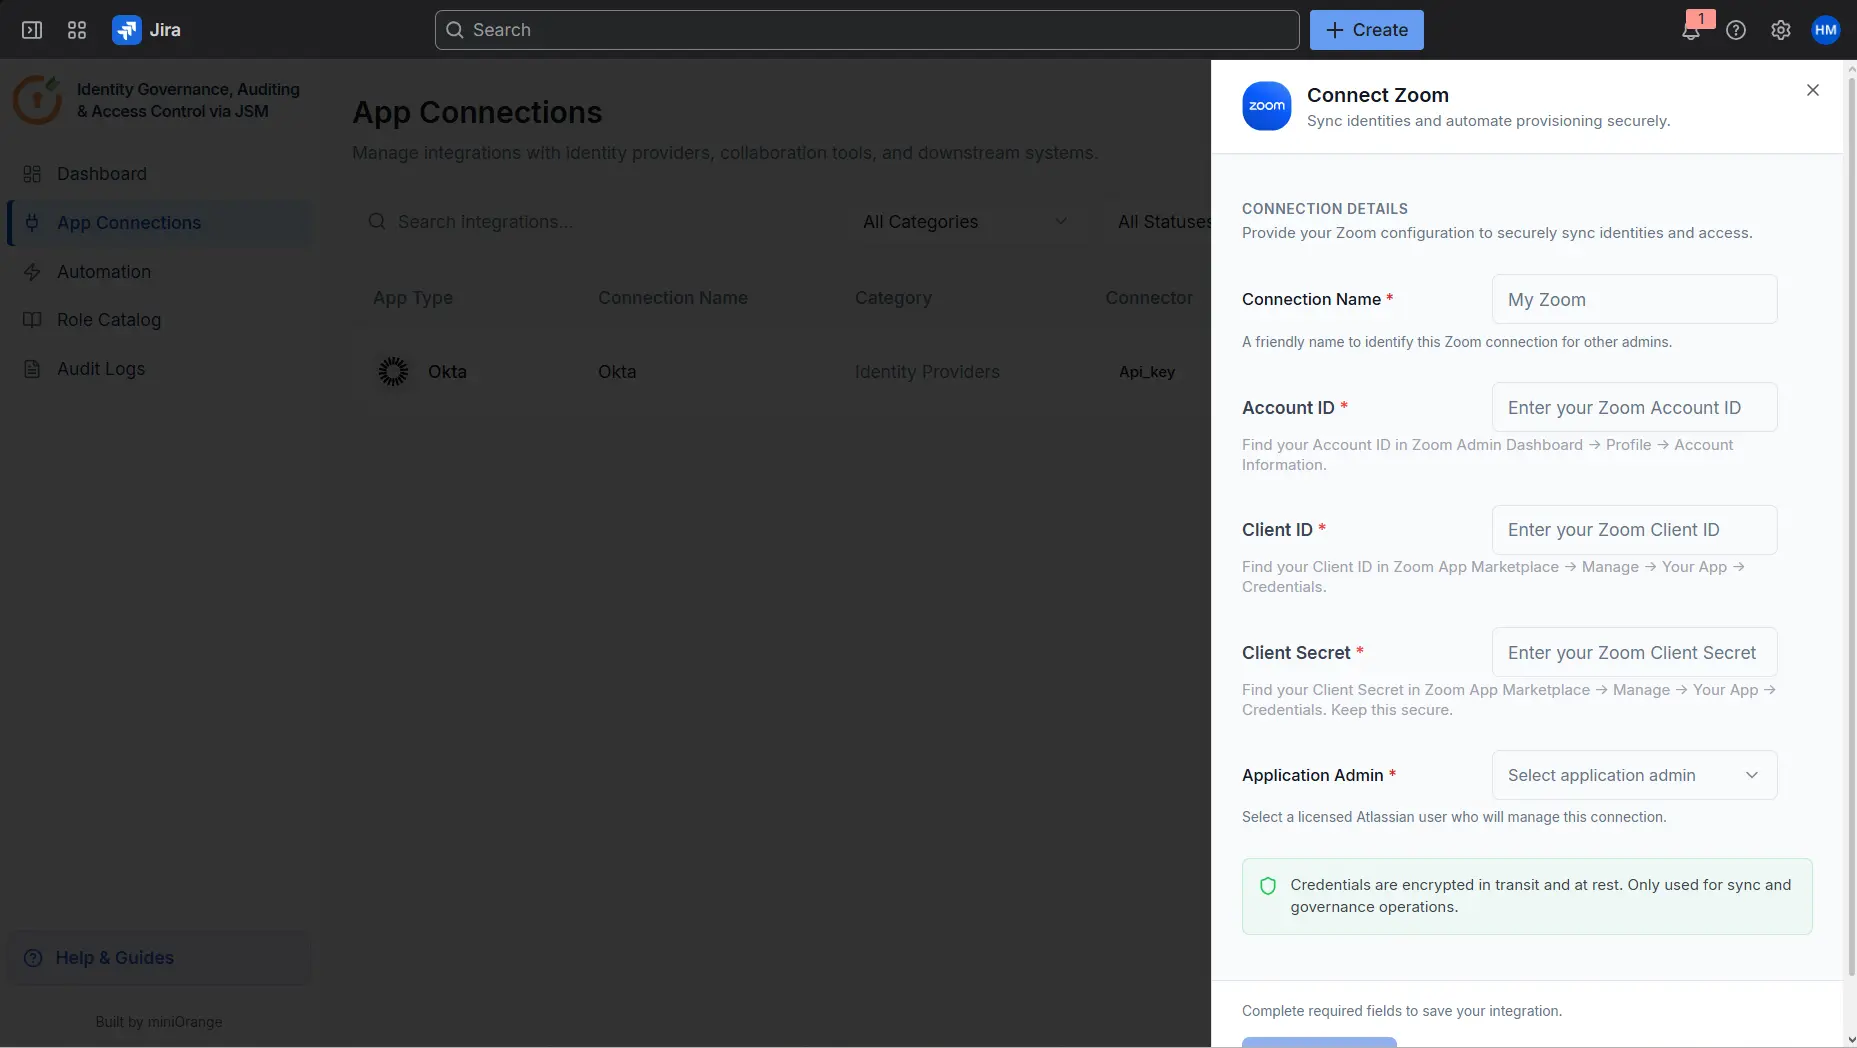
- The Connect Zoom panel opens on the right. Fill in the following:
- Complete the required fields and save the connection. Once saved, Zoom should appear in the App Connections table with a Connected status, the same way the existing Okta connection is shown.
| Field | Value |
|---|---|
| Connection Name | A recognizable label for this connection (e.g. "My Zoom") |
| Account ID | The Account ID retrieved in Step 5 |
| Client ID | The Client ID retrieved in Step 5 |
| Client Secret | The Client Secret retrieved in Step 5 |
| Application Admin | The licensed Atlassian user who will manage this connection |
Configure Automation Rules for Zoom
With the connection saved, configure automation rules to define how access requests are routed, approved, and provisioned:
Did this page help you?