Part 2: Setup miniOrange with ADFS
Step 1. Setup ADFS as IDP
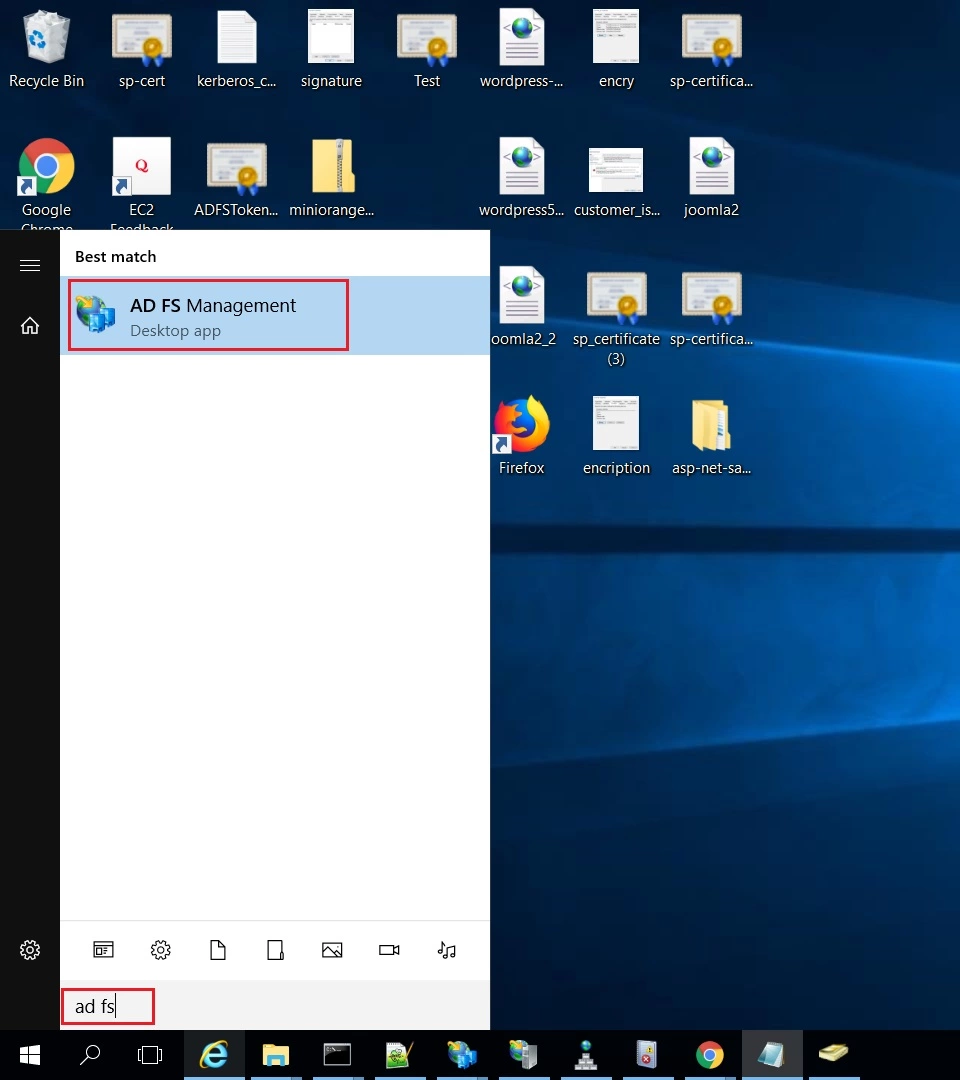
- On ADFS, search for ADFS Management application.
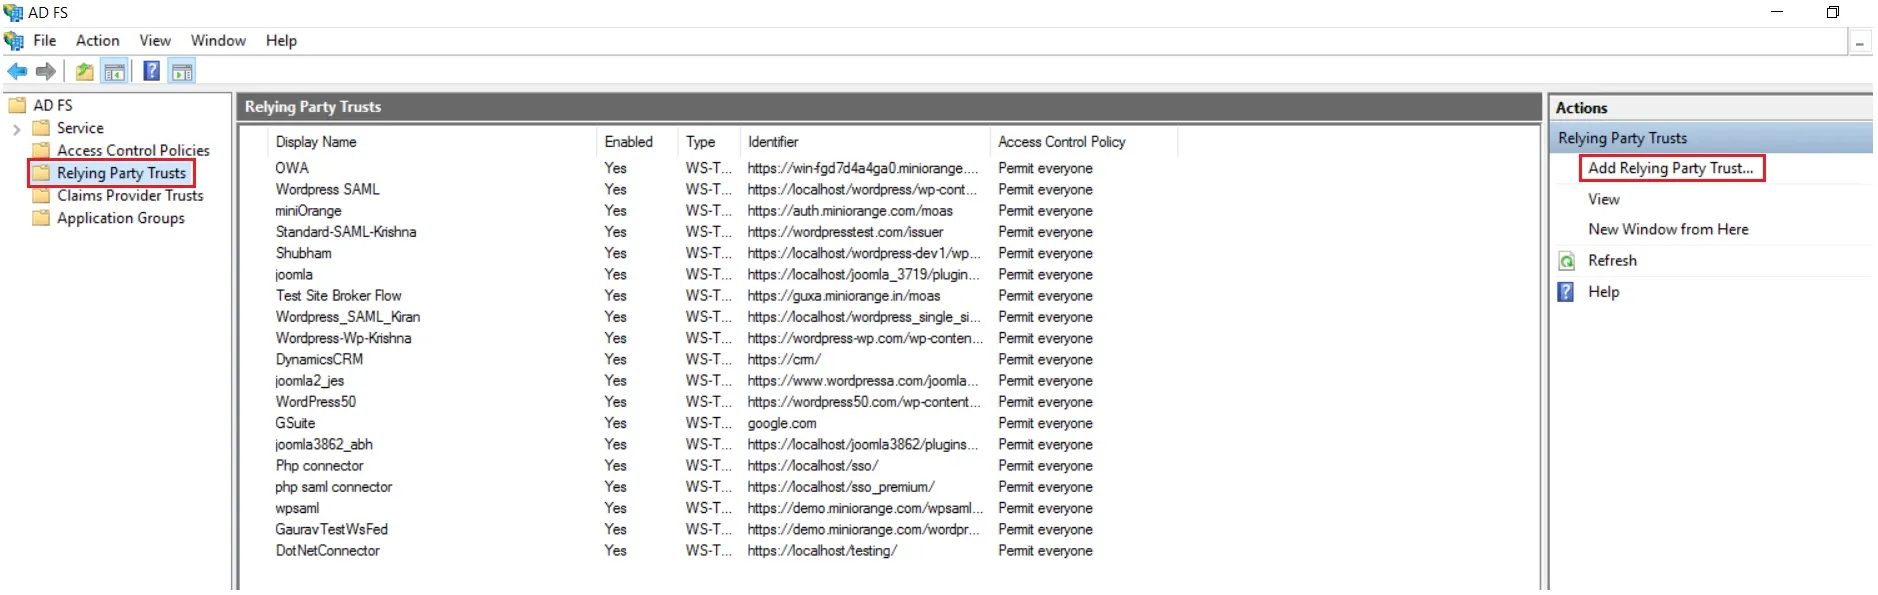
- After opening the AD FS Management, select Relying Party Trust & then click on Add Relying Party Trust.
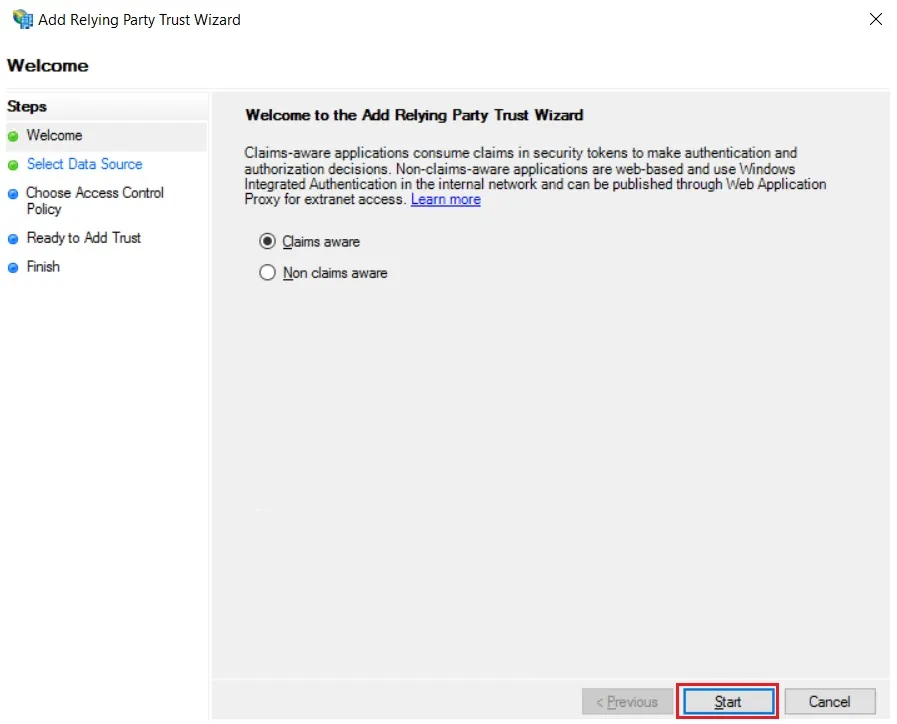
- Click the Start button from the Relying Party Trust Wizard pop up. But before that please make sure Claims Aware is selected.
- Select the options for adding a relying party trust.
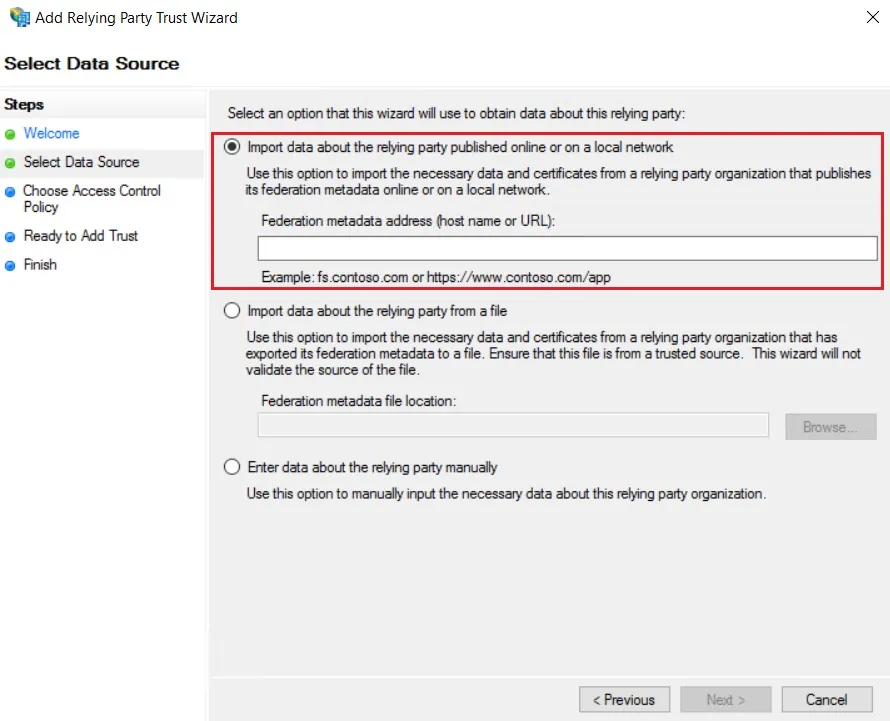
- In Select Data Source: Import data about the relying party published online or on the local network option & then add URL in Federation metadata address.
- Skip step-5 to step-8 & start configuring from step-9. Navigate to Service Provider Info tab from the plugin for getting SP Meatadata URL.
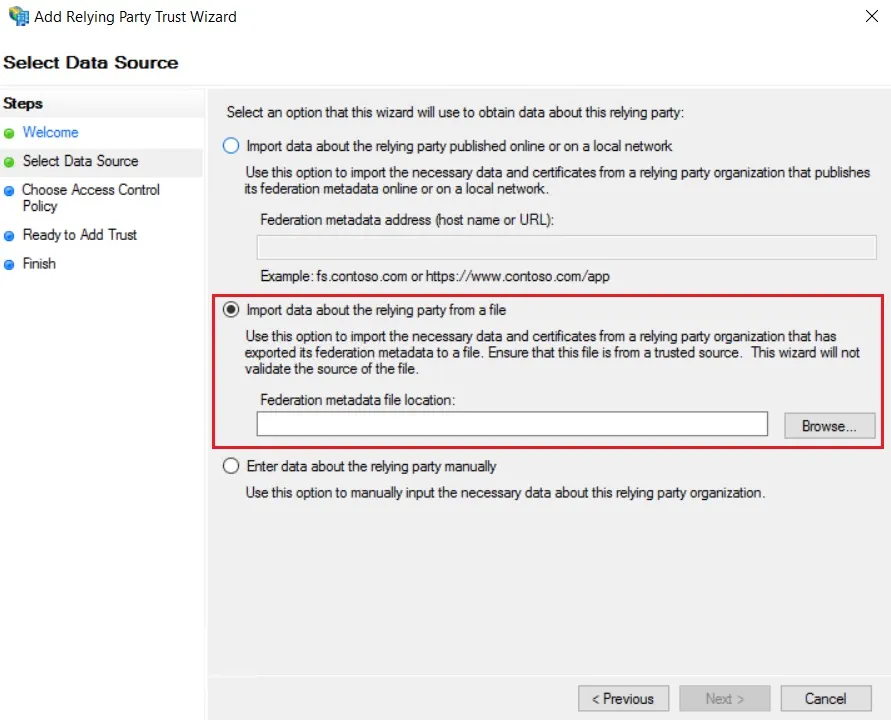
- In Select Data Source: Import data about the relying party from a file option & then browse the metadata file.
- Skip step-5 to step-8 & start configuring from step-9.
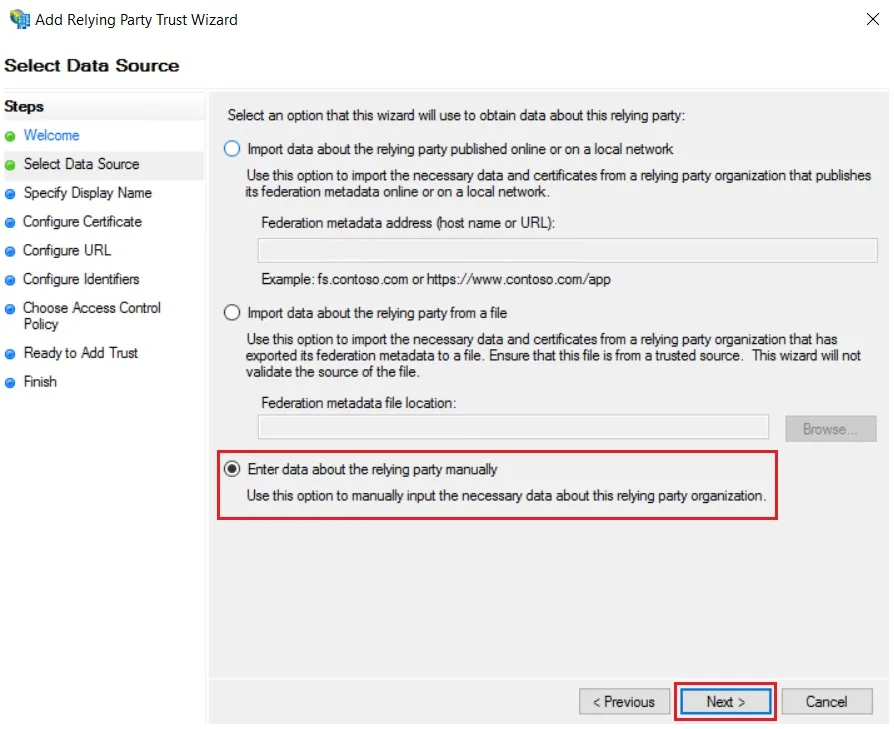
- In Select Data Source: Enter Data about the relying party manually & Click on Next.
- Enter Display Name & Click Next.
- Upload the certificate & click next. Download the certificate from plugin & use the same certificate to upload on ADFS.
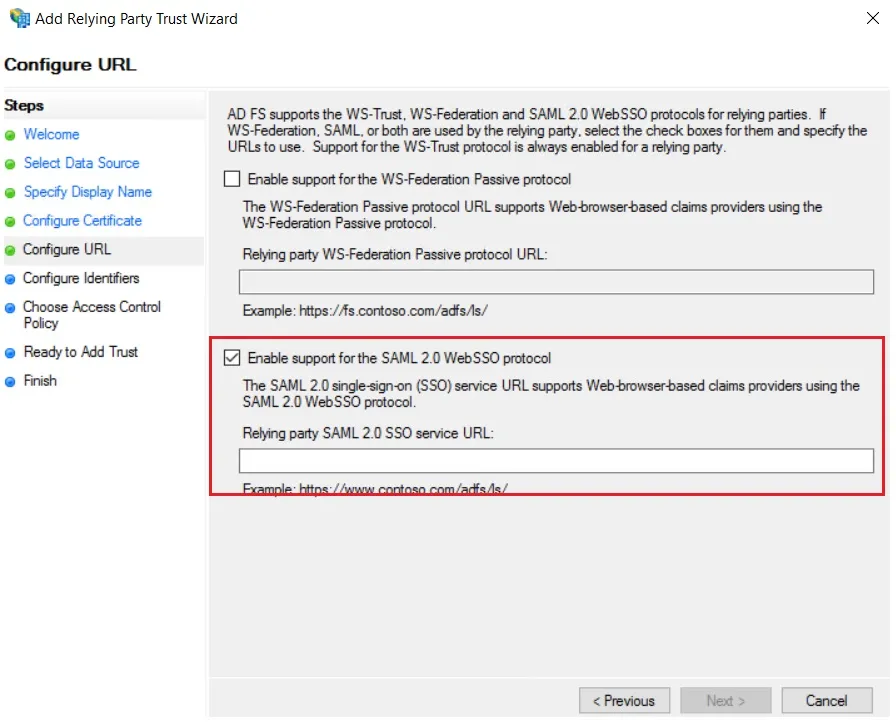
- Select Enable support for the SAML 2.0 WebSSO protocol & Enter ACS URL from the plugins Service Provider Info Tab. Click Next.
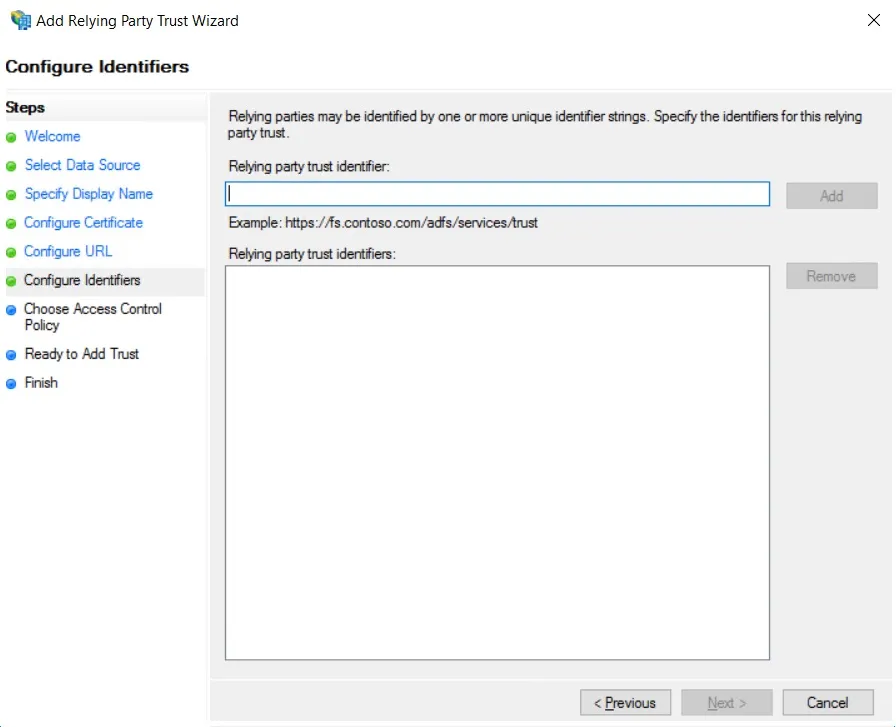
- Add Entity ID from plugins Service Provider Info Tab as Relying party trust identifier then click Add button & then click Next.
- Also download the Signing certificate from Service Provider Info Tab from the plugin.
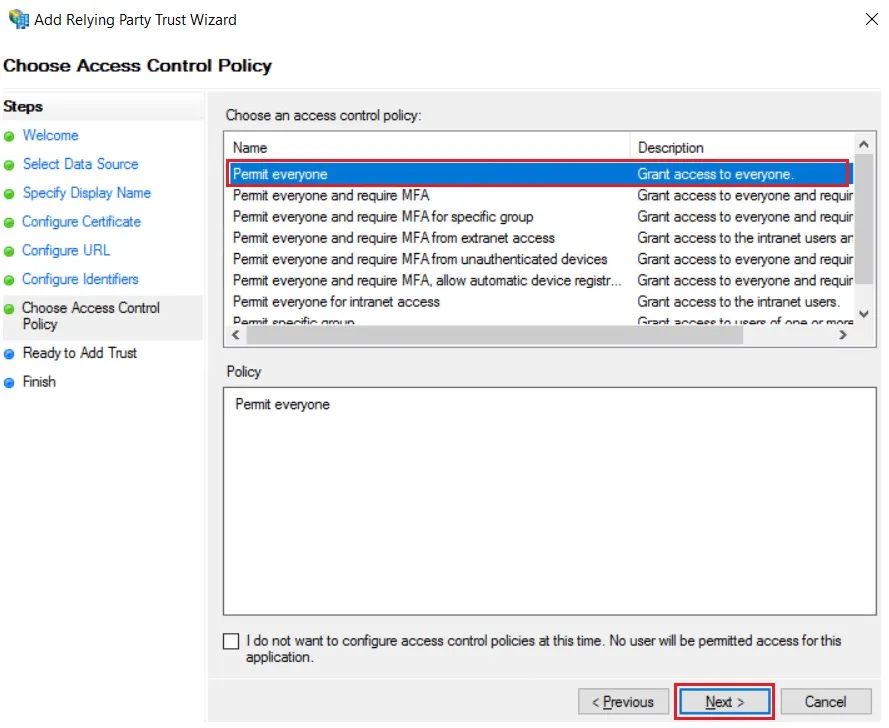
- Select Permit everyone as an Access Control Policy & click on Next.
- Click the Next button from Ready to Add Trust & click Close.
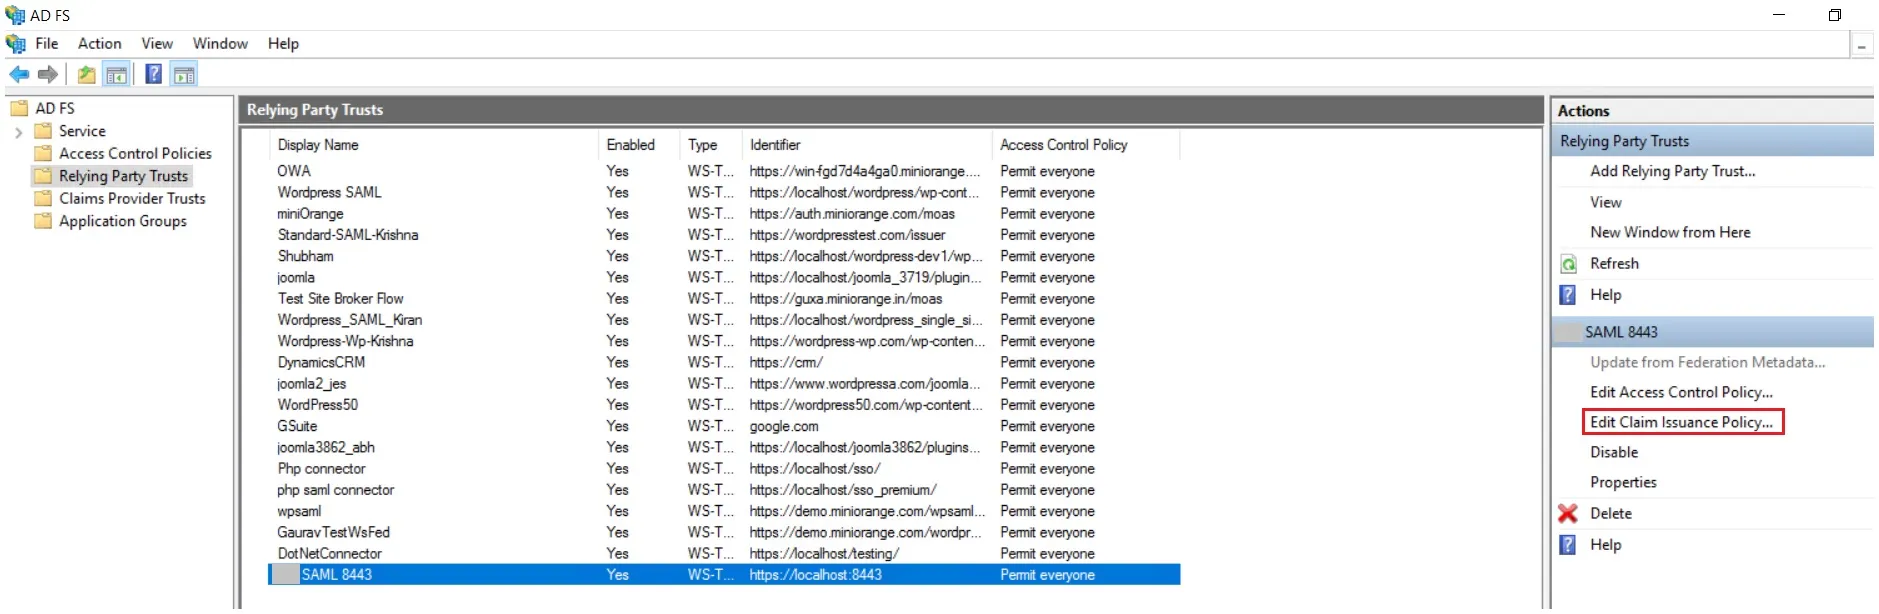
- It will show you the list of Relying Party Trusts. Select the respective application & click on Edit Claim Issuance Policy.
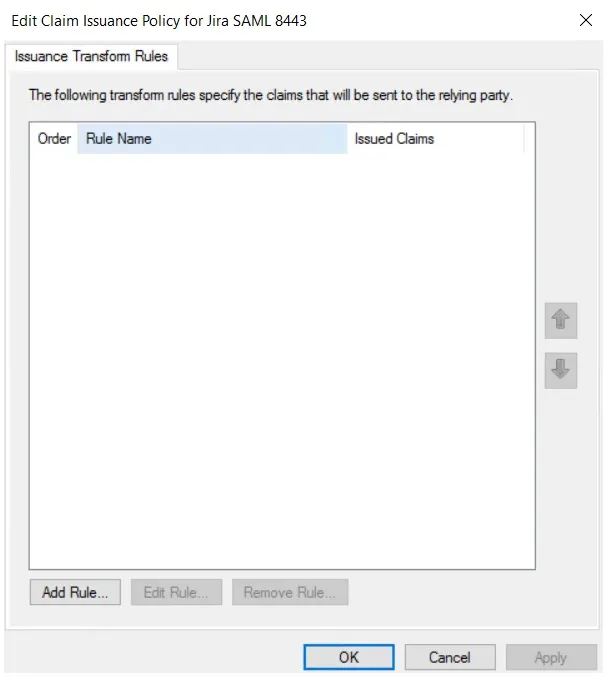
- Click on Add Rule button.
- Select Send LDAP Attributes as Claims & click on Next.
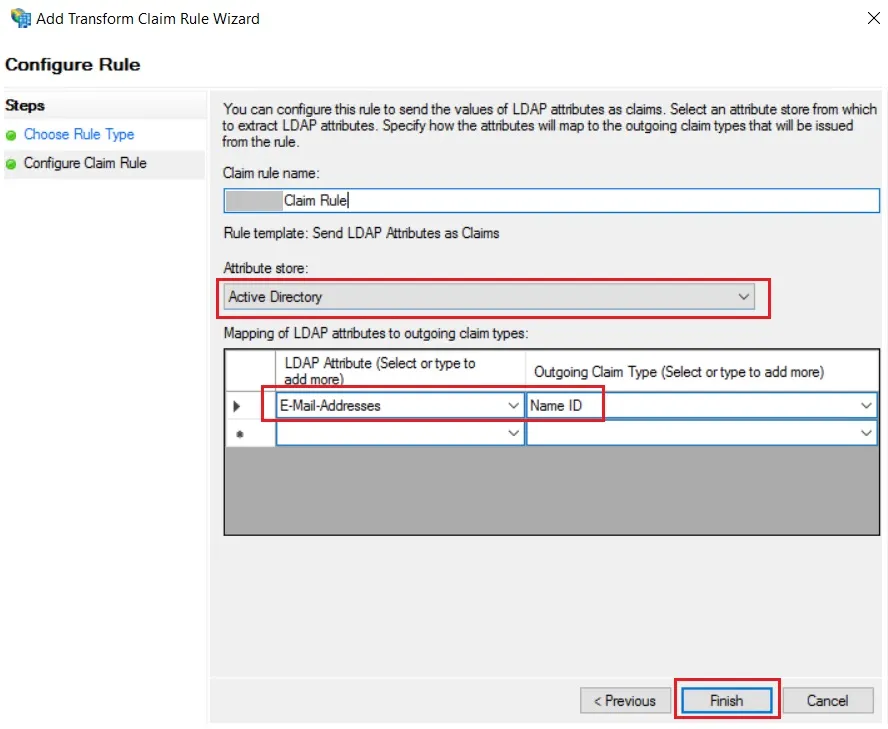
- Enter the following details & click on Finish.
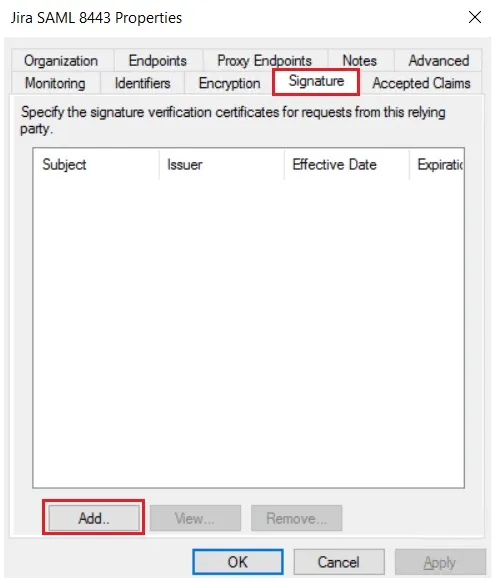
- Click Apply Ok.
- Select property of the application & add the certificate downloaded from the add-on.
 Using Metadata URL
Using Metadata XML file
Using Manual configuration
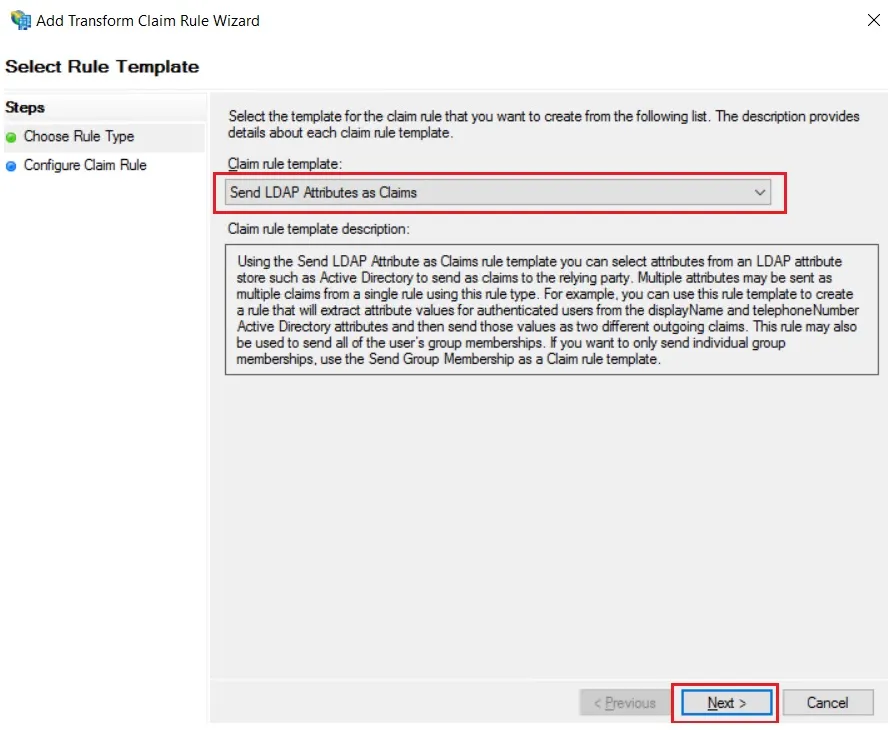
| Claim rule name: | Attributes |
| Attribute Store: | Active Directory |
| LDAP Attribute: | E-Mail-Addresses |
| Outgoing Claim Type: | Name ID |
Step 2. Setup miniOrange as Service Provider
- Go to miniOrange Admin Console.
- From the left navigation bar select Identity Provider. Then click on Add Identity Provider
- Select SAML tab.
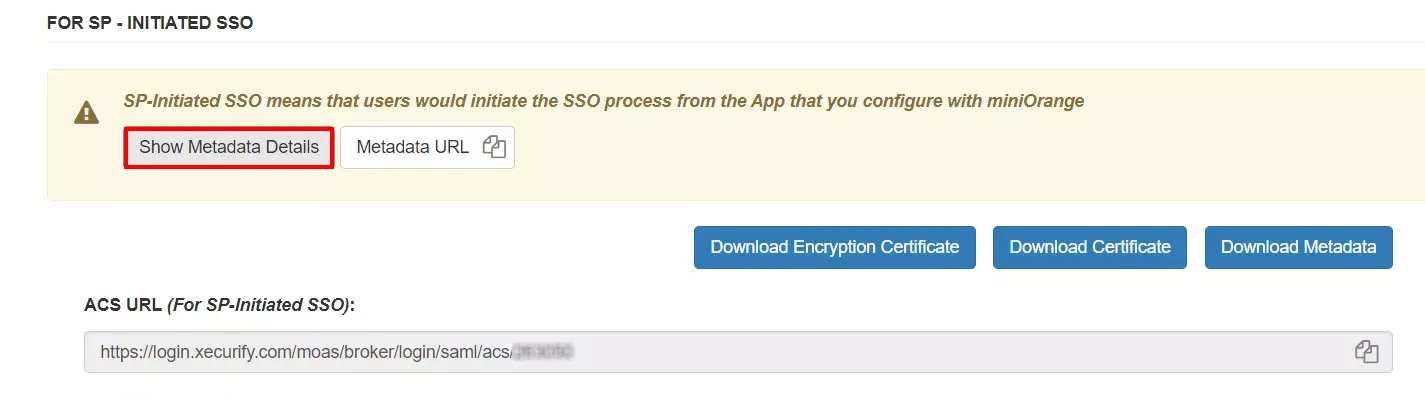
- Click on Show Metadata details under For SP - INITIATED SSO. You can either manually enter details or use Metadata URL or File
- Now to create SAML app for ADFS, go to the Add Identity Provider page and click on Import IDP Metadata. Import the metadata file that you will get from the SAML Login Information section of ADFS.
- If you don't have a metadata file, you can also provide the details manually. You need to configure following endpoints:
- Few other optional features that can be added to the Identity Provider(IDP) are listed in the table below:
- Click on Save.

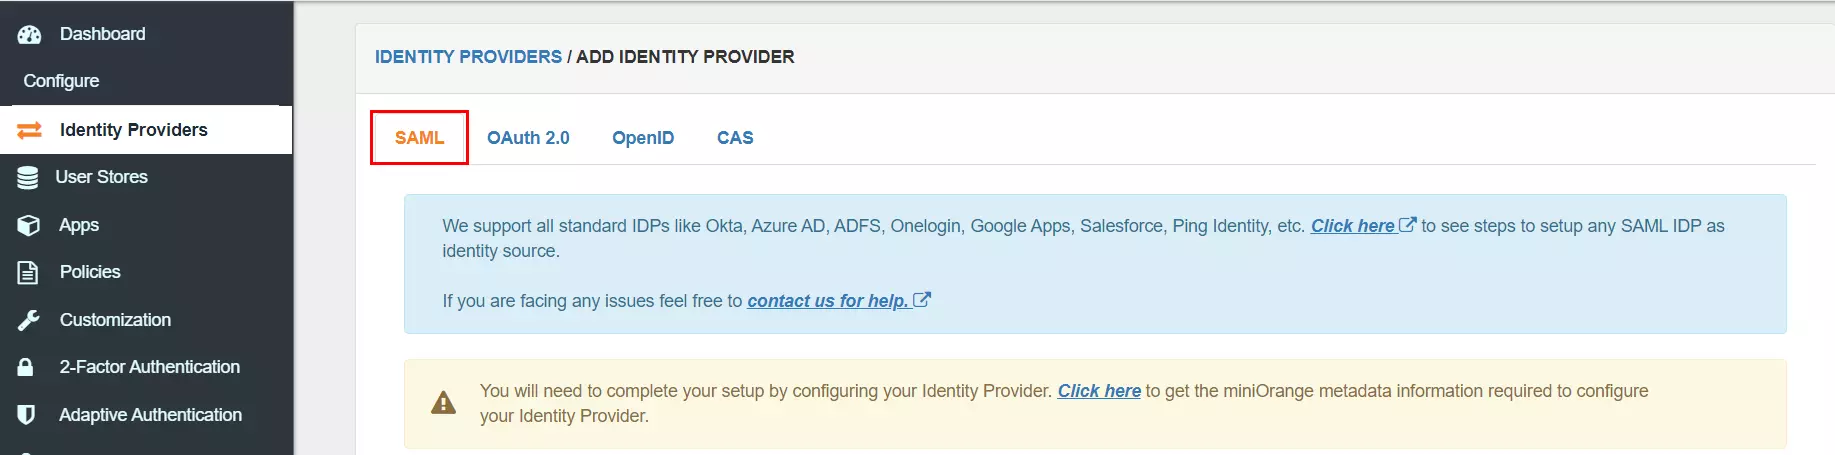
You can get the metadata details of miniOrange app either by clicking on the link
shown by "Click here" in the yellow block, Or you can also get the details after creating the
app. Keep these details handy as we will need these in configuring ADFS.

| IDP Entity ID | Entity ID of IDP |
| Single Login URL | Login Url from IDP |
| Single Logout URL | Logout Url from IDP |
| X.509 Certificate | The public key certificate of your IDP. |
| Domain Mapping | Can be used to redirect specific domain user to specific IDP |
| Show IdP to Users | Enable this if you want to show this IDP to all users during Login |
| Send Configured Attributes | Enabling this would allow you to add attributes to be sent from IDP |
Step 3. Test connection between miniOrange and ADFS
- Go to the miniOrange Admin Dashboard.
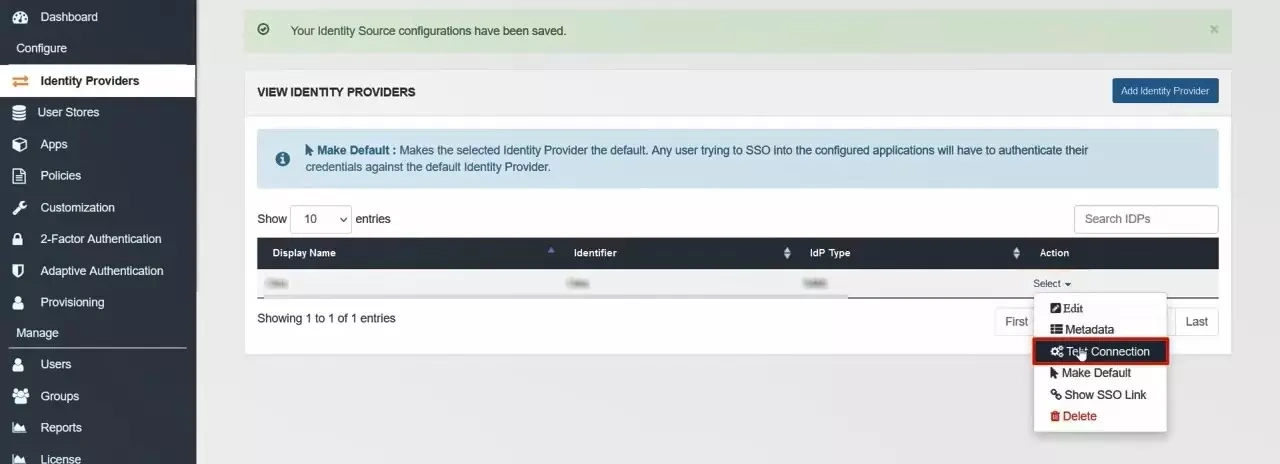
- Go to Identity Providers tab. Then click on select button under the app you just created. Then click on Test Connection.
- A new popup login window will open. Enter your credentials and login.
- Now you will see TEST SUCCESSFUL in a new popup window. If not, then check if you have missed any of the above step.