- Home
- AD/LDAP User Authenticator
- LDAP Authentication for Atlassian Cloud

Atlassian Cloud LDAP Authentication
The Atlassian Self Hosted products such as Server or Datacenter allows
users to login via their LDAP credentials.
However Cloud hosted Atlassian products do not have this capability.
With miniOrange Broker Service, cloud administrators can enable this
functionality easily and efficiently.
 Try it for free
Pre-requisites
1. Domain Verification:
The first step of Atlassian Access starts with the Domain Verification
Process to enforce SAML SSO on the managed user accounts. This process
verifies that you own a valid domain for managing the user accounts and
use the same domain name for the email addresses. Once the domain is
successfully verified, it lets you host the Jira Software, Jira Service
Management (JSM), Confluence (wiki), or any Atlassian instance on the
Cloud, along with providing pre-generated site URLs. For example, if the
verified domain is acma.com, then the Jira Hosting URL will be
https://acma.com/jira and user accounts will be user1@acma.com. So you
can consider Domain Verification as a crucial step for your instance
hosting and anyone who wants to do SAML SSO Configuration on Atlassian
Cloud needs to go through the Domain Verification Process. Follow the
steps in the document or video for Domain Verification.
2. Atlassian Access Subscription:
Atlassian Access is an additional subscription applied across the
Atlassian cloud products like Jira Software, Jira Service Management,
Jira Work Management, Confluence, Bitbucket, etc. So it is needed for
Single Sign-On(SSO) or any Cloud Service which comes under Atlassian
Access.
1: Configure miniOrange App
- Login into miniOrange Admin Console.
- Go to Apps and click on the Add Application button.
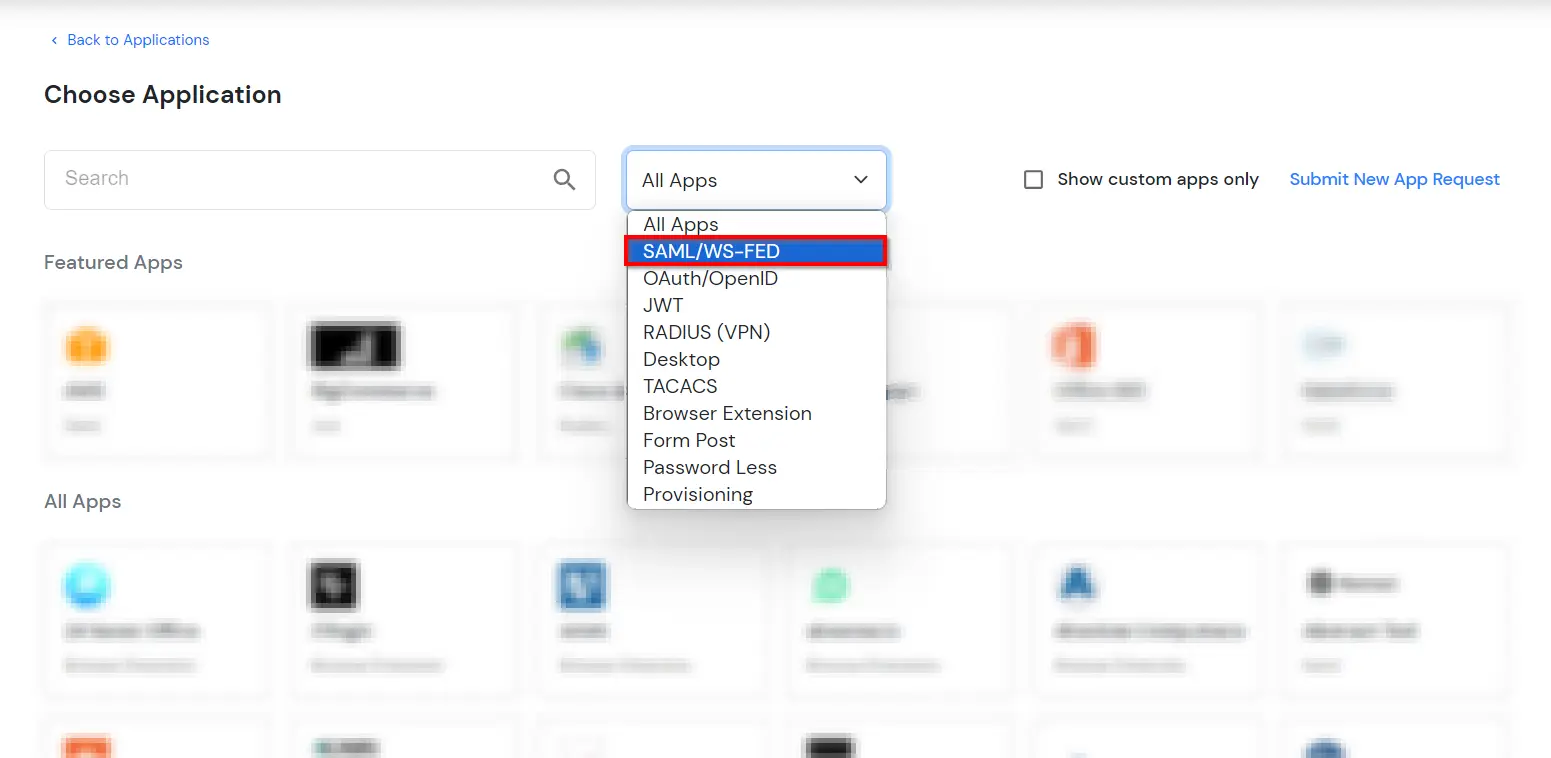
- In Choose Application Type click on Create App button in SAML/WS-FED application type.
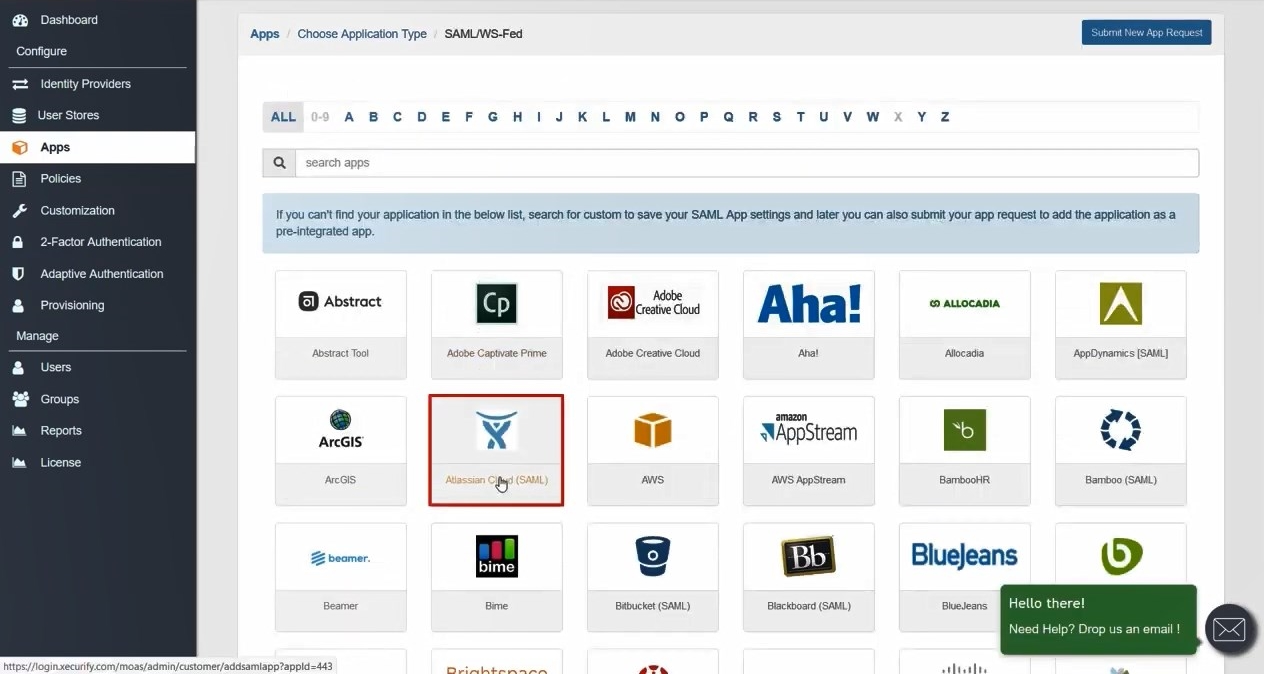
- Search for Atlassian Cloud (SAML) in the list, if you don't find it in the list then, search for custom and you can set up your application via Custom SAML App.
- Enter the following values in the respective fields, you will receive these values after creating an app in Atlassian access.
- Also make sure that Sign Response & Sign Assertion both options are turned on. Then click on the Save button.
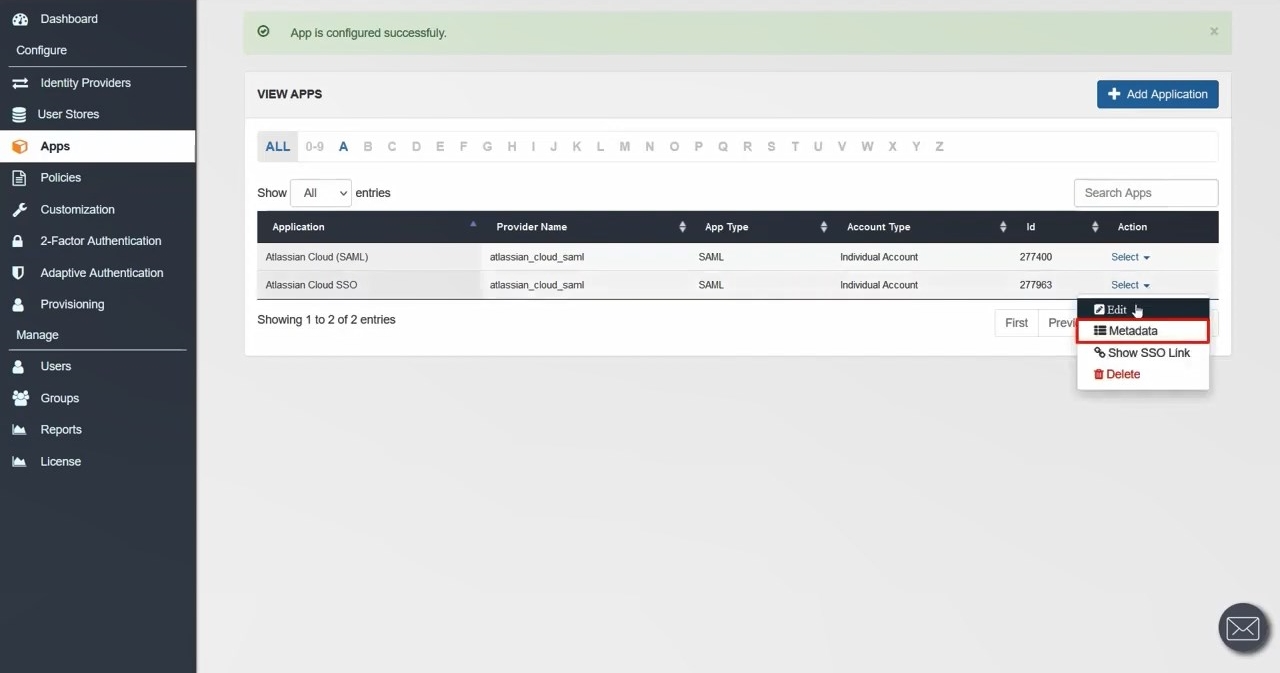
- You would be able to see the success message, App is Configured Successfully on the View Apps page. Find your app from the list of apps on the page, click on the Select button of the app, and then click on Metadata option to get app’s Metadata.
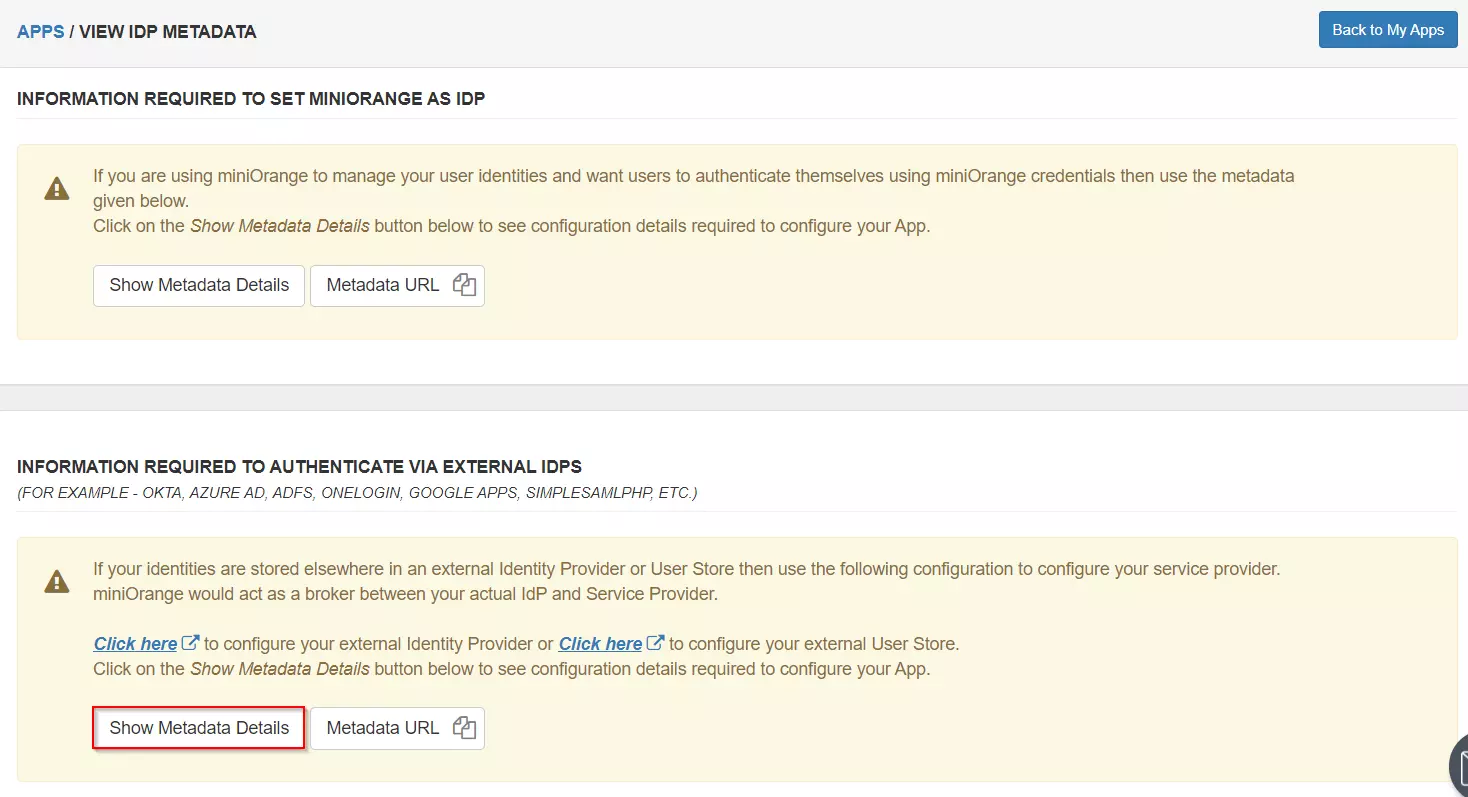
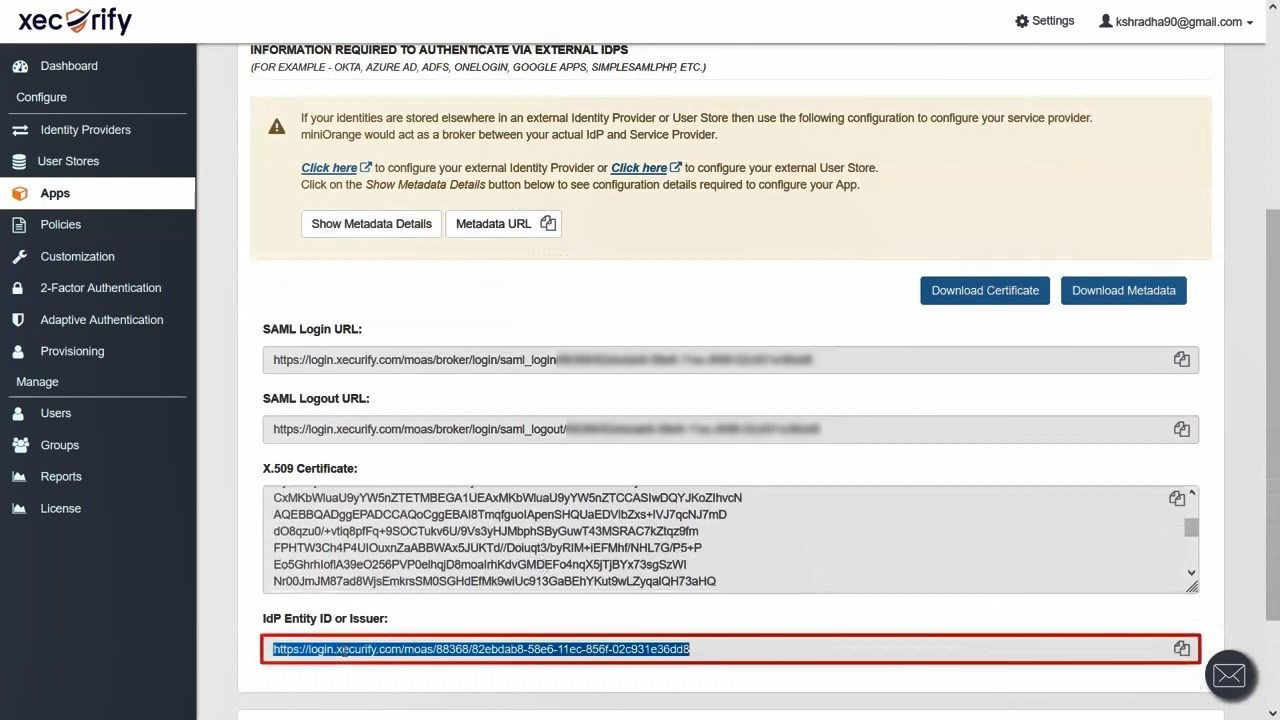
- Since we are using miniOrange as a Brokering Service in this solution, select the second option ( Second Metadata Details Button ) as highlighted, but if you are using miniOrange as an IDP then you’ll have to select the first option.
- After clicking on the Show Metadata Details button you can see the metadata details. You will need these details while configuring an Atlassian Access app.

| Name | Value |
|---|---|
| Custom Application Name | Any name would be fine |
| SP Entity ID or Issuer | You will receive after configuring Atlassian Access App |
| ACS URL | You will receive after configuring Atlassian Access App |

2: Configure Atlassian Access
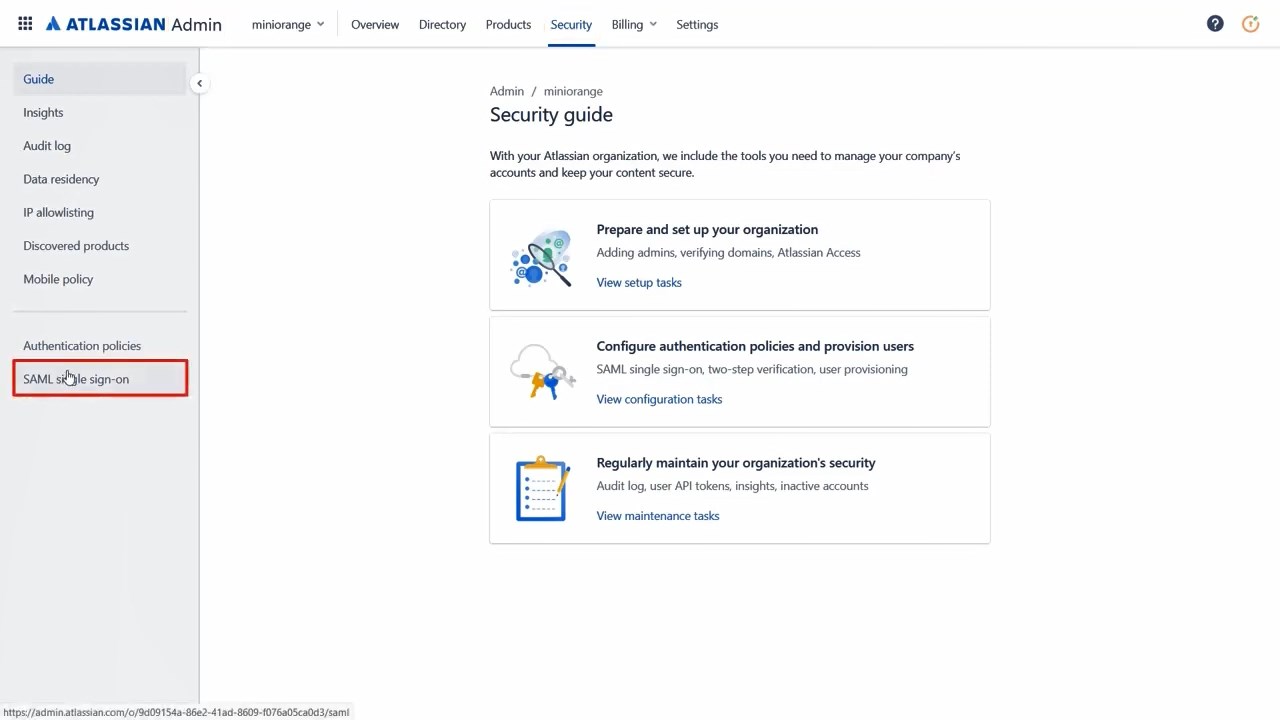
- Now login to Atlassian Cloud Admin Console.
- Select your organization and then select the Security tab. Click on SAML Single Sign-On from the left sidebar.
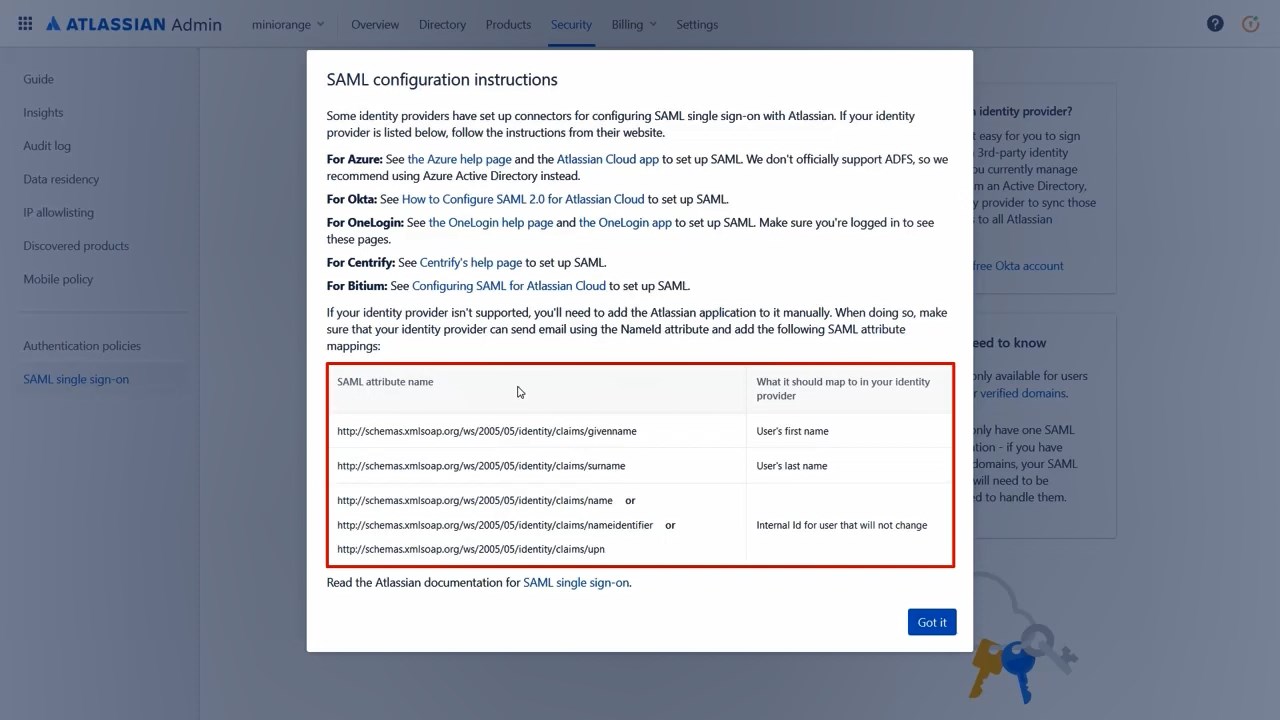
- After opening the window refer to Instructions for different Identity Providers link. It provides a help page for specific IDP and Attribute Names for Attribute Mapping.
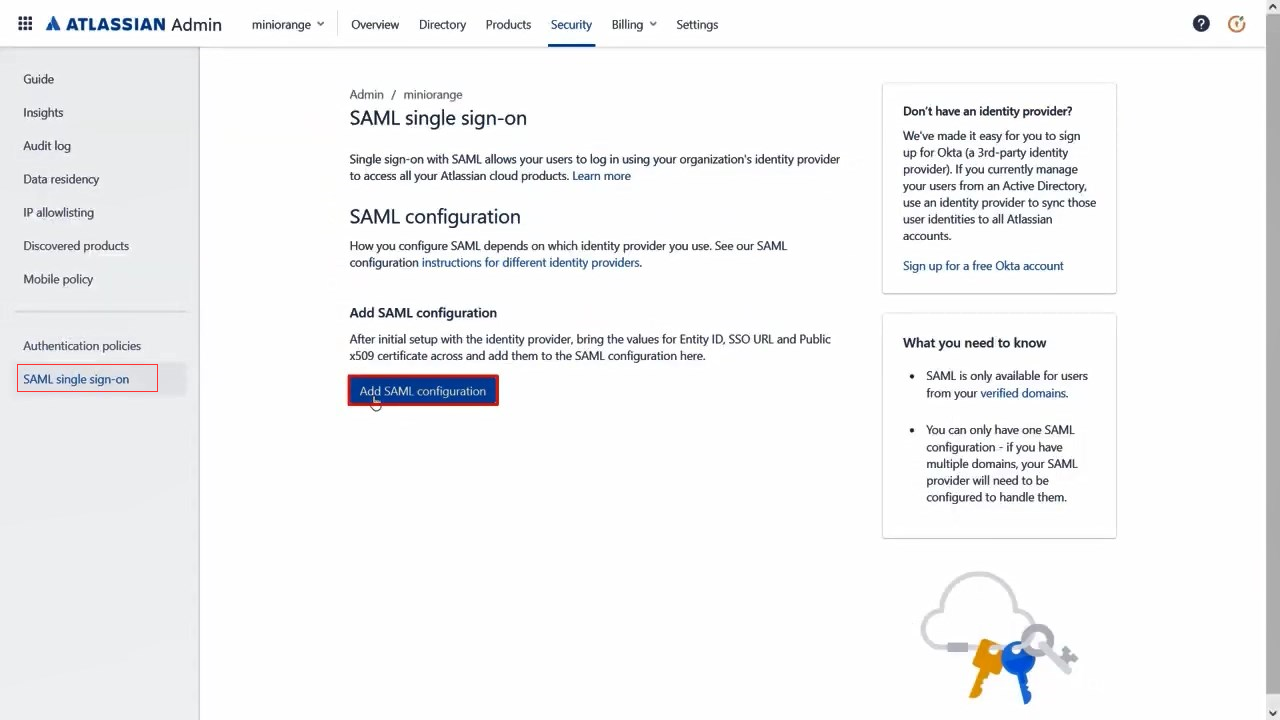
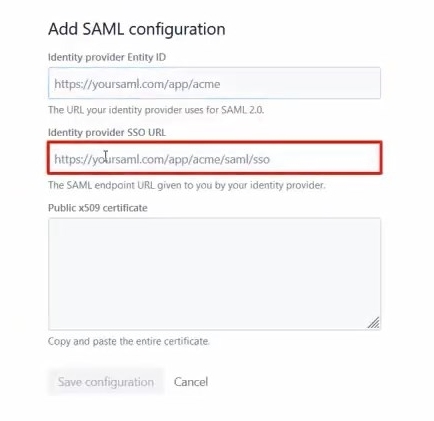
- Click on Add SAML Configuration.
- You will be redirected to the Add SAML Configuration window. Enter IDP Entity ID, SSO URL and the public certificate that you get in the metadata details section after configuring the miniorange app. Click on the Save Configuration button.
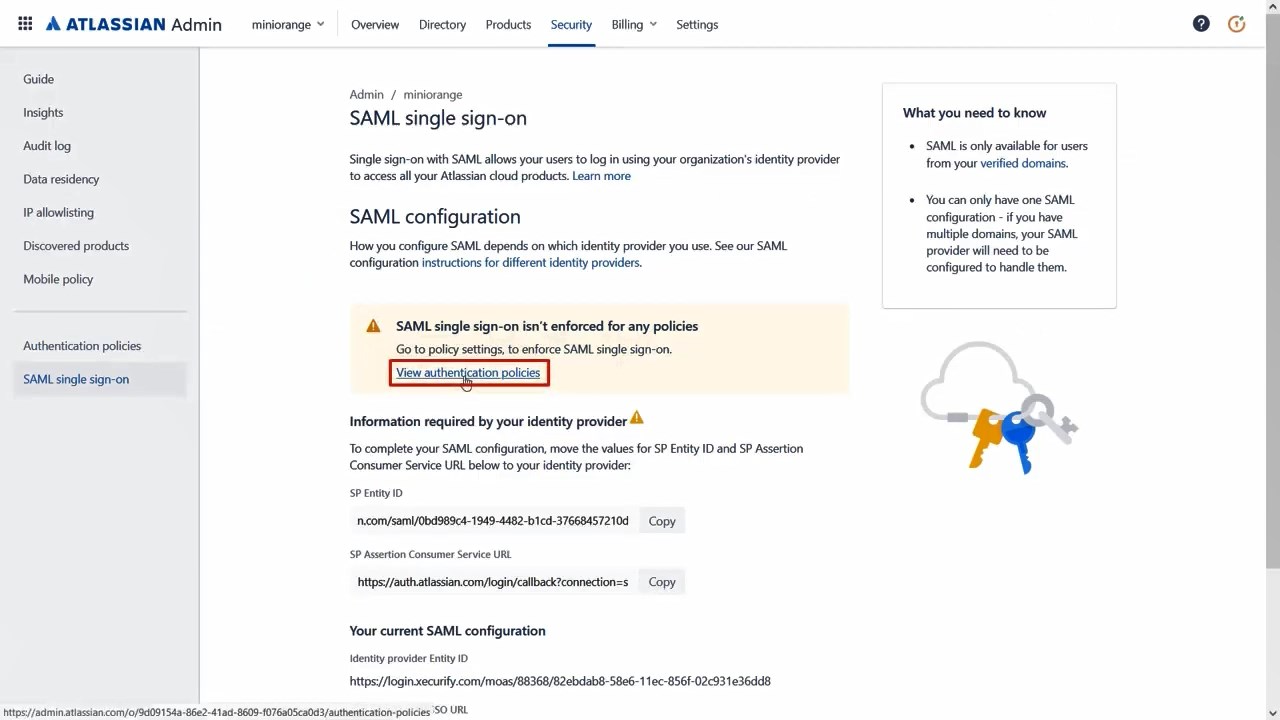
- Now you will be shown SP Entity ID & SP ACS URL as shown below. You will need these in miniOrange app configuration. Now set up the Authentication Policies by clicking on the View Authentication Policies.
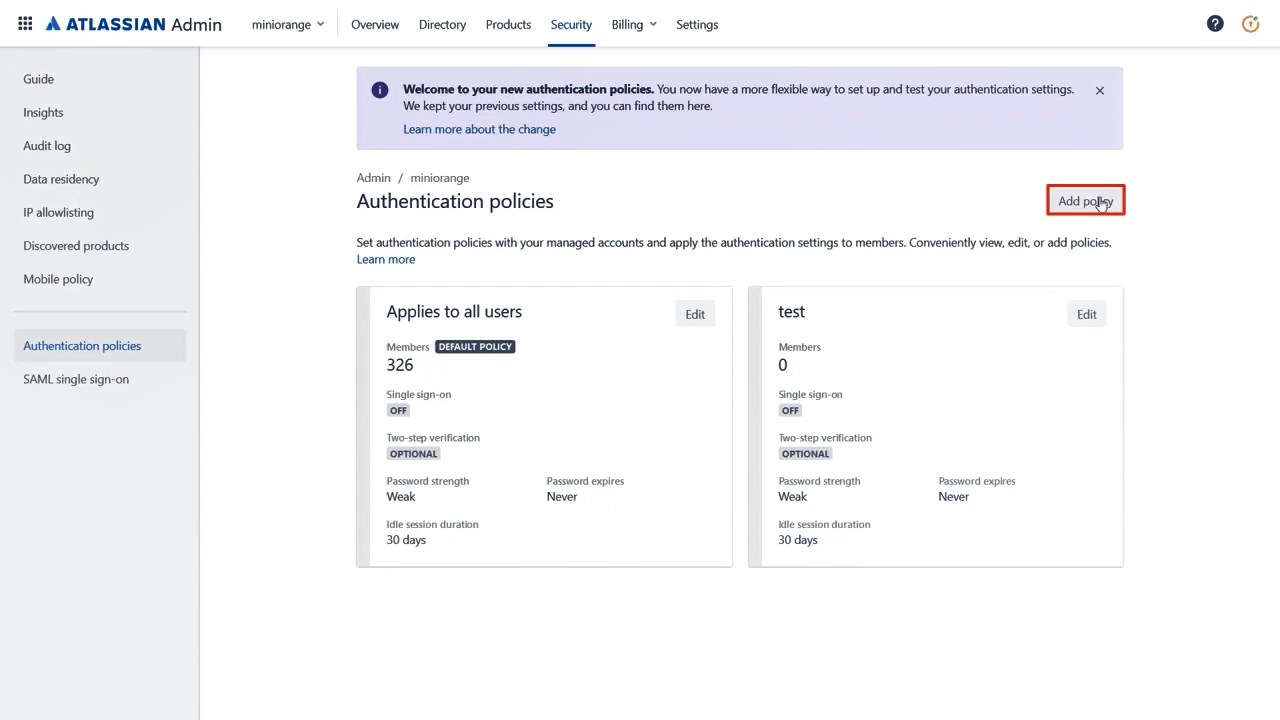
- Click on Add Policy. Then enter the policy name and add the policy.
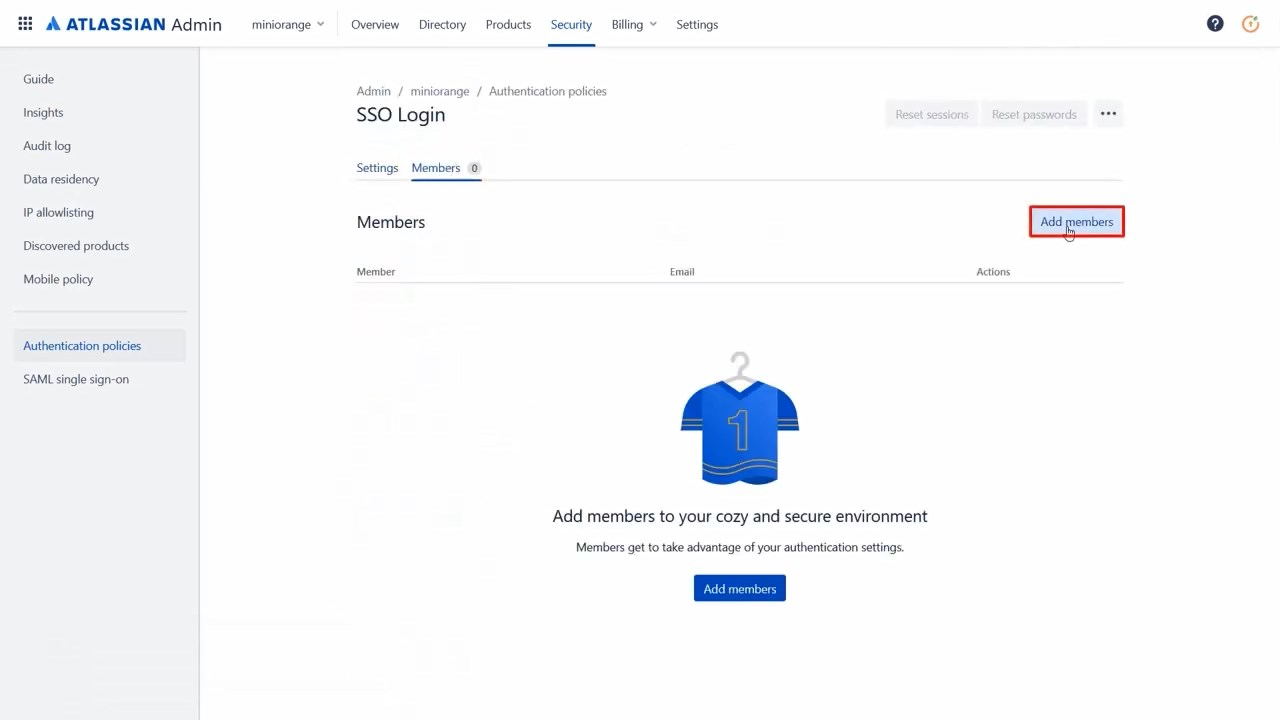
- Now under Single Sign-On click on Enable Single Sign-On. Then click on the Members tab besides the settings tab and click on Add Members.
- Here you can either add a single user by the username or you can use the option Bulk Entry that will allow you to add multiple users at once.
3: Configure User Directory
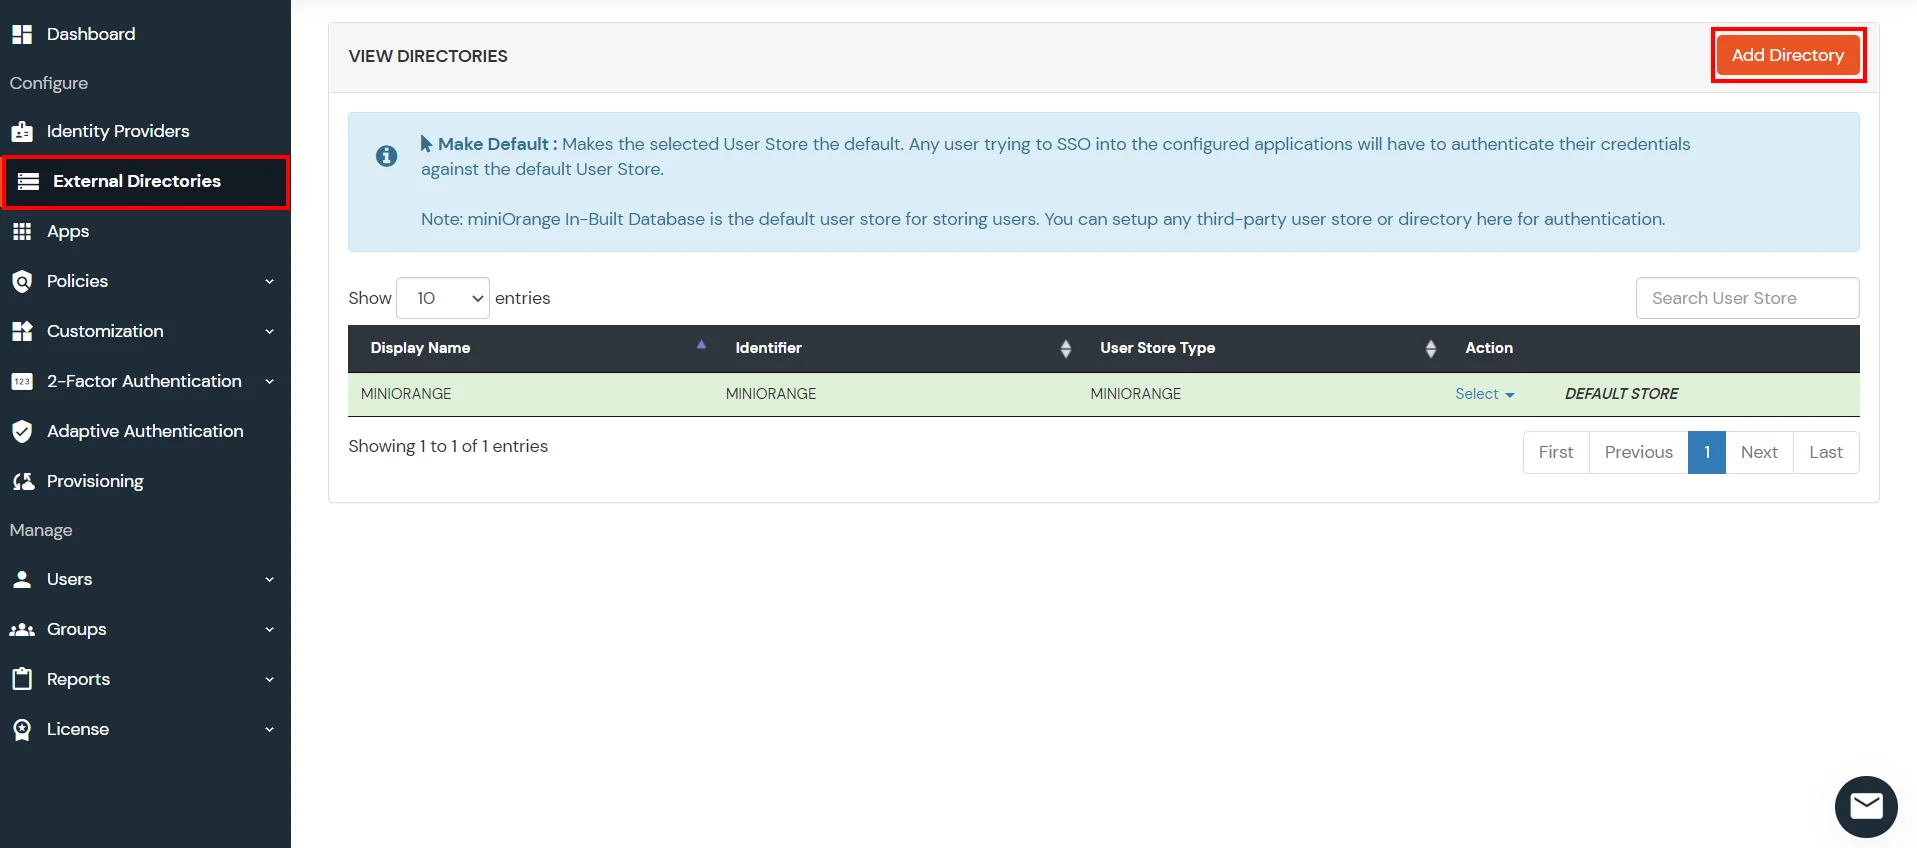
- Click on User Stores >> Add User Store in the left menu of the dashboard.
- Select User Store type as AD/LDAP.
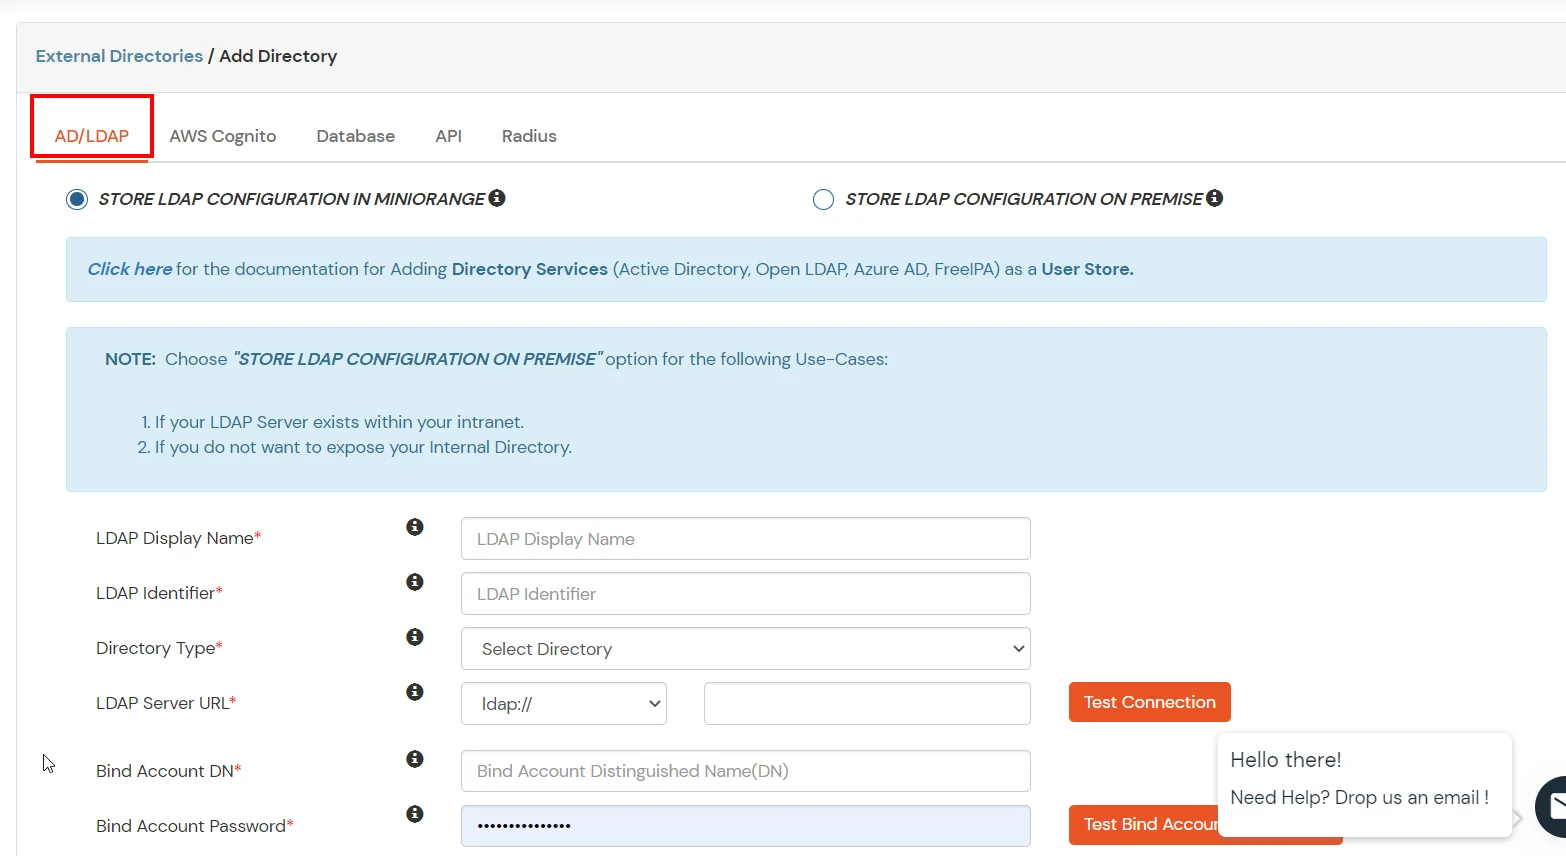
- Enter LDAP Display Name and LDAP Identifier name.
- Select Directory Type as Active Directory.
- Enter the LDAP Server URL or IP Address against the LDAP Server URL field.
- Click on the Test Connection button to verify if you have made a successful connection with your LDAP server.
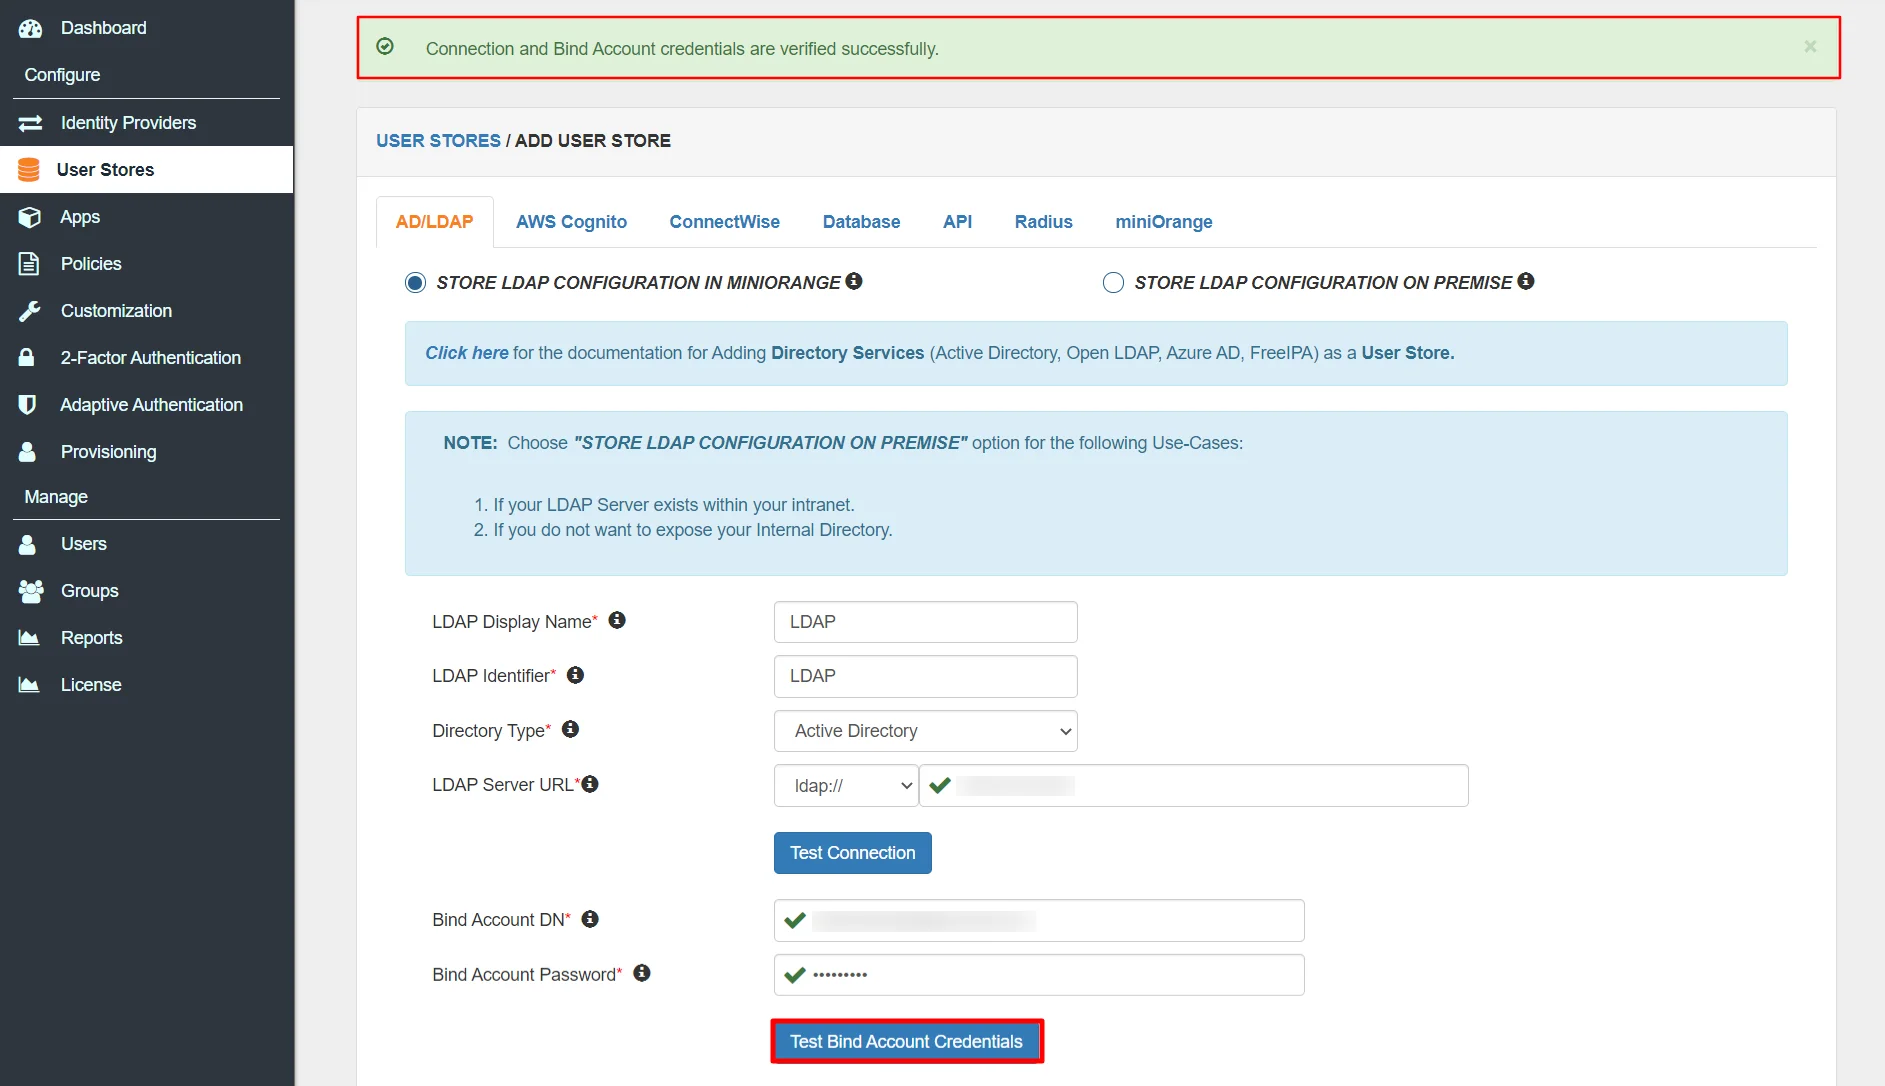
- Enter the Distinguished Name attribute, Bind Account password and Click on Bind Account Credentials button to verify your LDAP Bind credentials for LDAP connection.
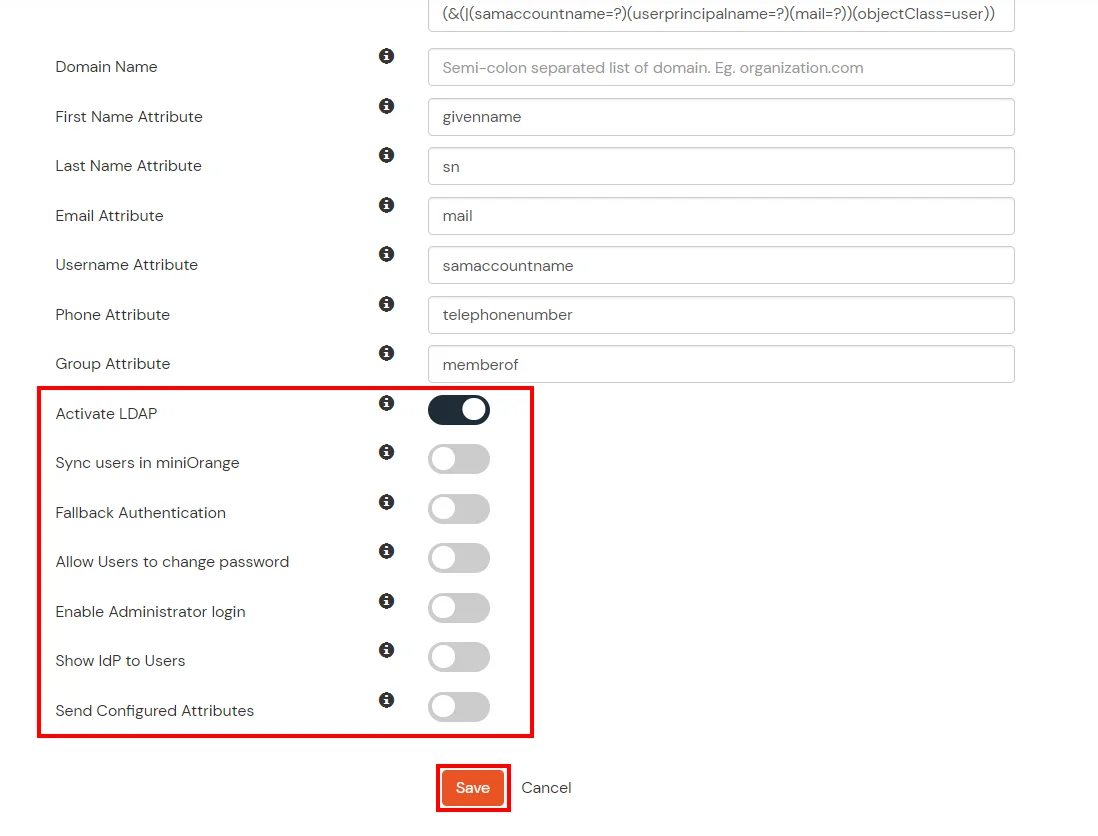
- You can also configure the following options while setting up AD. Enable Activate LDAP in order to authenticate users from AD/LDAP. Click on the Save button to add a user store.
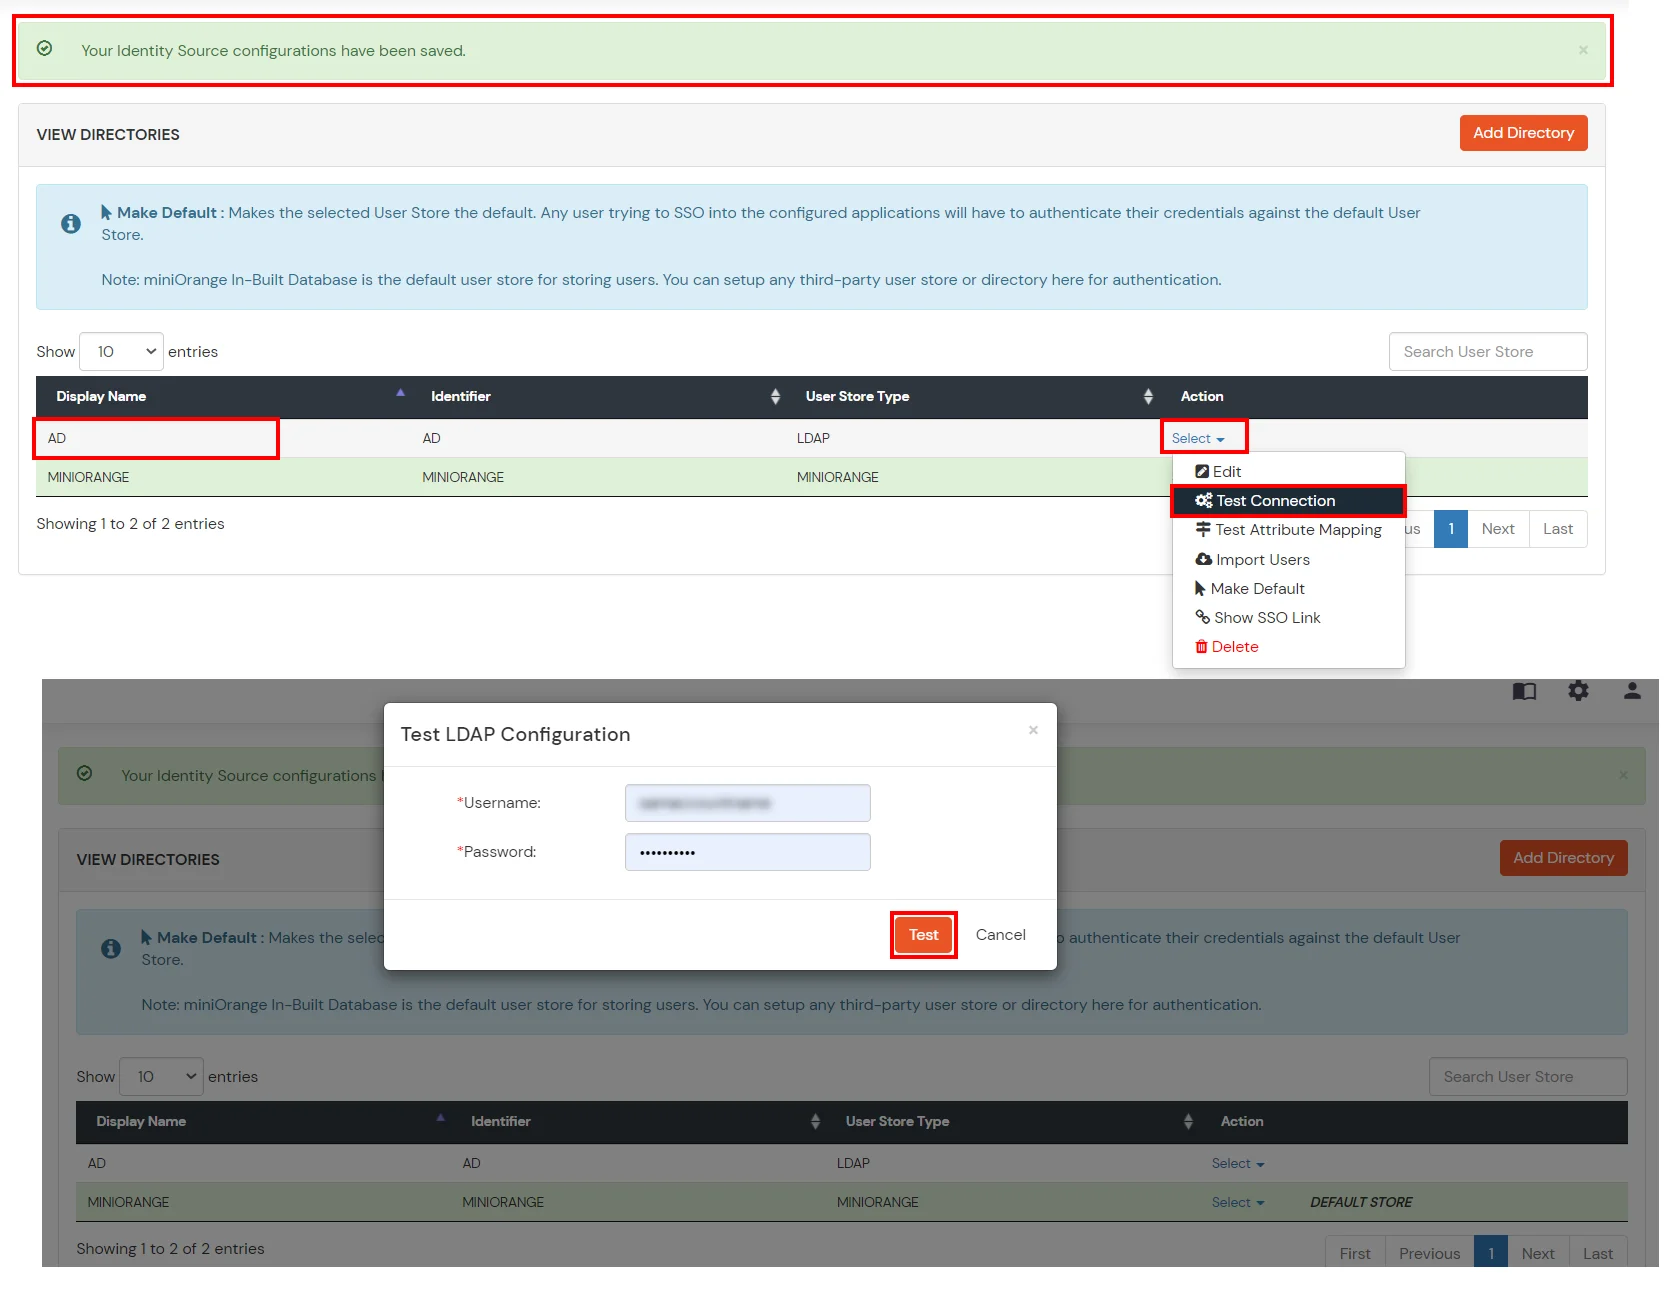
- Click on Save. After this, it will show you the list of User stores. Click on Test Configuration to check whether you have entered valid details. For that, it will ask for username and password.
4: User Import and Provisioning from AD
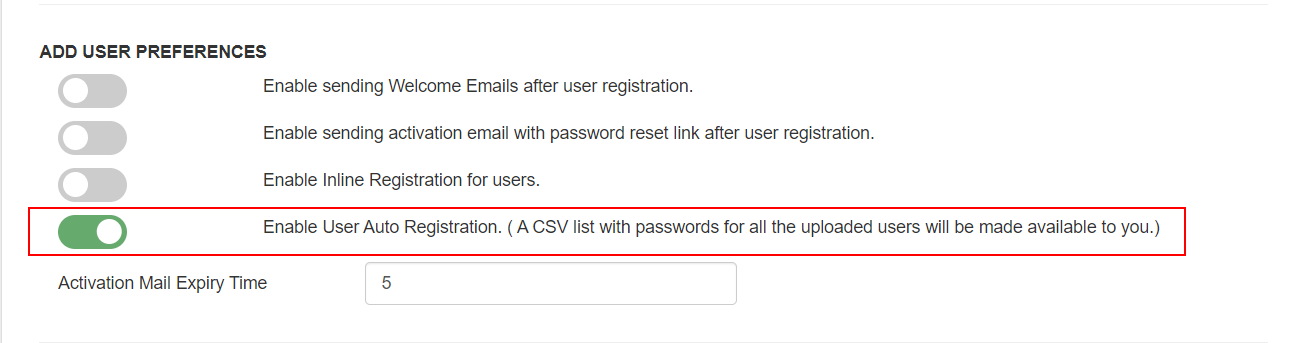
- Go to Settings in the Customer Admin Account.
- Enable the Enable User Auto Registration option and click Save.
- From the Left-Side menu of the dashboard select Provisioning.
- In the Setup Provisioning tab select Active Directory in the Select Application Drop Down.
- Toggle the Import Users tab, click on Save button.
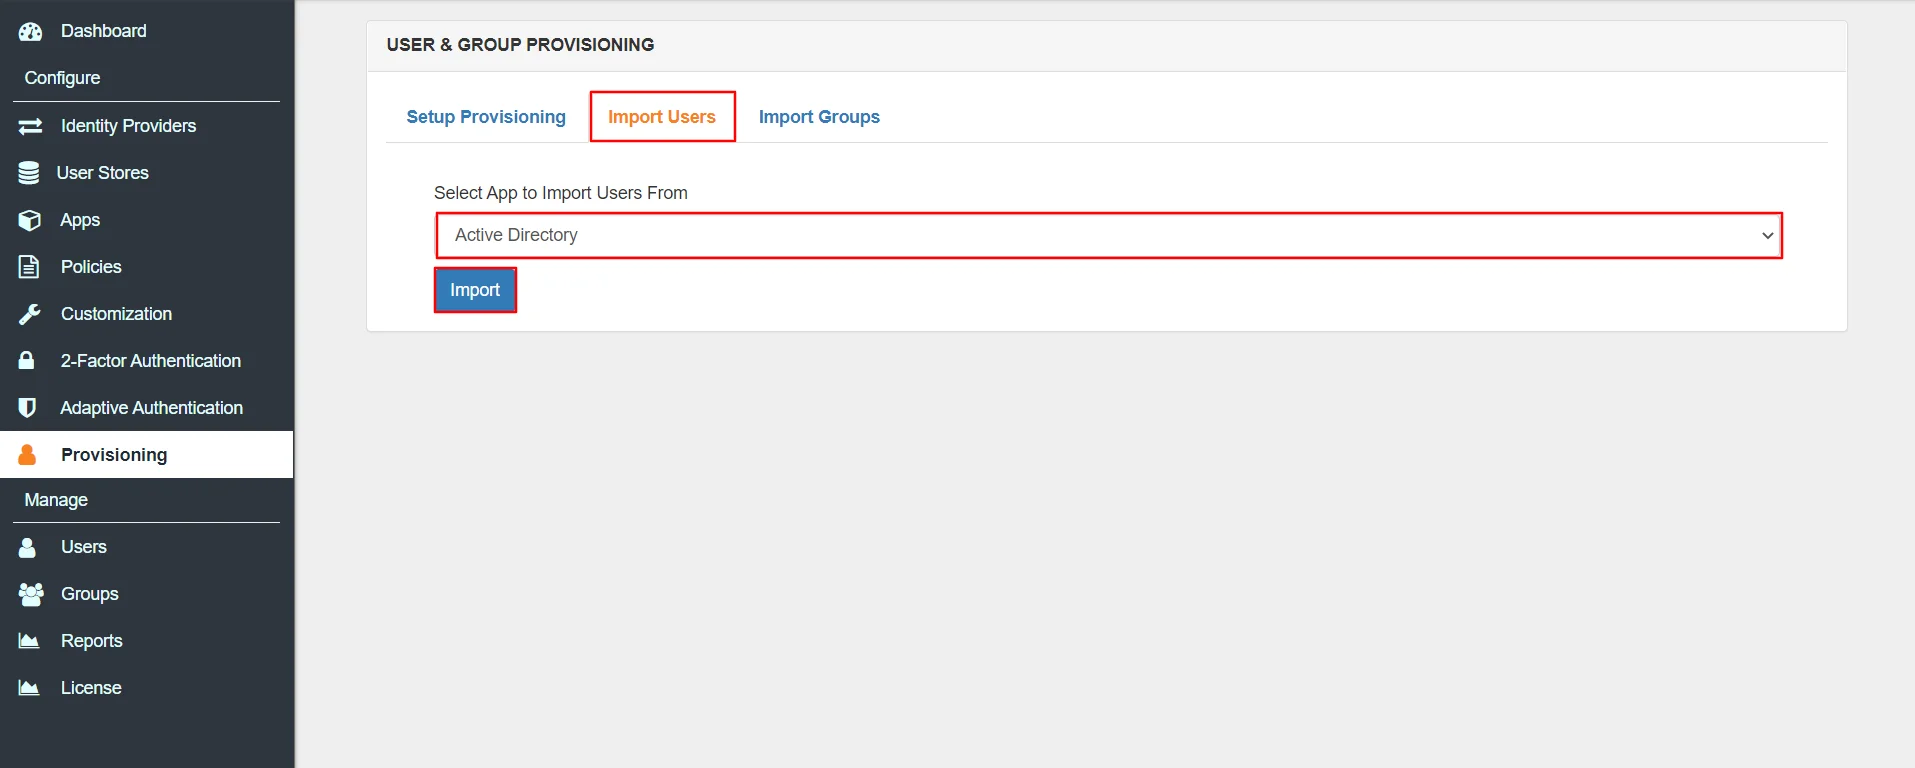
- In the same section, switch to the Import Users section.
- Select Active Directory from the dropdown and click on the Import Users tab, to import all the users from Active Directory to miniOrange.
- You can view all the Users you have imported by selecting Users >> User List from Left Panel.

5: Test SSO Configuration
- Go to your Atlassian Cloud Login URL, here you will be asked to enter the username which will redirect you to miniOrange IdP Sign On Page.
- Enter your miniOrange login credentials and click on Login. You will be automatically logged in to your Atlassian Cloud account.
- Login to miniOrange IdP using your credentials.
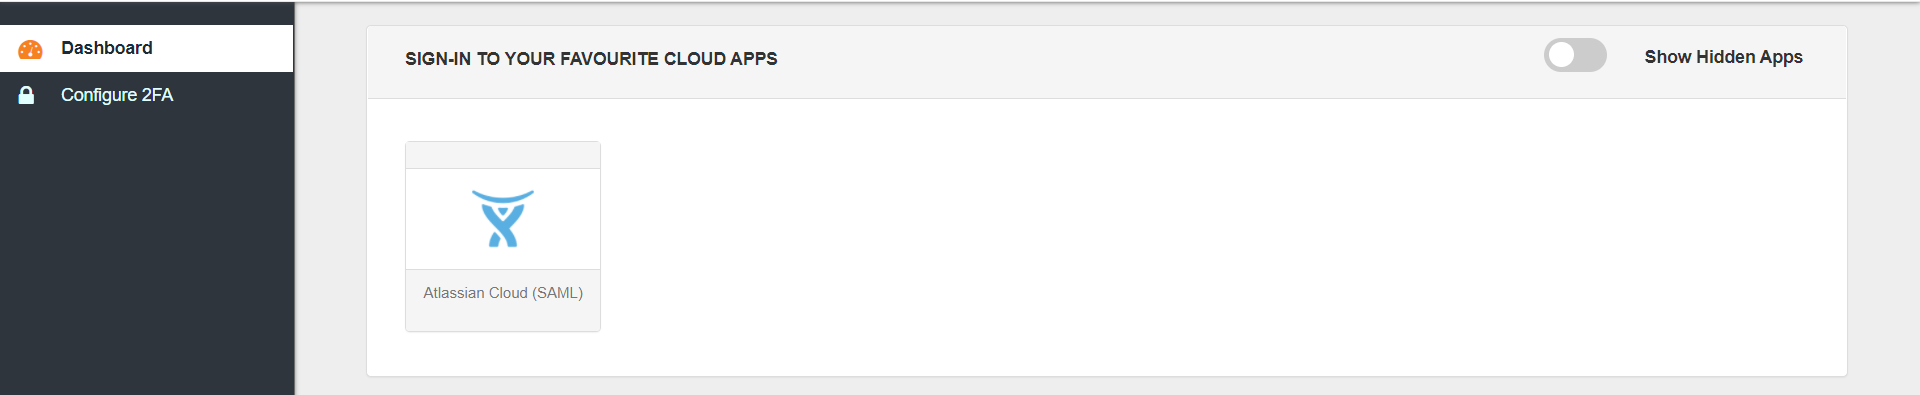
- On the Dashboard, click on the Atlassian Jira Cloud application which you have added, to verify SSO configuration.
- You will automatically be logged in to Jira Cloud after clicking on the app.
a. Using SP Initiated Login
b. Using IDP Initiated Login
Did this page help you?
