Step 1: Set Up AuthAnvil as Identity Provider
- Copy these values from the Service Provider Info tab of the SAML plugin.
- SP Entity ID
- ACS URL
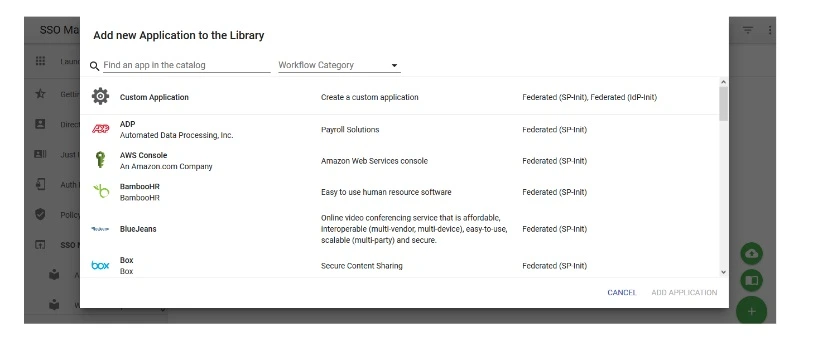
- Login to Authanvil and Go to SSO Manager +(add icon) and select Custom Application.
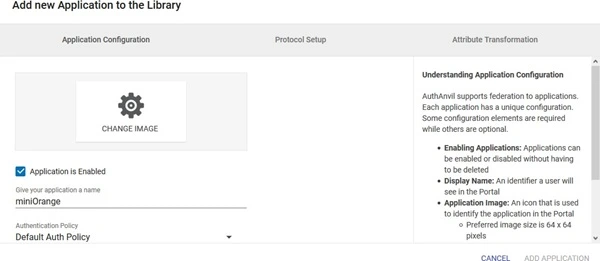
- Enter the Application Name.
- Go to Protocol Type and Enter following info:
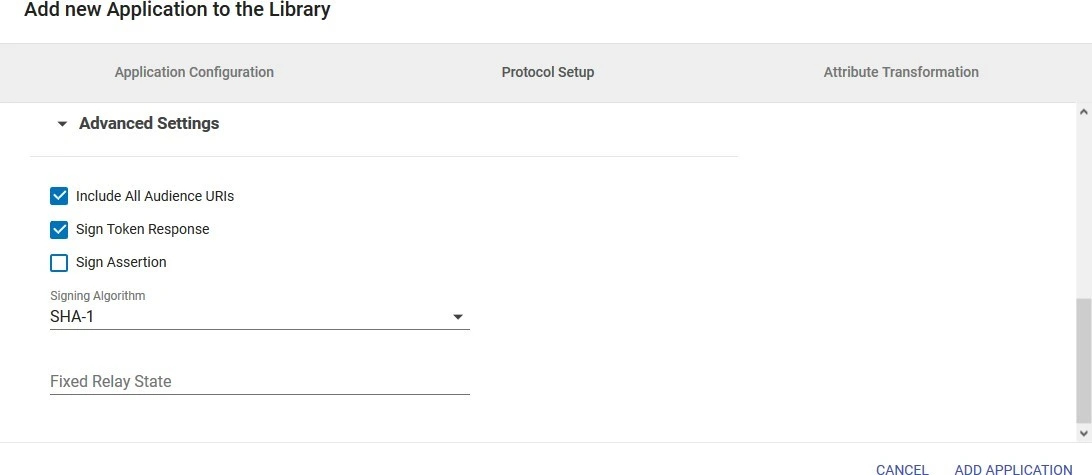
- Enter Advanced Settings.
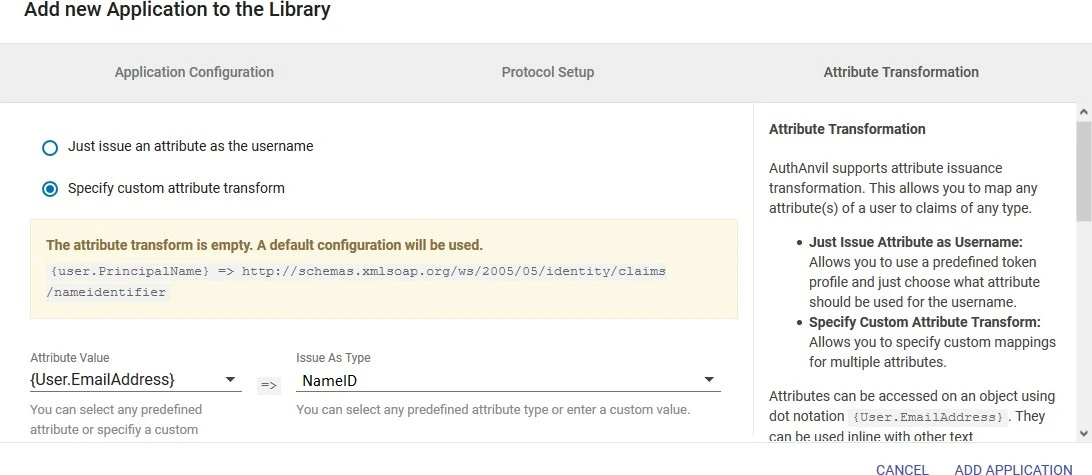
- Go to Attribute Transformation Tab and select Specify custom attribute transform. Add the NameID attribute and click on Add. Then add the name attribute as given in the image.
- Click on Add Application .
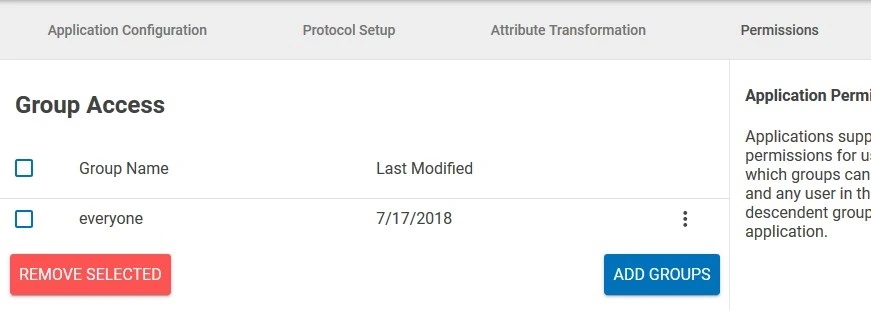
- Go to Permissions tab and add Groups to which you want to give access to this application.
- Click on Save Changes.
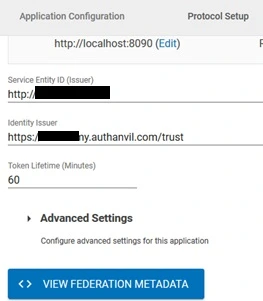
- Open the app. Click on View Federation Metadata in Protocol Type Tab and save the generated metadata xml file. This metadata file will be required to configure the plugin.
 Prerequisites:
Instructions:
Prerequisites:
Instructions:
| Protocol Type | SP-INIT |
| Assertion Consumer Service URL | ACS URL copied from the plugin |
| Allow Multiple Audiences | Unchecked |
| Identity issuer | SP Entity ID copied from the plugin |
| Service Entity ID | SP Entity ID copied from the plugin |
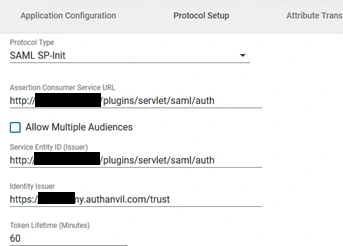
| Include All Audience URIs | Checked |
| Sign Token Response | Checked |
| Sign Assertion | Unchecked |
| Signing Algorithm | SHA1 |