Part 2: Setup miniOrange with AWS Cognito
Step 1. Configure miniOrange as SP in AWS Cognito
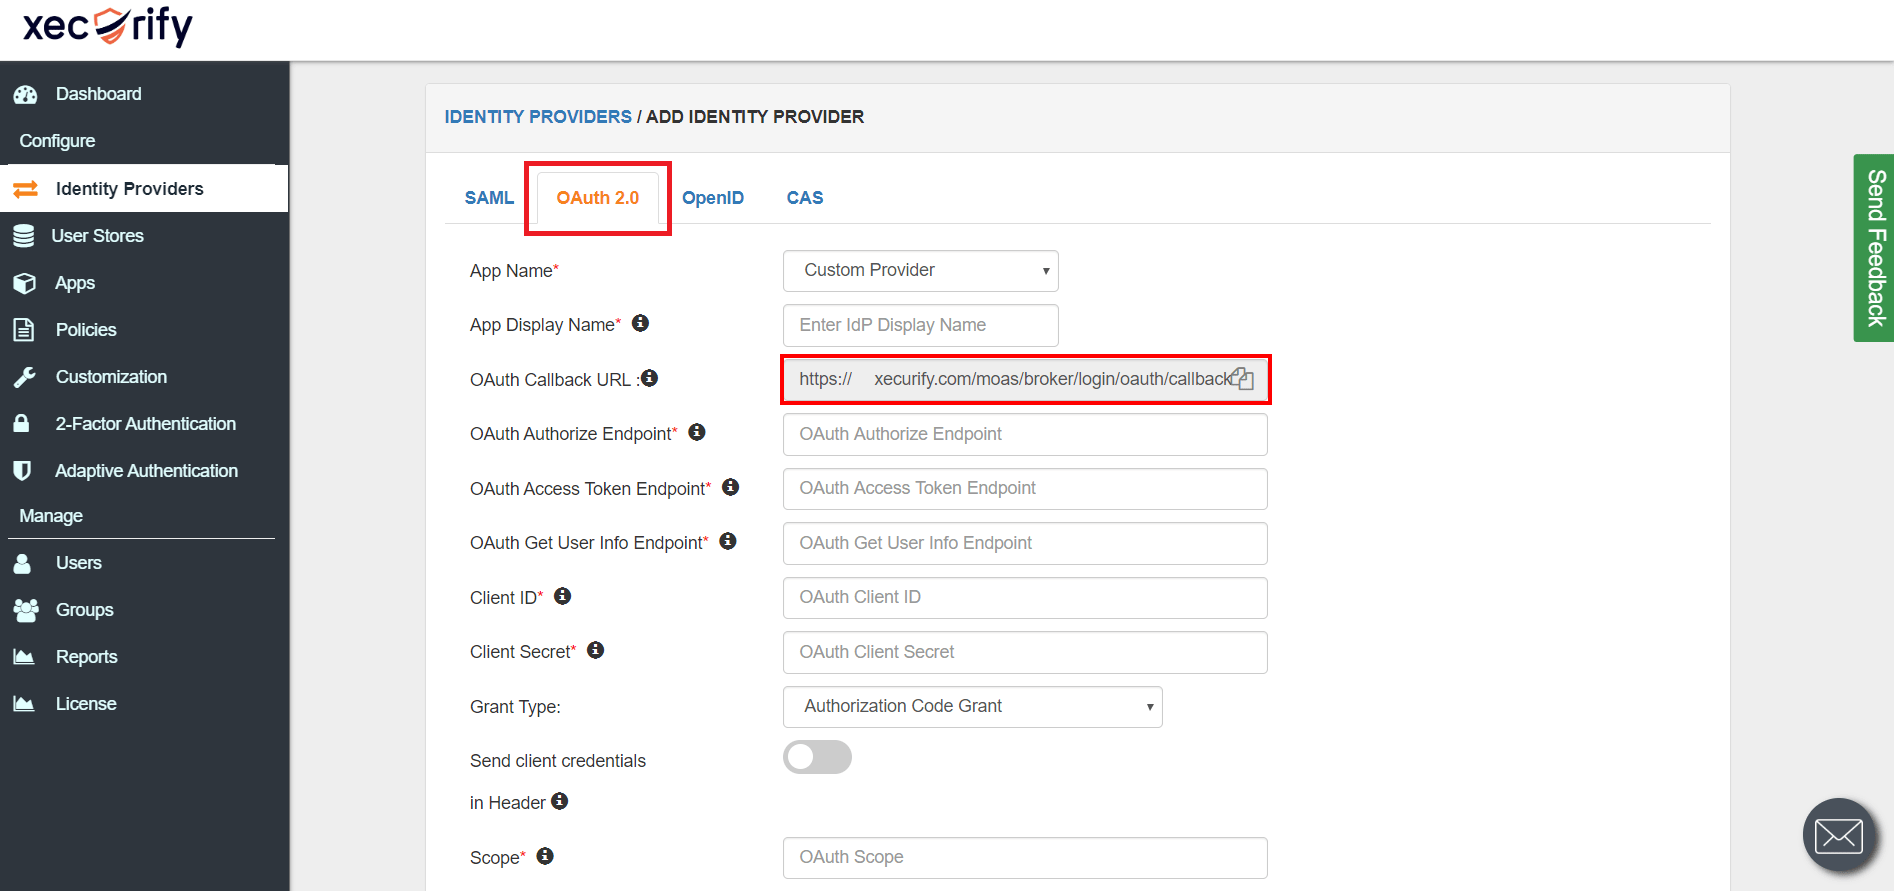
Obtain the following steps to get callback url.
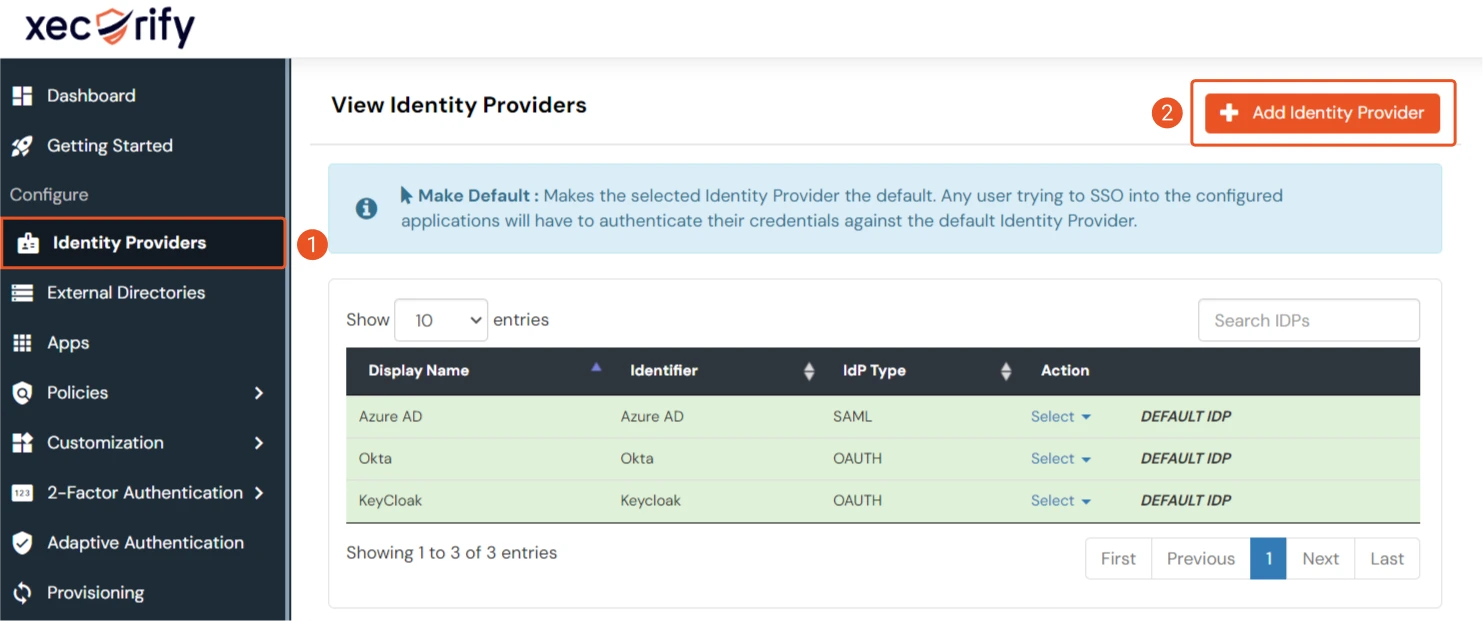
- Go to miniOrange Admin Console.
- From the left navigation bar select Identity Provider. Then, click on Add Identity Provider button.
- You will get the callback URL here, keep it handy this would be required in next steps.
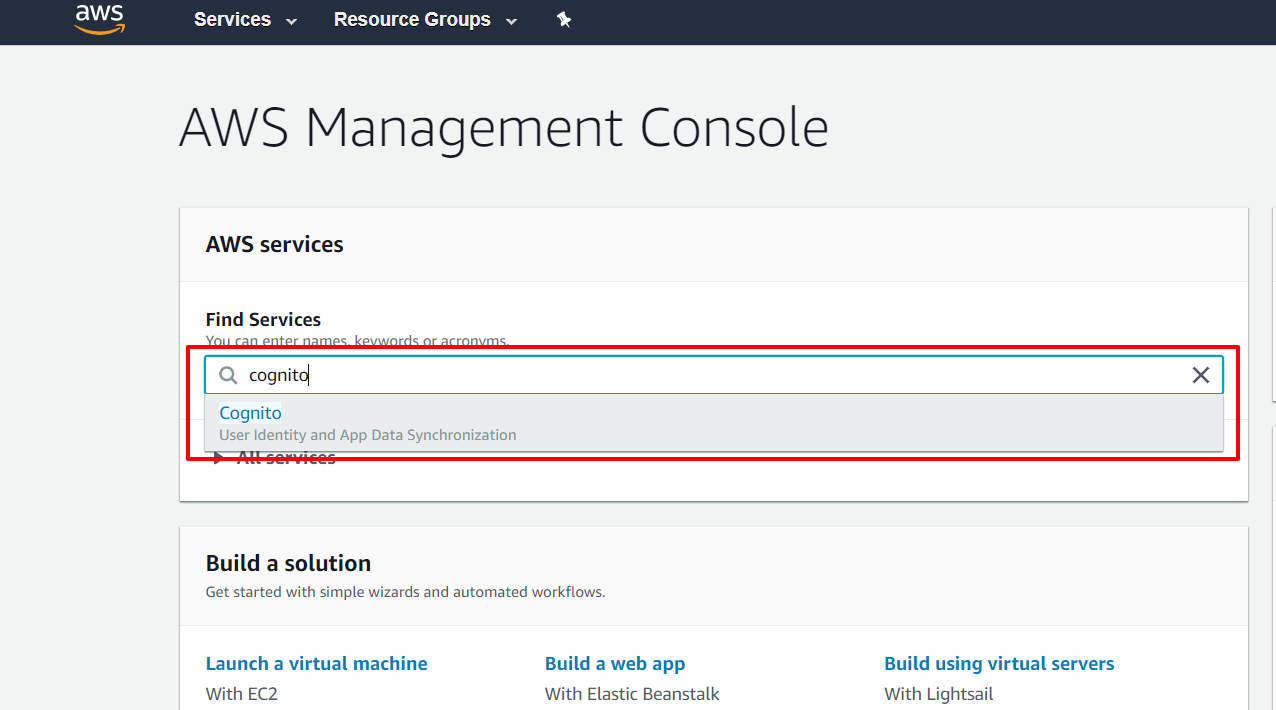
- Sign in to AWS Amazon.
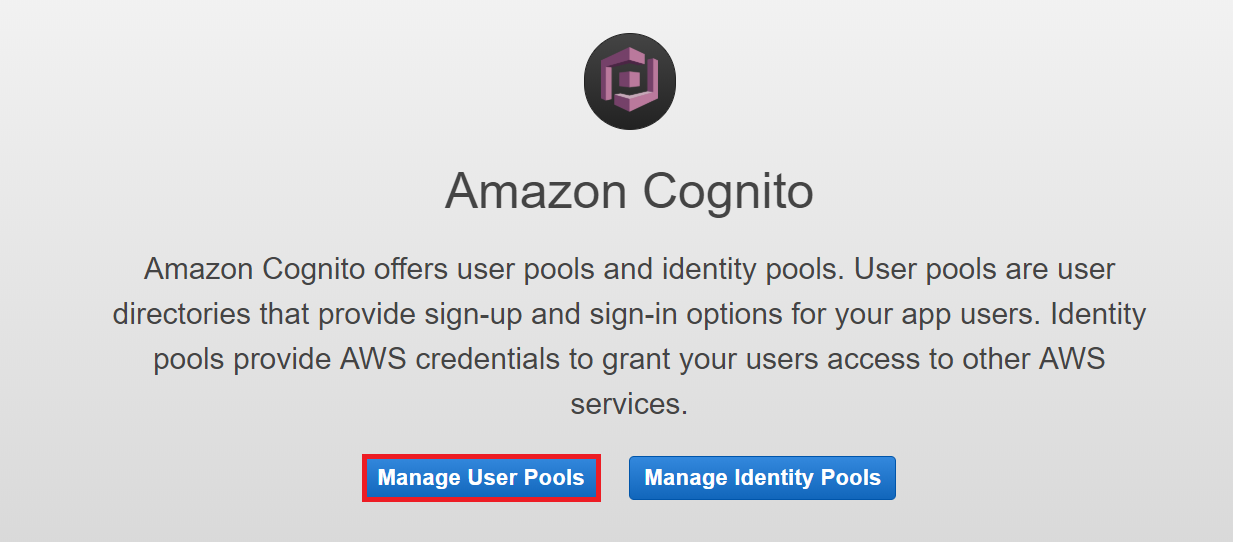
- Now enter “Cognito” in search textbox & select Cognito from dropdown.
- Go to “Manage your user pools”.
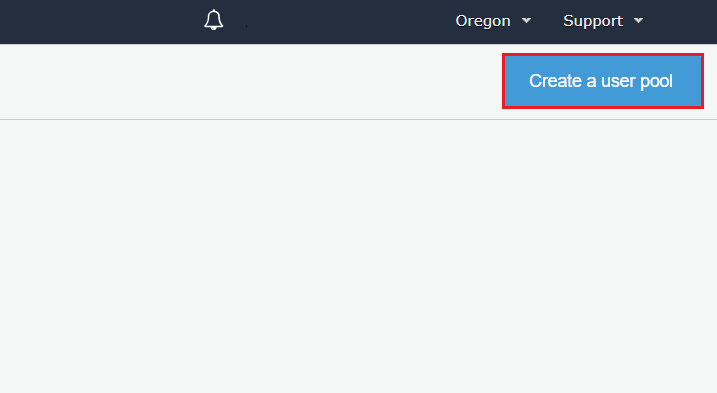
- Click on “Create a user pool”.
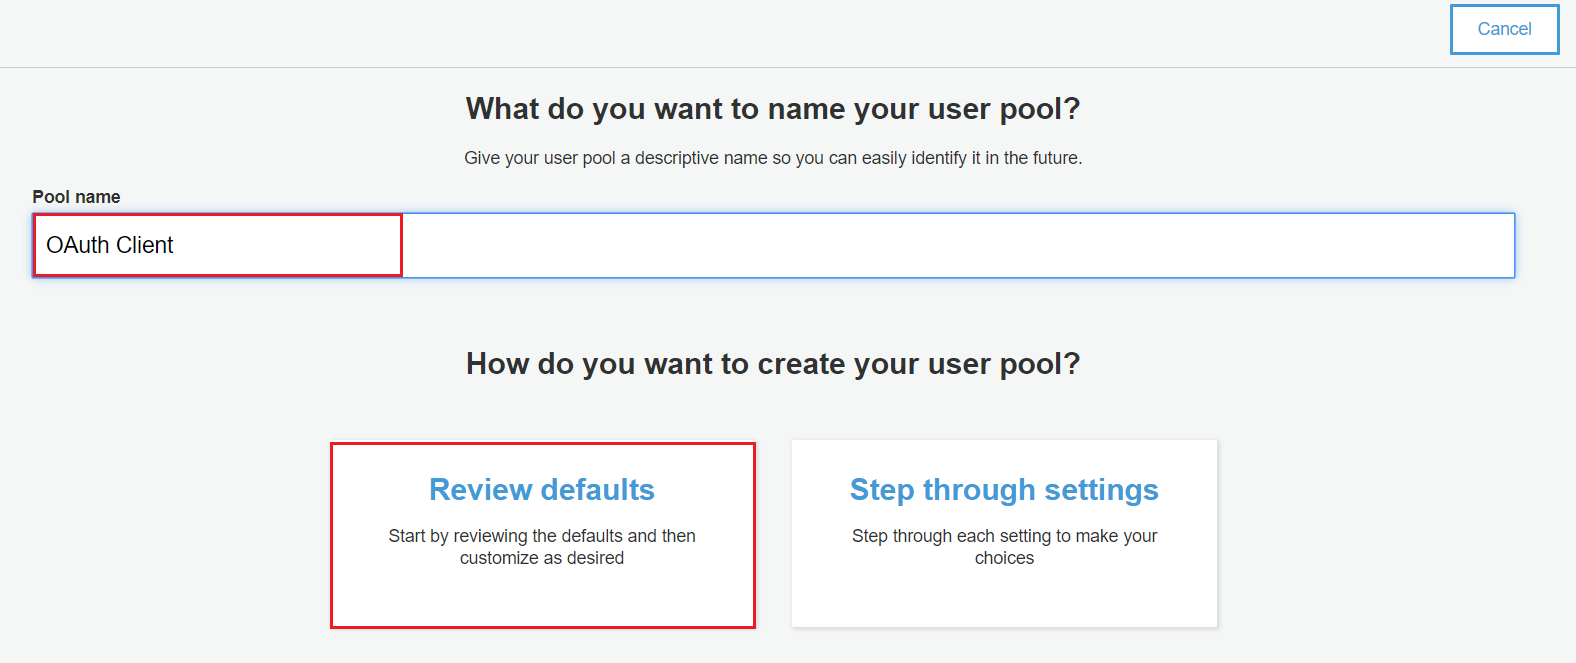
- Add pool name and select “Review Defaults”.
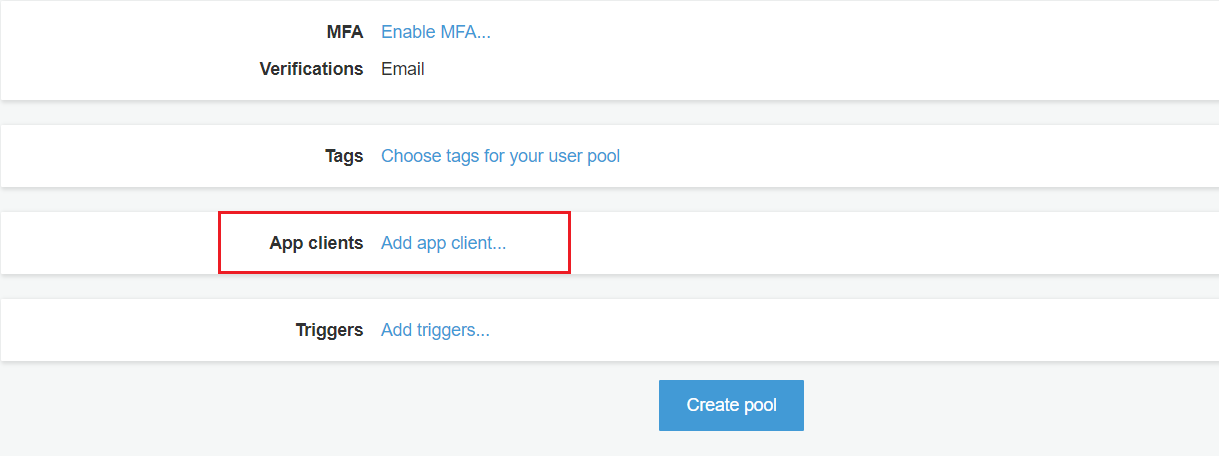
- Click on “Add app client” & then click on Add an app client.
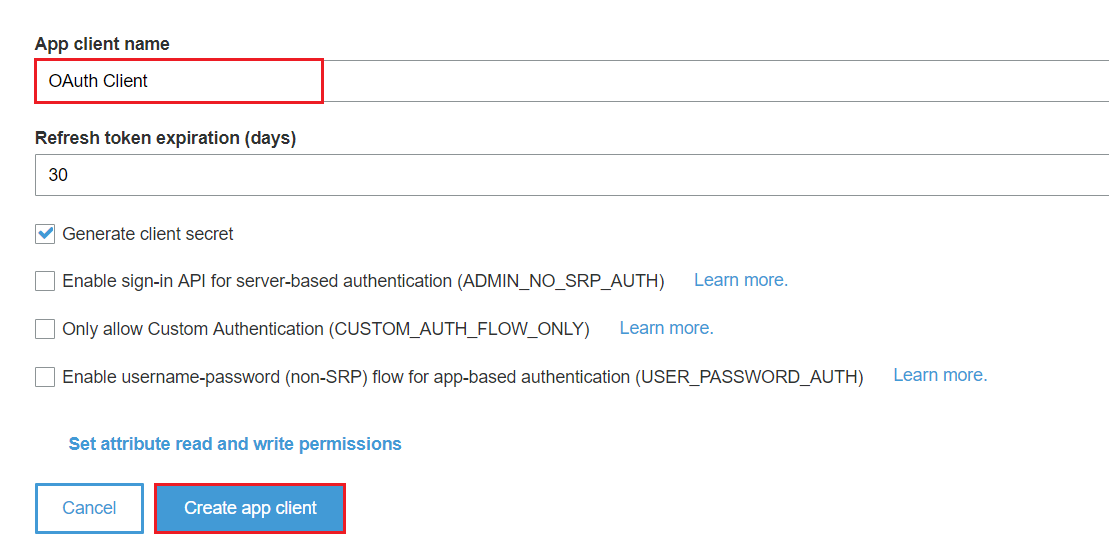
- Enter App client name & then Click on “Create app client”.
- Click on Return to pool details. After this click on “Create Pool”.
- Navigate to App client settings.
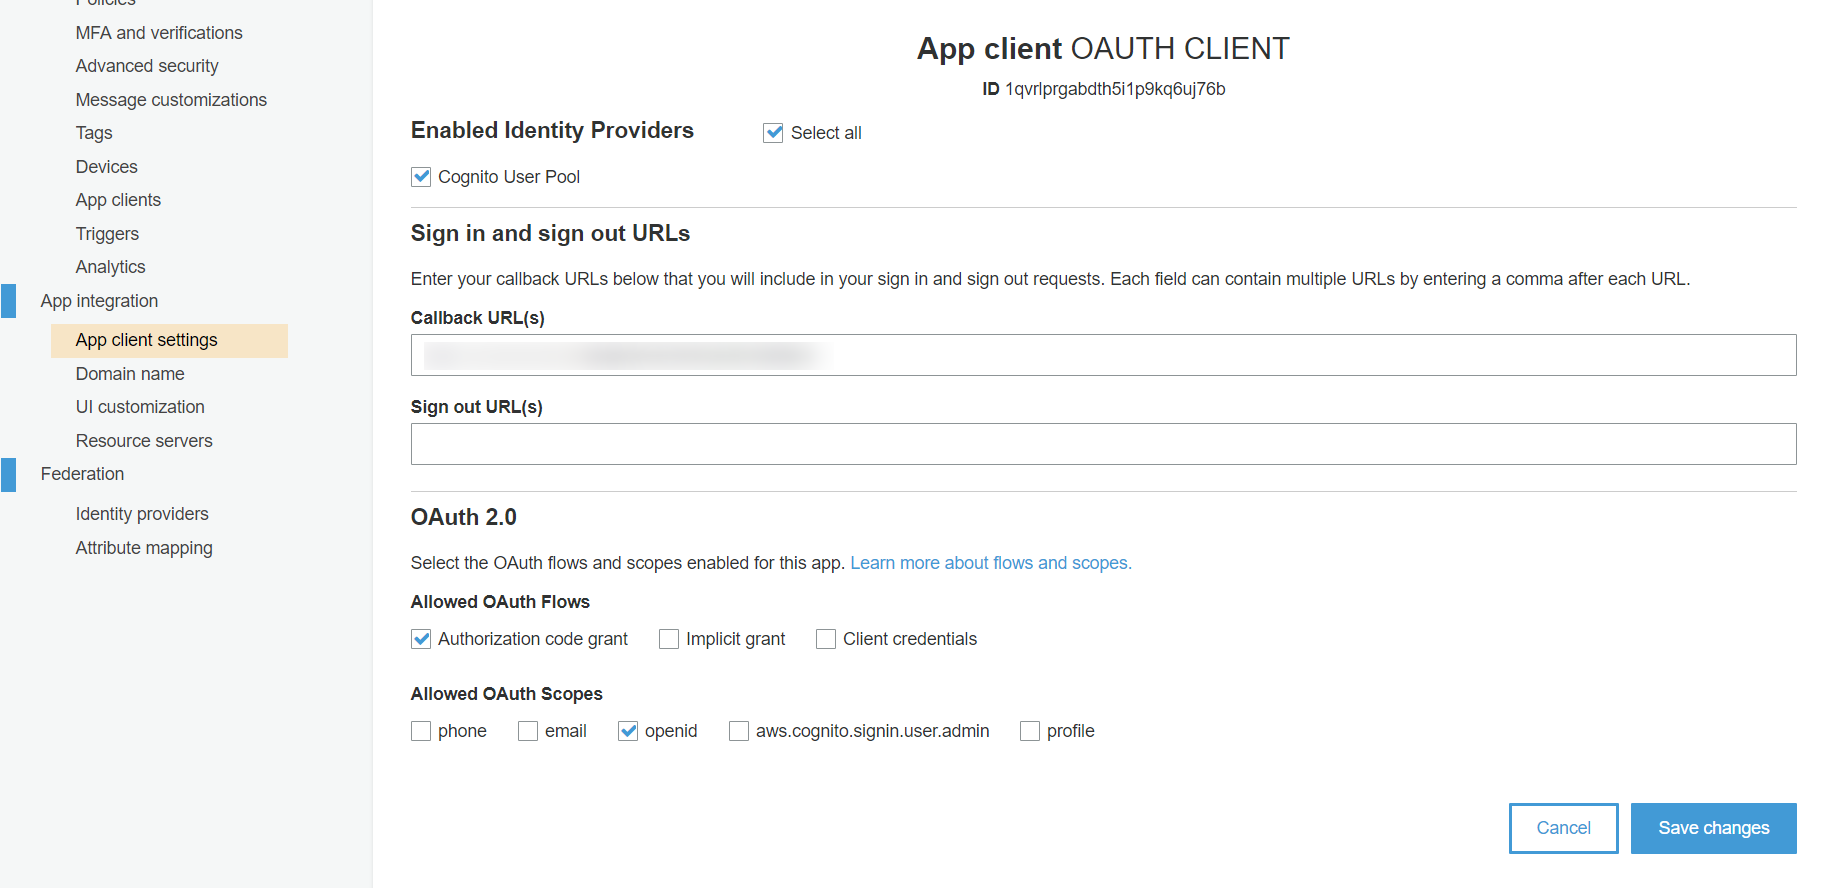
- Now go to the Cognito dashboard and select “Cognito User Pool”, add callback URL here.
- Add application home page URL has to Sign out URL.
- Also, select Authorization code grant as “Allowed OAuth Flows” & select OpenID as “Allowed OAuth Scopes”.
- After selecting all details click on Save changes button.
- Go to “App client” and click on “Show details” to get a client ID and client secret. (Keep client ID and client secret handy as you will need it later.)
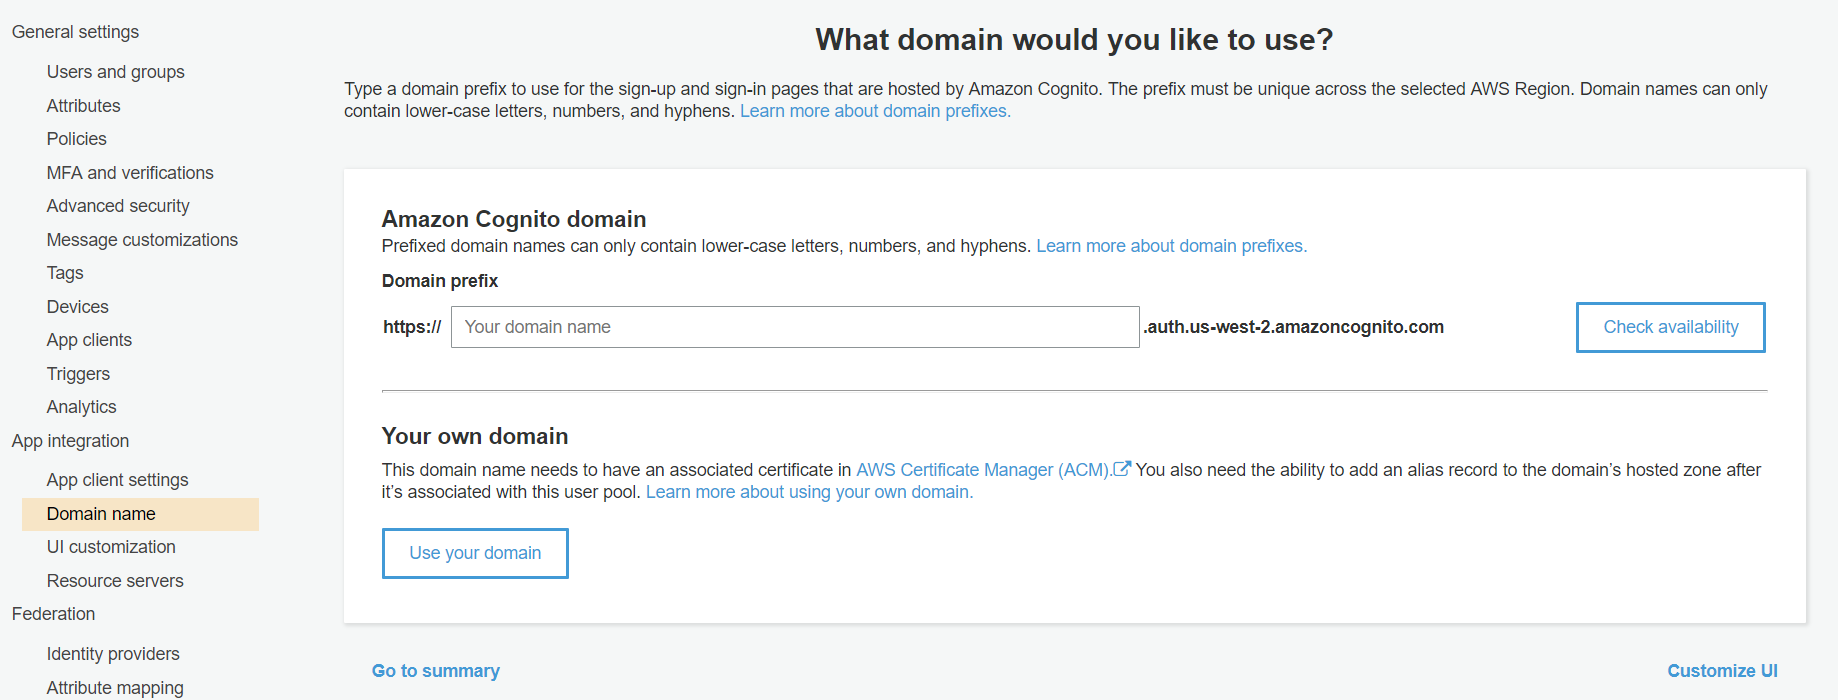
- Go to domain name and enter a domain name for your app. After adding domain name you can check its availability by clicking on “Check availability” button. After entering valid domain name click ”Save changes” button.
- Complete domain name: The complete domain name that you need to enter in miniOrange dashboard is {your domain name}.auth.{region name}.amazoncognito.com
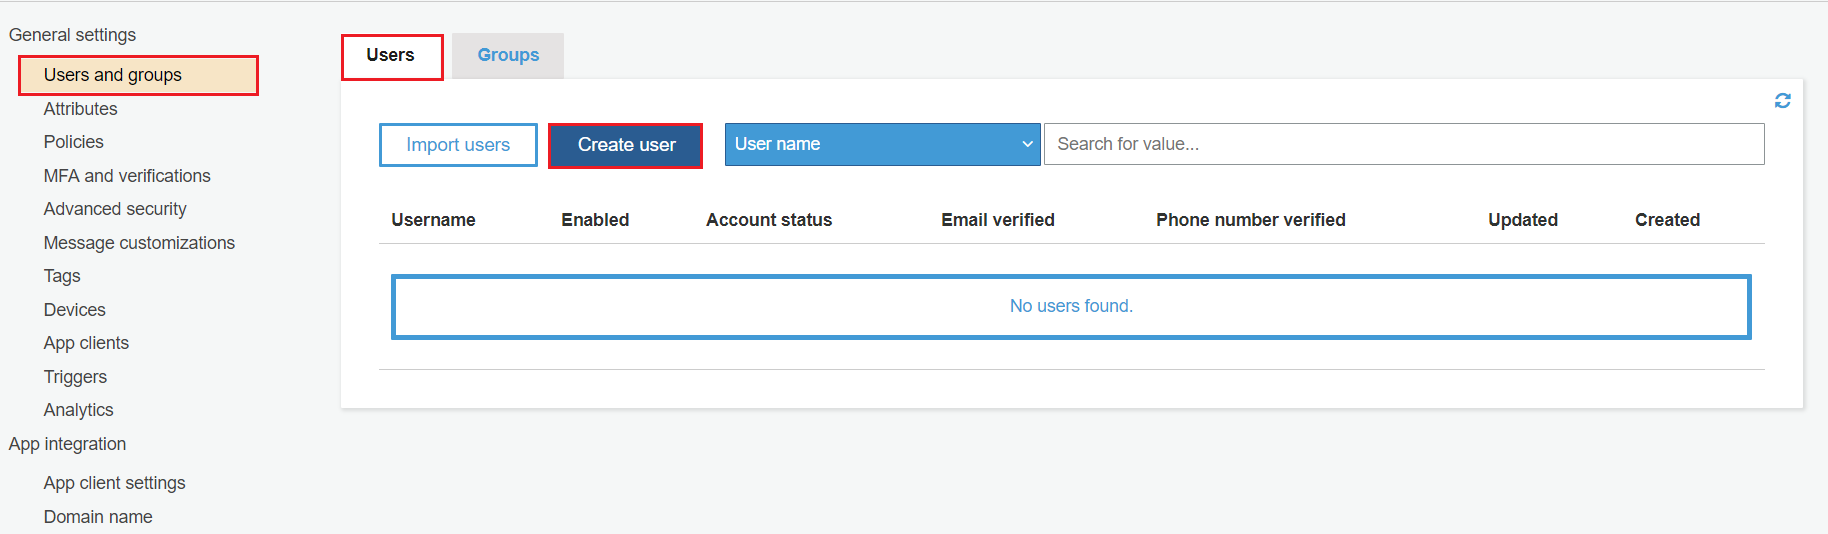
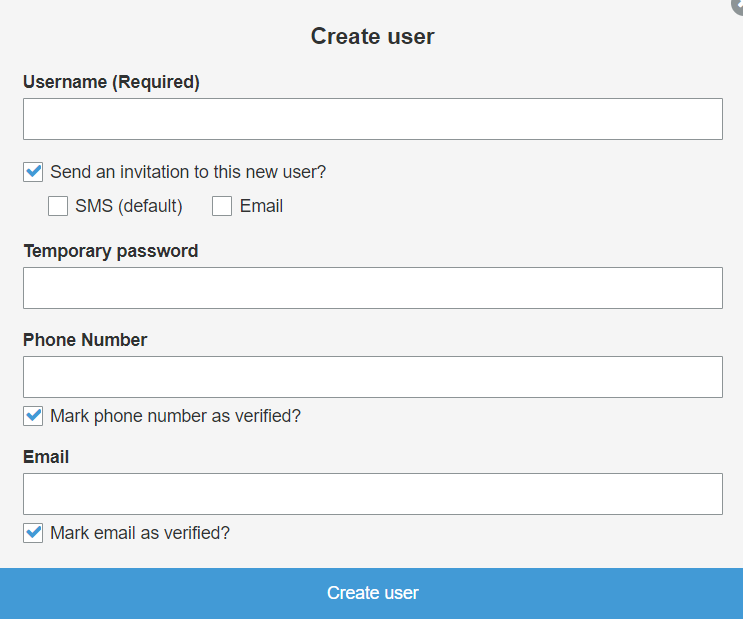
- Add Users / Groups to Cognito App : Go to Users and groups and then click on Users. After this click on Create user.
- Fill all required informations and click on Create user.
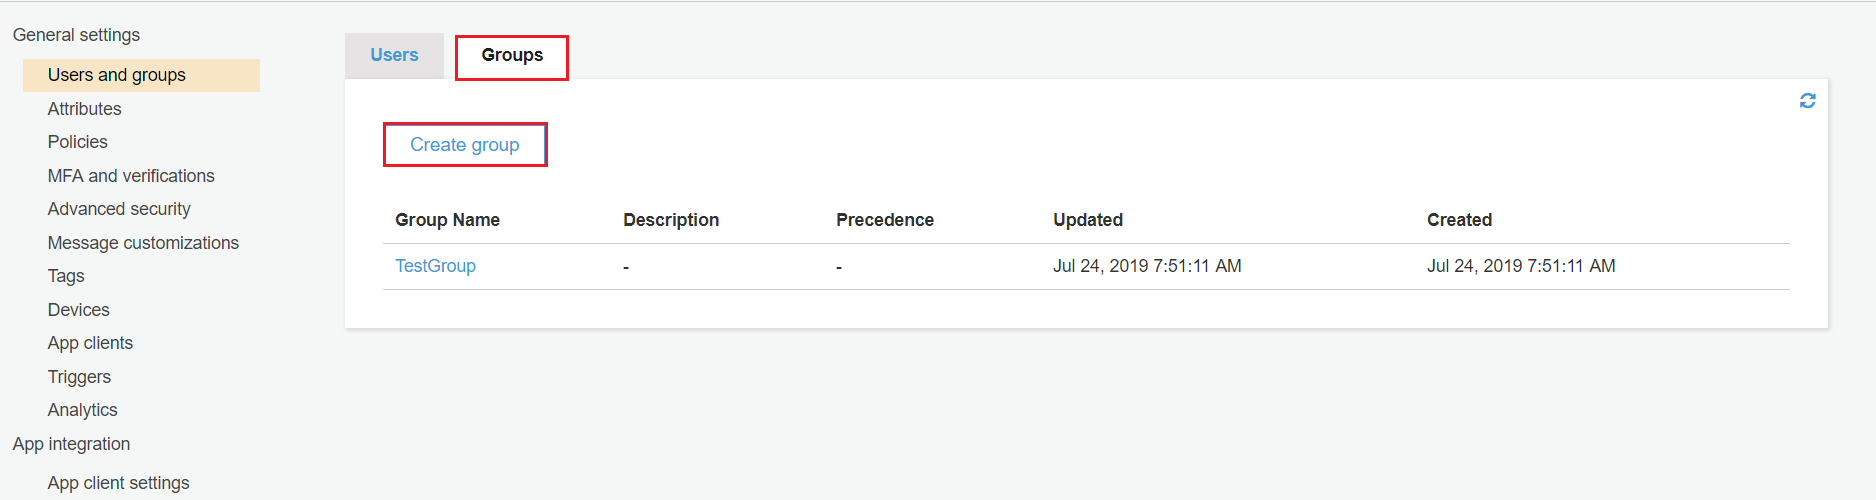
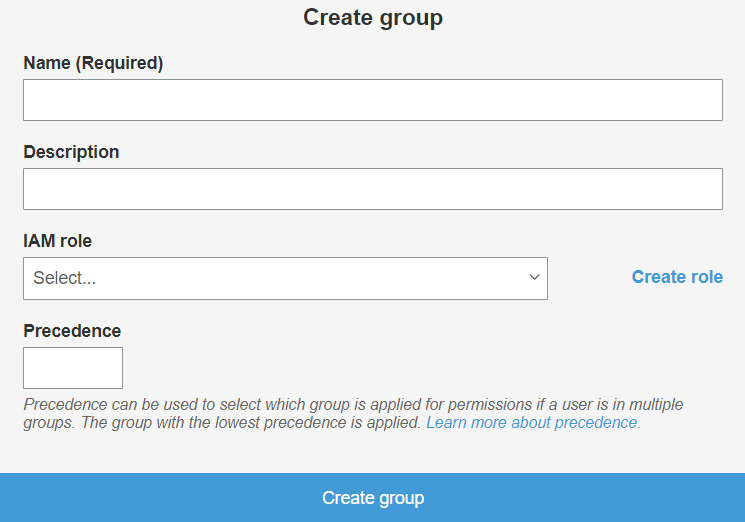
- Click on Groups and then click on Create group.
- Fill all required informations and click on Create group.

Step 2. Configure AWS Cognito in miniOrange.
- Go to miniOrange Admin Console.
- From the left navigation bar select Identity Provider. Then, click on Add Identity Provider button.
- Select OAuth
- Enter the following values.
- Now you can click on Save.

| IdP Name | Custom Provider |
| IdP Display Name | Choose appropriate Name |
| OAuth Authorize Endpoint | https://{cognito-app-domain}/oauth2/authorize | OAuth Access Token Endpoint | https://{cognito-app-domain}/oauth2/token | OAuth Get User Info Endpoint (optional) | https://{cognito-app-domain}/oauth2/userInfo |
| Client ID | This value can be obtained from the above steps |
| Client secret | This value can be obtained from the above steps |
| Scope | openid |
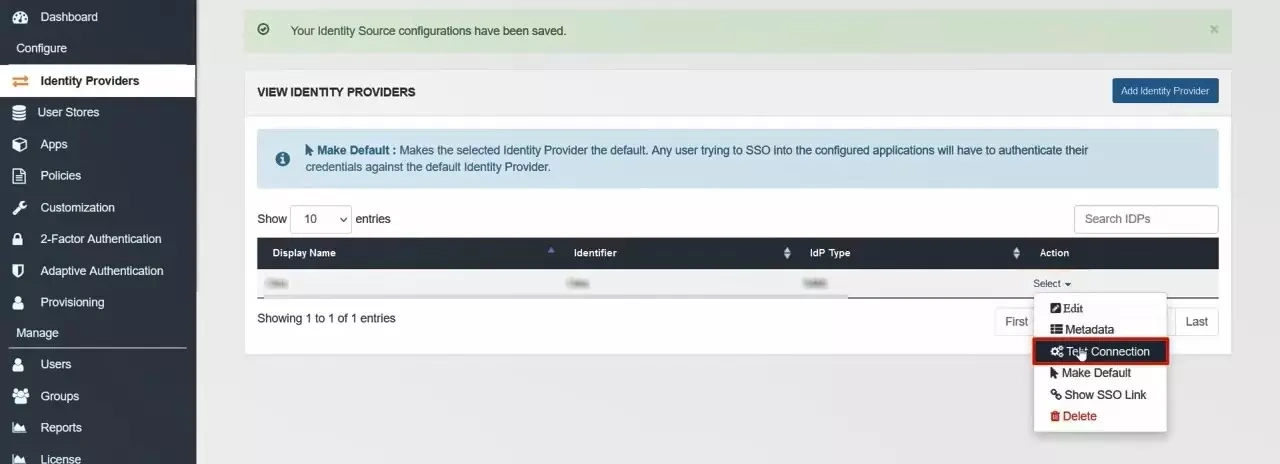
Step 3. Test connection between miniOrange and AWS Cognito
- Go to the miniOrange Admin Dashboard.
- Go to Identity Providers tab. Then click on select button under the app you just created. Then click on Test Connection.
- A new popup login window will open. Enter your credentials and login.
- Now you will see TEST SUCCESSFUL in a new popup window. If not, then check if you have missed any of the above step.