- Home
- SCIM Provisioning
- SCIM Provisioning Documentation
- Jira Cloud Users & Groups Provisioning: miniOrange IdP Sync

Jira Cloud Users & Groups Provisioning: miniOrange IdP Sync
miniOrange Users & Groups Provisioning for Jira synchronizes users, groups, and attributes from various identity providers (IdPs) with the Jira Cloud directory. You can manage users directly within your IdP, saving time and effort spent on manual provisioning while ensuring an up-to-date Atlassian directory.
 Try it for free
Before you begin
- You need admin access to both your Jira Cloud site and Identity Provider Admin Console (e.g., miniOrange).
- Know whether you are syncing Licensed Users or Portal Customers.
Download and Installation
- Log in to your Jira instance as an admin.
- Under the Apps section, click on Explore more apps.
- Search for miniOrange SCIM.
- Click Try it free to begin a new trial of the app.
- After installation, locate the miniOrange Users & Groups Provisioning For Jira app and click to open it.
Step 1: Admin Setup Configuration
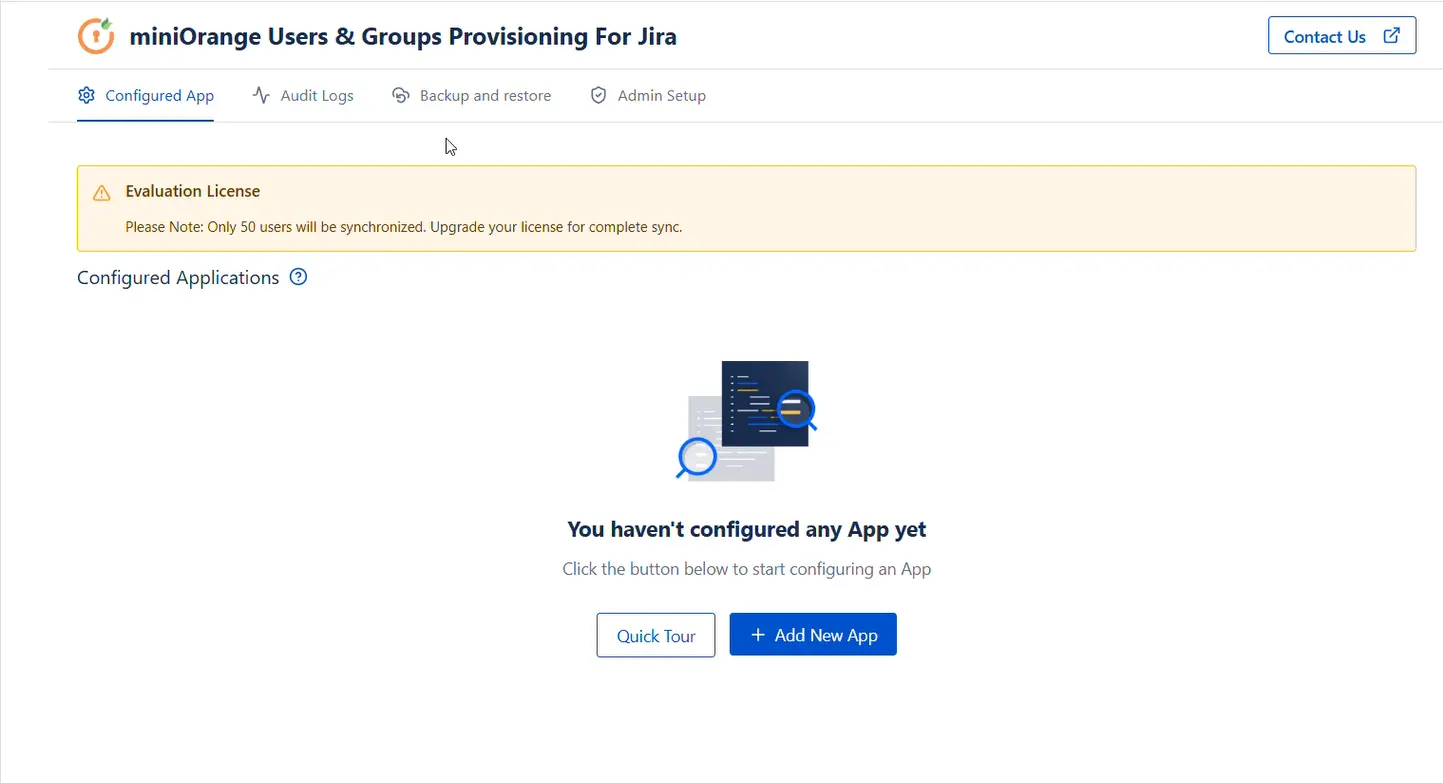
Upon installing the miniOrange Users & Groups Provisioning For Jira app, the admin needs to configure the Admin Token and API Key to complete the admin setup and start the provisioning process.
Part A: Configure Atlassian API Token
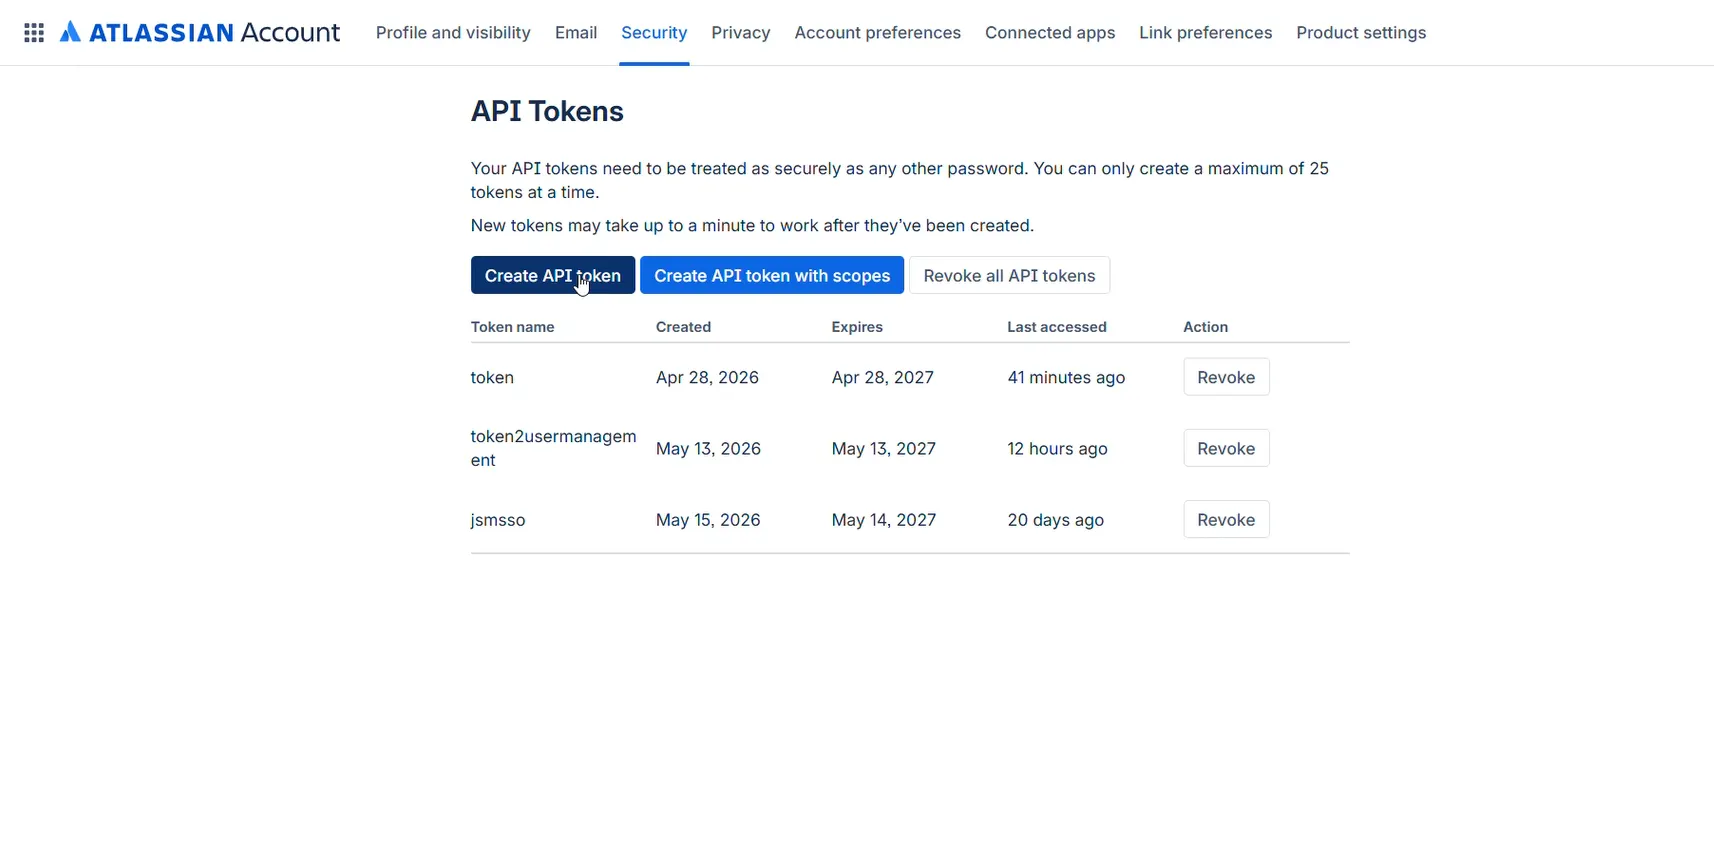
- Go to Atlassian Account and login with your admin account.
- Create API Token without scope and save at a safe place.
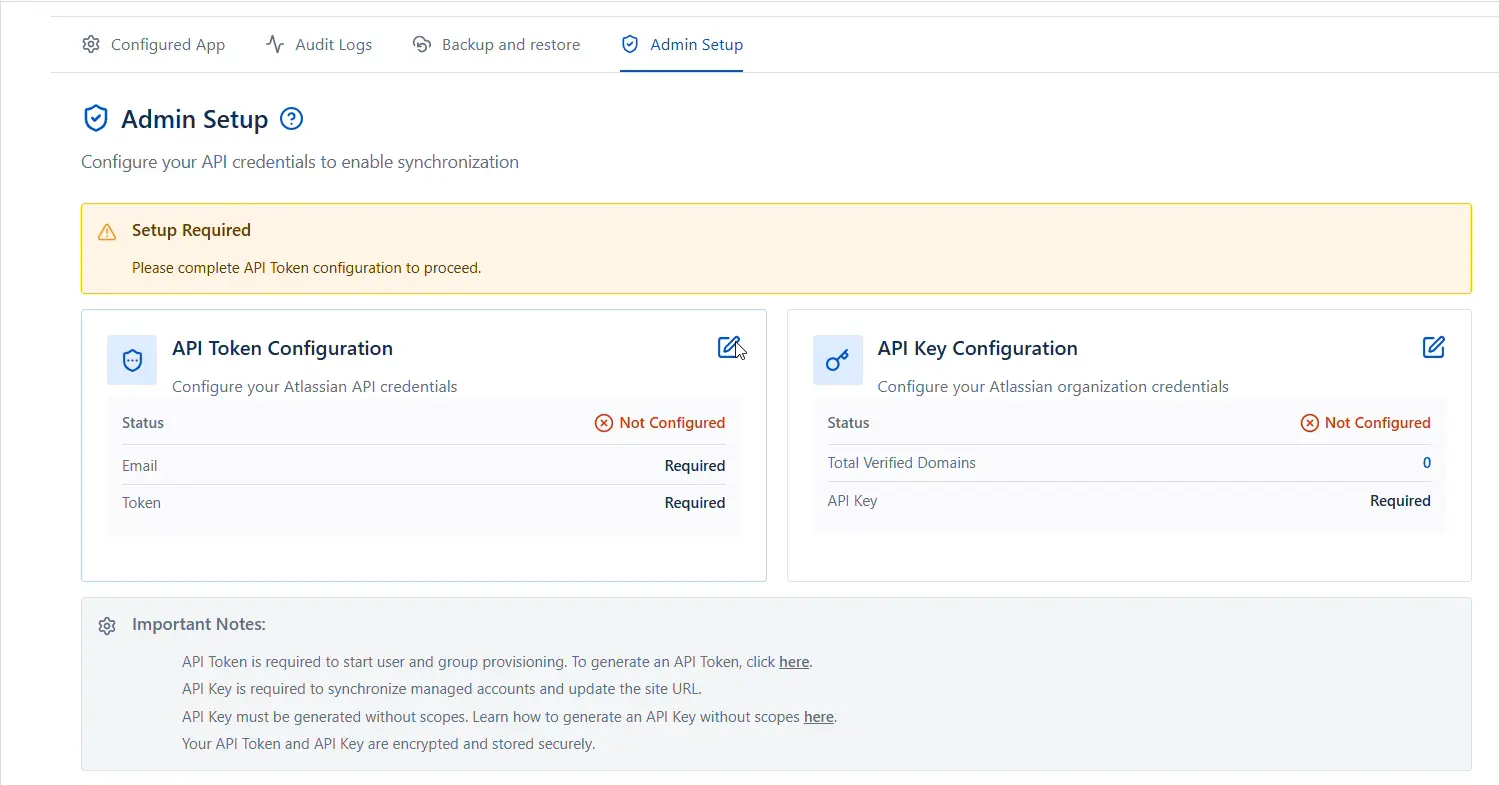
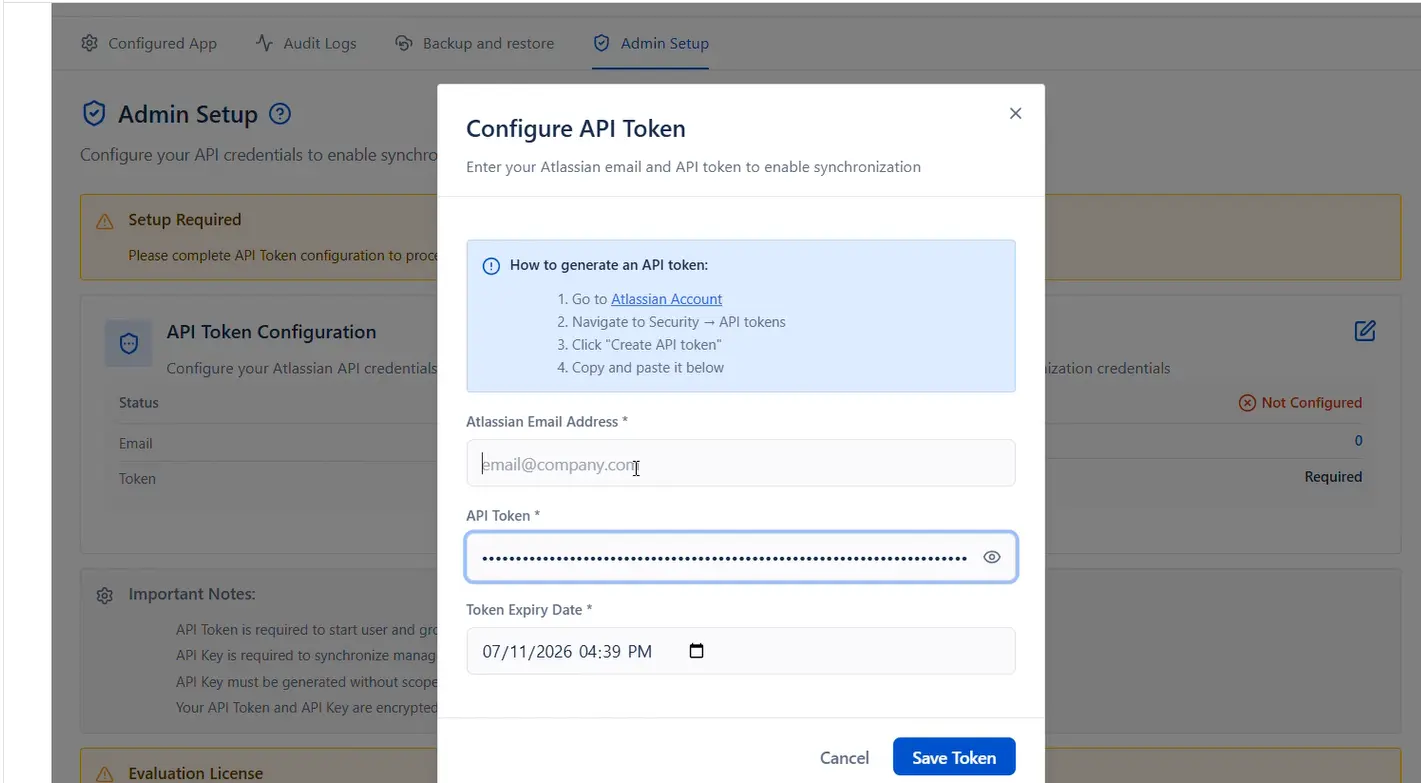
- Go to Admin Setup page inside the plugin and edit API Token Configuration (using the pencil button).
- Enter your Atlassian admin Email Address, API Token, and expiry date of API Token.
- Click on Save Token.
- Go to Atlassian Administration.
- Select your organization if you have more than one.
- Navigate to Organization settings → API Keys.
- Click Create API Key and select API keys without scopes.
- Go to the Admin Setup page inside the plugin and edit API Key Configuration (using pencil button).
- Enter API Key and click on Save API Key button.
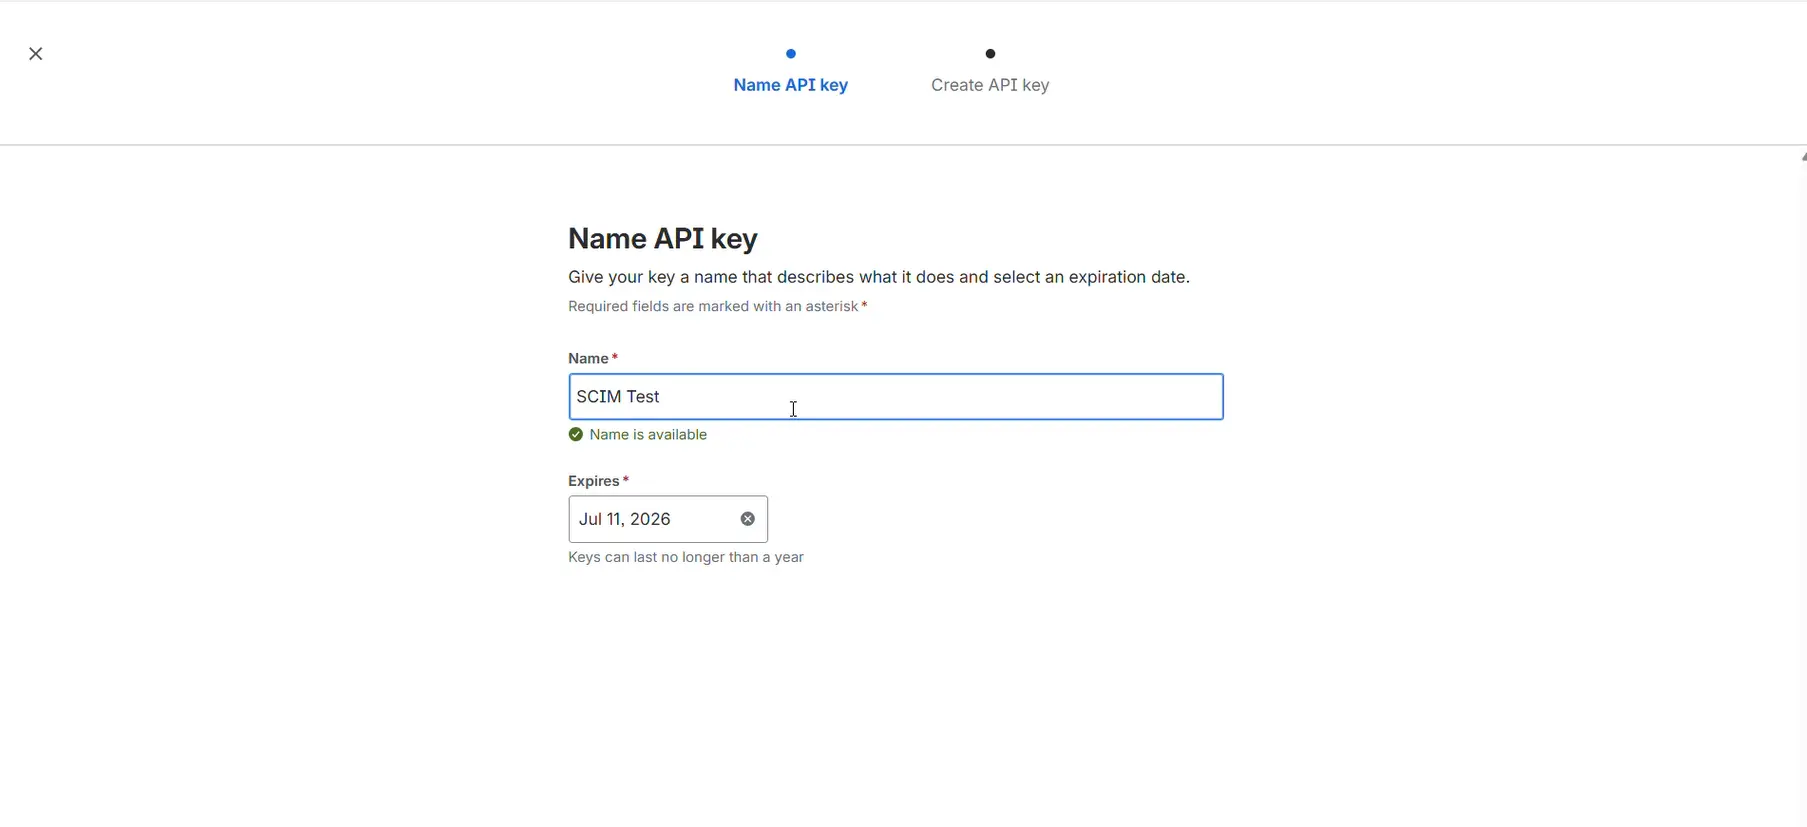
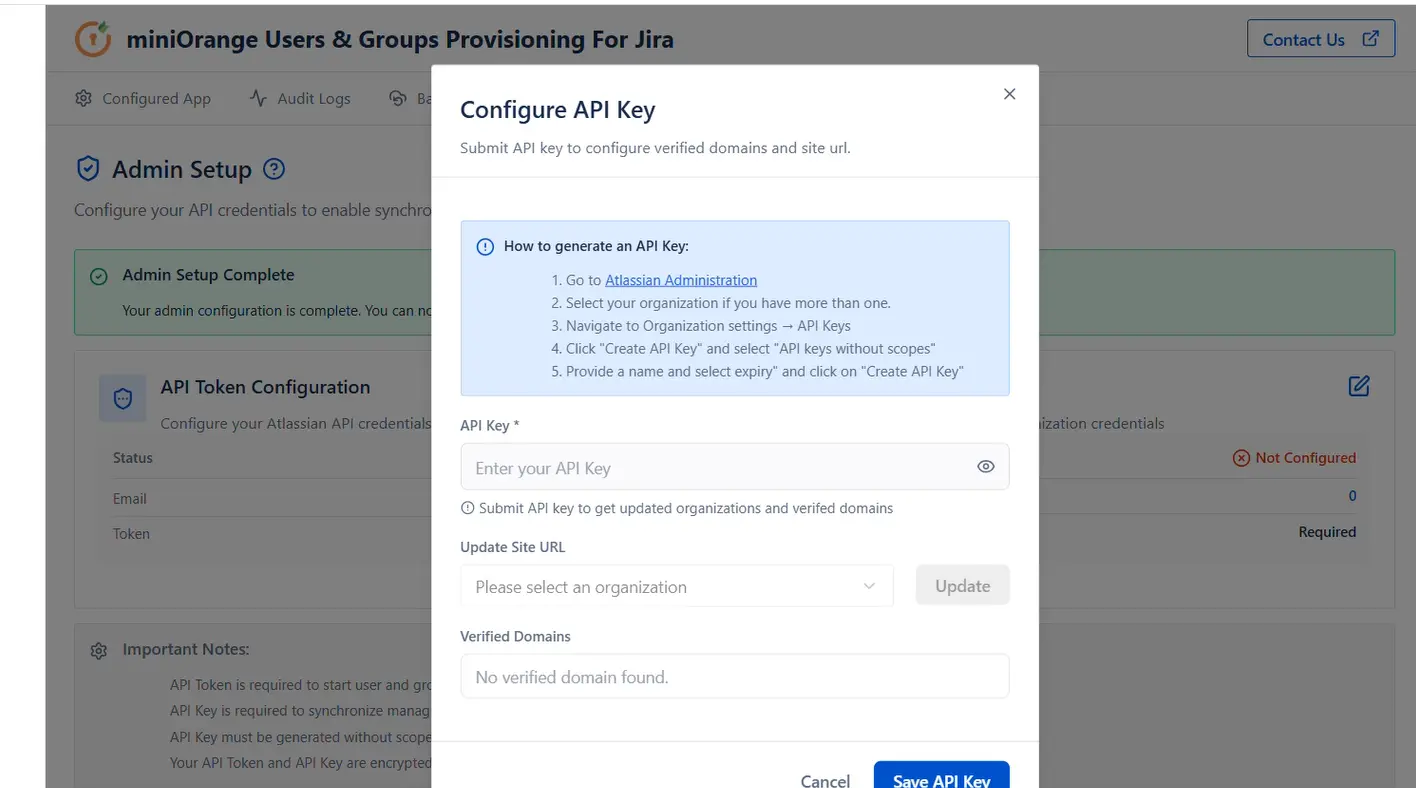
Once these configurations are fully processed, your core administrative setup is complete and ready for application configuration.
Step 2: Service Provider Configuration (Jira)
After completing the administrative setup, the admin needs to configure the service provider (Jira App) to establish a connection with the identity provider (e.g., miniOrange).
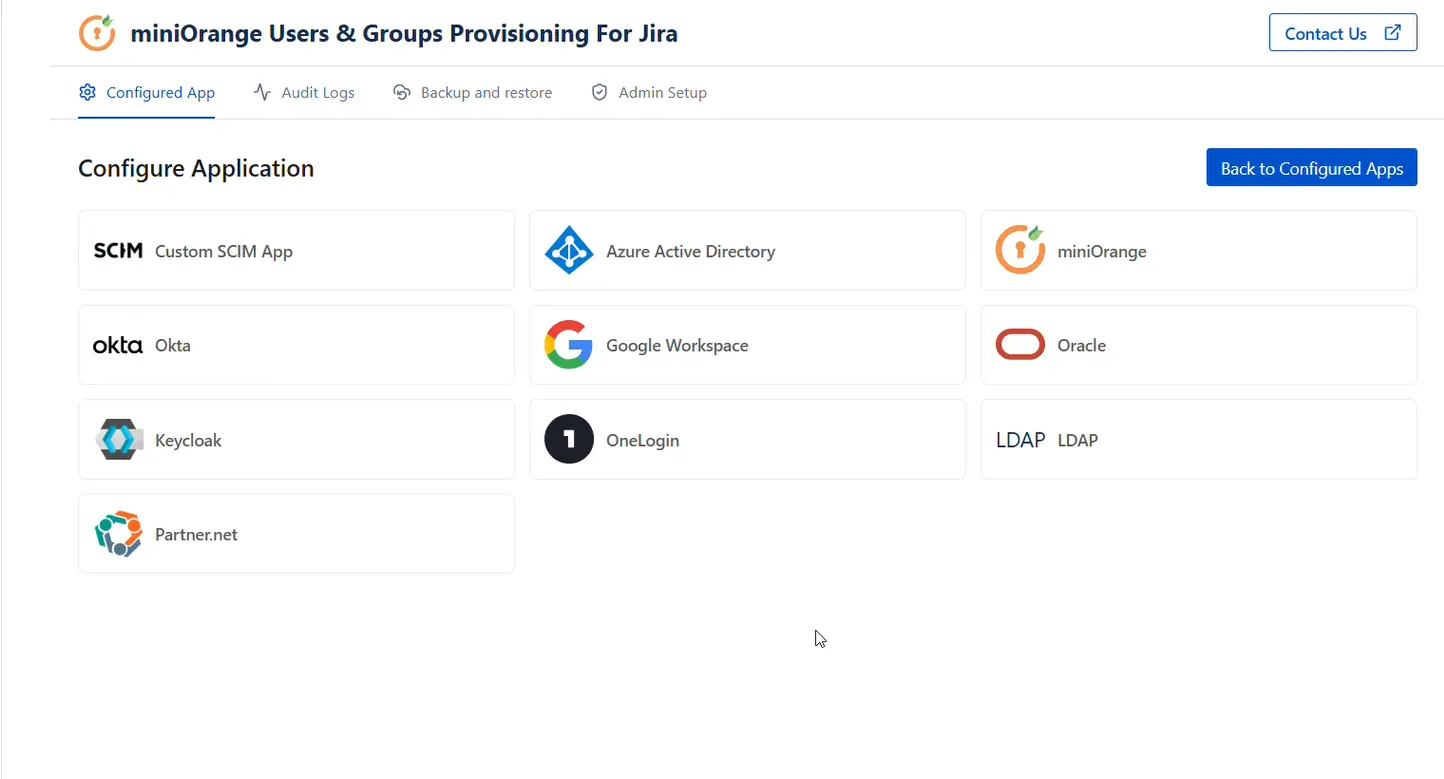
To configure the service provider, go to the plugin configuration page, click the + Add New App button, and select the desired identity provider from the provider list.
Case 1: Synchronize Licensed Users
- Select miniOrange as the IDP from the providers list.
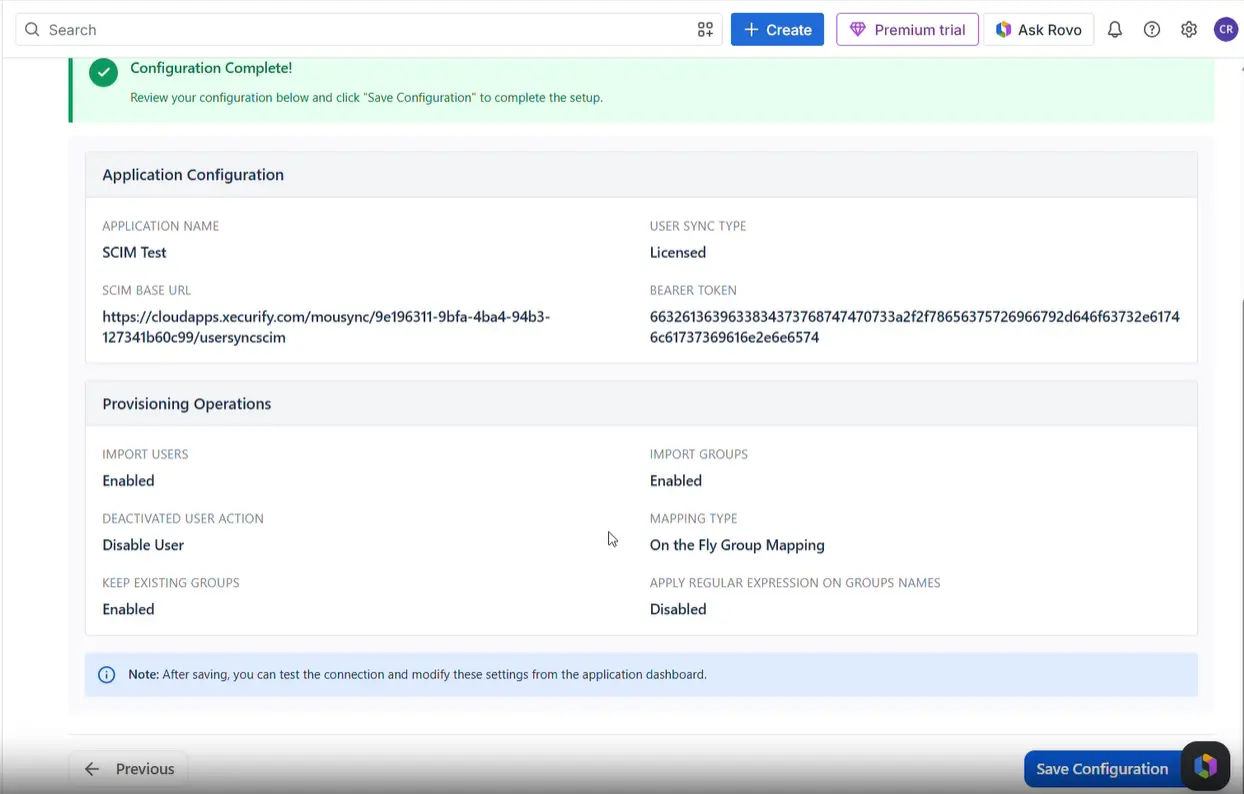
- In the Application Configuration section, enter a distinct identifier in the Application Name field (e.g., SCIM App).
- Select Licensed as the user sync type to provision IDP users as licensed users in the Jira directory.
- Keep a note of SCIM Base URL and Bearer Token in a safe place and click Next to head to the provisioning operation section.
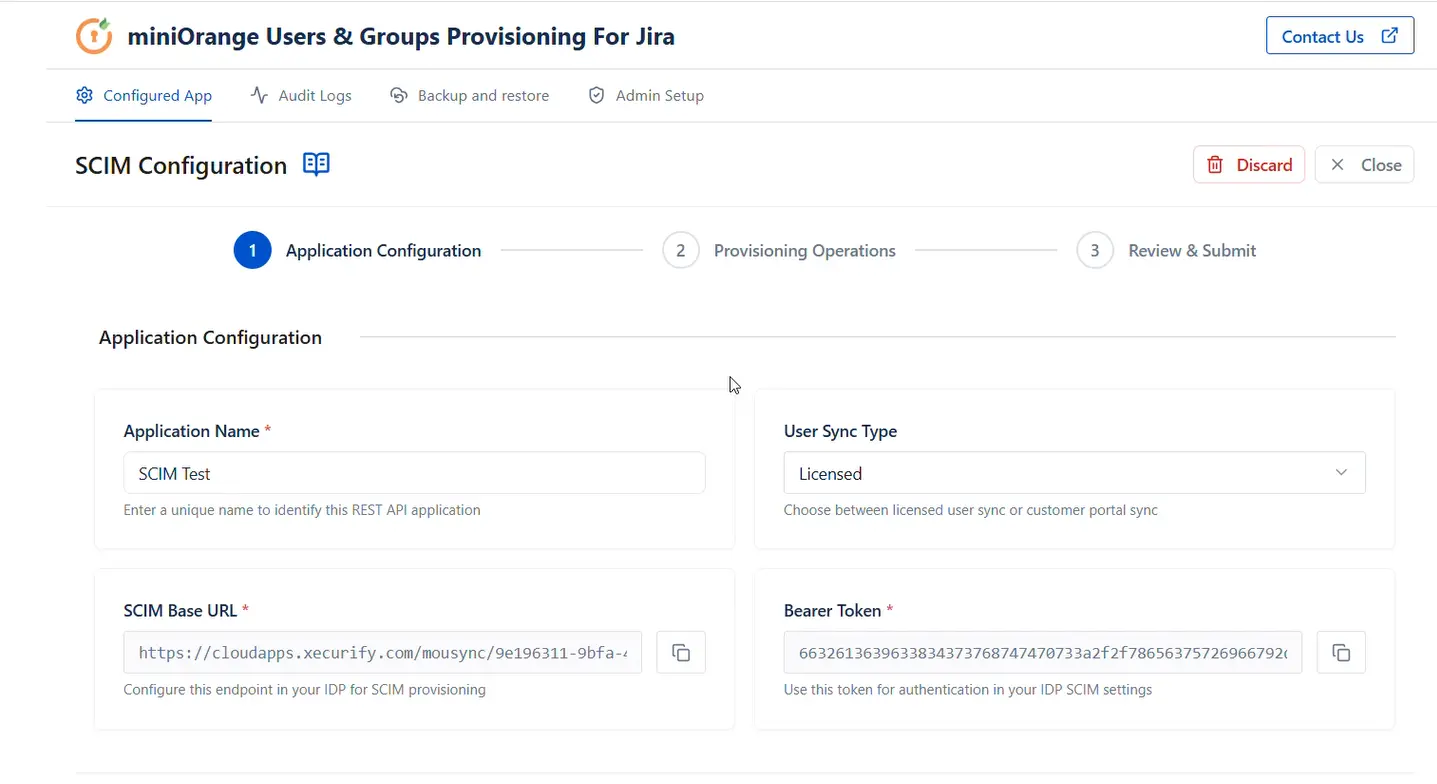
In the Provisioning Operations section:
User Operations:
- Enable Import Users toggle to provision users in the Jira directory. Ensure the Import Users toggle is switched ON.
- In the Deactivated User Action dropdown, select the action that should be taken when a user is unassigned or deactivated in miniOrange.
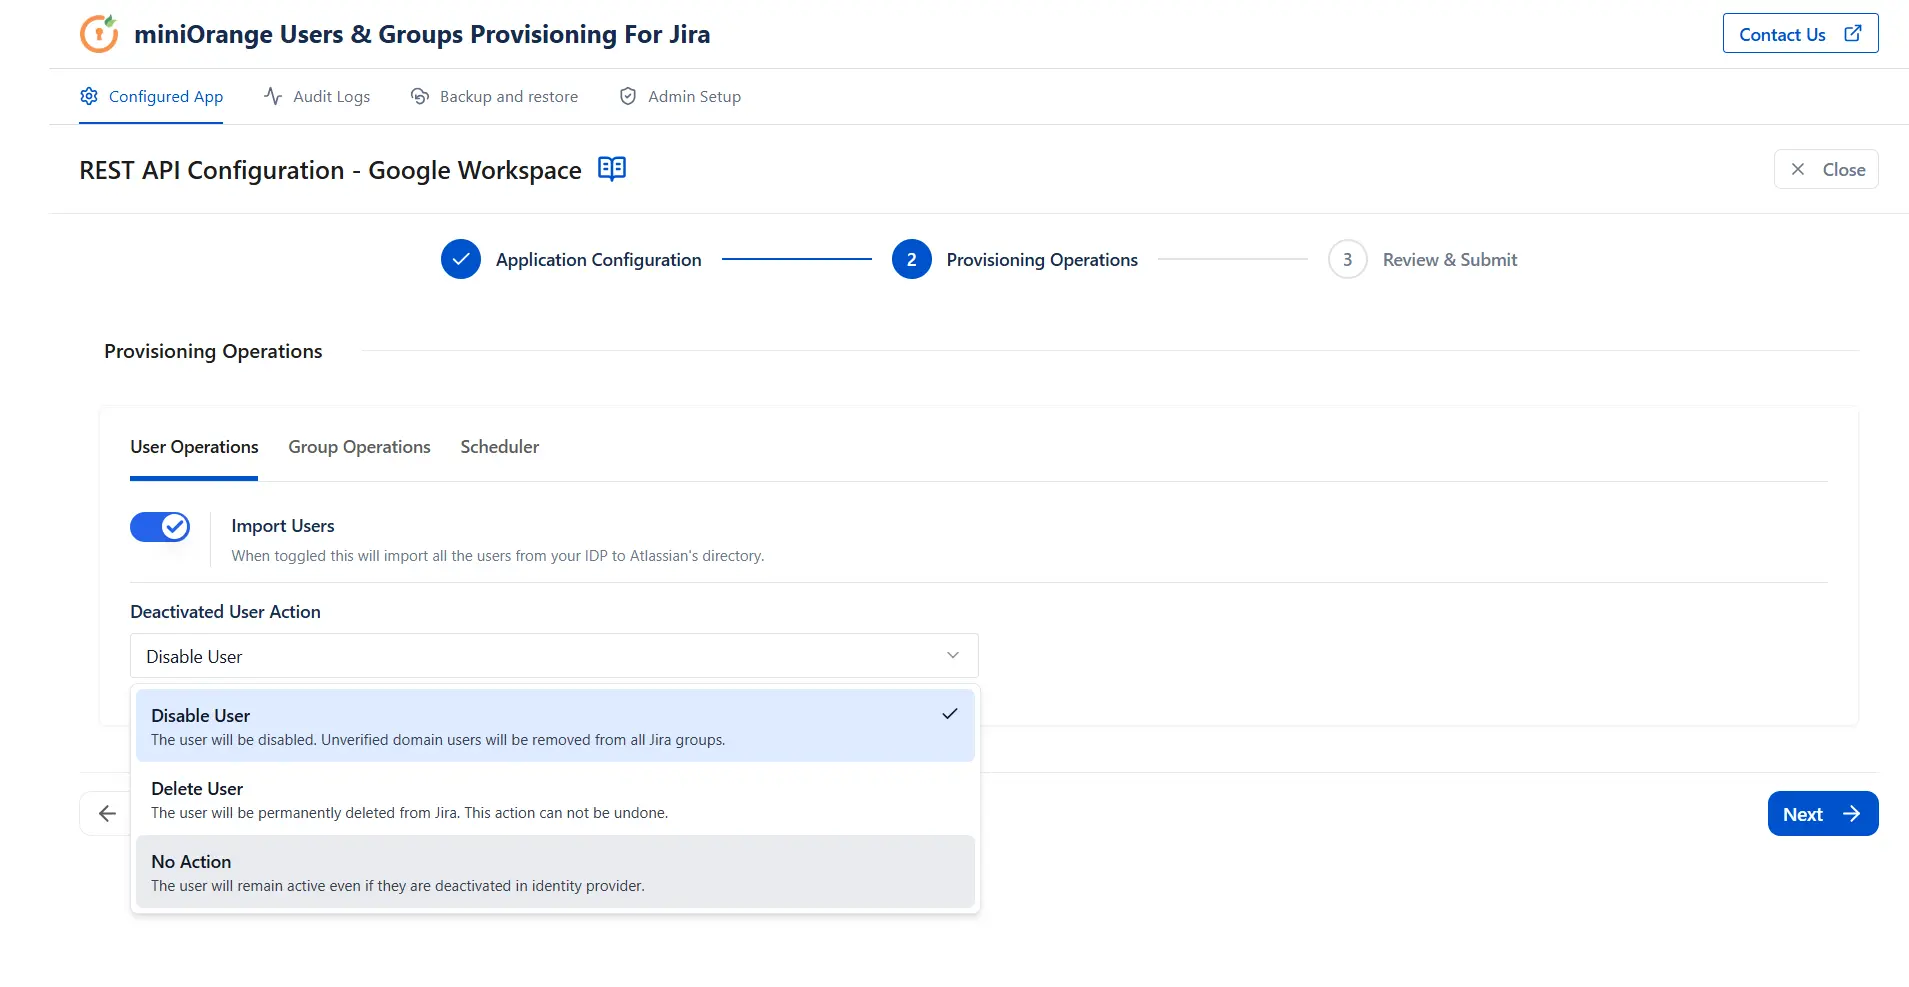
Group Operations:
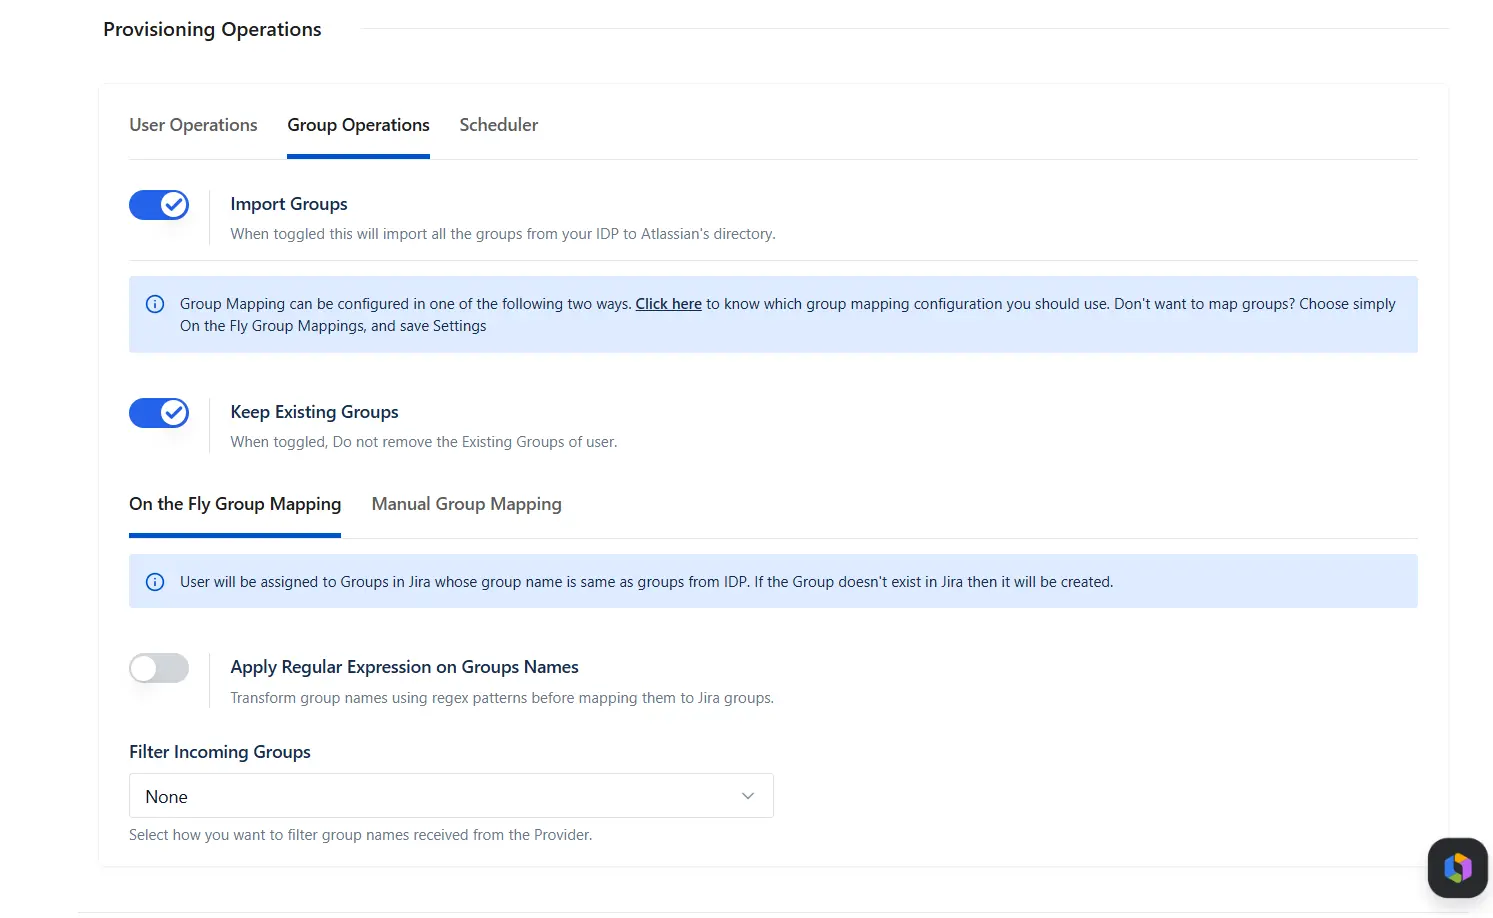
- Switch to Group Operations and enable Import Groups.
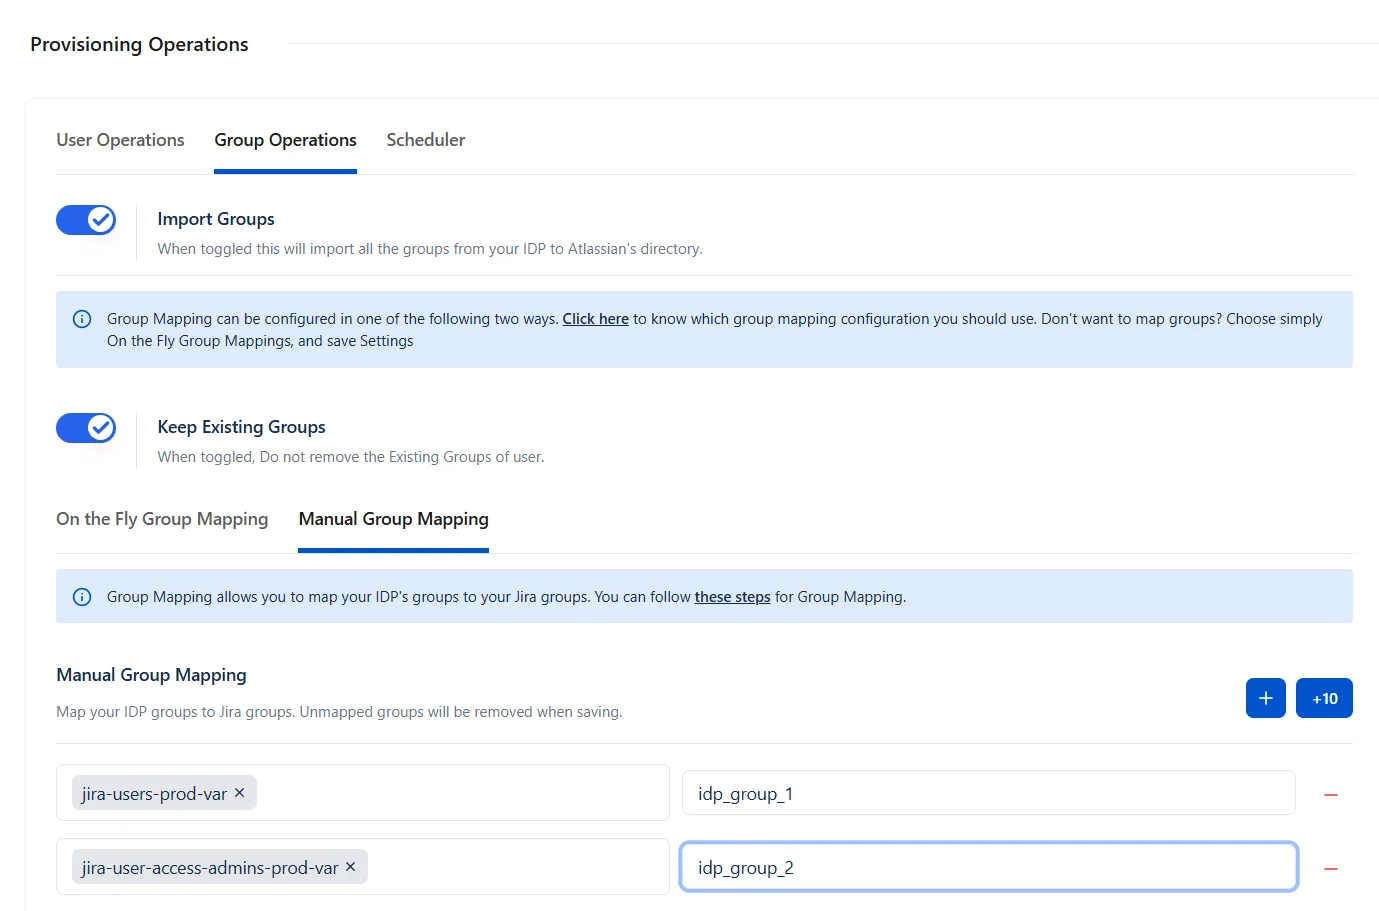
- Group operations can be performed either with On-the-Fly Group Mapping or Manual Group Mapping.
- Use this tab to automatically create groups from the IdP in Jira Cloud if they don't already exist, and assign users to the corresponding groups.
- You can enable the Apply Regular Expressions on Group Names option to transform group names using Regex patterns before mapping them to Jira groups.
- Use the Filter Incoming Groups section to filter the group names received from the identity provider.
- To map groups from your IdP to Jira's native groups, select this tab. When the sync executes, the users from respective groups of the IdP will be mapped to Jira groups as per configuration.
Keep Existing Groups
This setting controls how a user's Jira group memberships are managed during user provisioning and deprovisioning operations performed by the Identity Provider (IdP).

Enabled
- For any new user added to IdP groups, it will be added to Jira groups. But if users are removed from IdP groups, Jira group memberships are preserved in the Jira directory.
-
Example:
Current Jira groups: jira-software-users, jira-administrators
Groups received from IdP: developers, employees
Resulting Jira groups: jira-software-users, jira-administrators, developers, employees
No existing Jira group memberships are removed.
Disabled
- During provisioning, deprovisioning, or user unassignment, all existing Jira group memberships are removed except those specified in the Exclude Groups list. During provisioning, the user is subsequently assigned only to the groups received from the Identity Provider (IdP).
-
Example:
Current Jira groups: jira-software-users, jira-administrators, support-team
Groups received from IdP: developers, employees
Excluded groups: jira-administrators
Resulting Jira groups after provisioning: jira-administrators, developers, employees
After provisioning, the groups jira-software-users and support-team are removed because they are not received from the IdP and are not included in the exclusion list.
Exclude Groups: Use the Exclude Groups option to specify Jira groups that should never be removed during provisioning or deprovisioning operations, such as jira-administrators or org-admins. These groups will always be retained regardless of the user's group assignments in the IdP.
Case 2: Synchronize Portal-Only Customers- Select miniOrange as the IDP from the providers list.
- In the Application Configuration section, enter a distinct identifier in the Application Name field (e.g., SCIM App).
- Select Portal Customers as a user sync type to provision IDP users as Portal customers in the Jira directory.
- Keep note of the Customer Base URL and Bearer Token in a safe place and click Next to head to the provisioning operation section.
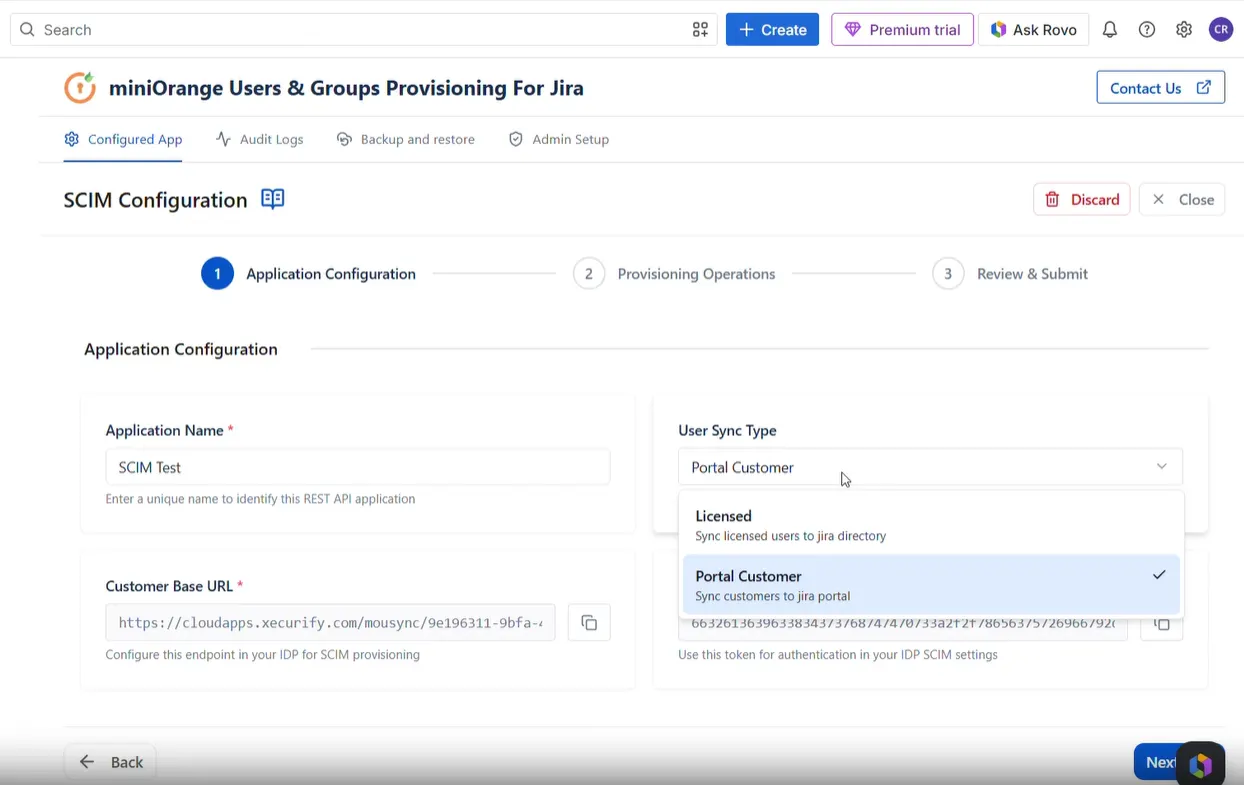
In the Provisioning Operations section:
- Enable the Import Customers toggle to provision users in the Jira directory.
- Map the attributes from the IDP that you want to sync so they appear in the customer profile.
- Map Jira portal with Groups available inside IdP.
- Configure available options based on your use case and requirements.
- Click Next, review the configurations, and save.
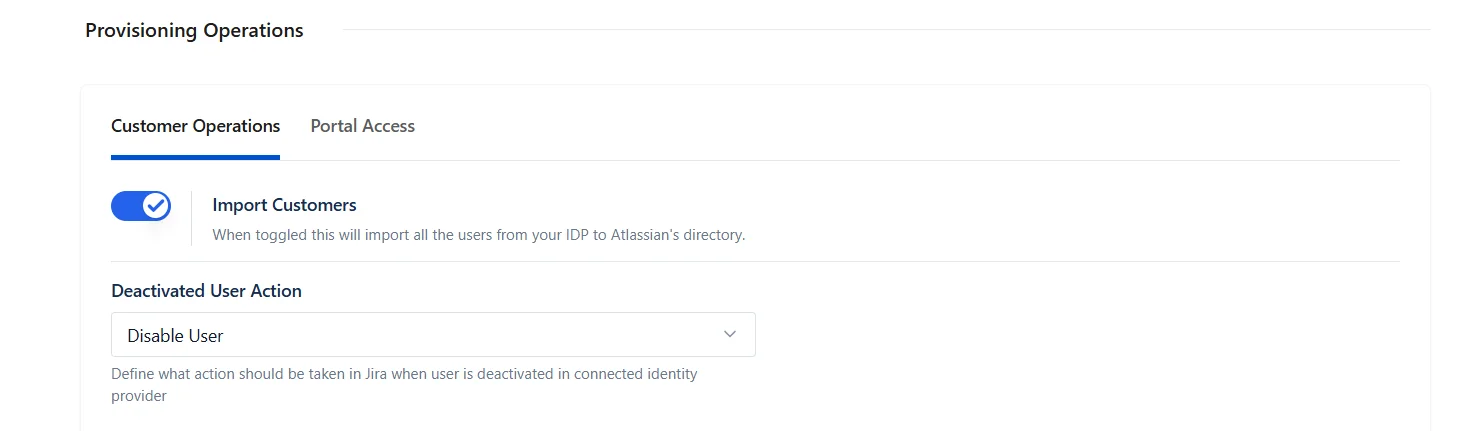
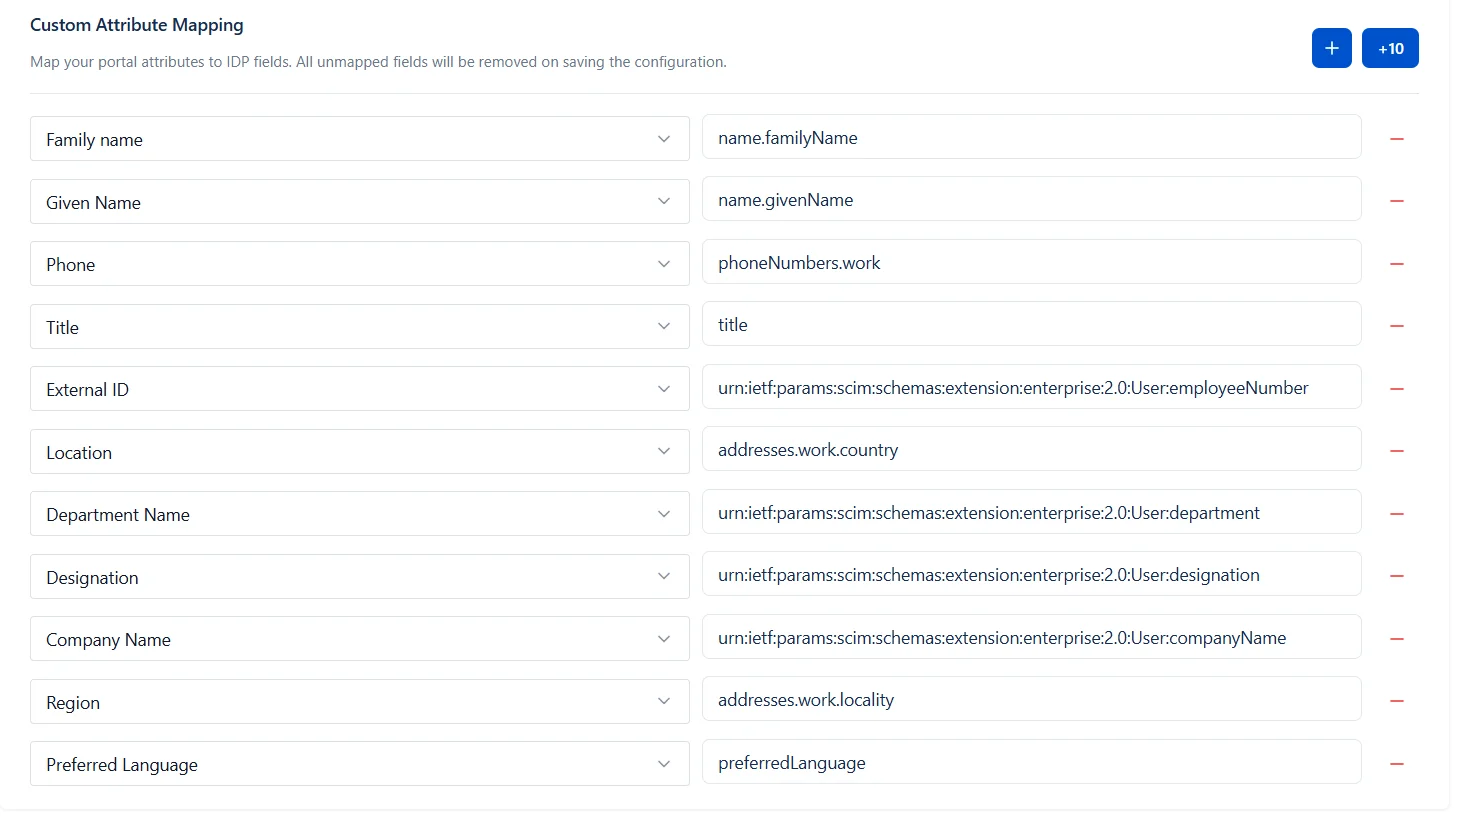
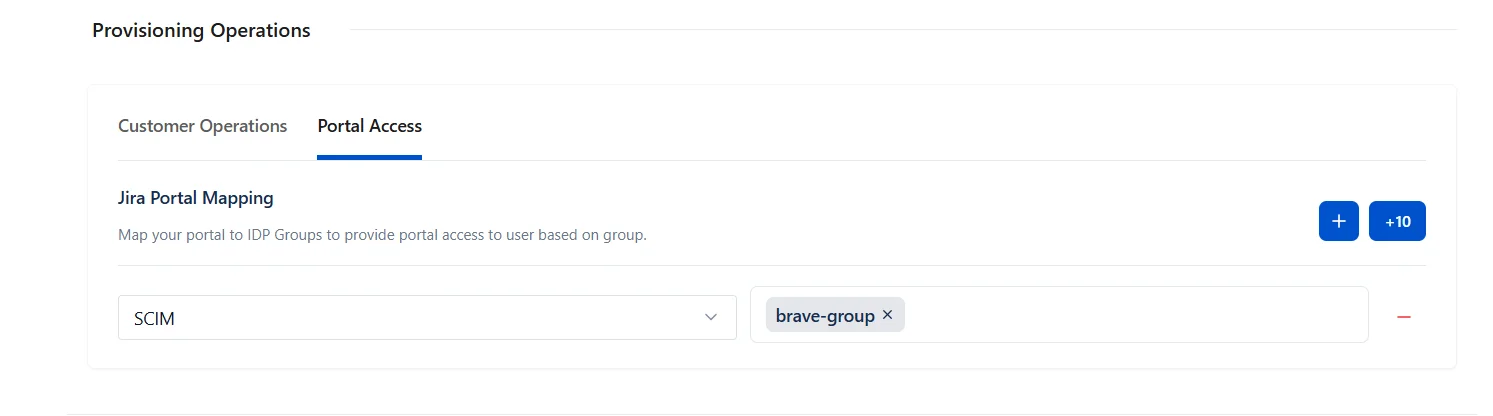
Once satisfied with the setup overview, click the Save Configuration button in the bottom-right corner to save your integration profile.
Step 3: Identity Provider Configuration
After completing the configuration setup on the miniOrange Users & Groups Provisioning For Jira app, you need to configure miniOrange IdP to provision users and groups to Jira using SCIM. This step involves creating a SCIM destination application and mapping the authentication credentials.
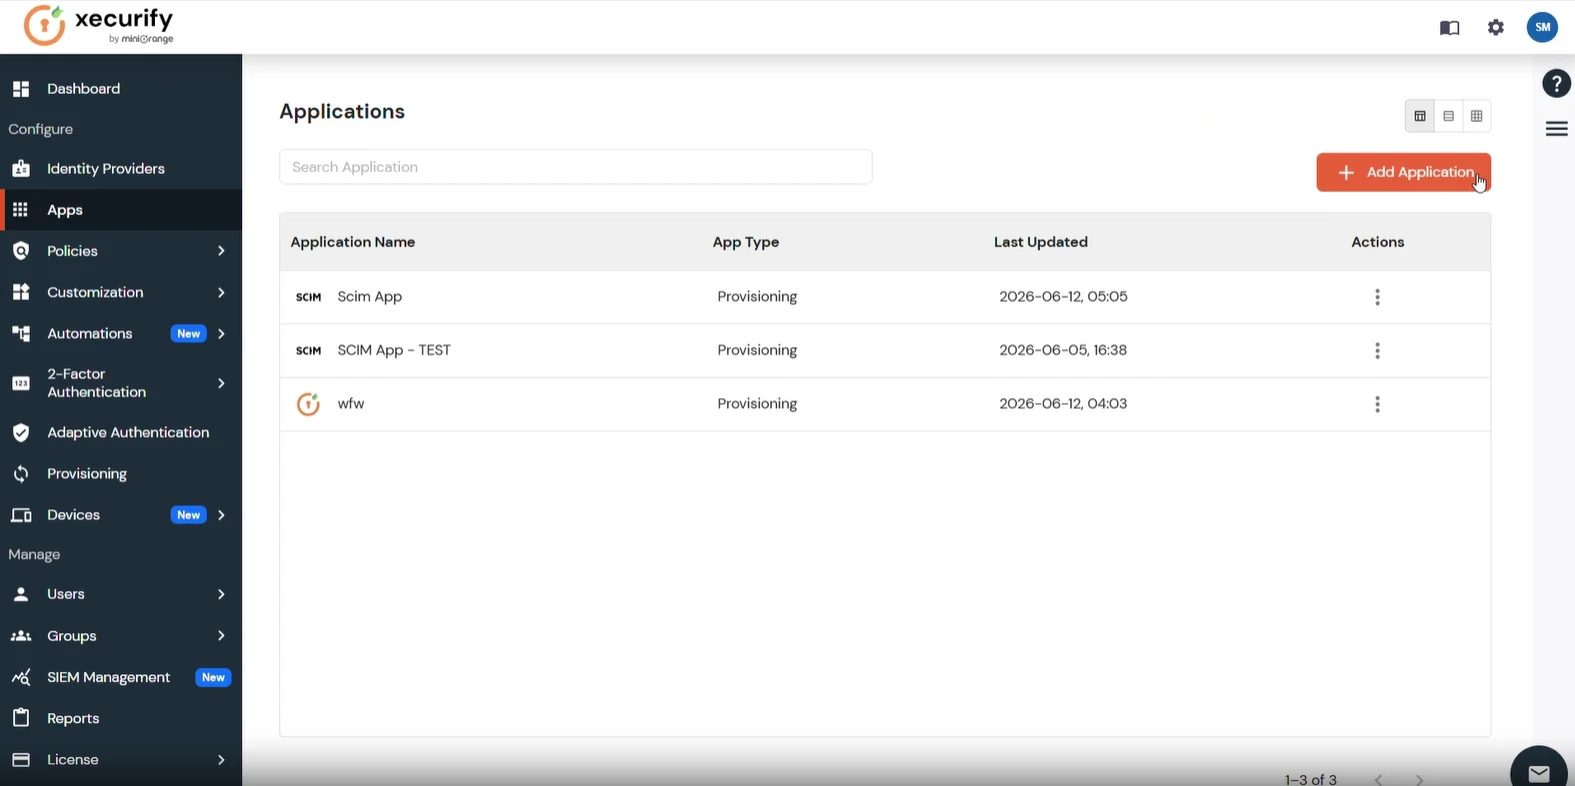
- Log in to your miniOrange IdP Admin Console, and click on Apps in the left sidebar menu.
- Click the + Add Application button in the upper right corner.
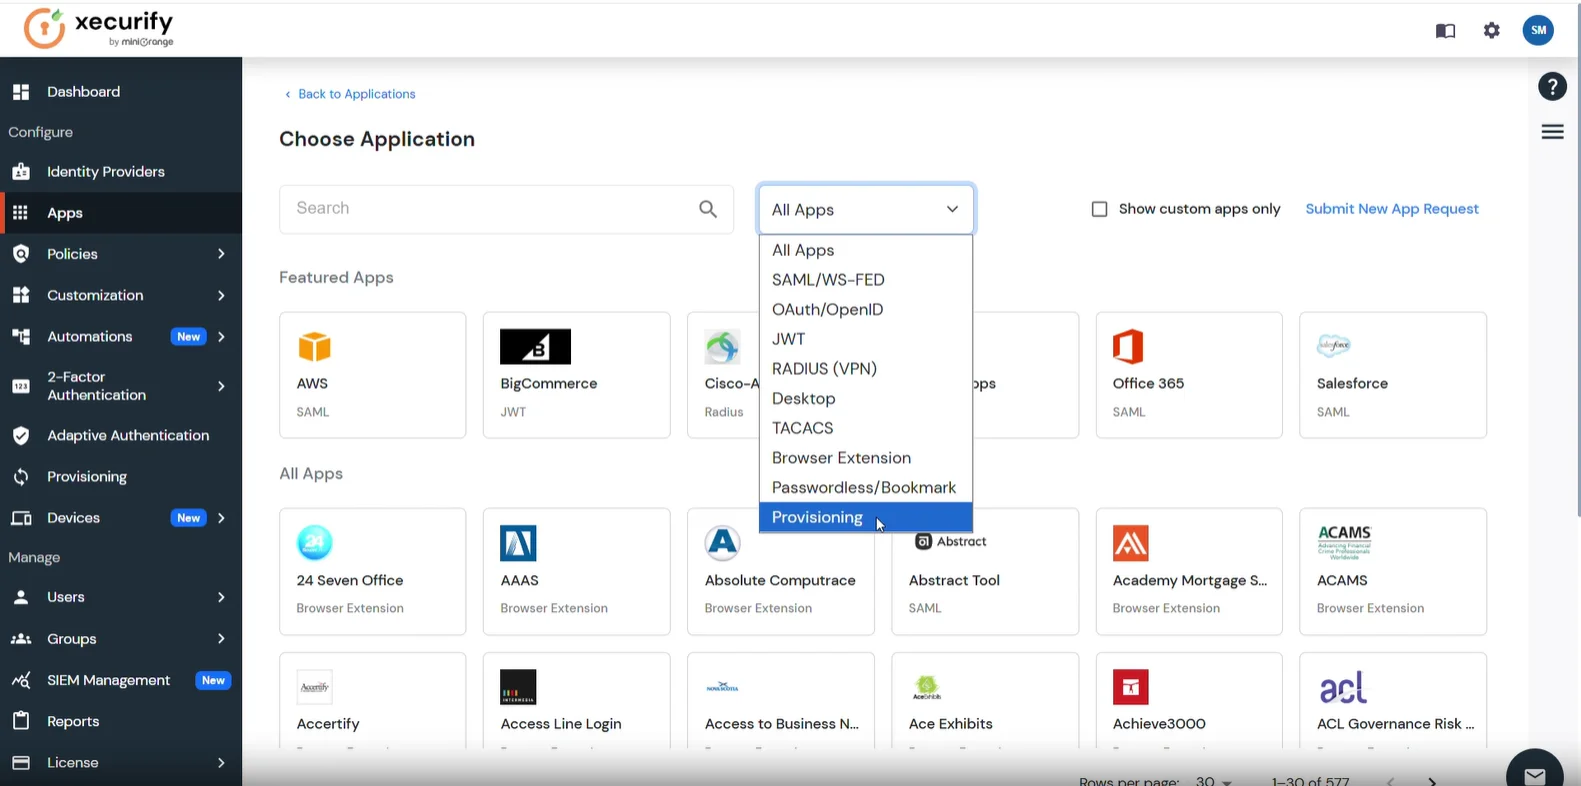
- Inside the Choose Application catalog, click on the All Apps filter dropdown and select Provisioning.
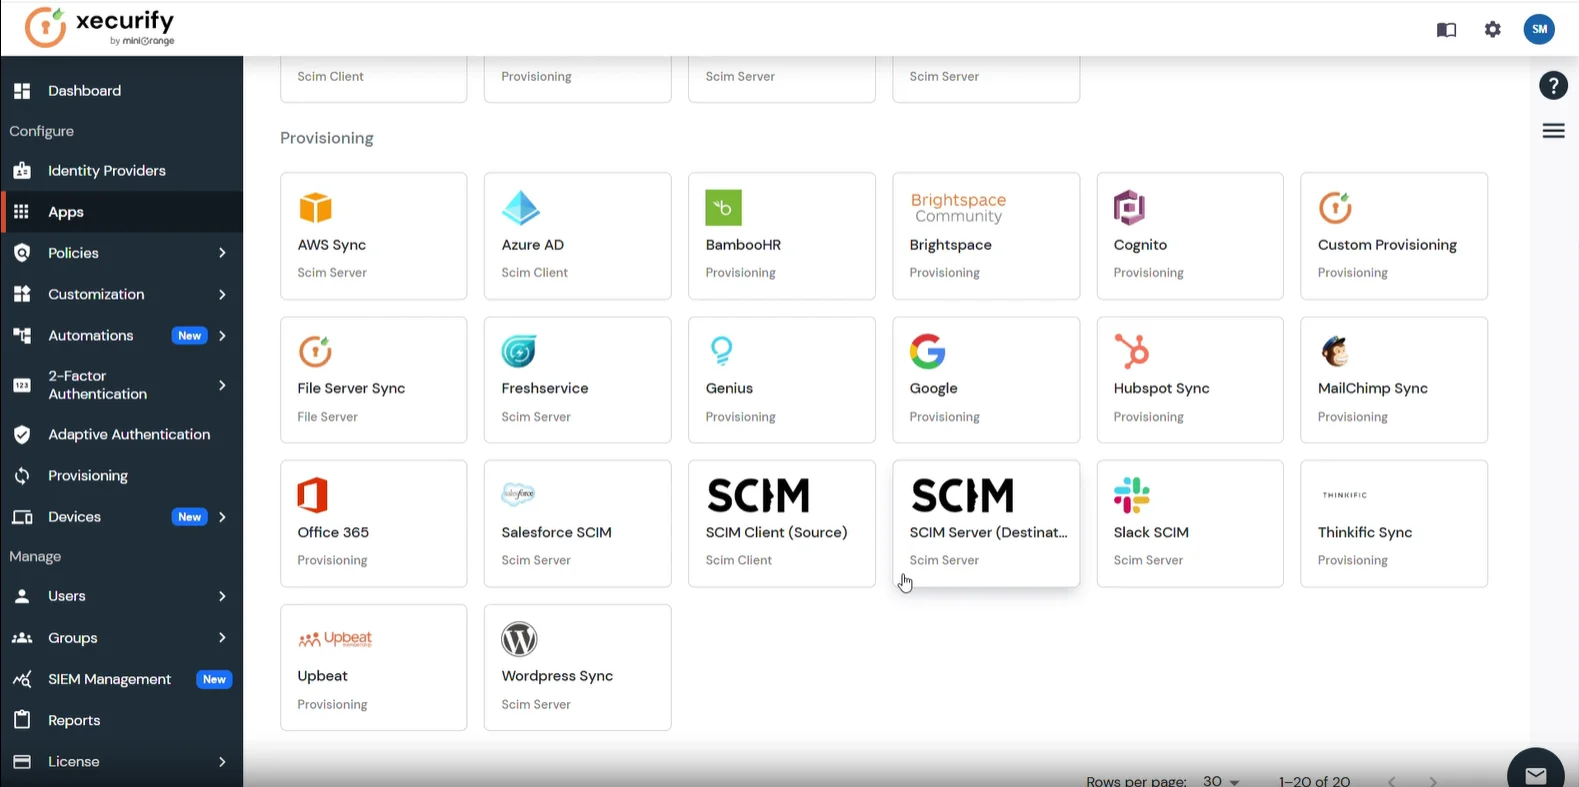
- Scroll through the provisioning list, locate the SCIM Server (Destination) card, and click on it.
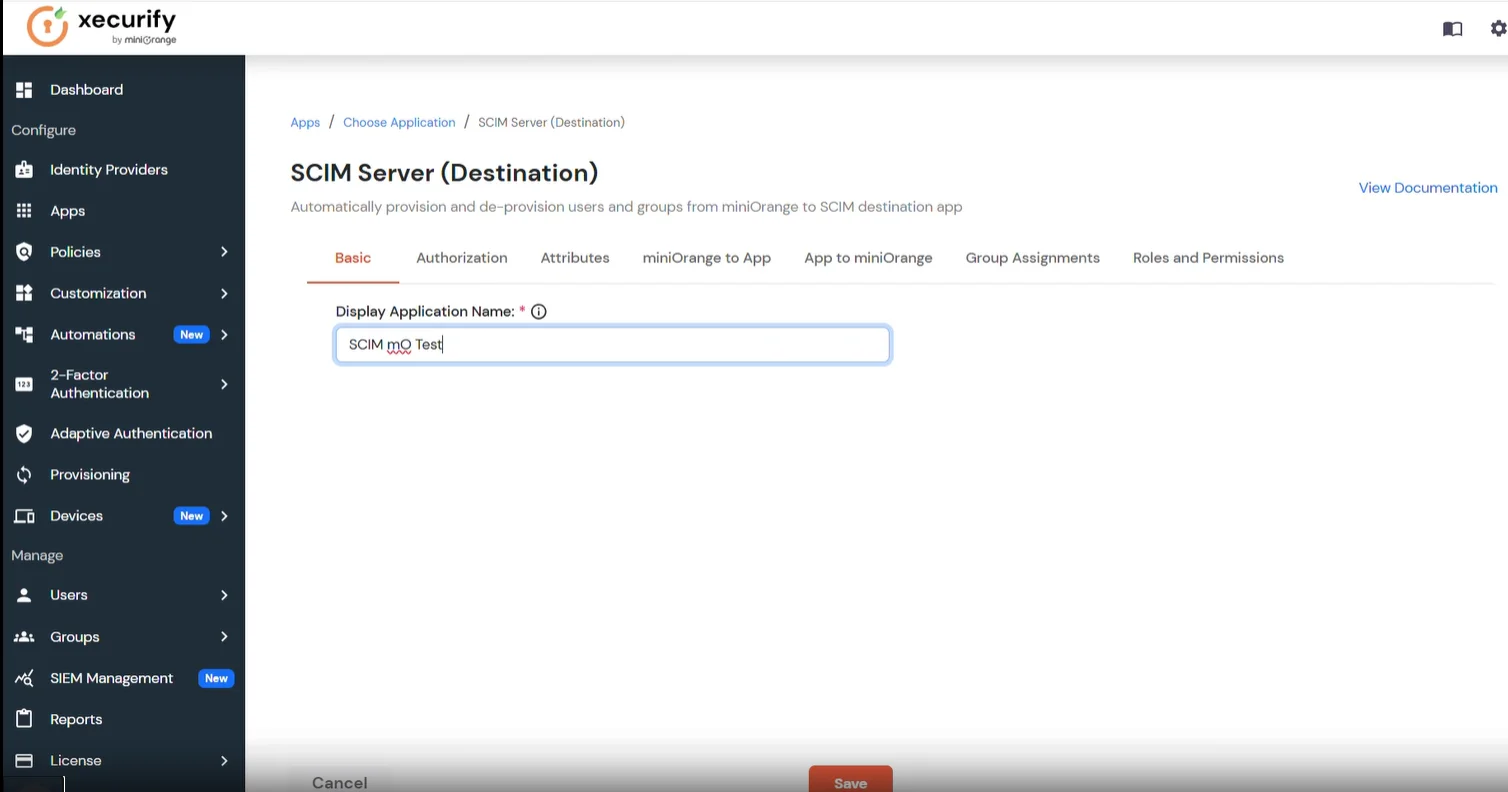
- Under the initial Basic tab, enter an appropriate name in the Display Application Name field and click Save.
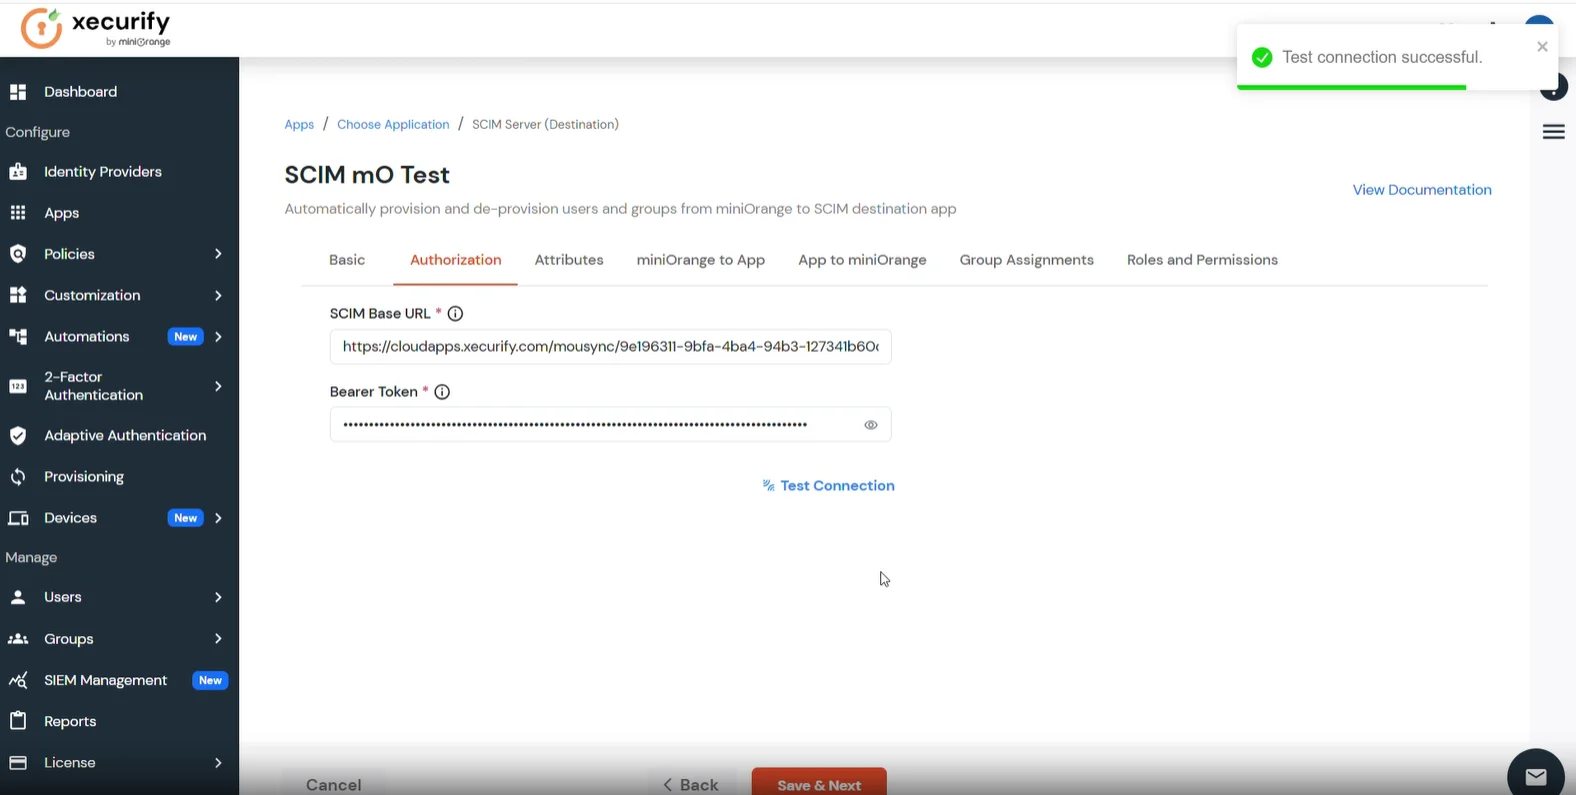
- Once the application profile is created successfully, you will automatically transition to the Authorization tab.
- Paste the SCIM Base URL and Bearer Token you have copied earlier in step 2.1 in their respective fields.
- Click the Test Connection button to verify.
- Click Save & Next to advance.
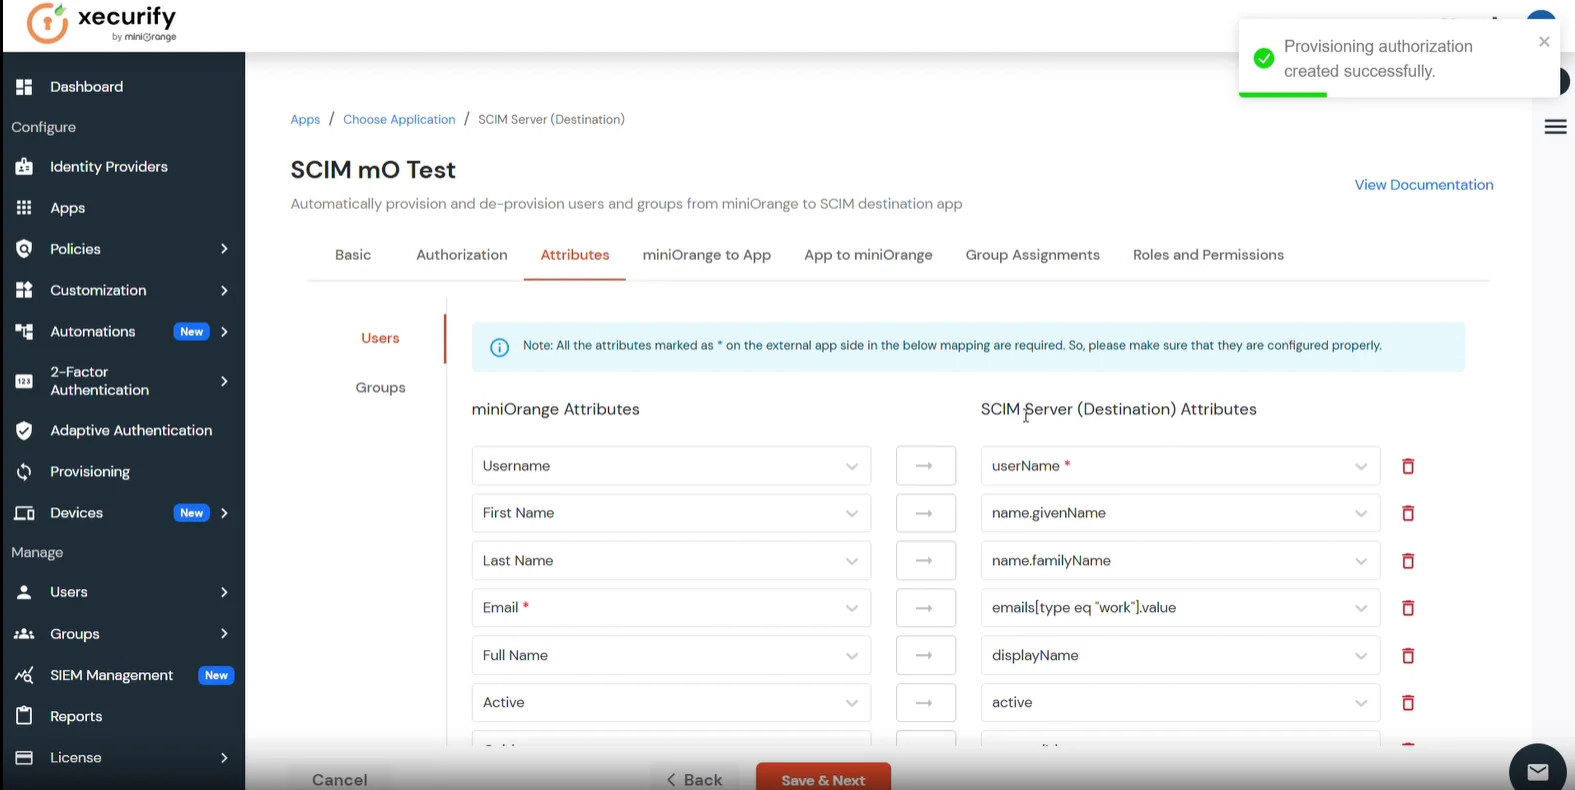
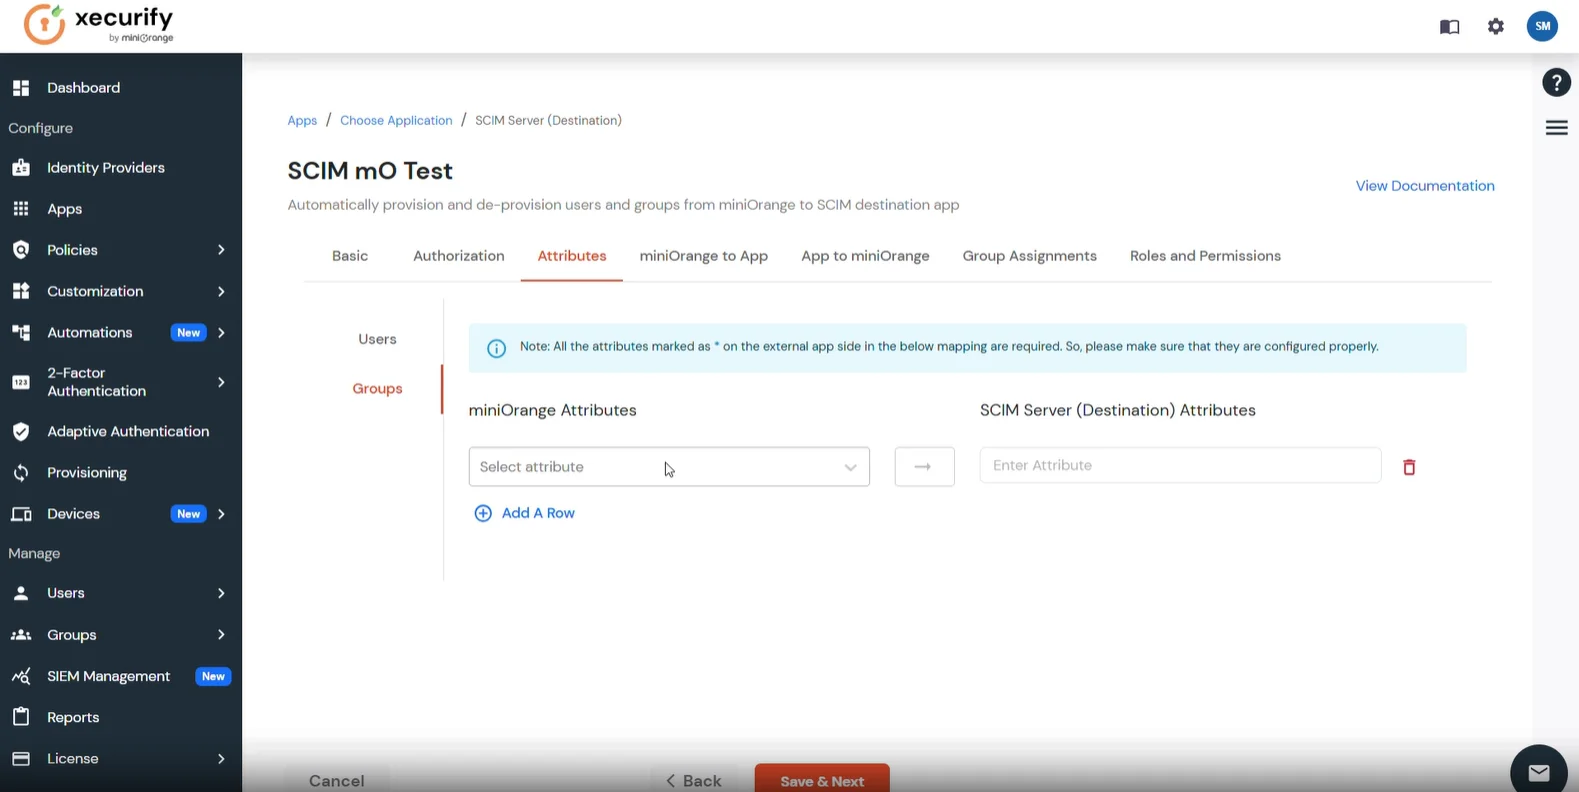
- In the Attributes tab, verify that your core miniOrange Attributes (such as Username, First Name, Last Name, and Email) are properly mapped to their corresponding SCIM Server (Destination) Attributes. You can also manage group-level structural schemas by switching to the Groups sub-tab.
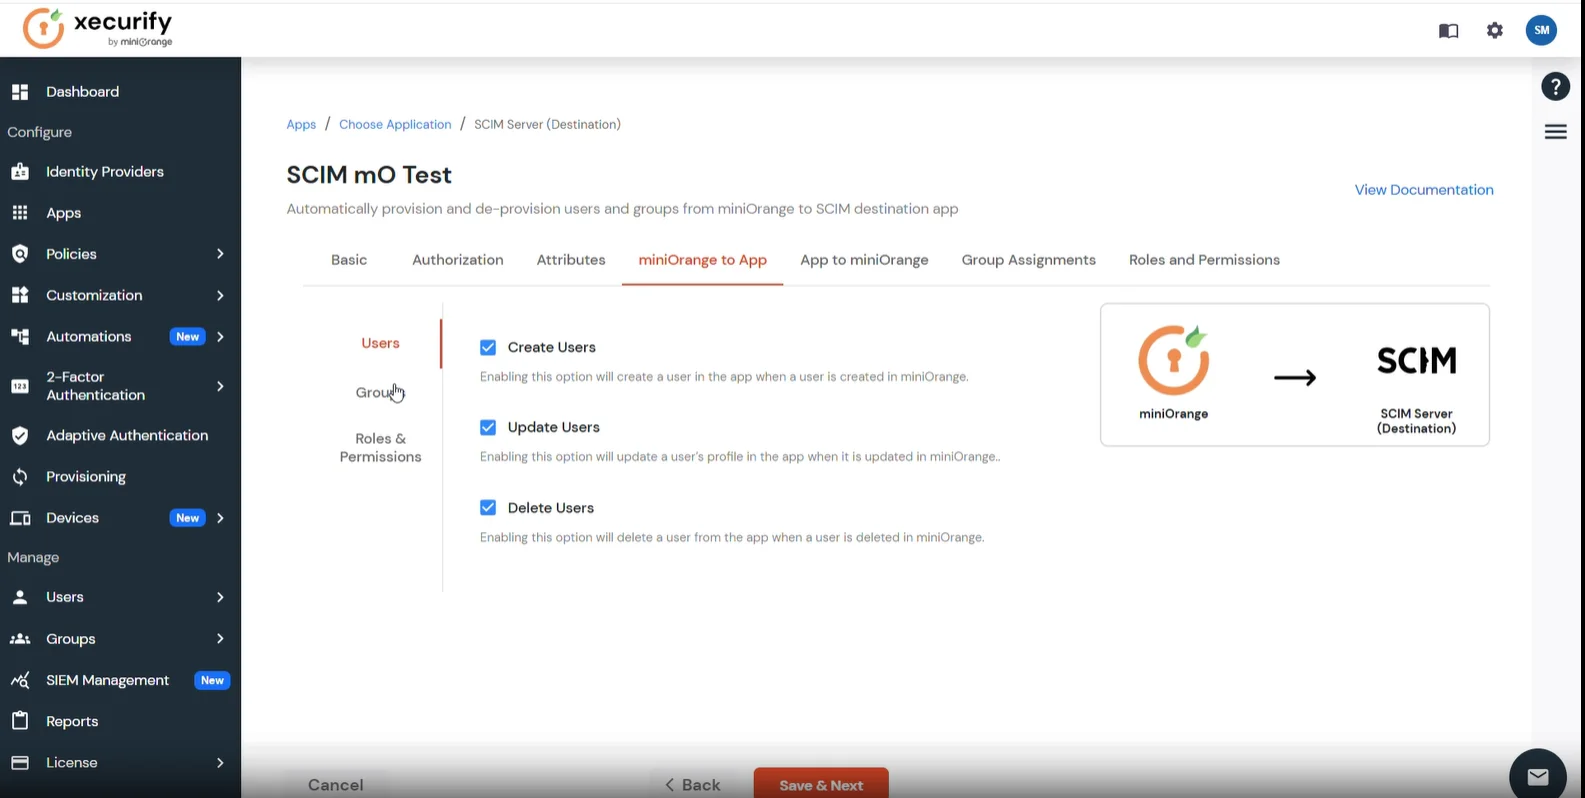
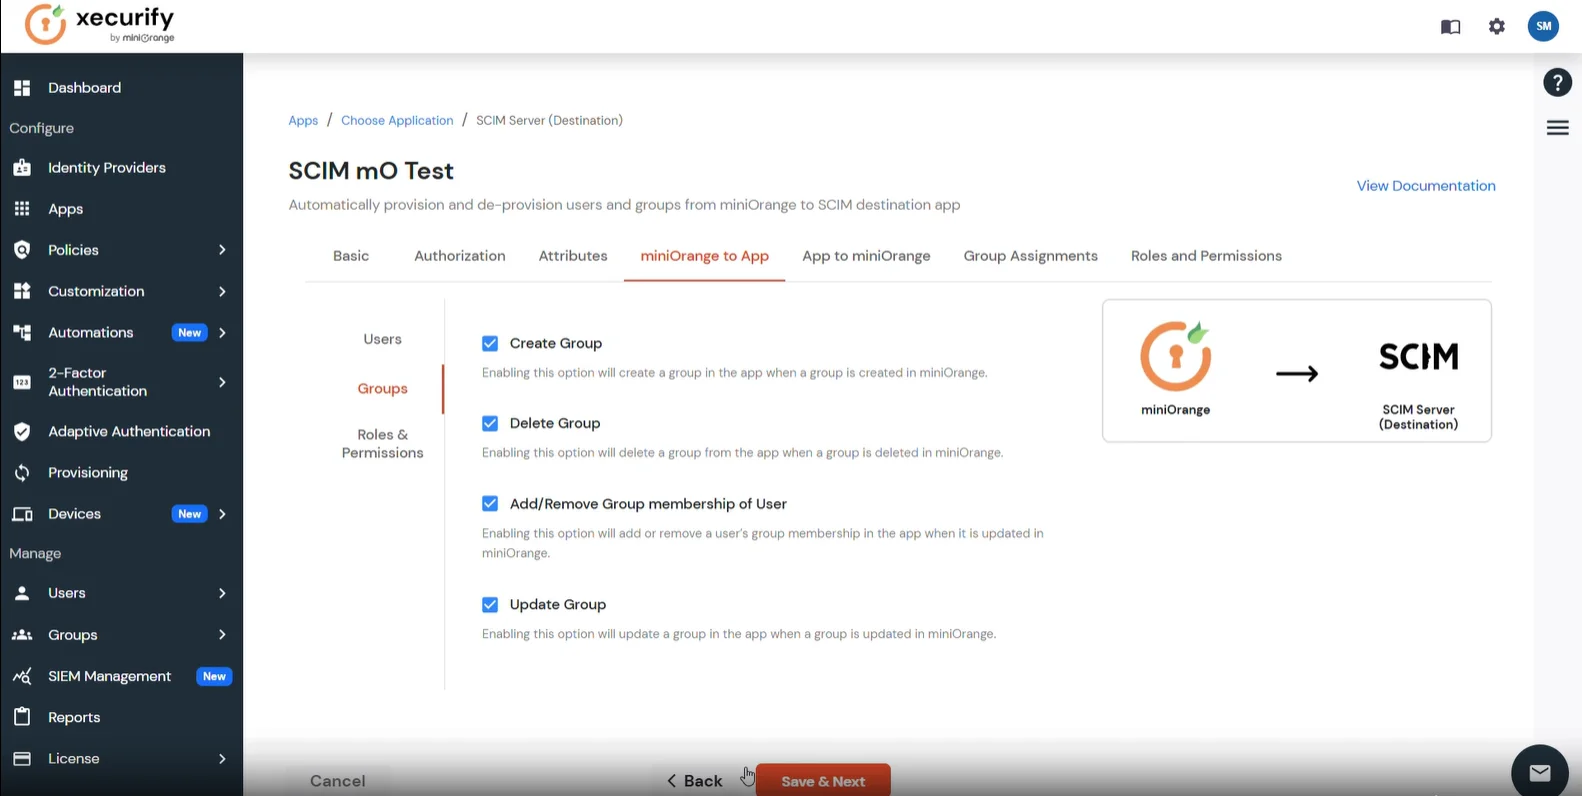
- Switch over to the miniOrange-to-App tab. Under the Users and Groups sub-sections, you can view or toggle the specific lifecycle triggers, such as Create Users, Update Users, and Delete Users, that miniOrange will actively push to Jira.
- Click Save & Next to lock in your provisioning rules.
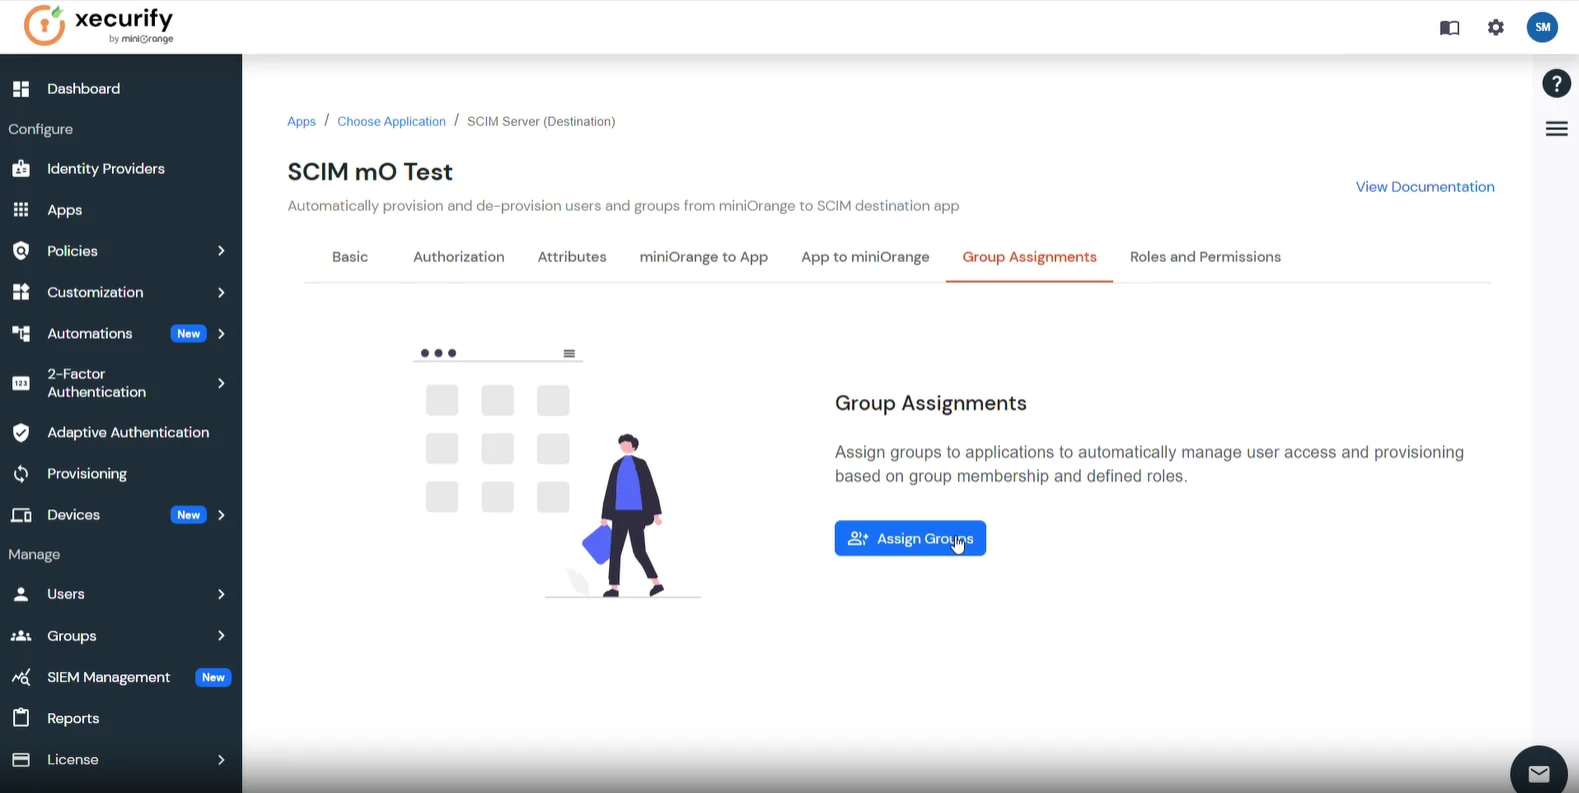
- Navigate to the Group Assignments tab to map your user directories.
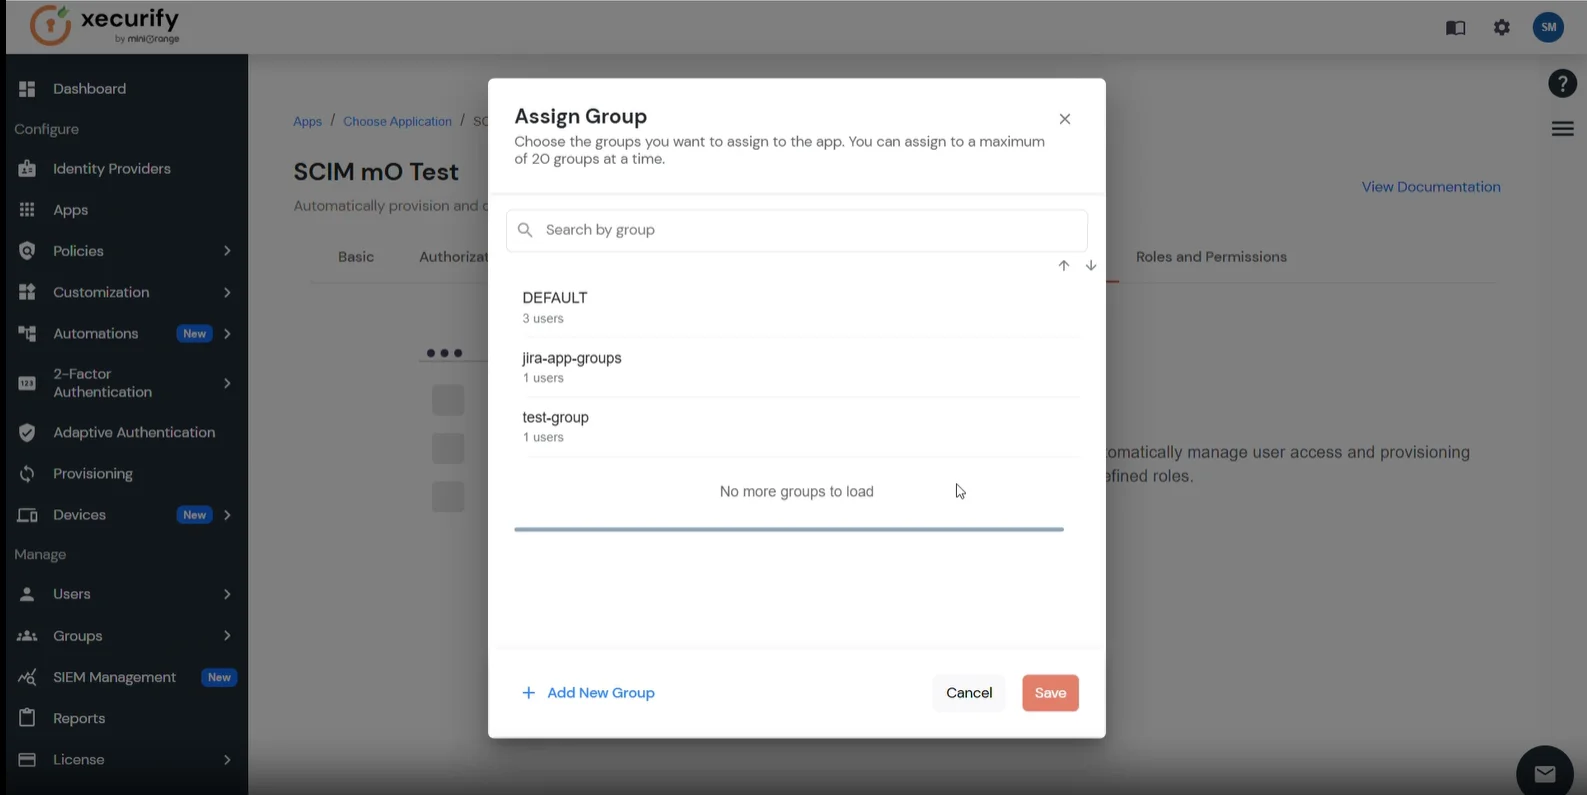
- Click Assign Groups, select the groups that should be provisioned to Jira, and save your configuration.
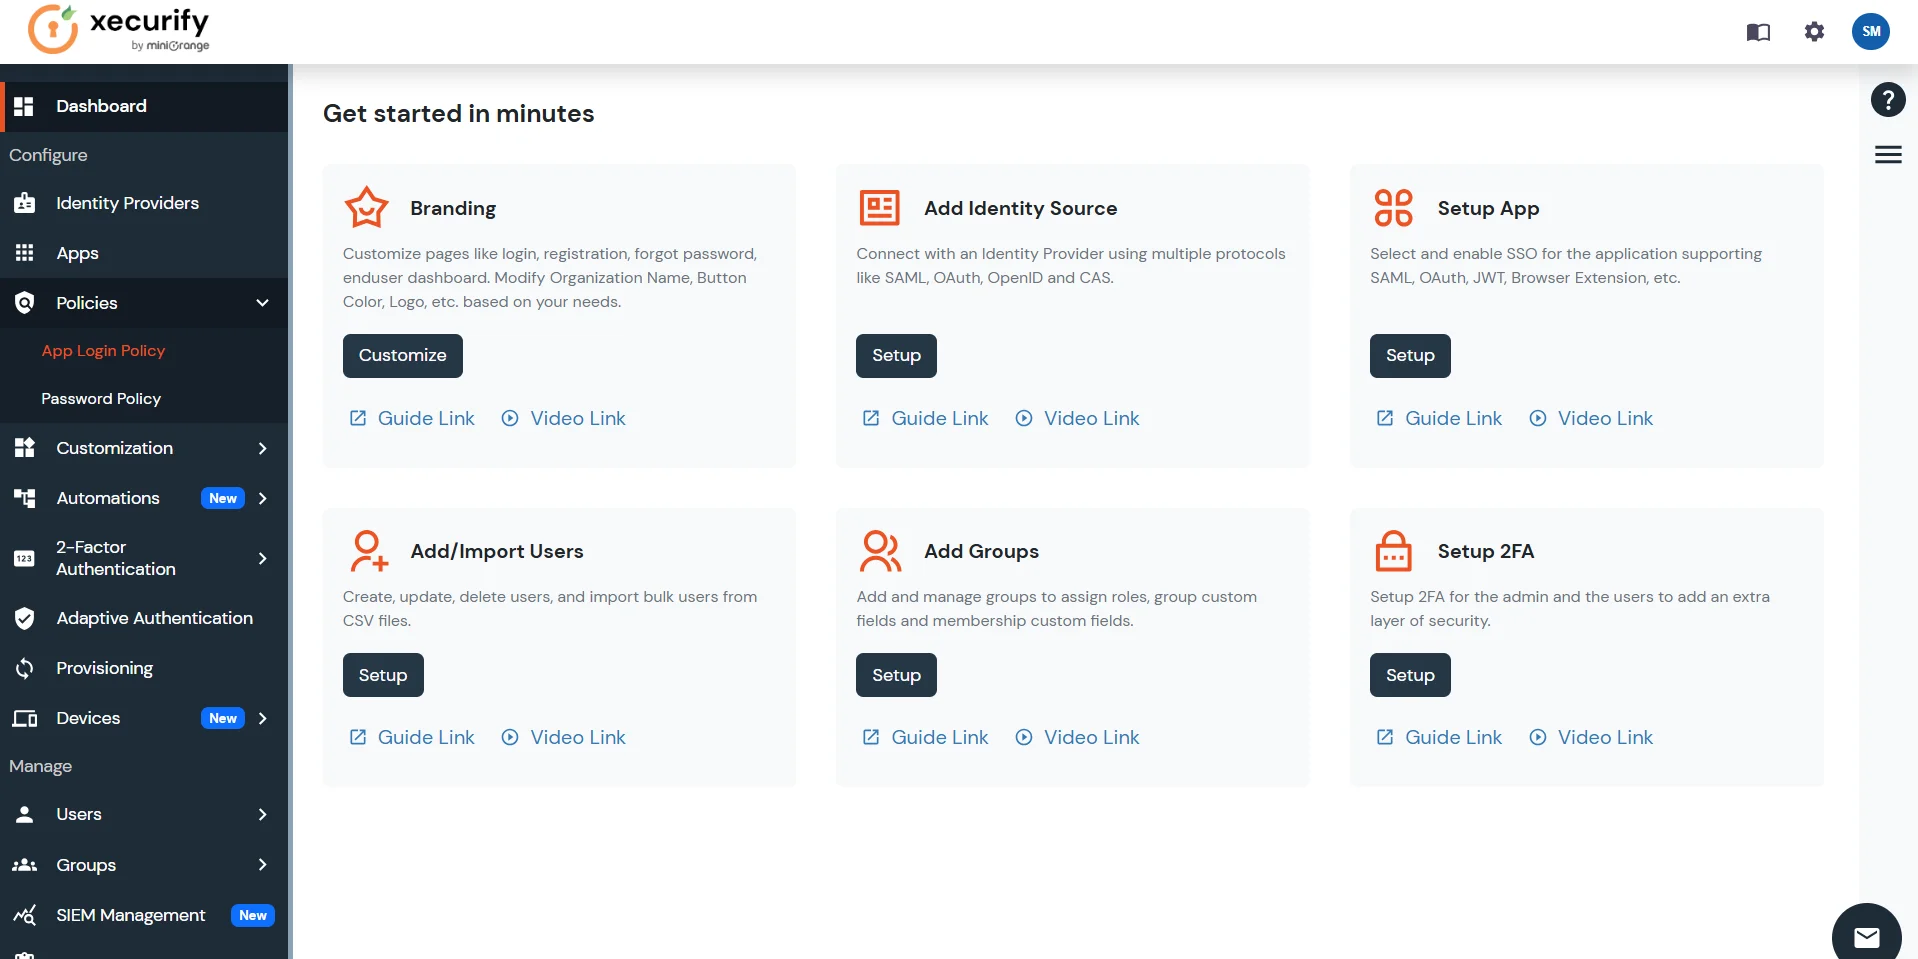
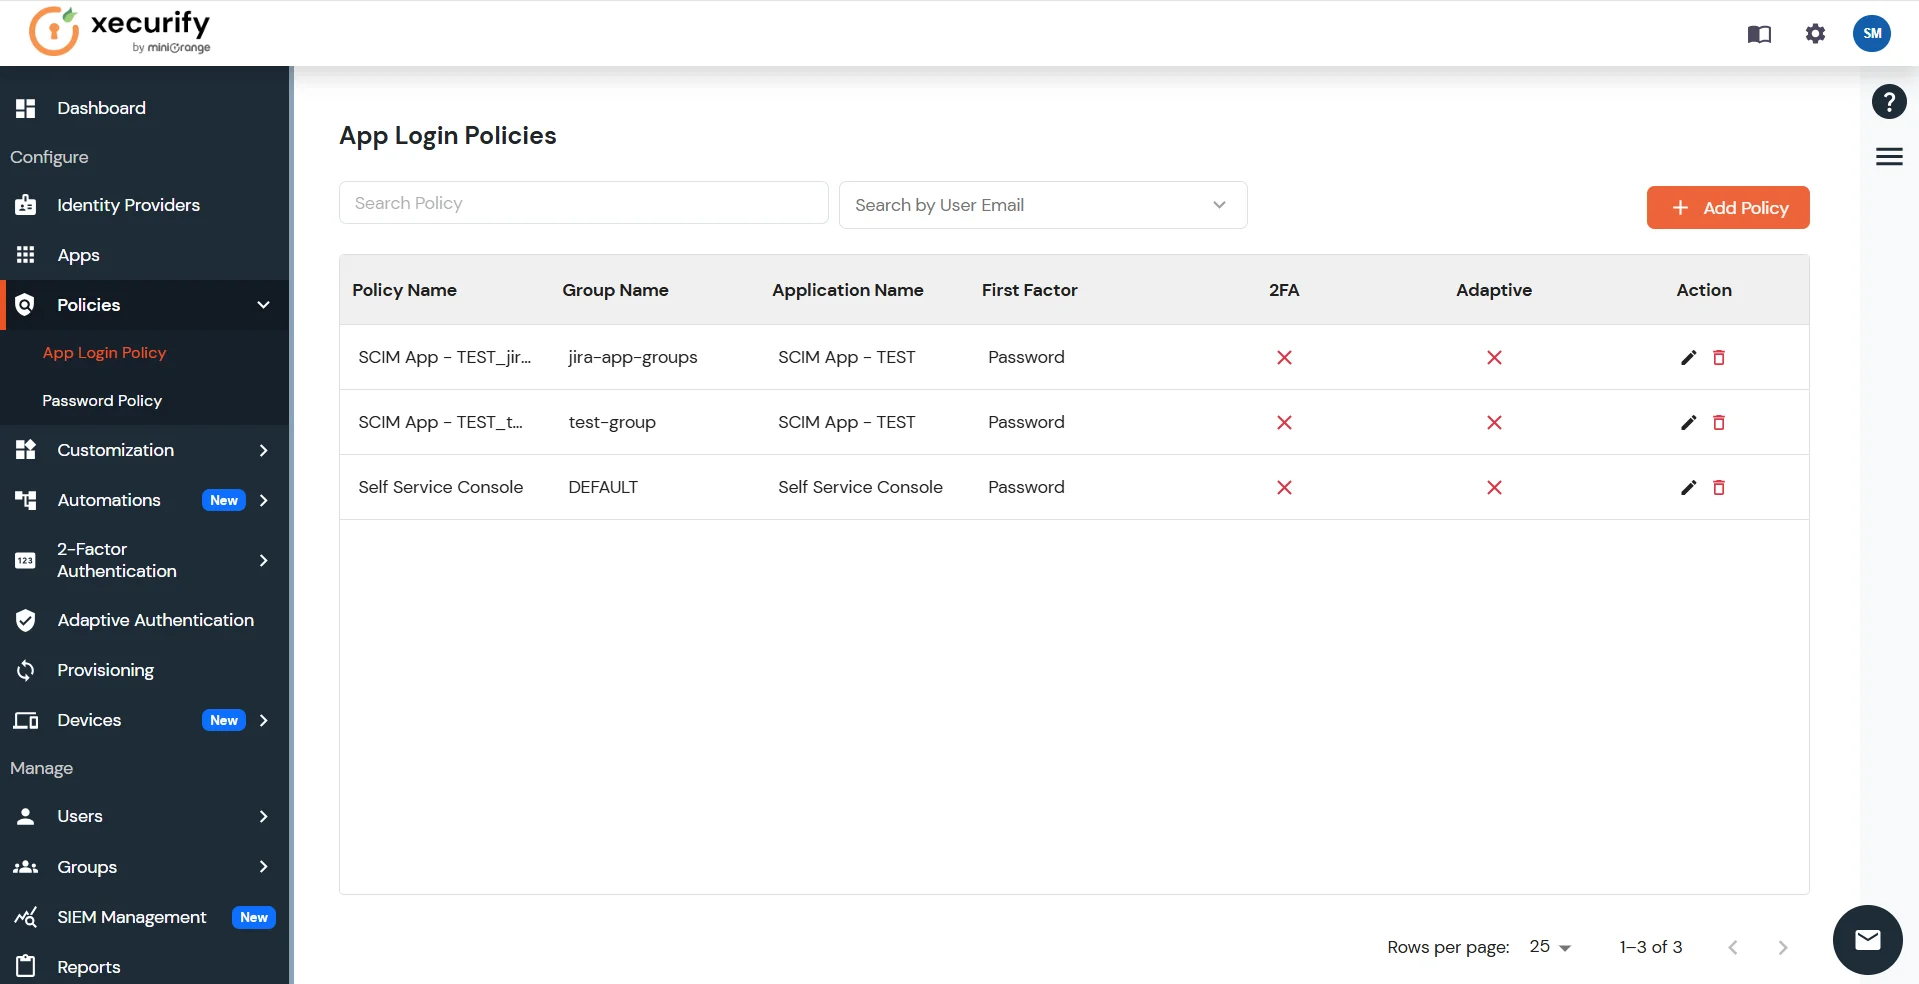
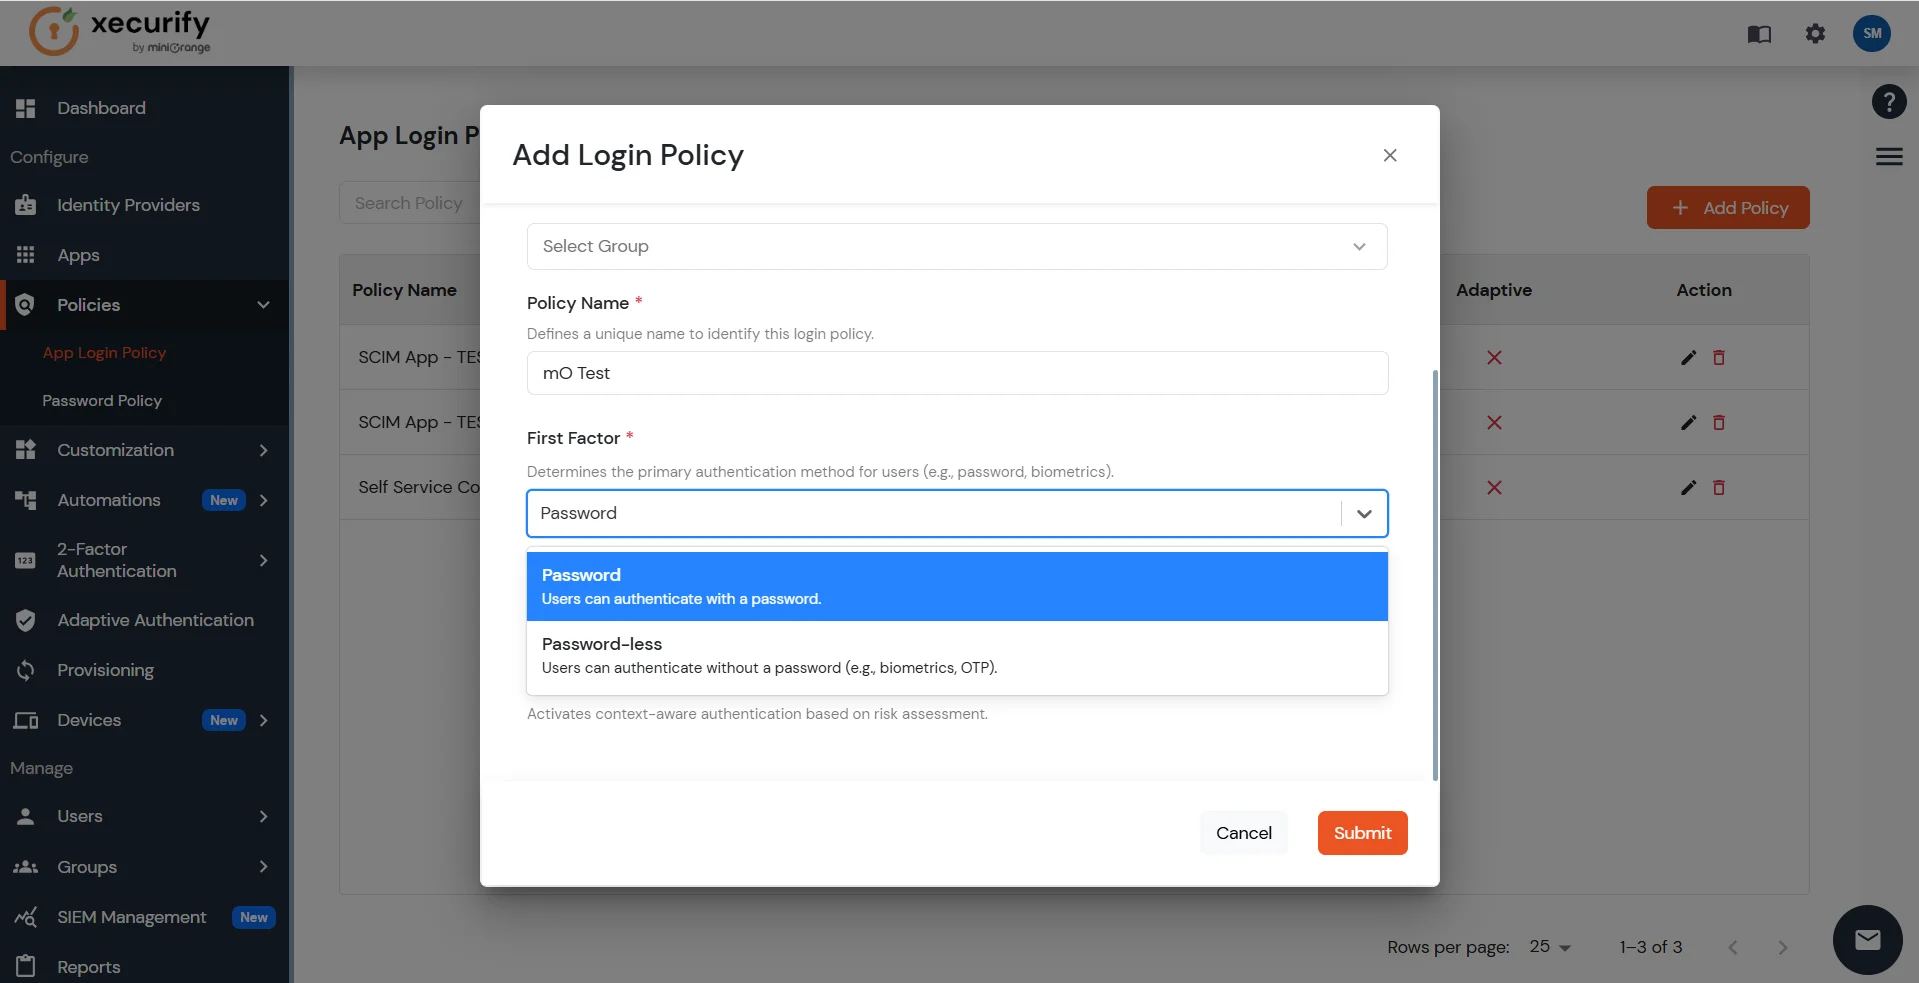
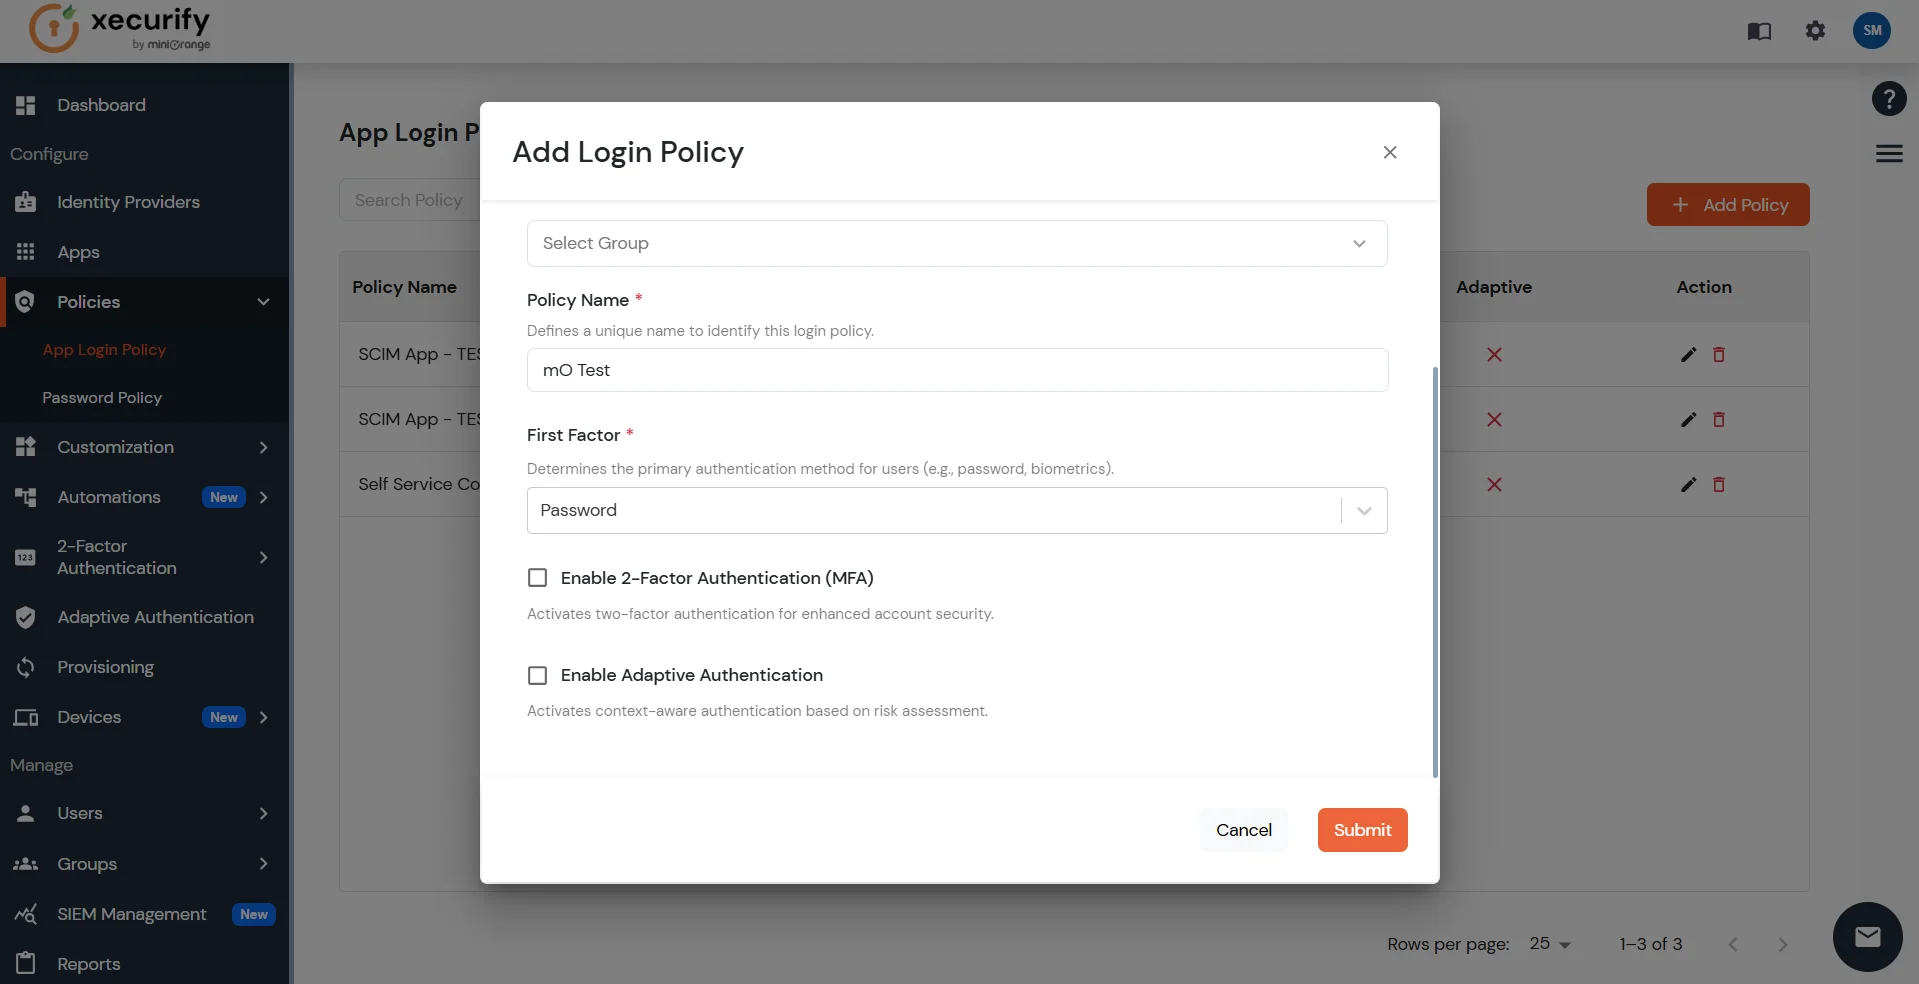
- Go to Policies > App Login Policy on the left sidebar menu.
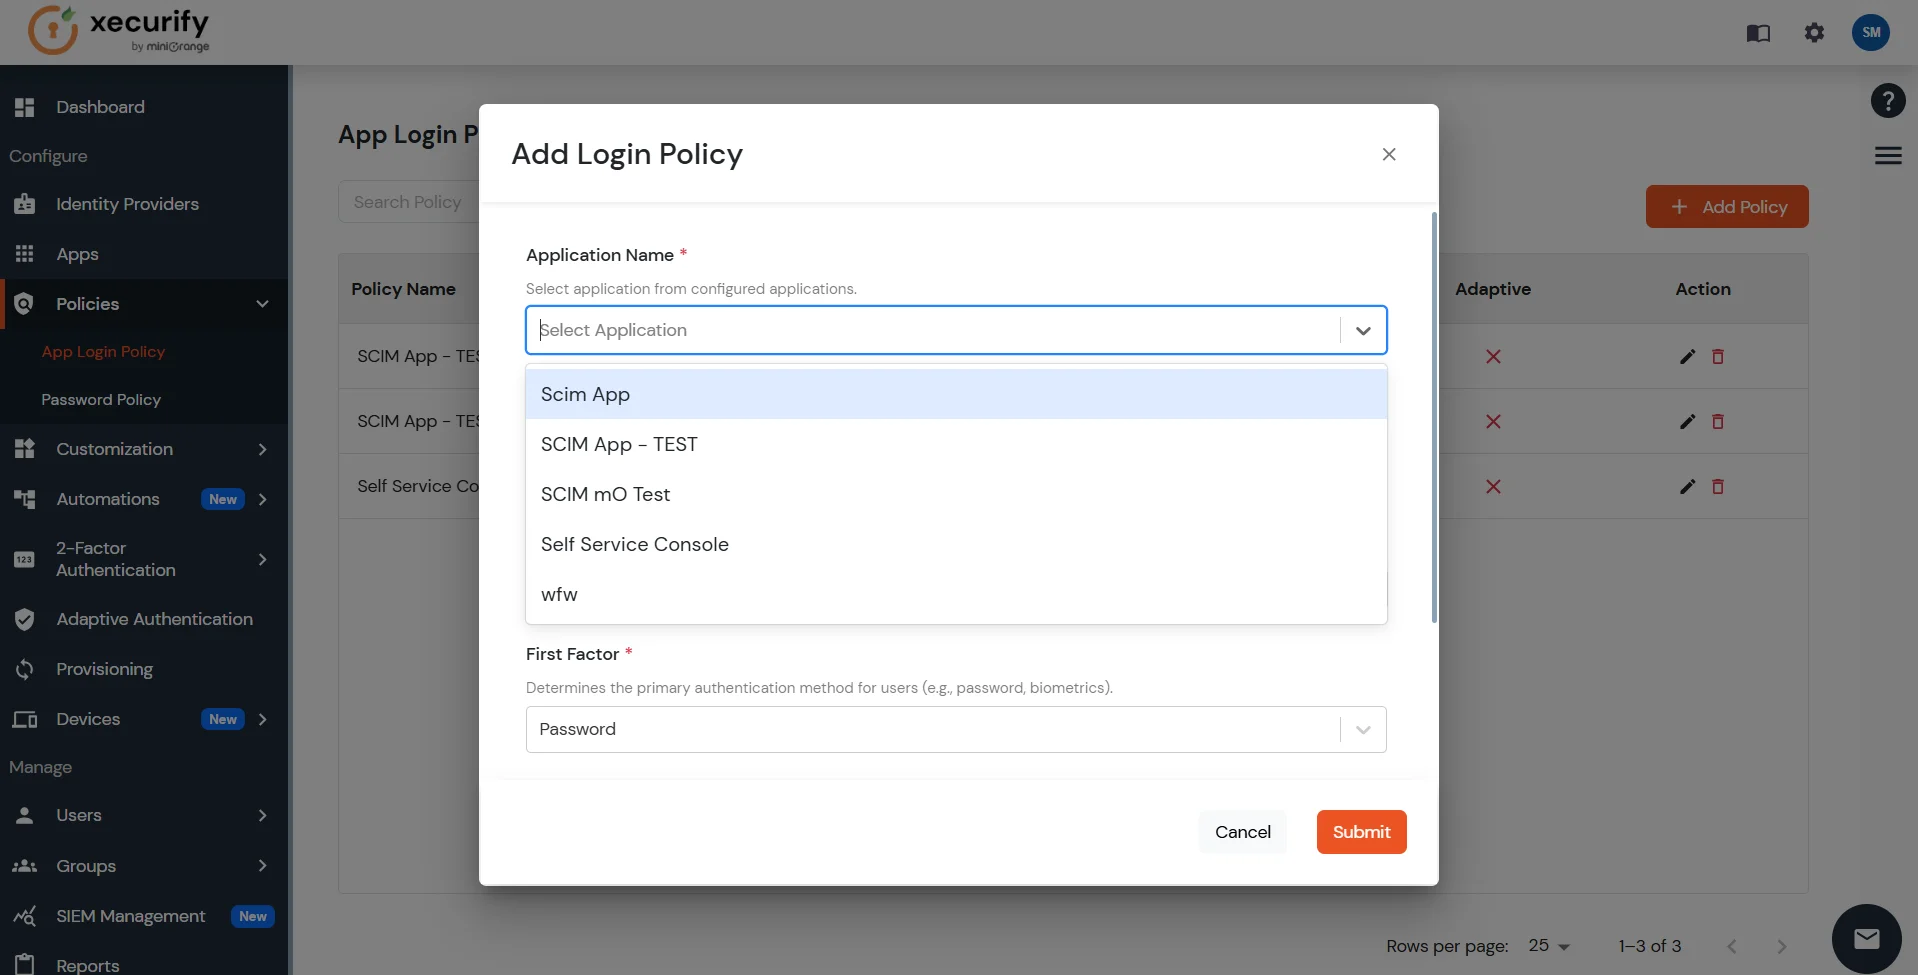
- Click on the + Add Policy button in the top right corner.
- Select the name of the app you just created under Application Name.
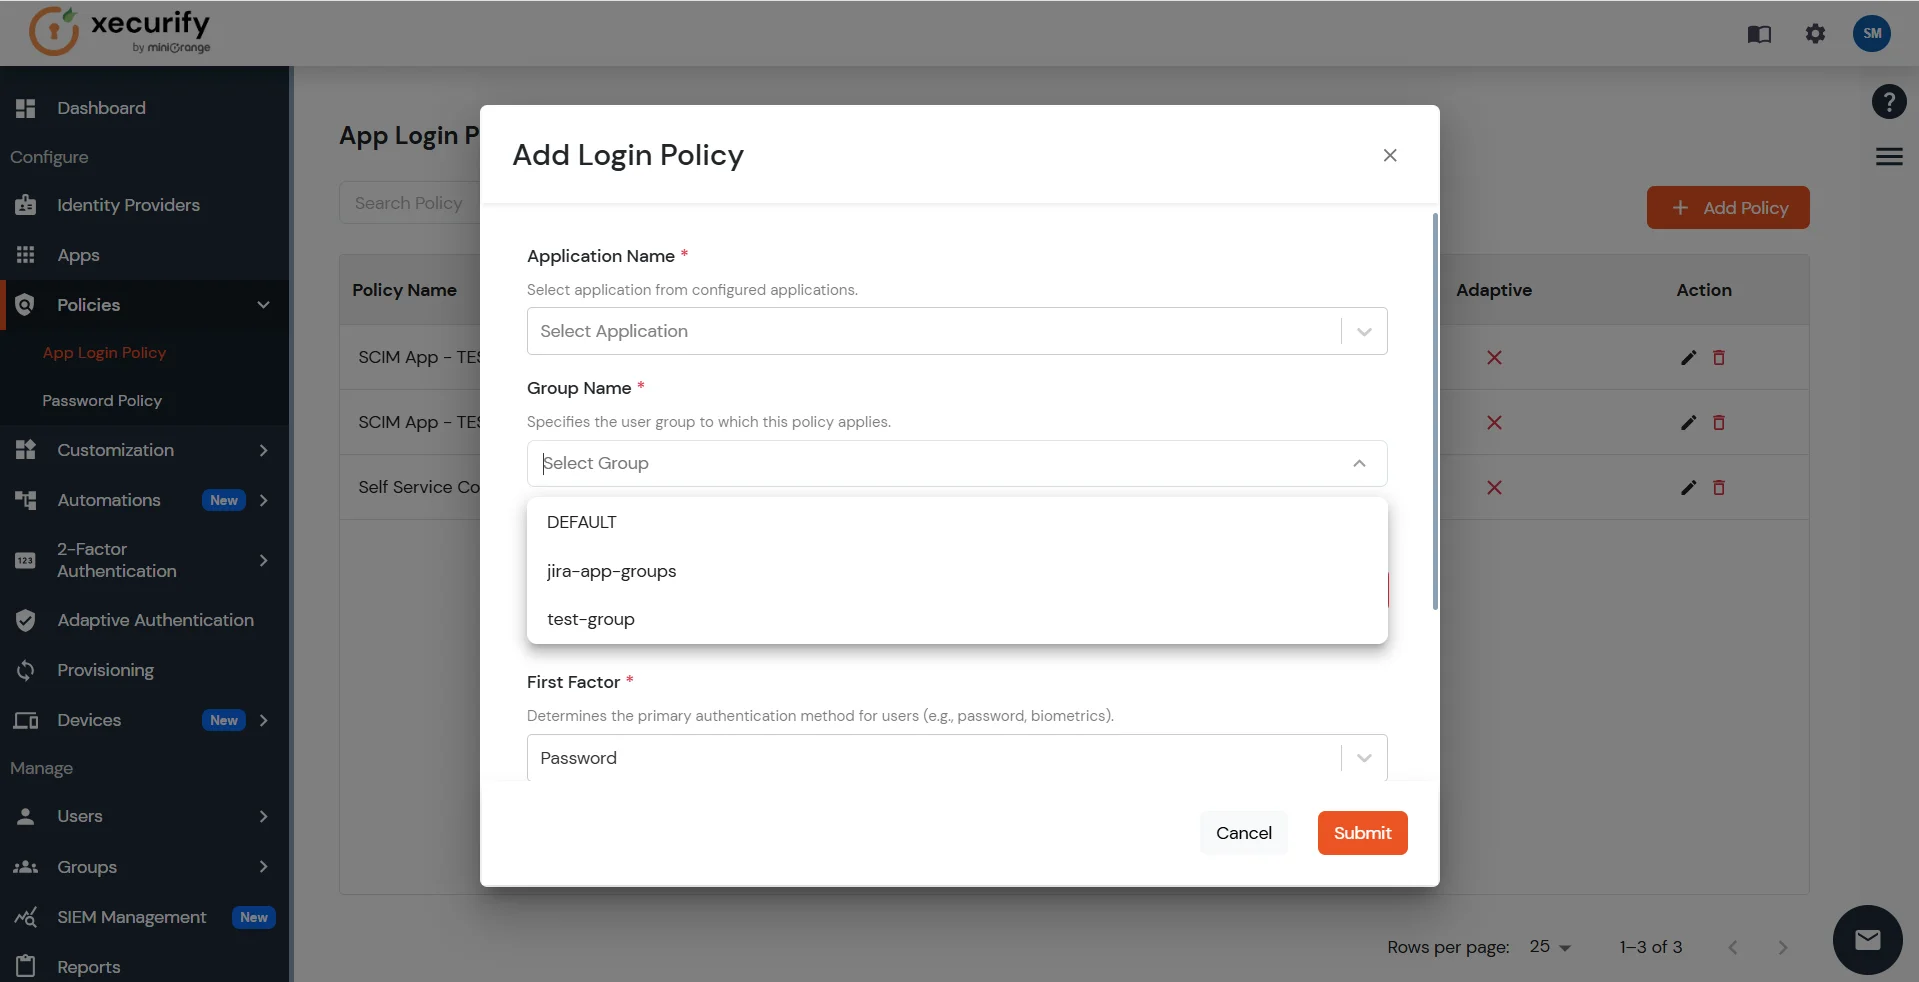
- Select the groups you want to sync under Group Name.
- Enter an appropriate name for the policy under Policy Name.
- Select the primary authentication method for users, password or passwordless, under the First Factor.
- You can choose if you want to enable MFA or Adaptive Authentication by selecting the checkbox.
- Click on the Submit button to create the policy.
The miniOrange Users & Groups Provisioning For Jira app is now successfully set up.
Did this page help you?