Contents
JumpCloud as IDP
Step 1: Set Up JumpCloud as Identity Provider
- Log in to your JumpCloud Administrator account.
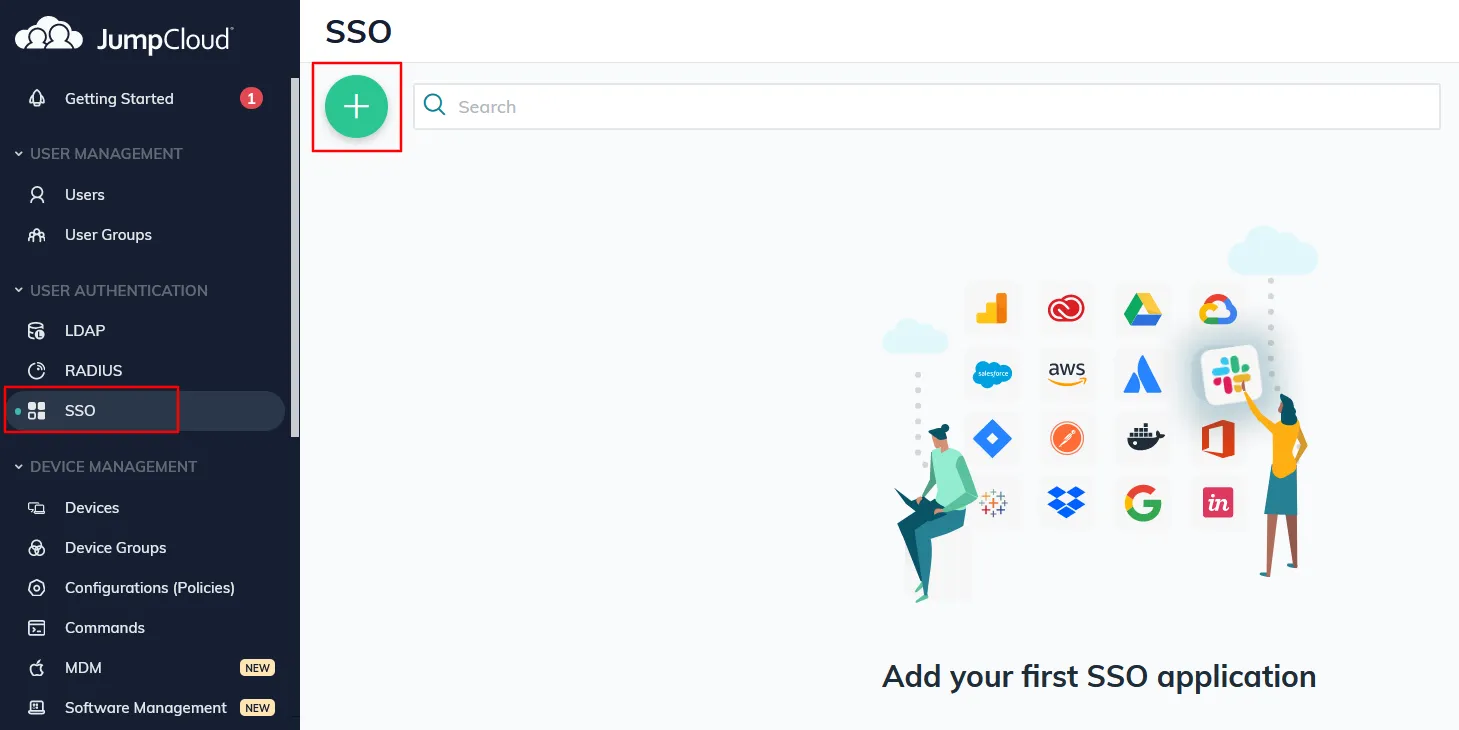
- Go to SSO tab and click on + icon given on the page for adding a new SSO app.
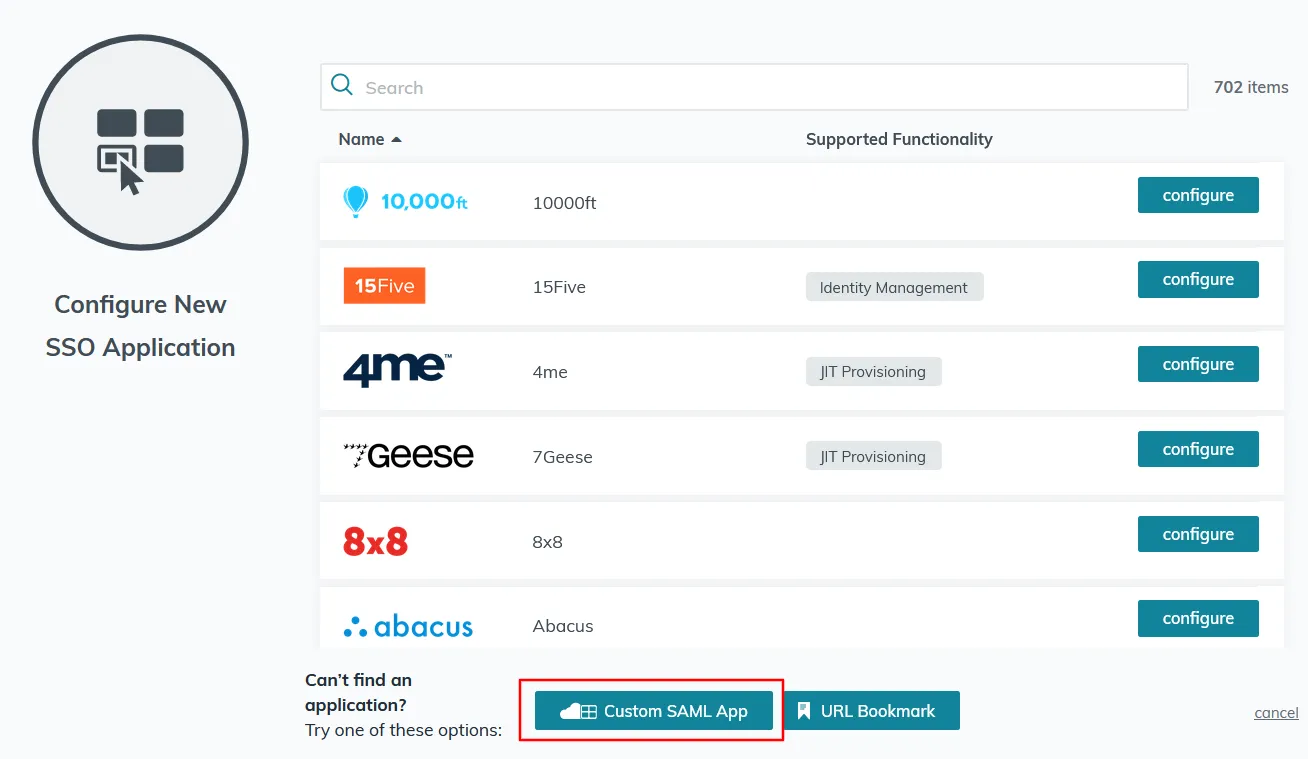
- Click on the Custom SAML App button.
- On the New Application page, provide a name and description (optional) for your app and then go to the SSO tab.
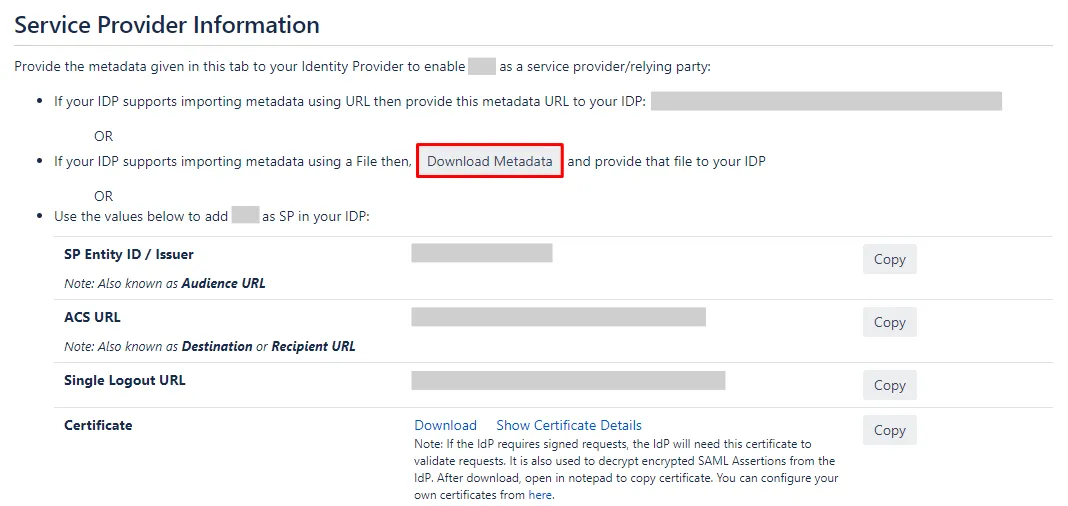
- Download SP Metadata file from SP Information tab of the plugin.
- On the JumpCloud New Application page, in the field IdP Entity ID, enter a unique value of your choice.
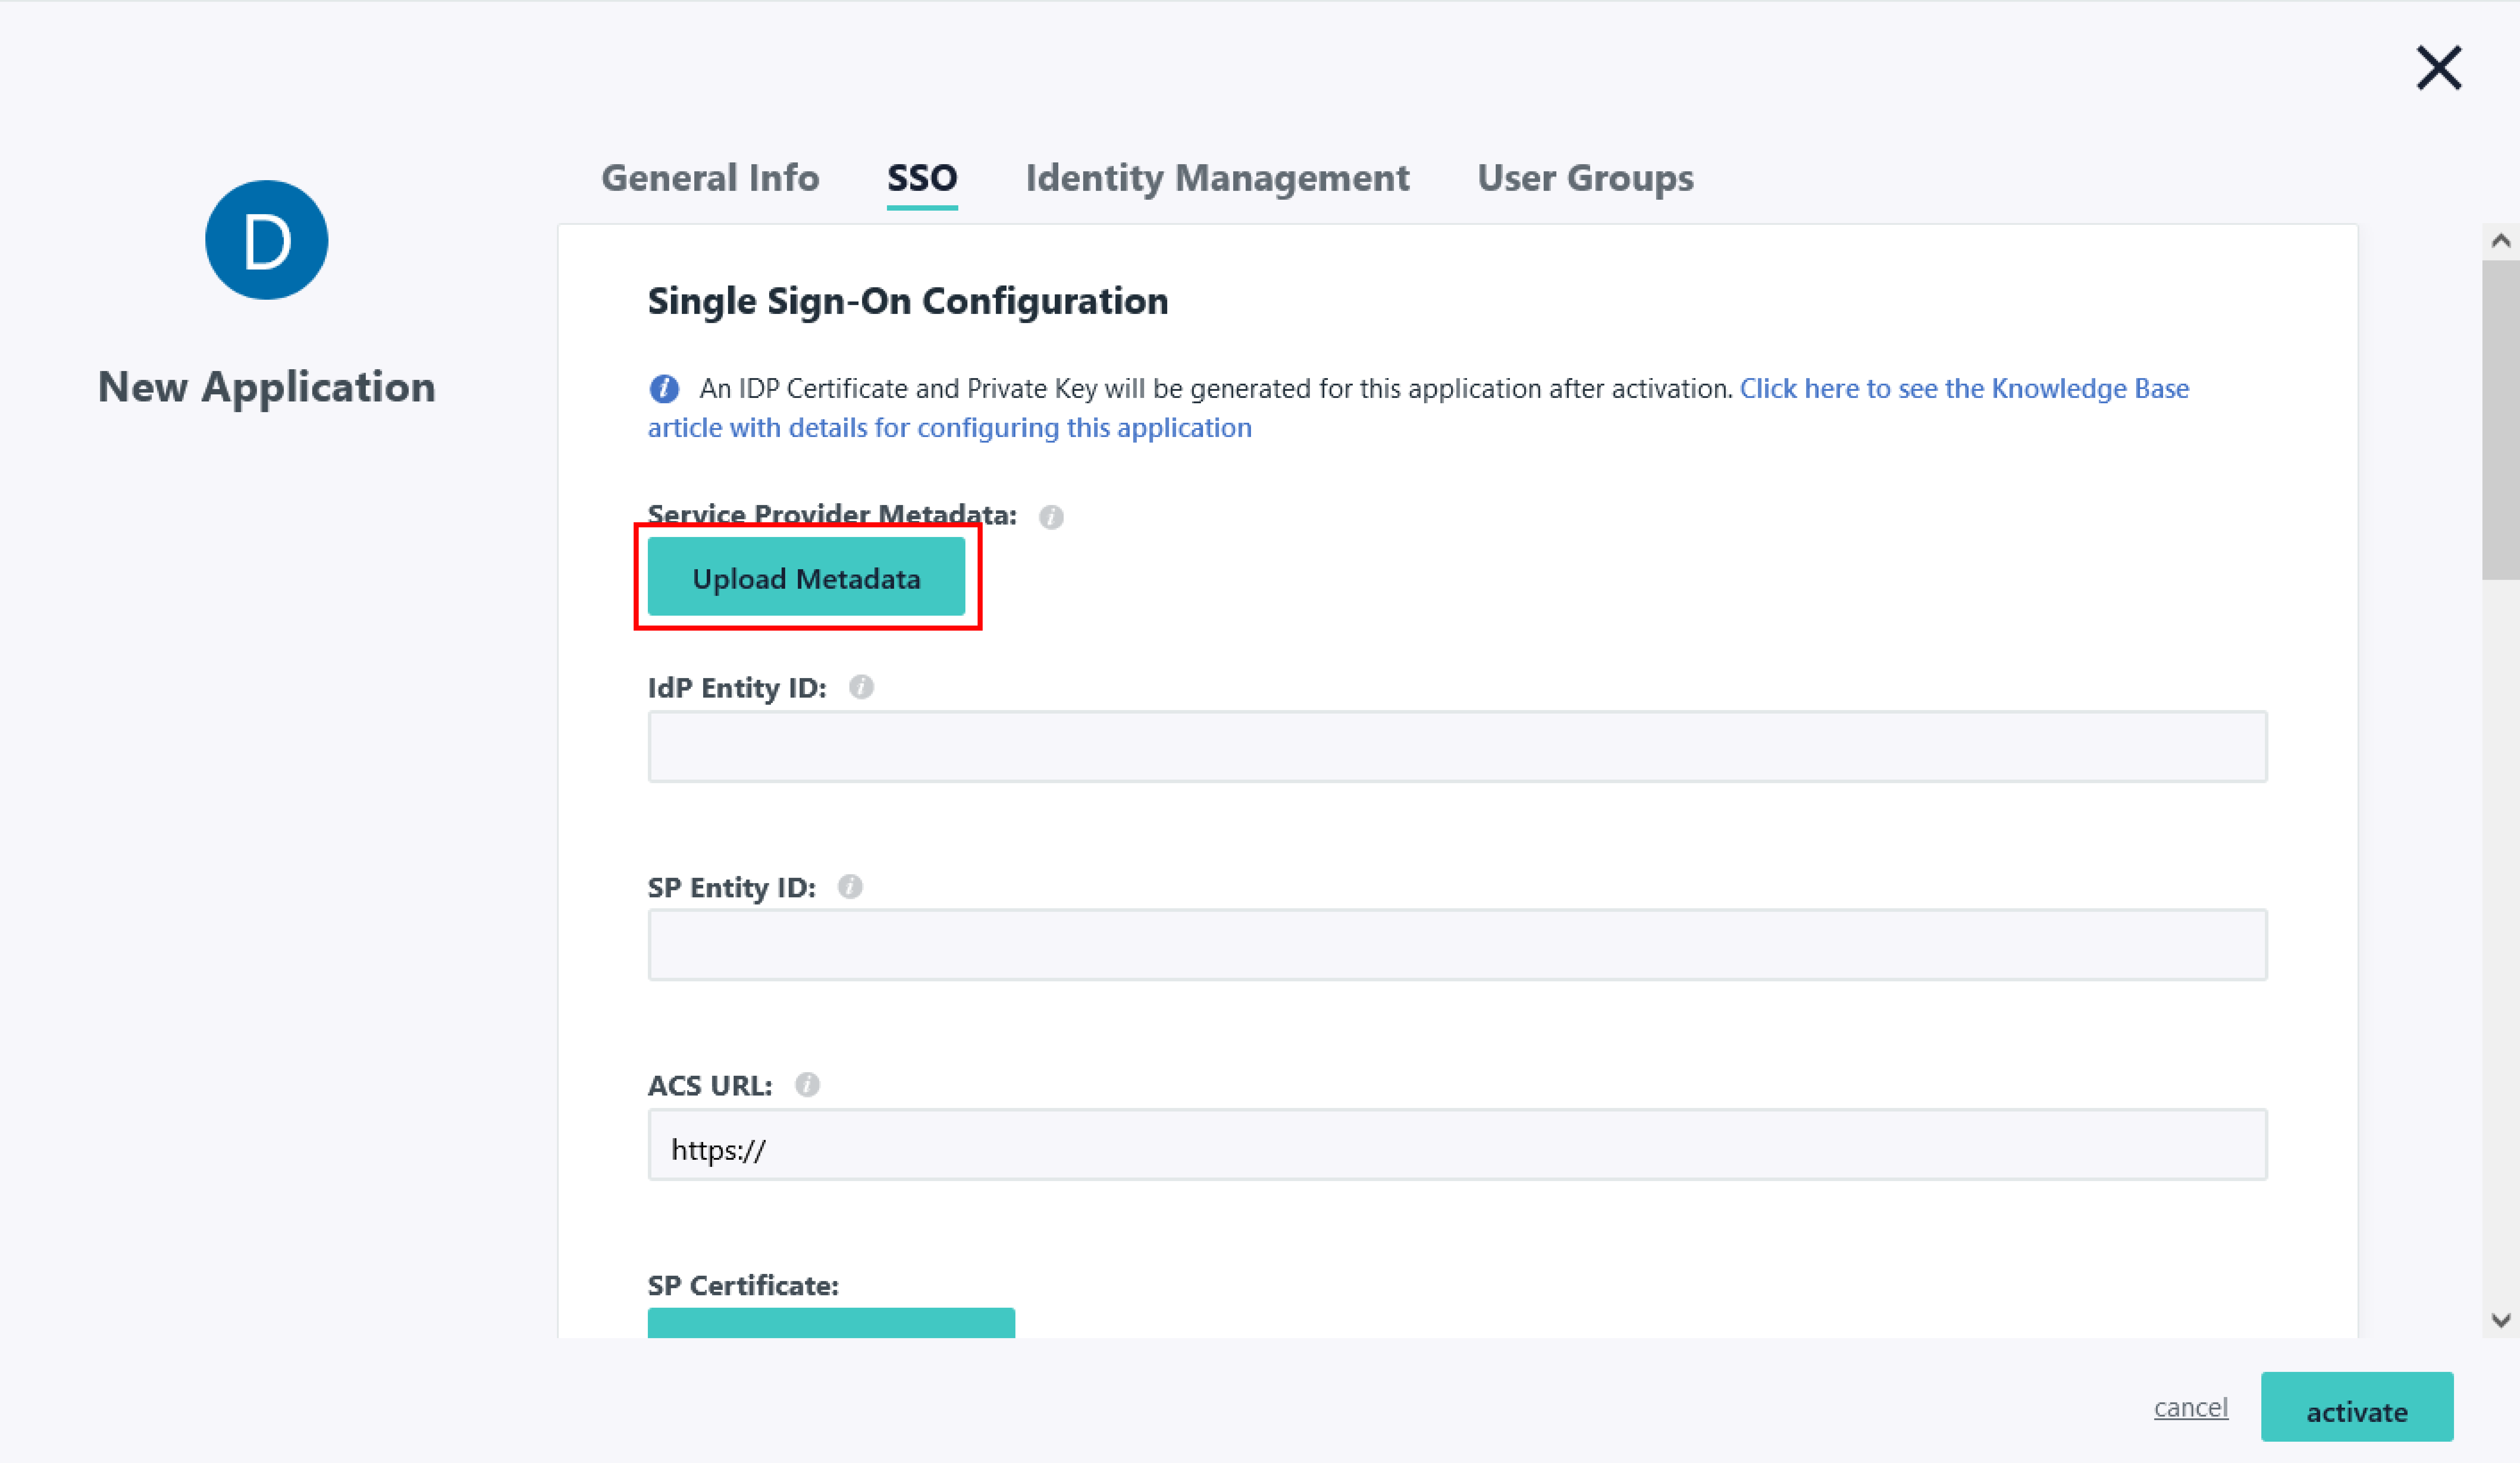
- Now, click on the Upload Metadata button and upload the SP Metadata file.
- Enter details manually from the SP Information tab.
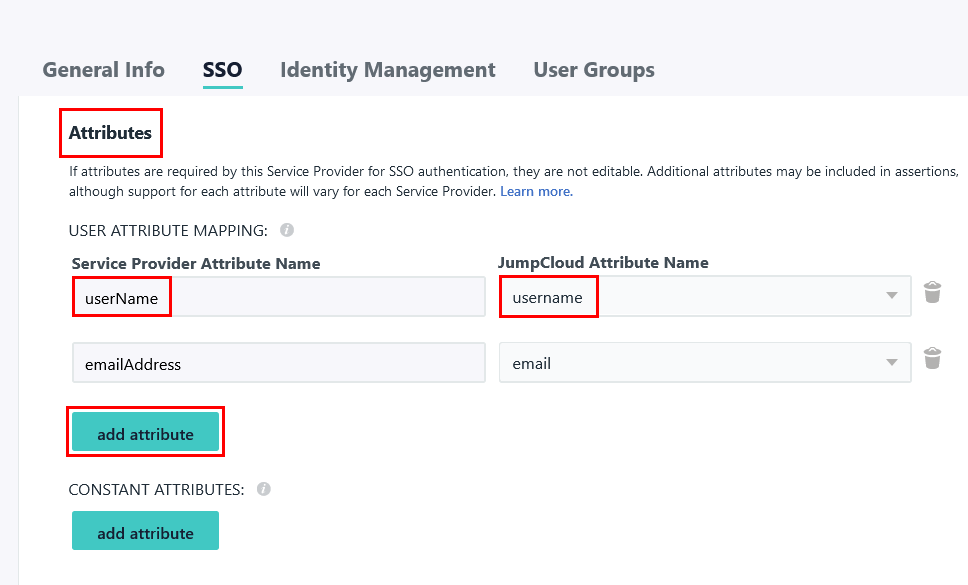
- Scroll down to the Attributes section and click the add attribute button.
- In the left-side input field provide Attribute Name to be sent in SAML assertion and, select the appropriate attribute value from the dropdown given on the right side.
- For example, below we have provided userName as attribute and selected username from the dropdown. Similarly add all the attributes you wish to provision to service provider.
- In the Group Attributes section enable the checkbox and provide the group attribute name.
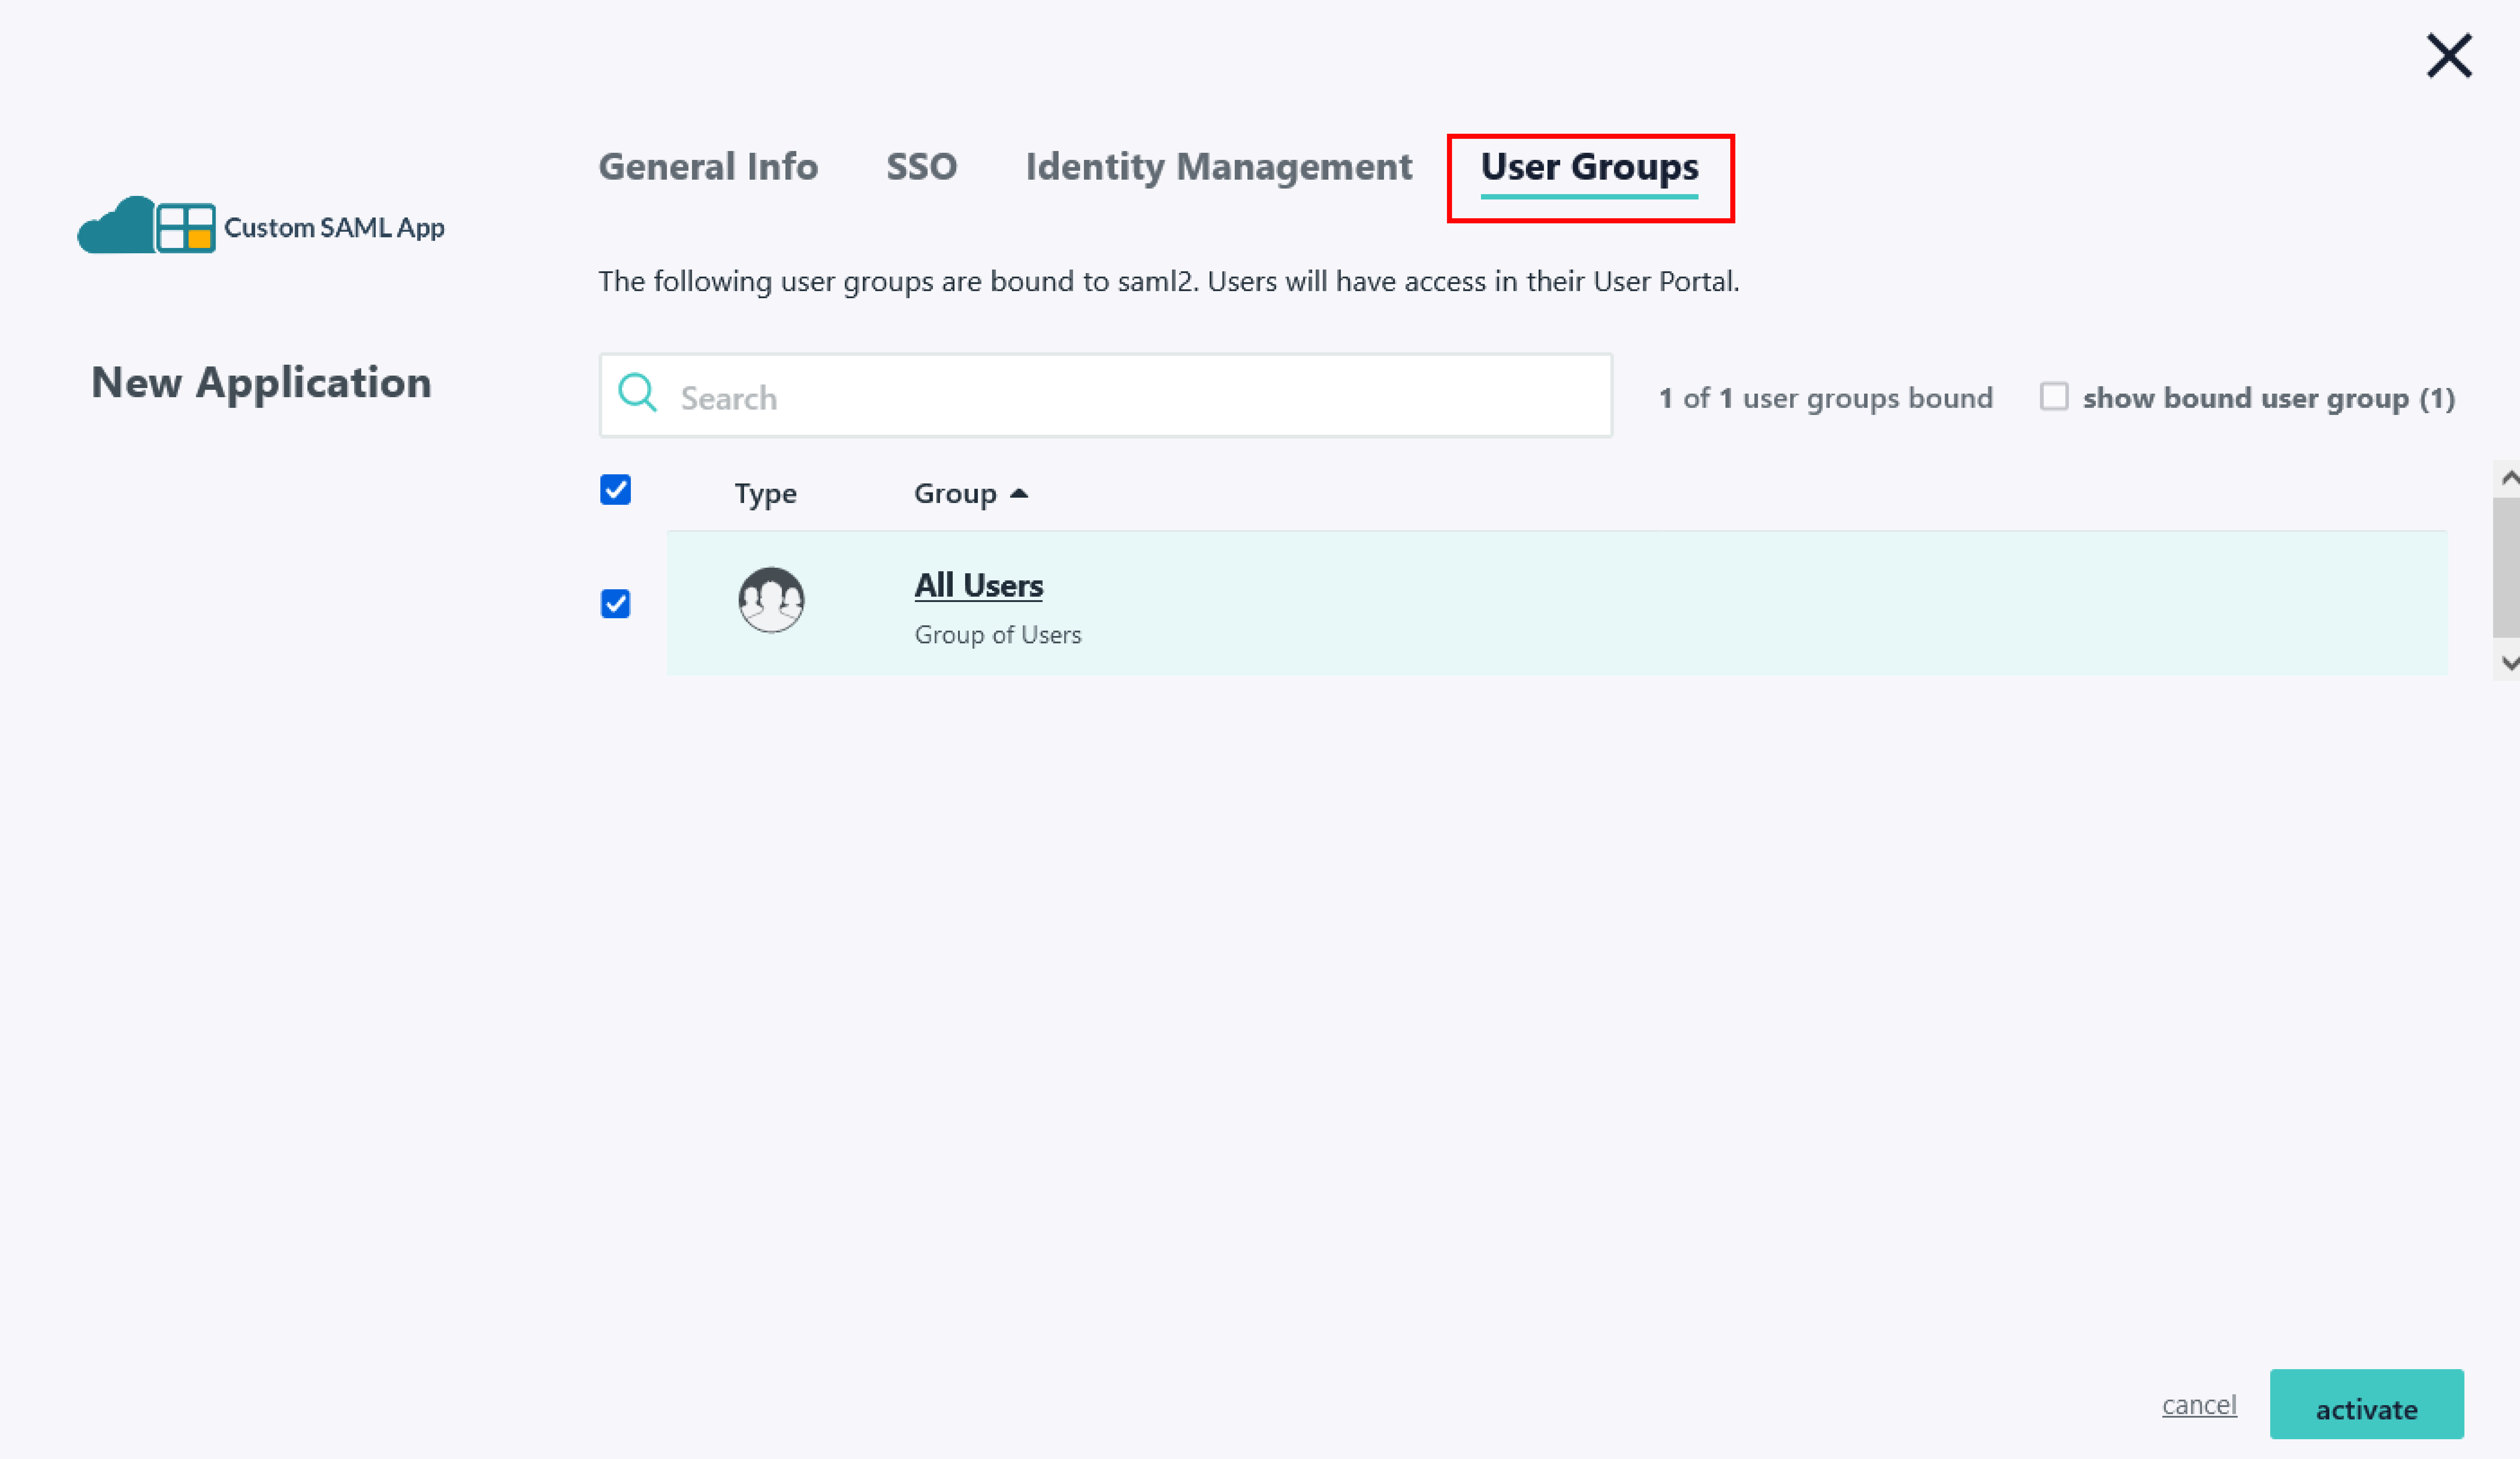
- Go to the User Groups tab. Here you can select which groups will have access to this SSO app. This is an important step to allow users to perform SSO with JumpCloud.
- Click on the activate button given at the bottom and then click on Continue in the confirmation dialog box.
- On the SSO page, select the checkbox given in front of the newly created application and click on the export metadata button. IDP metadata file will be downloaded.

Step 1.1: Import SP Metadata File
Import through SP metadata file
Manual configuration
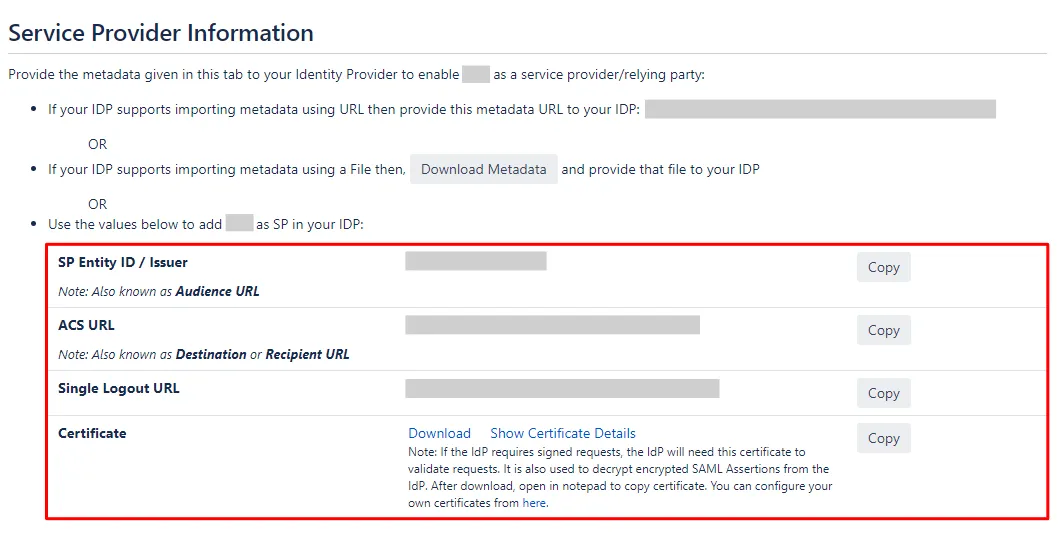
| Fields to be filled in JumpCloud | Corresponding details to be copied from the plugin |
| IdP Entity ID | Enter a unique IdP Entity ID of your choice |
| SP Entity ID | SP Entity ID/ Issuer |
| ACS URL | ACS URL |
| SP Certificate | Certificate (Download the file and upload here) |
Step 1.2: Attribute Mapping
Step 1.3: Group Mapping


×
![ADFS_sso]()
