Choose an app to view its listing on Atlassian Marketplace.
Step 1: Set Up Keycloak as Identity Provider
Select Keycloak version:
Configure Keycloak as IdP
In your Keycloak Admin console, select the realm that you
want to use.
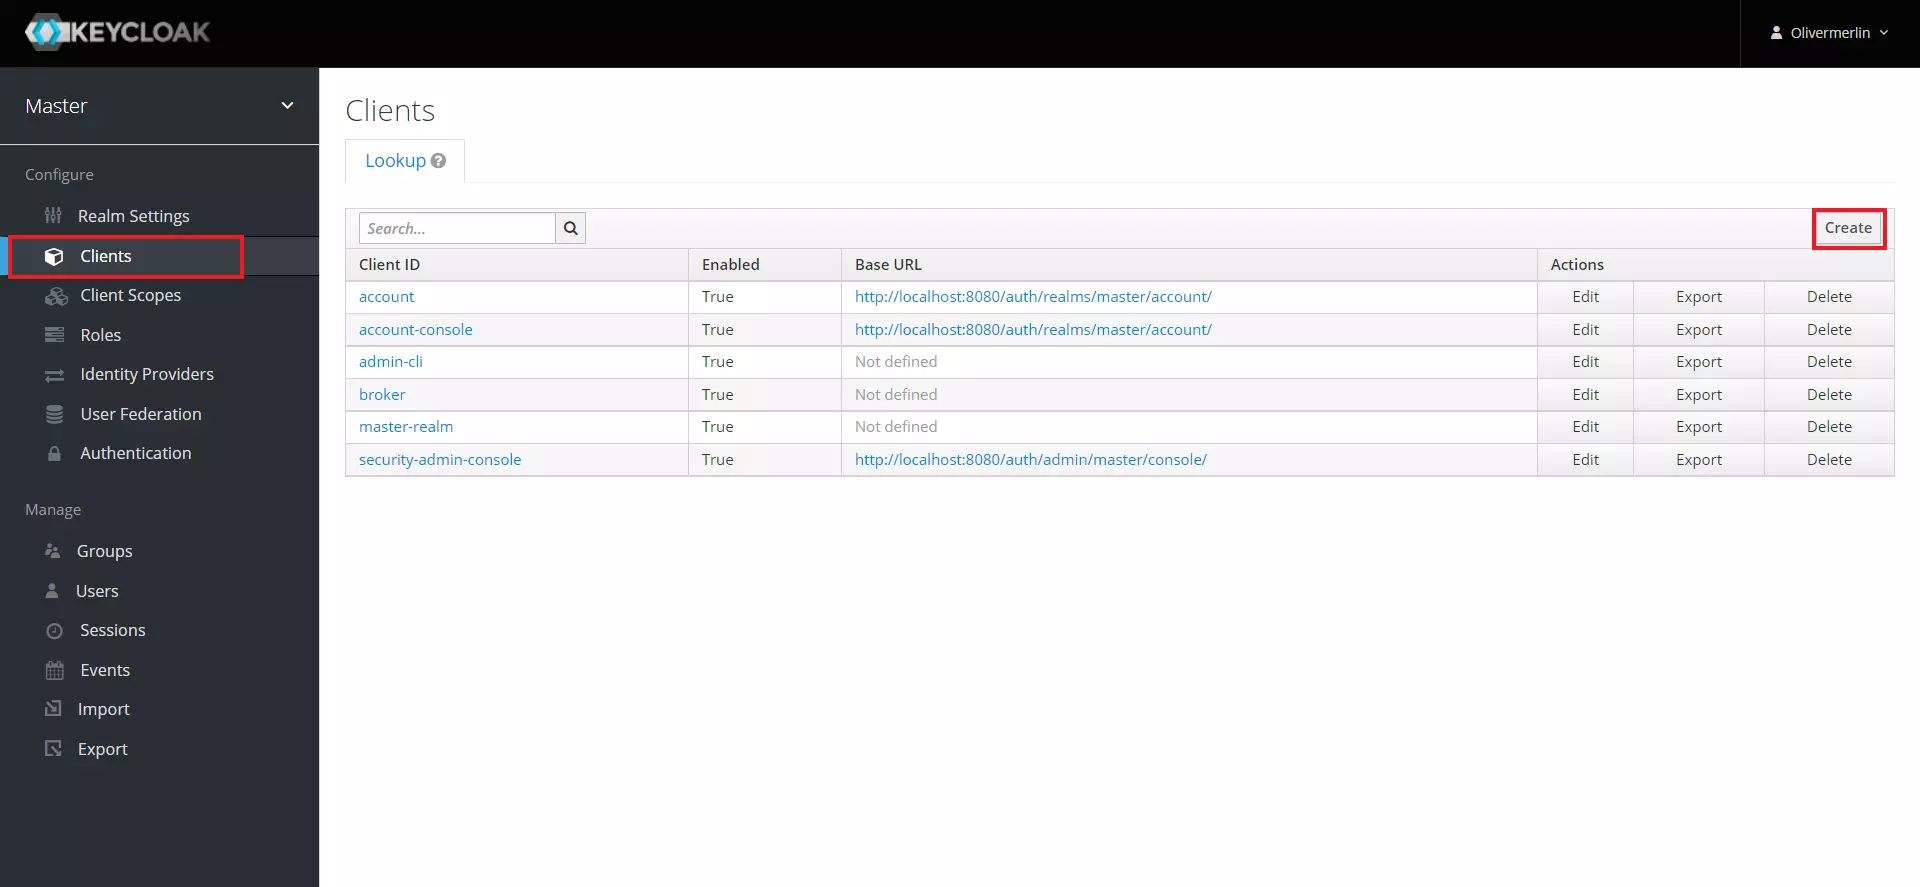
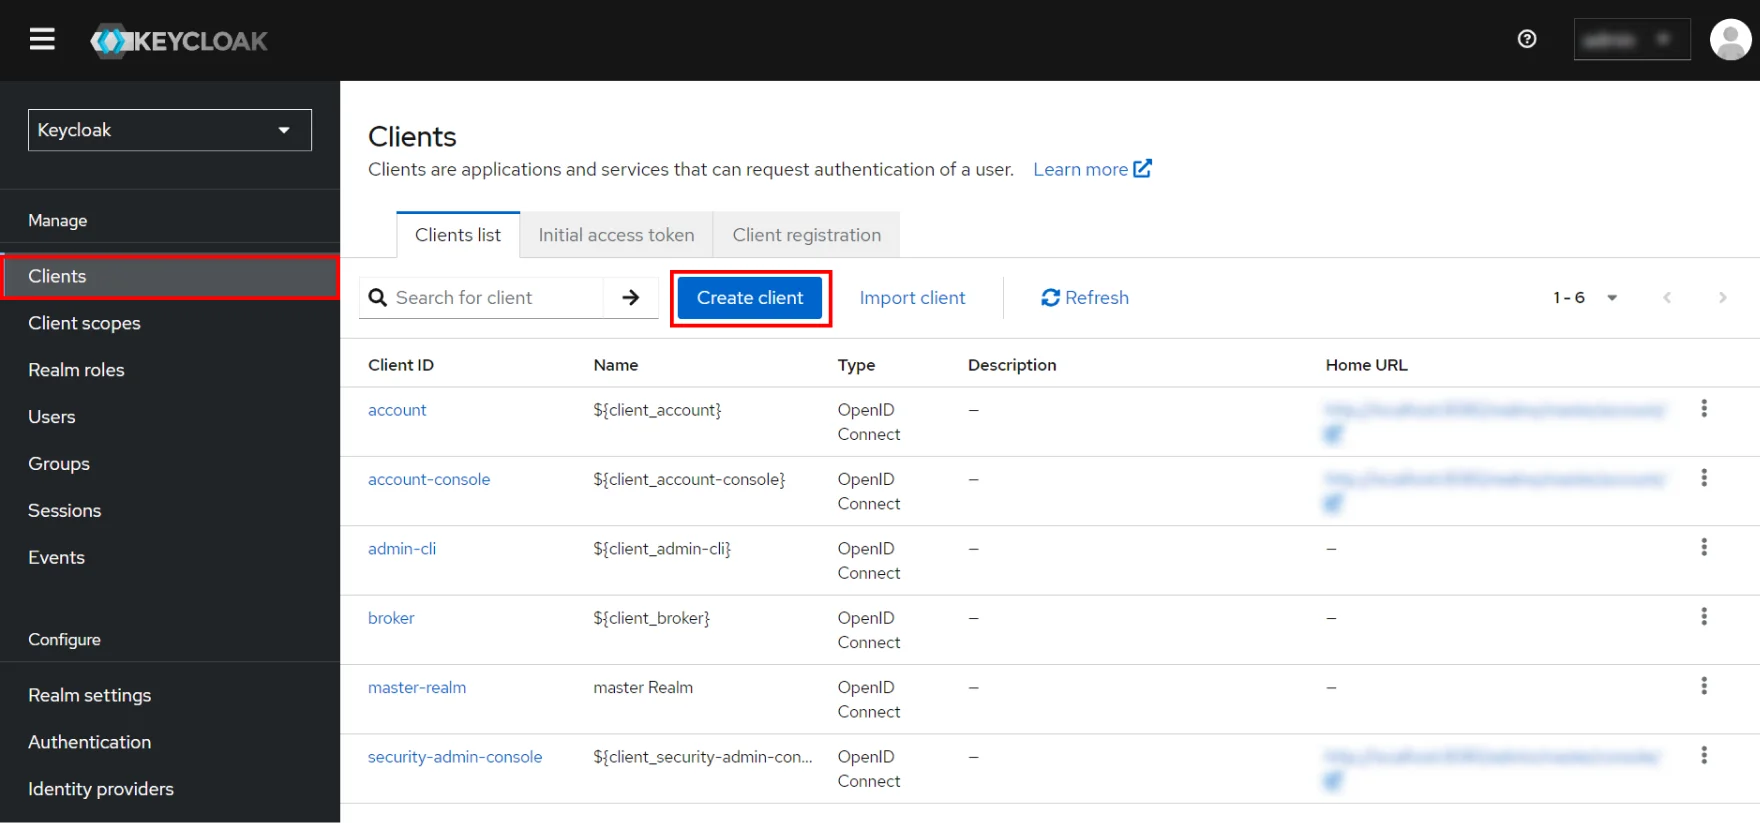
Click on Clients from the left menu and then click on
Create button to create a new client/application.
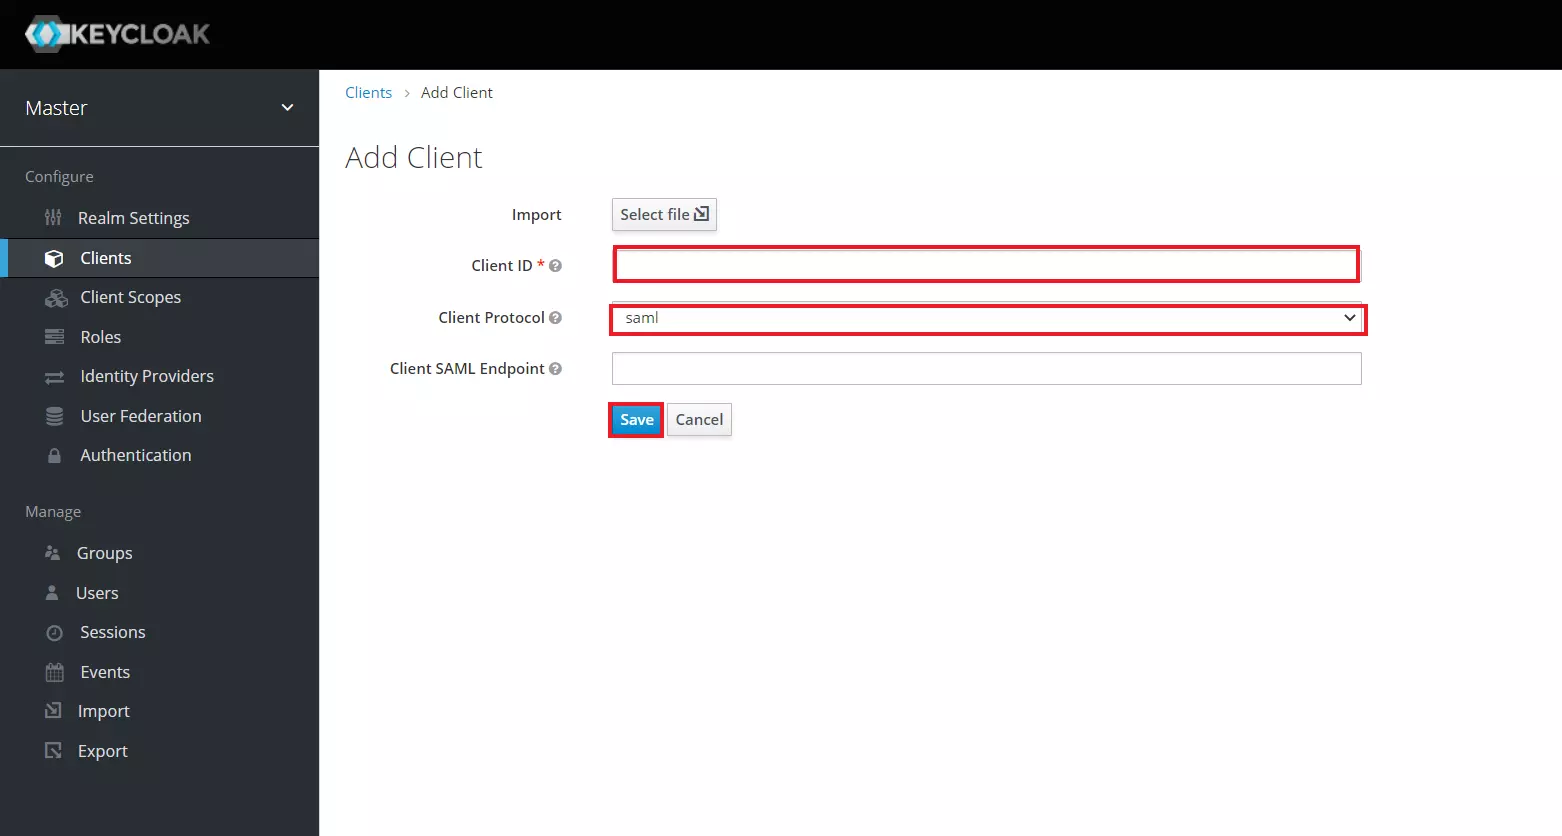
Enter SP-EntityID / Issuer as the Client ID from the
"Service Provider Metadata" Tab and select SAML as the
Client Protocol.
Now click on Save.
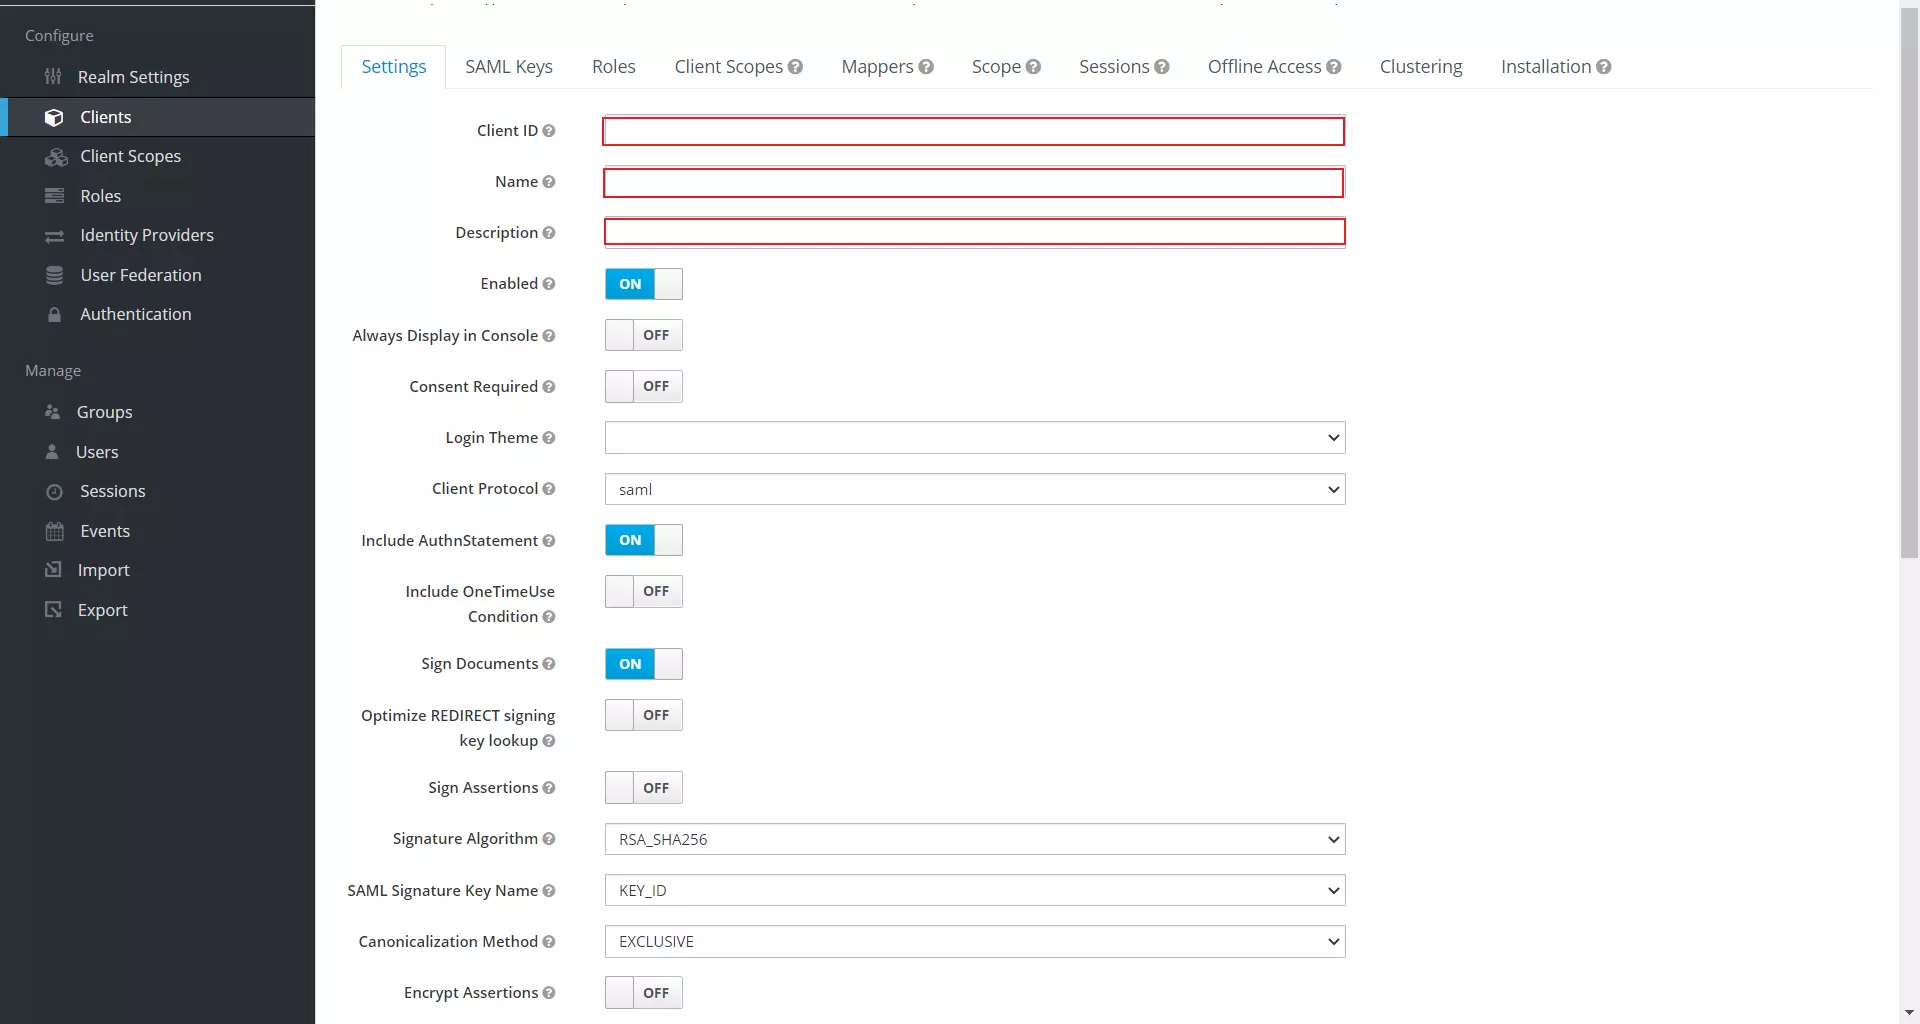
Configure Keycloak by providing the required details:
Client ID
The SP-EntityID / Issuer from the plugin's Service
Provider Metadata tab
Name
Provide a name for this client
Description
Provide a description
Client Signature Required
OFF
Force POST Binding
OFF
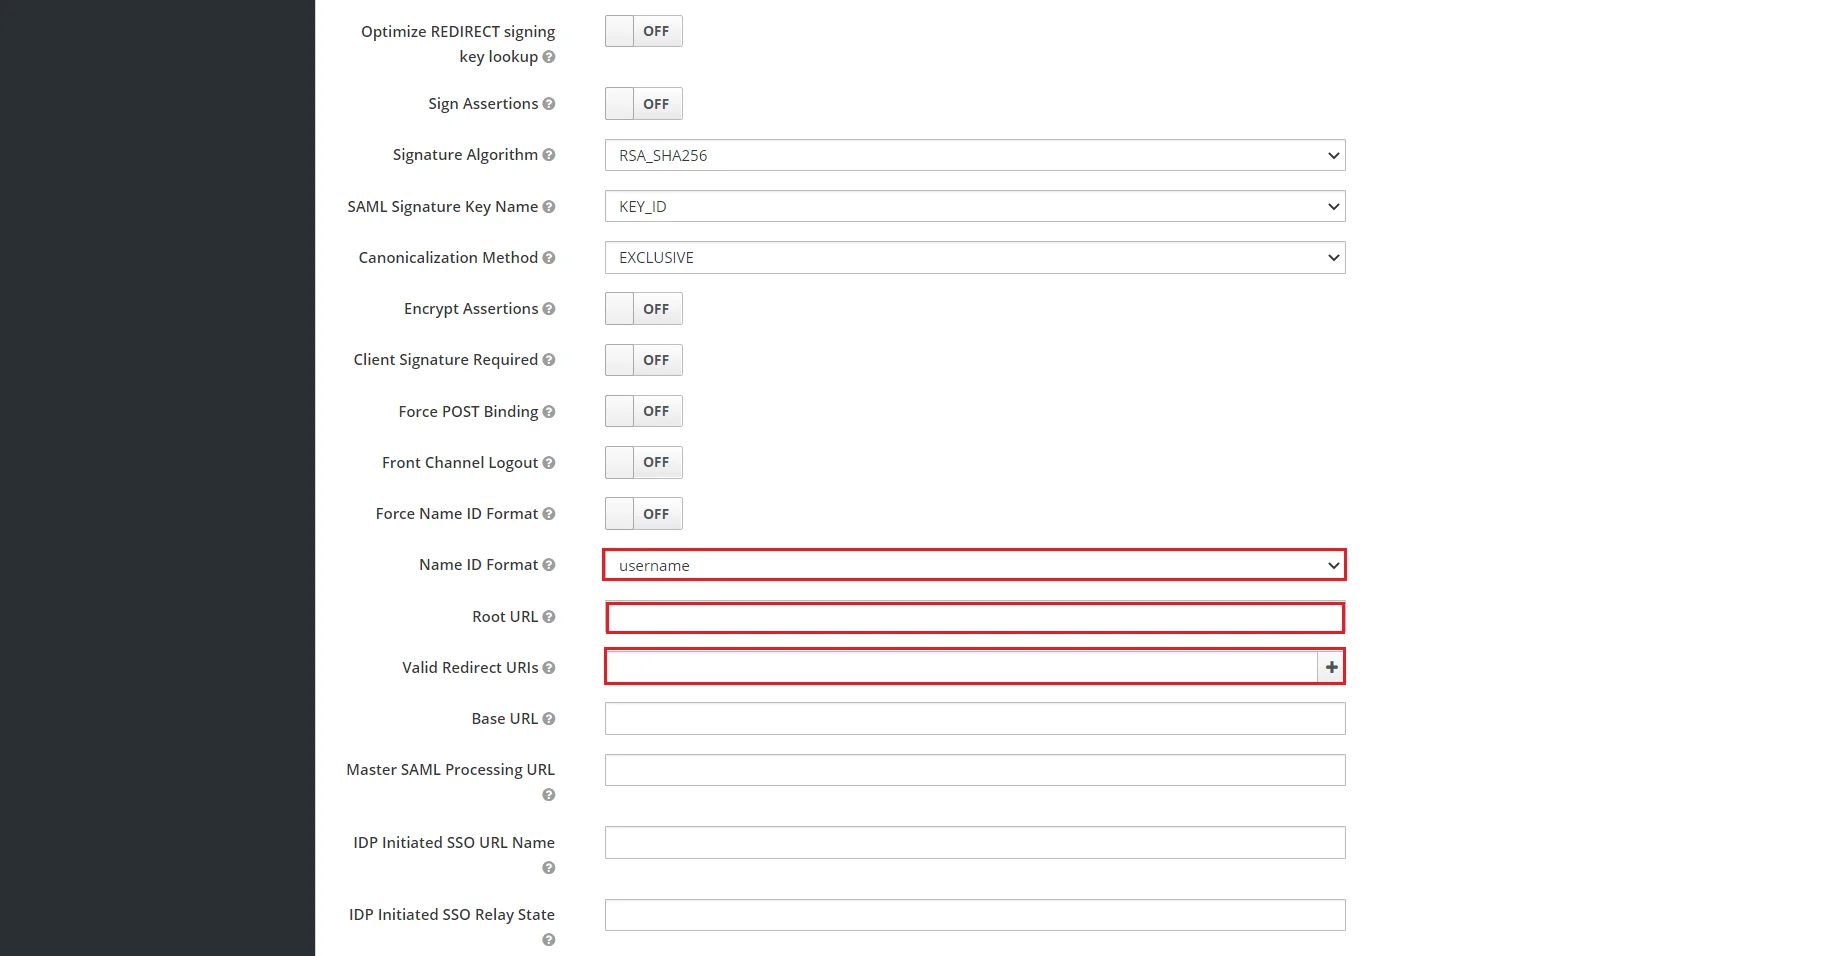
Force Name ID Format
OFF
Name ID Format
Email
Root URL
Leave empty or Provide Base URL from Service Provider
Metadata tab
Valid Redirect URIs
The ACS (Assertion Consumer Service) URL from the
plugin's Service Provider Metadata tab
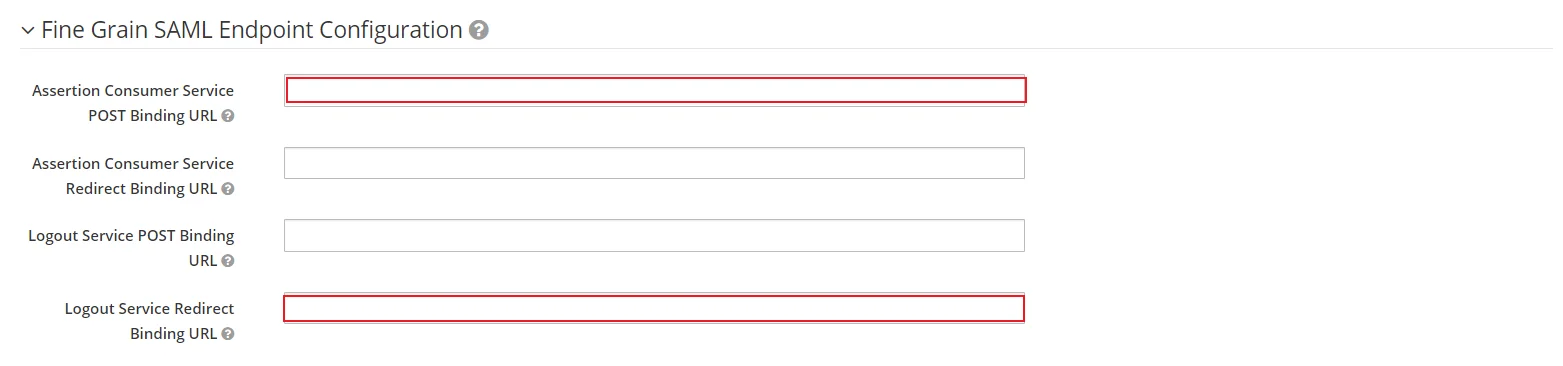
Under Fine Grain SAML Endpoint Configuration, Enter the
following details:
Assertion Consumer Service POST Binding URL
The ACS (Assertion Consumer Service) URL from the
plugin's Service Provider Metadata tab
Logout Service Redirect Binding URL (Optional)
The Single Logout URL from the plugin's Service
Provider Metadata tab
Click on Save.
In your Keycloak Admin console, select the realm that you
want to use.
Click on Clients from the left menu and then click on
Create Client
button to create a new client/application.
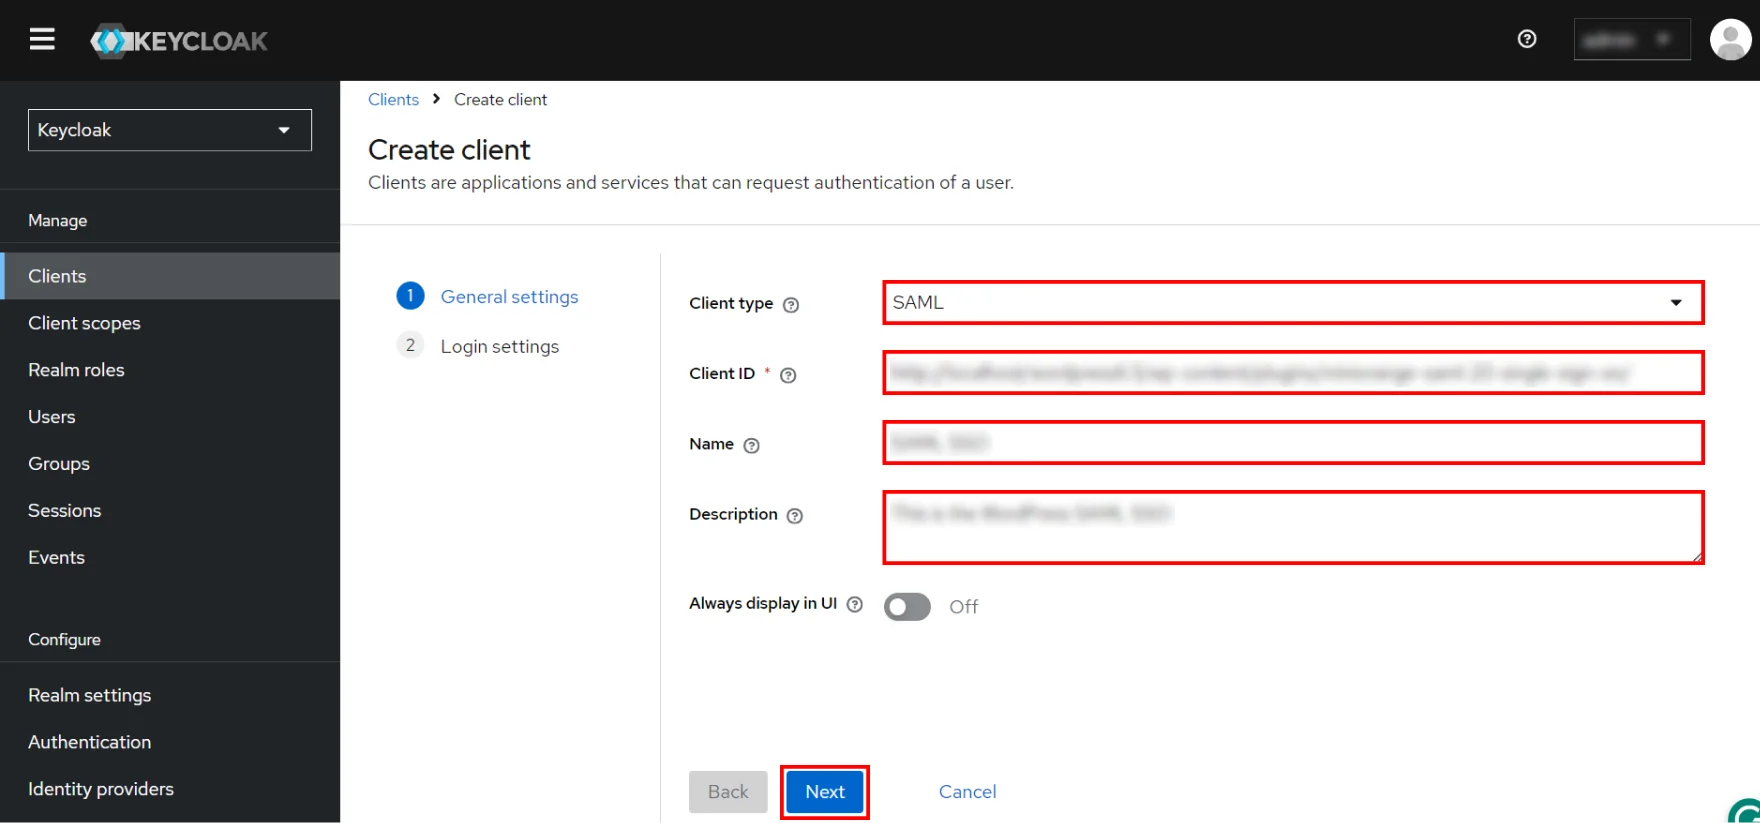
Select SAML as Client type, Enter
SP-EntityID / Issuer as the Client ID from the
"Service Provider Metadata" Tab,Enter Name of your application and
enter Description.
Now click on Save.
Configure Keycloak by providing the required details:
Client ID
The SP-EntityID / Issuer from the plugin's Service
Provider Metadata tab
Name
Provide a name for this client
Description
Provide a description
Client Signature Required
OFF
Force POST Binding
OFF
Force Name ID Format
OFF
Name ID Format
Email
Root URL
Leave empty or Provide Base URL from Service Provider
Metadata tab
Valid Redirect URIs
The ACS (Assertion Consumer Service) URL from the
plugin's Service Provider Metadata tab
Now click on Save.
In Advanced tab, under
Fine Grain SAML Endpoint Configuration, Enter the following
details:
Assertion Consumer Service POST Binding URL
The ACS (Assertion Consumer Service) URL from the
plugin's Service Provider Metadata tab
Logout Service Redirect Binding URL (Optional)
The Single Logout URL from the plugin's Service
Provider Metadata tab
Click on Save.
In your Keycloak Admin console, select the realm that you
want to use.
Click on Clients from the left menu and then click on
Create Client button to create a new client/application.
Select SAML as
Client type, Enter SP-EntityID / Issuer as the
Client ID from the Service Provider Metadata tab,
enter Name of your application and enter Description.
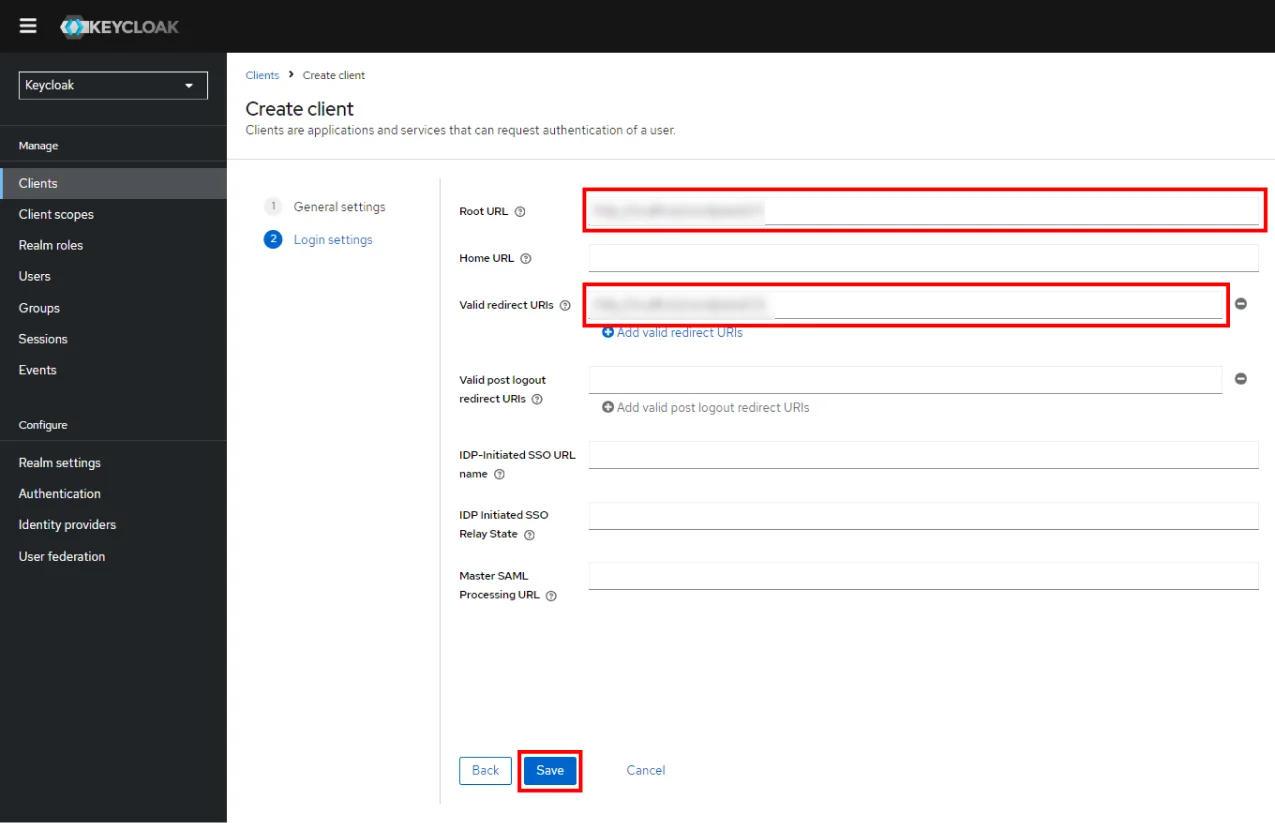
Click on the Next button.
Provide the details as mentioned below:
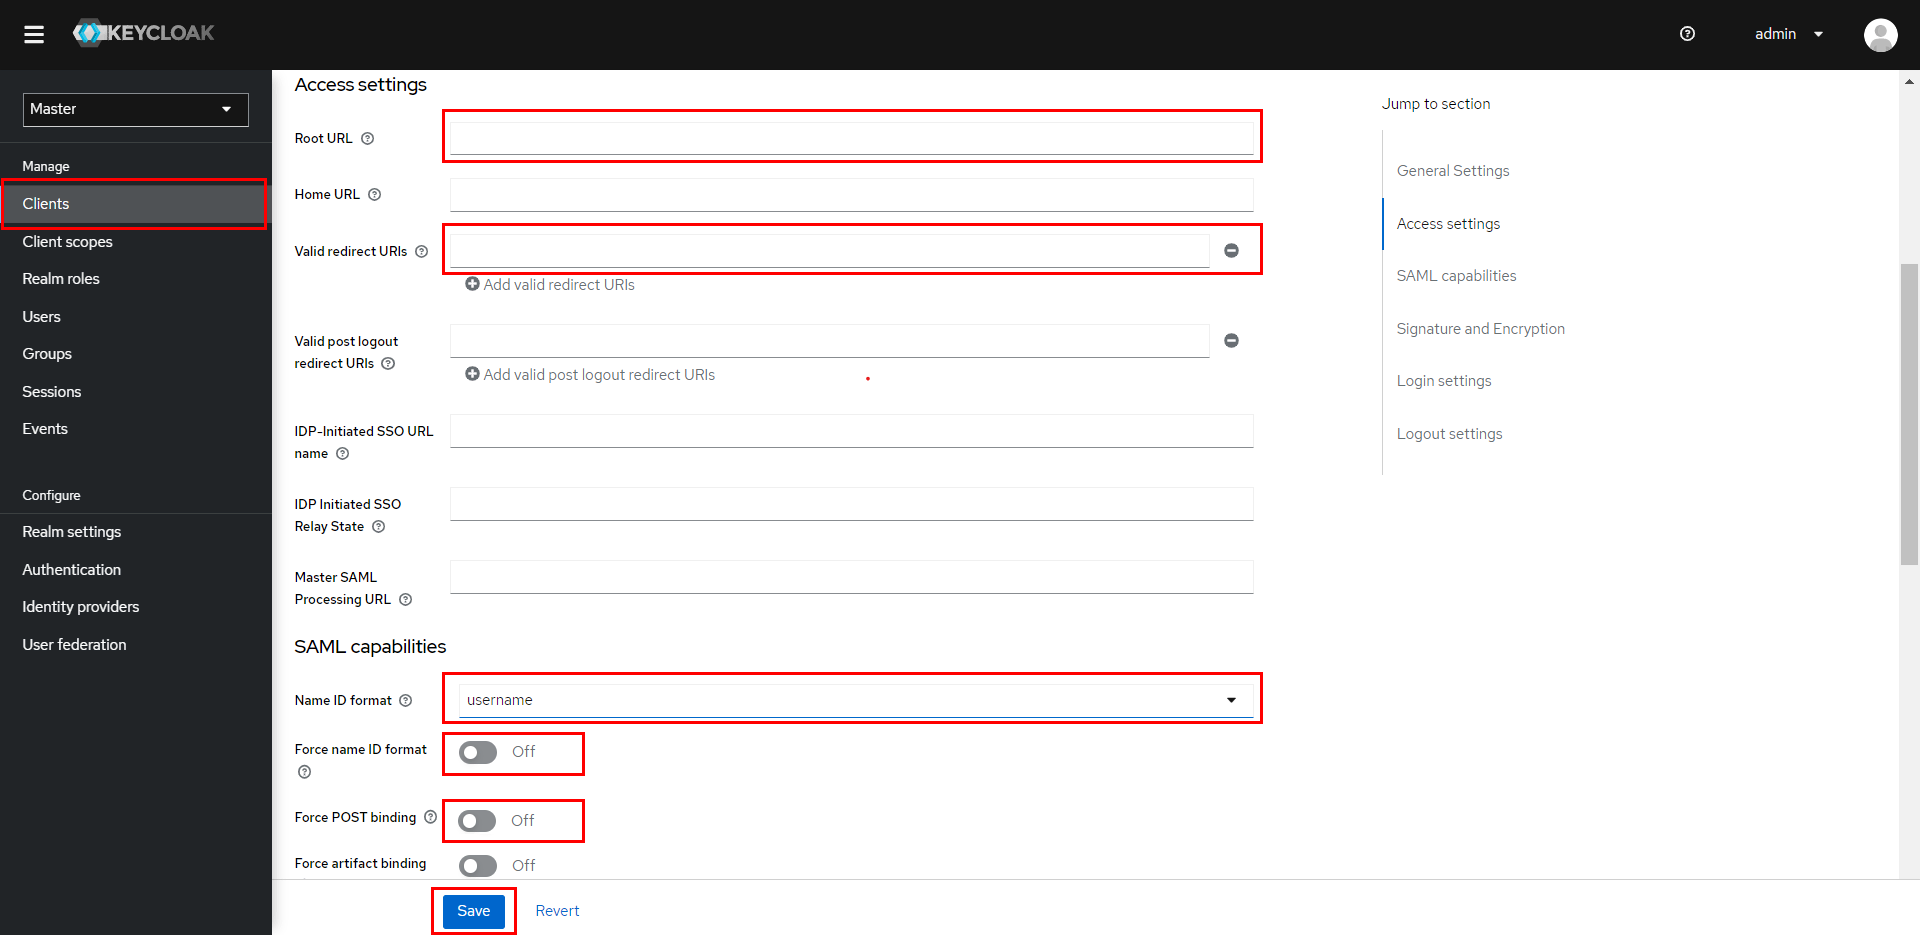
Root URL
Leave empty or provide Base URL from Service Provider
Metadata tab
Valid Redirect URIs
The ACS (Assertion Consumer Service) URL from the
plugin's Service Provider Metadata tab
Click on Save button.
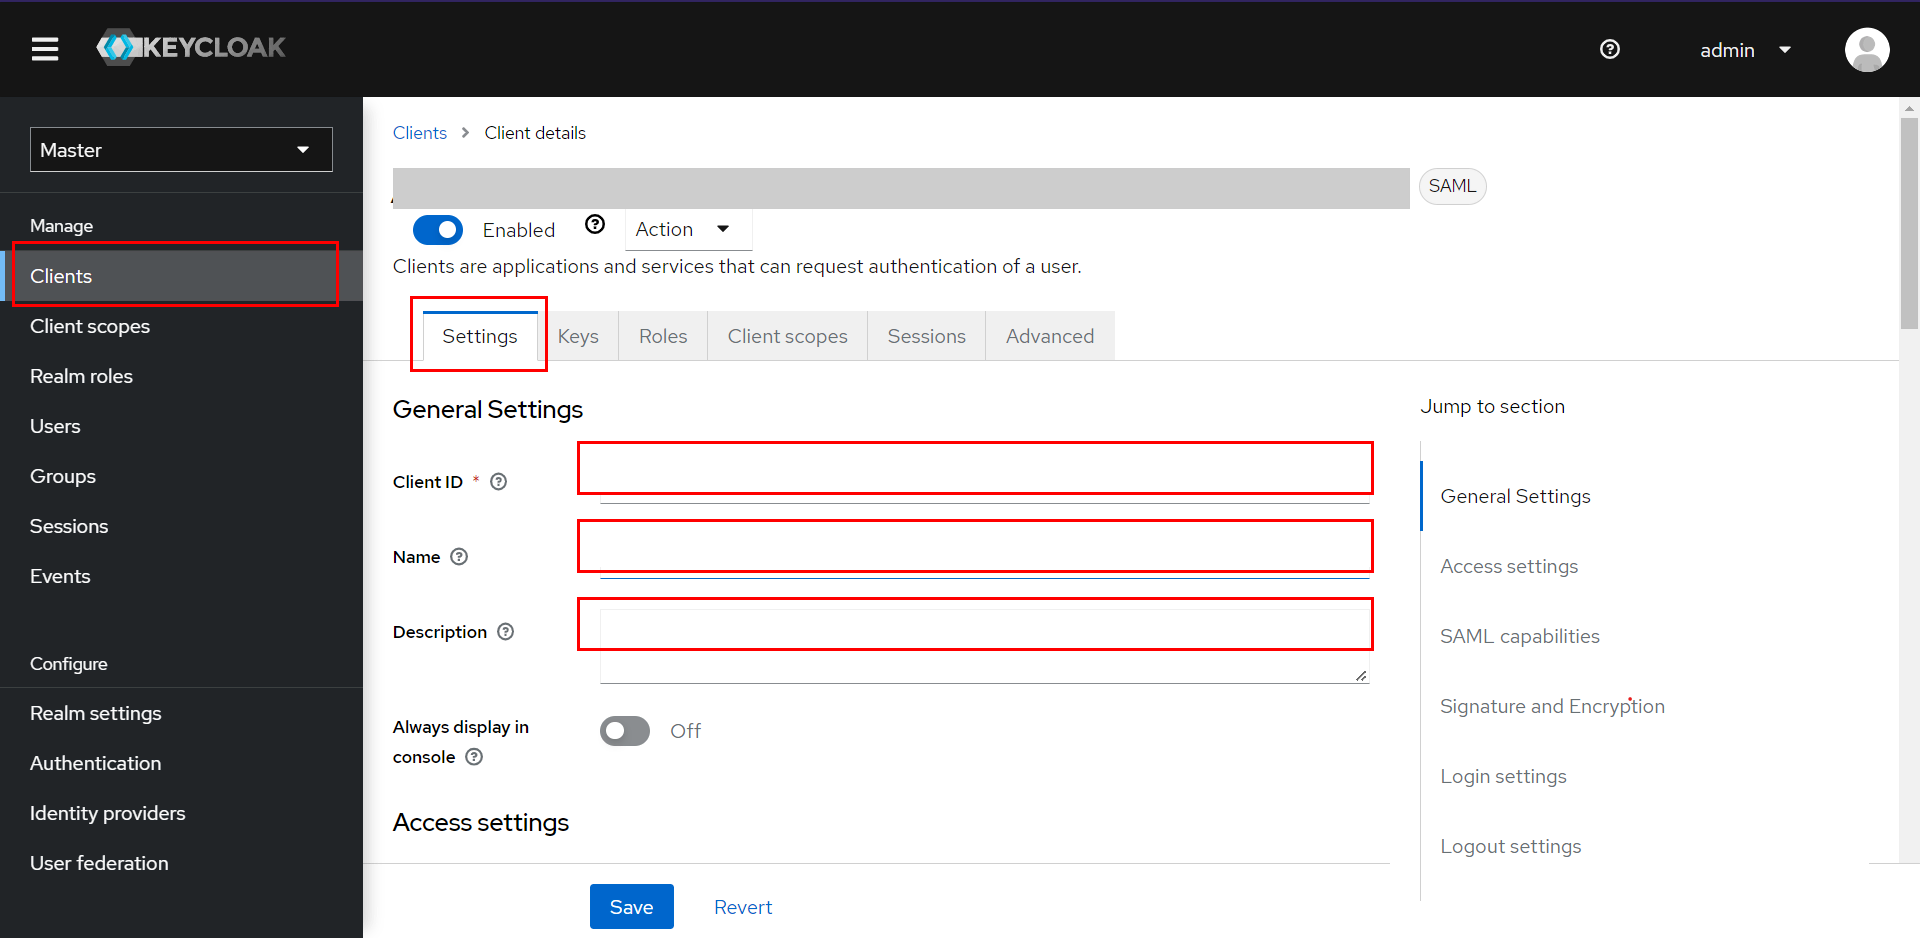
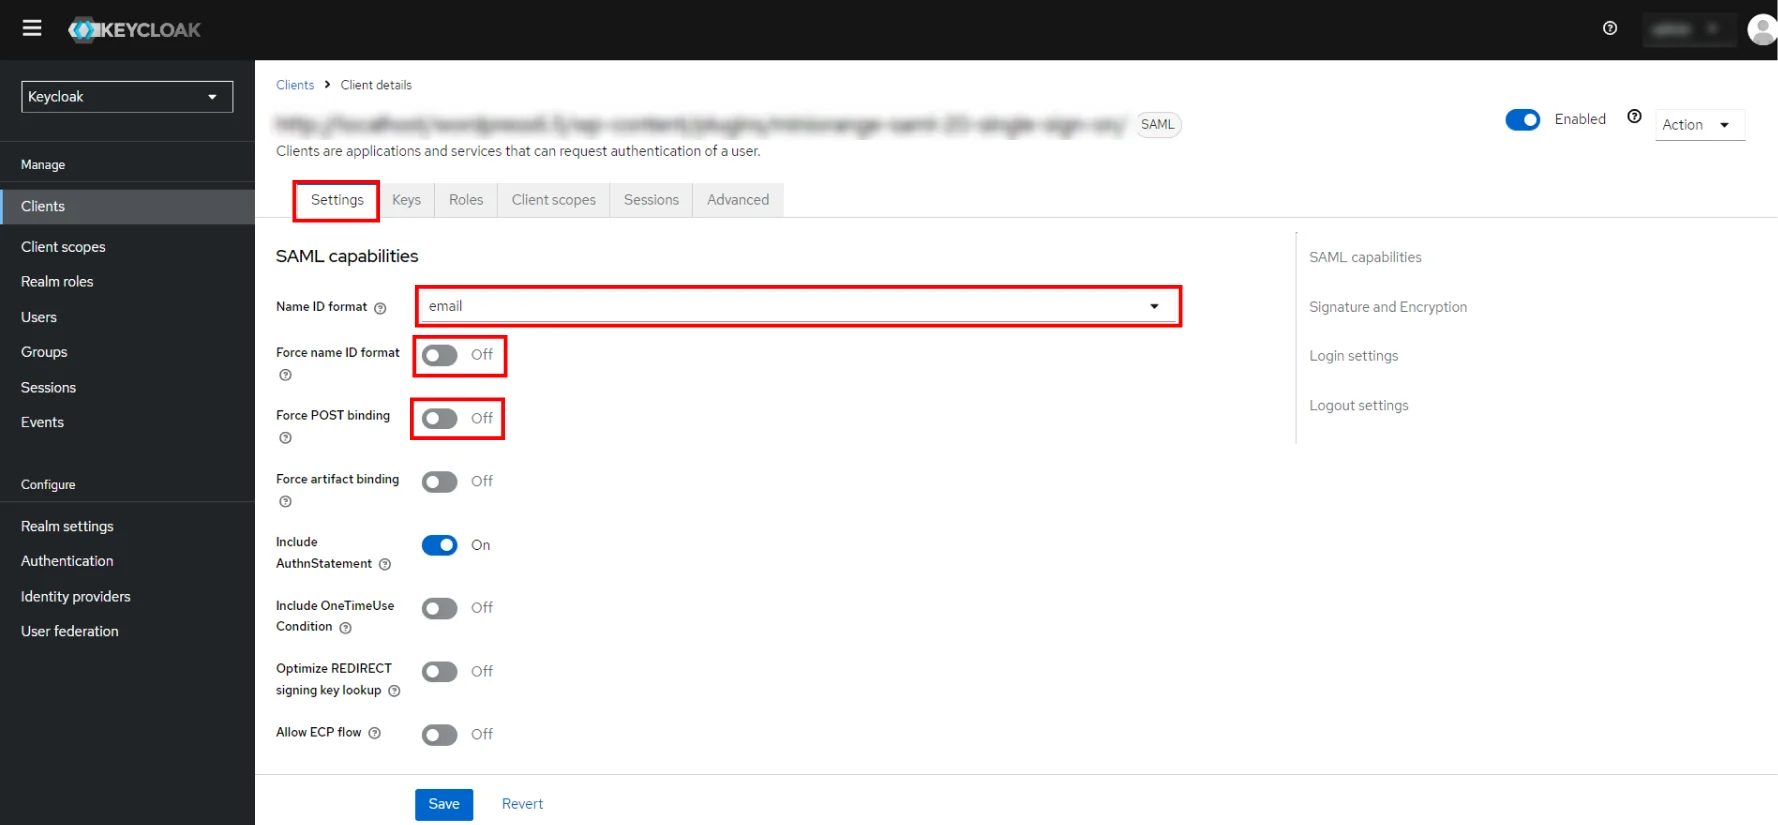
In the Settings tab under SAML capabilities section,
configure Keycloak by providing the required details:
Force POST Binding
OFF
Force Name ID Format
OFF
Name ID Format
Email
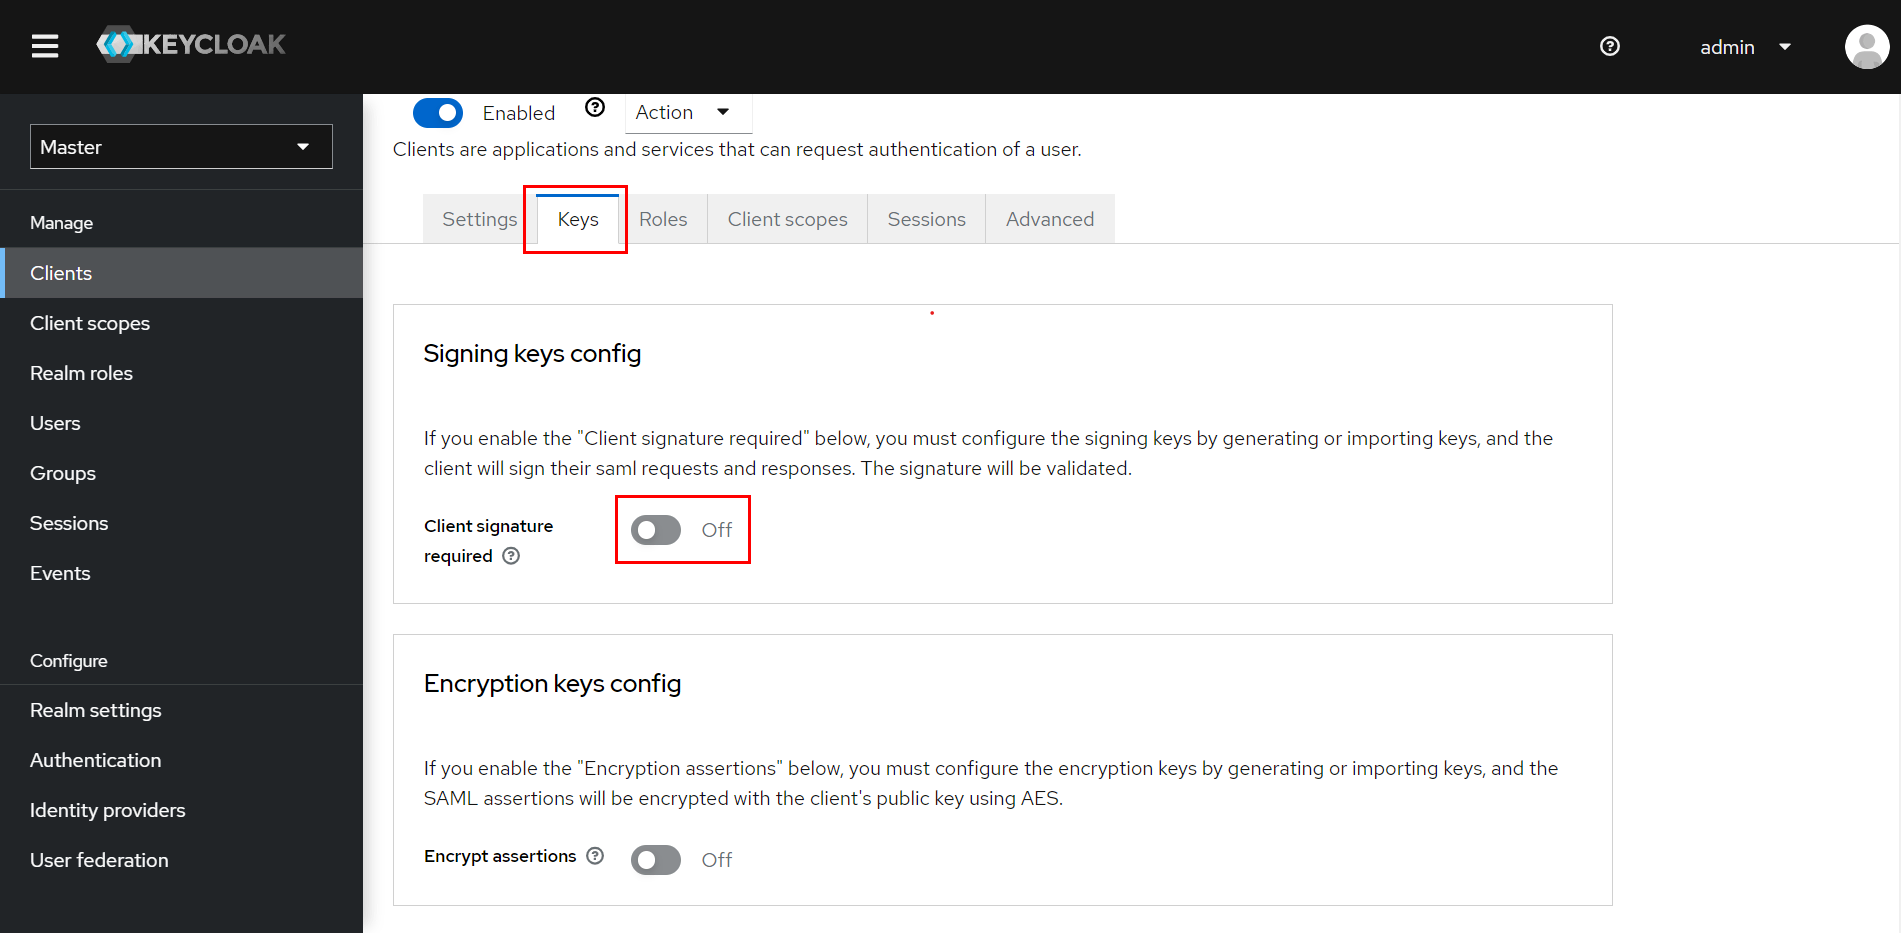
In the Keys tab, disable the
Client signature required toggle.
Click on the Save button.
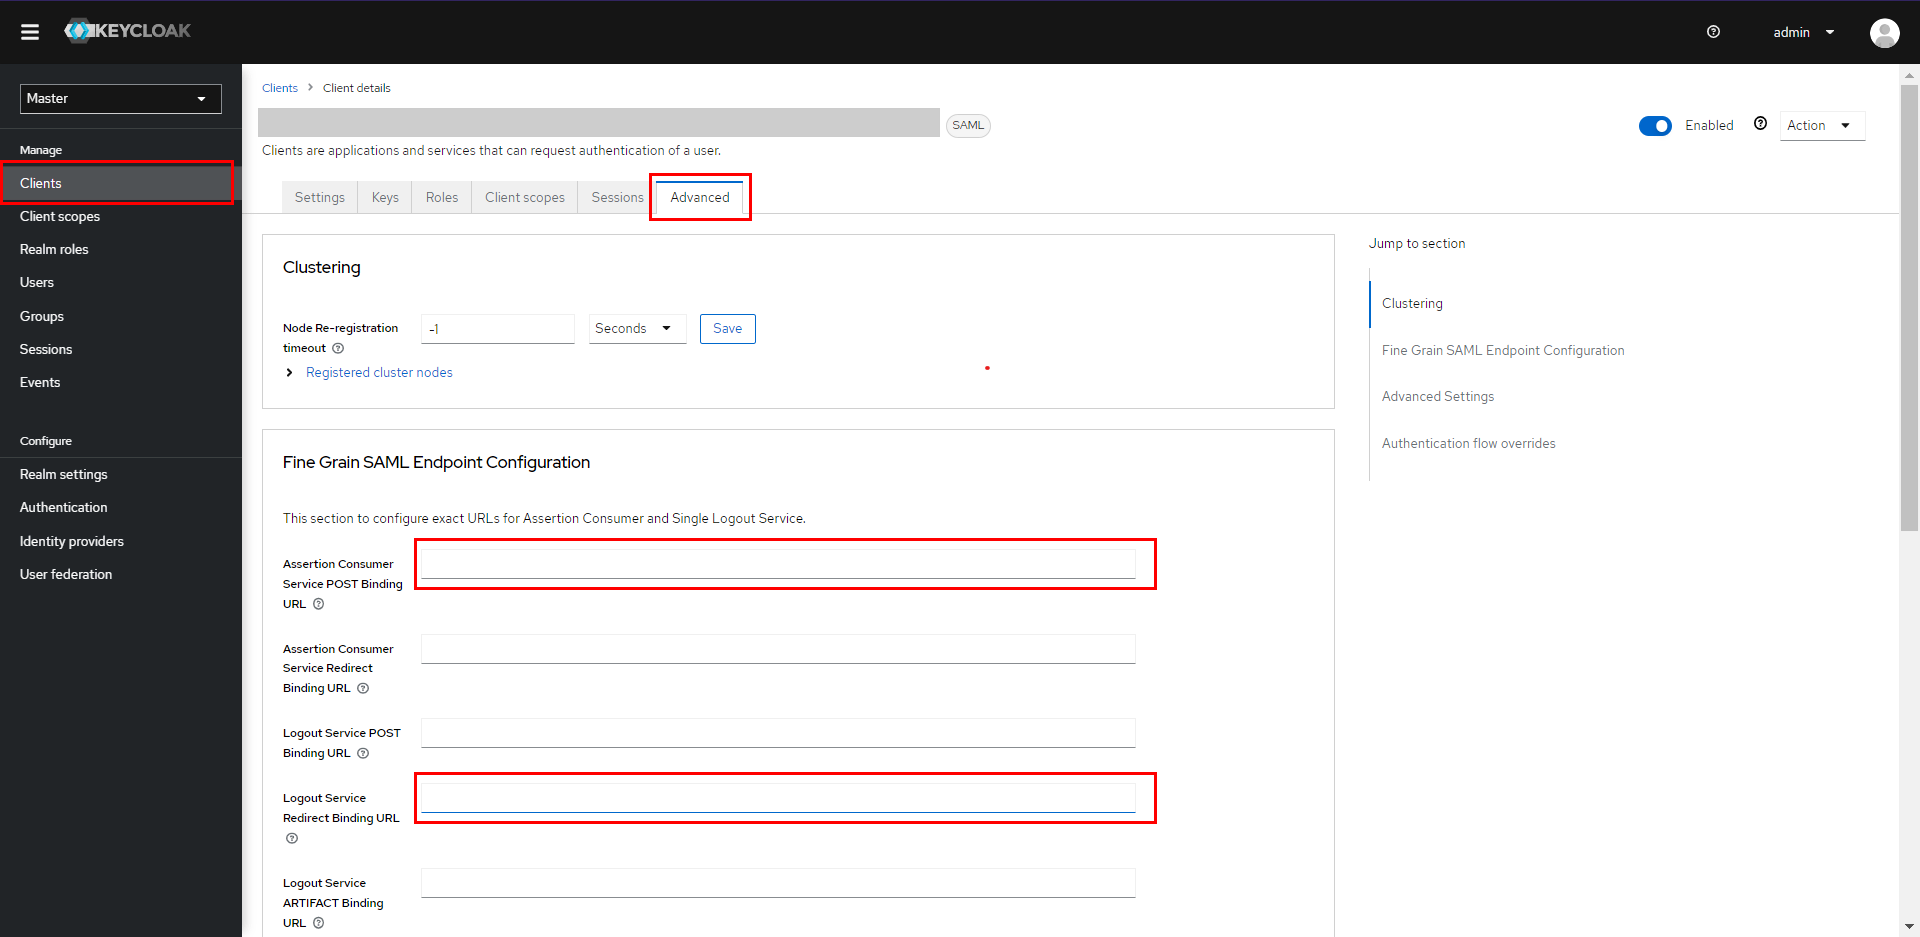
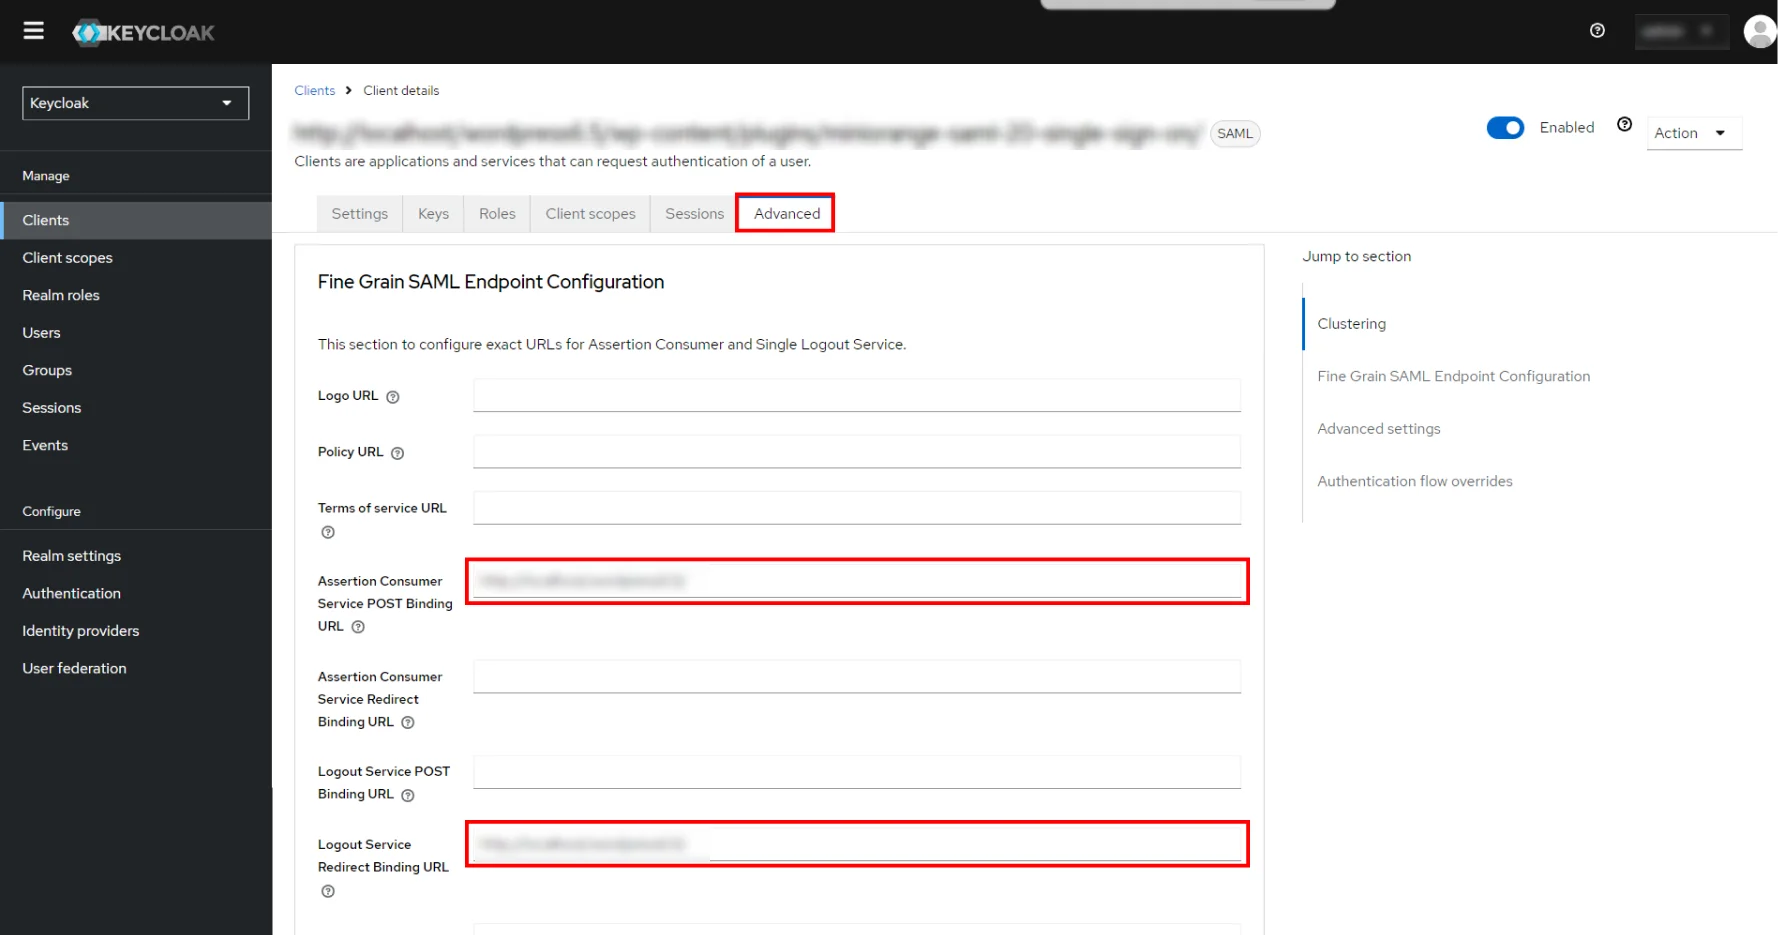
In Advanced tab, under
Fine Grain SAML Endpoint Configuration, enter the following
details:
Assertion Consumer Service POST Binding URL
The ACS (Assertion Consumer Service) URL from the
plugin's Service Provider Metadata tab
Logout Service Redirect Binding URL (Optional)
The Single Logout URL from the plugin's Service
Provider Metadata tab
Click on Save button.
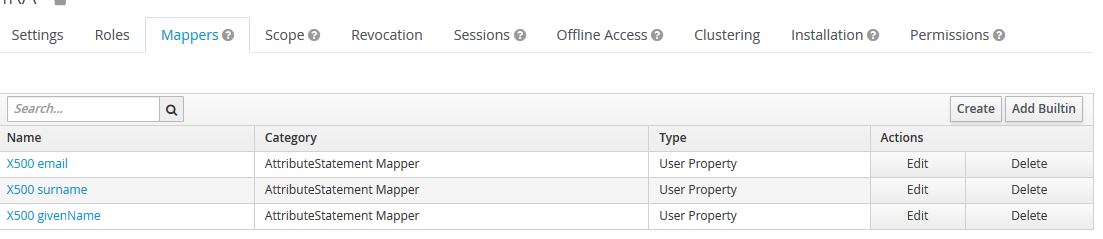
Add Mappers
Navigate to Mappers tab and click on
Add Builtin button.
Select the checkboxes of X500 givenName, X500 surname and
X500 email
attributes.
Click on Add Selected button. You will see the mappings that
are added below.
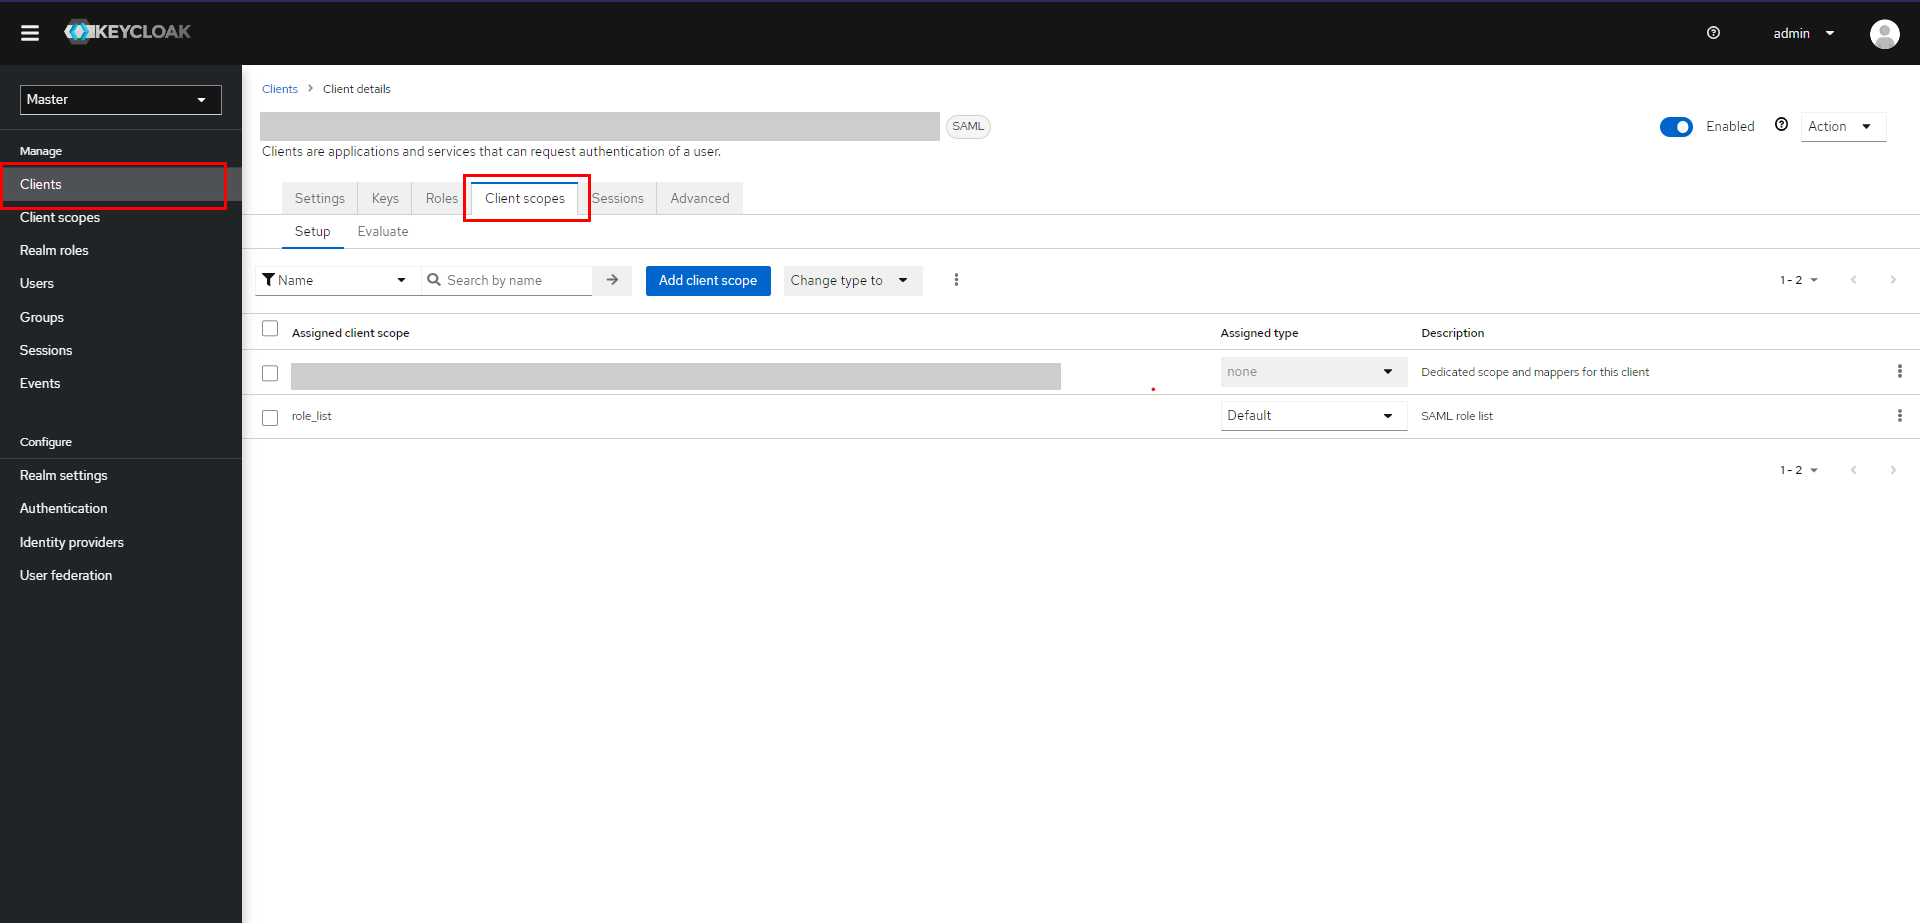
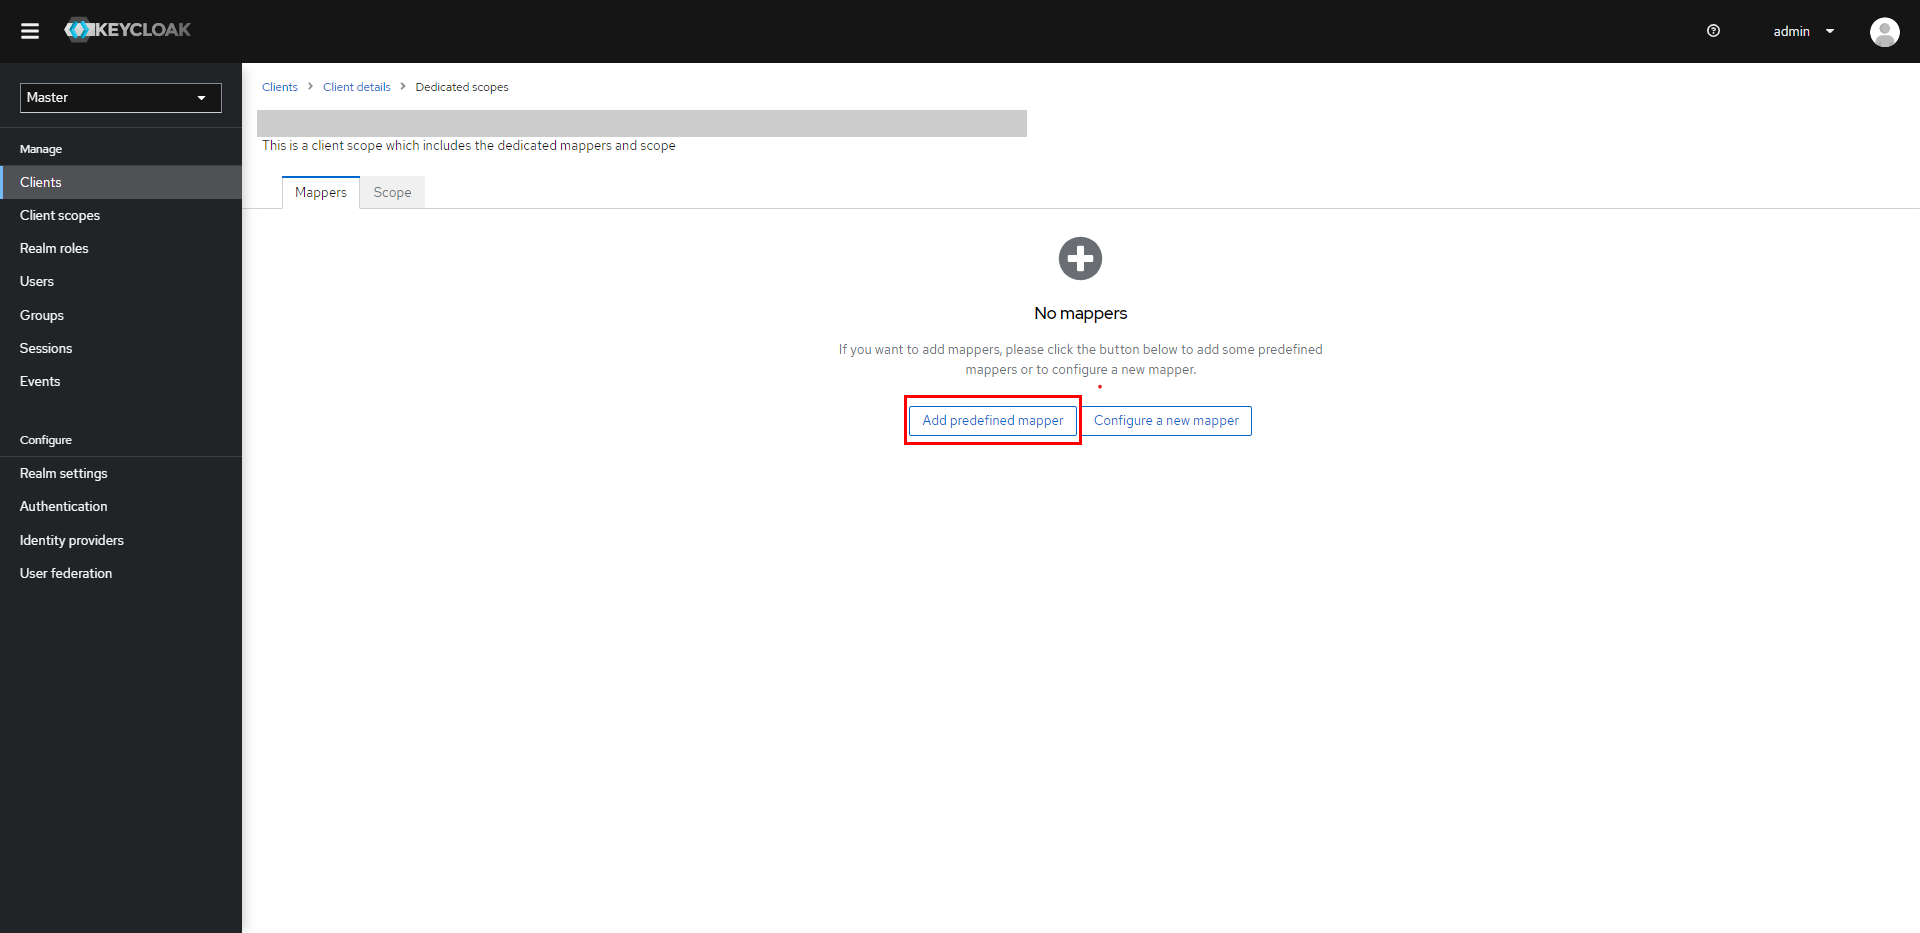
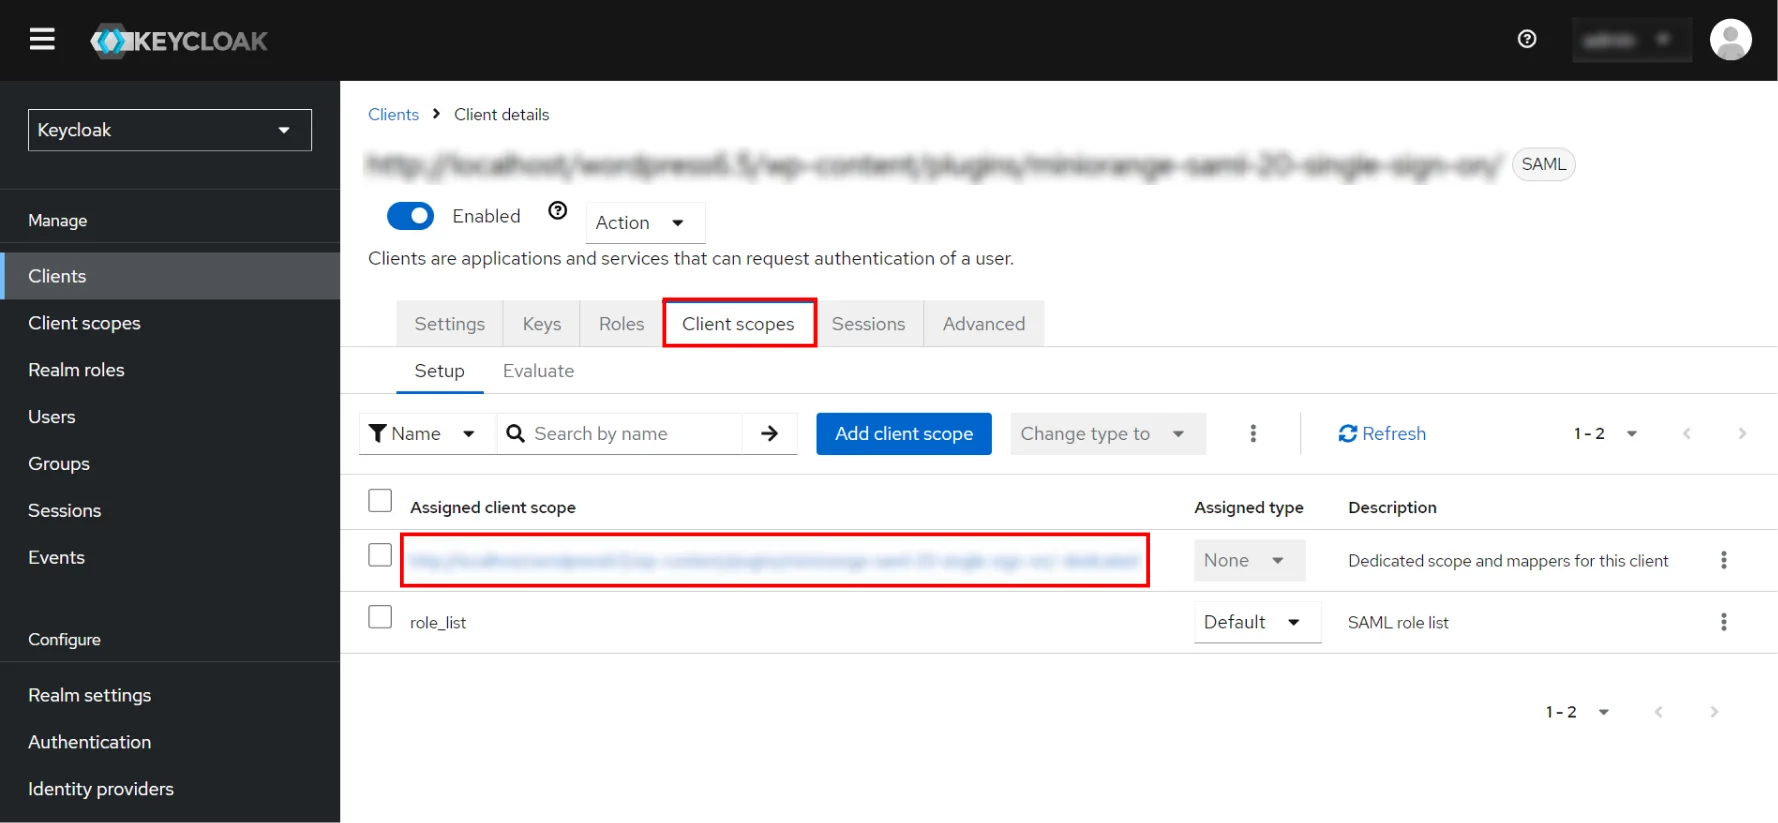
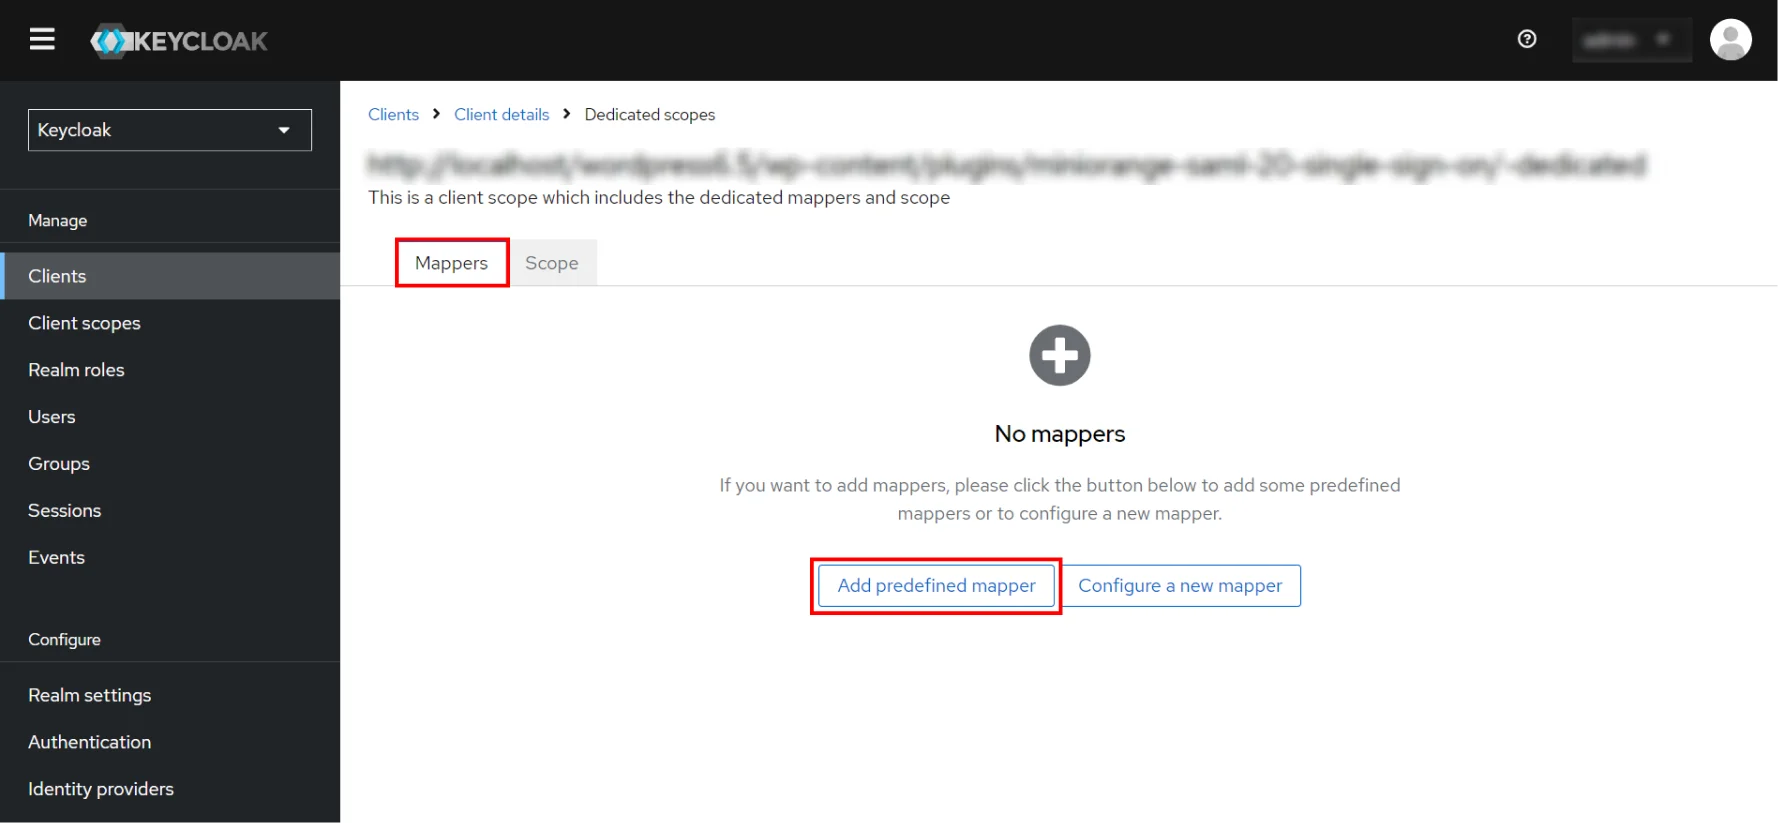
In Client scopes tab,click on your application.
Click on Add predefined mapper.
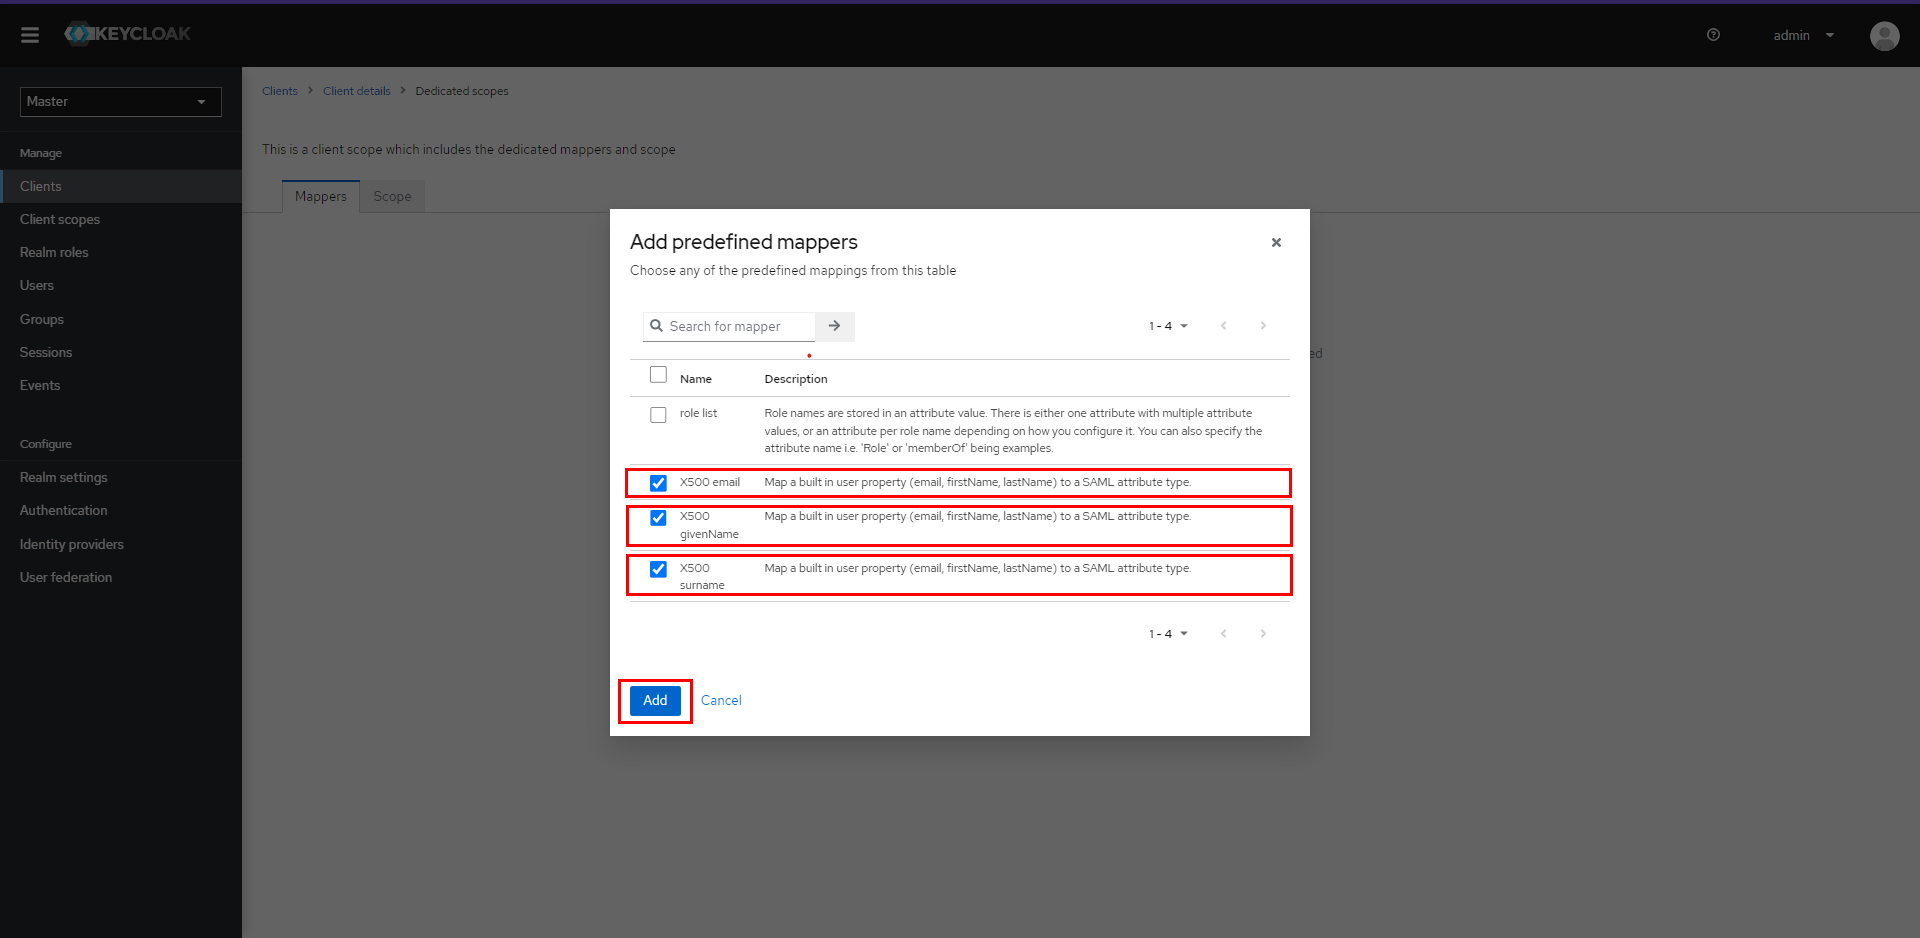
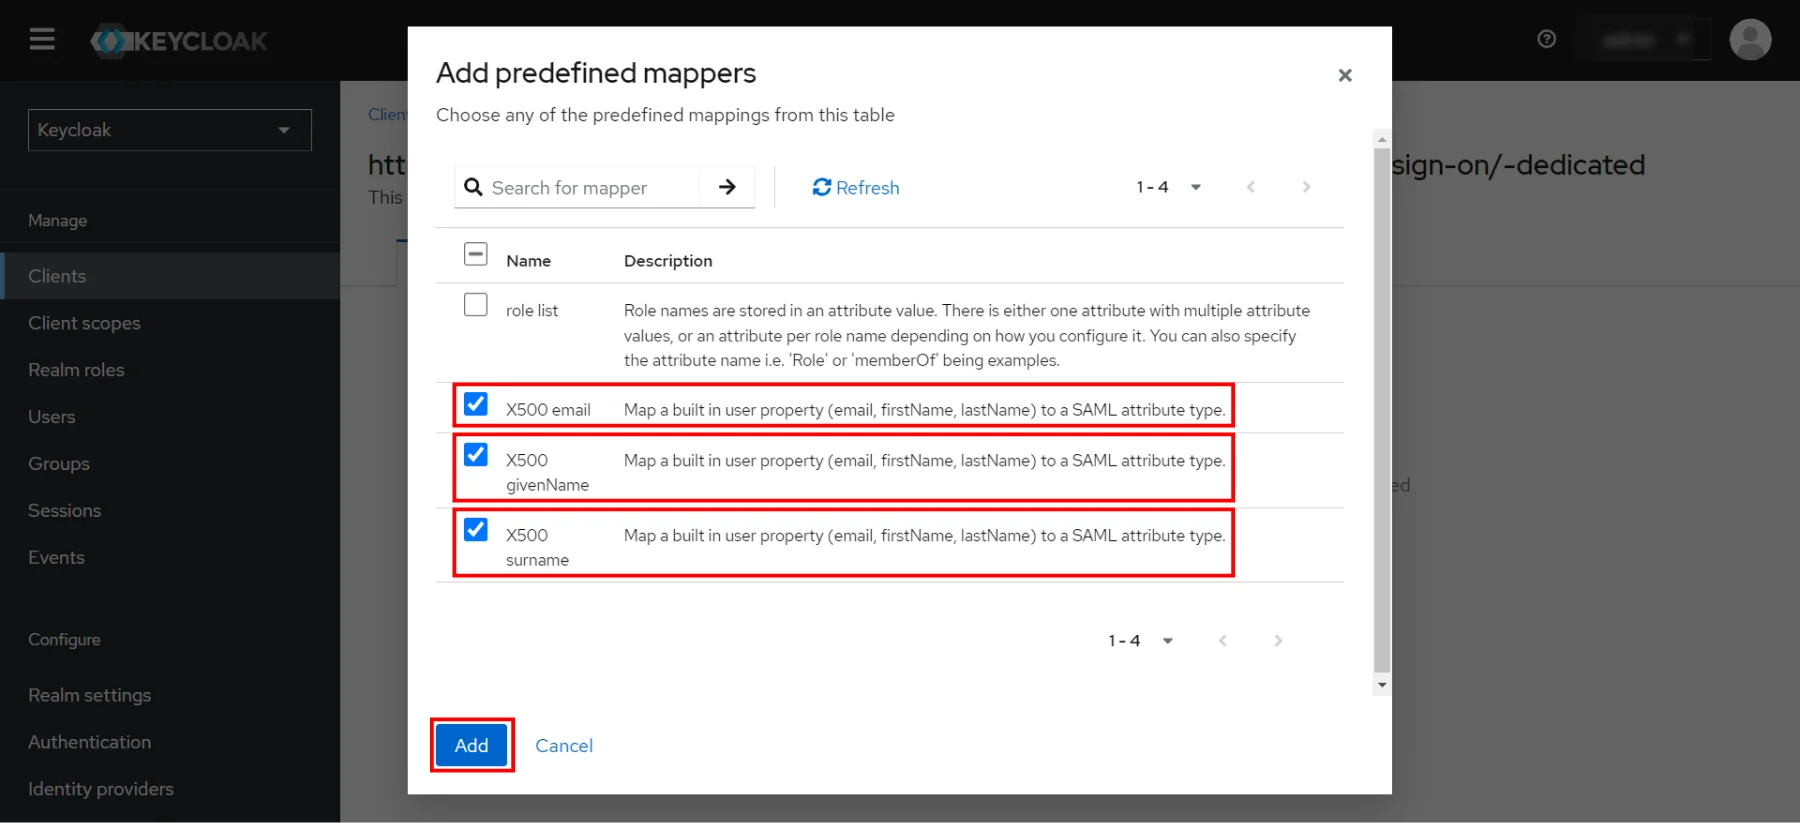
Select the checkboxes of X500 givenName, X500 surname and
X500 email
attributes.
Click on Add button.
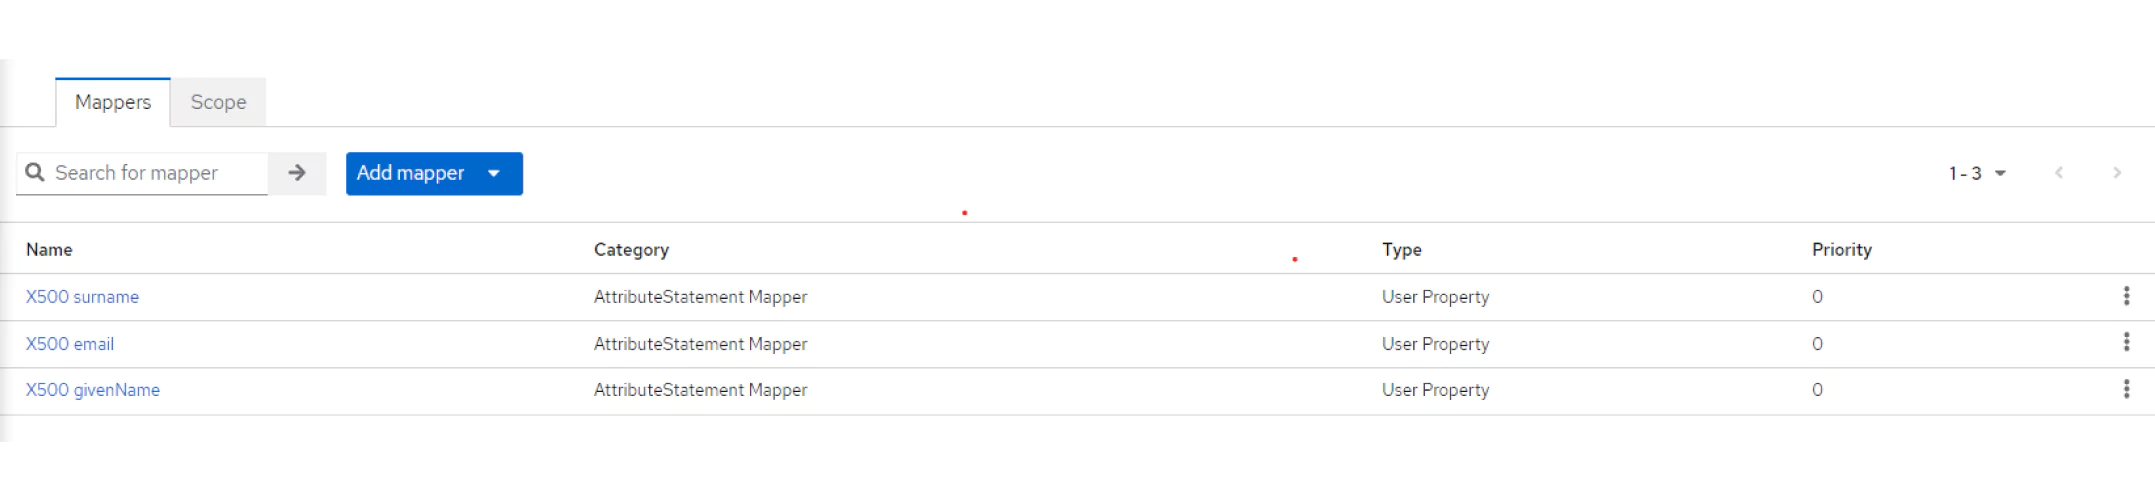
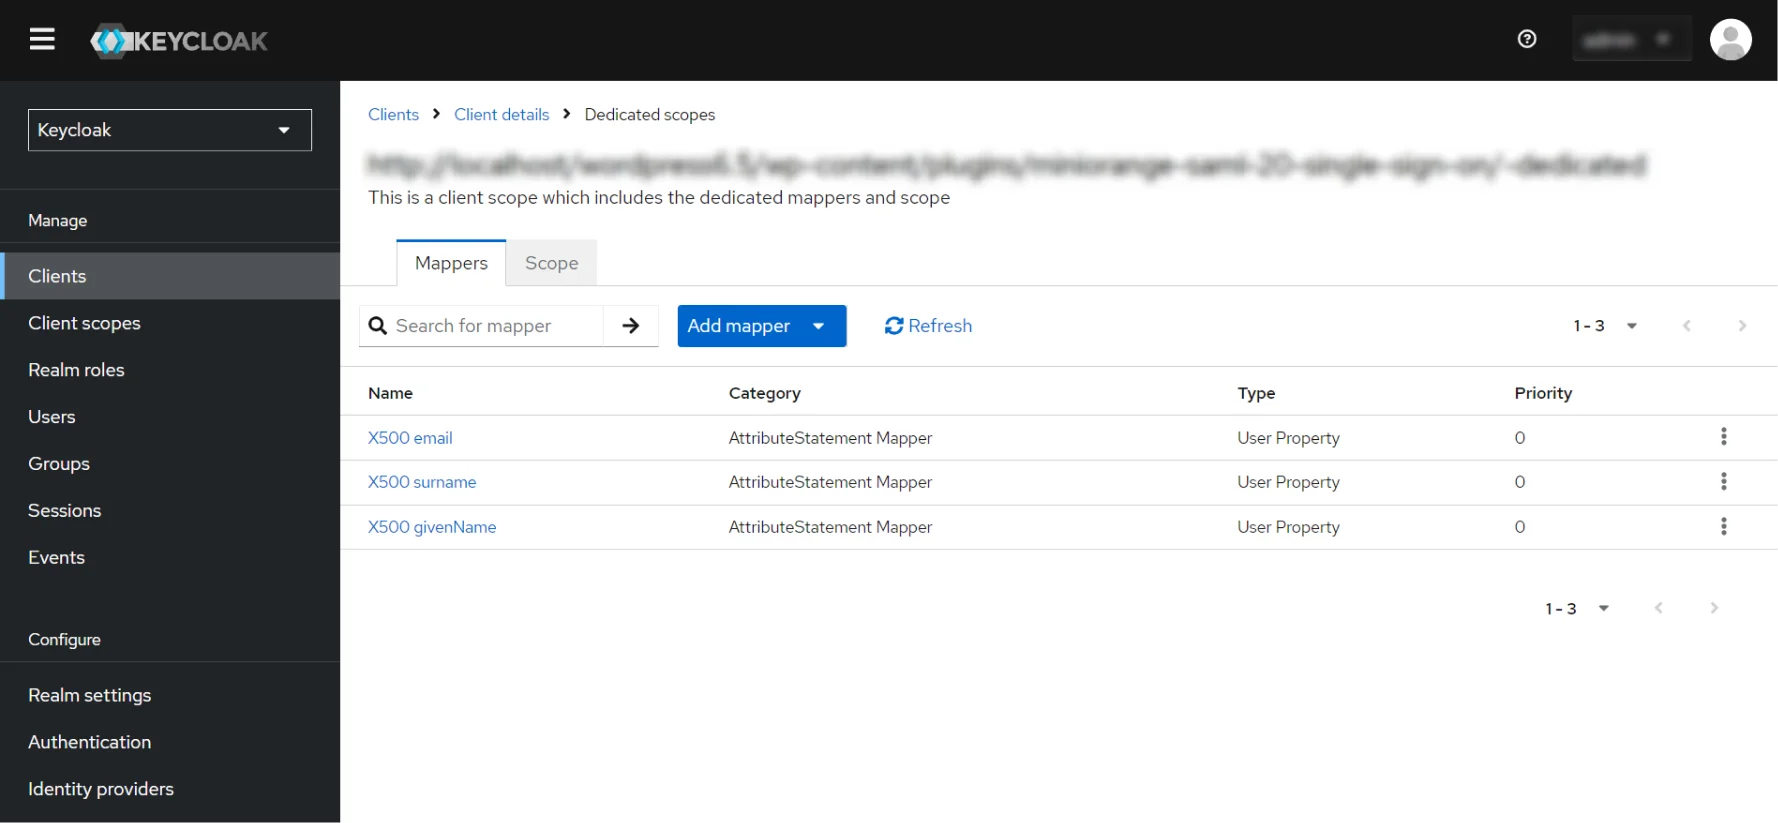
You will see the mappings that are added below.
In the Client scopes tab, click on your application.
Click on Add predefined mapper.
Select the checkboxes of X500 givenName, X500 surname and
X500 email
attributes.
Click on the Add button.
You will see the mappings that are added below.
Download setup file
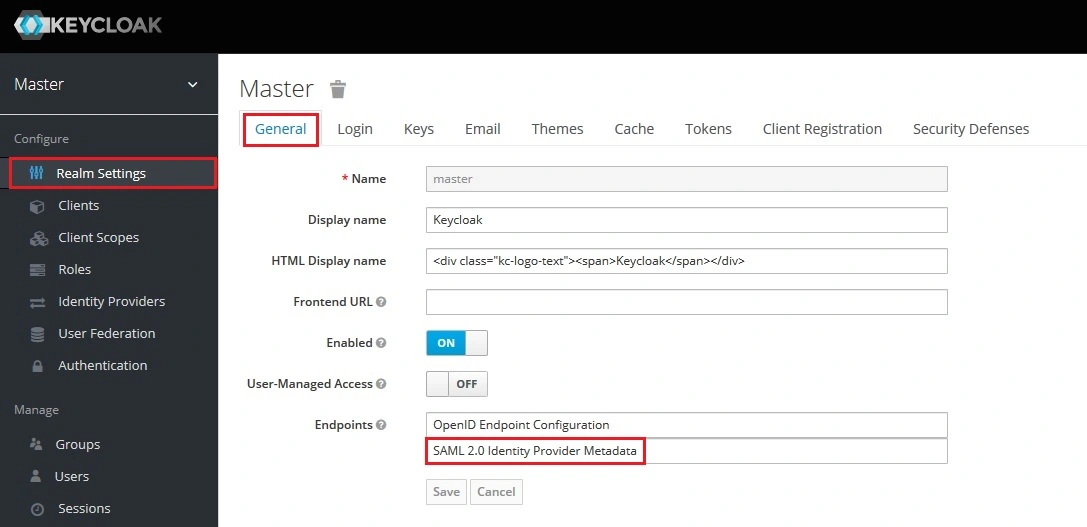
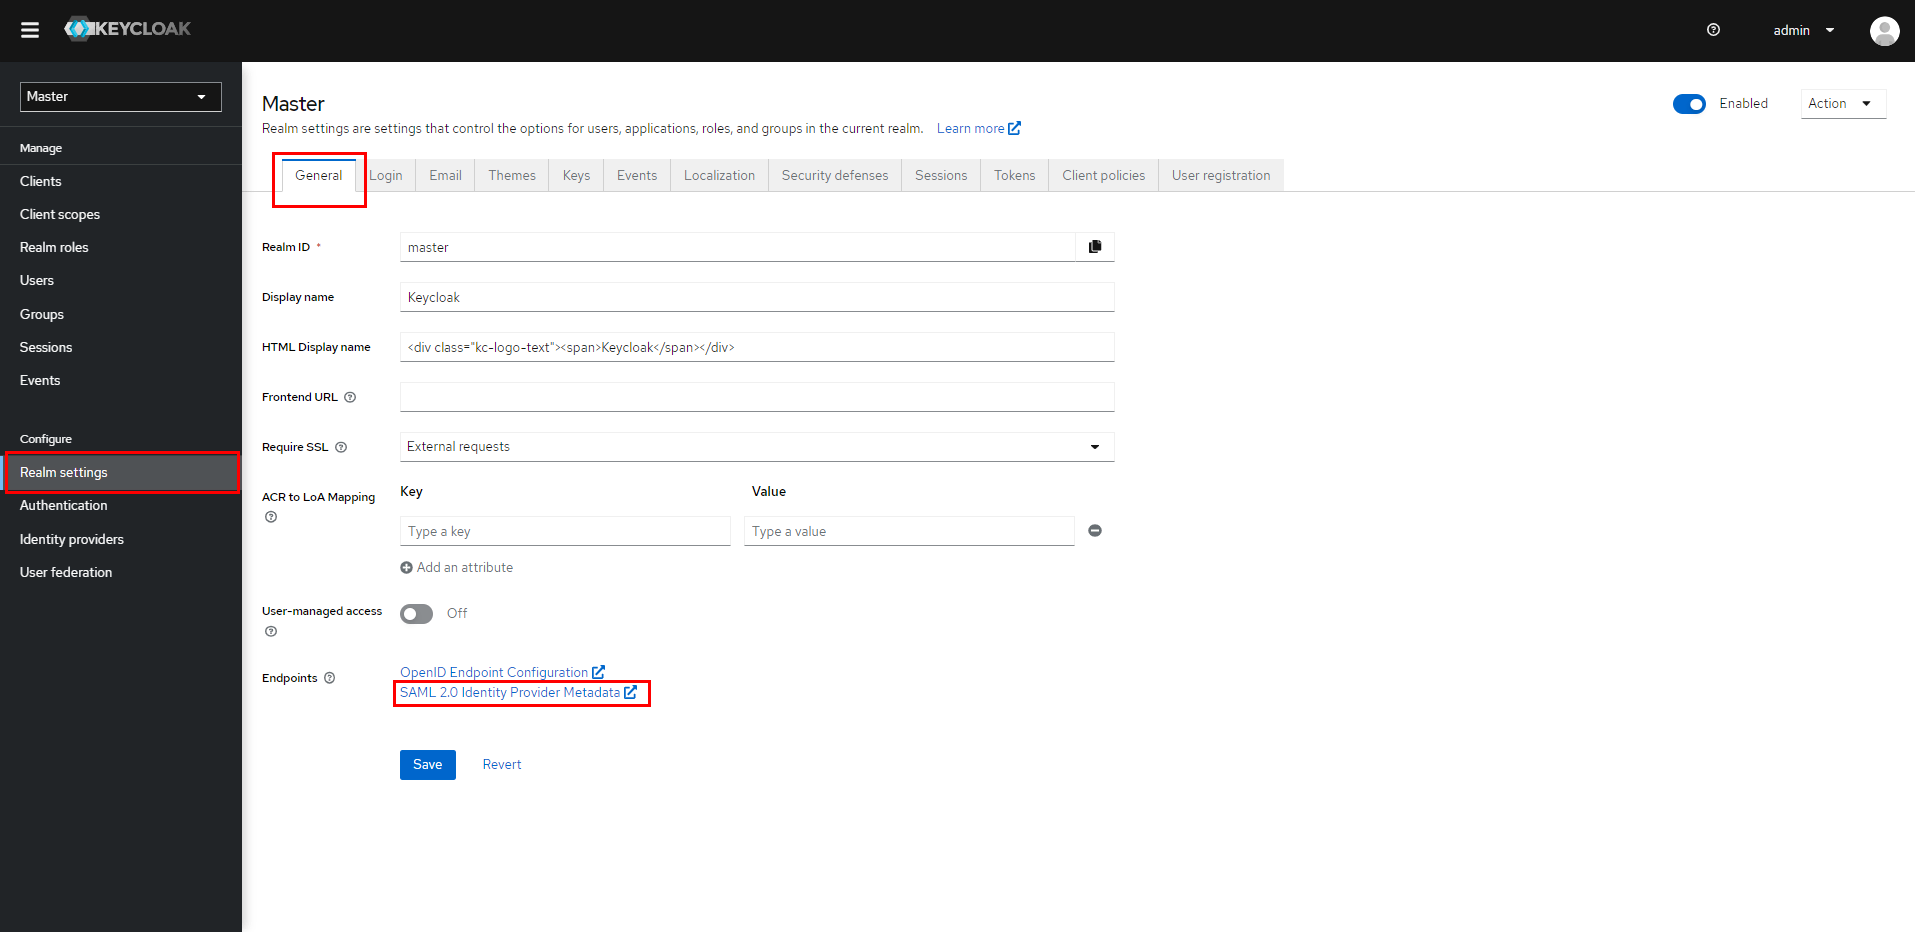
Navigate to Realm Settings, click on
SAML 2.0 Identity Provider Metadata mentioned as Endpoints in
the General Tab.
Note the URL and keep it handy. That will provide you with the
Endpoints required to configure the plugin.
Navigate to Realm Settings, click on
SAML 2.0 Identity Provider Metadata mentioned as Endpoints in
the General Tab.
Note the URL and keep it handy. That will provide you with the
Endpoints required to configure the plugin.
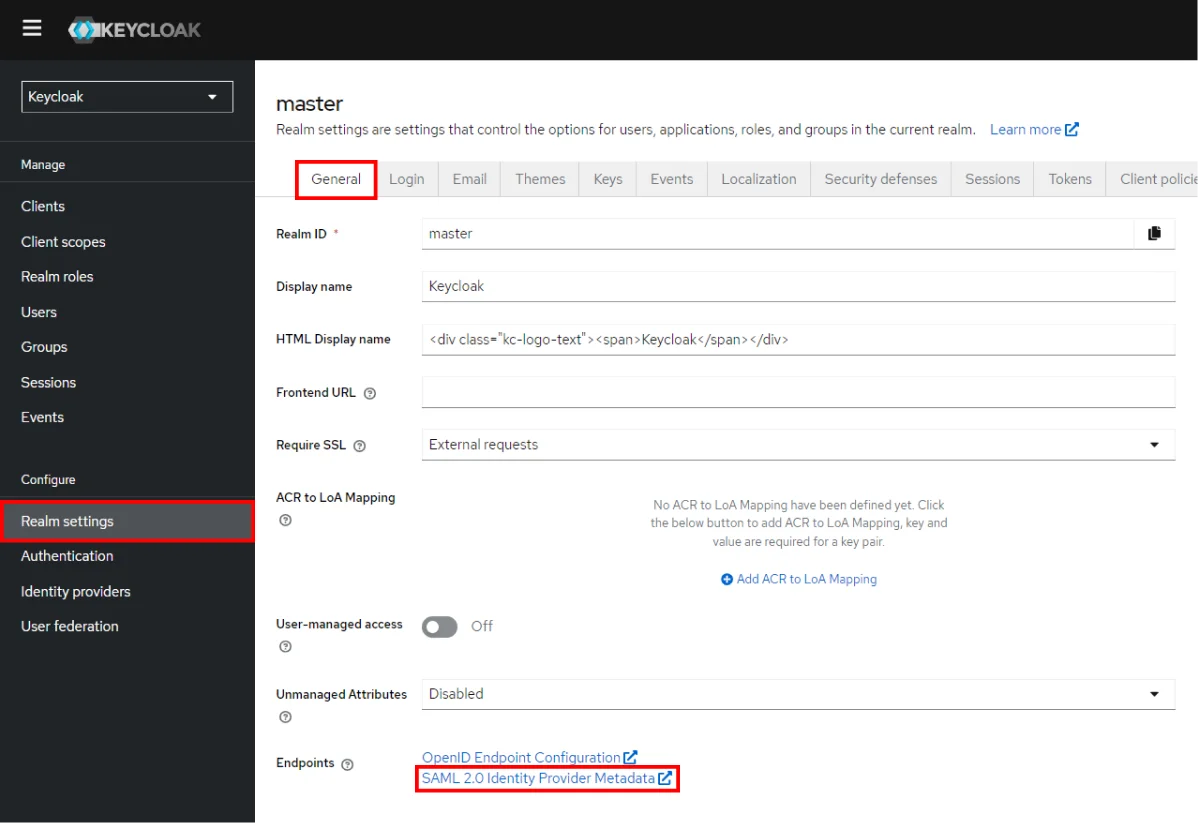
Navigate to Realm Settings, click on
SAML 2.0 Identity Provider Metadata mentioned as Endpoints in
the General tab.
Note the URL and keep it handy. That will provide you with the
Endpoints required to configure the plugin.
 Configure Keycloak as IdP