Step 2: Setup Nexus as Service Provider
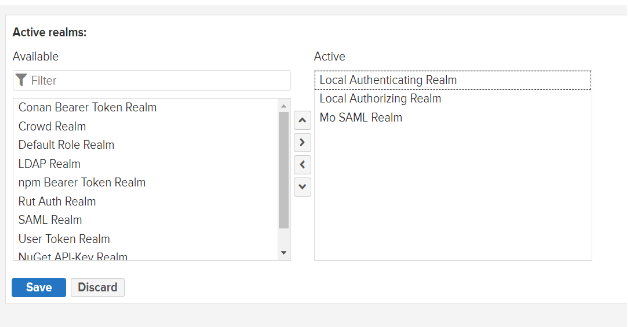
- Log into Nexus as administrator and go to Administration >> Security >> Realms page.
- To activate the Mo SAML Realm move the realm from the Available list to the Active list and save the changes.
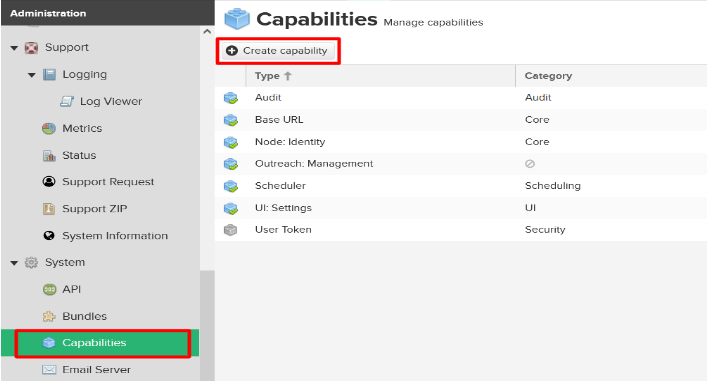
- Once the Mo SAML Realm is active, go to the Administration >> System >> Capabilities page and click on the Create capability button.
- Find and select miniOrange SAML SSO capability and scroll to the bottom of the page.
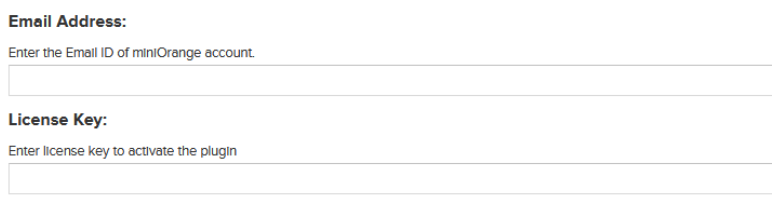
- You’ll find the fields for Email Address and License Key. Enter your email and the license key provided by miniOrange, and then proceed to configure the rest of the plugin.
- You can find SP metadata for Nexus SAML plugin at : <nexus_base_url>/service/rest/v1/security/mosaml/metadata
- After adding SP application on IDP, you’ll receive below IDP metadata details:
- Enter these IDP details into respective fields on miniOrange SAML SSO capability page, and save the settings.
- On the miniOrange SAML SSO capability page, scroll to the Attribute Mapping section.
- Provide the attribute name for below fields, which will be receiving from the IDP:
- Now scroll down to the Group Mapping section and provide the group attribute name receiving from the IDP and then save the settings.
2.1: Activating the Nexus SAML Plugin
Note: Please note that the realm order in the Active box
determines the order of the realms in your authentication flow. We recommend putting
Mo SAML Realm after the built-in realm.
2.2: Configuring IDP details in Nexus SAML
1. IDP Entity ID
2. IDP SSO URL
3. IDP X.509 Certificate
2. IDP SSO URL
3. IDP X.509 Certificate

2.3: User Profile and Group Mapping Configuration
1. Username
2. Email
3. Display name
2. Email
3. Display name