Step 1: Set Up Facebook as OAuth Provider
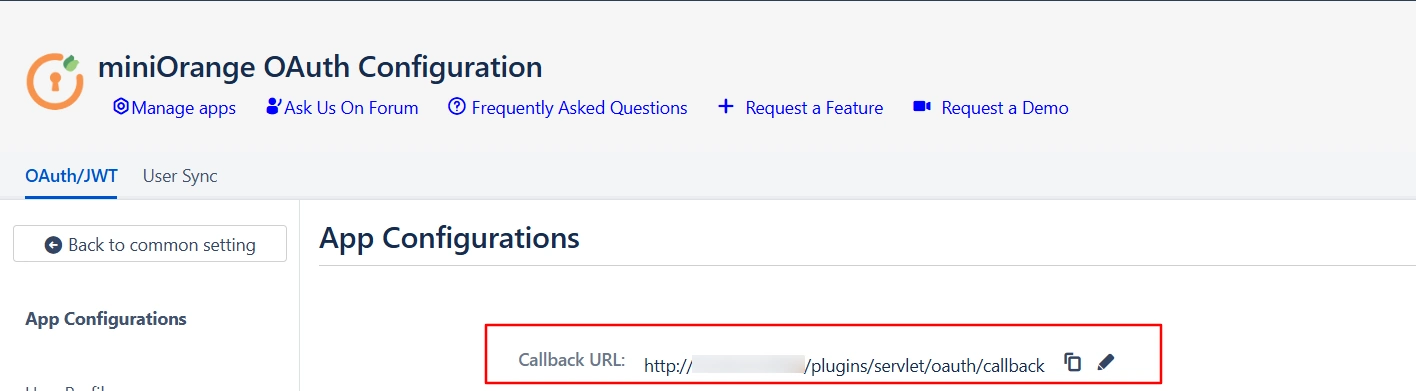
- Navigate to the plugin configuration page, click the "Add New Provider" button (located either in the middle or top-right corner), select Facebook as the application, and copy the callback URL from the plugin and keep it handy, as you'll need it to configure Facebook as the OAuth provider.
- To perform SSO with Facebook as Provider, your application must be https enabled.
- Login to Facebook Developers: Go to Facebook Developers and login with your account. Select My Apps from the menu:
- Click on Create App and select For Everything Else option.
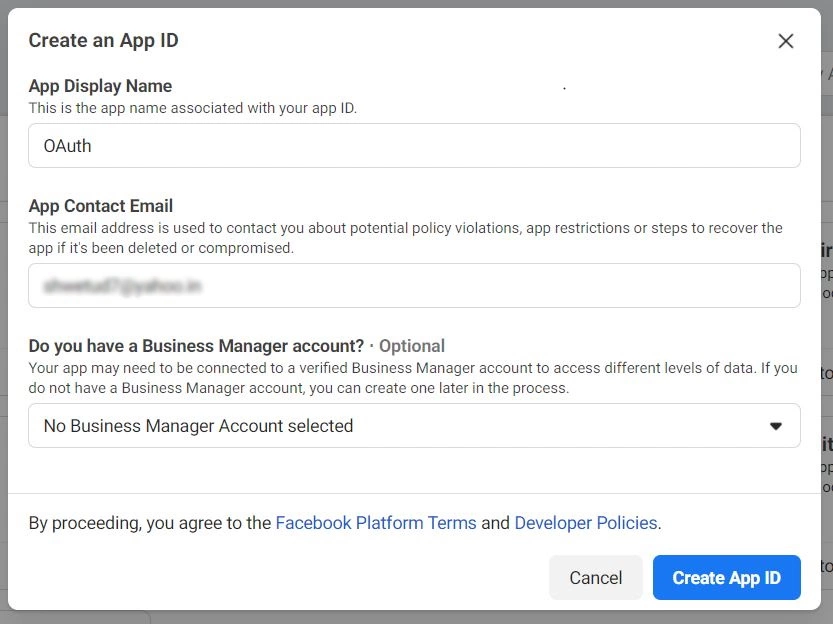
- Name your application : Provide a Display Name and Contact Email for your app and then click Create App ID button.
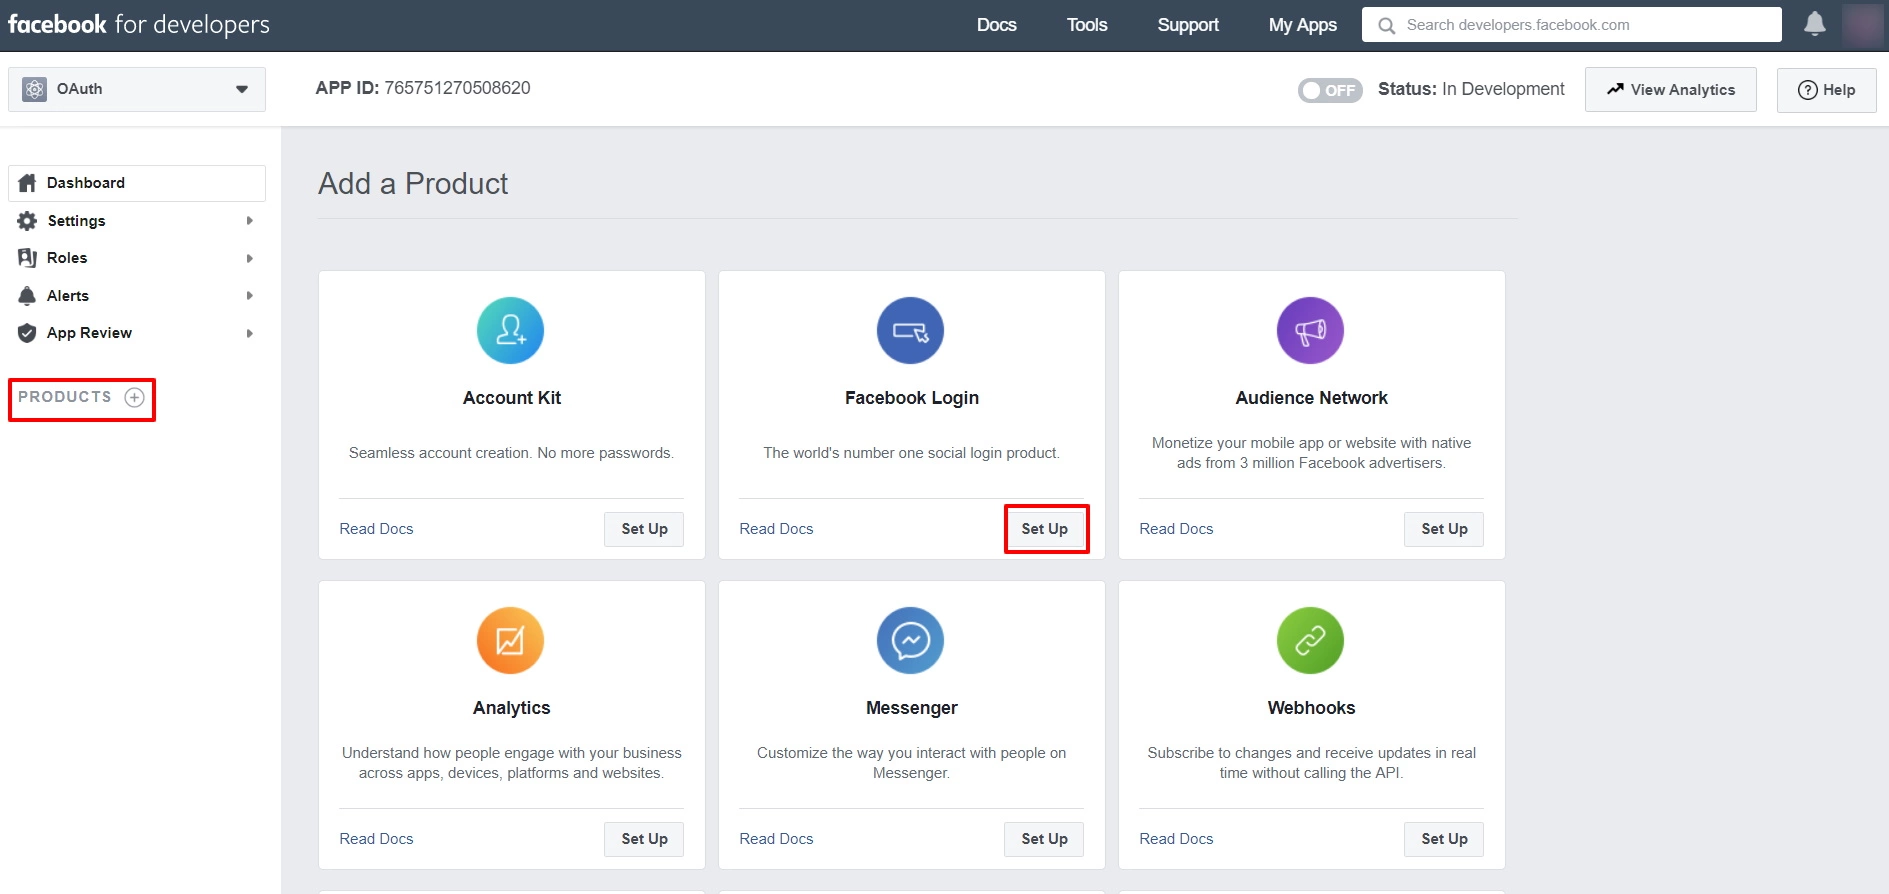
- Setup Facebook Login : On the PRODUCTS page that follows, click on Set Up next to Facebook Login.
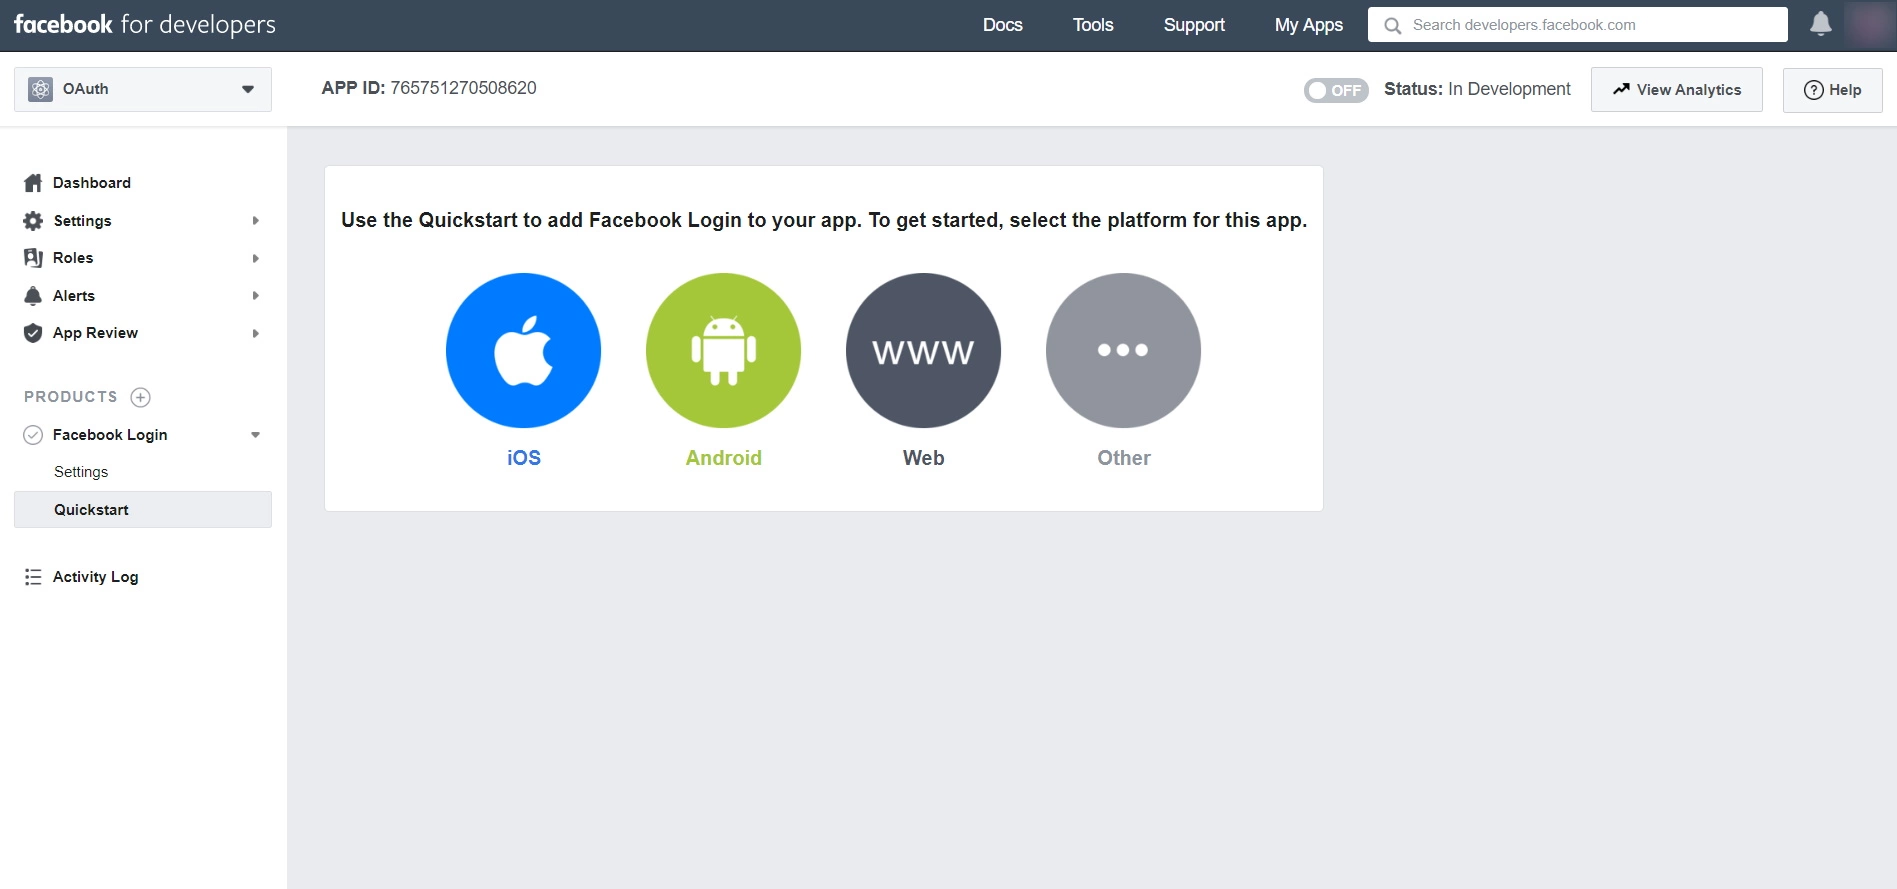
- Next choose the type of application, for this tutorial we have selected Web.
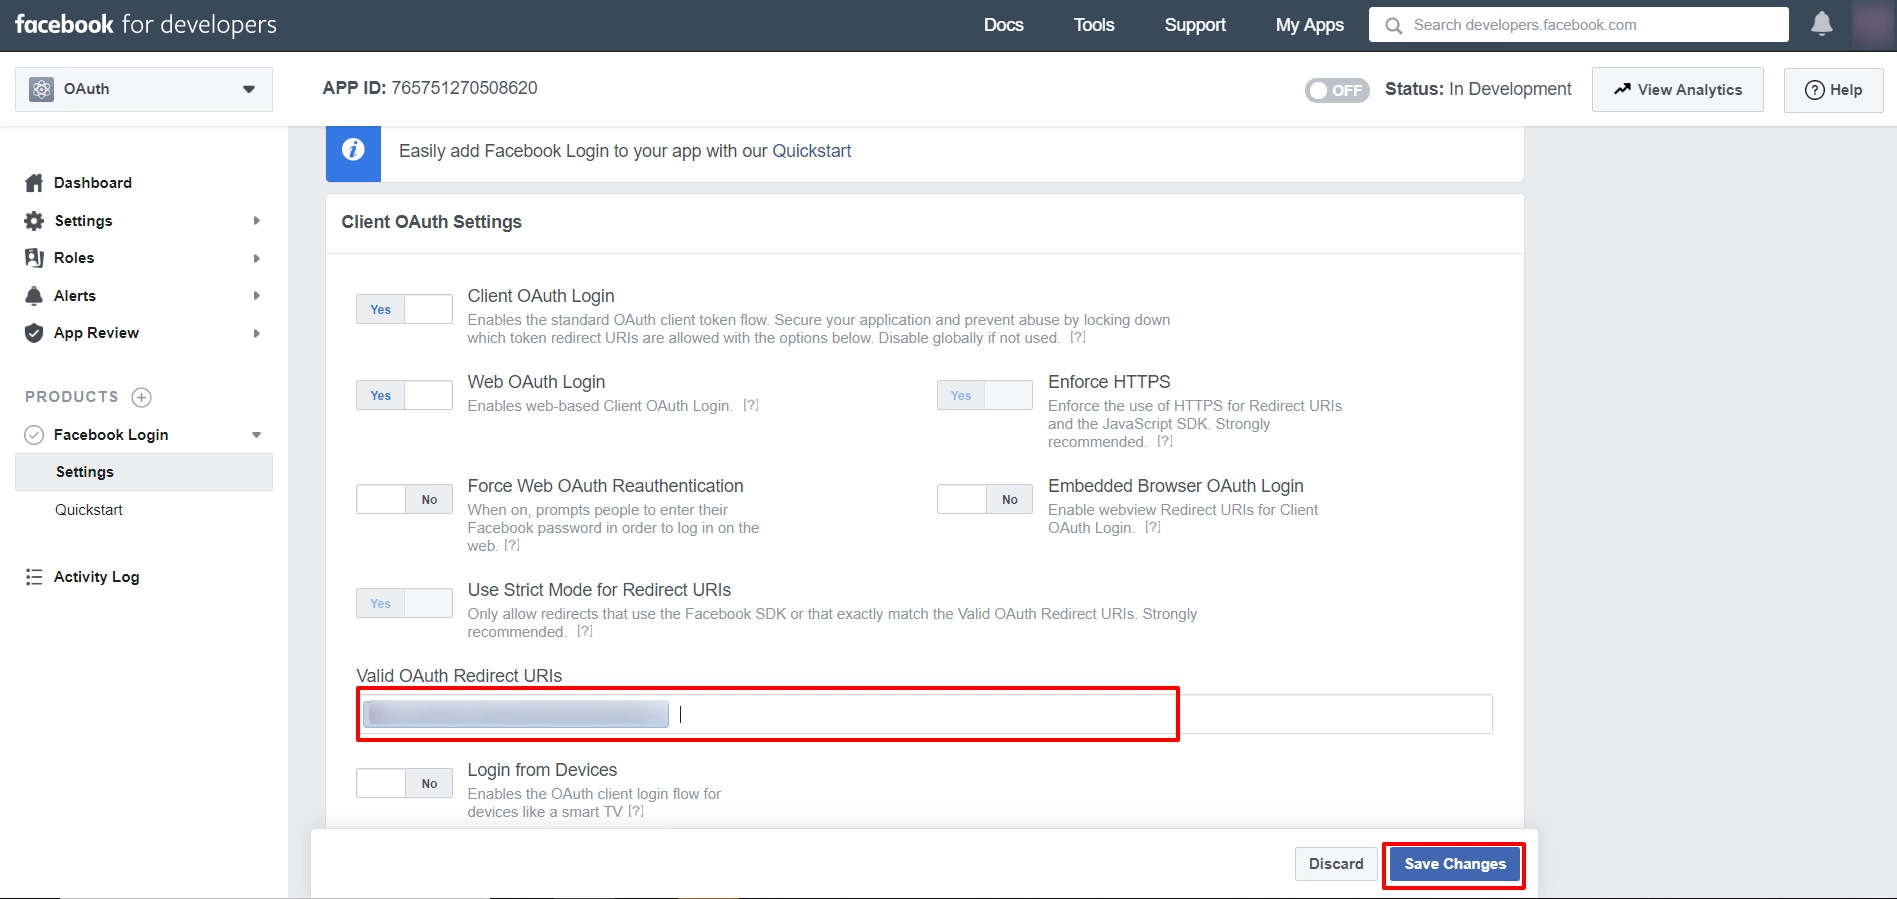
- After clicking on Web go to the Settings tab under the Facebook login.
- The Client OAuth Settings page for Facebook Login will appear:
- Enter the Callback URL (copied from the plugin) in the Valid OAuth redirect URIs field.
- Click On Save Changes.
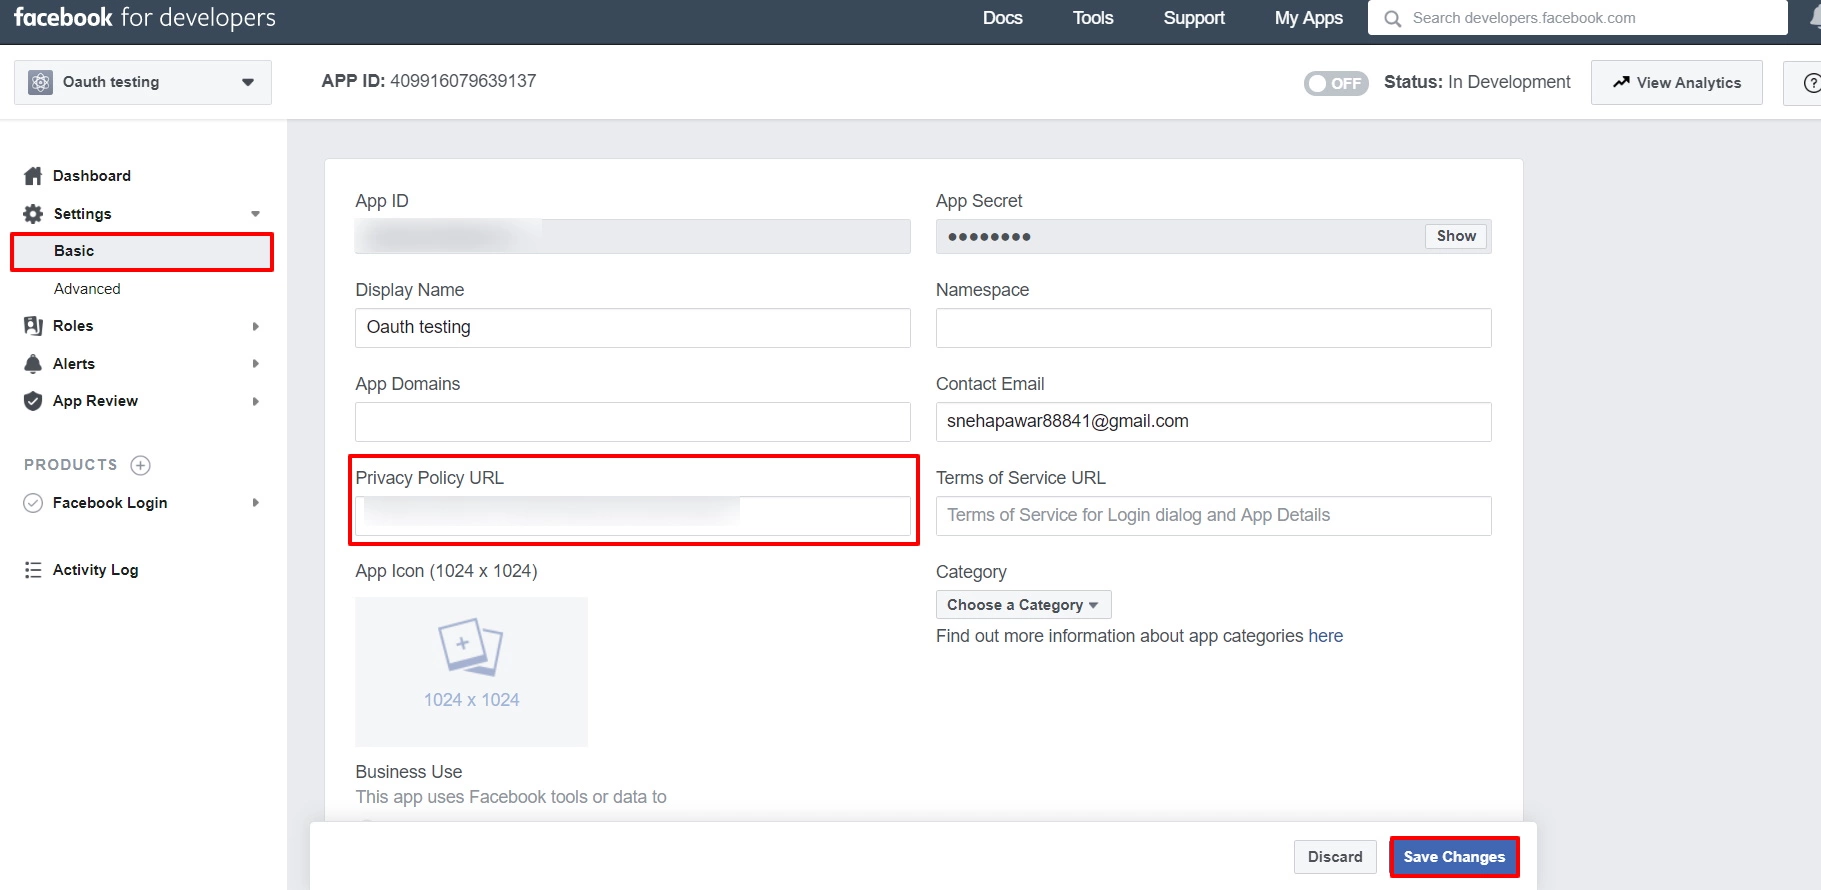
- Go to Settings->Basic and Enter your Privacy Policy URL in the Privacy Policy URL field. Click on the Save Changes button to save your configurations.
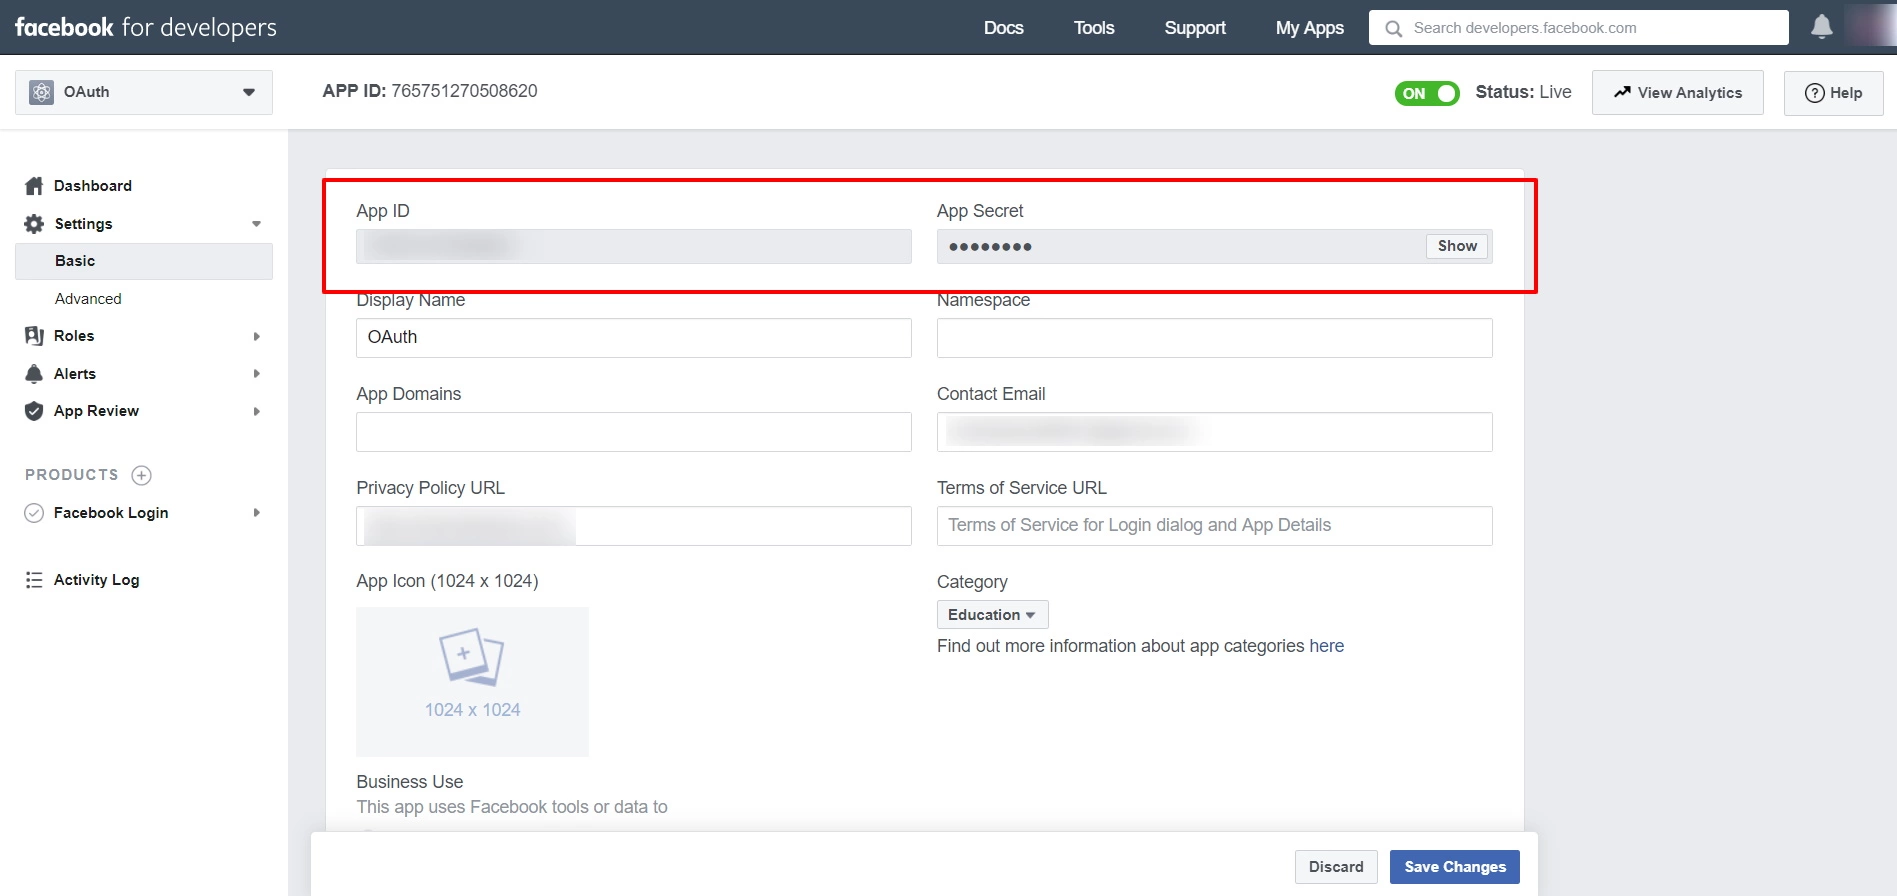
- Get App Id and App Secret : Click Settings in the left nav. On this page you can retrieve your App ID and App Secret.
- Click Show to reveal the App Secret (you may be required to re-enter your Facebook password).


NOTE: Before entering the callback url it should be changed to https.