Contents
OKTA as IDP – SAML
Step 1: Set Up Okta as Identity Provider
With the plugin installed, you can move on to setting up Okta as an IDP.
 1.1: Okta IDP Configuration
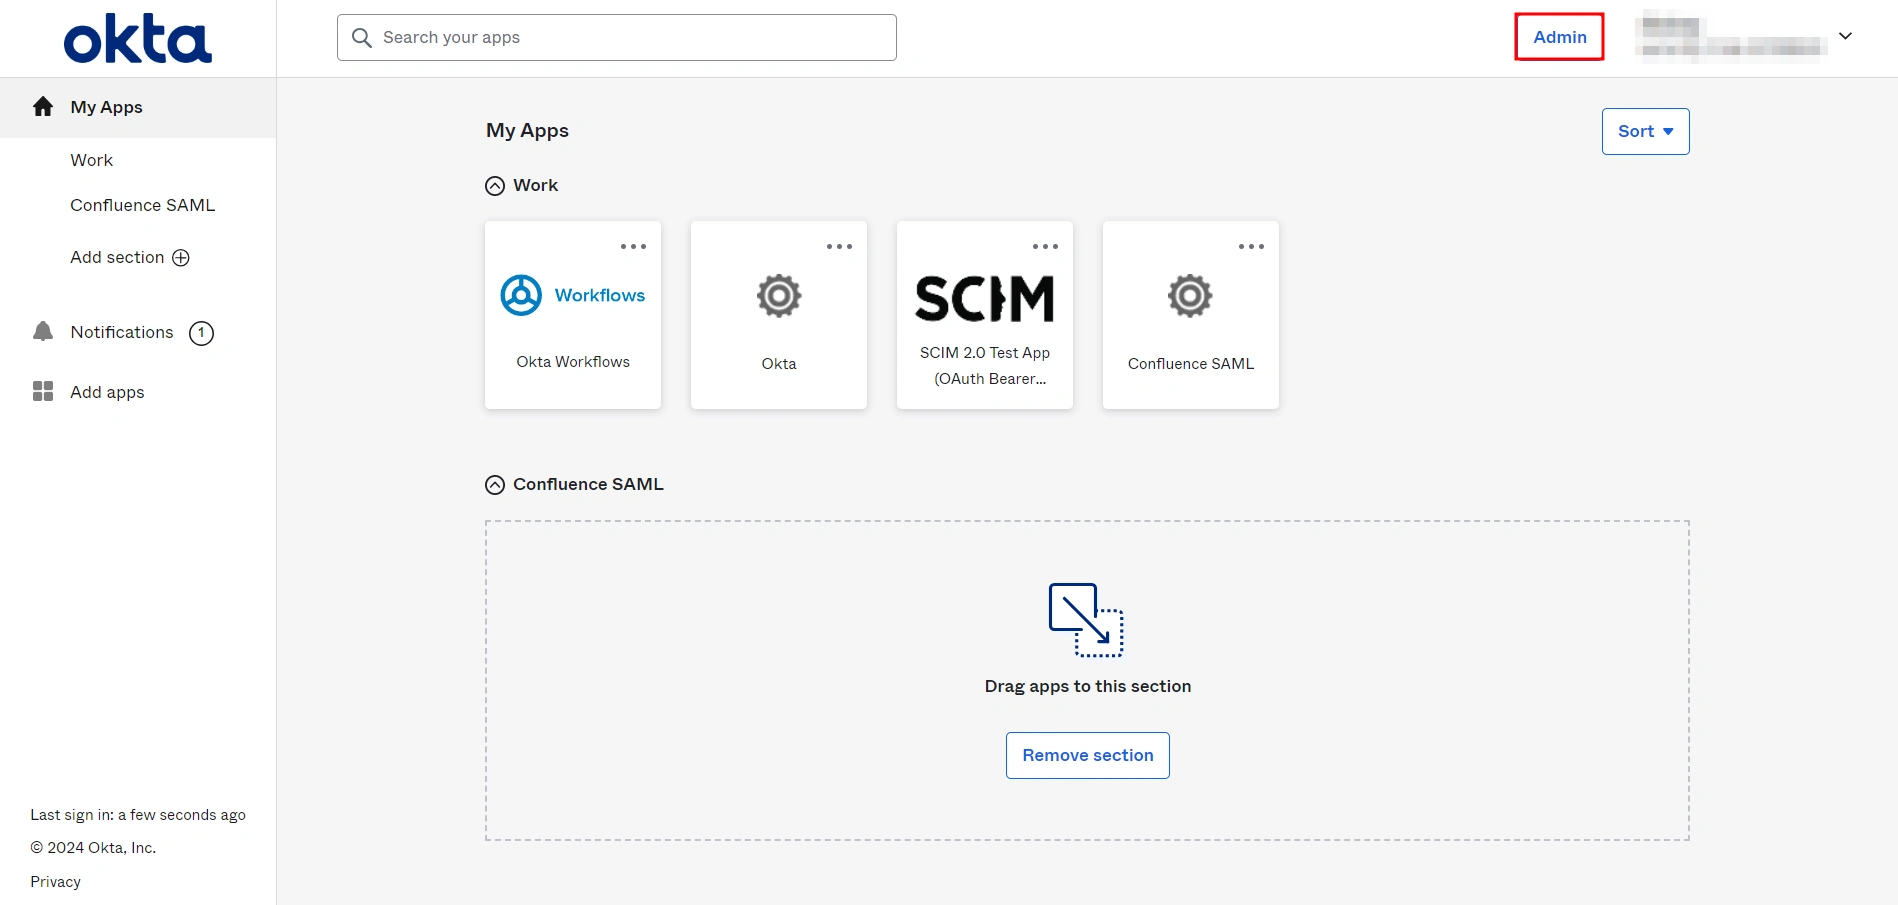
- Log into Okta Admin Console.
- For developer account, switch to Classic UI to configure app.
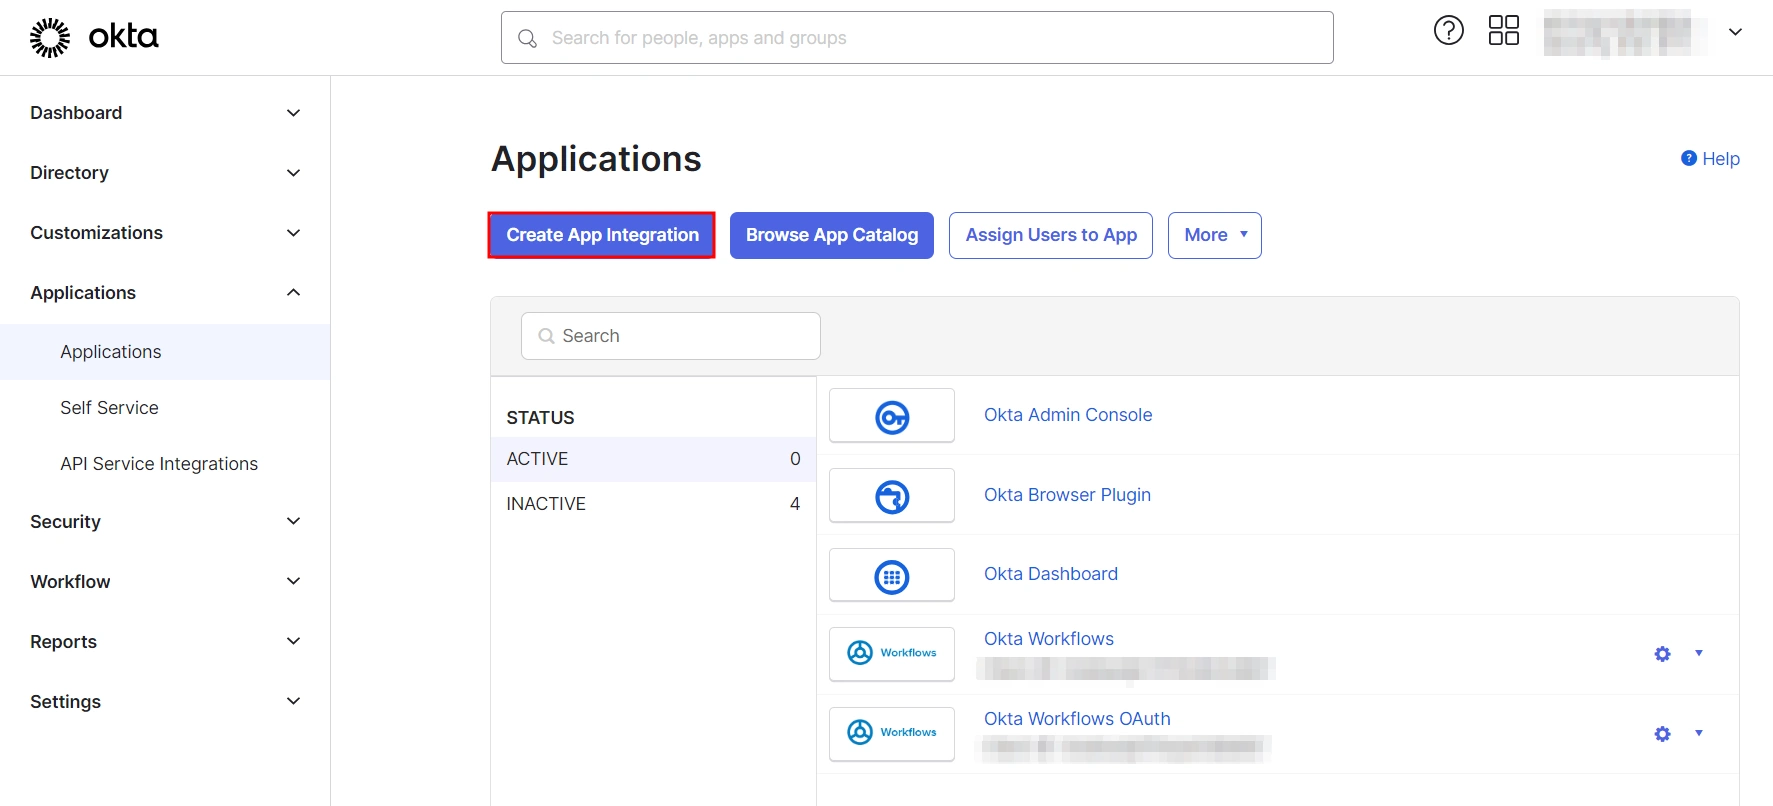
- In the left hand menu, go to Applications → Applications and then click on Create App Integration.
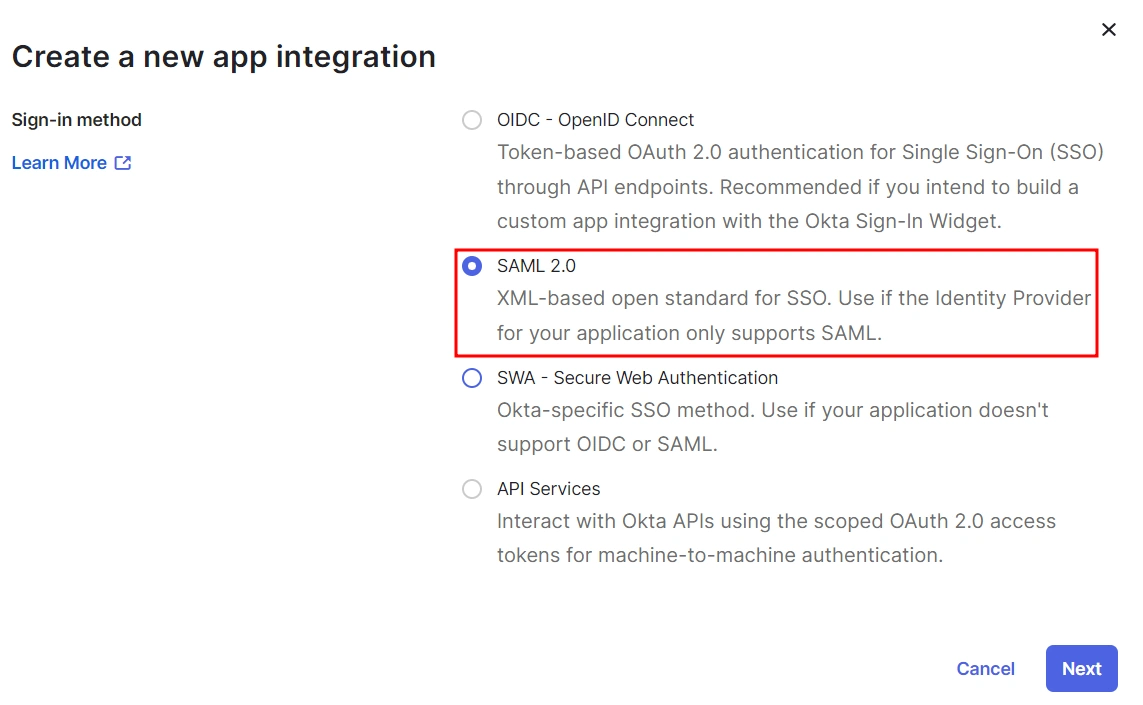
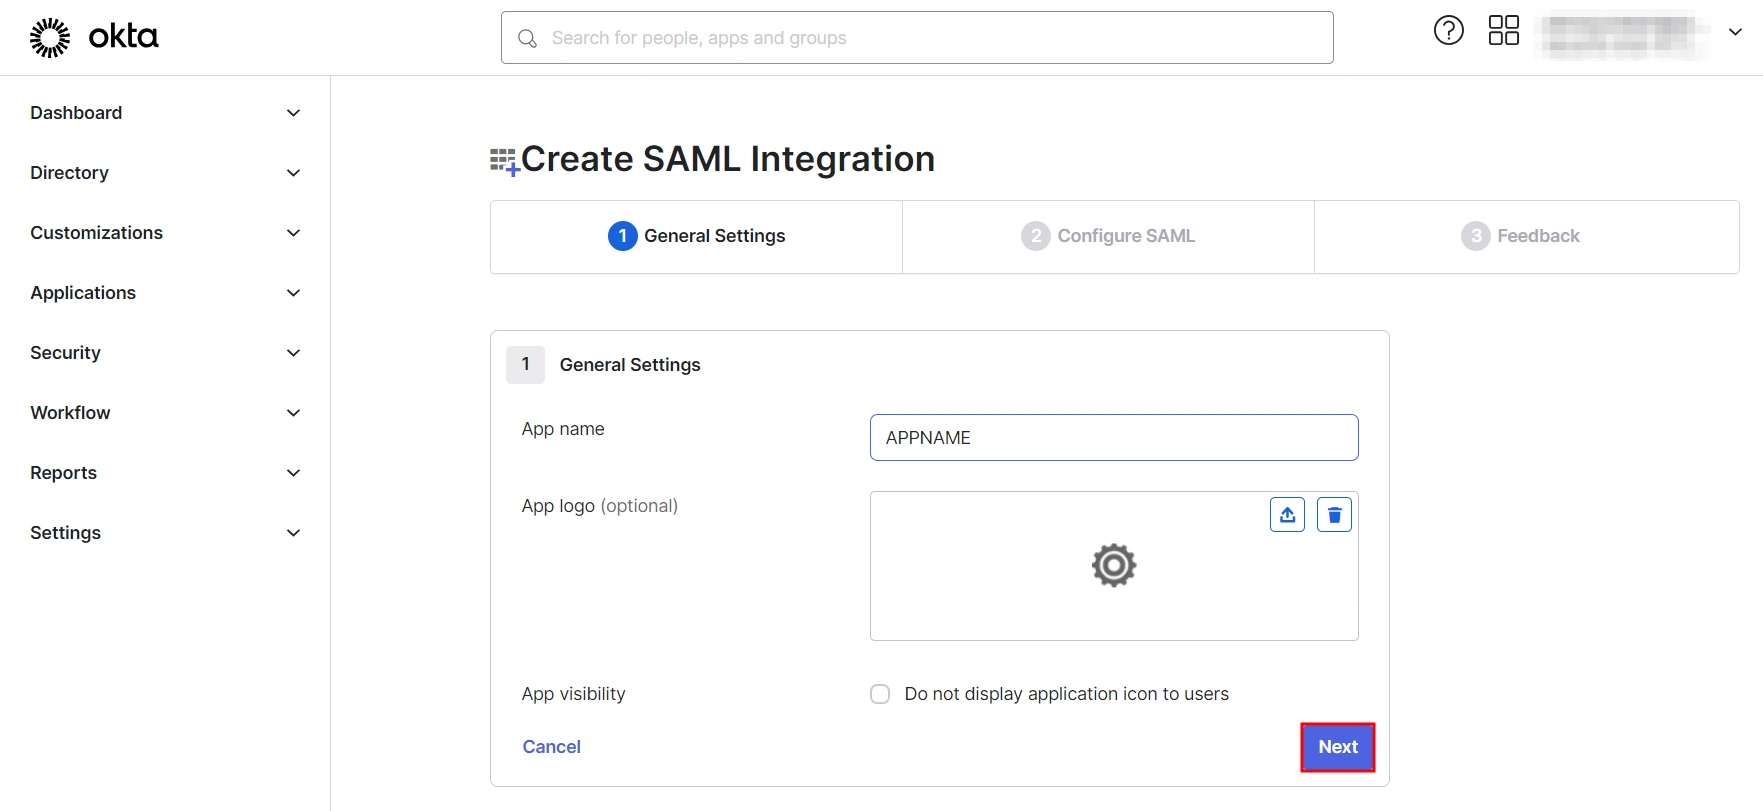
- Select SAML 2.0 as Sign on method and click Next.
- In General Settings, enter the app name and click on Next.
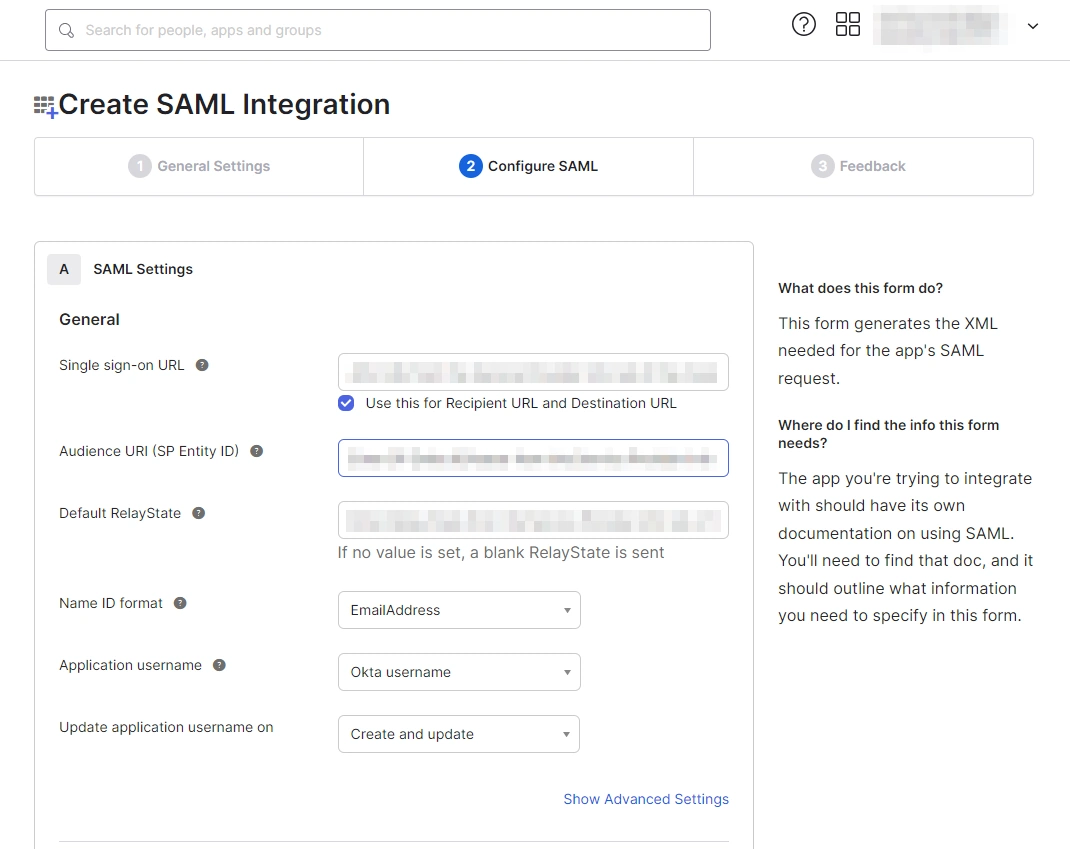
- Set up SAML parameters in the Configure SAML tab. You will find all the required information inside the SP Information tab of your plugin. The table below will help you map the right data to the fields.
- Next, scroll down inside the Configure SAML tab and fill out Attribute Statements and Group Attribute Statements (this step is optional).
- Here’s how you can populate these fields:
Follow the steps provided below:
| Single Sign On URL | Enter ACS (Assertion Consumer Service) URL from the Service Provider info tab of the plugin. |
| Audience URI (SP Entity ID) | Enter SP Entity ID/Issuer from the Service Provider info (or SP Information) tab of the module. |
| Default Relay State | Enter Relay State from the Service Provider info tab of the module. |
| Name ID Format | Select EmailAddress as the Name ID Format from the dropdown list. |
| Application Username | Set Application Username to Okta username. |
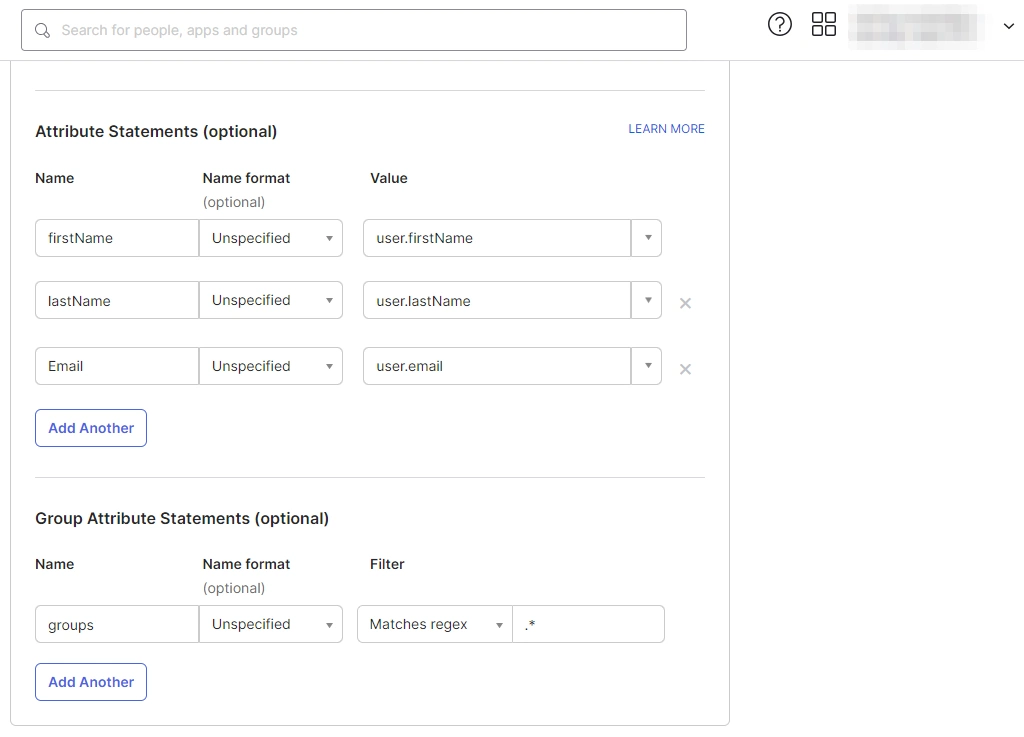
a. For Name, enter "firstName" and select user.firstName from the value dropdown.
b. For Name, enter "lastName" and select user.lastName from the value dropdown.
c. For Name, enter "Email" and select user.email from the value dropdown.
d. Under Group Attribute Statements, enter "groups" for Name and select Matches regex from the Filter dropdown and enter ".*" in the adjacent textbox.
 1.2: Assigning Groups/People
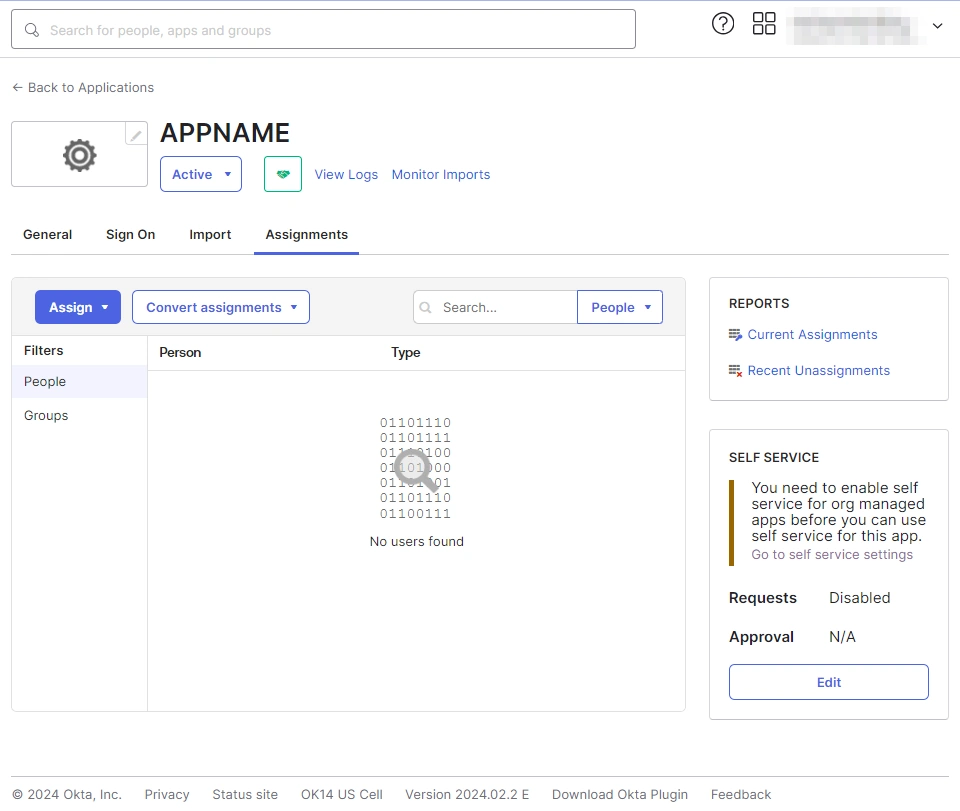
- After creating and configuring the app, you will be redirected to the Assignment Tab in Okta.
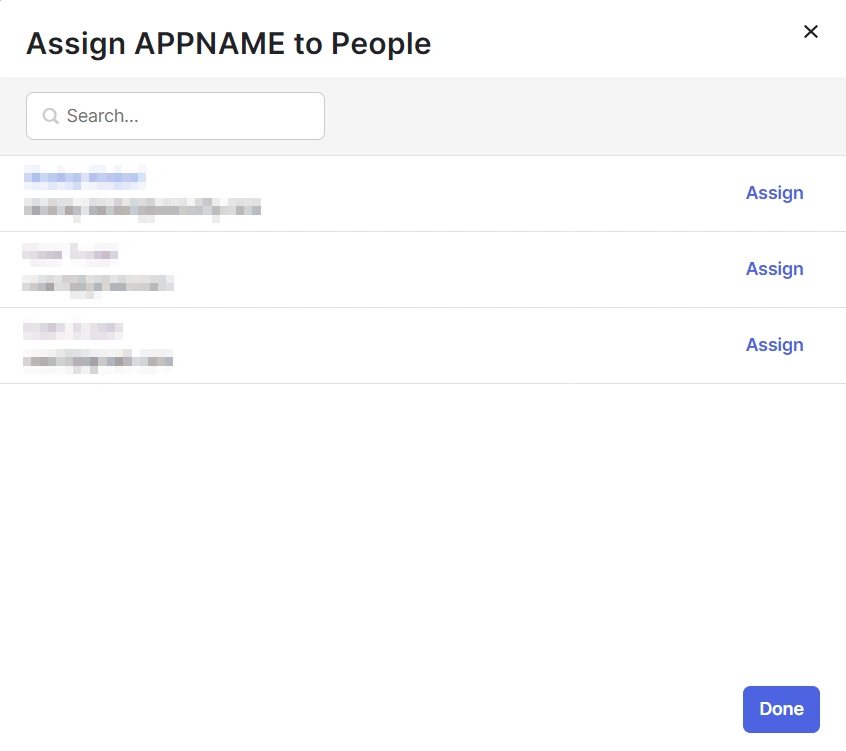
- Here, select the people and groups that you want to be able to log in through the app. You can do this by clicking Assign and selecting Assign to People to give access to specific people.
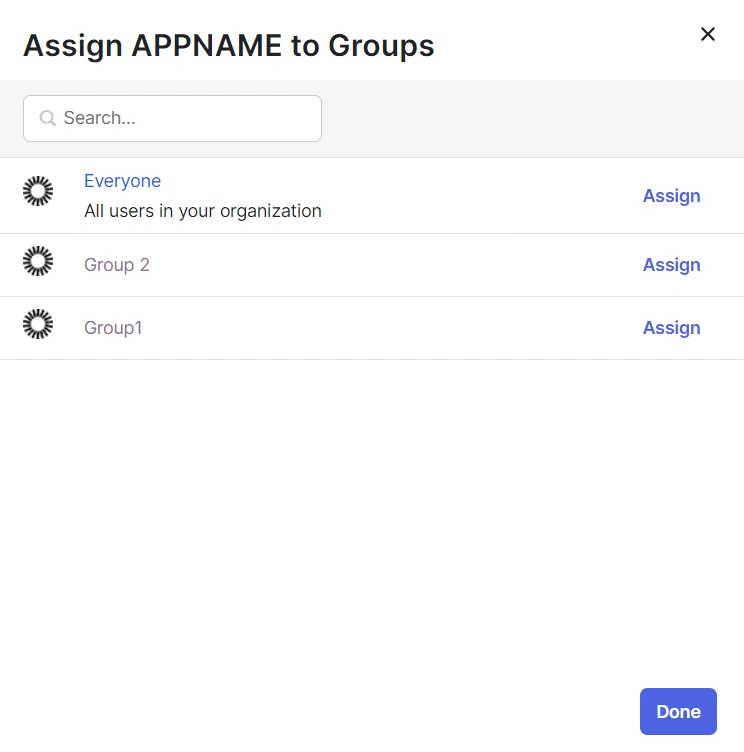
- You can also select Assign to Groups to give access to a specific group.
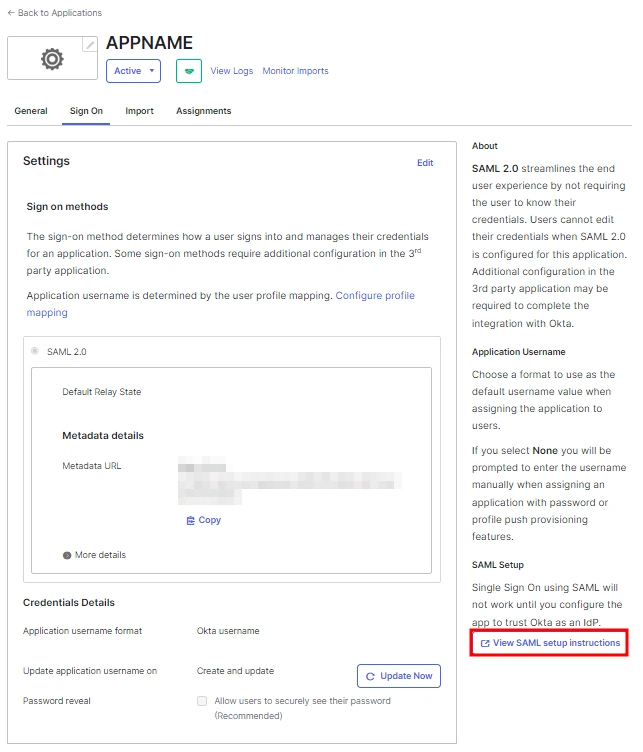
- Once you’re done assigning people and groups to your app, go to the Sign On tab.
- Here, click on View Setup Instructions to get the SAML Login URL (Single Sign on URL), Single Logout URL, IDP Entity ID, and X.509 Certificate. You will need these to configure the Service Provider.
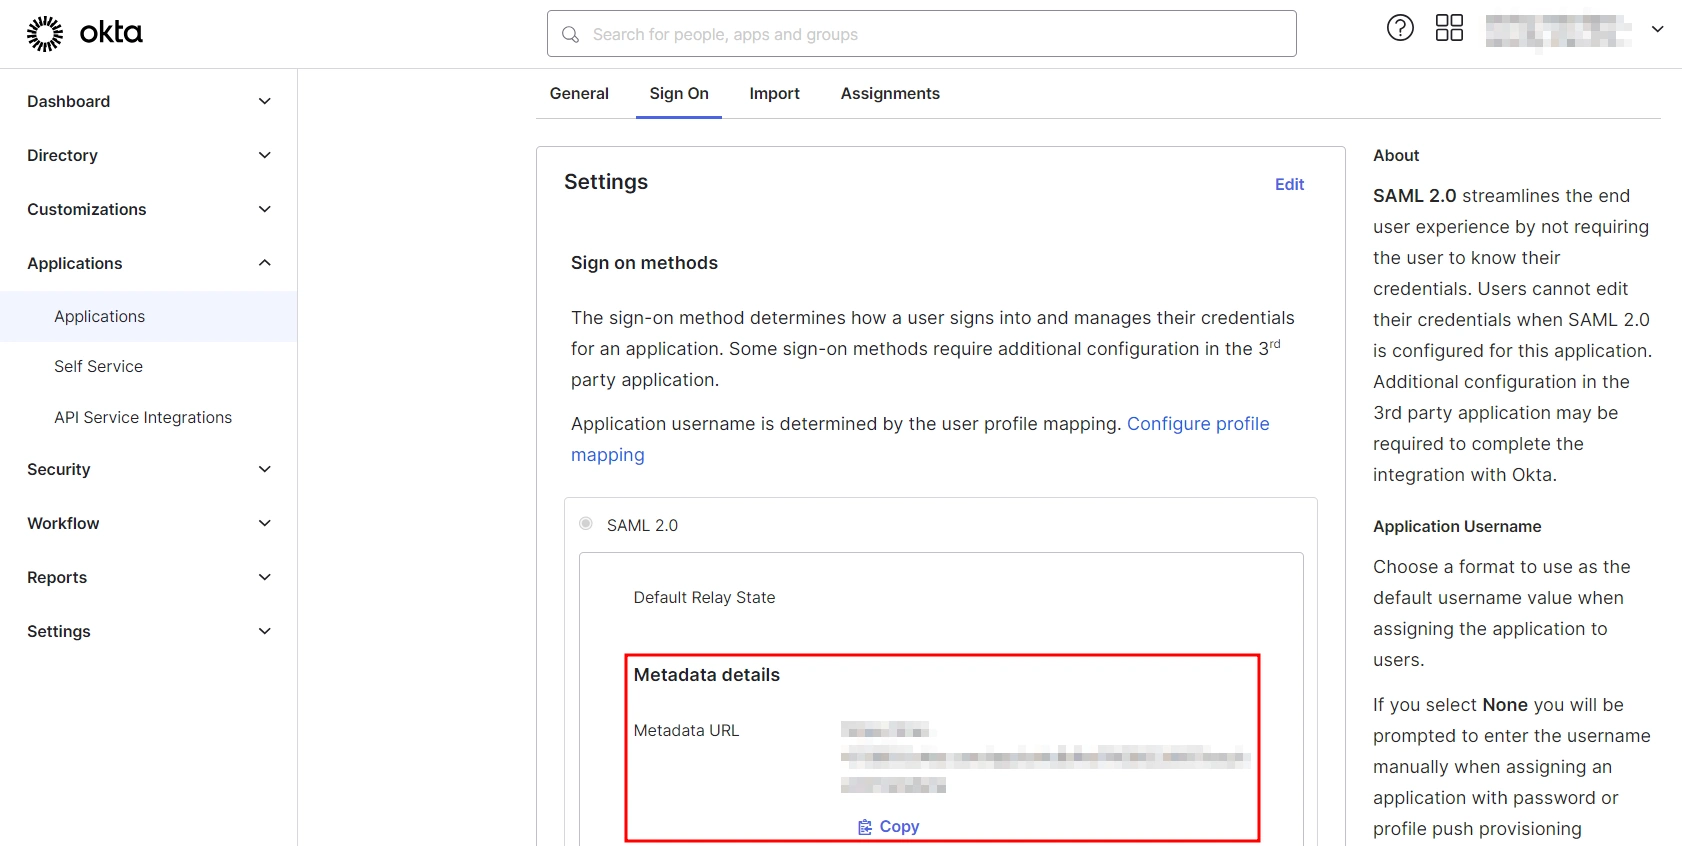
 1.3: Fetching Metadata URL
- Log into your Okta Admin Console
- Navigate to Applications → [Your Application Name] → Sign On
- You will find the metadata URL under the Metadata details section.
- You can either leave this window open in another tab or copy and paste the URL to a note while setting up the service provider.
One important component you’ll require while setting up your service provider is the metadata URL of your Identity Provider.
You can follow these steps to find the metadata URL for your Okta Application:
