Step 1: Setup Okta as OAuth Provider using Okta Integrated App
- Go to https://www.okta.com/login and log into your Okta account.
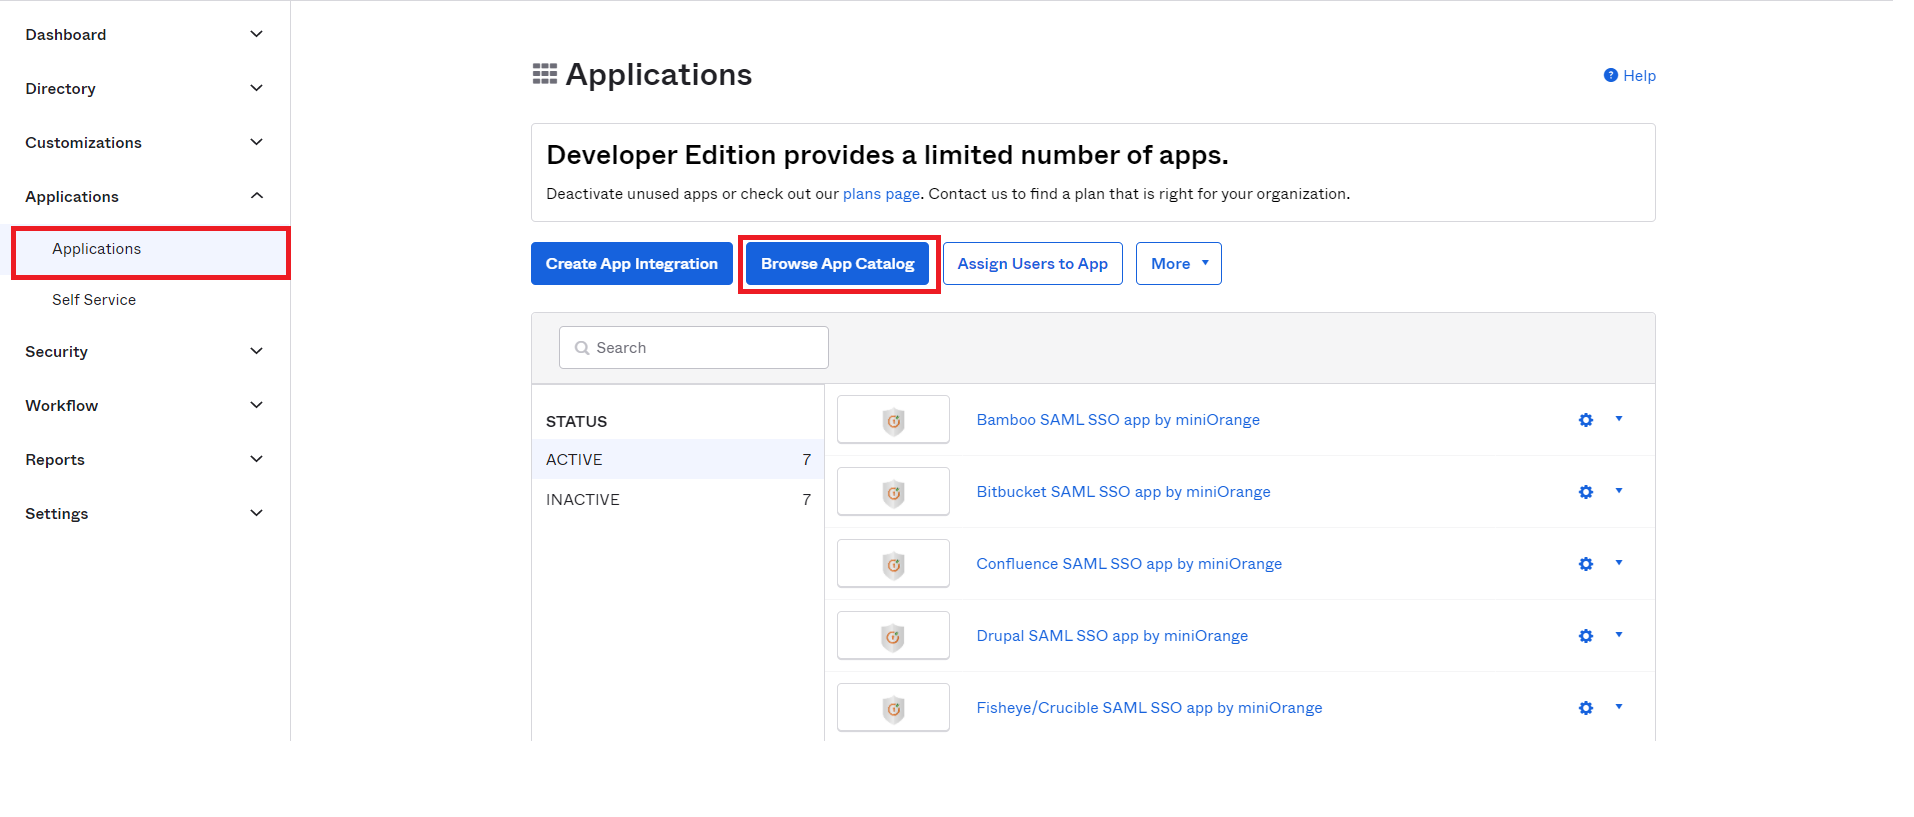
- Go to the Applications from the left menu and then click on Browse App Catalogue button.
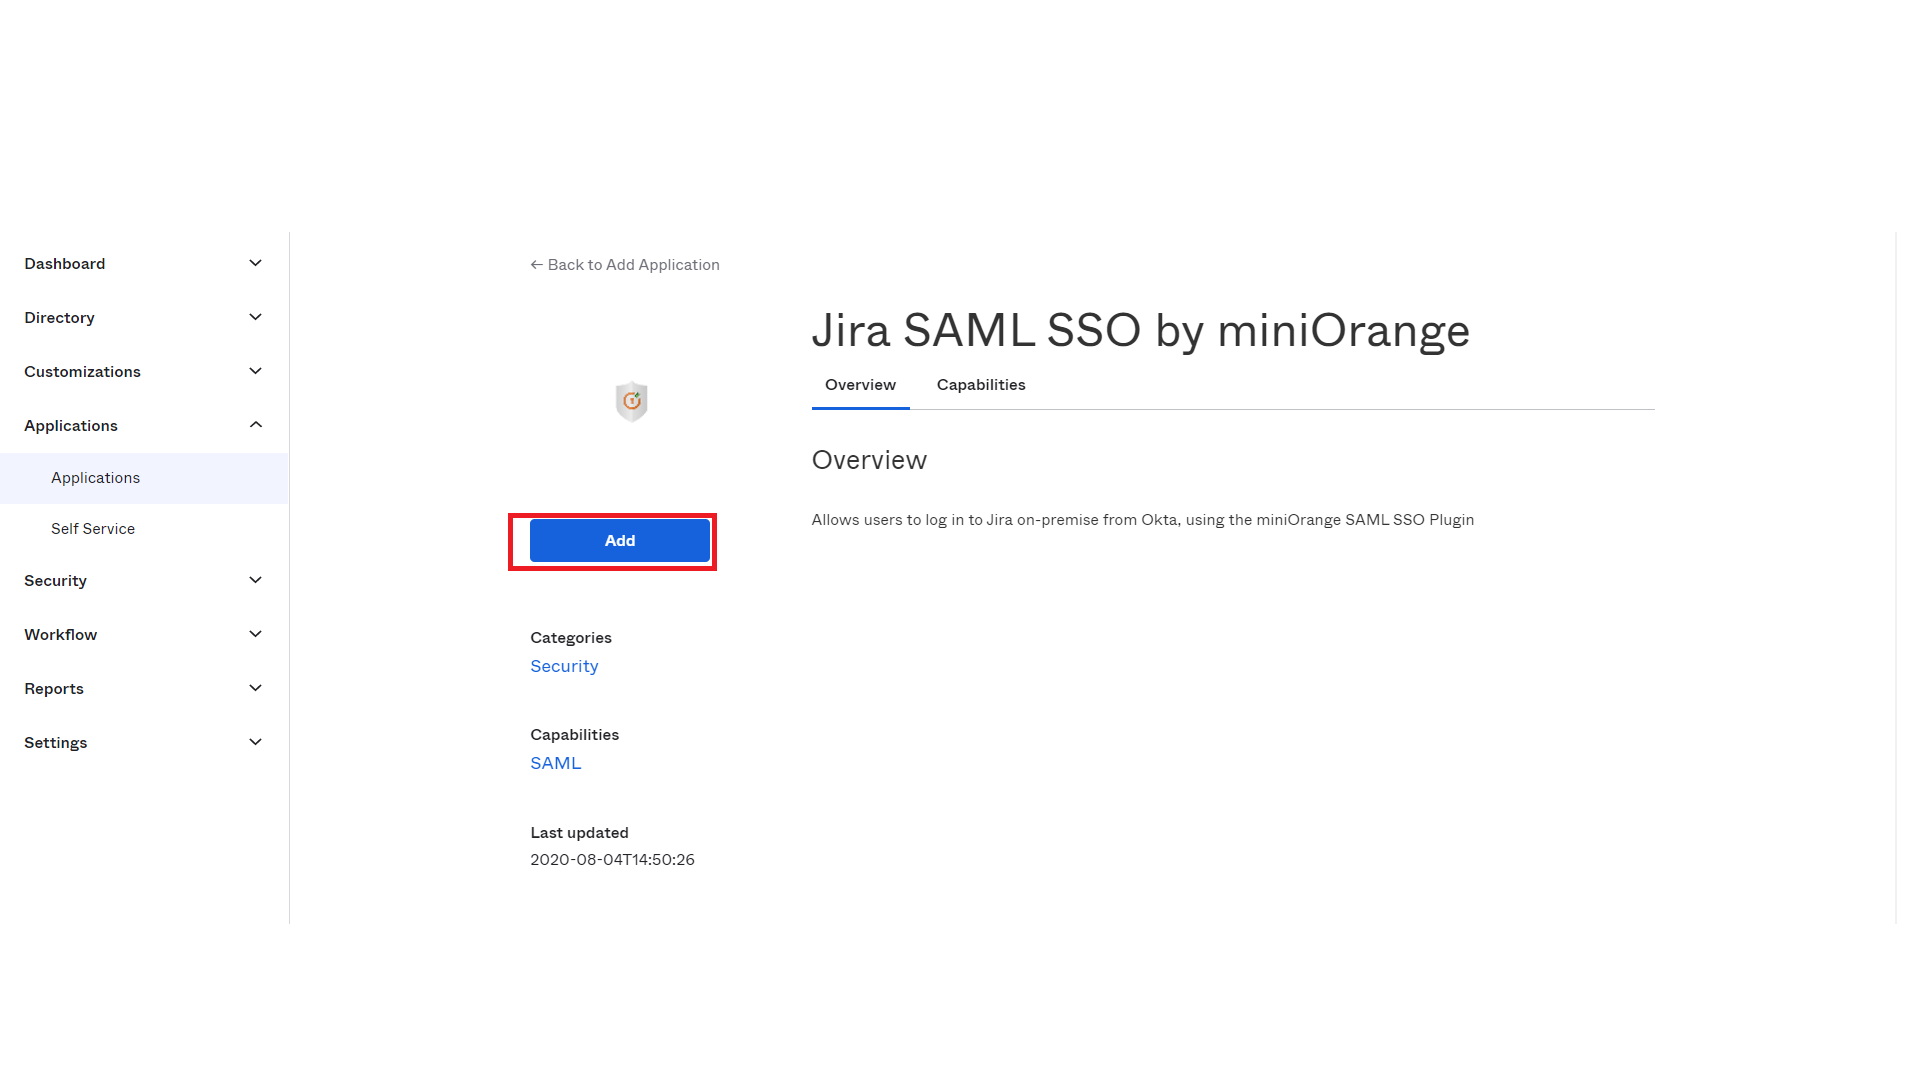
- Search for Jira SAML in the search box. Choose Jira SAML SSO by miniOrange from the list.
- Select Add Button.
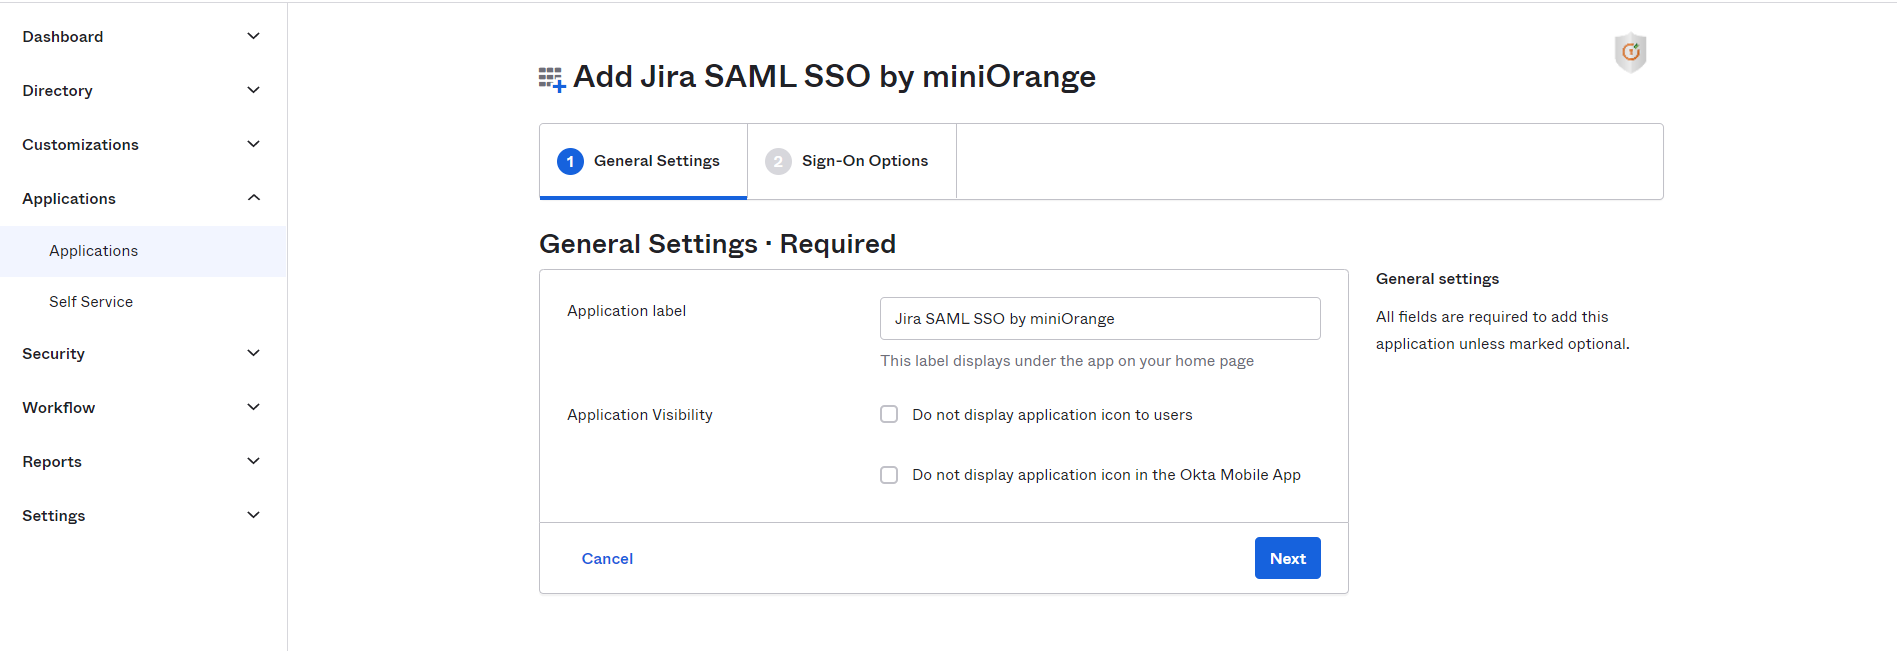
- Fill in the details such as the Application name as per your requirement. You can also keep the default name as Jira SAML SSO by miniOrange as well. Make sure you save the Application visibility as per your choice. Save the settings by clicking on the Next button.
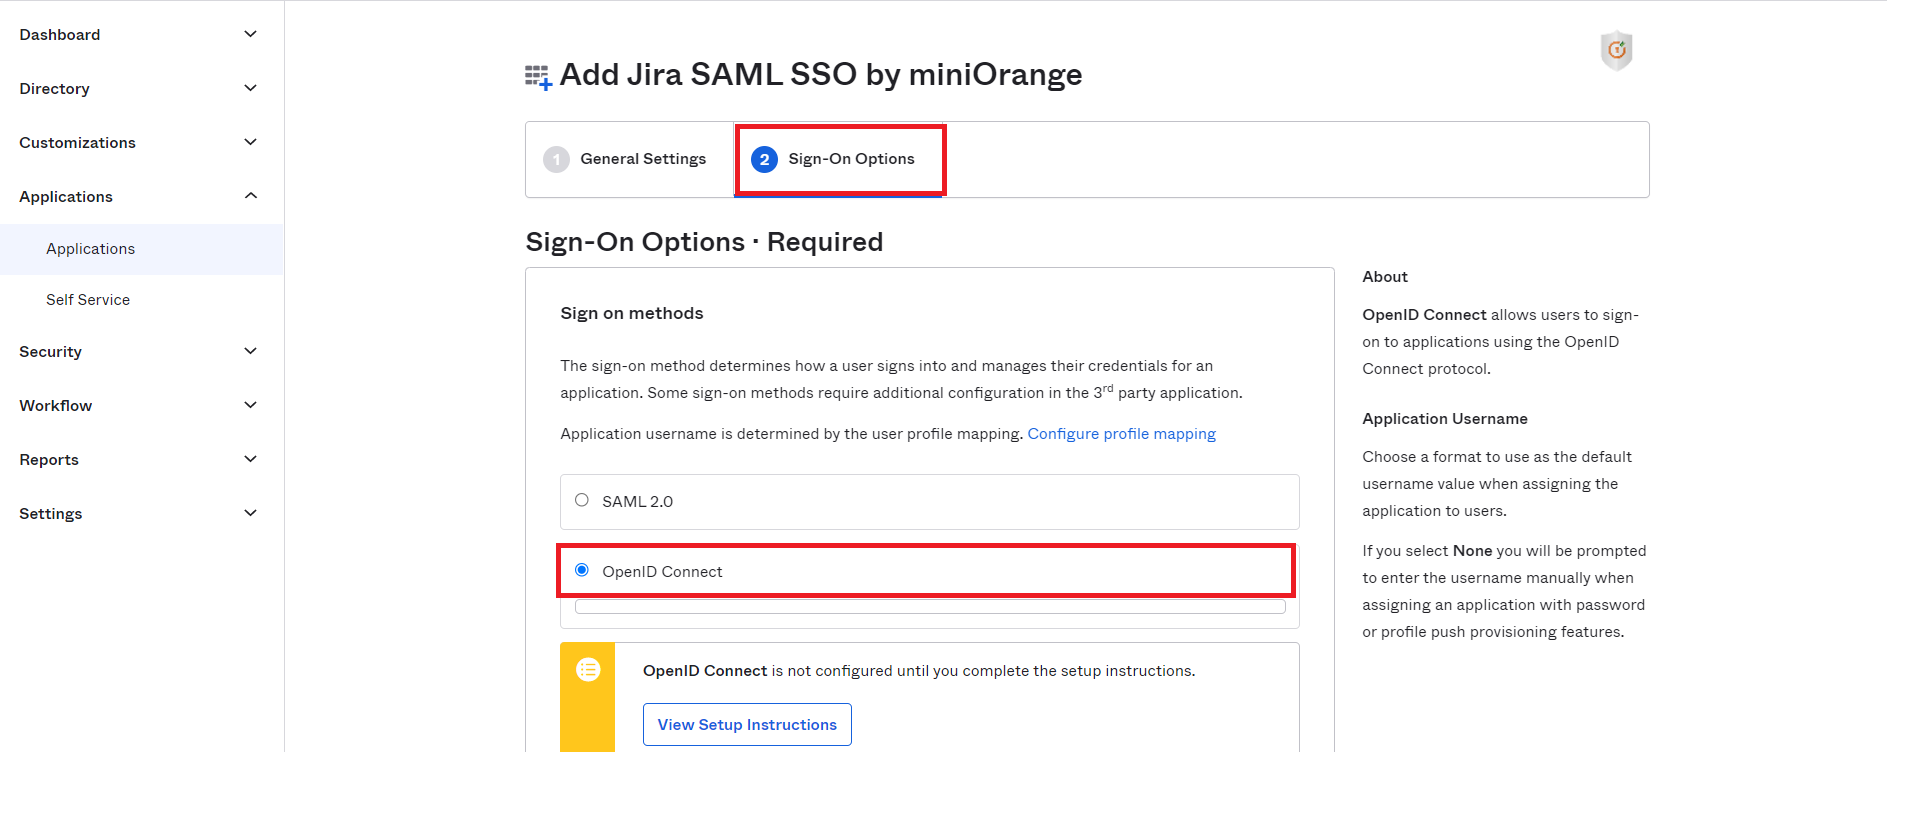
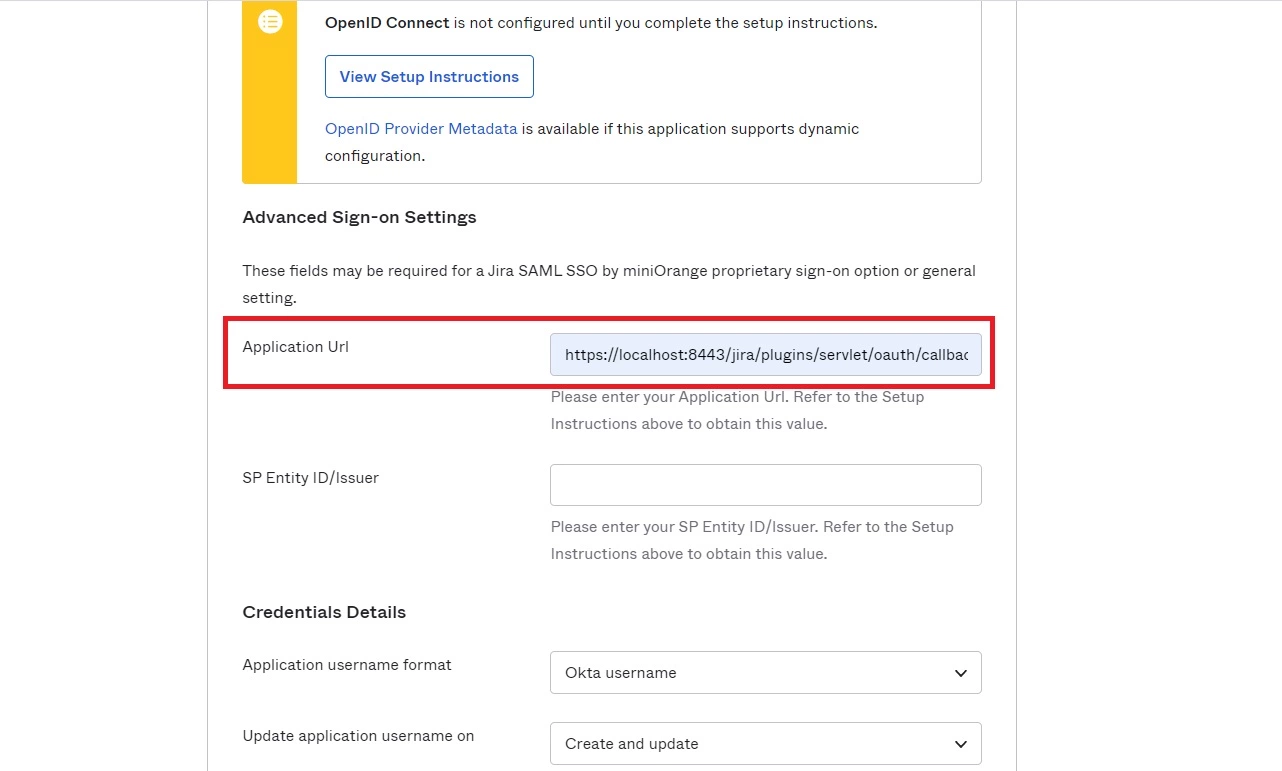
- In the Sign In options, scroll down to find the OpenID Connect option.
- Fill out the below details:
URL Field Value Application URL Callback URL from the plugin - Save settings.
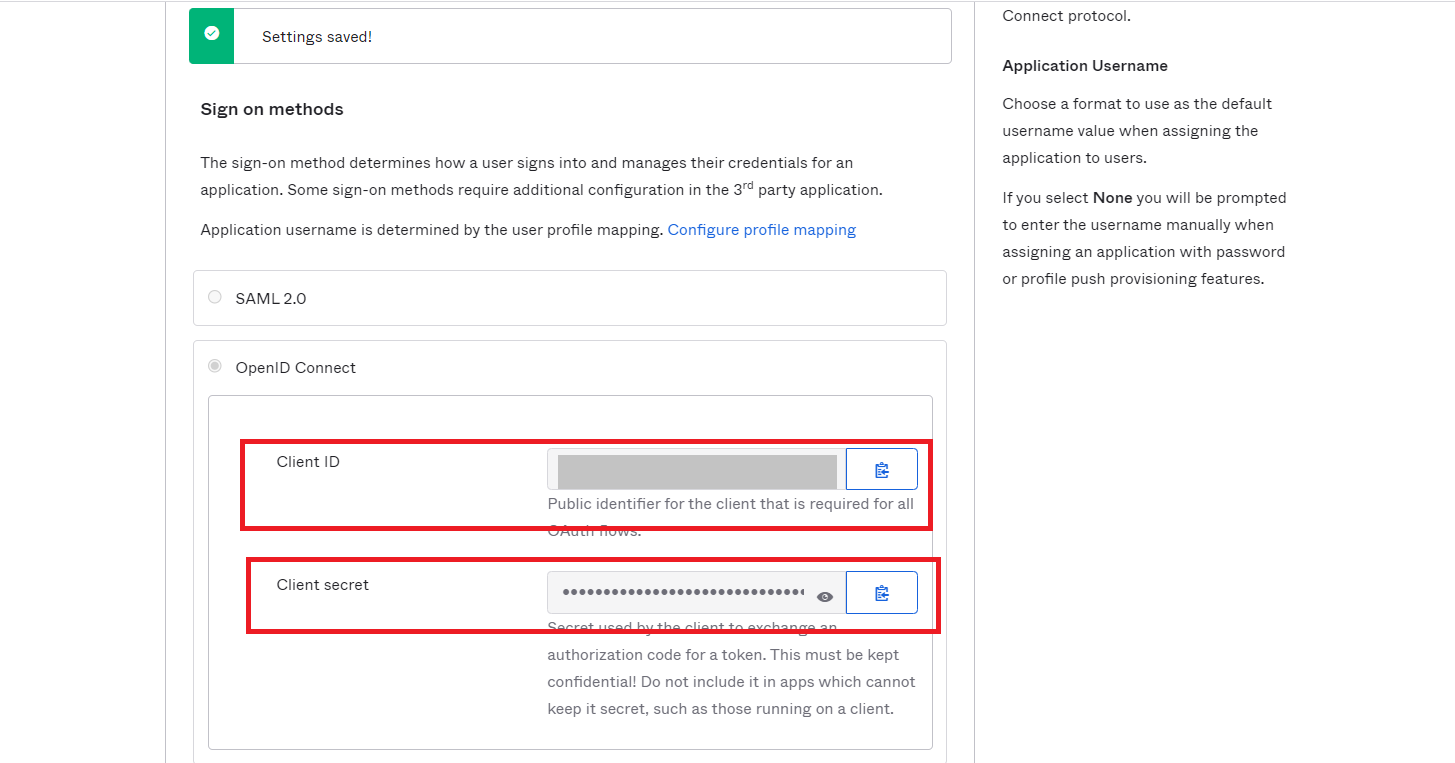
- You will see the Client ID and Client Secret. Copy these values and paste them into the plugin settings.