Part 2: Setup miniOrange with Okta
Step 1. Setup Okta as IDP
- First of all, go to https://www.okta.com/login and log into your Okta account.
- Switch to Classic UI to configure app.
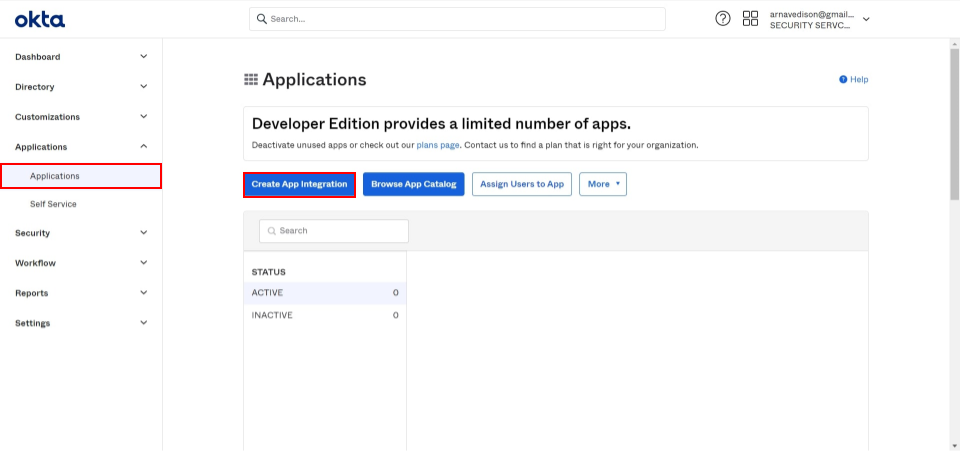
- Go to the Applications from the left menu and then click on Create App Integration button.
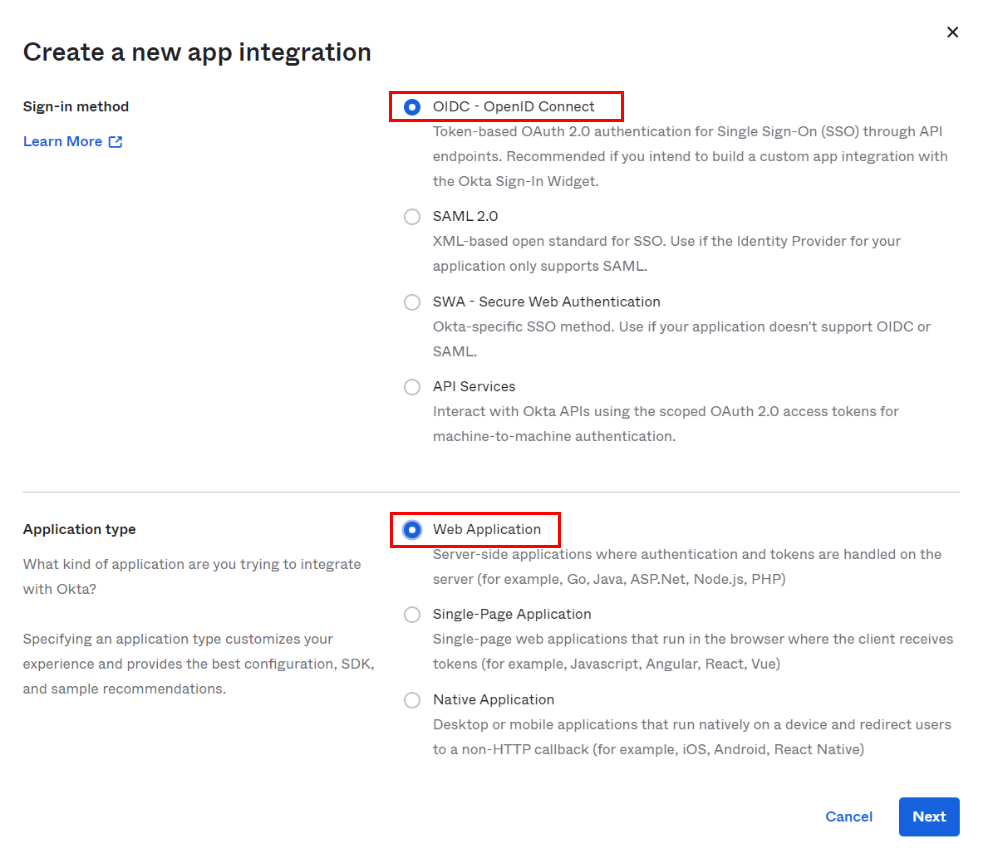
- Select OIDC-OpenID Connect as a Sign-in method and then choose Web Application as an Application type.
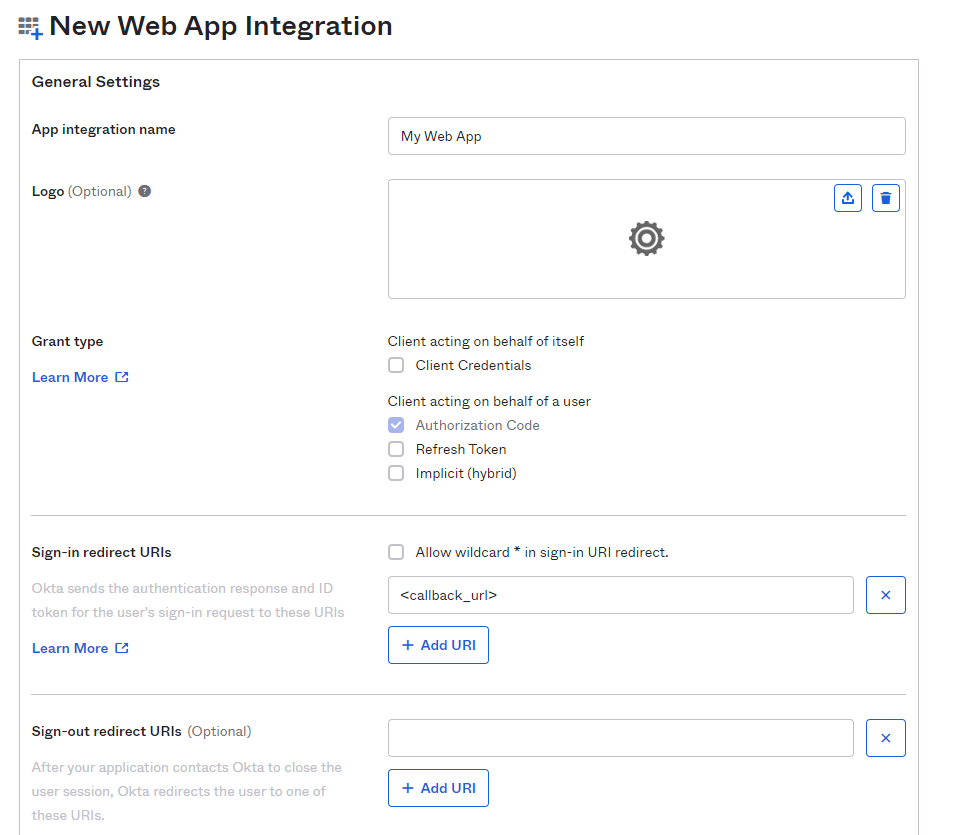
- You will be redirected to the app details page. Enter Application name and Login Redirect URIs. Copy Callback URL from the plugin to configure Login Redirect URL. Click on Save.
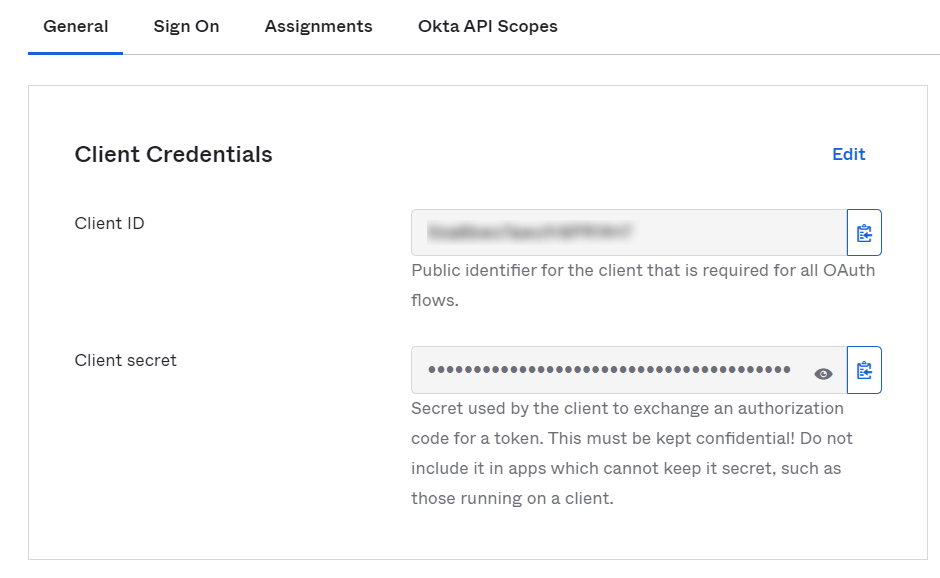
- You will be brought to App details page. Scroll down to Client Credentials section.

- Go to miniOrange Admin Console.
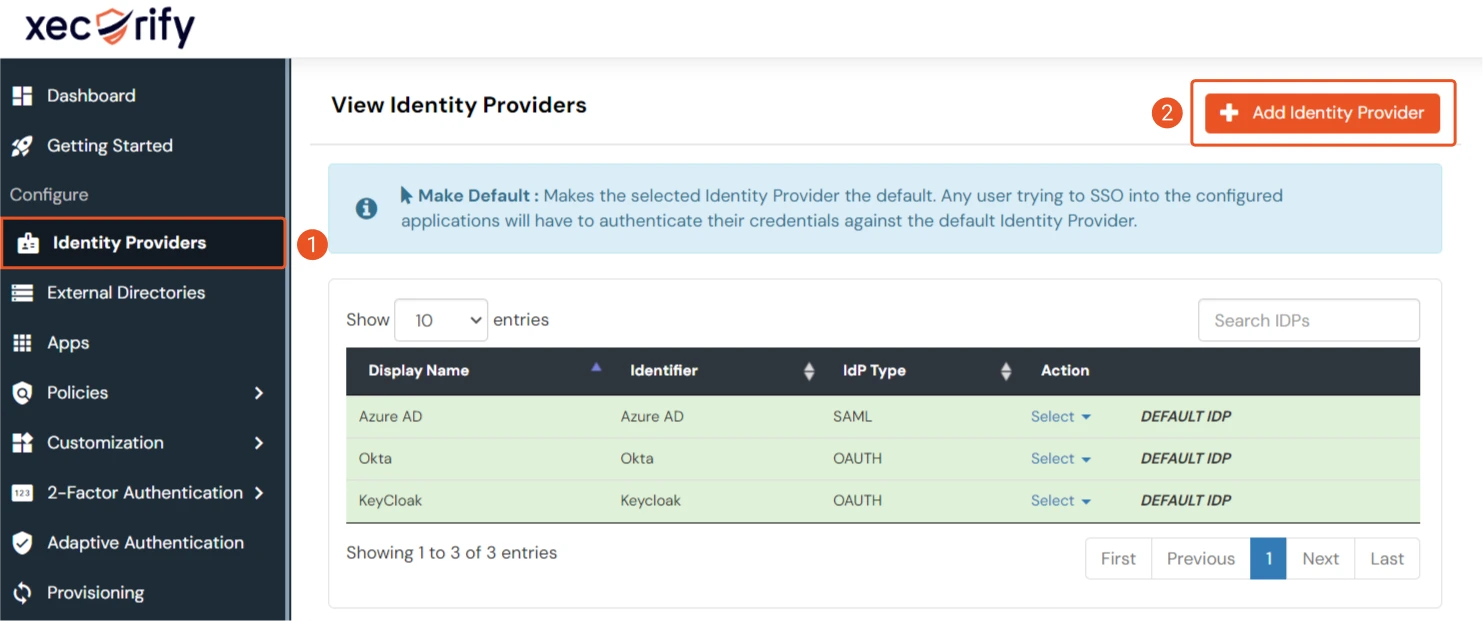
- From the left navigation bar select Identity Provider. Then click on Add Identity Provider
- Select OAuth tab.
- Enter the following values.
- Click on save
Step 2. Setup miniOrange as Service Provider
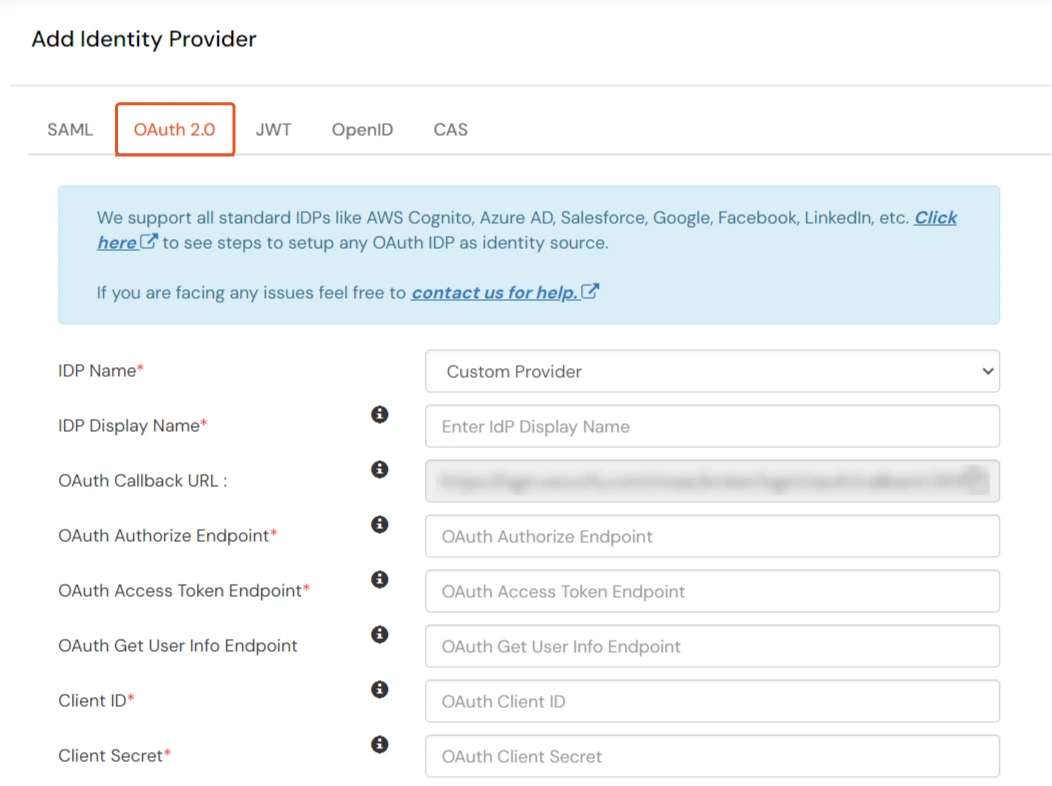
| IdP Name | Custom Provider |
| IdP Display Name | Choose appropriate Name |
| OAuth Authorize Endpoint | https://{yourOktaDomain}.com/oauth2/default/v1/authorize | OAuth Access Token Endpoint | https://{yourOktaDomain}.com/oauth2/default/v1/token | OAuth Get User Info Endpoint | https://{yourOktaDomain}/oauth2/default/v1/userinfo |
| Client ID | From step 1 |
| Client secret | From step 1 |
| Scope | openid profile email |
Step 3. Test connection between miniOrange and Okta
- Go to the miniOrange Admin Dashboard.
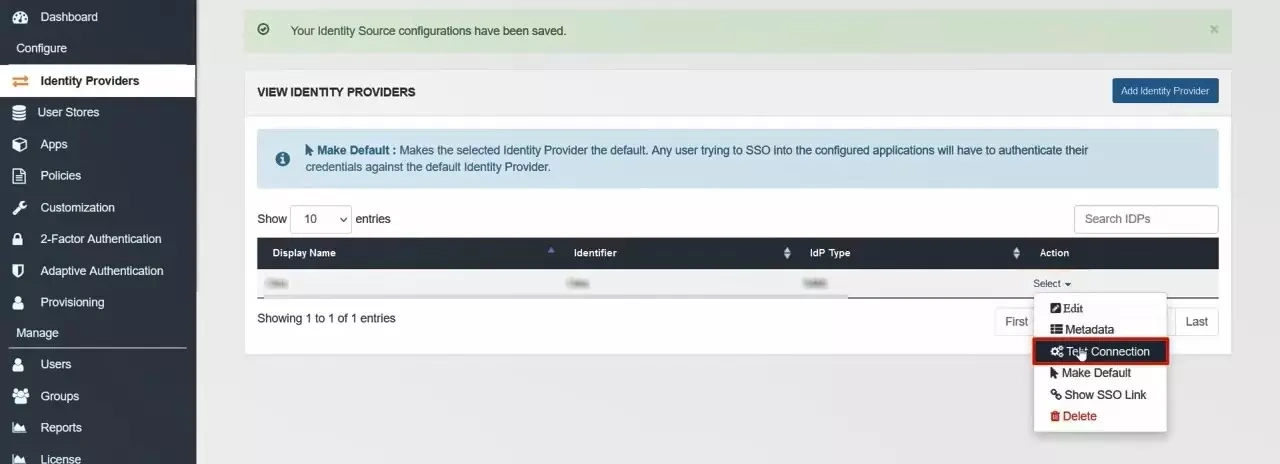
- Go to Identity Providers tab. Then click on select button under the app you just created. Then click on Test Connection.
- A new popup login window will open. Enter your credentials and login.
- Now you will see TEST SUCCESSFUL in a new popup window. If not, then check if you have missed any of the above step.
Hello there!
Need Help? We are right here!


