Welcome to the setup guide for the miniOrange REST API Authentication add-on, which enables you to secure your Jira, Confluence, and Bitbucket REST APIs using,
Atlassian's REST APIs support only two authentication methods: basic authentication and OAuth 1.0. However, this plugin offers additional functionality, such as the ability to set the maximum expiry time for API tokens, use bearer tokens for automation tools, and restrict access to REST APIs based on IP addresses and User Groups.
Additionally, the plugin supports JWT token and OAuth 2.0 authentication and can be configured for access control to Jira's default authentication methods.
In this guide, we will walk you through the steps to configure an API token and Azure AD as a provider for the miniOrange REST API Authentication Plugin.
You can refer the steps to configure Rest API Authentication from the video or documentation given below
Download And Installation
- Log into your Atlassian instance as an admin.
- Navigate to the settings menu and click Manage Apps.
- Click Find new apps or Find new add-ons from the left-hand side of the page.
- Locate API Token/OAuth Authentication app.
- Click Try free to begin a new trial or Buy now to purchase a license.
- Enter your information and click Generate license when redirected to MyAtlassian.
- Click Apply license.
Step 1: Plugin Configuration:
- Follow below steps to configure miniOrange API Authentication add-on.
- You can create API keys or Bearer API tokens by clicking on the Add key button under API token tab .
- Select the type of the key - Basic/Bearer.
- Set the expiry interval and count of the token. It could also be set to never.
- Tokens could also be sent to the user via email.
- Finally, click on the Create button.
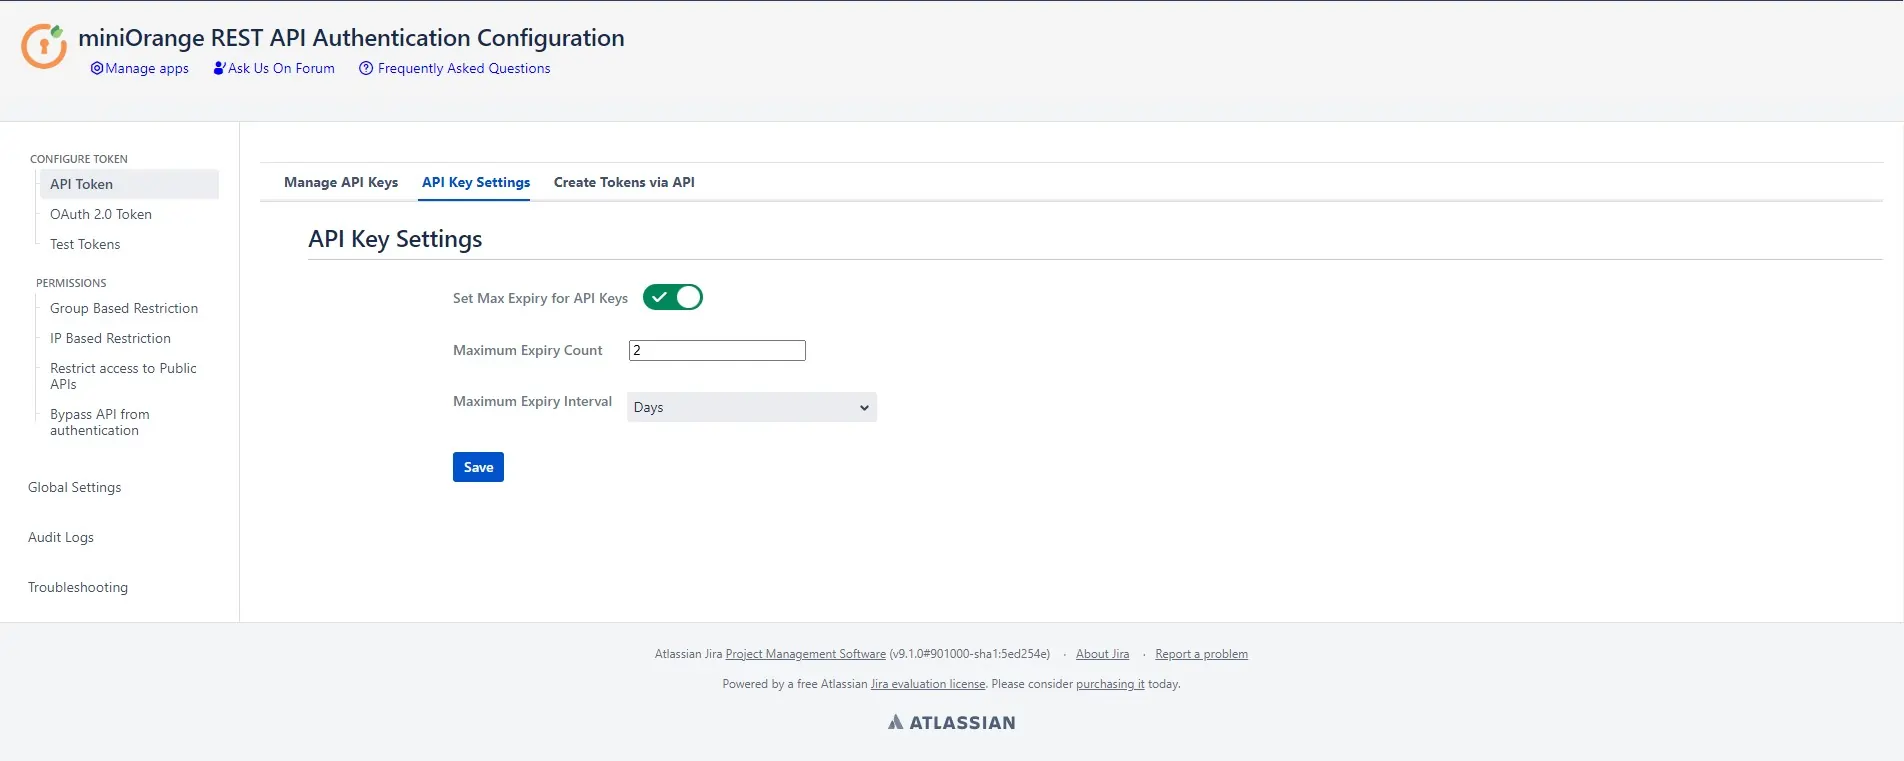
- Here you can set the Maximum expiry time that the tokens can have. Tokens can be configured with the expiry time less than this value but not greater.

NOTE : Please copy the generated key as it won't be visible once you close the dialogue box.
API key settings -
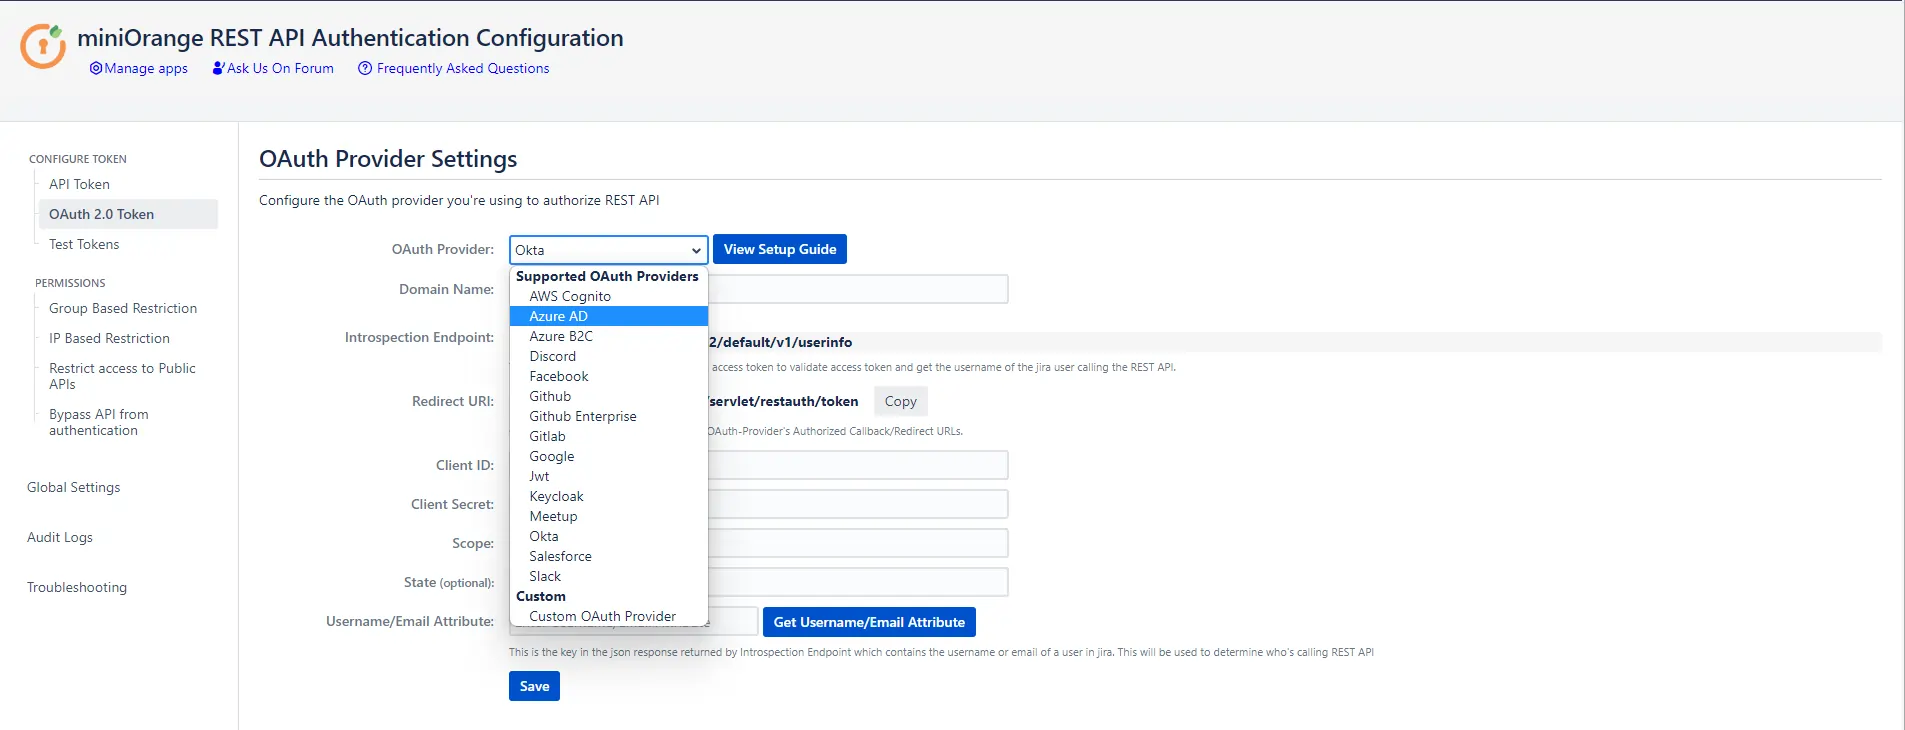
- Go to OAuth 2.0 Token tab.
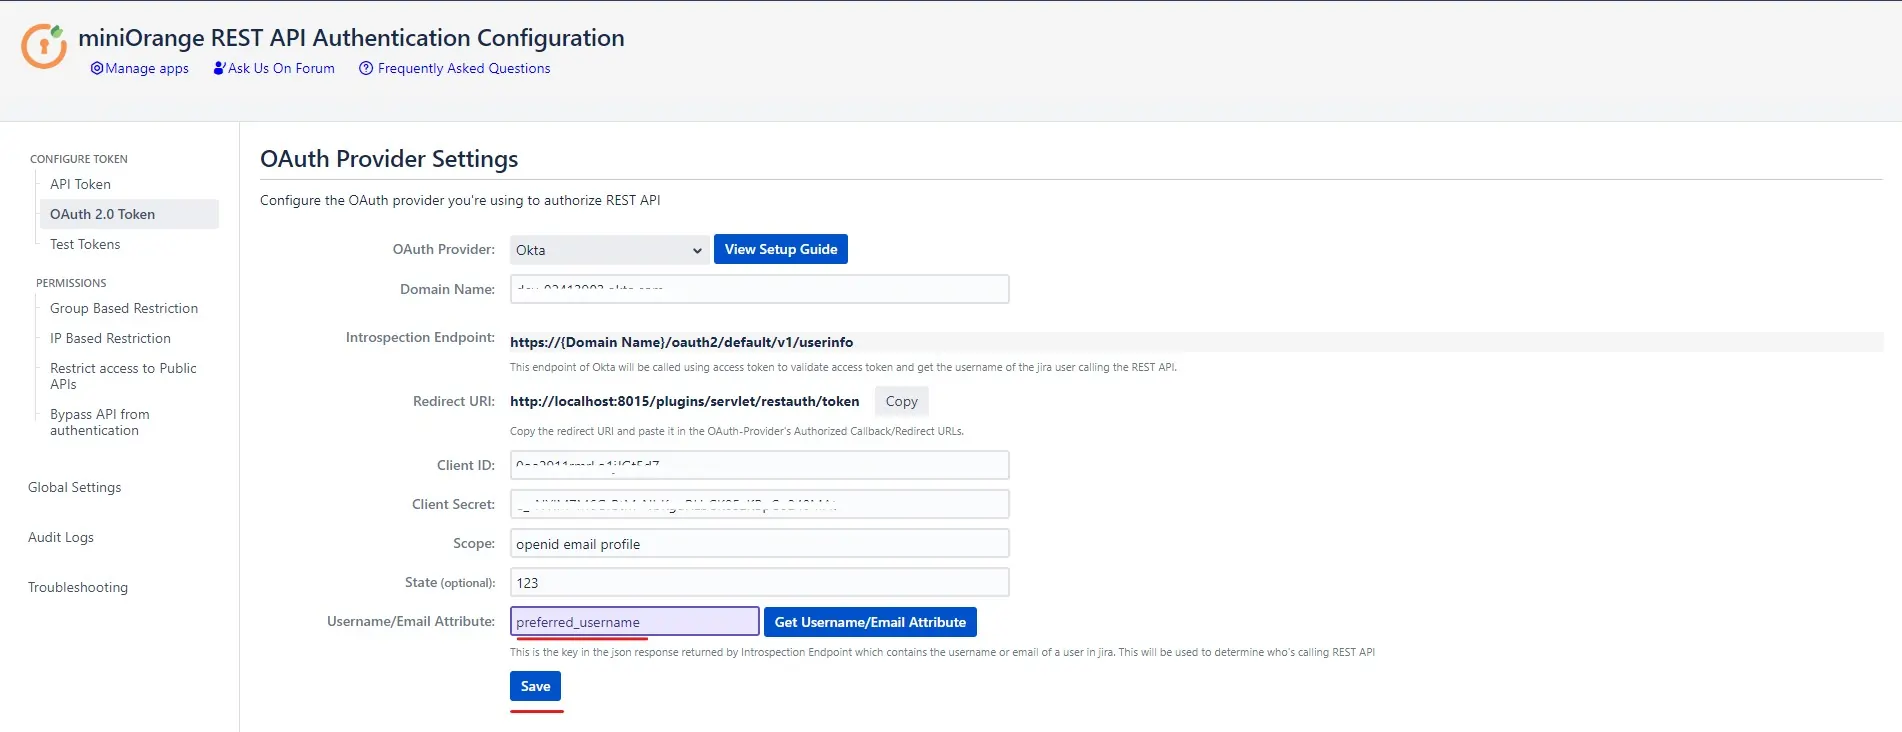
- Select the OAuth provider to be configured from the dropdown list. Select a custom OAuth provider if you don’t find your OAuth provider in the list.
- Enter the provider specific details (if any, such as domain name in case of Okta) and click on Continue.
- For custom OAuth provider, enter the below endpoint
- Copy the Redirect URI and paste it in the OAuth provider’s callback/redirect URIs.
- Enter the details such as client ID, client secret, scope and state.
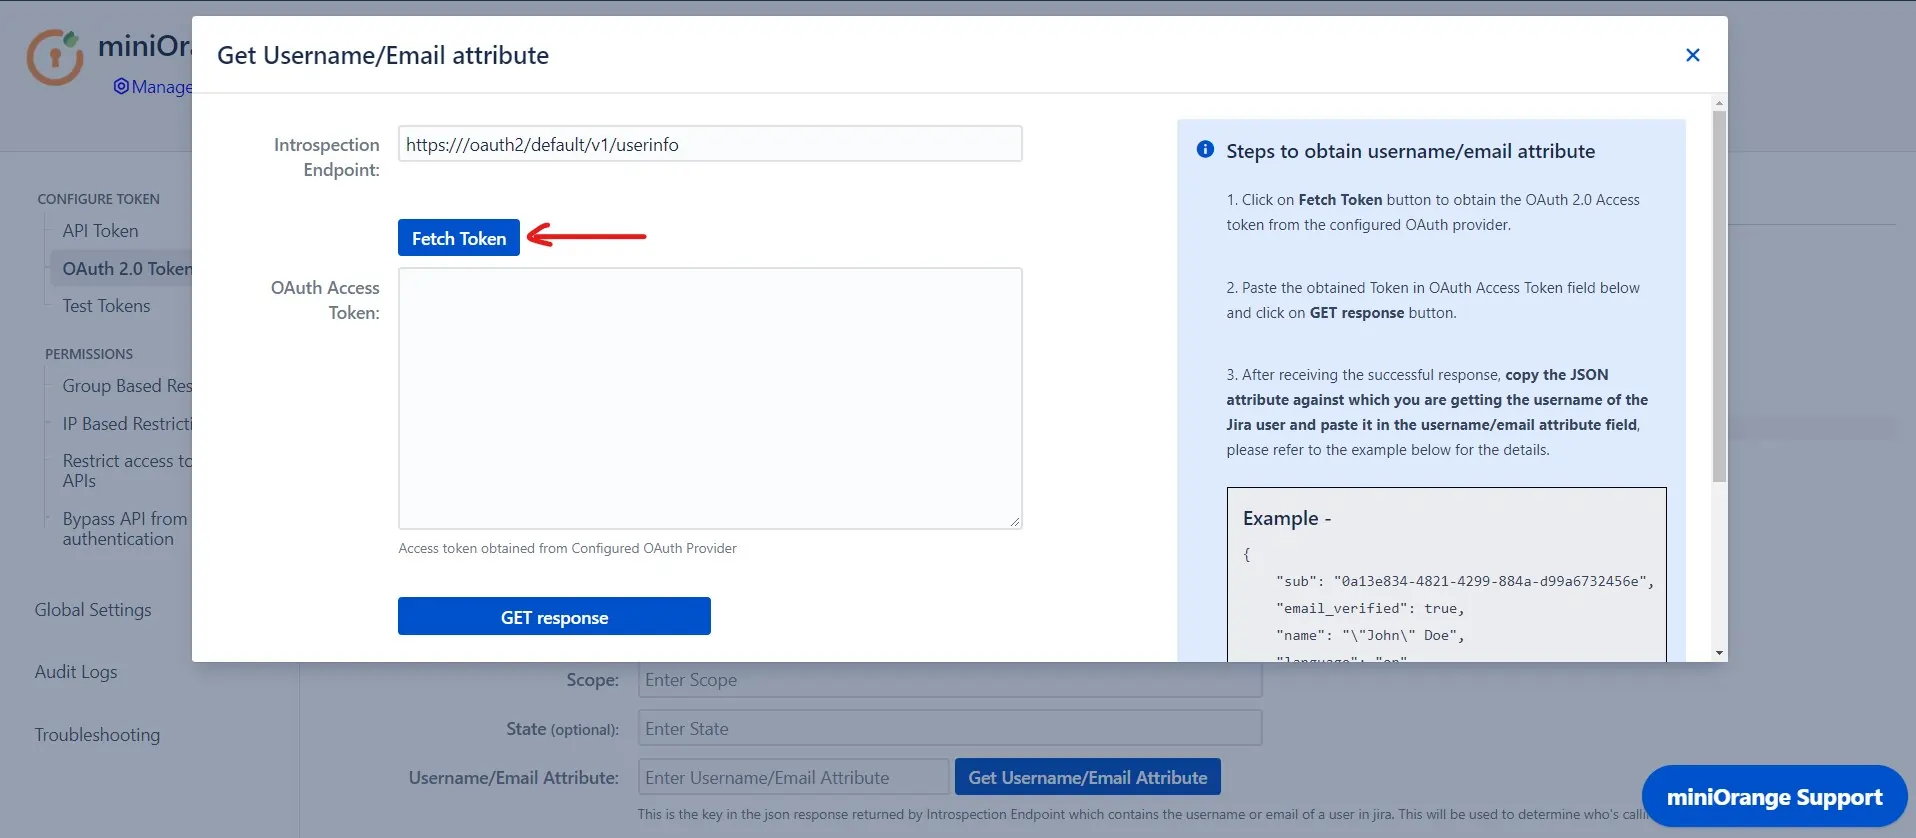
- Finally, to configure the username attribute, click on Get username/email Attribute button.
- Click on the Fetch token button. Please make sure you have entered all the necessary information in the previous form as the details such as client Id and Client secret will be used to fetch the OAuth token.
- After the above step, you will be redirected to your OAuth provider. You will receive the access token once you login into your account.
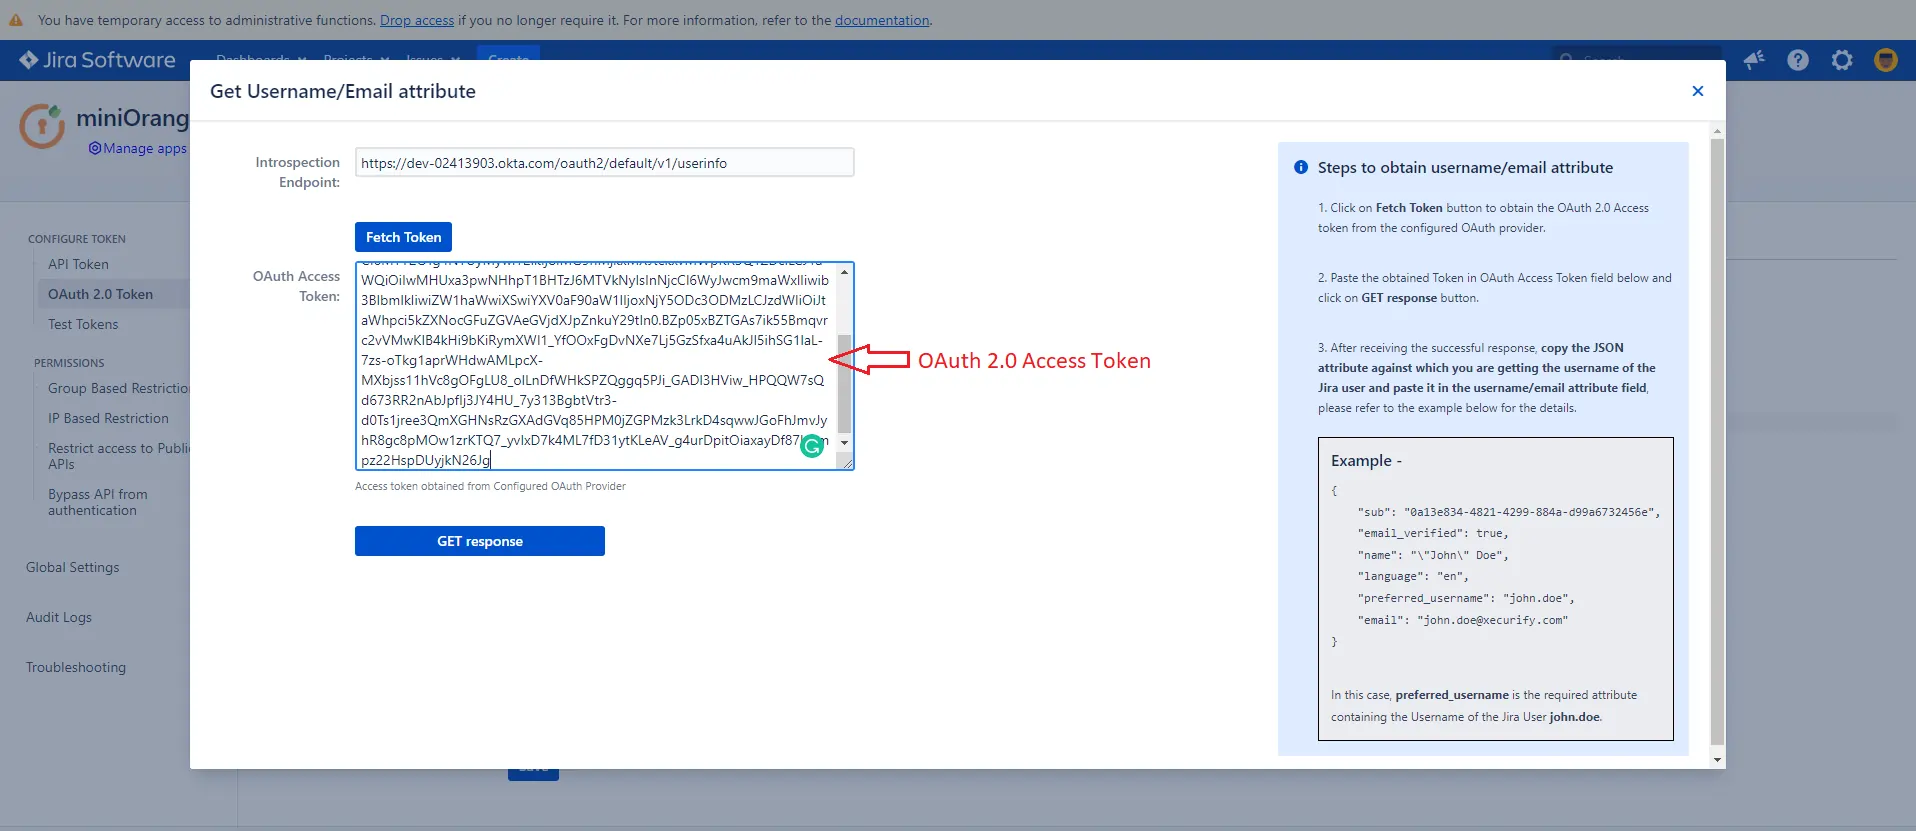
- Paste the OAuth 2.0 Access token obtained from the OAuth provider and click on Get response.
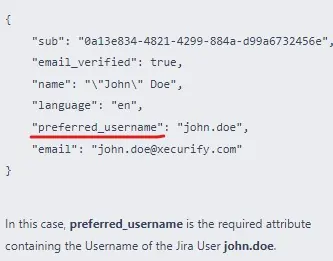
- In the received response, copy the JSON attribute against which you are receiving the username/email of the user in the local directory and paste it into the Username/Email Attribute input field, and click on Save.
a. User info endpoint.
b. Authorization endpoint.
c. Token Endpoint
Step 3: Group & IP Based Restrictions
Group Based Restrictions
- Follow below steps to configure Group Based Restrictions in miniOrange API Authentication add-on.
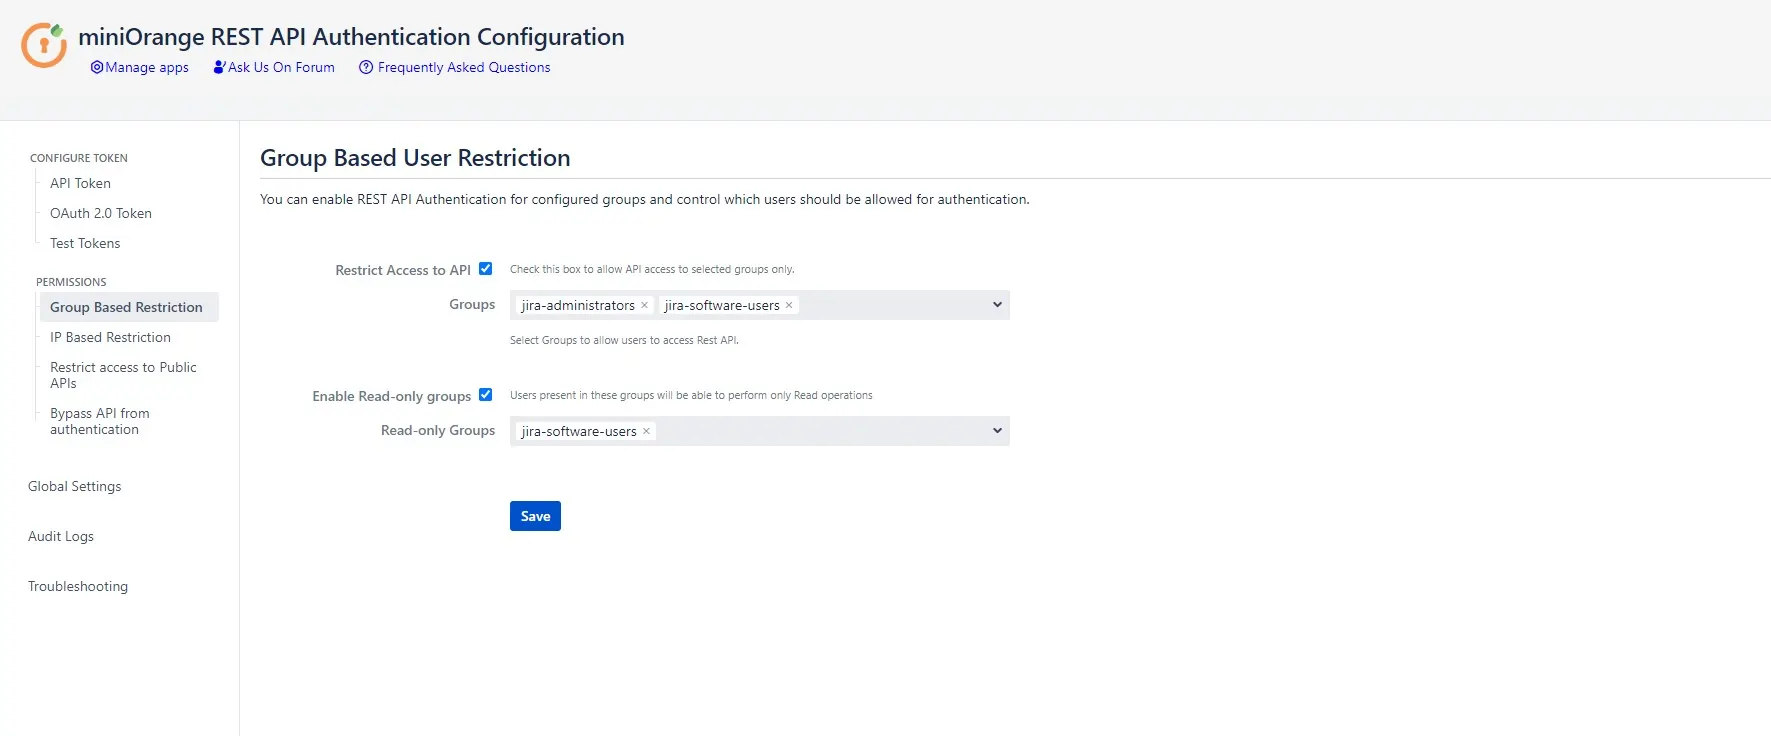
- Here, you can restrict the access to the APIs to the selected local groups only. The users which are not present in the selected groups would not be able to access the APIs.
- Users present in the “Read-only” groups would only be able to perform read operations via APIs. This can be used to allow only GET requests to some set of users.
IP Based Restrictions
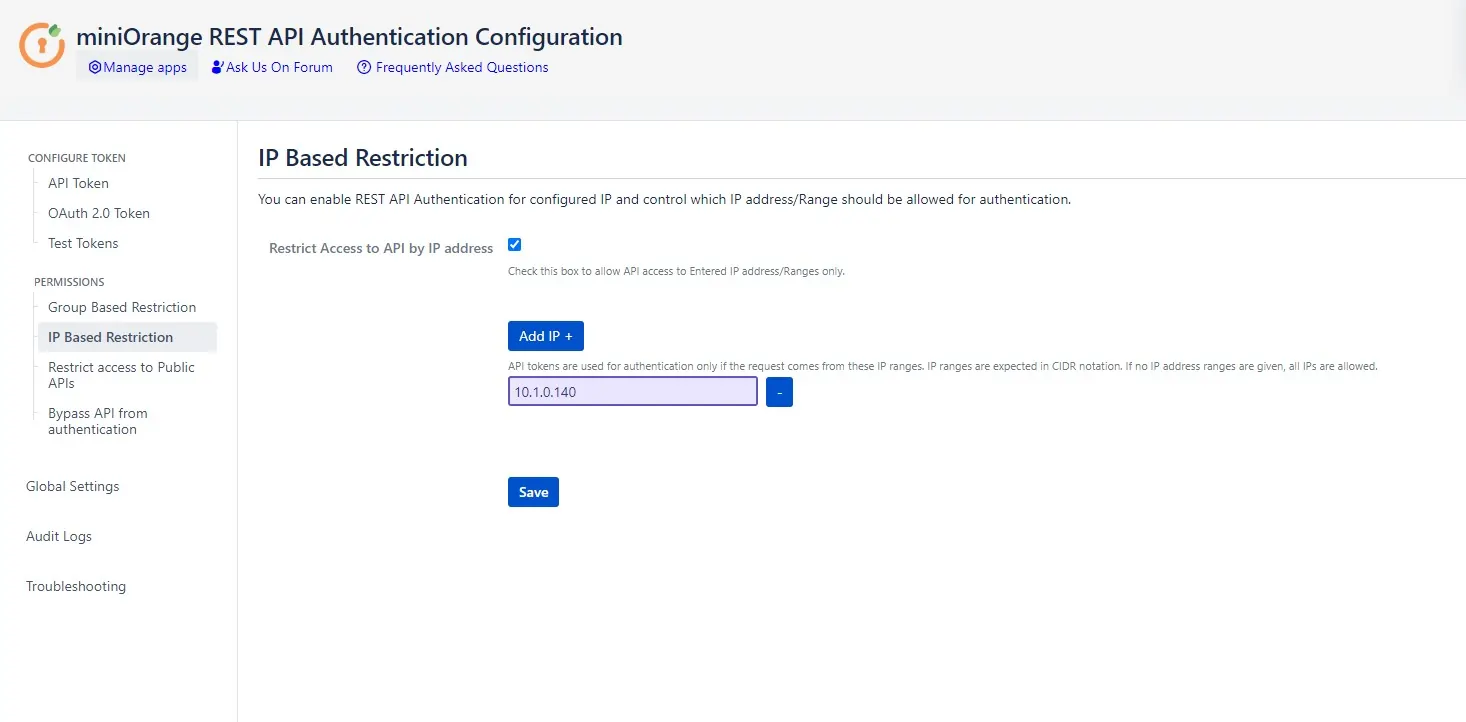
- You can allow users to make API requests only from certain IP addresses. This is particularly useful when you want to restrict the API access to a certain network only. All of the calls made from outside the configured address would be rejected.
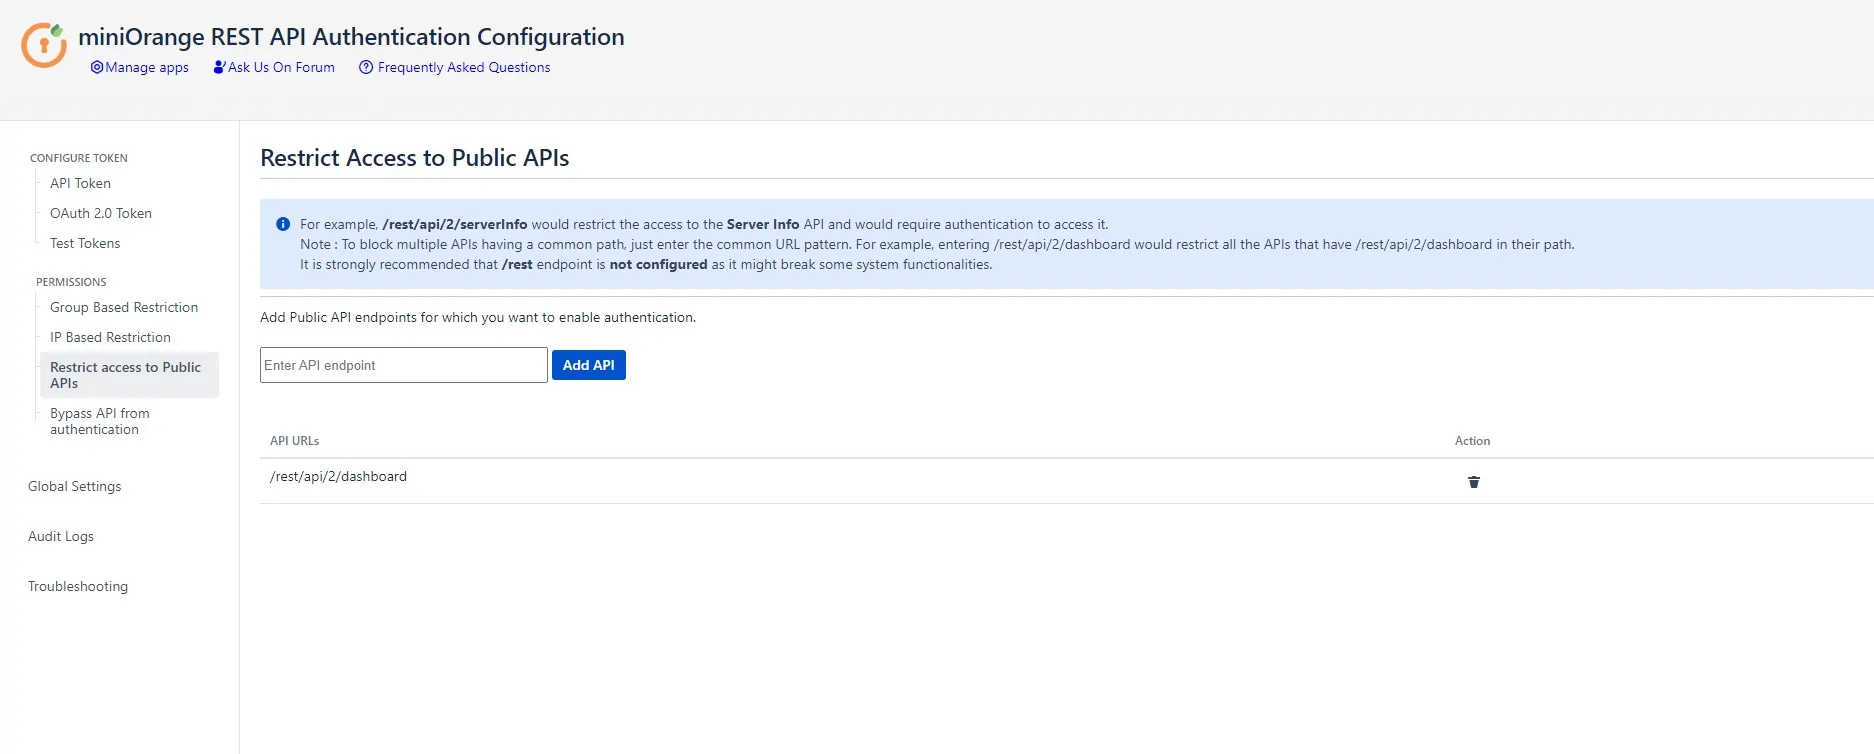
Step 4: Public APIs Access
Restrict Access to public APIs
- Public APIs do not require authentication by default, However, you can restrict access to the Public APIs with our plugin by configuring them under the Restrict Access To Public API section.
- E.g. If anonymous access is enabled for a particular page, the page can be easily accessed with the API’s, but by enabling restriction on that API, a valid API key or token will be required to access it.
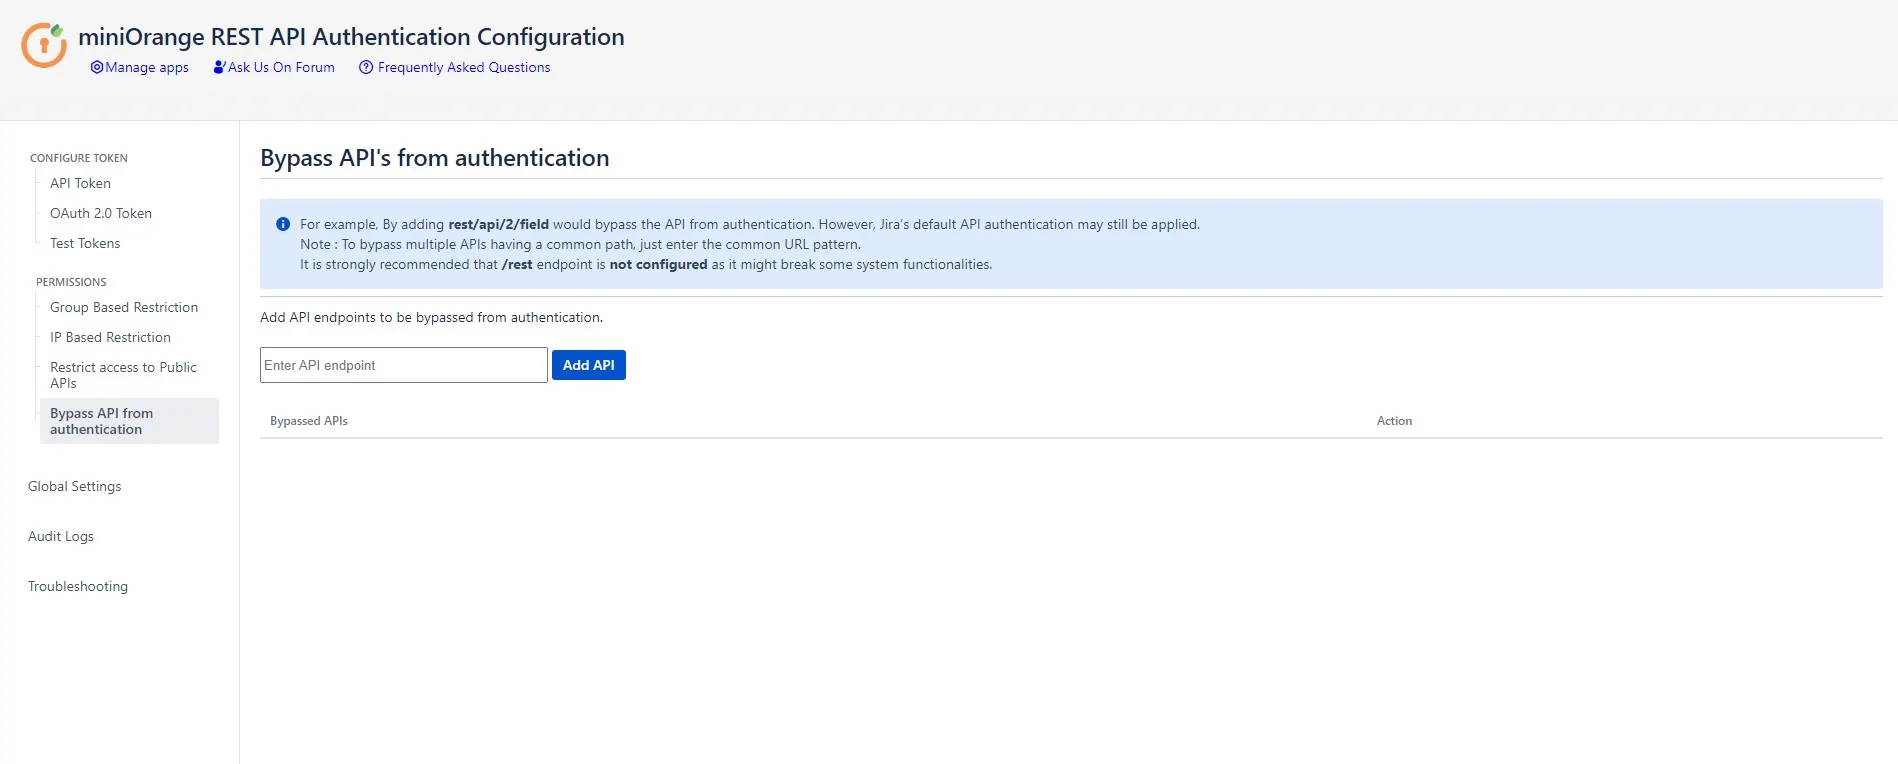
Bypass APIs from Authentication
- Rest API authentication by the plugin for certain API’s can be disabled by adding them under the Bypass APIs section. However, the default Authentication would still be applied.
- To configure it, enter the common rest endpoints for which you need the authentication to be skipped and the rest is done by the plugin.
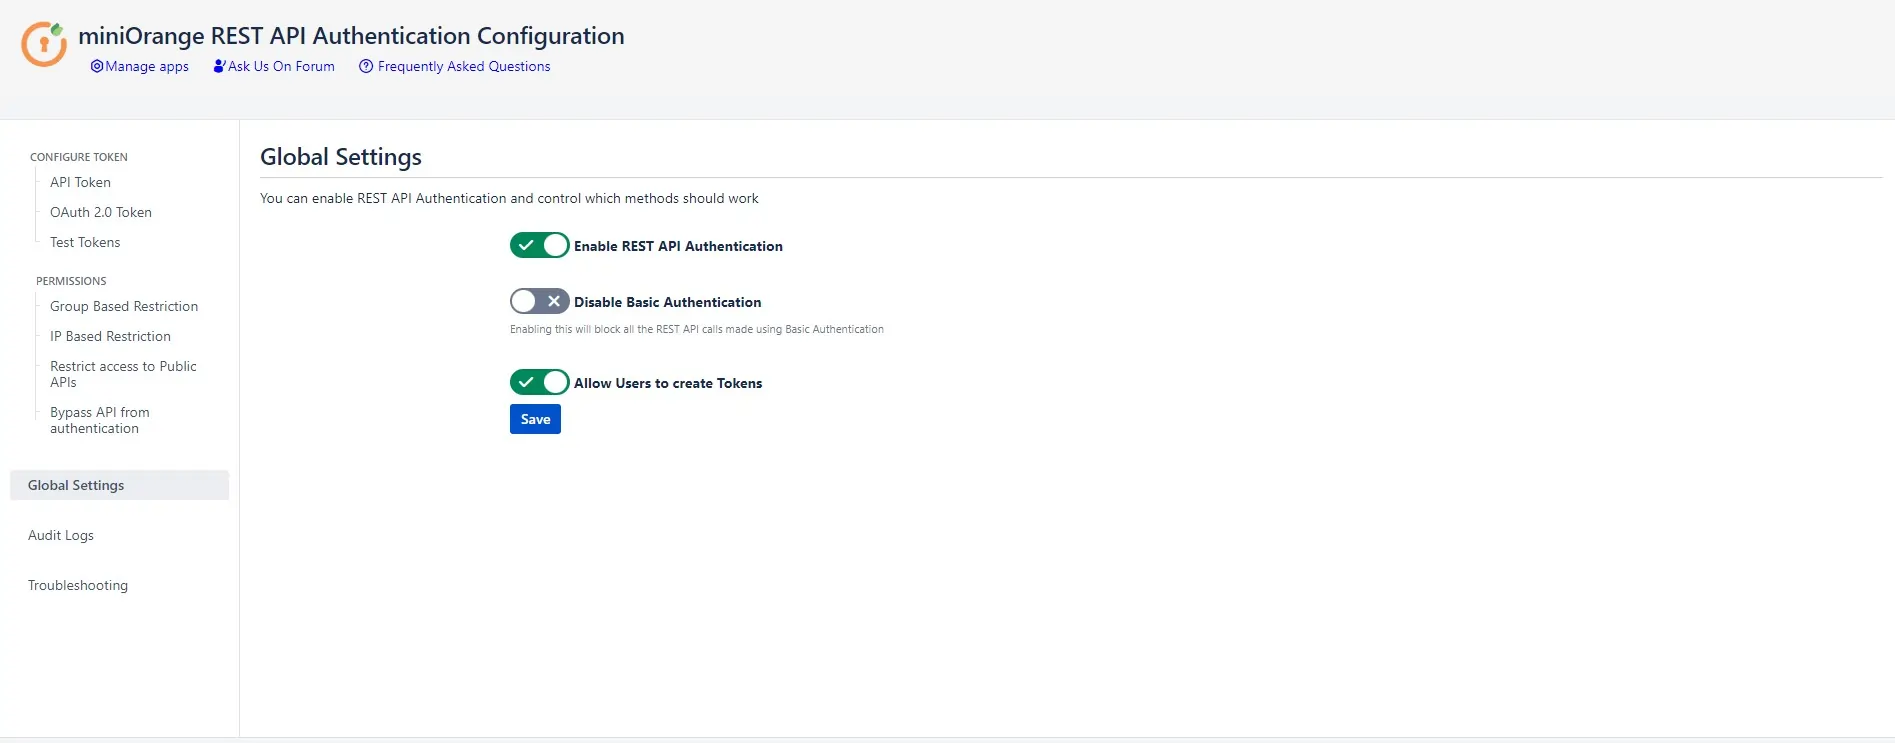
Step 4: Global Settings
- Enable read-only access : Plugin’s authentication can be enabled or disabled using this toggle.
- Disable Basic Authentication : Basic authentication can be disabled using this toggle.
- Allow users to create tokens : Using this toggle, admins can allow other users to create tokens. If the toggle is disabled, only admins would be able to create tokens for all the users.
Recommended Add-Ons

Jira SAML SSO
Jira SAML SSO application enables SSO for Jira Software and Jira Service Desk.
Know MoreJira OAuth SSO
Secure your Jira Service Management with OAuth/OpenID Connect SSO.
Know MoreUser Sync SCIM Provisioning
Synchronize users, groups and directory with SCIM and REST APIs for Server DC.
Know MoreAdditional Resources
Our Other Apps:
SAML SSO Apps
|
OAuth Apps
|
Crowd Apps
|
2FA Apps
|
REST API Apps
|
User Sync Apps
|
Bulk User Management
|
Secure Share
|
Bitbucket Git Authentication App | Kerberos/NTLM Apps | Word/PDF Exporter | WebAuthn | SonarQube SSO | Jenkins SSO
Bitbucket Git Authentication App | Kerberos/NTLM Apps | Word/PDF Exporter | WebAuthn | SonarQube SSO | Jenkins SSO
If you don't find what you are looking for, please contact us at support-atlassian@miniorange.atlassian.net or raise a support ticket here.