Enhance and streamline customer access to Jira Service Management (formerly Jira Service Desk) with the combined power of Single Sign-On (SSO) and Two-Factor Authentication (2FA). This setup allows your external customers to effortlessly log in to your portal using their existing Identity Provider (IDP). It also adds an extra layer of security with Two-Factor Authentication (2FA). With support for multiple IDPs, the solution ensures adaptability for a wide range of configurations.
This guide provides detailed, step-by-step instructions to configure Jira Service Management with an identity provider and enable 2FA for enhanced security.
Download And Installation
- Log into your Jira instance using an administrator account.
- Navigate to the settings and Click Manage Apps.
- Search for SAML/OAuth SSO for JSM Customers in the app marketplace.
- Click on Try it free to start a trial of the SAML/OAuth SSO for JSM Customers app.
- After installation, go to the Apps menu on the top bar and select SAML/OAuth SSO for JSM Customers to begin configuring SSO and 2FA for your customers.
Step 1: Configure IDP in miniOrange
- Log into miniOrange Admin Dashboard.
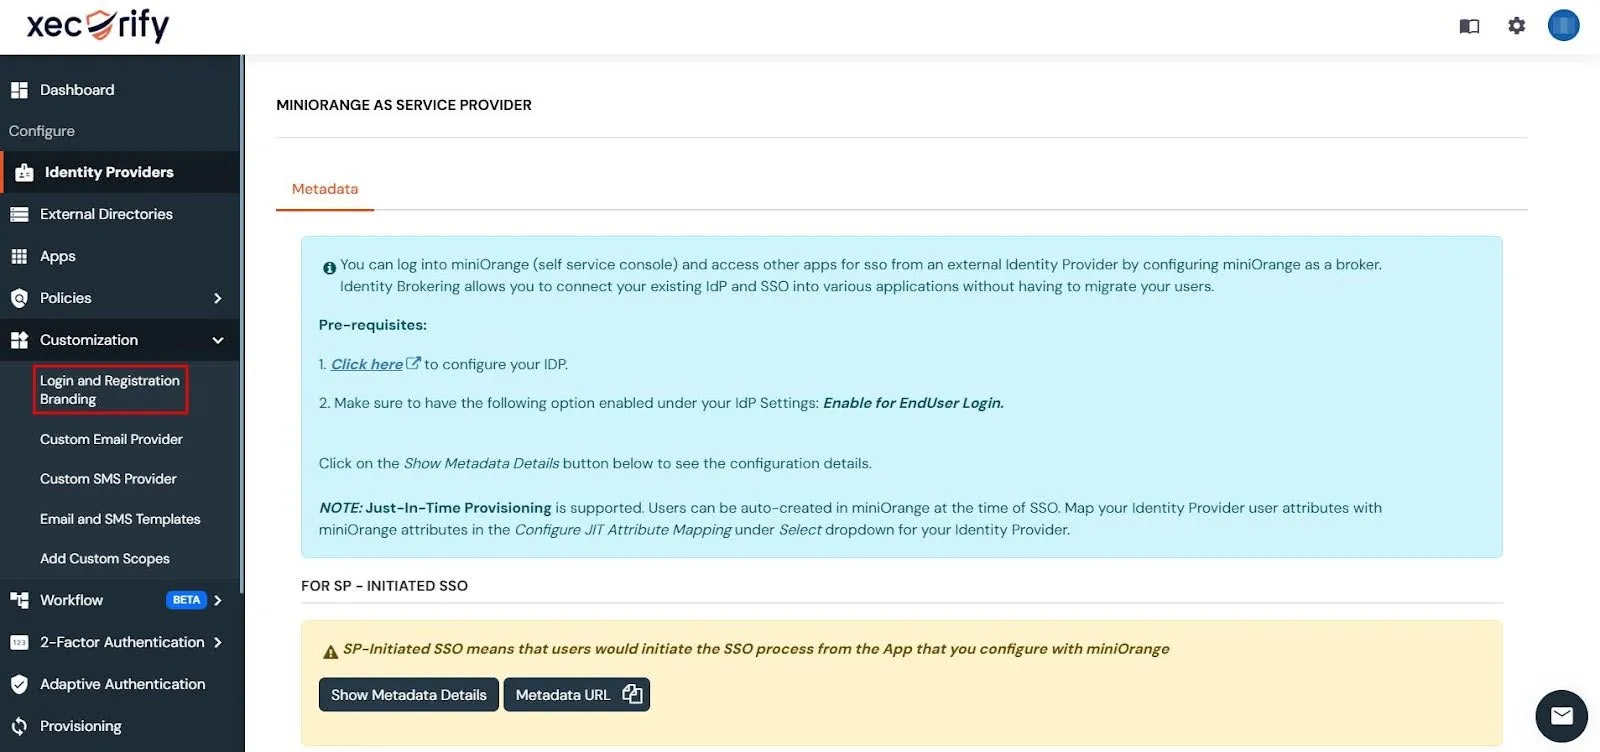
- Next, navigate to the left-hand menu, expand the Customization menu, and select Login and Registration Branding.
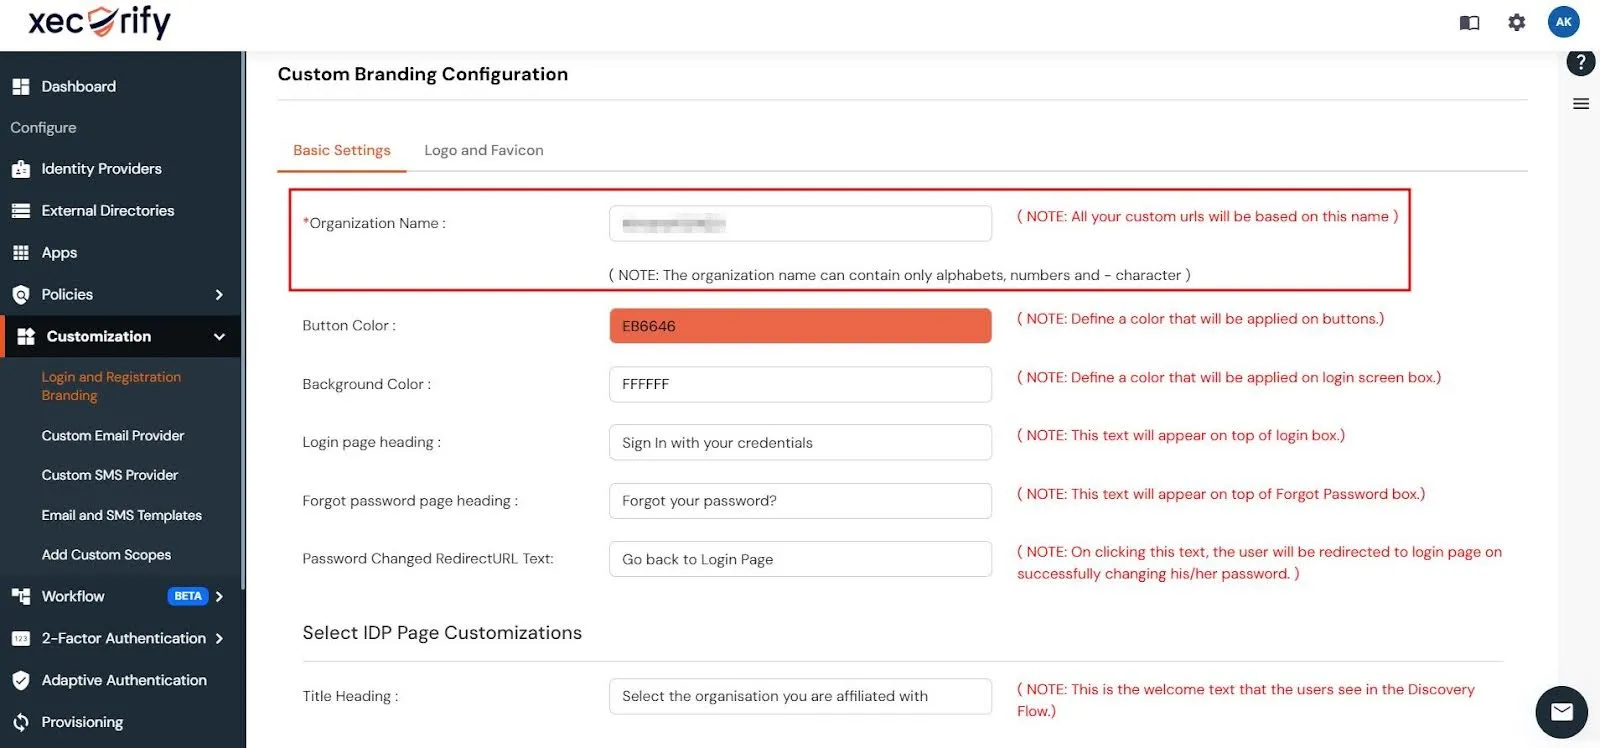
- Change the Organization Name to create custom URLs. For example, if you set the name to piedpipers, your custom URLs will change from login.xecurify.com to piedpipers.xecurify.com.
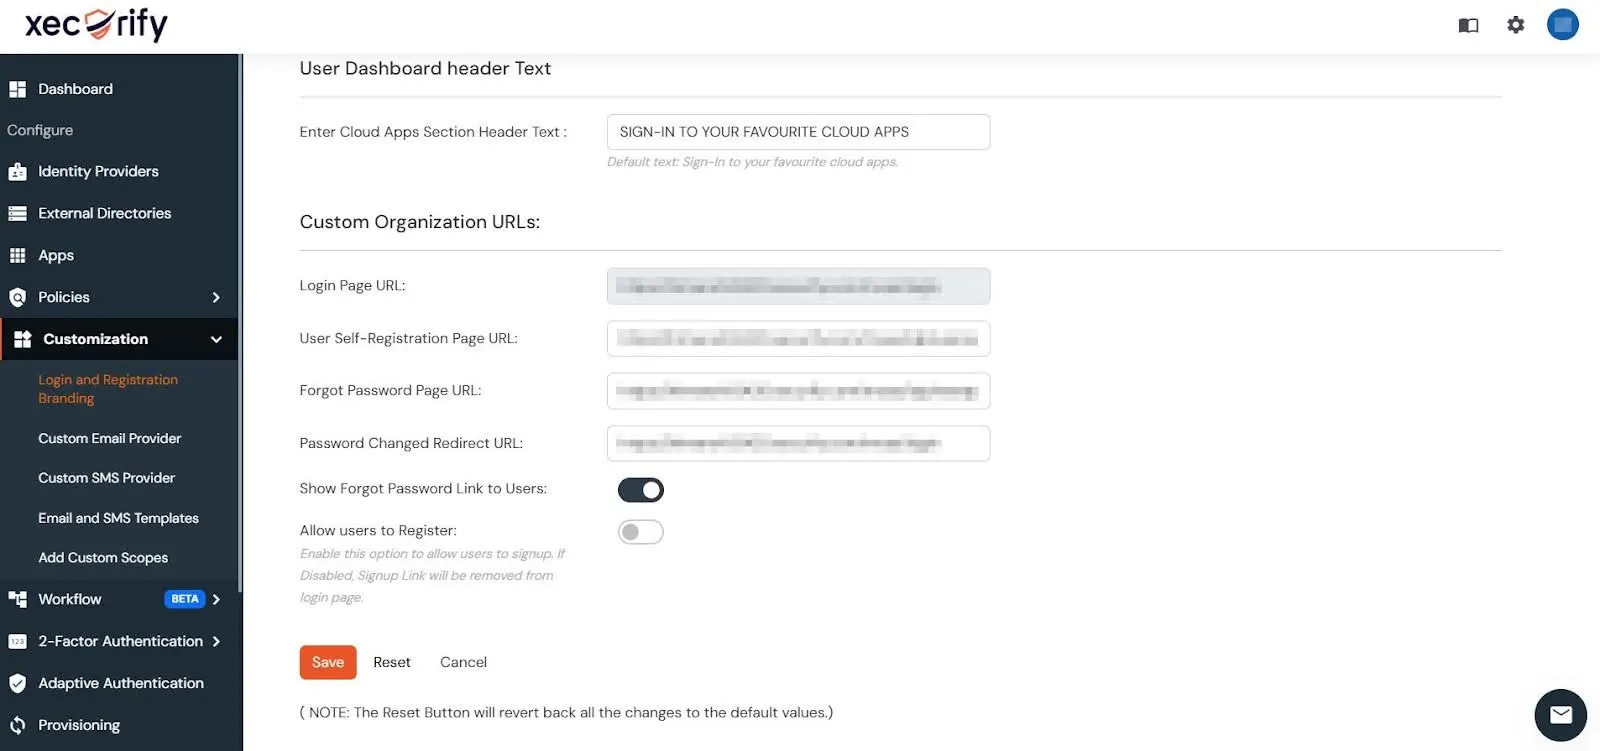
- After saving the changes, scroll down to the Custom Organization URLs section to view the updated URLs.
- After setting your organization name and custom URL, log out of miniorange dashboard and log back into the updated dashboard URL. For example, piedpipers.xecurify.com
Step 2: Retrieve metadata from miniOrange to Configure IDP
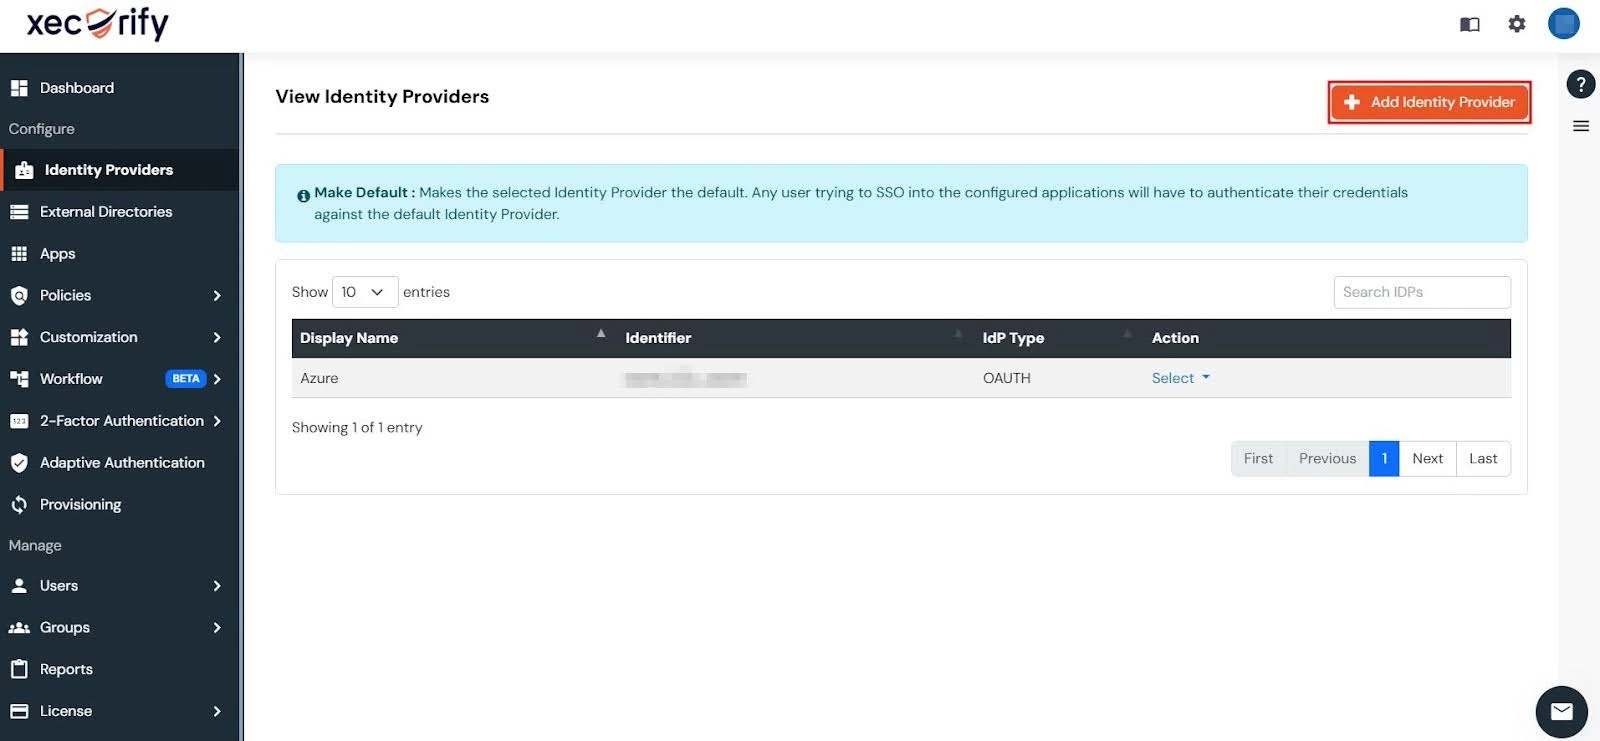
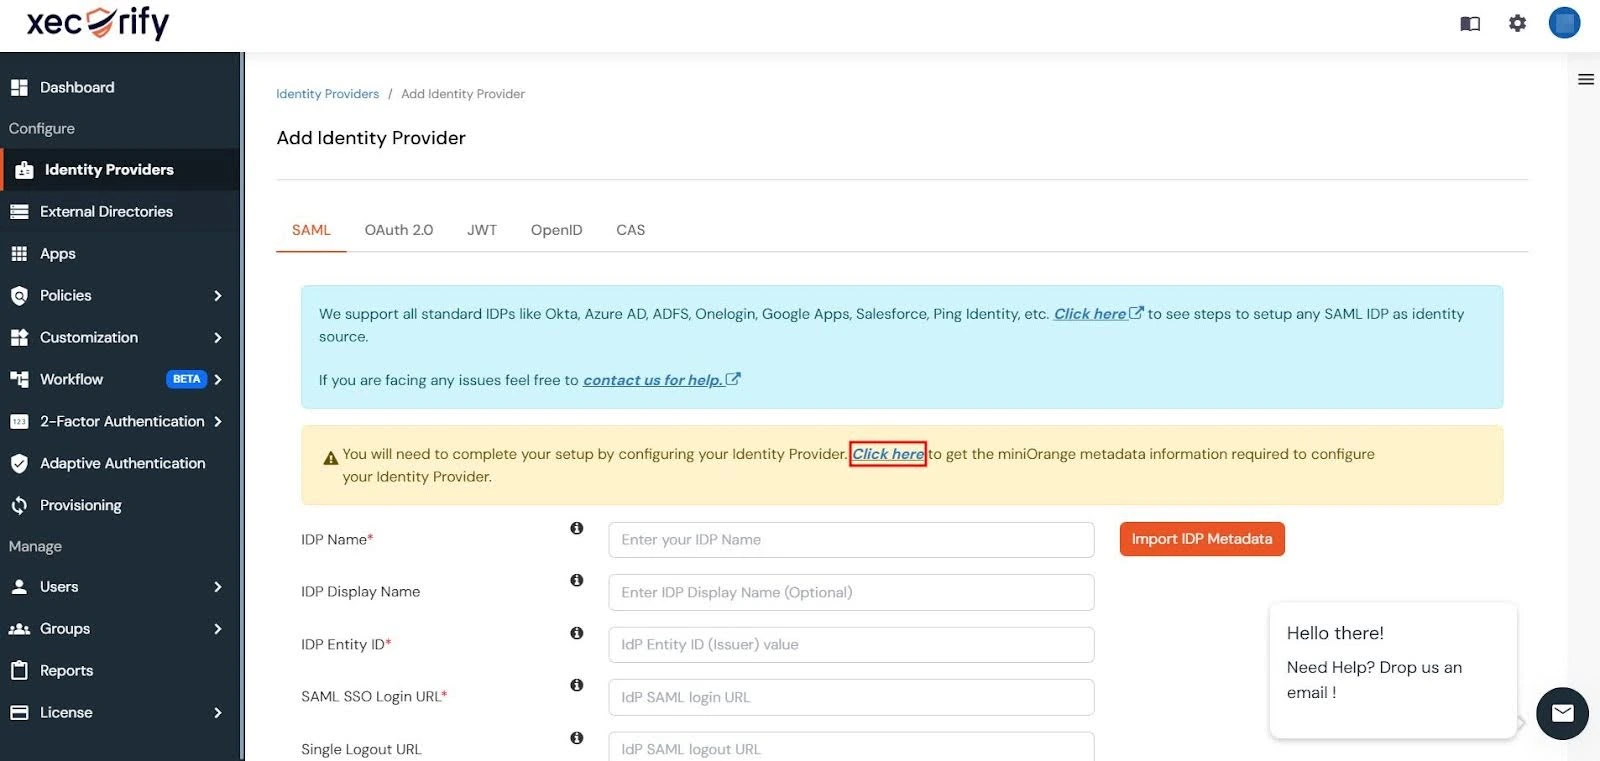
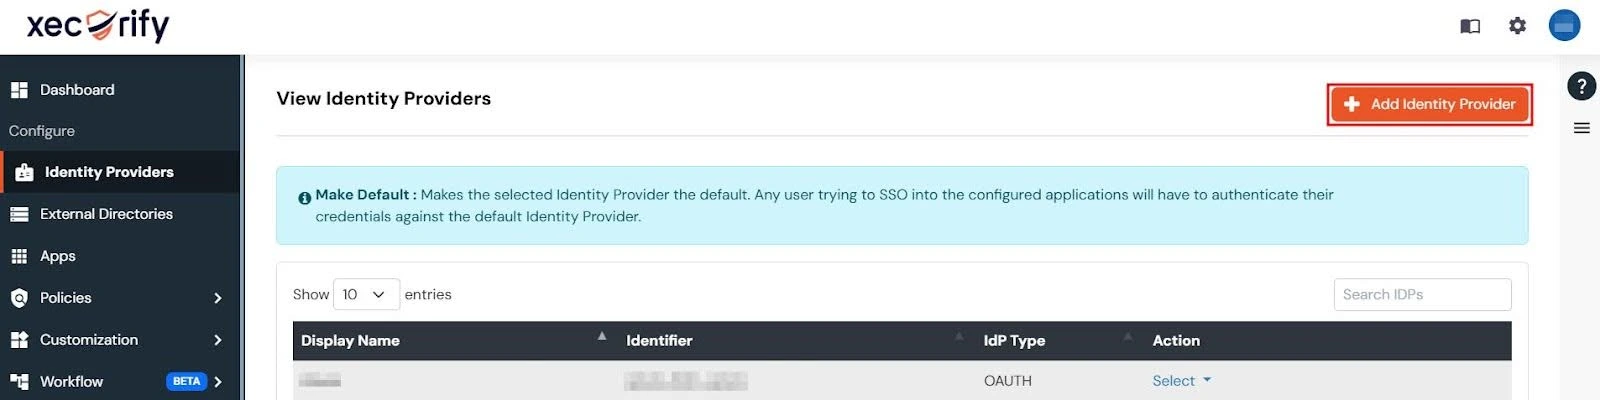
- In the miniOrange Dashboard, navigate to the Identity Providers section and click on the Add Identity Provider button in the top-right corner.
- In the alert box, click on the Click here link to proceed.
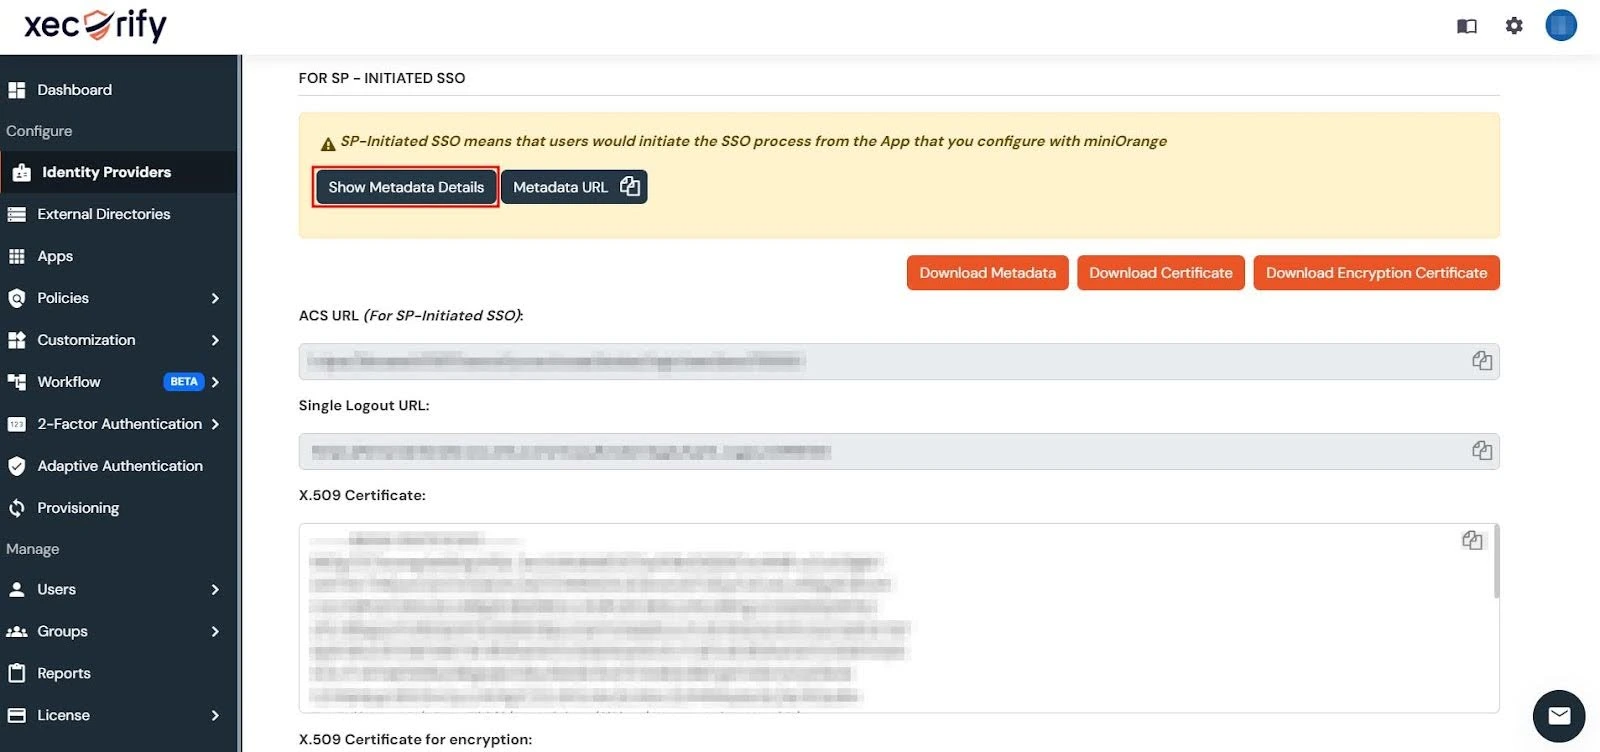
- Under the FOR SP-INITIATED SSO section, click Show Metadata Details.
- You’ll have to use the displayed metadata details to configure an app within your Identity Provider (IDP).
Step 3: Set Up Okta as Identity Provider
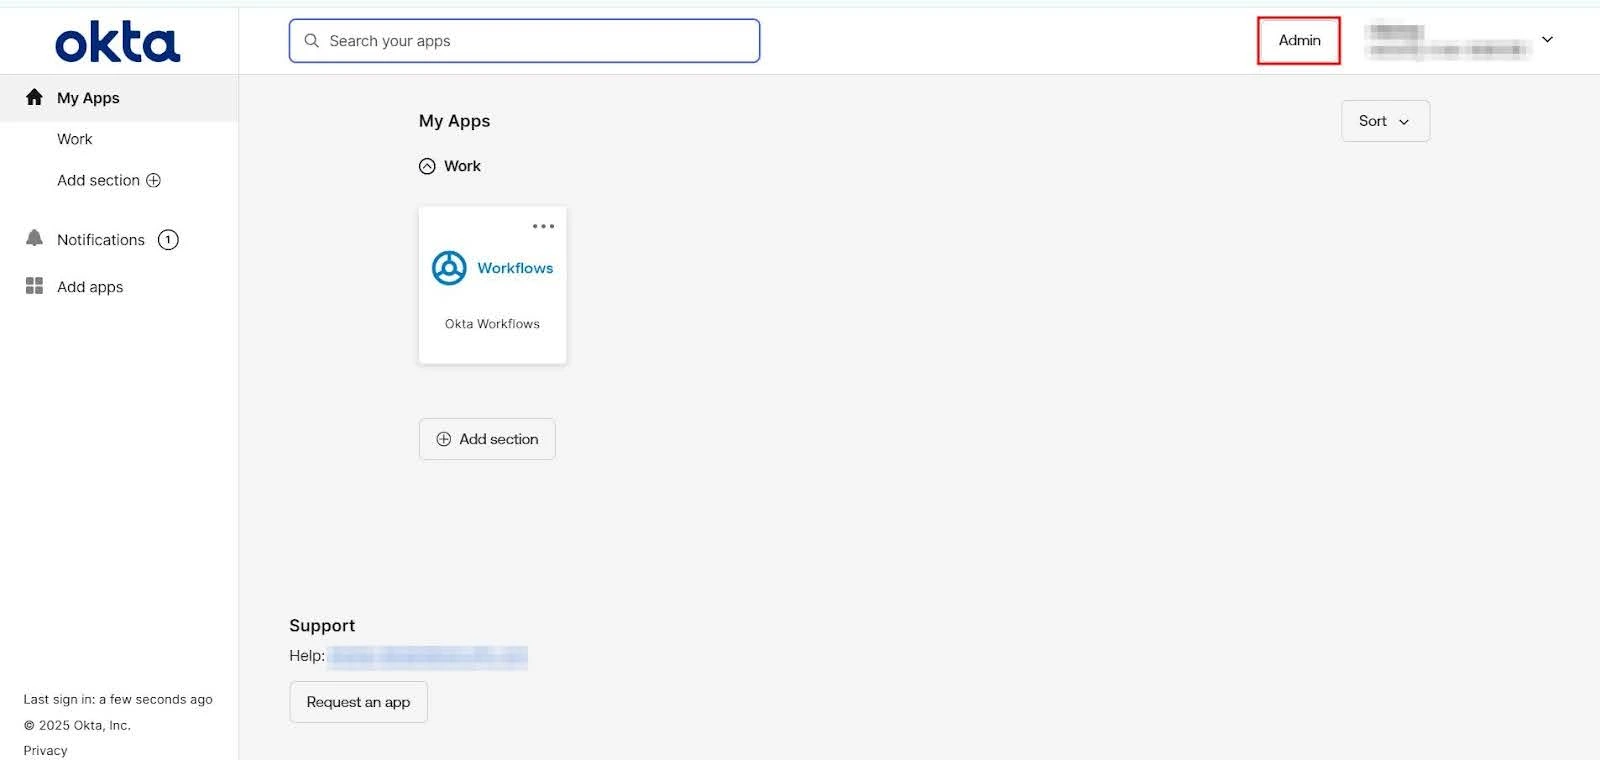
- Log in to the Okta Admin Console.
- Switch to Classic UI to configure the app (for developer accounts).
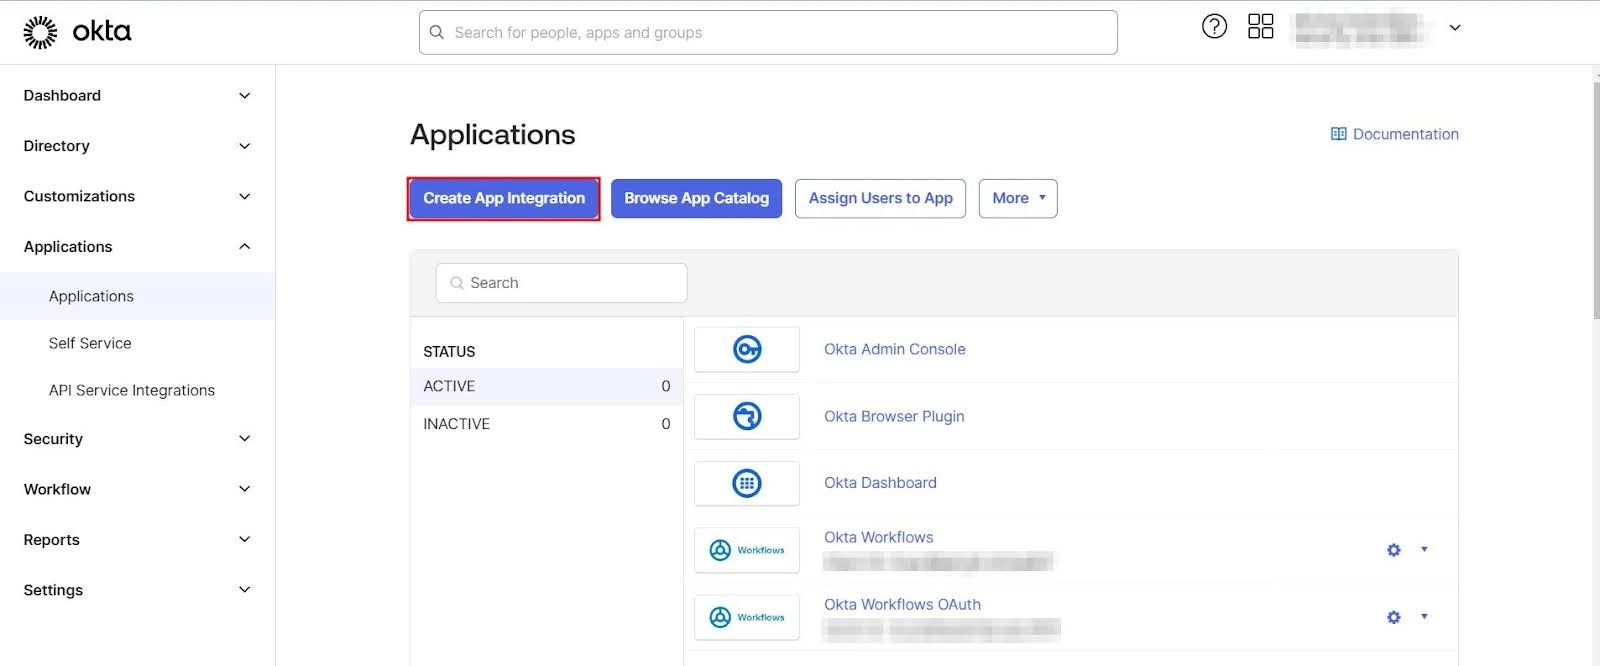
- Navigate to Applications → Applications and click Create App Integration.
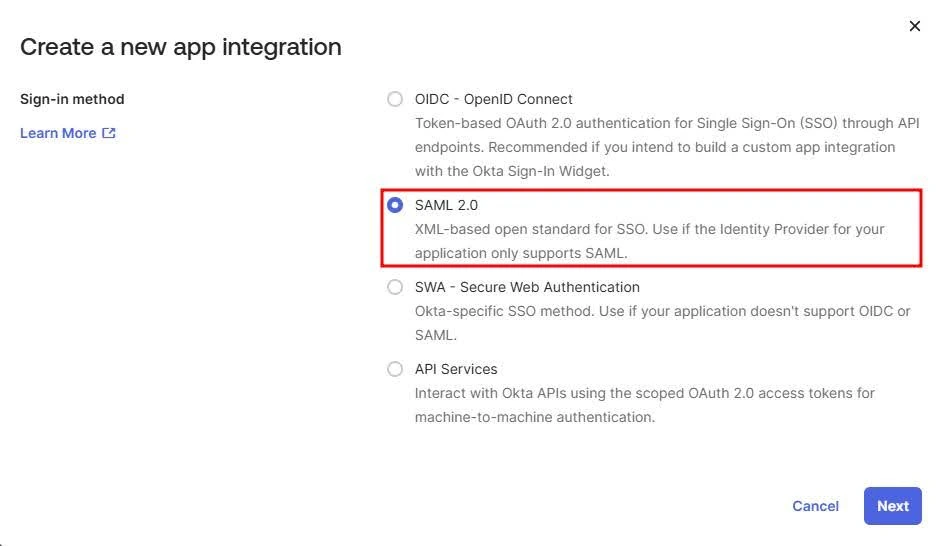
- Select SAML 2.0 as the sign-on method and click Next.
- In the General Settings, enter the application name and click on Next.
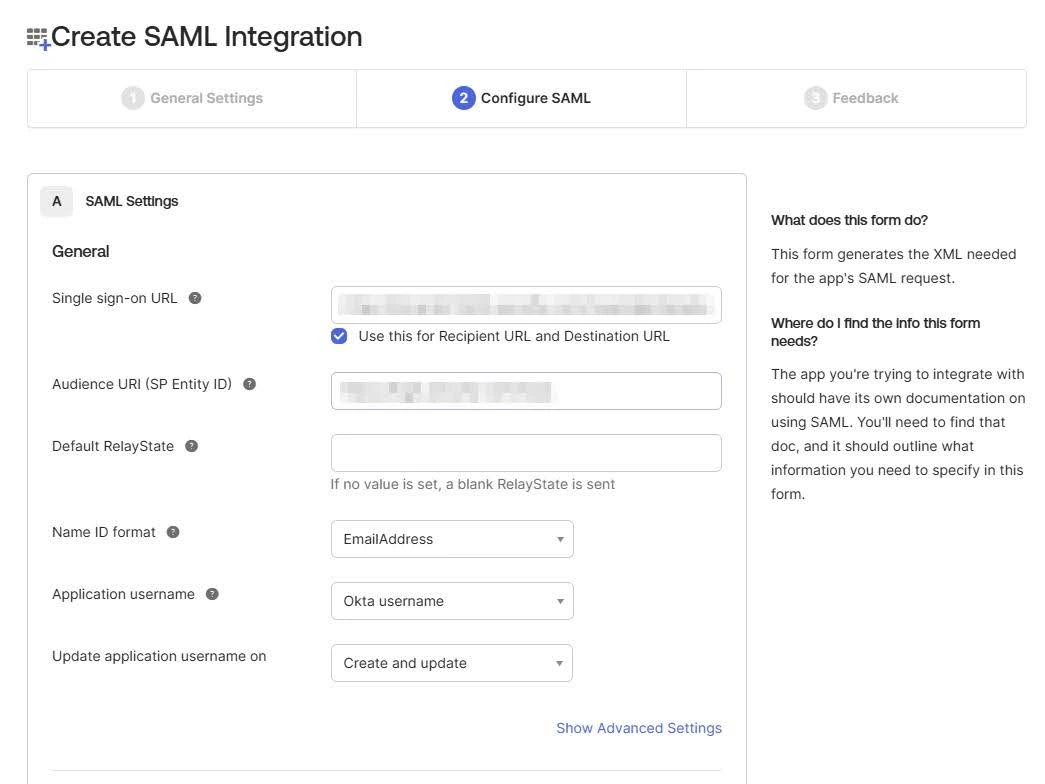
- Configure SAML settings using metadata details we previously copied from the miniOrange Admin Dashboard.
- Enter the following details:
Single Sign-On URL Enter the ACS URL from the miniOrange Dashboard. Audience URI (SP Entity ID) Enter the SP Entity ID/Issuer from the miniOrange Dashboard. Default Relay State Add the relay state if required. NameID Format Select EmailAddress. Application Username Set it to Okta username. - Next, scroll down within the Configure SAML tab and complete the Attribute Statements and Group Attribute Statements sections (Optional):
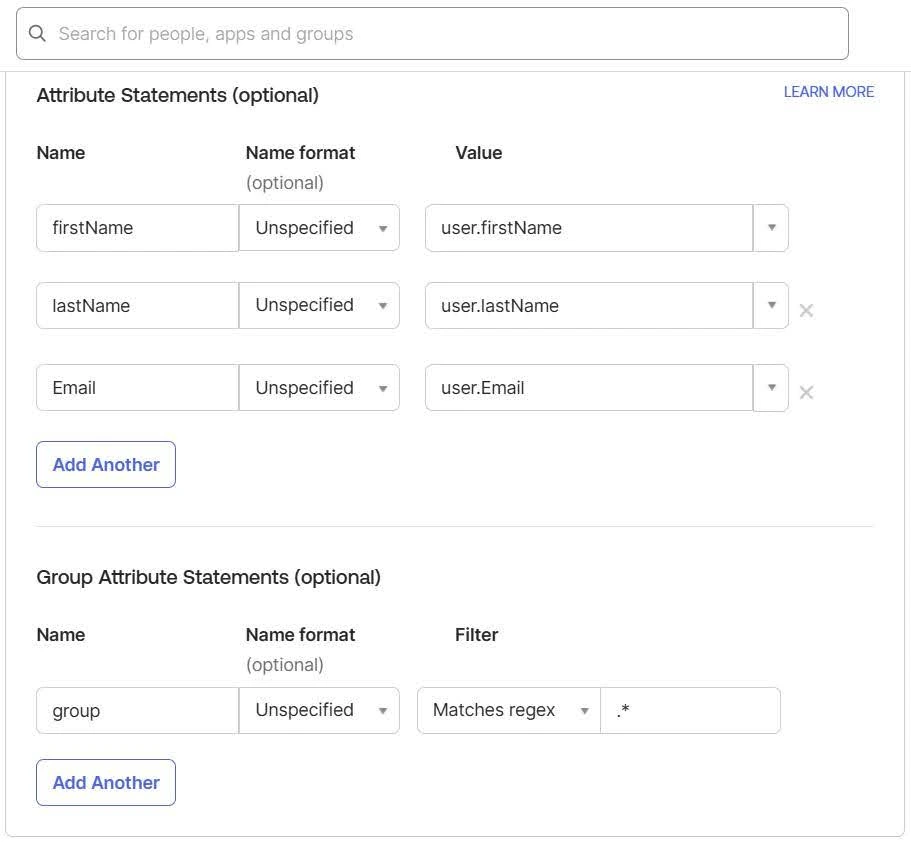
1. Add custom attributes like firstName, lastName, and Email.
- For Name, enter firstName and select user.firstName from the value dropdown.
- For Name, enter lastName and select user.lastName from the value dropdown.
- For Name, enter Email and select user.email from the value dropdown.
2. Under Group Attribute Statements, configure group assignments using regex filters if necessary.
- For Name, enter groups and select Matches regex from the Filter dropdown and then enter ".*" in the adjacent textbox.
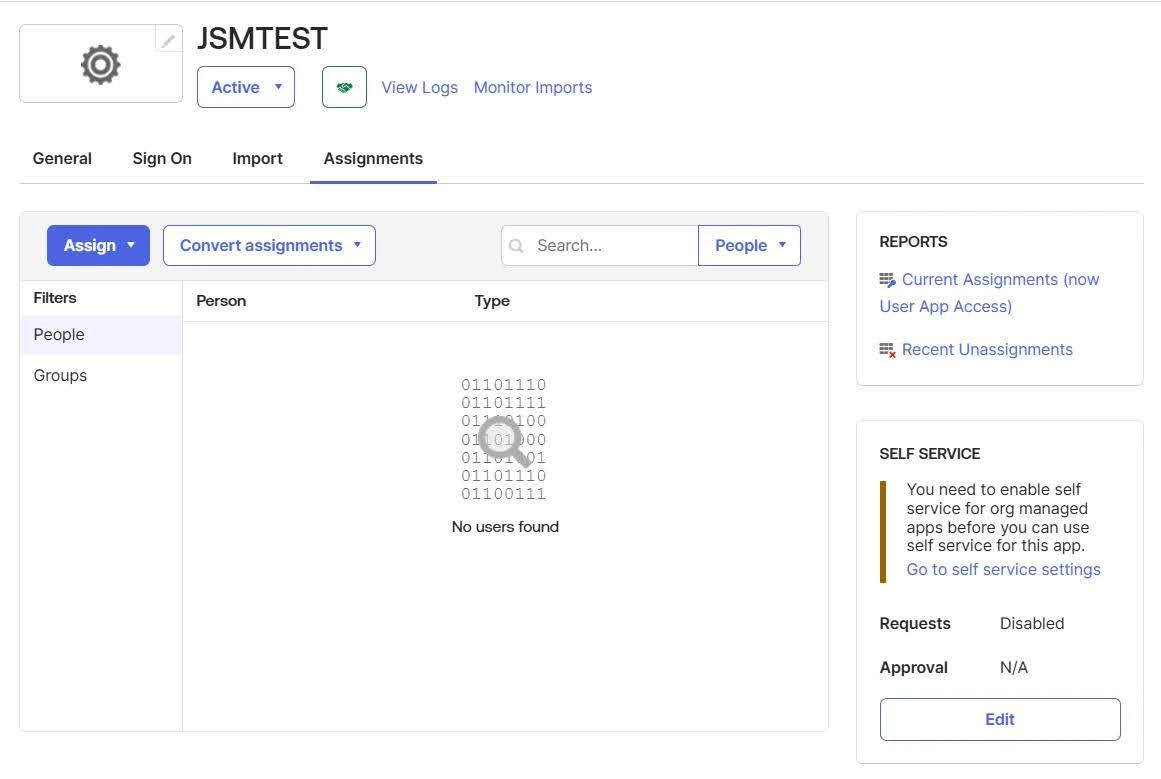
- Once you’re done mapping the attributes, click Next and then click Finish to be redirected to the Assignment Tab.
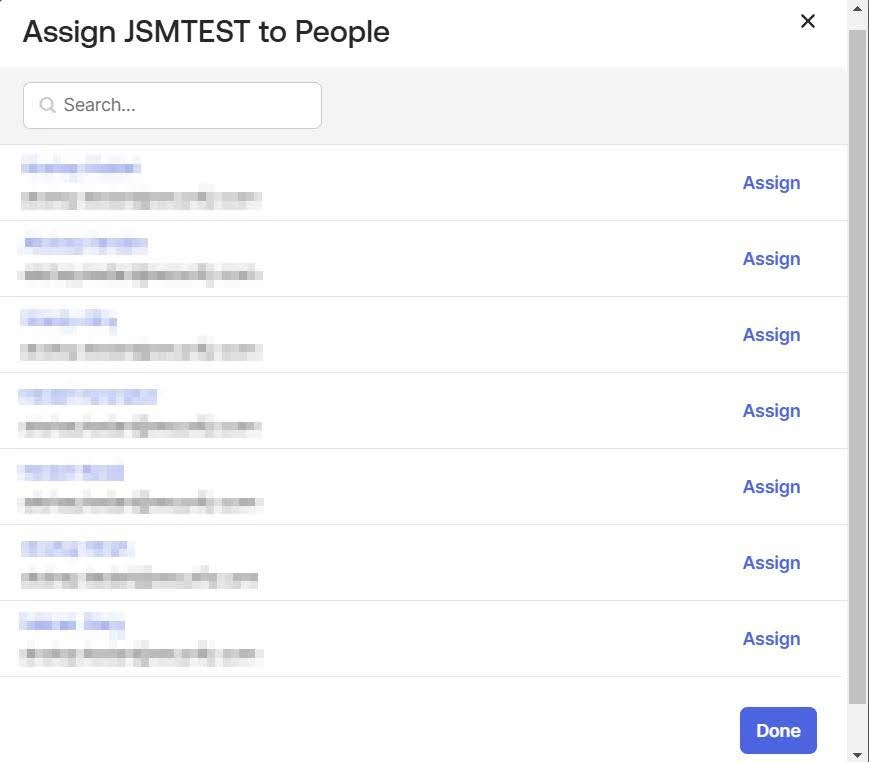
- Next, select the individuals and groups you want to grant login access to through the app by going to Assign → Assign to People.
- After assigning the desired individuals and groups to the app, navigate to the Sign On tab.
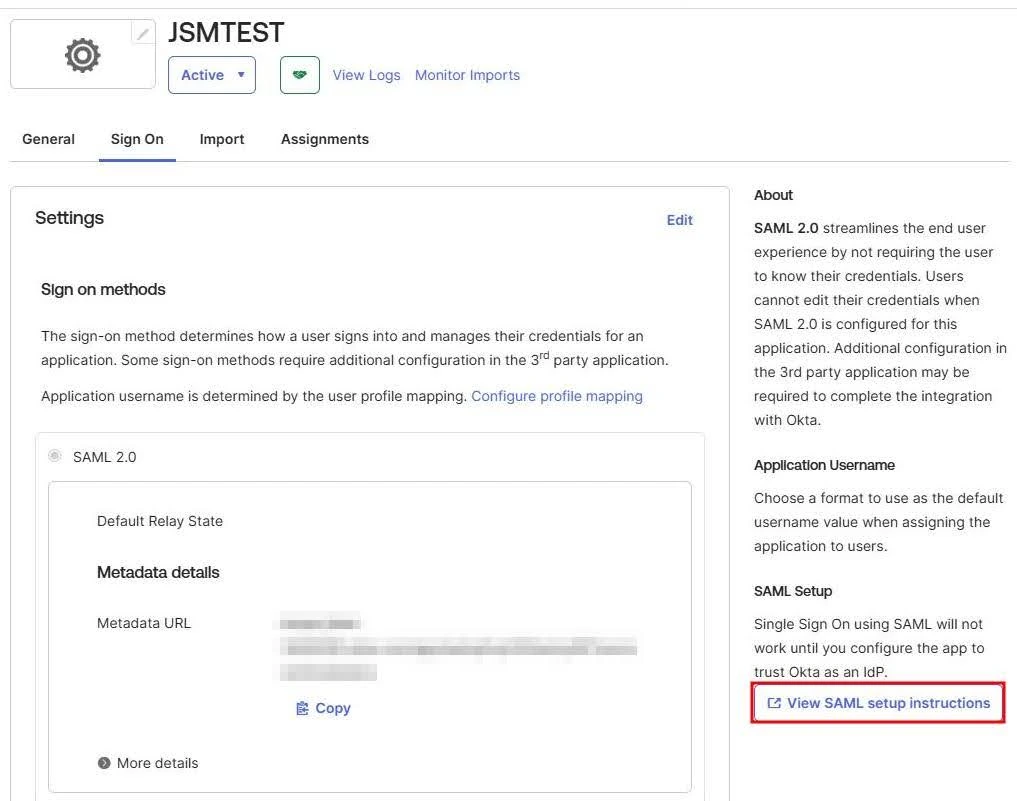
- Here, click on View Setup Instructions to retrieve the following metadata:
- SAML Login URL (Single Sign on URL)
- Single Logout URL
- IDP Entity ID
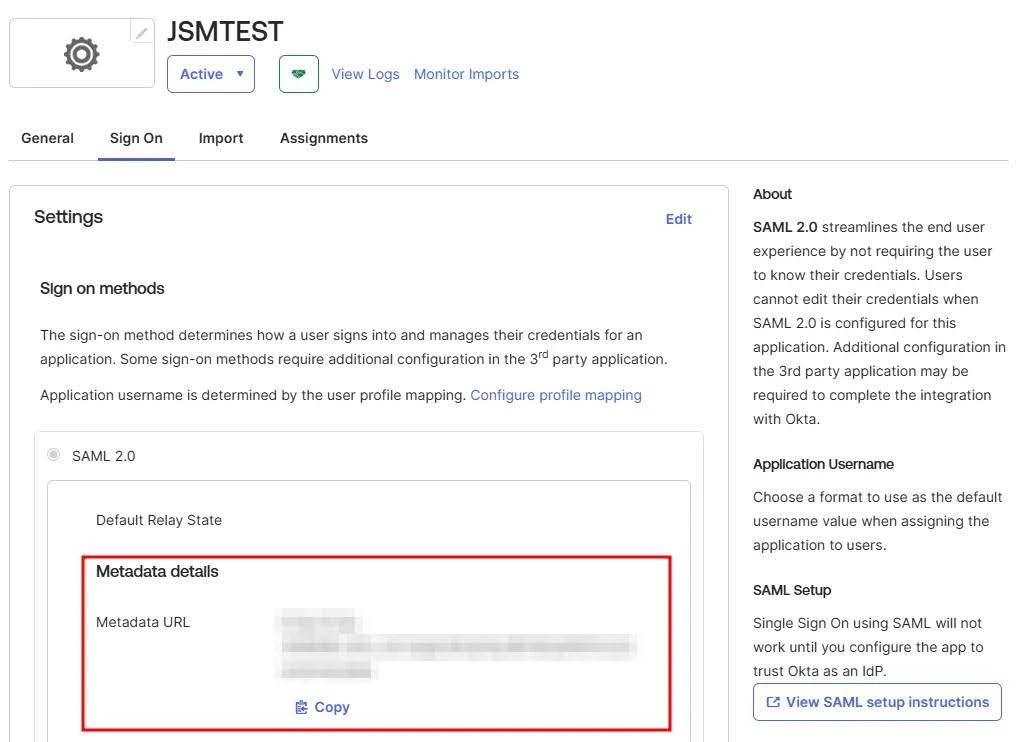
- X.509 Certificate - Alternatively, you can copy the Metadata URL under Sign On → Metadata Details for plugin configuration.
- Navigate to the Identity Provider tab in miniOrange Dashboard and click on the Add Identity Provider button in the top-right corner.
- Next, enter the following details in miniOrange Dashboard:
- IDP Name: Provide a name for the IDP.
- IDP Entity ID: Enter the Entity ID or Issuer ID from your Identity Provider.
- SAML SSO Login URL: Enter the Single Sign-On URL provided by your Identity Provider.
- X.509 Certificate: Paste the certificate provided by your Identity Provider. - Finally, click on the Save button to finalize the IDP configuration.
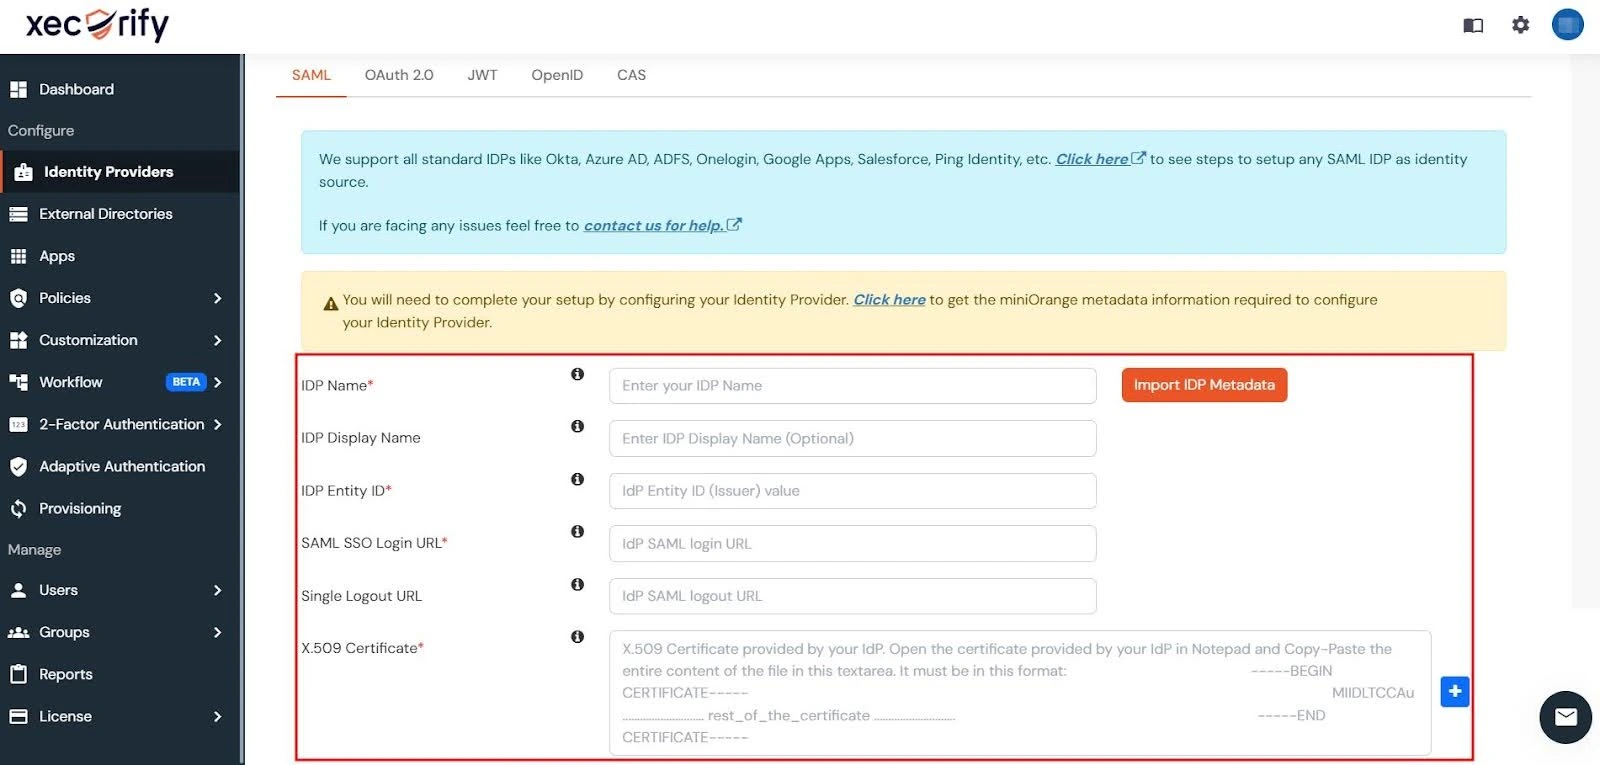
Note: You can enter the details manually or through the metadata URL.
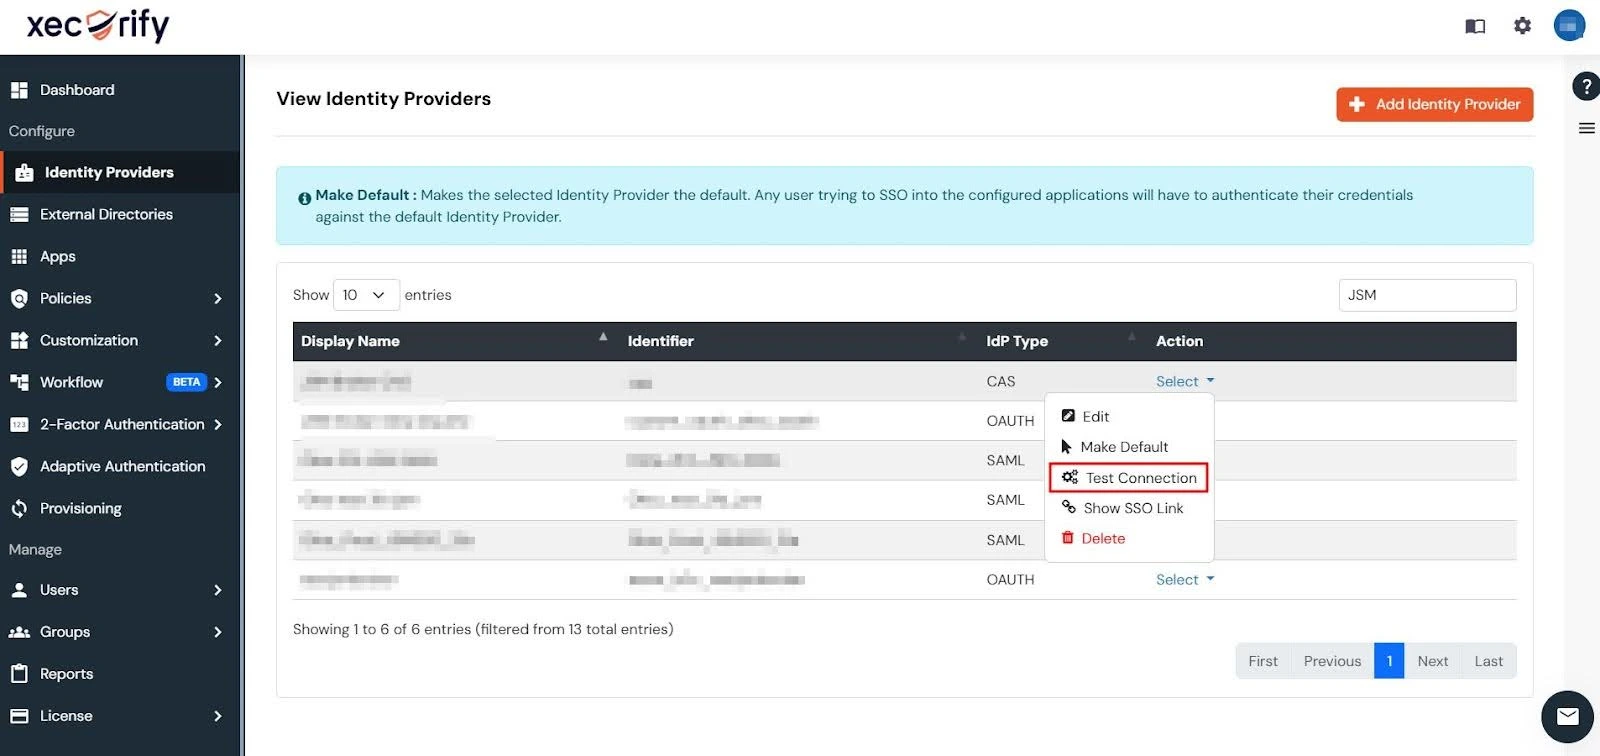
Note: You can also test connection between the IDP and miniOrange dashboard using the Test Connection Button under the Actions column for the IDP you’ve set up.
Step 4: Configure Helpdesk SSO with miniOrange
Retrieve Metadata from Helpdesk SSO
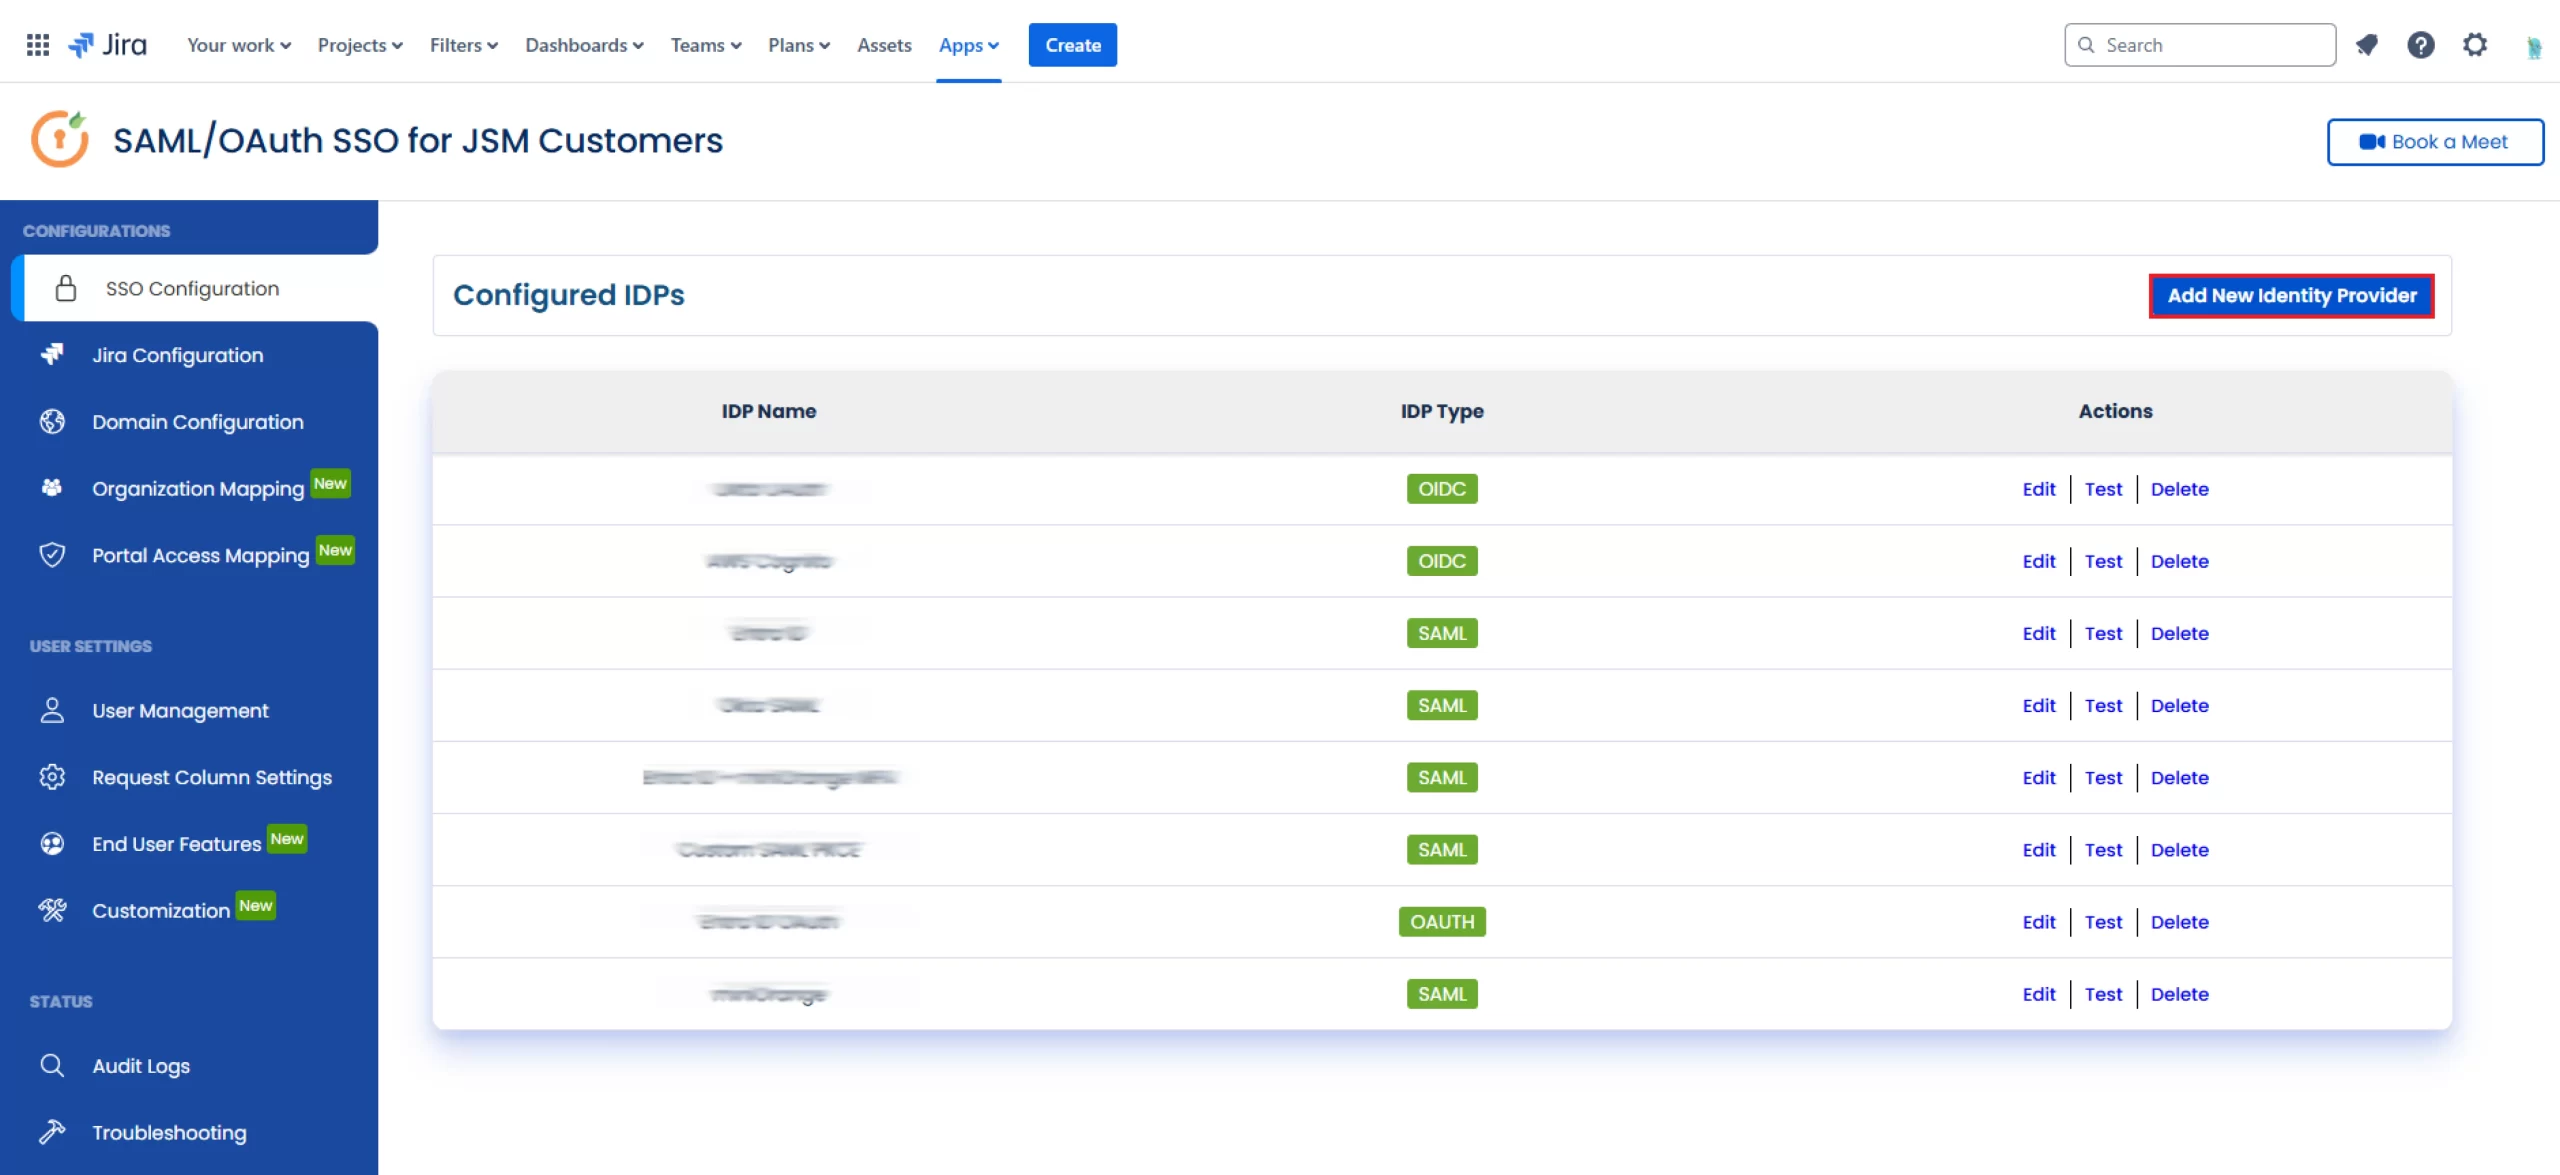
- In your Jira Cloud instance, click the Apps drop-down menu, goto Manage your apps and select SAML/OAuth SSO for JSM Customers.
- Next, navigate to the SSO Configuration tab and click on Add New Identity Provider.
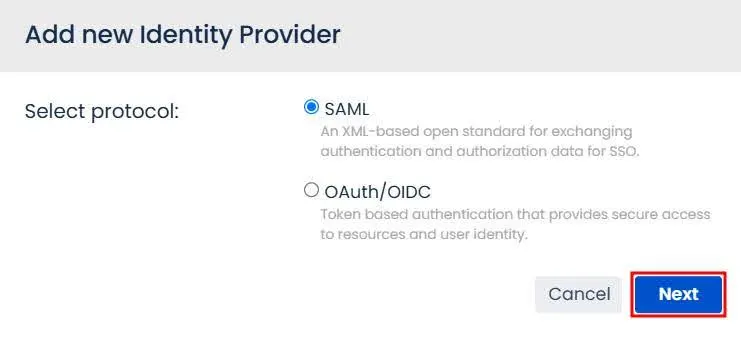
- In the popup window, choose the SAML protocol and click Next to proceed.
- Next, click on the SP Configuration tab to access the metadata information you need to configure your App in the miniOrange dashboard.
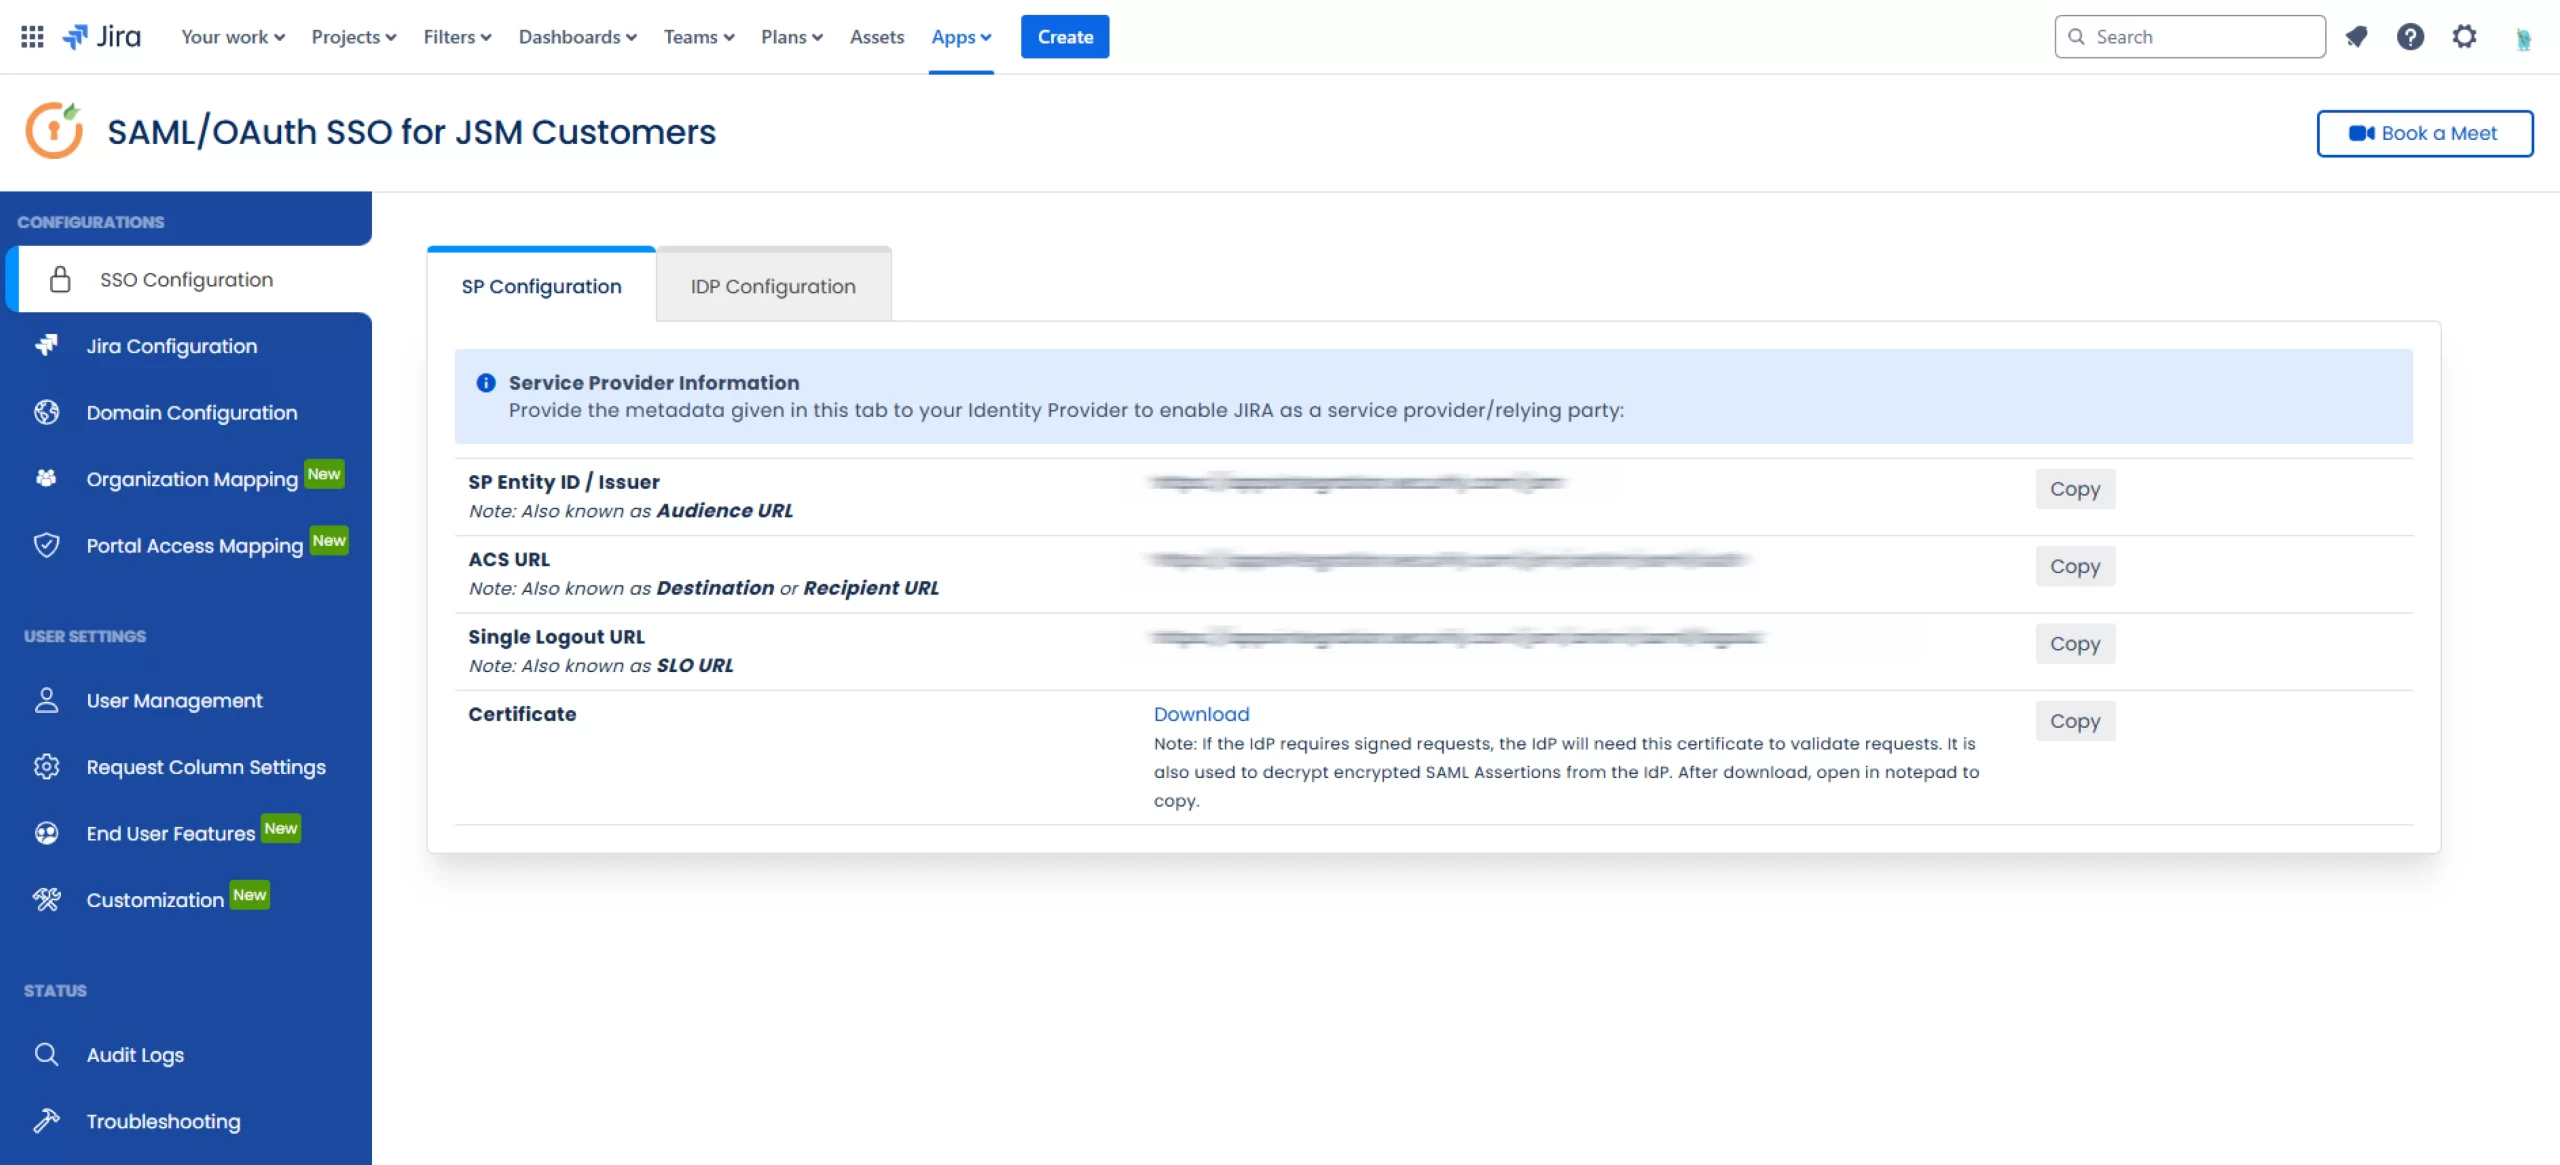
Create an Application in miniOrange
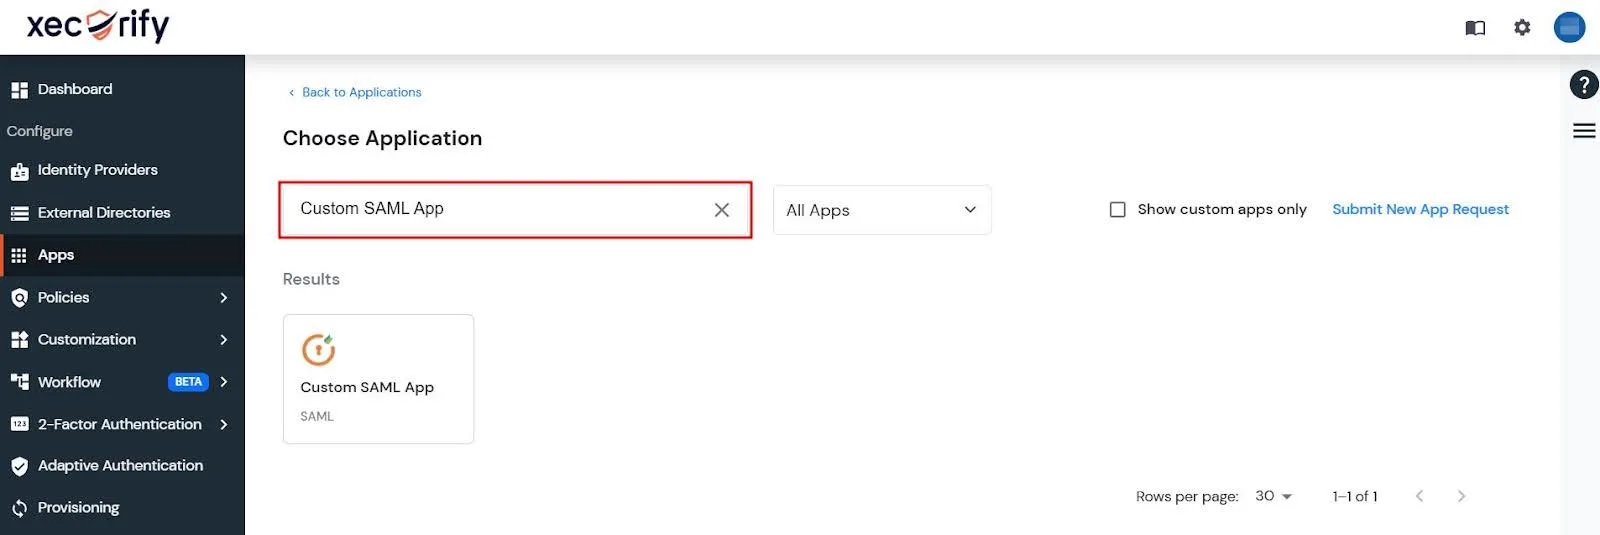
- In the miniOrange Admin Dashboard, go to Apps and click on Add Application.
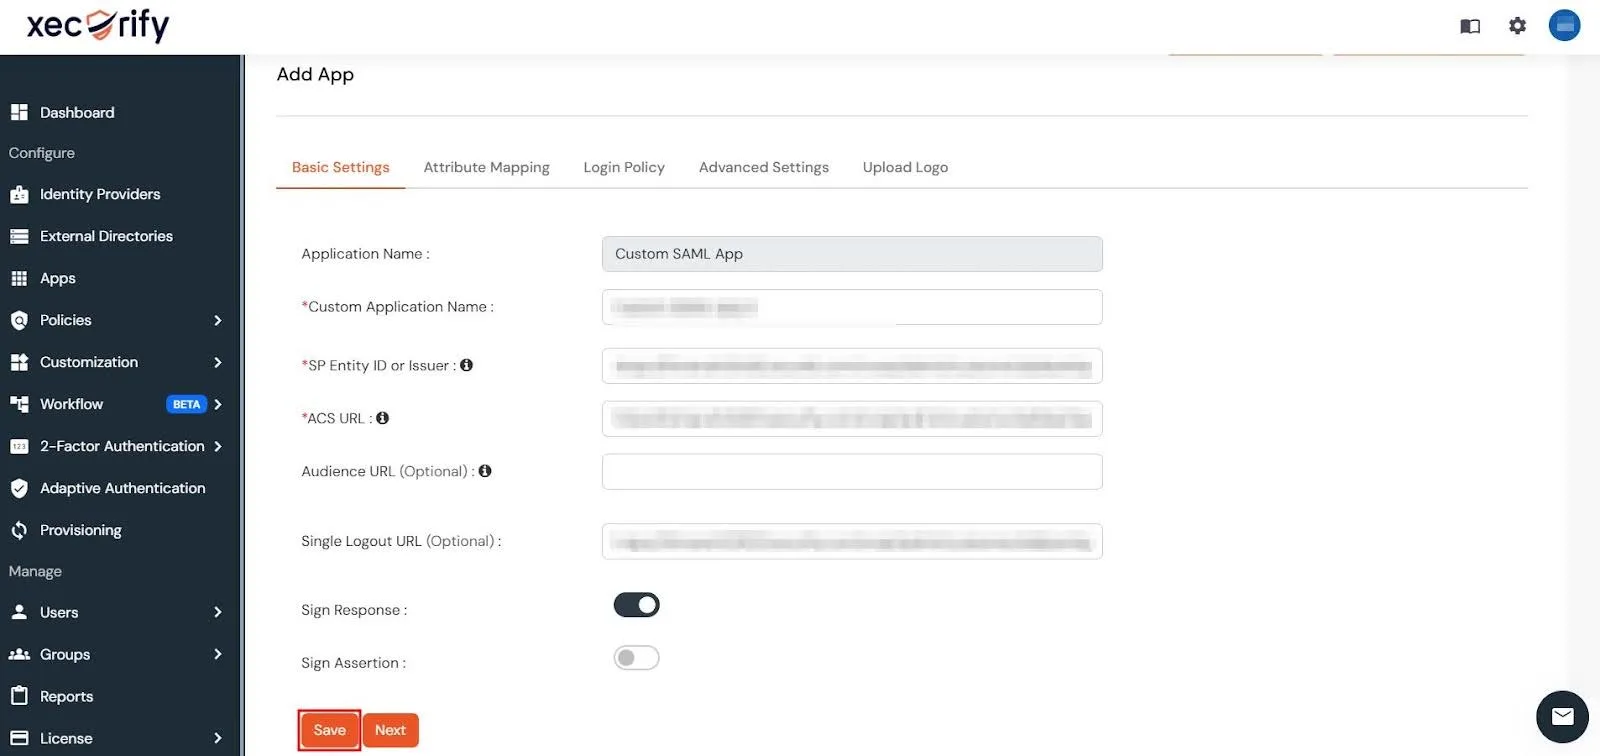
- Next, enter Custom SAML App in the search box and select the Custom SAML App that shows up in the results.
- Next, enter the metadata details copied from the Jira app and click Save.
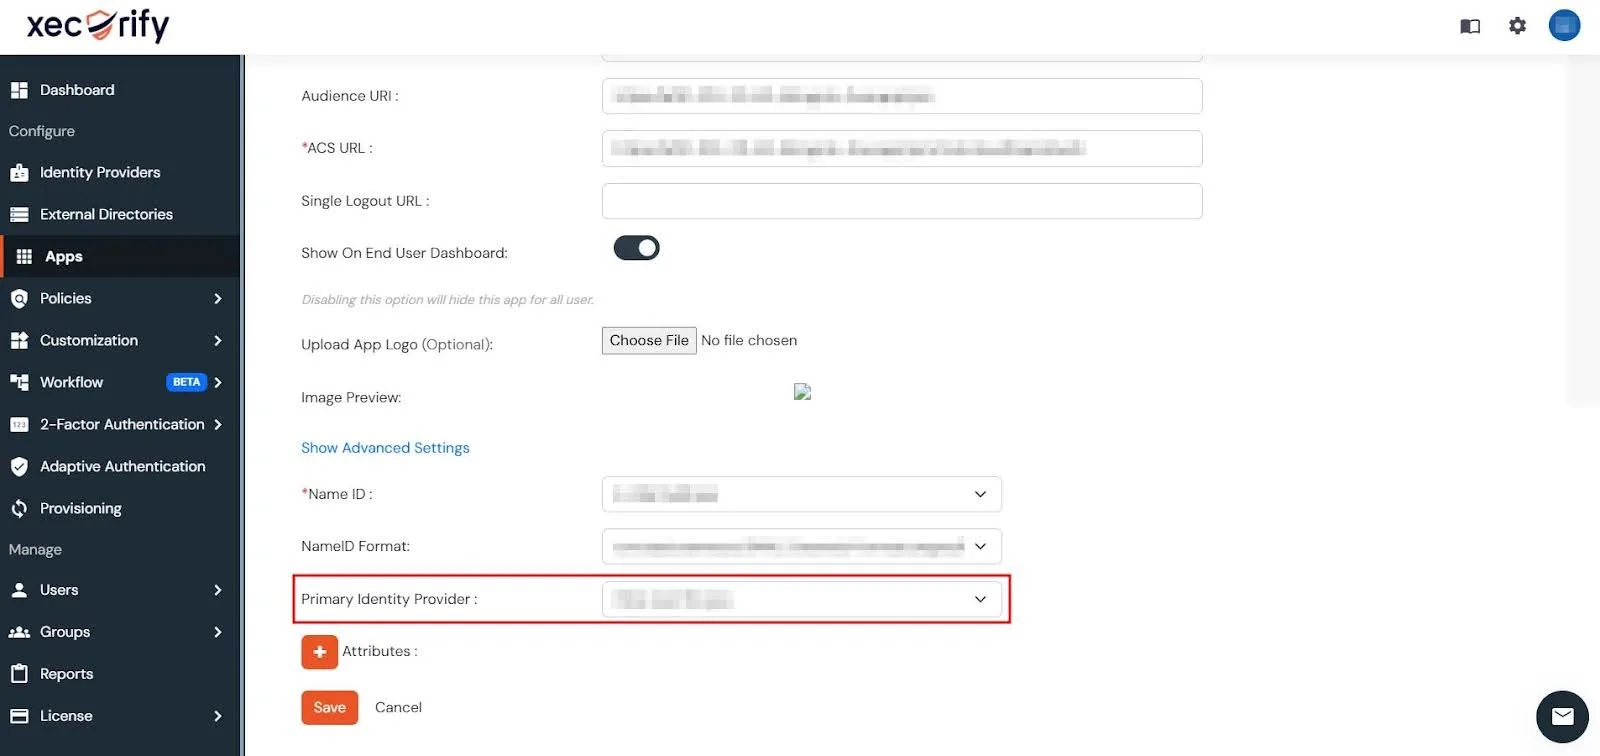
- In case you have multiple IDP configured in the Identity Providers tab, you need to set a Primary Identity Provider. To do this, you can:
- Go to Apps and locate your newly created Custom SAML App in the app table.
- Next, in the Action column of your app, click on the three dots and then click on Edit.

- Now, scroll down to the Primary Identity Provider section, specify the primary IDP for your app, and click Save.
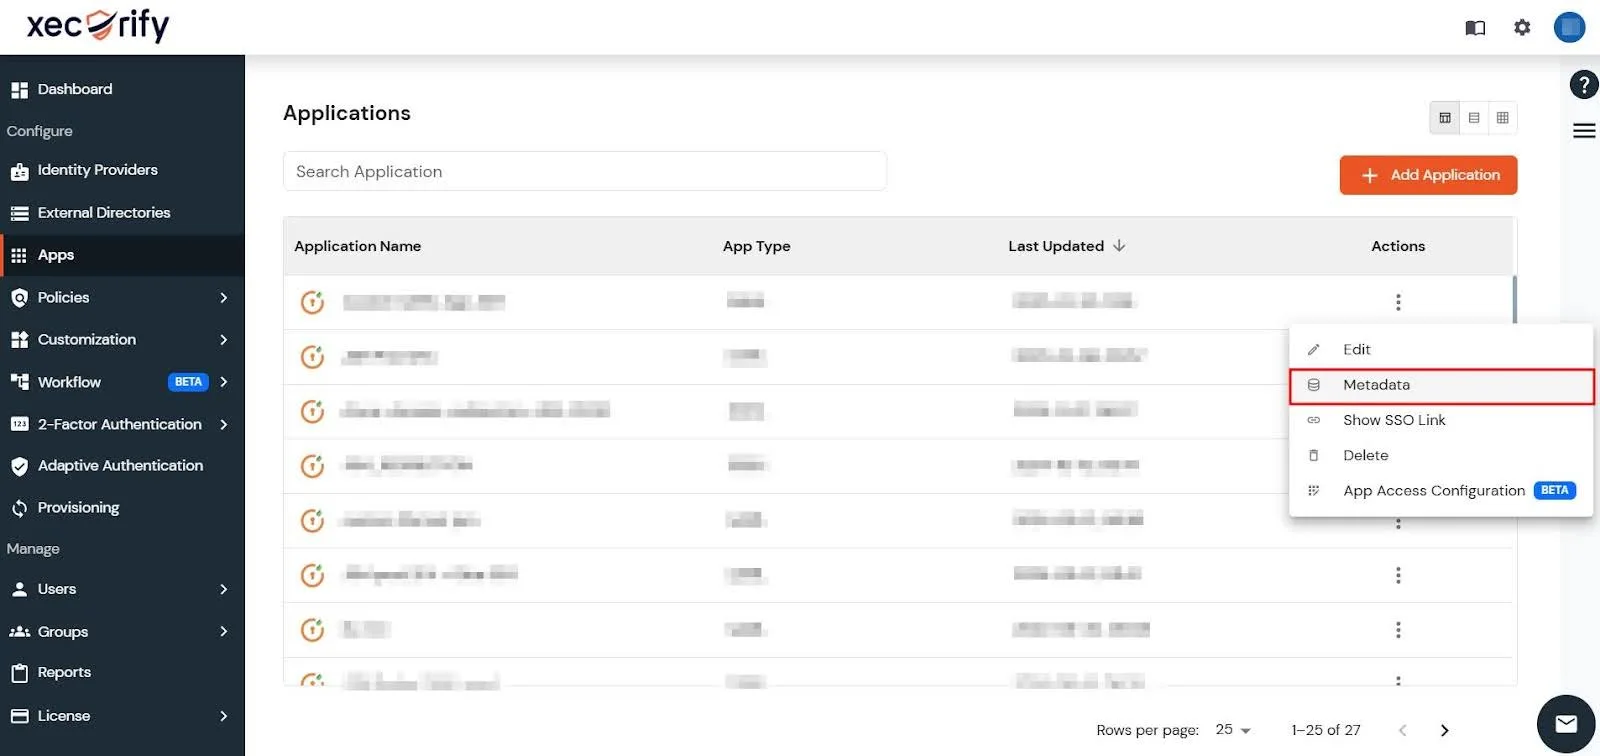
- Now, go to the Actions column of your newly created Custom SAML App, click on the three dots to expand the menu and click on Metadata.
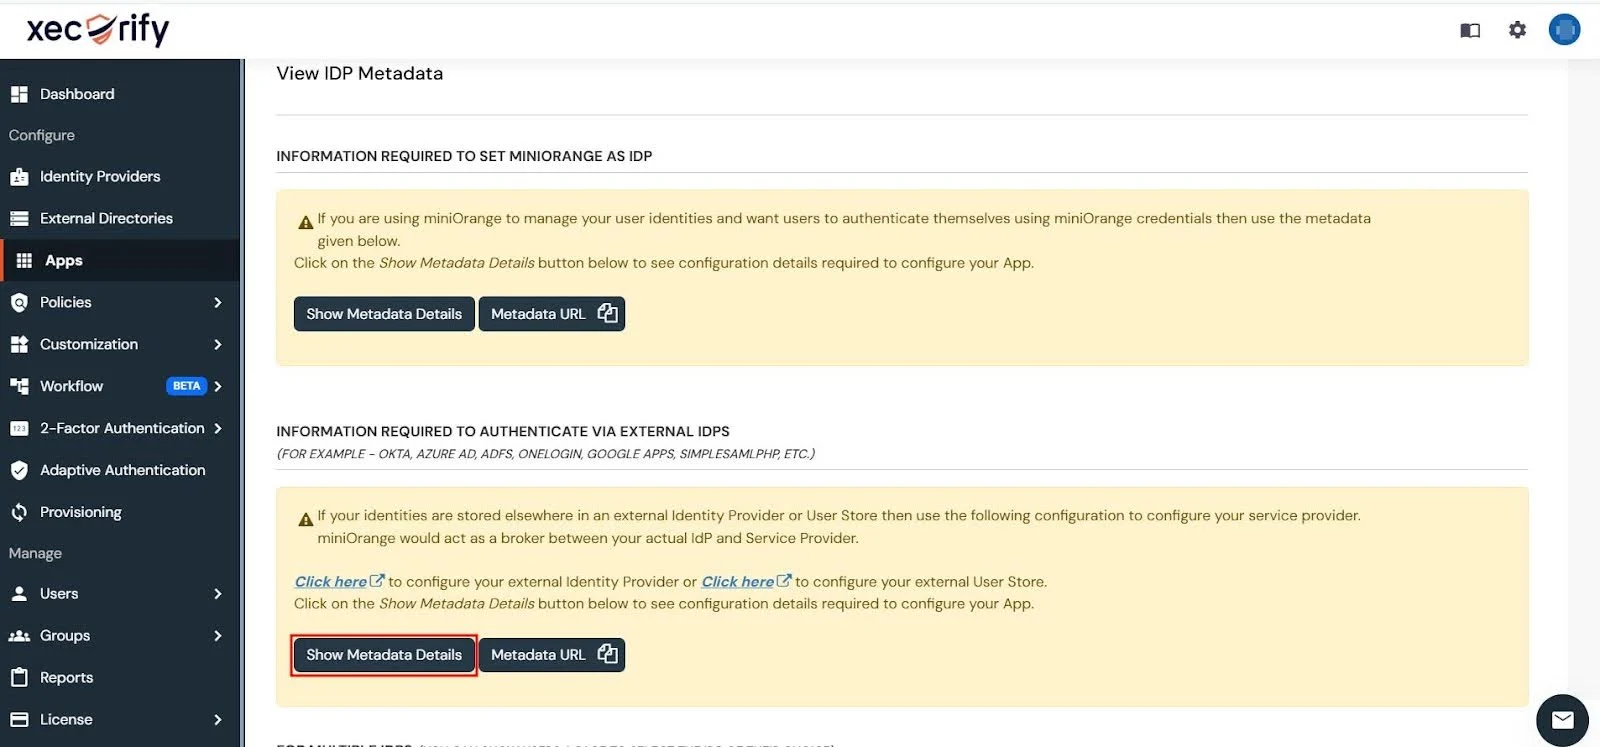
- Next, scroll down to the INFORMATION REQUIRED TO AUTHENTICATE VIA EXTERNAL IDPS section and click on the Show Metadata Details button.
- Use these metadata details to configure the add-on on the Jira side by either importing them using the Metadata URL or entering them manually.
- After entering the metadata details in Jira, click Save to store the configuration.
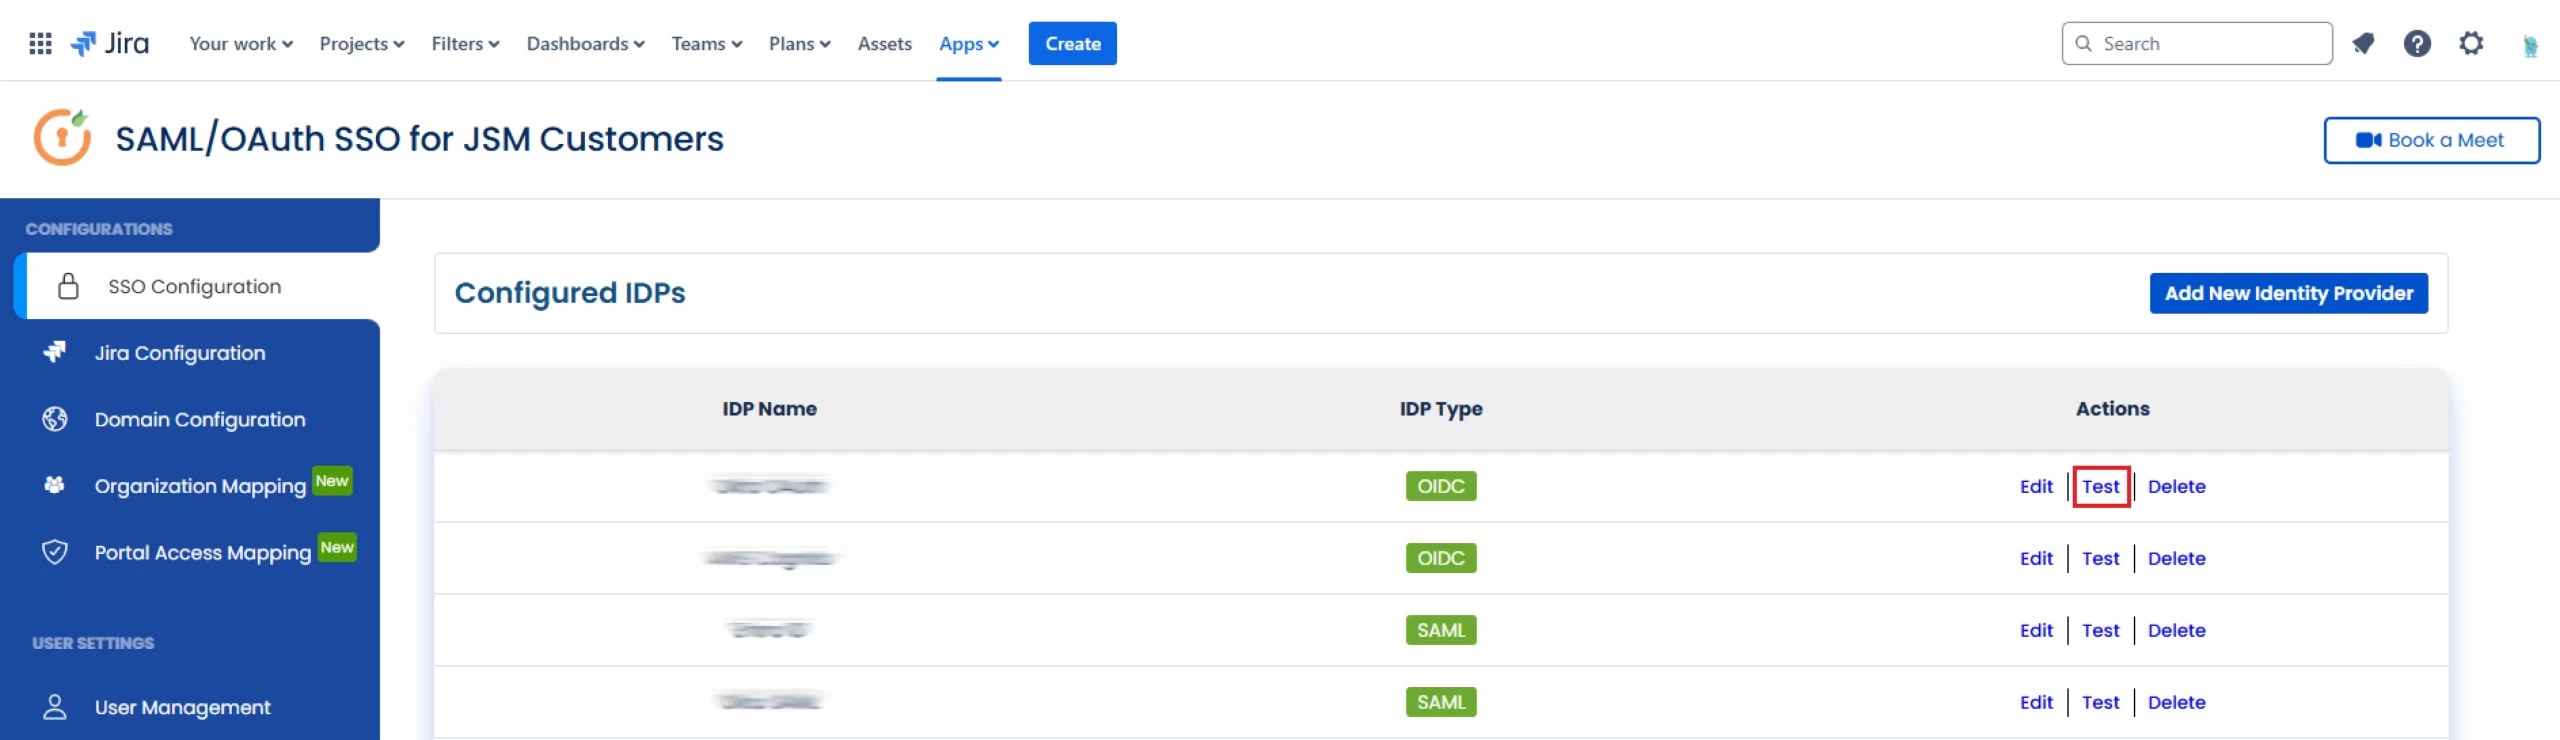
- To test the configuration, navigate to the SSO Configuration tab and click Test next to your configured IDP. You should then be redirected to your configured IDP.


Generate an API Token for Authentication
Before performing SSO in the Helpdesk, you need to generate an API token:
- In your Jira Cloud instance, click the Apps drop-down menu, goto Manage your apps and select SAML/OAuth SSO for JSM Customers.
- Navigate to the Jira Configuration tab and click on Configure New API Token.
- Click on from here to navigate to the Create API Token page. Ensure to log in with the service account that has org admin privileges.
- Click Create API Token, provide a label, and click Create.
- Be sure to copy this token for future use.
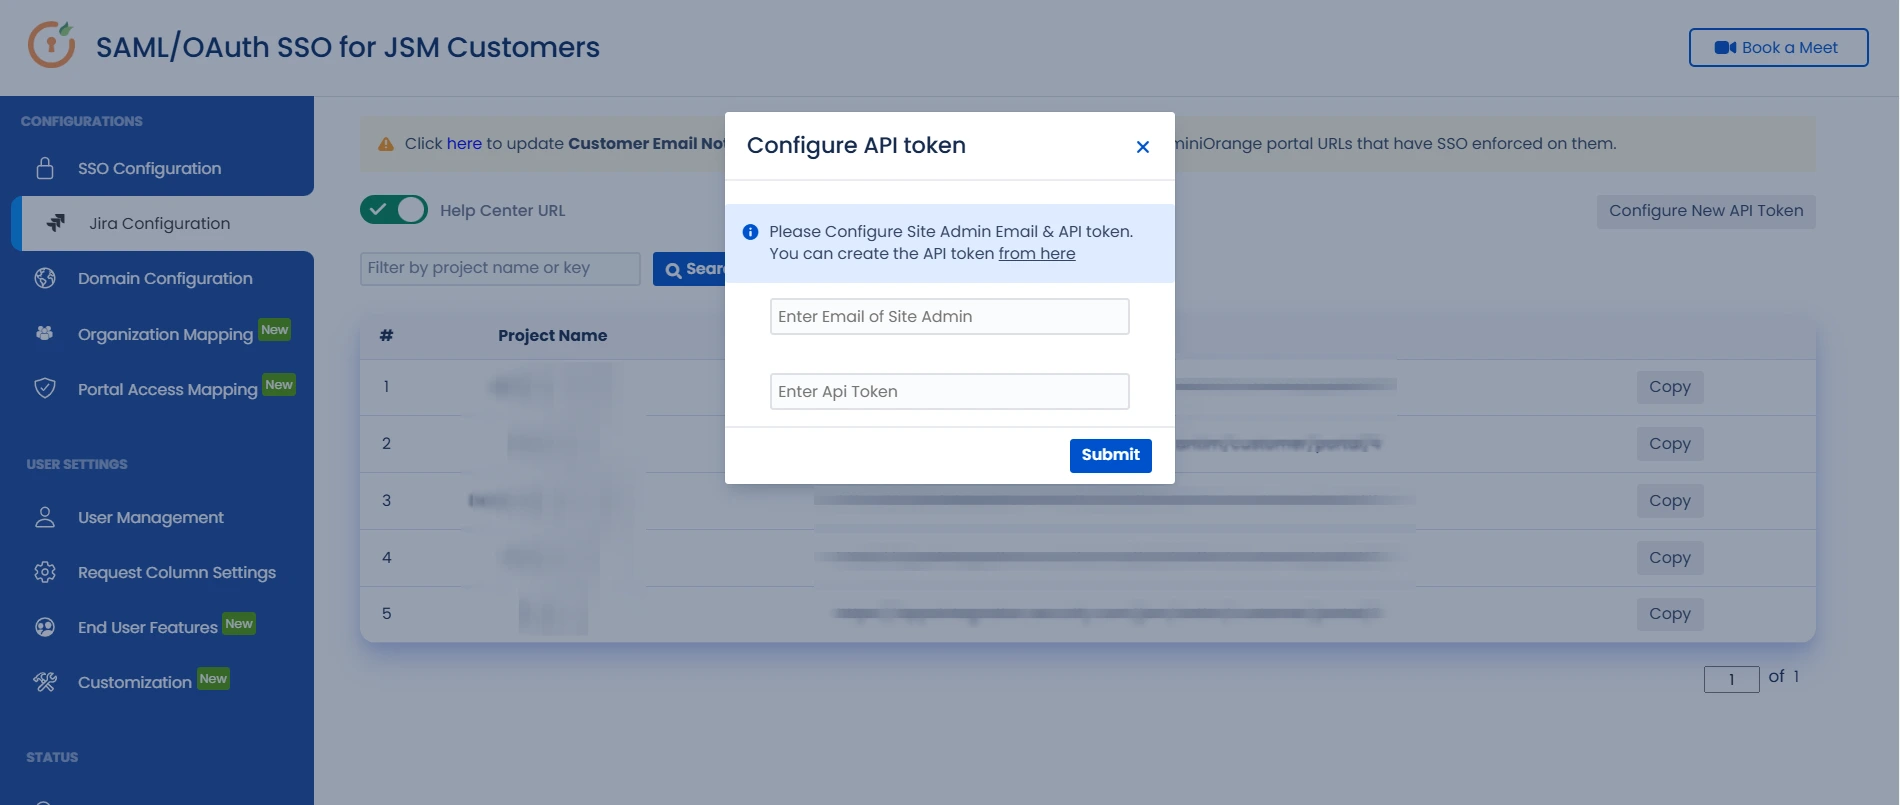
- Follow the first two steps above to access the Configure API Token dialog box.
- In the popup, enter the site admin's email and API token.
- Click Submit to save the configuration.
- In the Jira Configuration tab, copy the project link where you want to test SSO.
- Open an incognito browser window (recommended for testing) and paste the project link. You should be redirected to the IDP login page.
- Log in using your IDP account, and you’ll be signed into the Helpdesk project automatically.
Step 5: Setup 2fa for Users
- Now that your SSO configuration is complete, it's time to add an additional layer of security for your users. By setting up Two-Factor Authentication (2FA), you ensure that only authorized users can access your portal, even if their primary credentials are compromised.
- You can set up 2FA for your portal users through the App Login Policy functionality of the miniOrange Dashboard’s Policies section.
- Important: Before you define a login policy to set up 2FA for your users, you need to import them to the miniOrange Dashboard, which is acting as a broker between your IDP and the JSM SSO app.
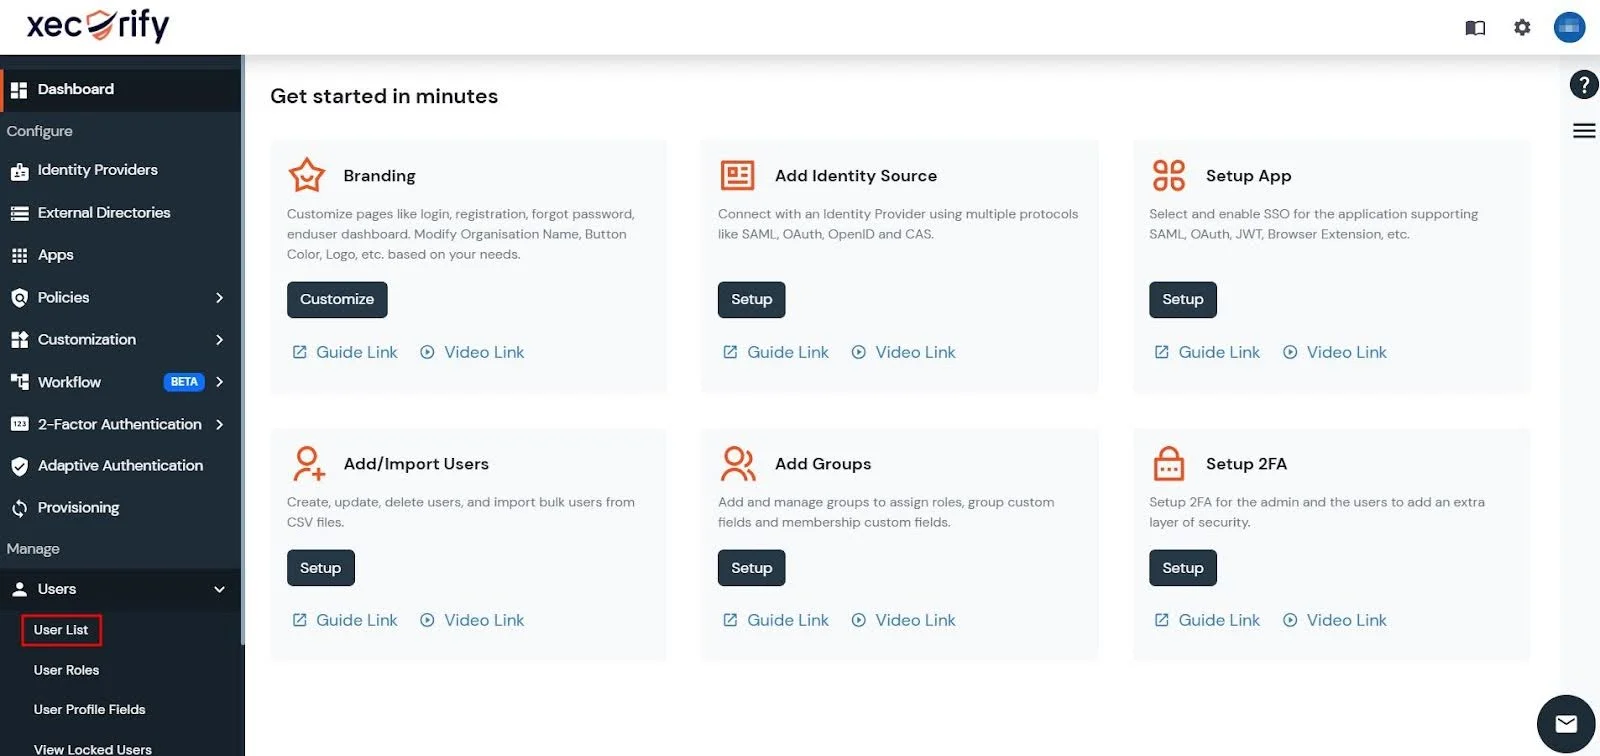
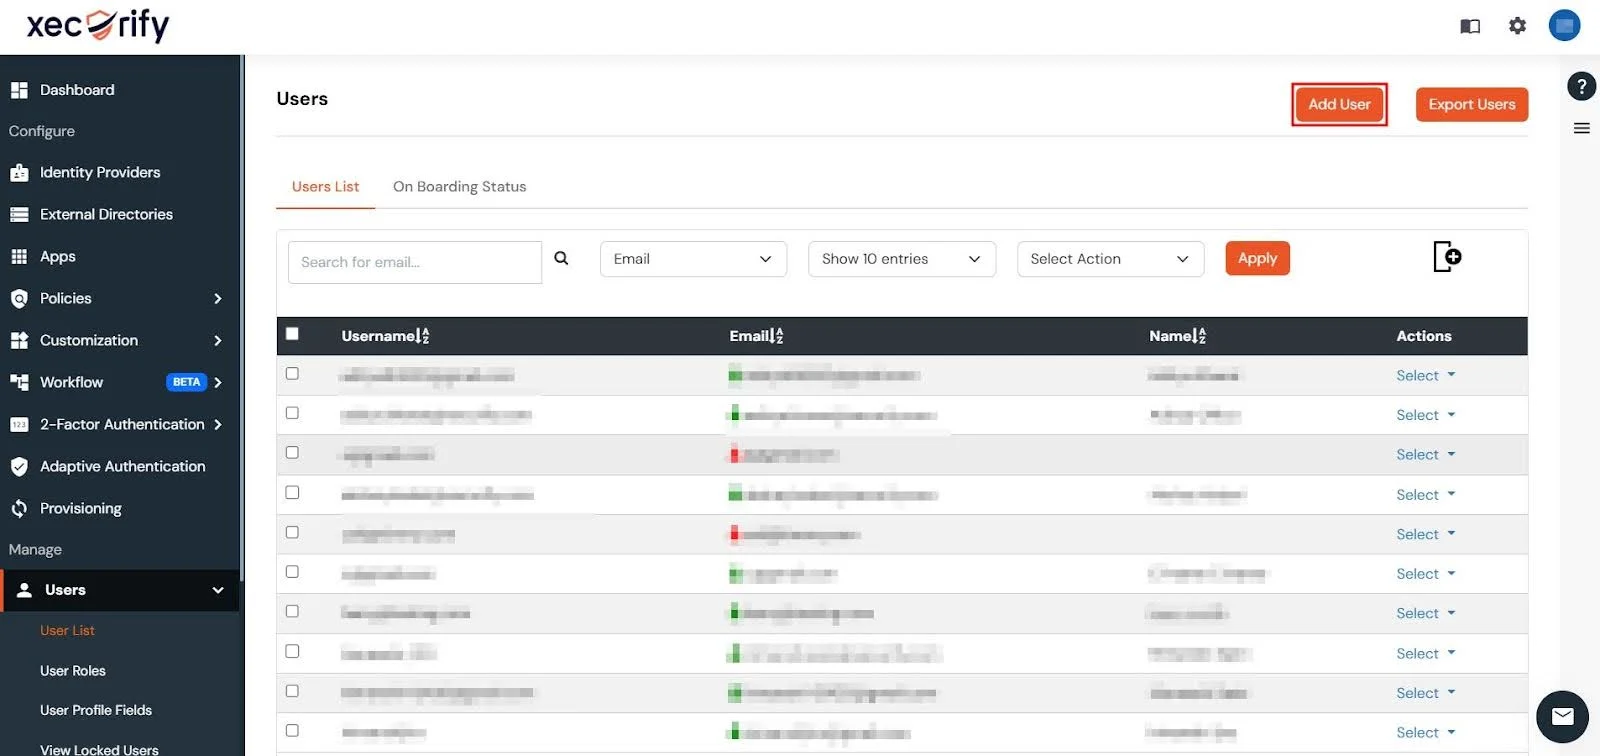
- Go to Users → User List in the left-hand navbar of the miniOrange Dashboard.
- Next, click on the Add User button.
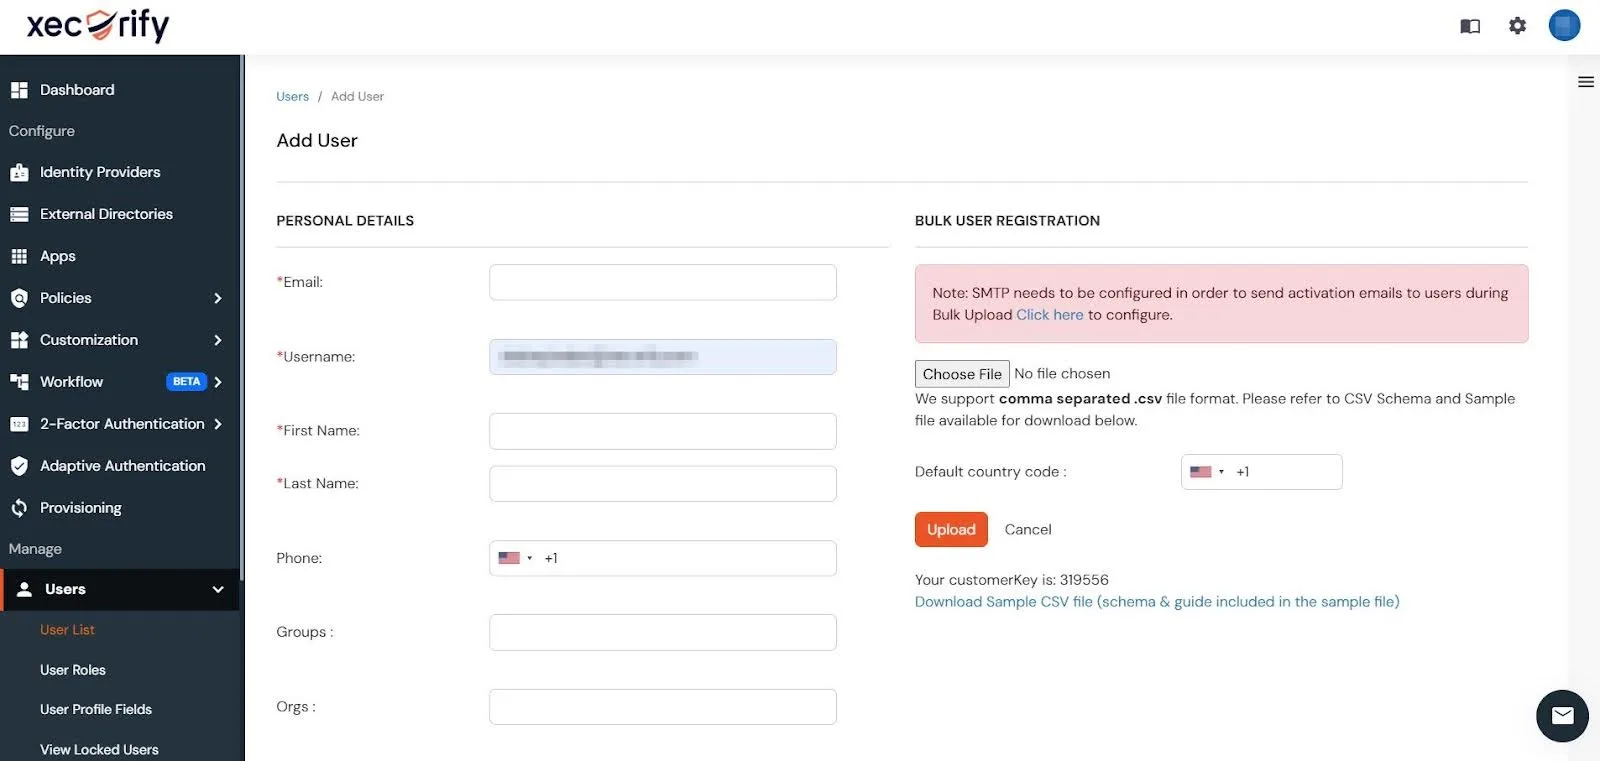
- You can then add user details to the miniOrange Dashboard individually through the Personal Details tab or you can import users in bulk through the Bulk User Registration tab.
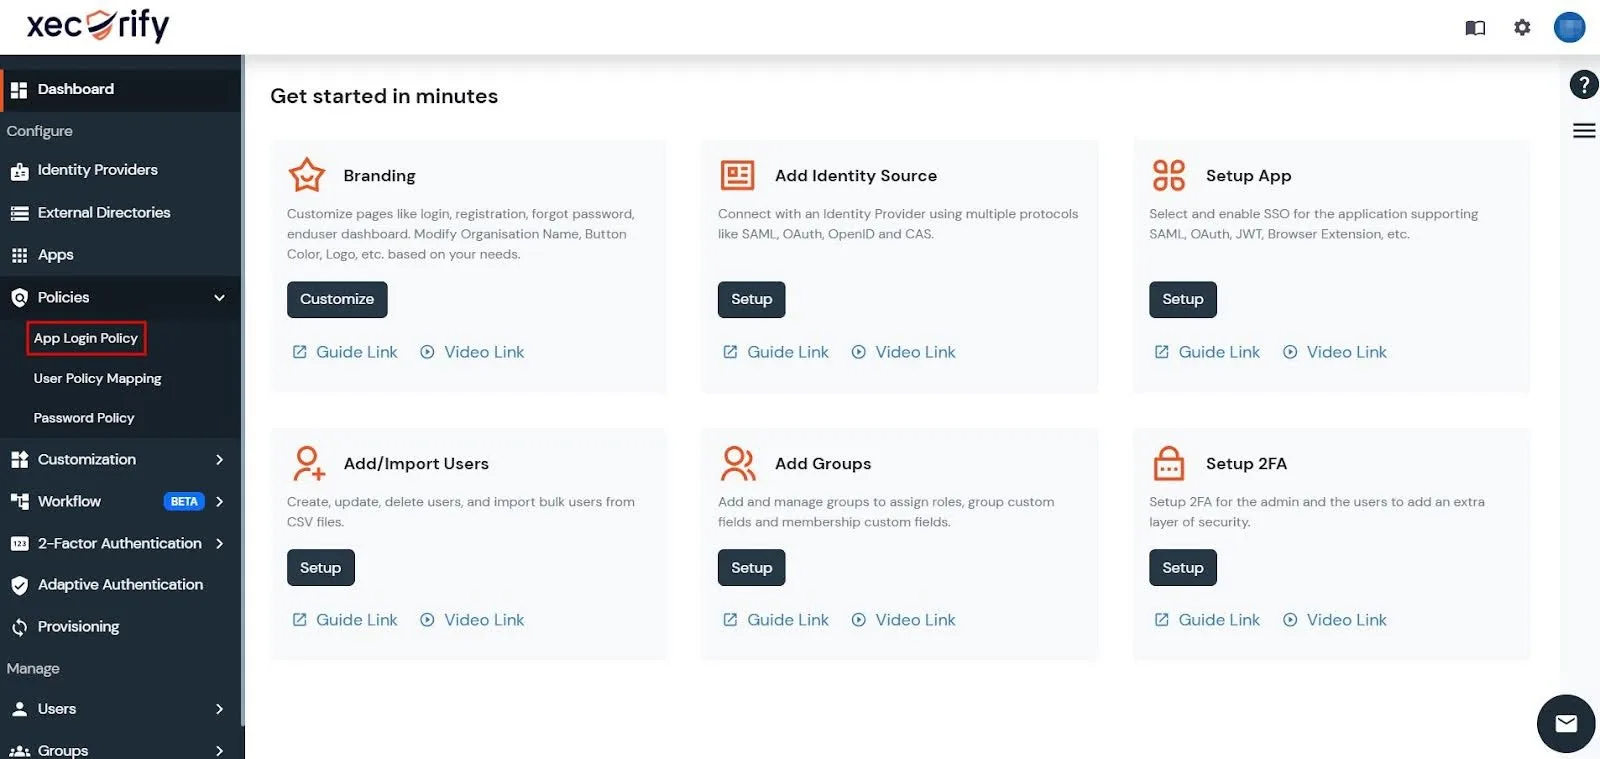
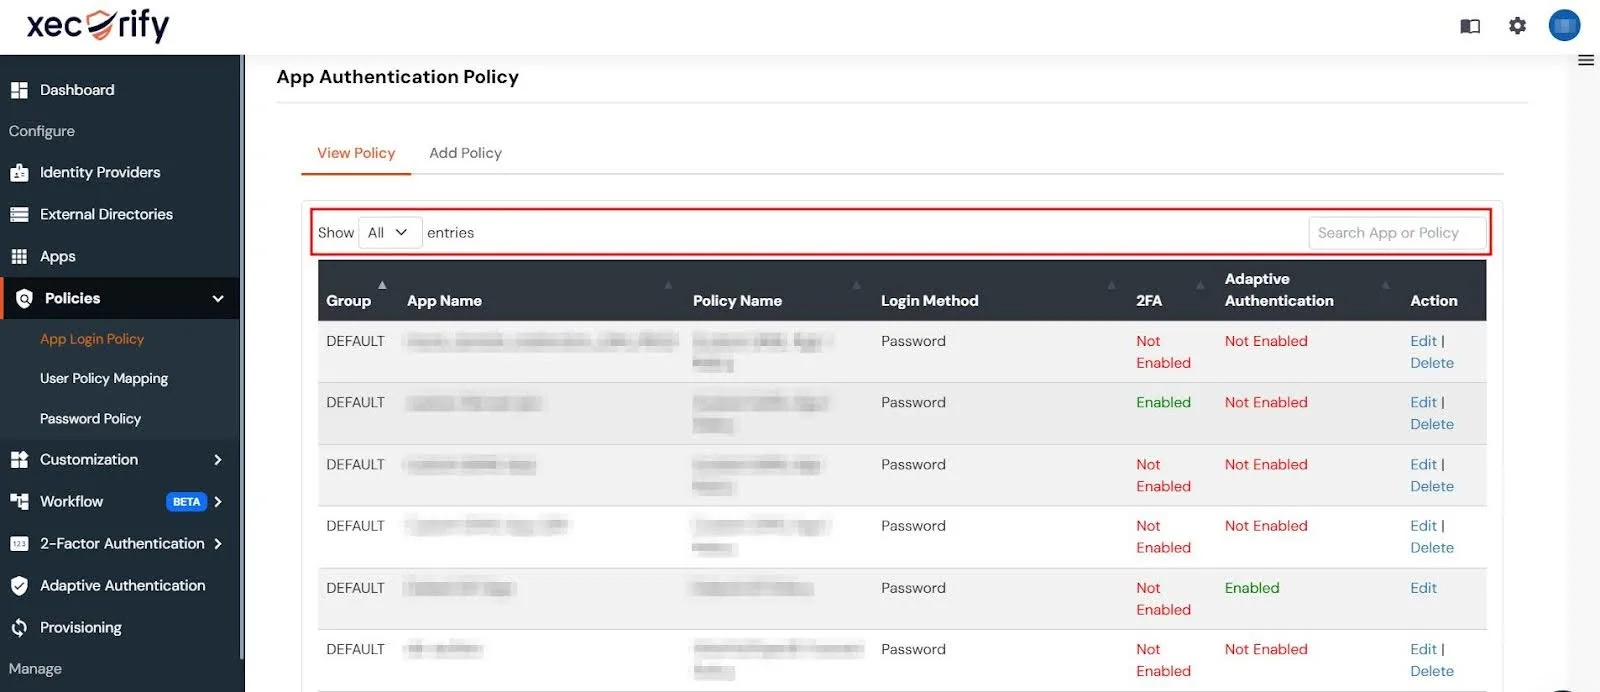
- In the miniOrange Admin Console, go to Policies → App Login Policy from the left-hand navigation panel.
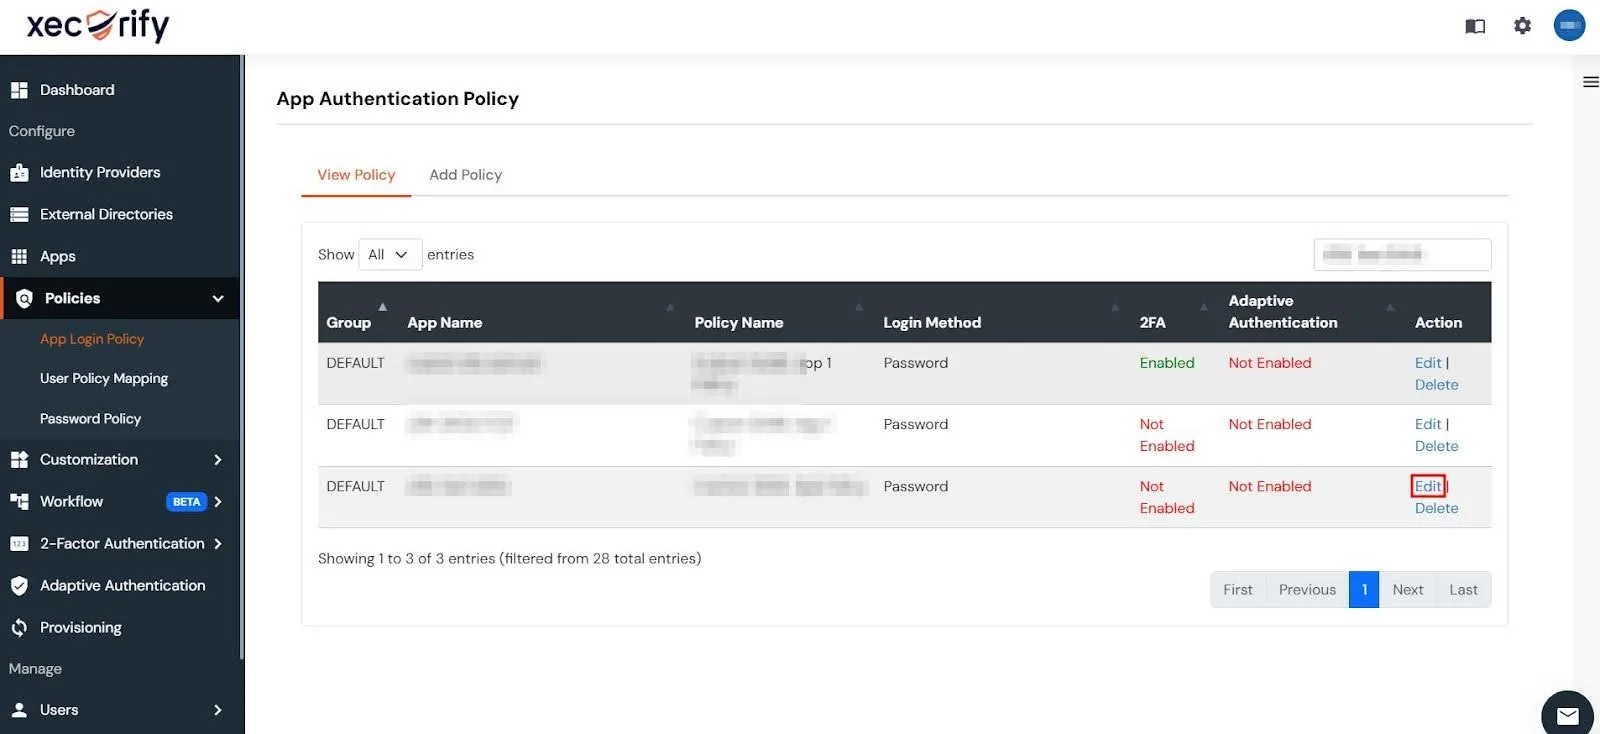
- Search for the app you want to enable 2FA for.
- Under the Actions column of your app, click the Edit button.
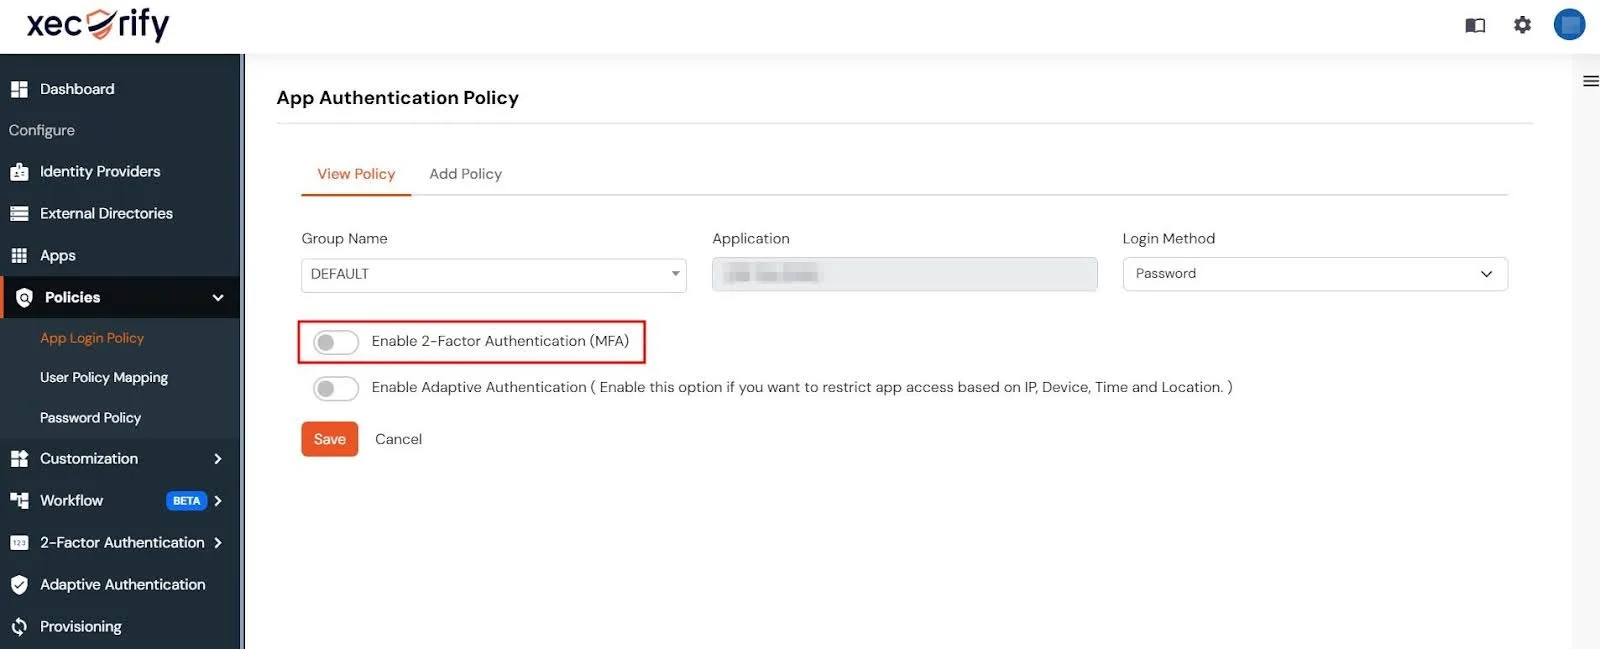
- Toggle the switch to Enable 2-Factor Authentication (MFA).
- Click Save to apply the changes.
Import users to the miniOrange Dashboard
Configure Two Factor Authentication for Your App
Once you have imported users to the miniOrange Dashboard, you can follow these steps to enable 2FA for your App:
To verify that 2FA is enabled, perform an SSO via the substitute link (found in the Jira Configuration tab) from the JSM app. After SSO, a 2FA prompt should appear to confirm the setup.
Bitbucket Git Authentication App | Kerberos/NTLM Apps | Word/PDF Exporter | WebAuthn | SonarQube SSO | Jenkins SSO
If you don't find what you are looking for, please contact us at support-atlassian@miniorange.atlassian.net or raise a support ticket here.