Choose an app to view its listing on Atlassian Marketplace.
Step 1: Setup Azure B2C as OAuth Provider
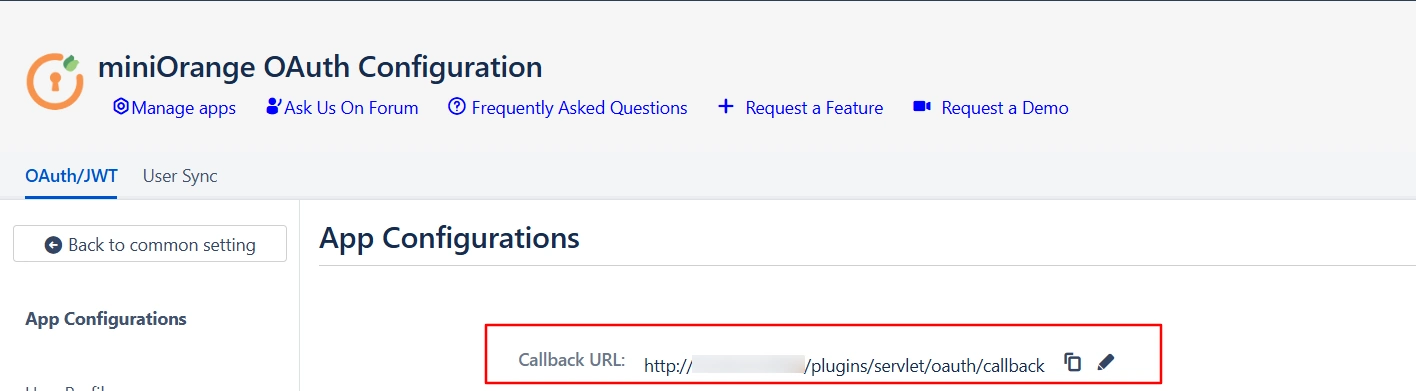
Navigate to the plugin configuration page, click the "Add New Provider" button (located either in the middle or top-right corner), select
Azure B2C as the application, and copy the callback URL from the
plugin and keep it handy, as you'll need it to configure Azure B2C as
the OAuth provider.
To perform SSO with Azure B2C as Provider, your application must be
https enabled.
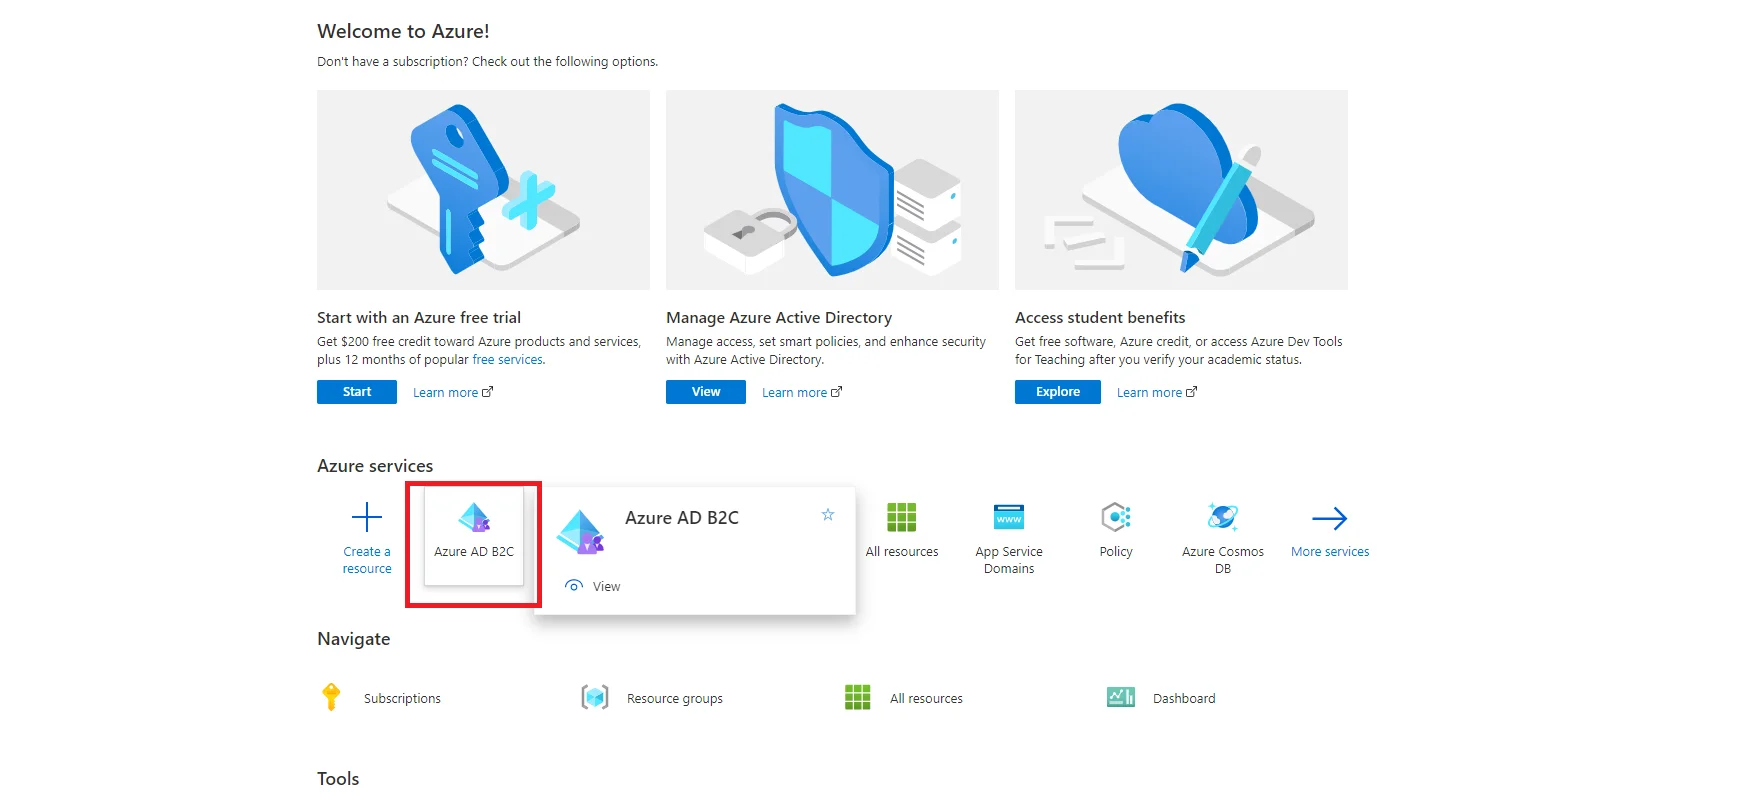
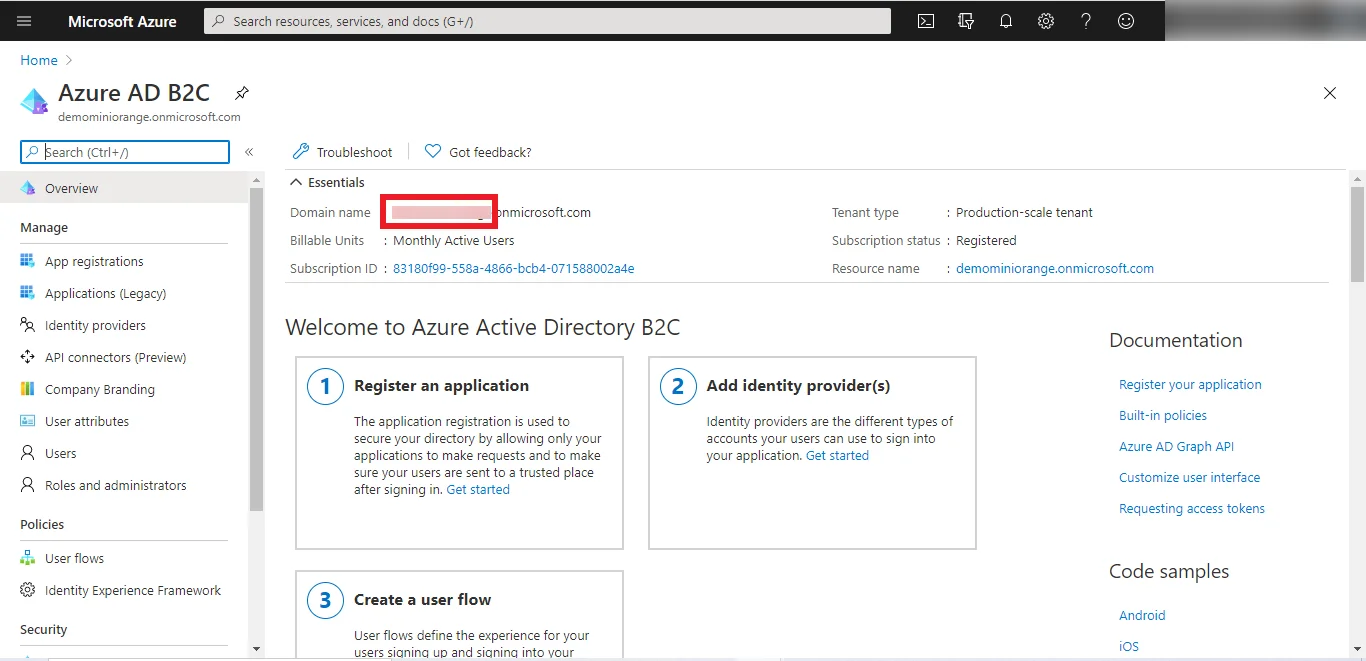
Go to Home and in the Azure services, select Azure AD B2C.
Please make sure you are in the Azure AD B2C directory with an active
subscription and if not, you can switch to the correct directory.
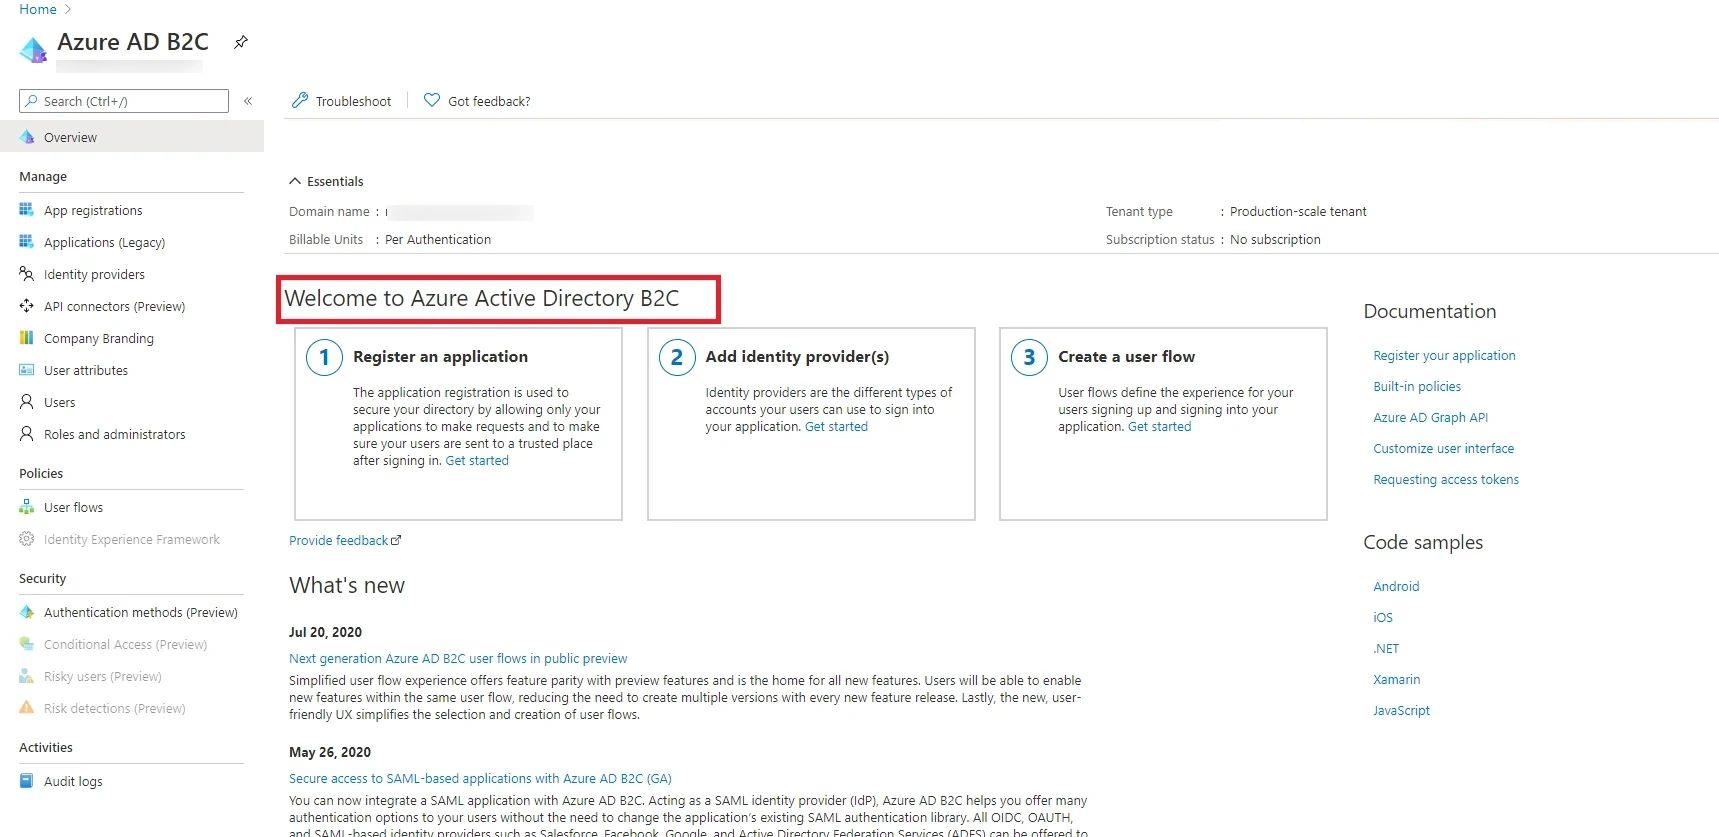
In the Essentials tab, you will find the
Azure B2C domain name, keep it handy, you will need it later for
configuring the Azure B2C tenant name
under plugin.
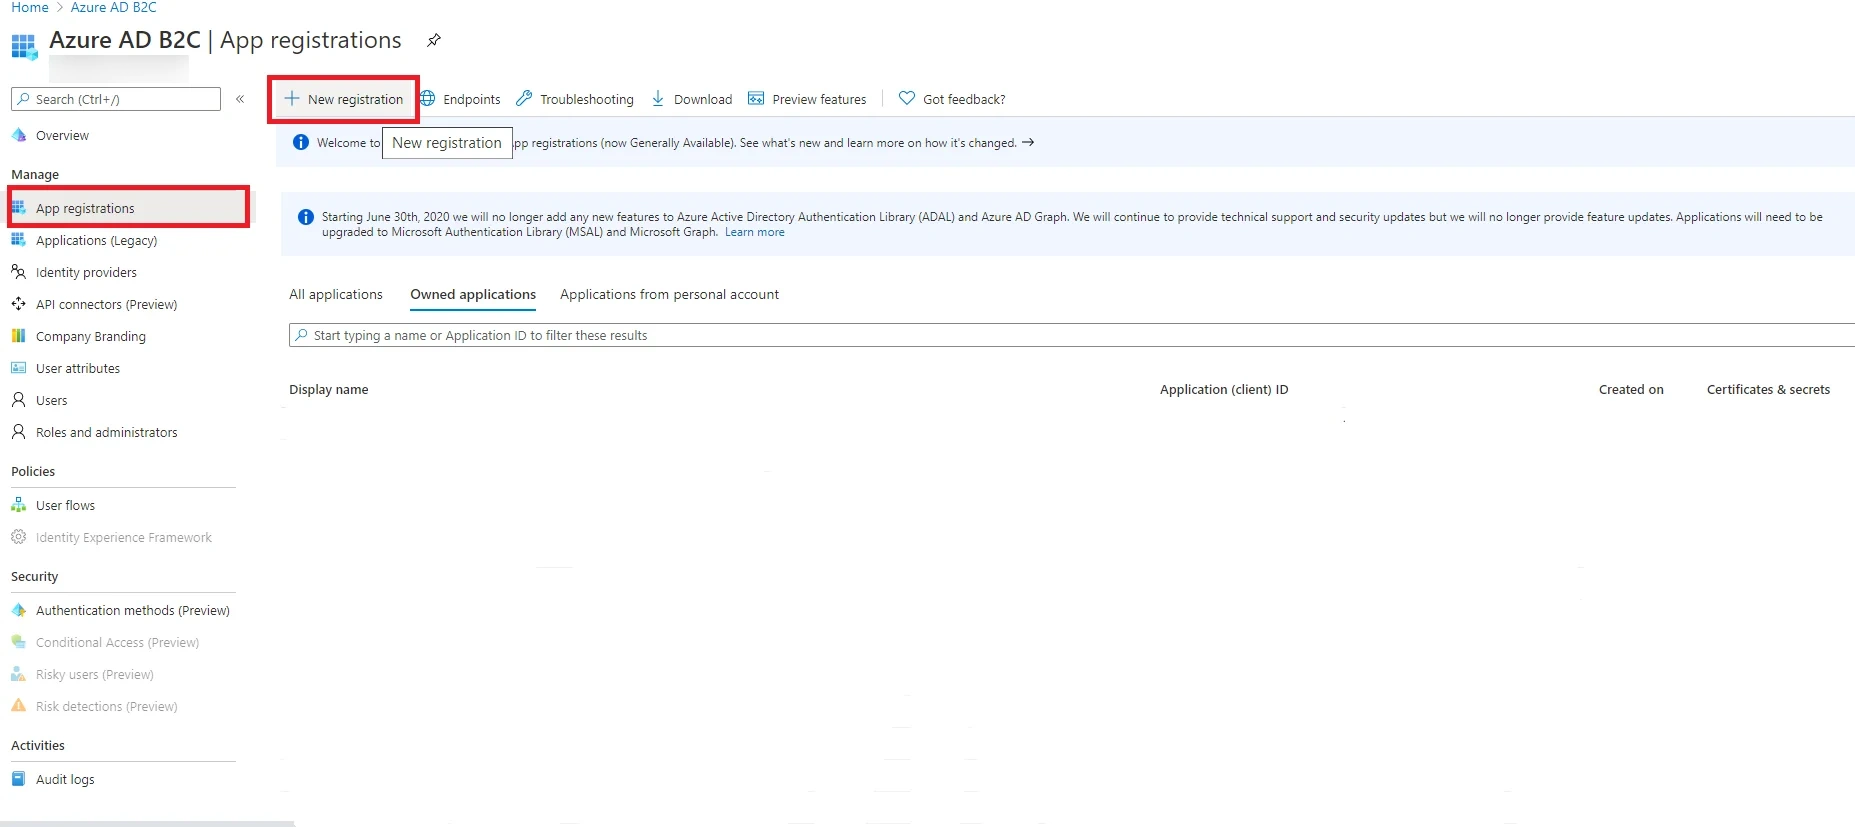
Now, click on App registrations and then click on the
New registration
option to create a new Azure b2c application.
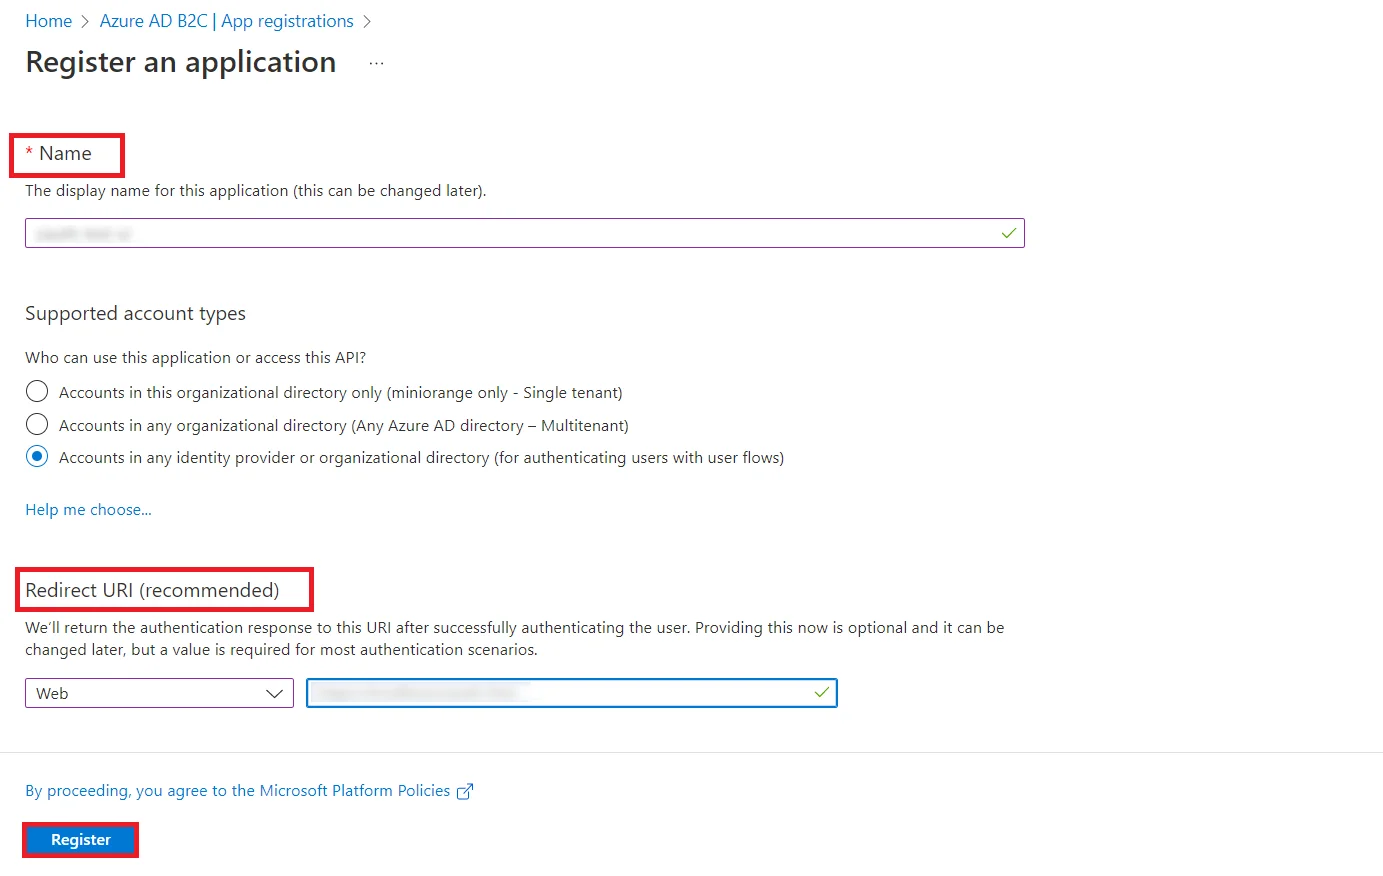
Configure the following options to create a new application.
Enter a name for your application under the Name text field.
In supported account types, select 3rd option
‘Accounts in any organizational directory (Any Azure AD directory
- Multitenant) and personal Microsoft accounts (e.g. Skype,
Xbox)’.
In the Redirect URI section, select the Web application and
enter the Callback URL from the plugin and save it
under the Redirect URL
textbox.
Click on the Register button to create your application.
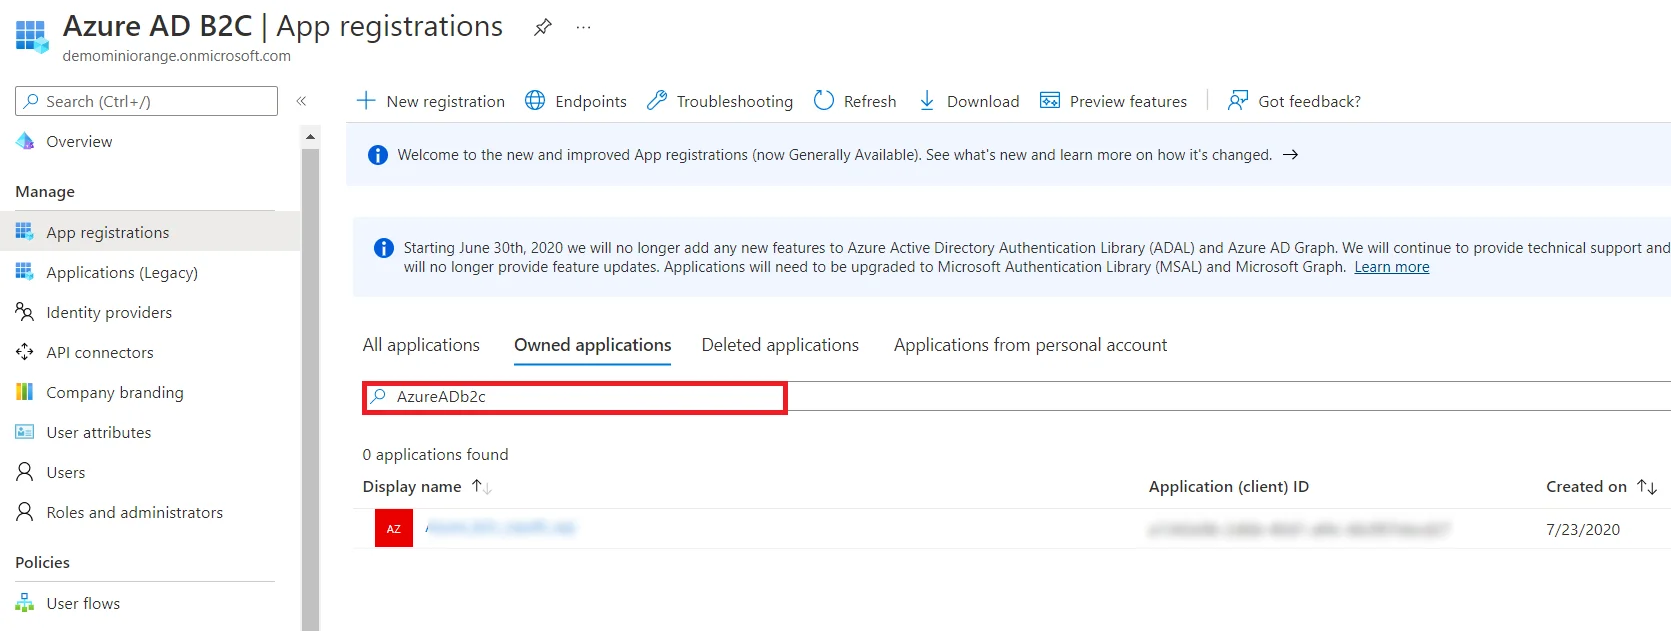
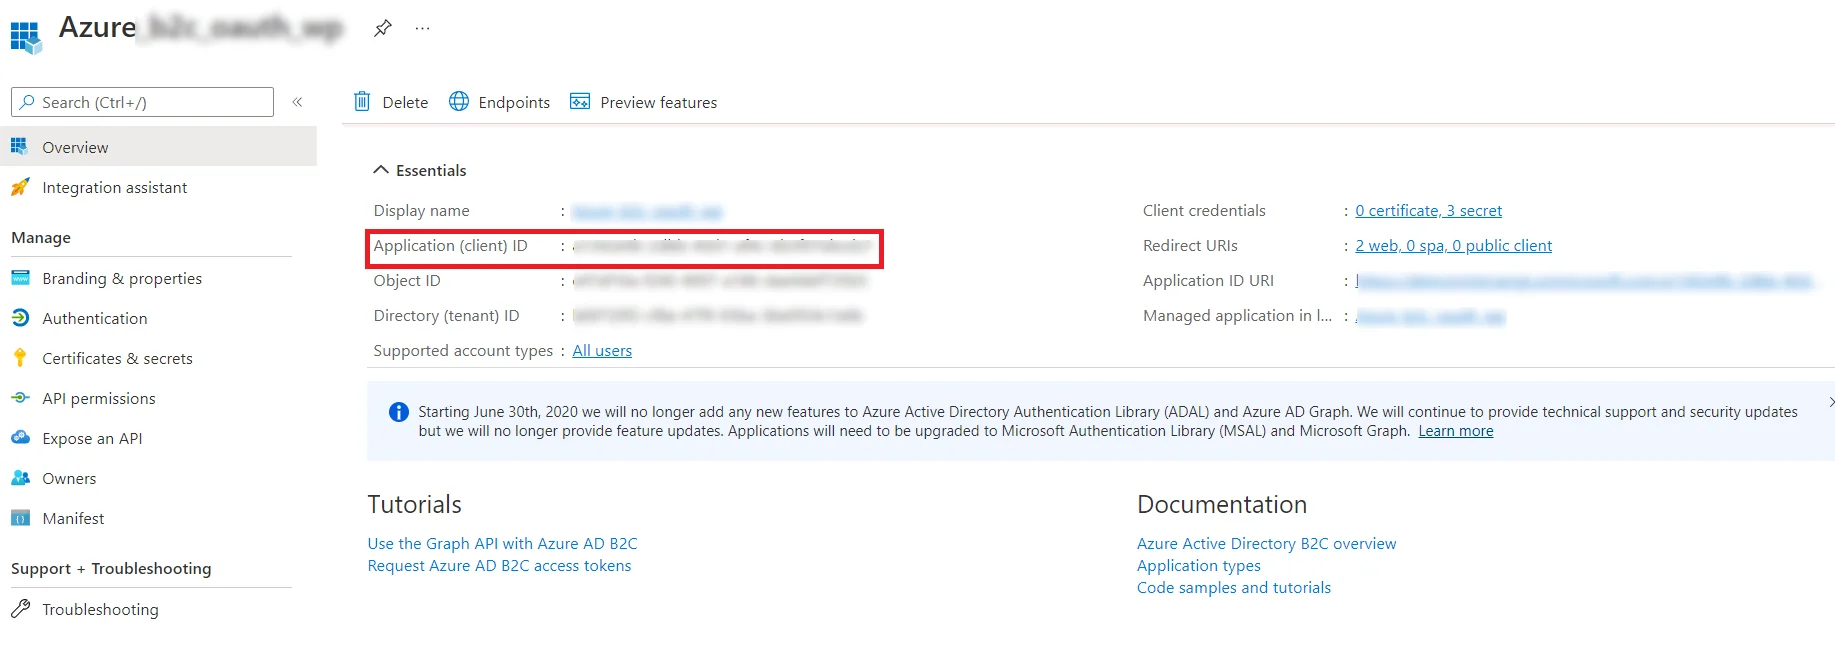
After successful application creation, you will be redirected to the
newly created application’s overview page. If not, you can go to the app
registrations and search the name of your application and you will find
your application in the list.
Copy your Application ID and keep it handy.
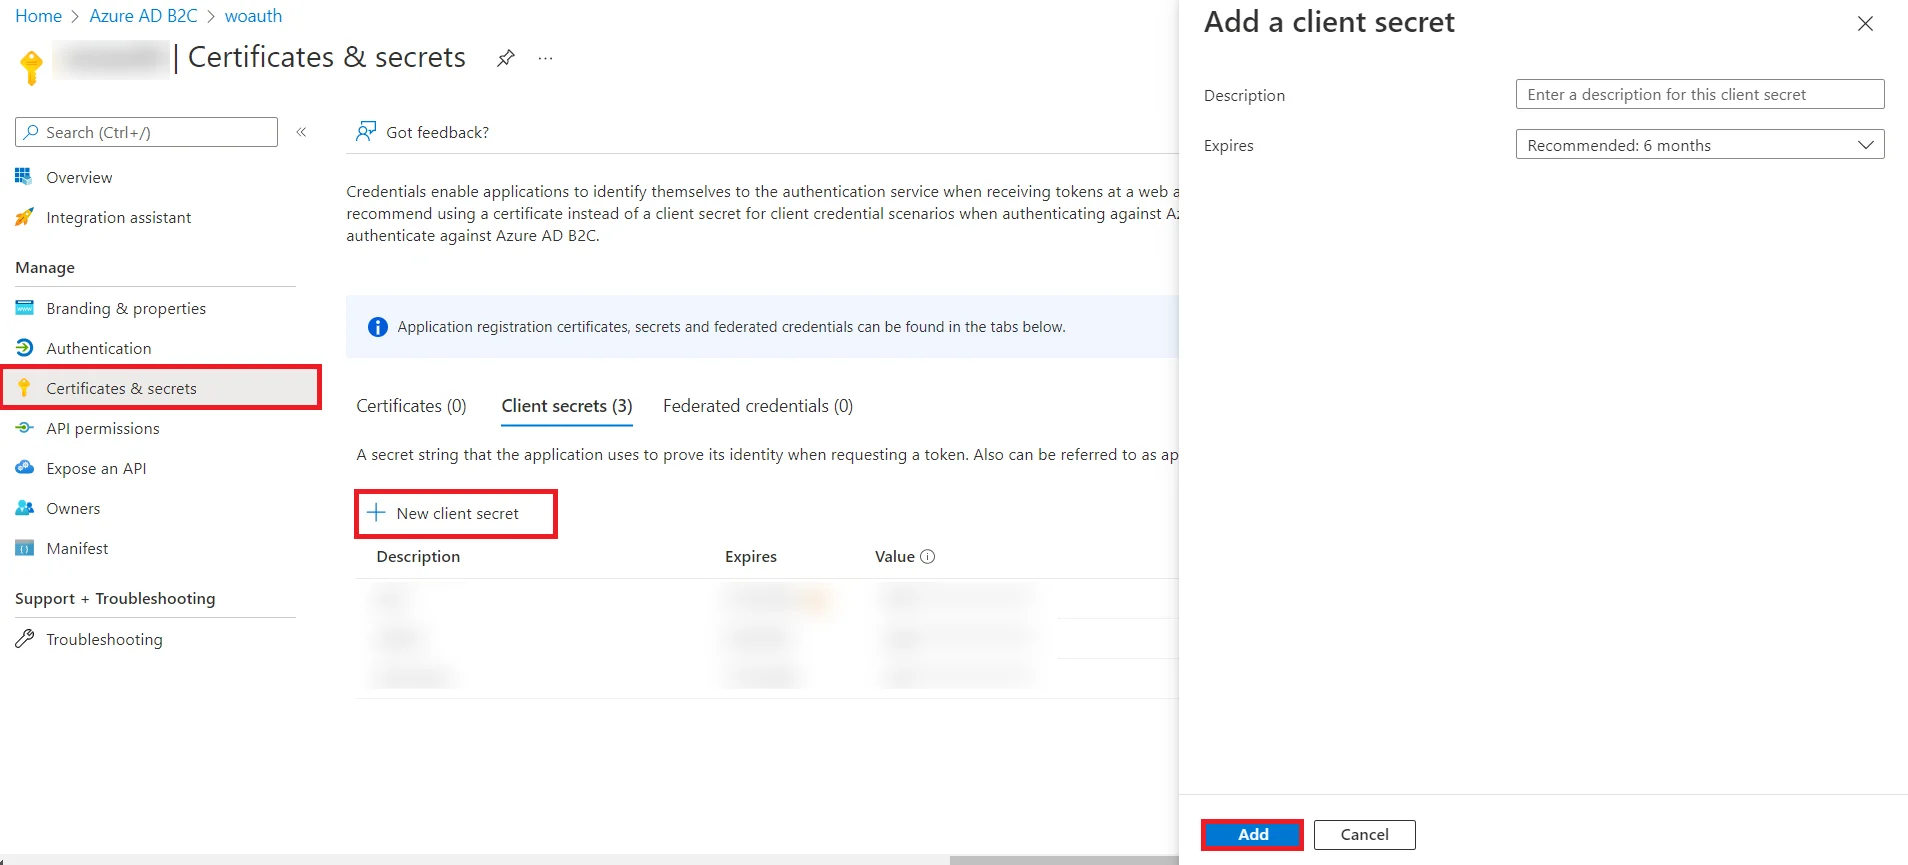
Now, click on Certificates and secrets and then click on
New Client Secret to generate a Client Secret. Enter a
description and click on the Add button.
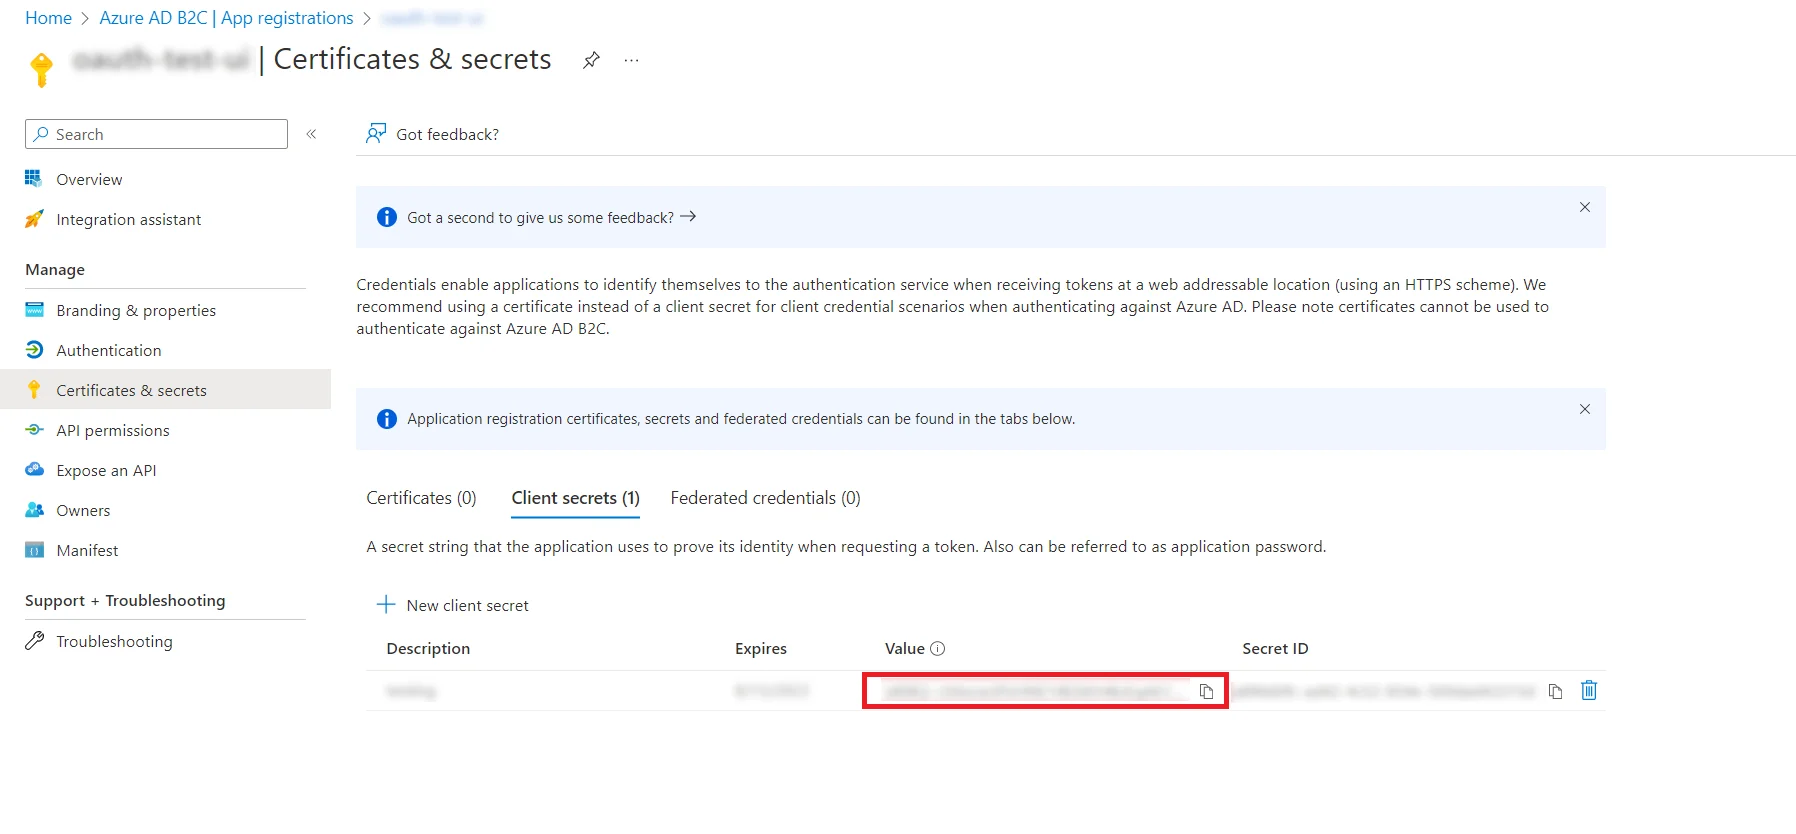
Copy the secret value from certificates & secrets page and keep
it handy.
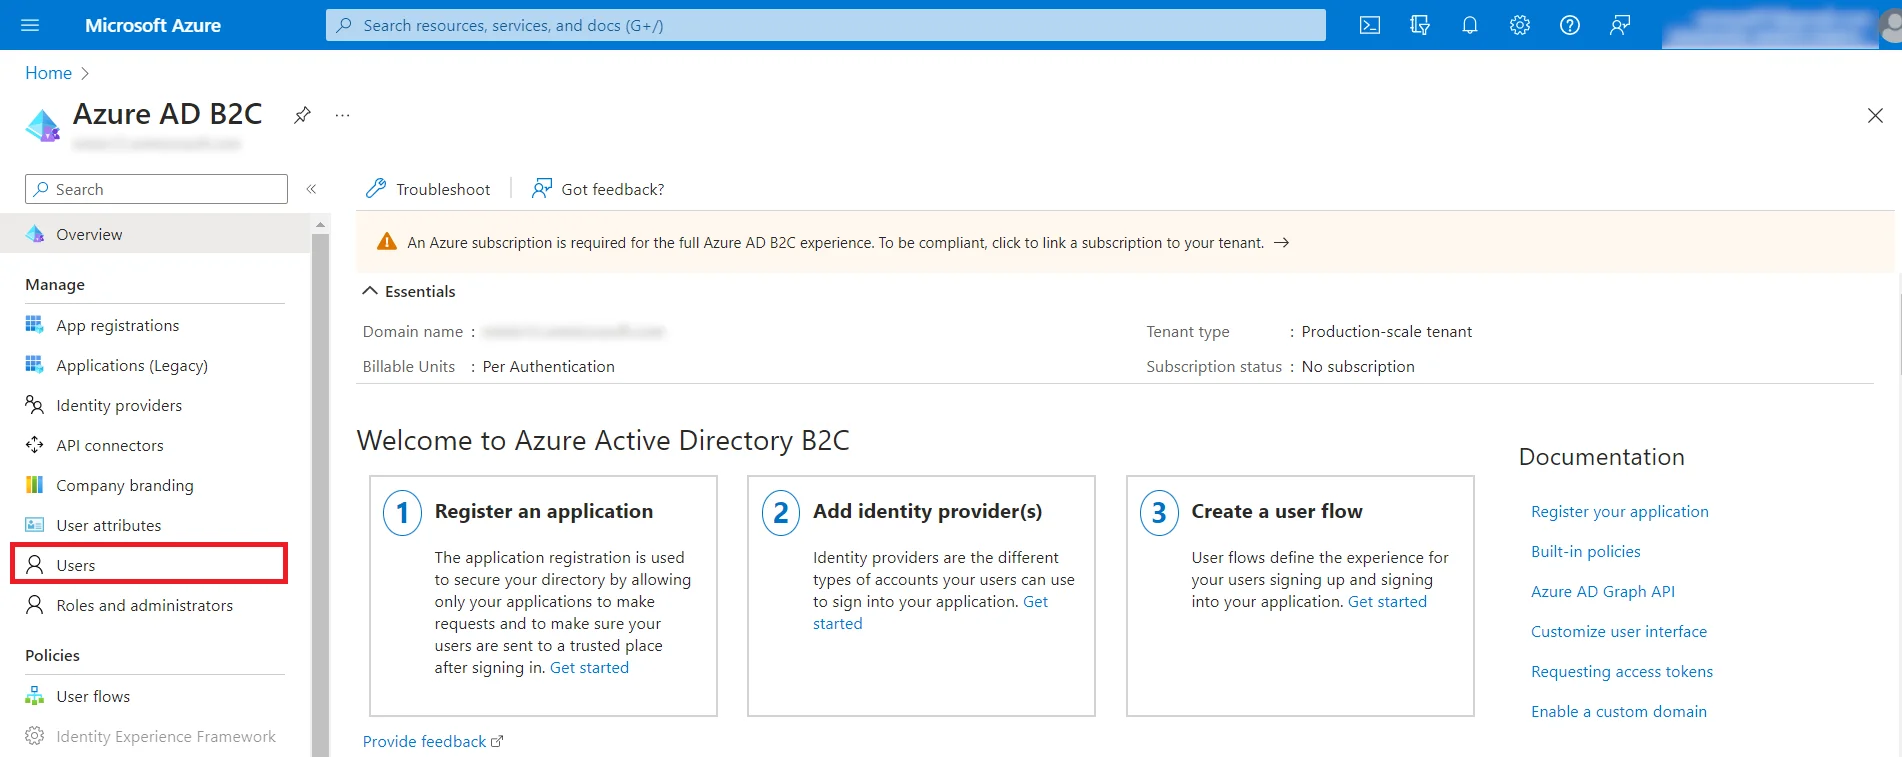
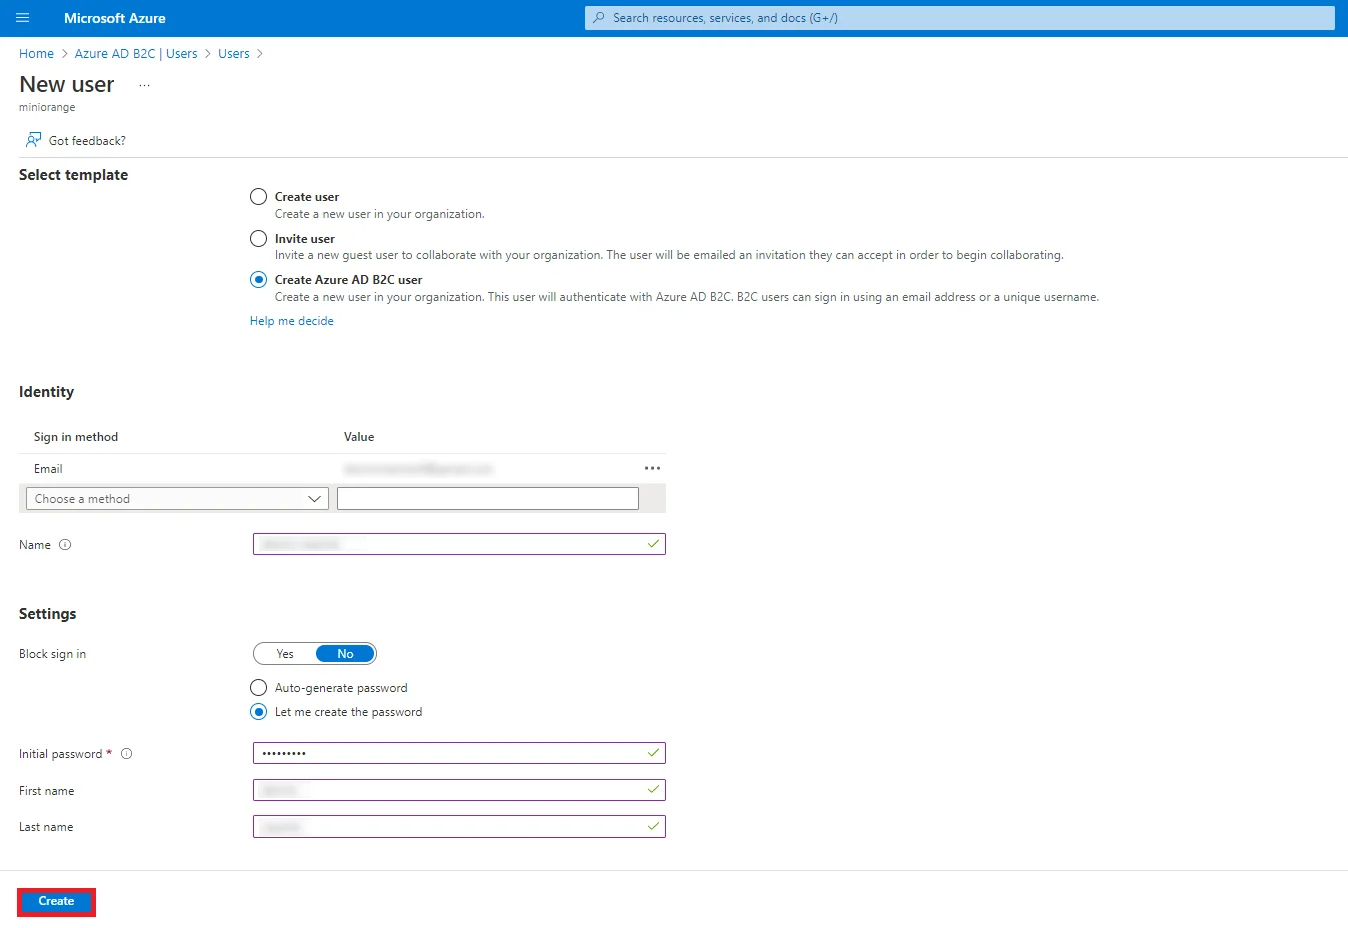
Add Users in your b2c application
In home page, go to the Users tab in the left corner.
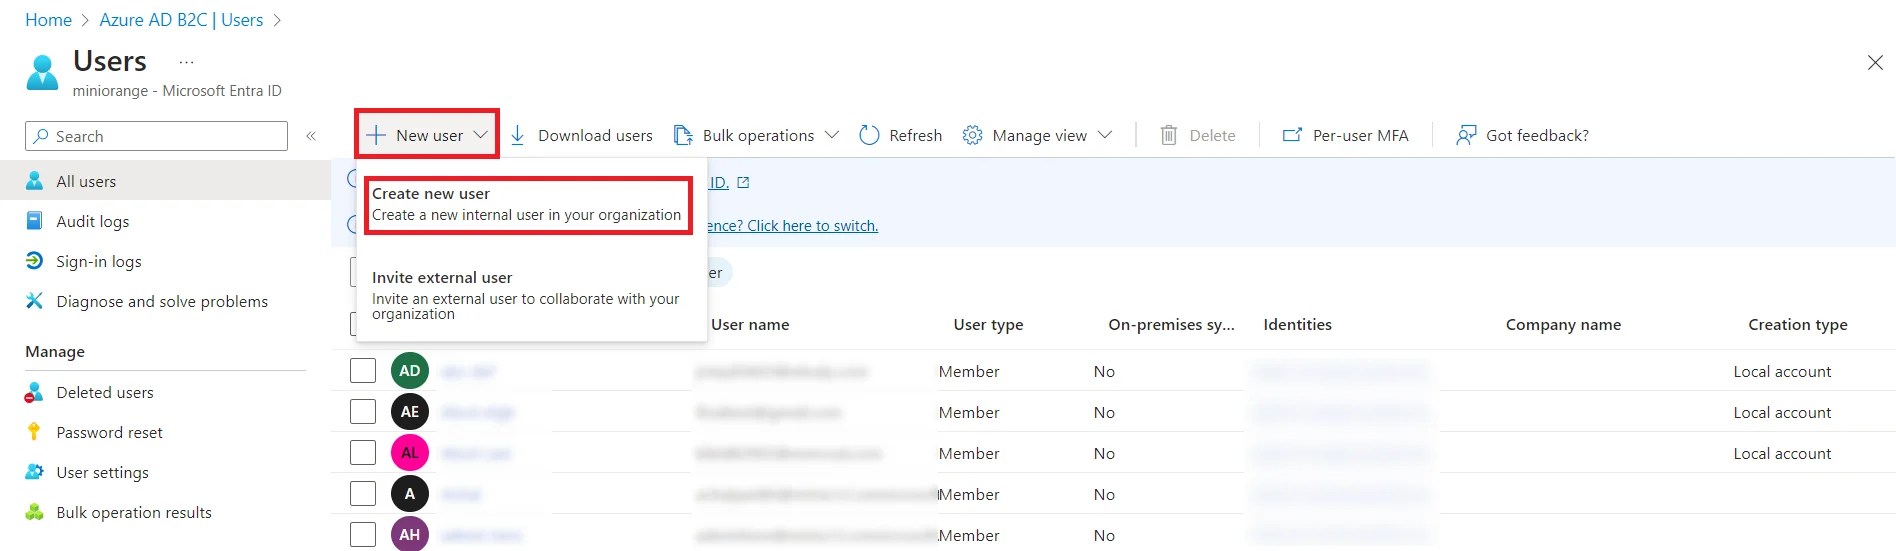
Click on New user in the users page. Then click on
Create new user
option.
Select Create Azure AD B2C user. Then, scroll down and click on
Email from sign in method and set your password and click
create to save the user details to perform test connection.