SAML SSO for JSM Customers using PingFederate as IDP
You can now allow External Customers to log in via SSO into Jira Service Management (previously Jira Service Desk or JSD). Integrate various customer portals like Atlassian Service Management and access tickets with the help of SAML SSO for JSM Customers.
Download and Installation
- Log into your Jira instance as an admin.
- Navigate to the settings and Click on Apps.
- Locate SAML/OAuth SSO for JSM Customers.
- Click on free trial to begin a new trial SAML/OAuth SSO for JSM Customers.
- On menu bar click on Apps. Locate SAML/OAuth SSO for JSM Customers.
Step 1: Set Up PingFederate as Identity Provider
- Login to your Ping Federate user admin dashboard.
- Click on the Identity Provider in the left navigation menu.
- Under SP CONNECTION, click on Create New button.
- Select the Browser SSO Profiles connection template on the Connection Type tab and click Next.
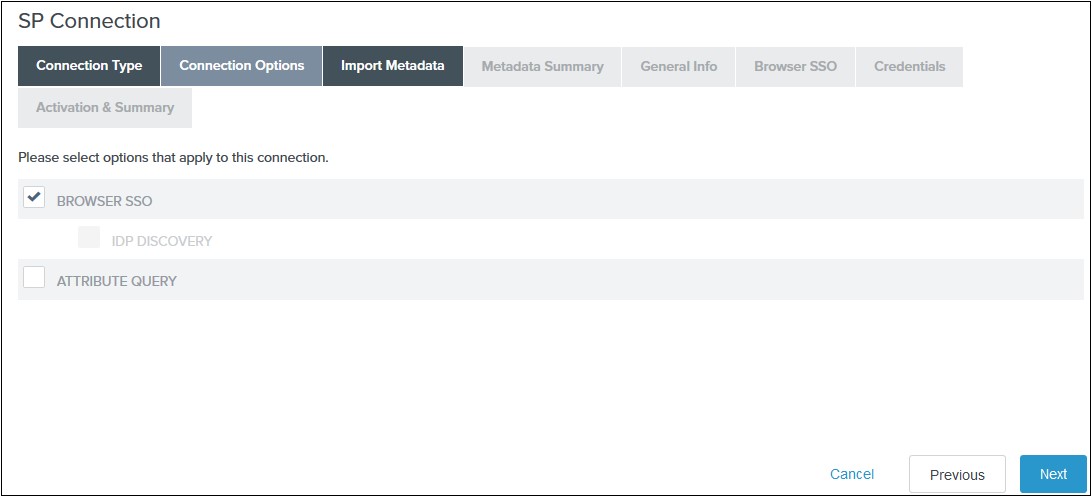
- Select Browser SSO on the Connection Options tab and click Next.
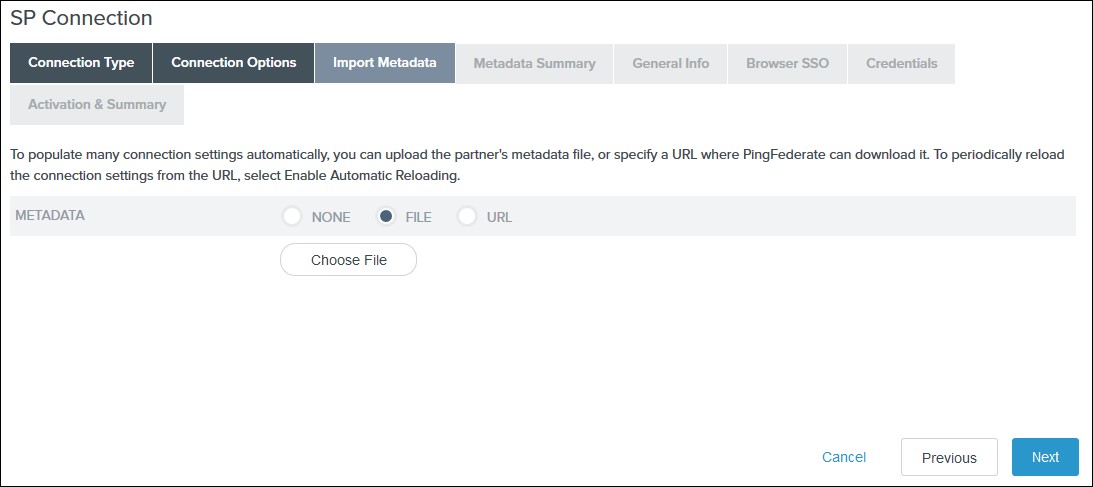
- Select File as the method for importing metadata and click Choose File to choose the miniOrange SSO plugin’s metadata on the Import Metadata tab or you can add SP Metadata information manually by selecting the None Option. You will need to copy SP Entity ID, SP ACS URL, and Certificate from Service Provider Tab.
- Review the information on the Metadata Summary tab and click Next.
- In the General Info tab ensure that the Service Provider’s Entity ID, Connection Name, and Base URL fields pre-populate based on the metadata. Click Next.
- Navigate to the Browser SSO tab and click on the Configure Browser SSO. You will be redirected to Browser SSO Setup wizard.
- Navigate to the Protocol Settings tab of the Browser SSO
wizard and click on the Configure Protocol settings.
-
1) Select POST for Binding and specify the single
sign-on endpoint URL in the Endpoint URL field on
the Assertion Consumer Service URL. Click Next.
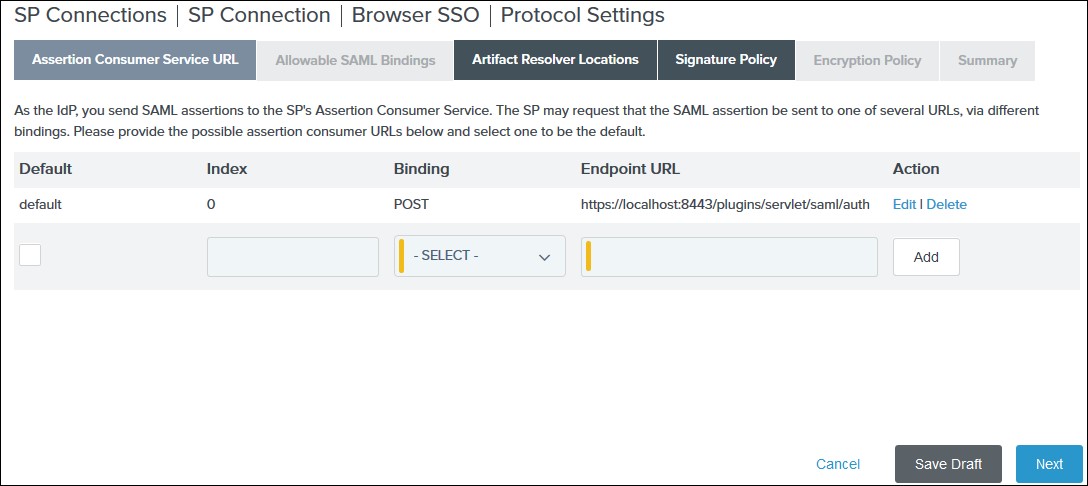
2) Select POST on the Allowable SAML Bindings tab and click Next.
3) Select your desired signature policies for assertions on the Signature Policy tab and click Next.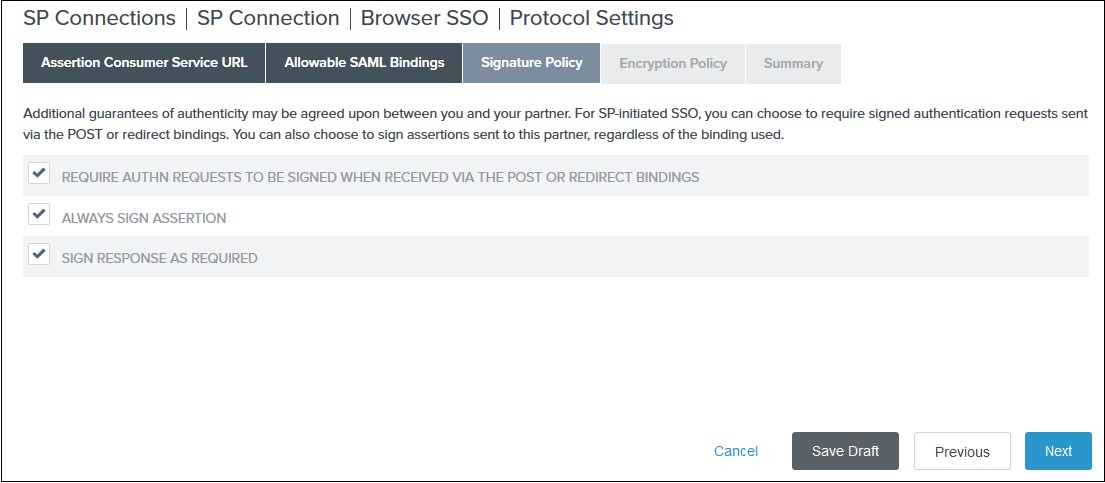
4) Select your desired encryption policy for assertions on the Encryption Policy tab and click Next.
5) Click Done on the Protocol Settings Summary tab.
6) Click Done on the Browser SSO Summary.
- Navigate to the Credentials and click on the Configure
Credentials. You will be redirected to the Credentials setup wizard.
-
1) Select the Signing Certificate to use with the Single Sign-On service
and select Include the certificate in the signature element in the
Digital Signature Settings tab. Click Done.
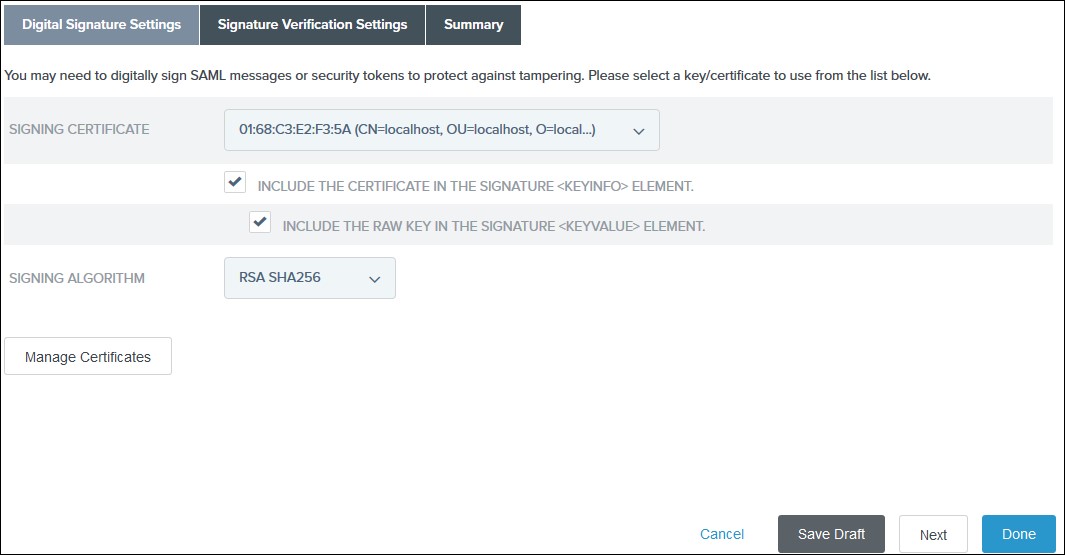
2) Click Done on the Summary.
3) Click Next on the Credentials.
- Select Active for the Connection Status on the Activation & Summary tab and click Save.
- Now, navigate to the Ping Federate User Admin dashboard Identity Provider.
- Click Manage All under SP Connections.
- Click Export Metadata for the desired service provider connection.
- Click Export on the Export & Summary tab and click Done.
All the information required to configure the Ping Federate as SAML IDP i.e. plugin’s metadata is given in the Service Provider Info tab of the miniOrange plugin.


-
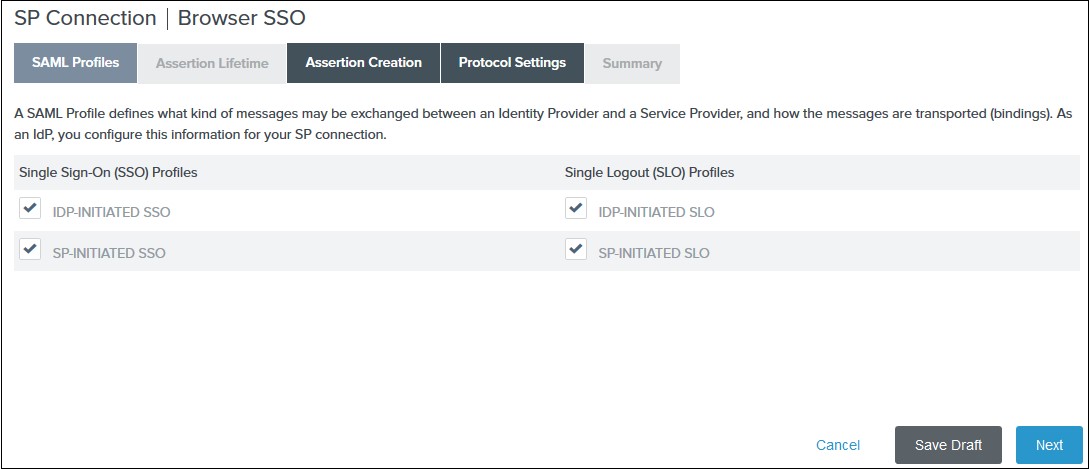
1) Select the IdP-Initiated SSO and SP-Initiated SSO options
on the SAML Profiles tab and click
Next.
2) Enter your desired assertion validity time from on the Assertion Lifetime tab and click Next. By default, it is configured 5 minutes for both. 3) Navigate to the Assertion Creation and click on the Configure Assertion Creation. You will be redirected to the assertion creation setup wizard.
-
I. In the Identity Mapping tab select STANDARD and click
Next.
II. Select a Subject Name Format for the SAML_SUBJECT on the Attribute Contract tab and click Next.
III. Click Map New Adapter Instance on the Authentication Source Mapping.
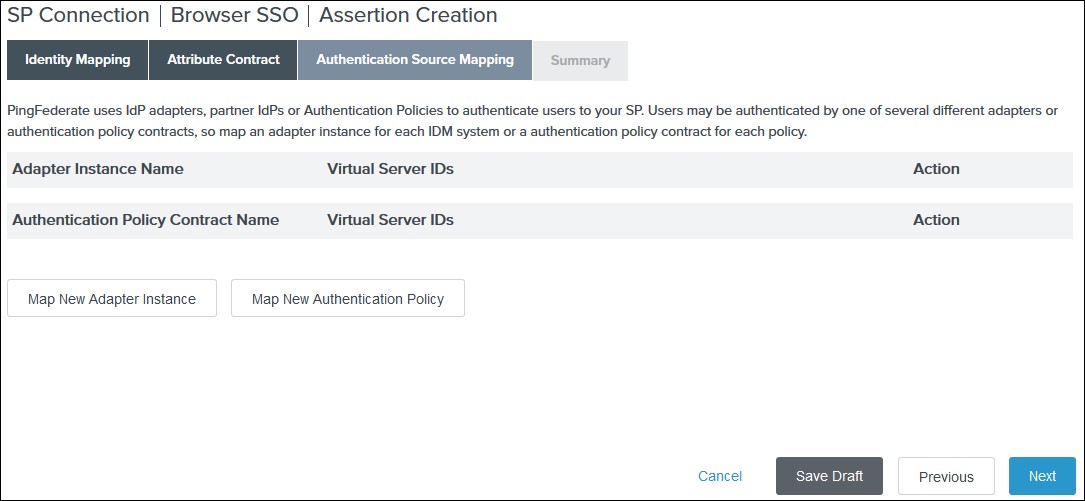
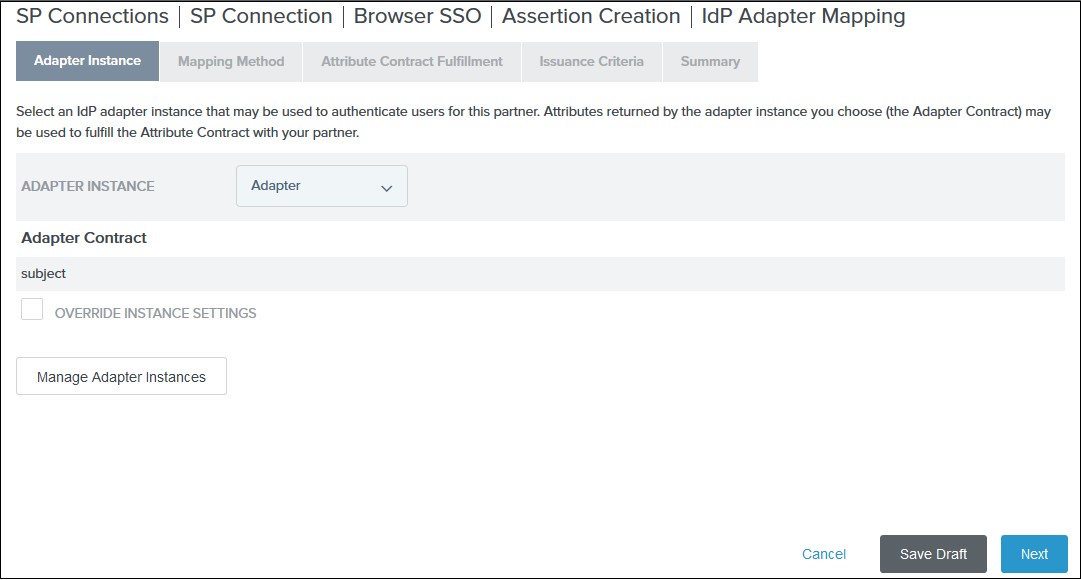
IV. Select an Adapter Instance and click Next. The adapter must include the user’s email address.
V. Select the Use only the adapter contract values in the SAML assertion option on the Mapping Method tab and click Next.
VI. Select your adapter instance as the Source and the email as the Value on the Attribute Contract Fulfilment tab and click Next.
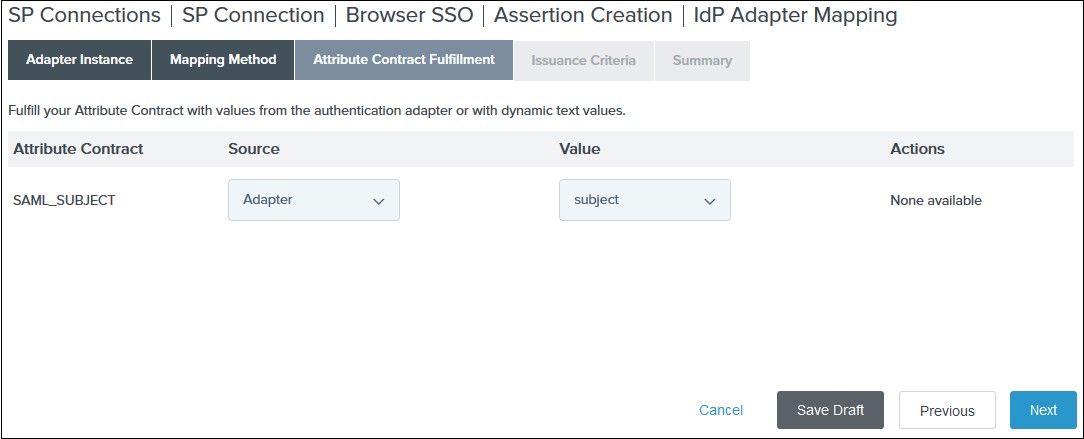
VII. (Optional) Select any authorization conditions you would like on the Issuance Criteria tab and click Next.
VIII. Click Done on the Summary. IX. Click Next on the Authentication Source Mapping tab. X. Click Done on the Summary tab. XI. Click Next on the Assertion Creation
Step 2: Setup JSM as Service provider
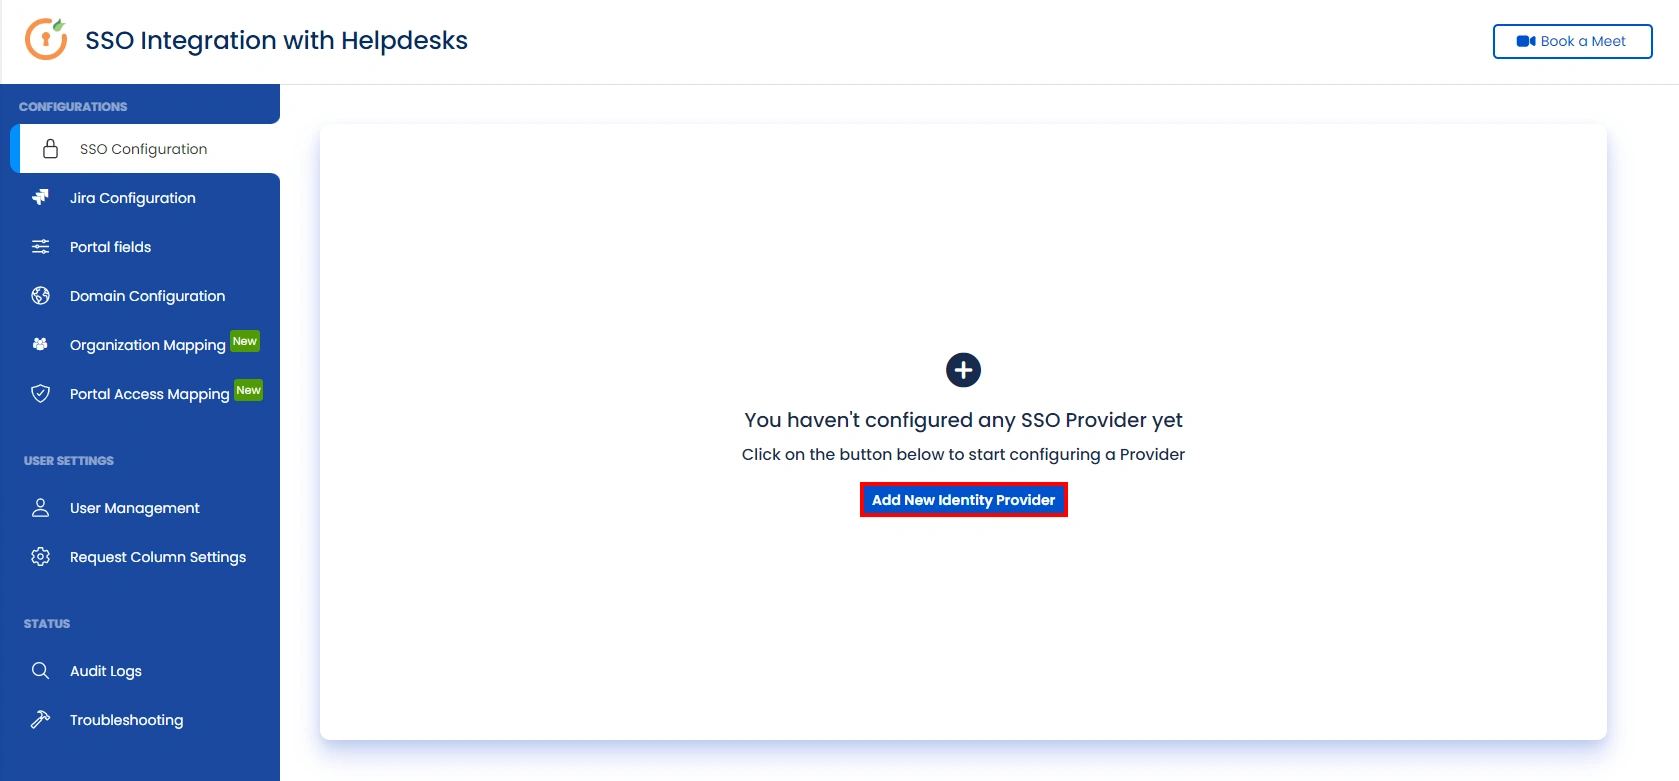
- Go to the Manage Apps -> click Getting started under SSO Integration with Helpdesk then click on the Add New Identity Provider.
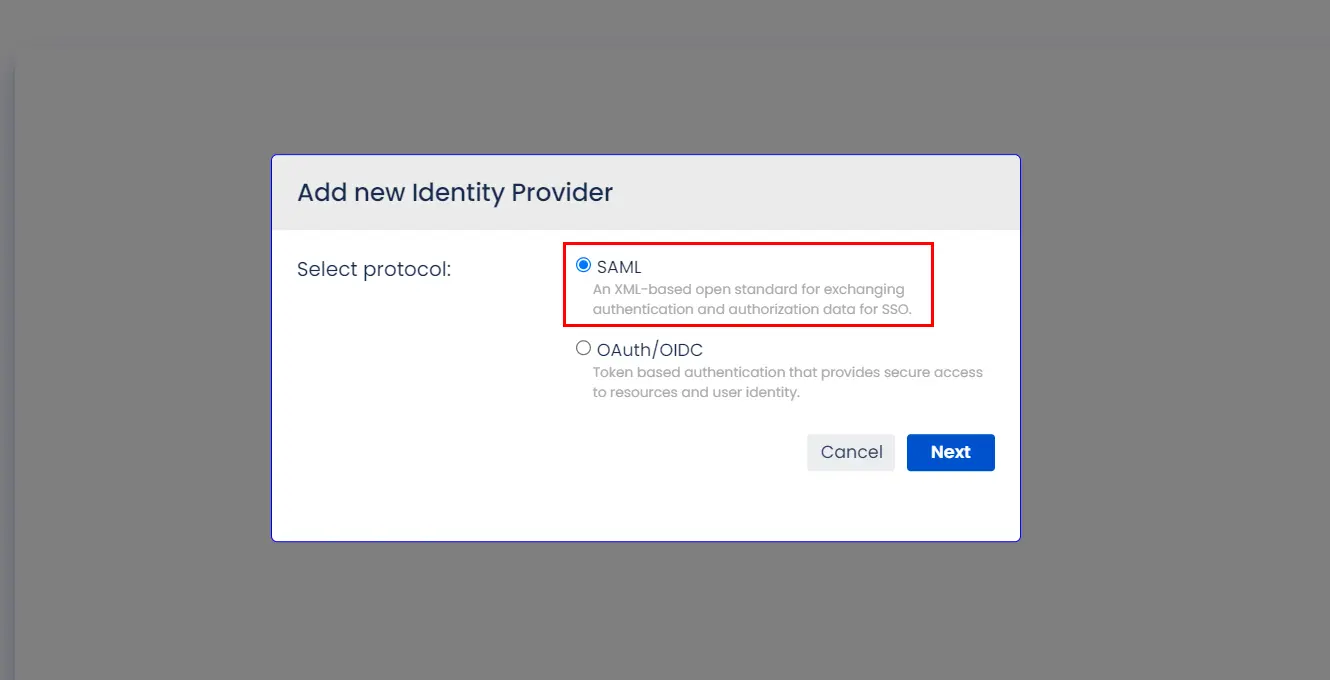
- Select SAML and click on the next button.
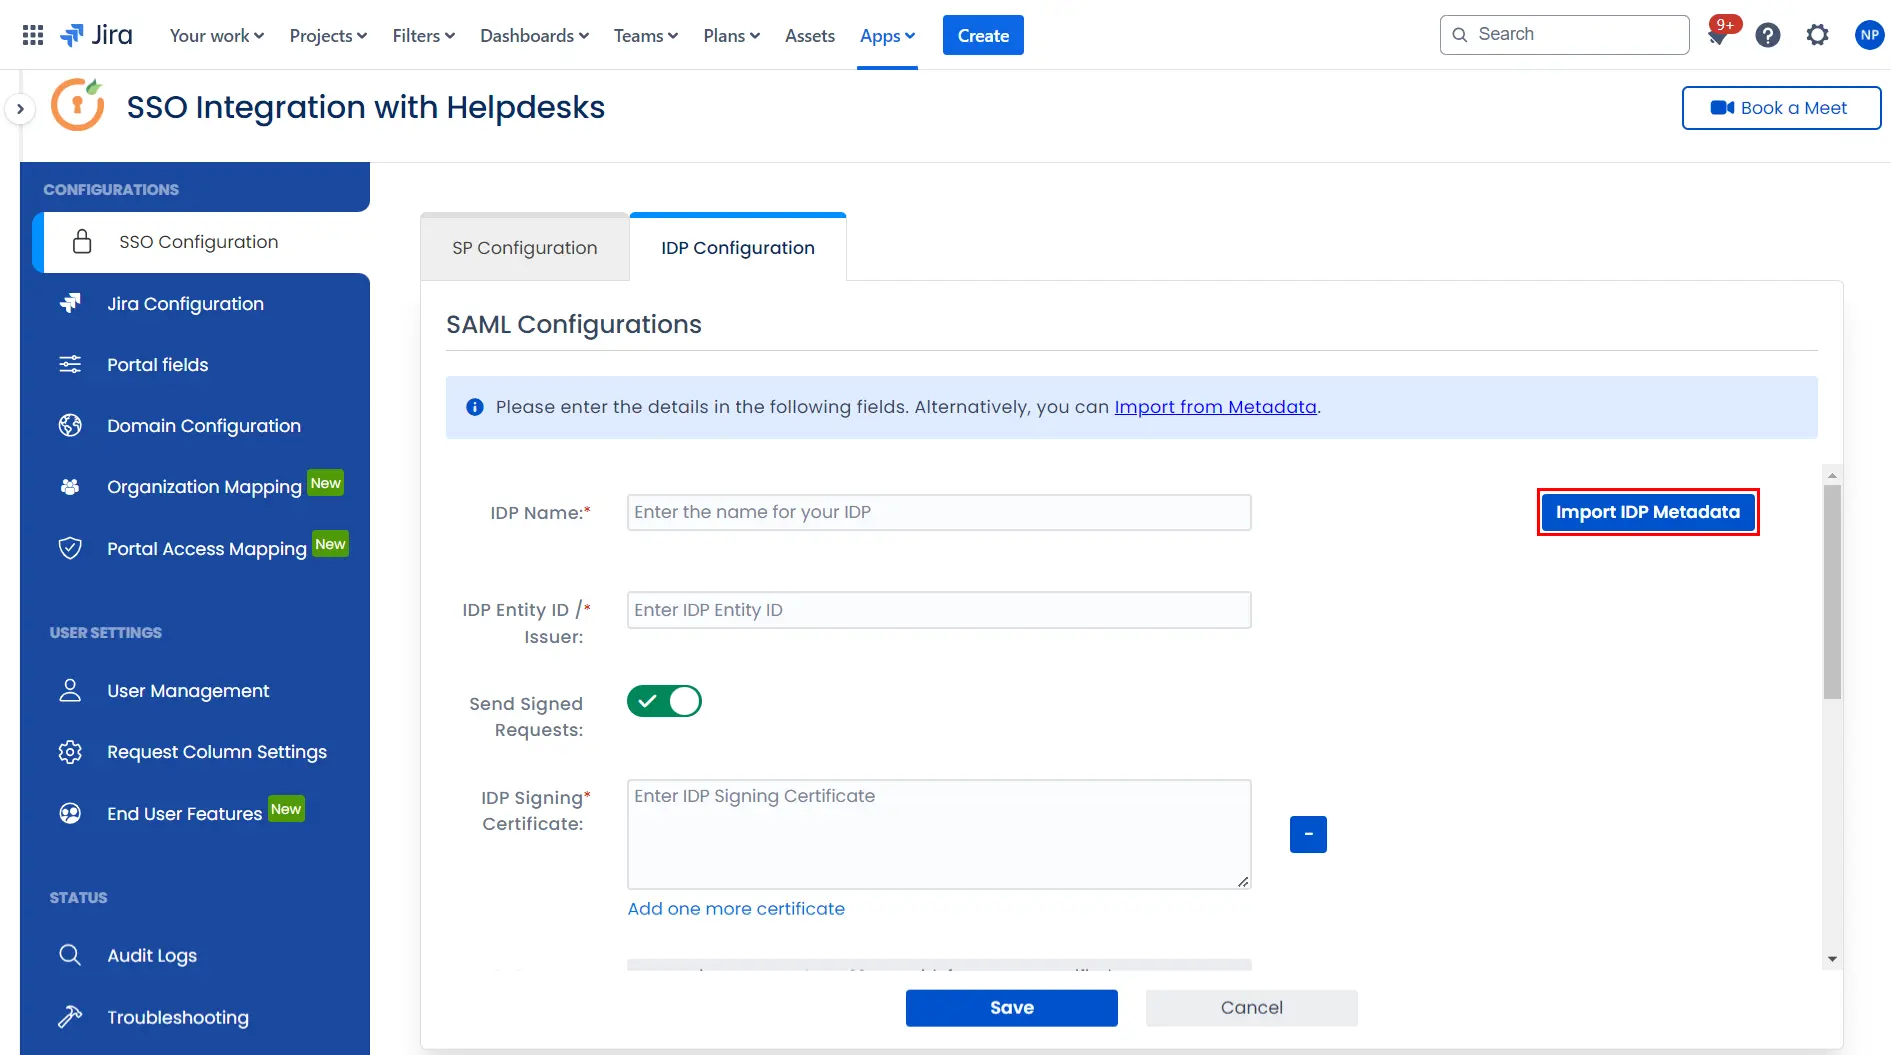
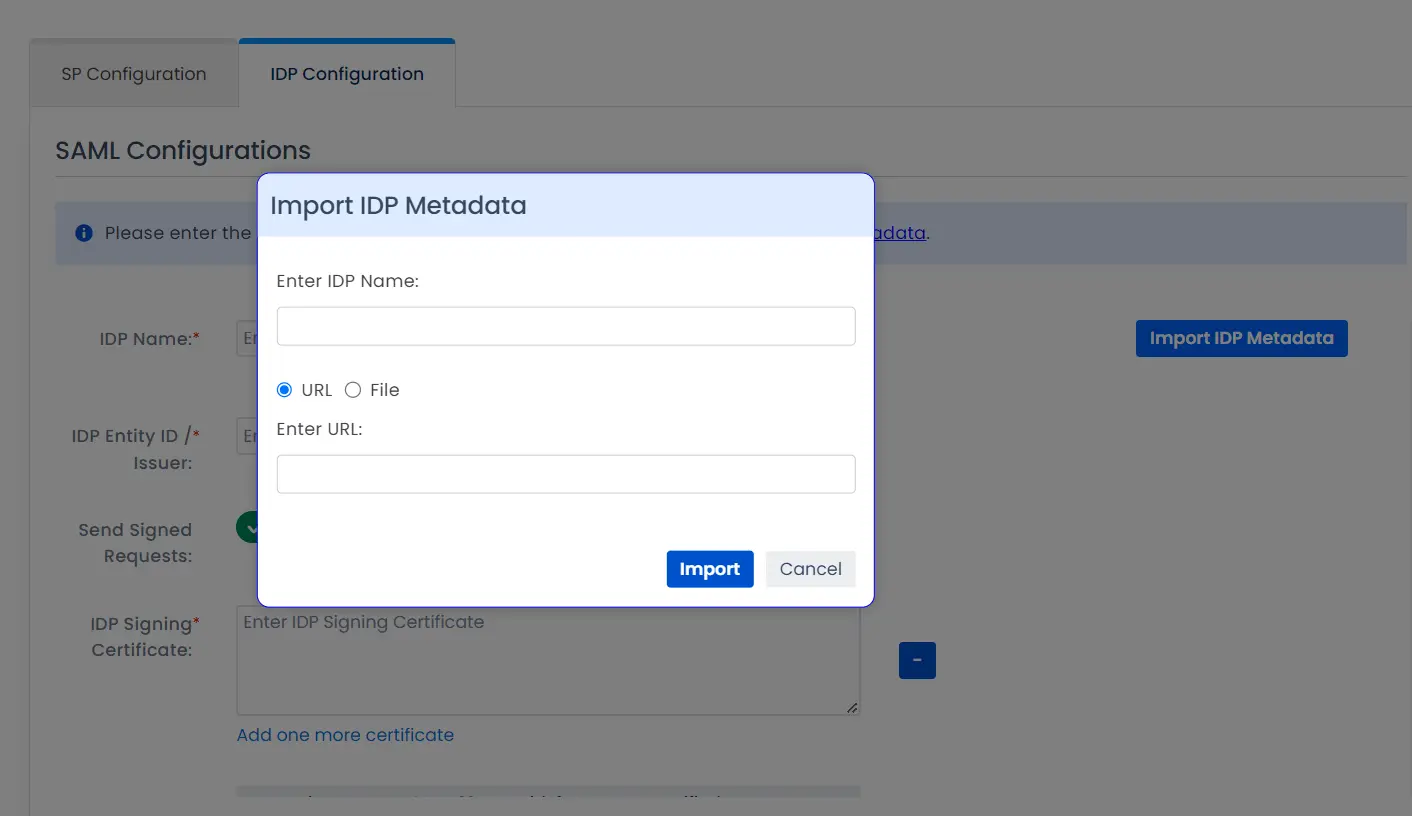
- Click on Import IDP Metadata.
- Enter IDP name.
- Choose IDP metadata URL / File: Enter your metadata URL / File
- Click Import
A. By Metadata URL :
To configure the IDP manually, you will need to have the following details from your IDP's metadata.
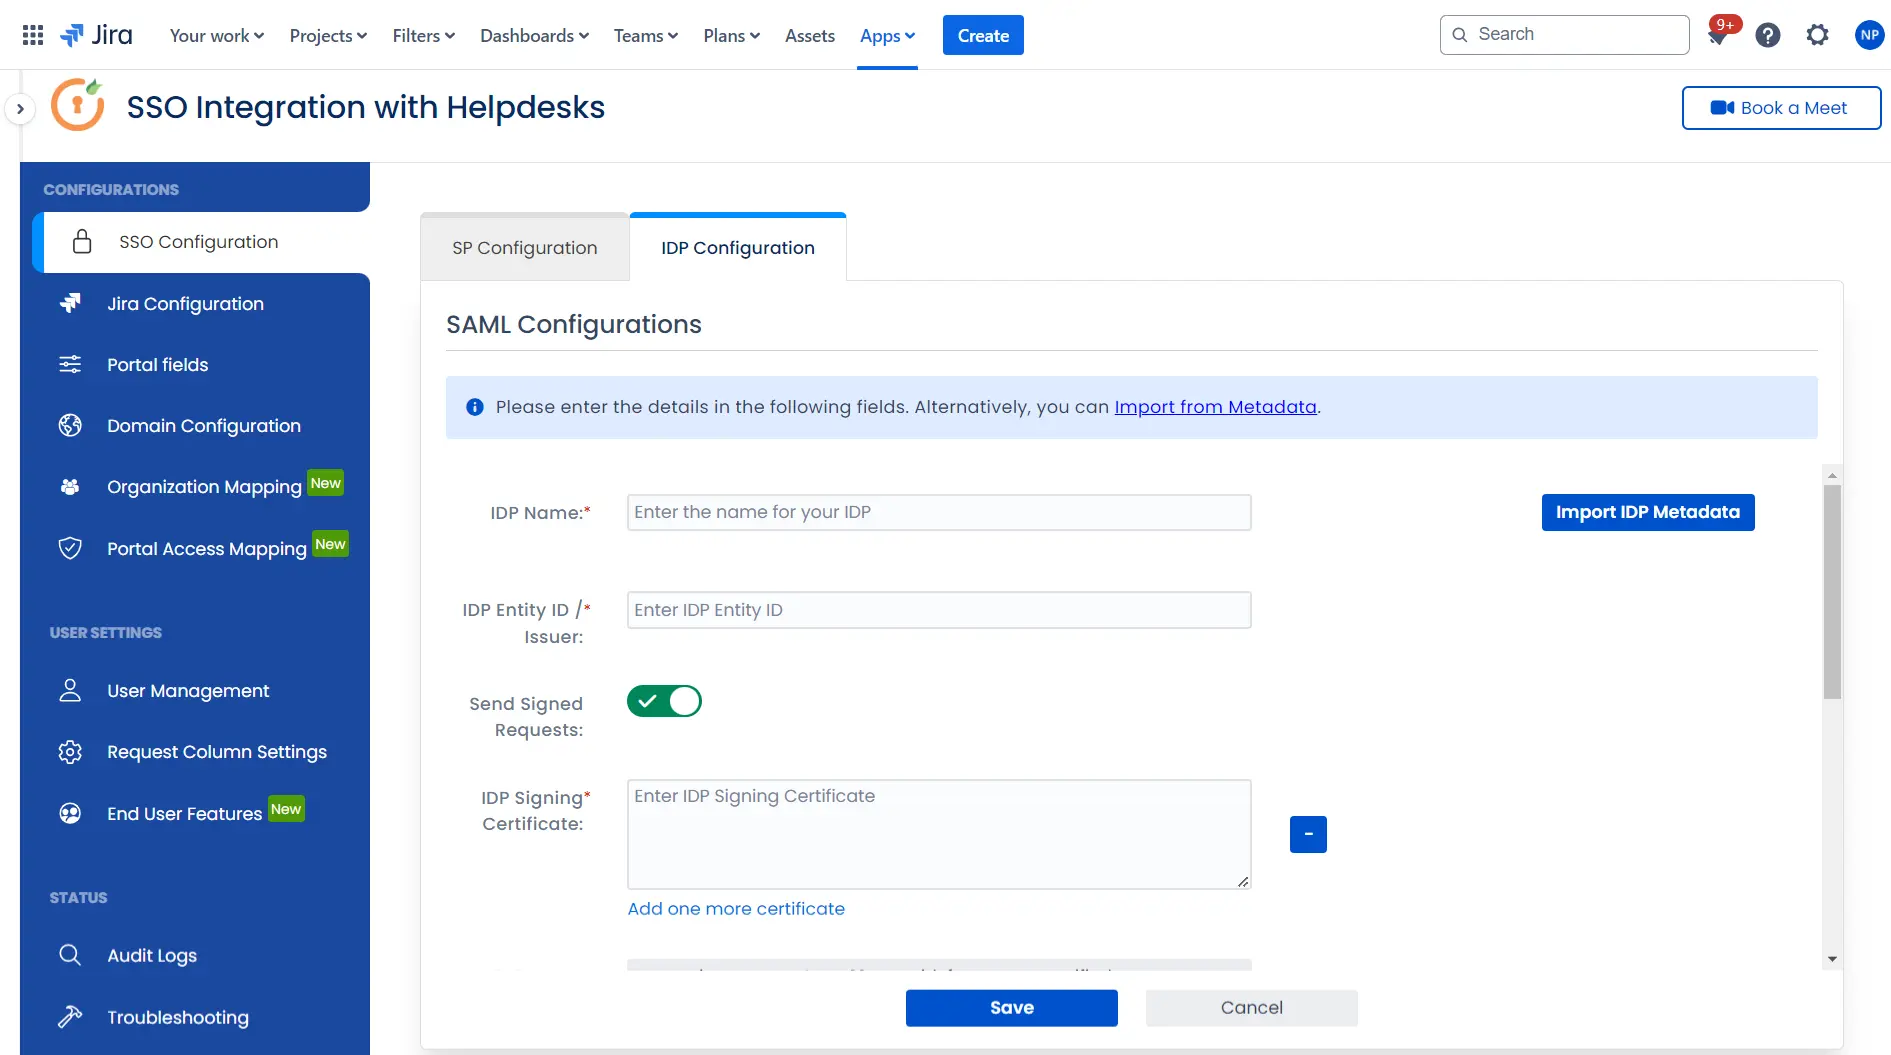
Once you have added the IDP metadata, click on Save. If the IDP has been added successfully, Click on the Test Configuration button to test if the IDP was added successfully.
Step 3: Integrate Atlassian HelpDesk with JSM SSO
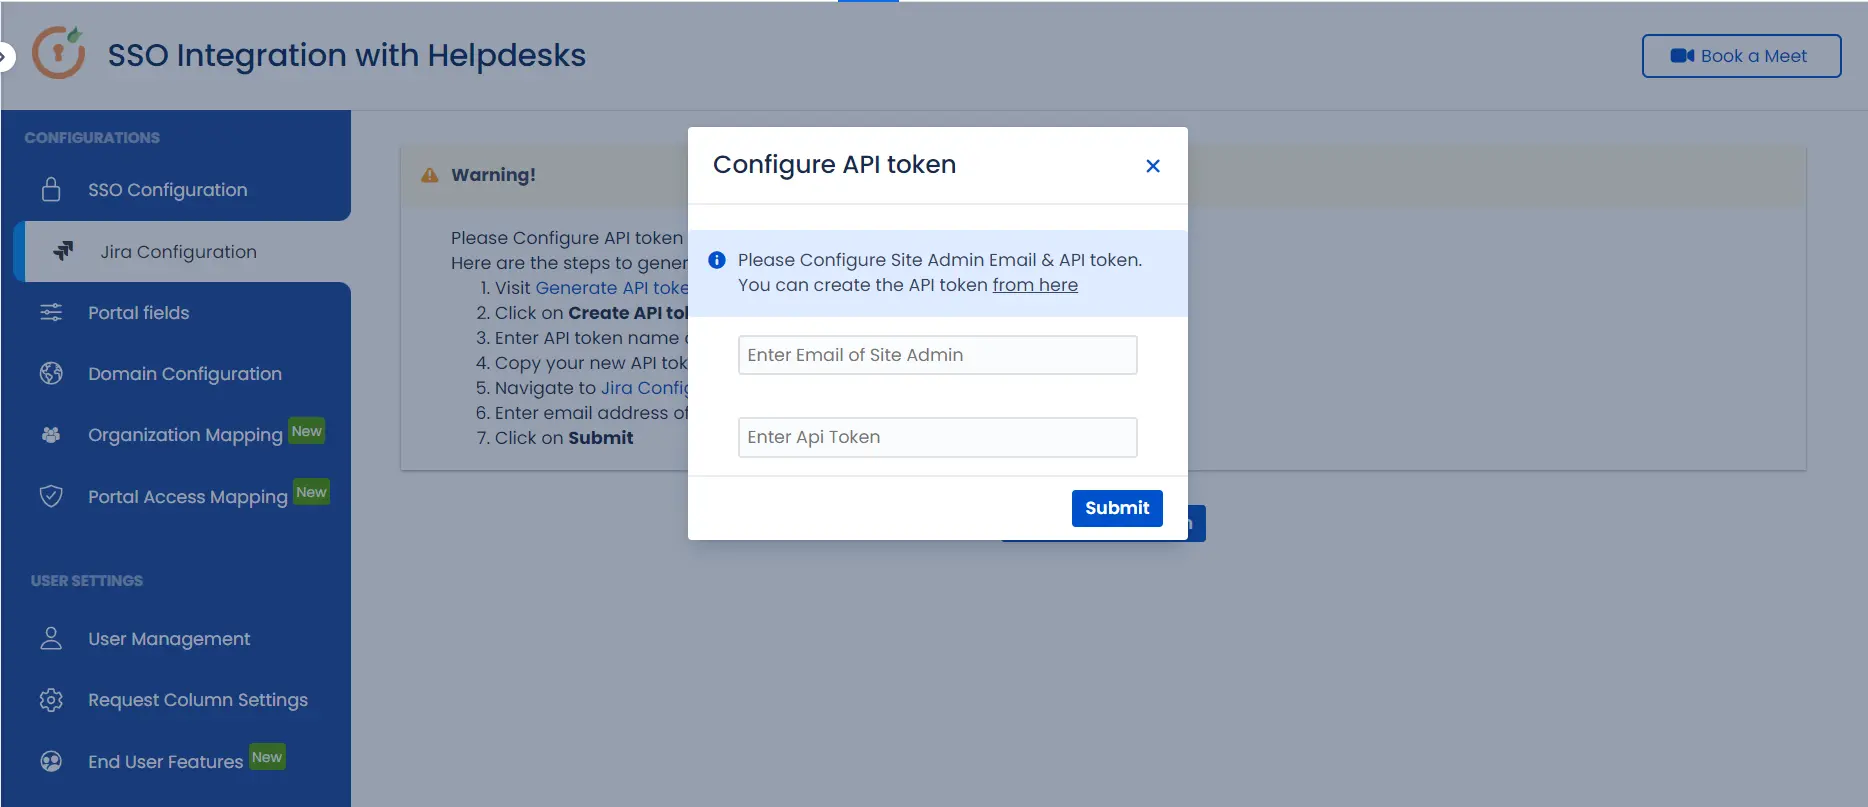
- Click on the Configure API Token and configure the Service Account API token with the email.
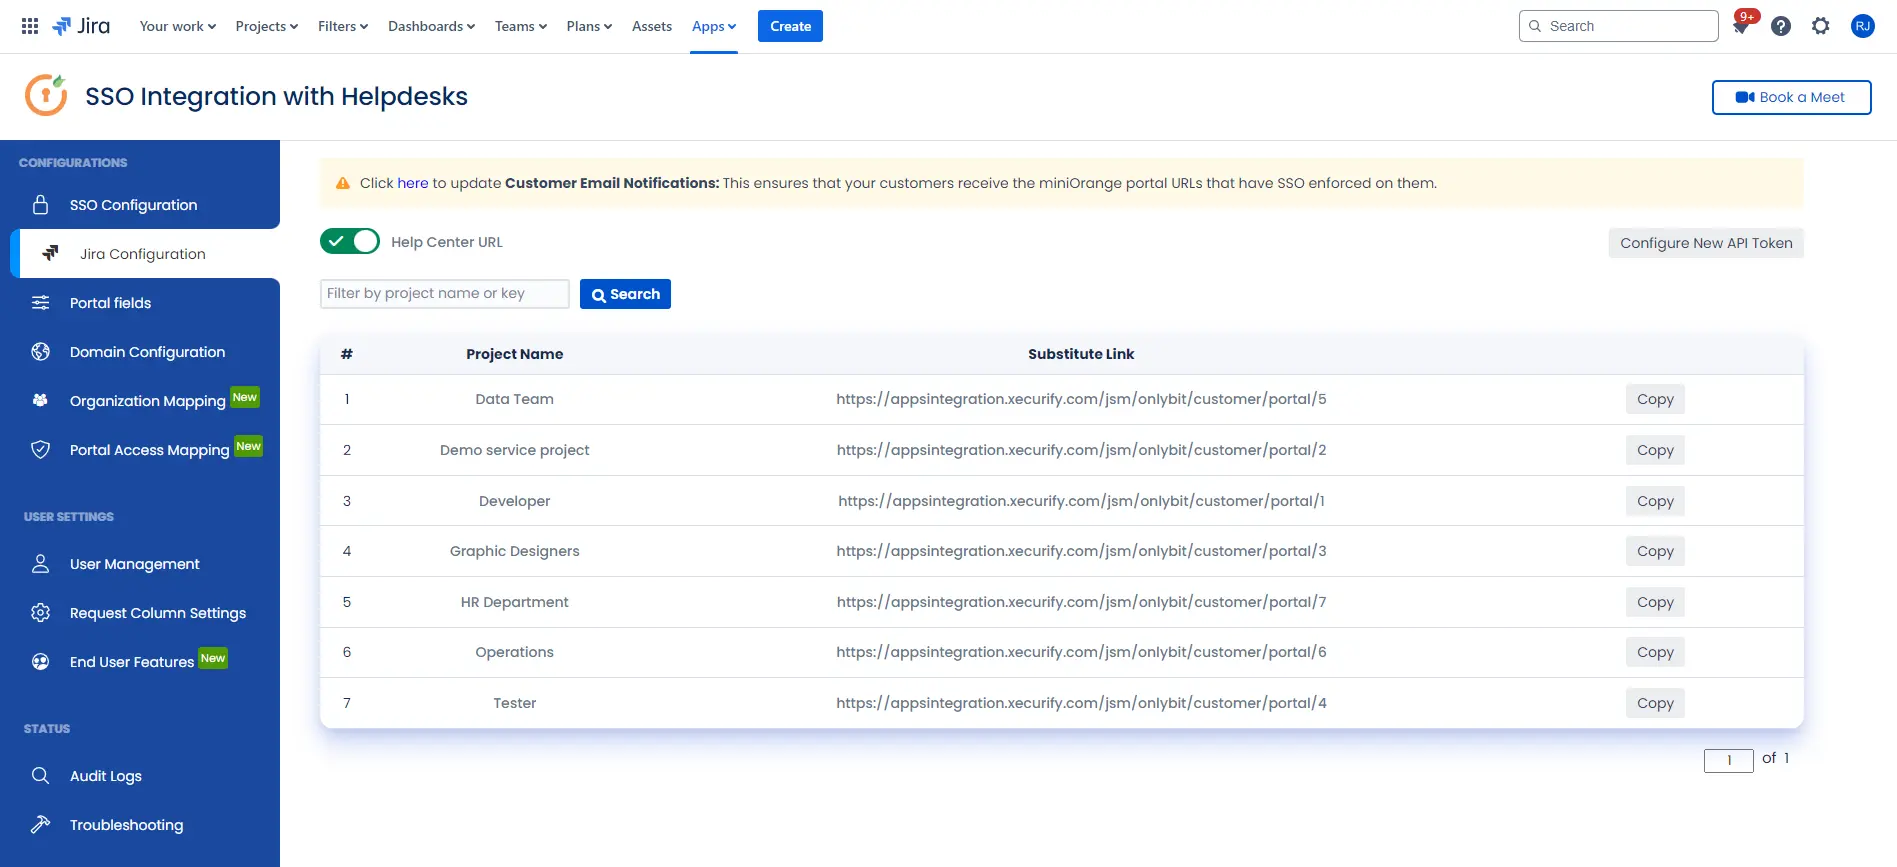
- After successful configuration of API token all the service desk projects with respective links will be displayed. These substituted links will be used by customers for accessing particular projects with SSO.
- Copy any of the substitute links you see for your portals and try accessing it in a private browser window. You would be automatically redirected to your Identity Provider for authentication and would be allowed access to the portal only after successful authentication.
It is necessary to have admin permissions for the service account.
×
![]()
Additional Resources
Did this page help you?


 Try it for free