Contents
WSO2 Apps as IDP – Cloud OAuth
Part 2: Setup miniOrange with WSO2
Step 1. Setup WSO2 as IDP
- First, let’s register this Consumer App in WSO2 IS. Download and start WSO2 IS.
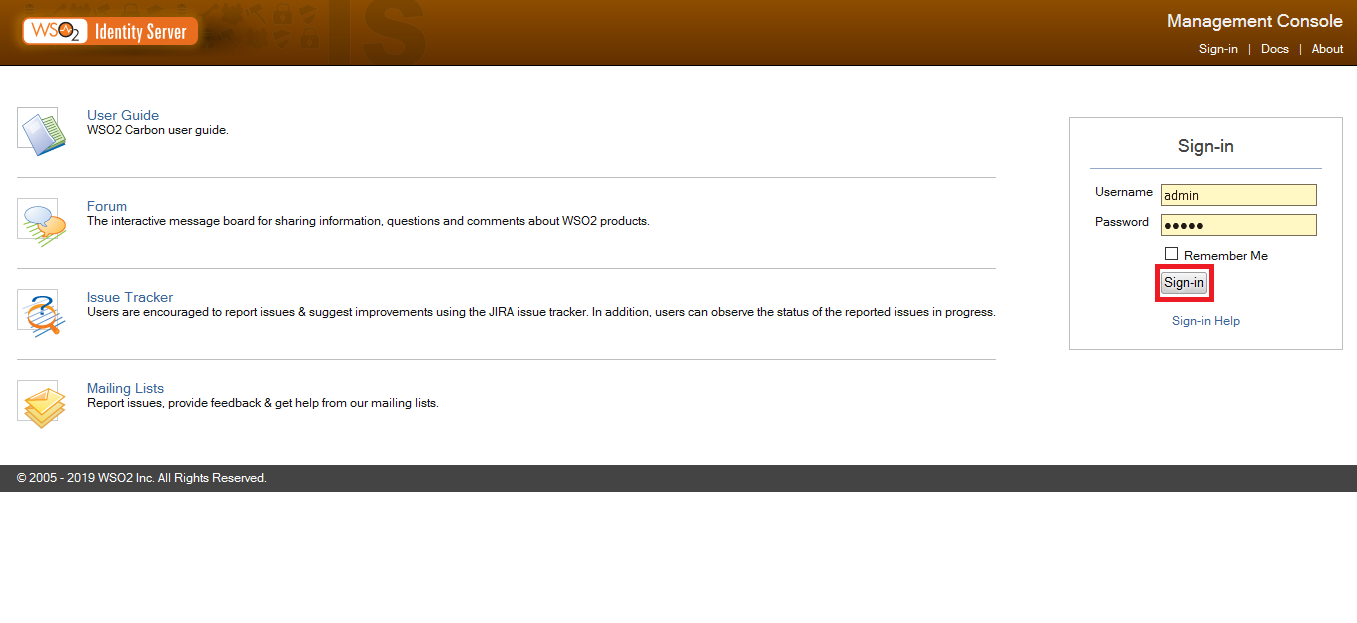
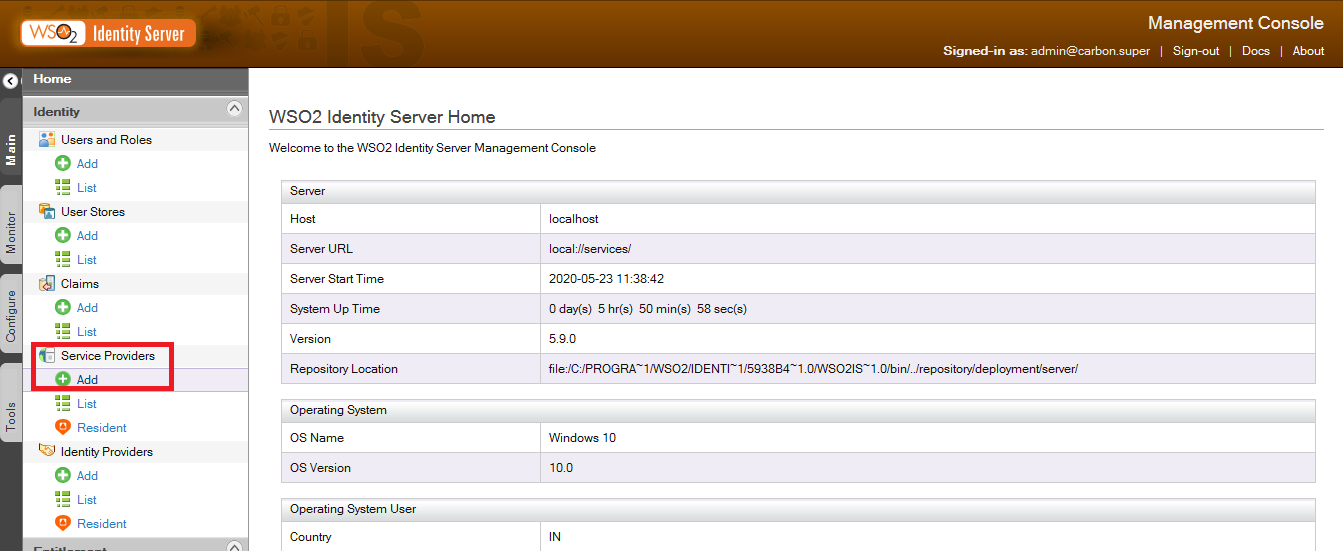
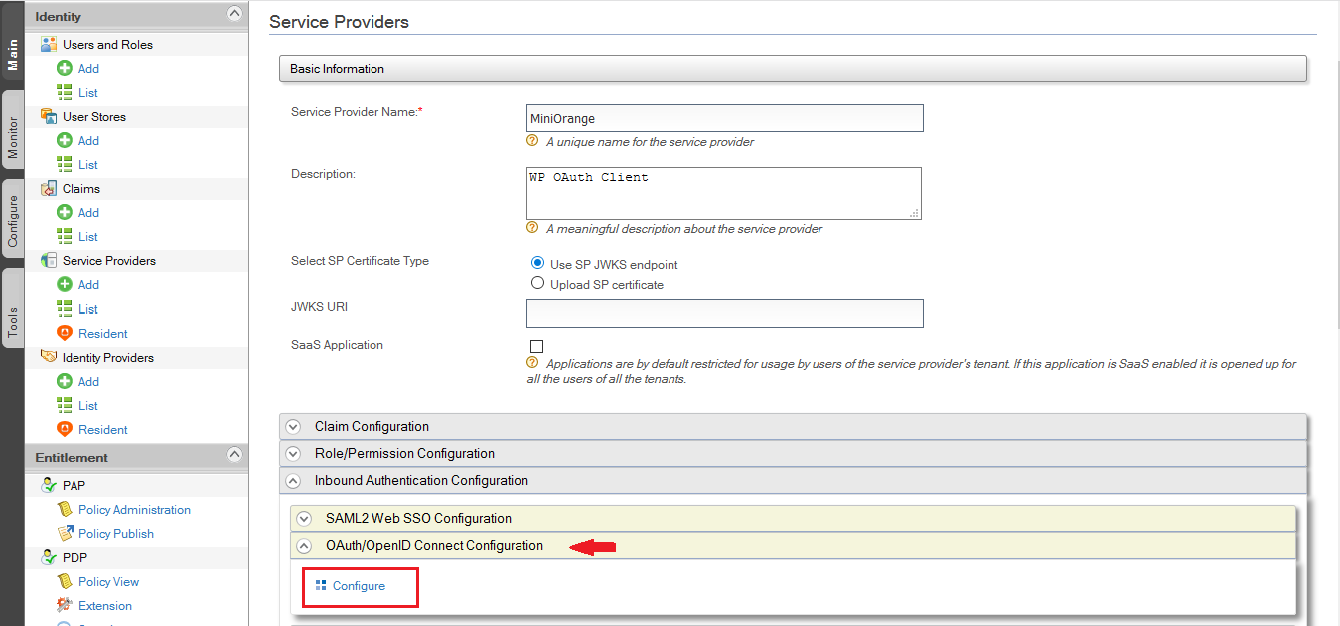
- Once logged in, go to Main -> Service Provider and click on Add.
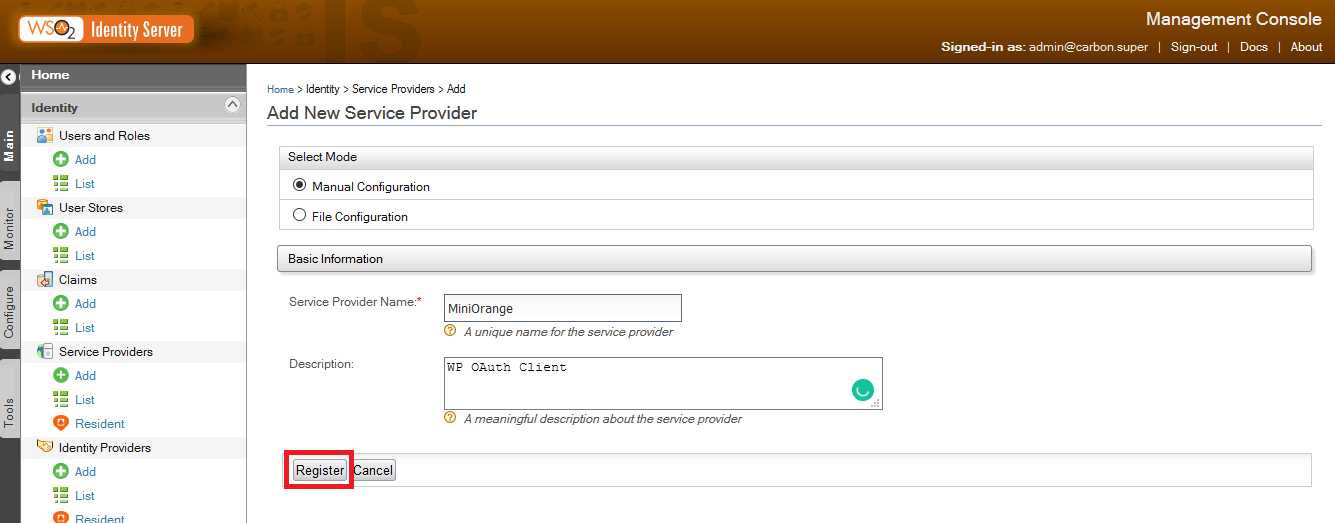
- Enter the Service Provider Name and Description and click on Register.
- Now go to the Service Provider->List and edit the Service Provider you have created.
- Scroll down and select Inbound Authentication Configuration and then select OAuth/OpenID Connect Configuration and click on Configure.
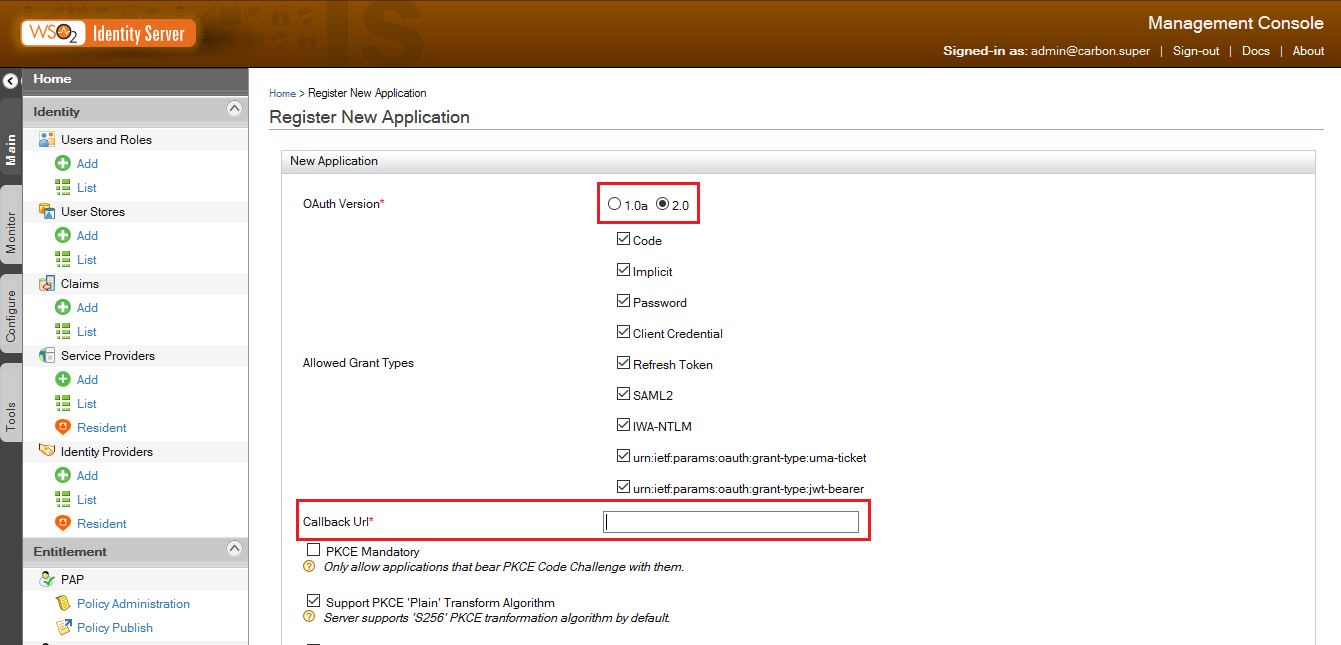
- You will get Callback URL/Redirect URL from Step 2.
- Copy the Callback URL and paste it in the field. Click on Add.
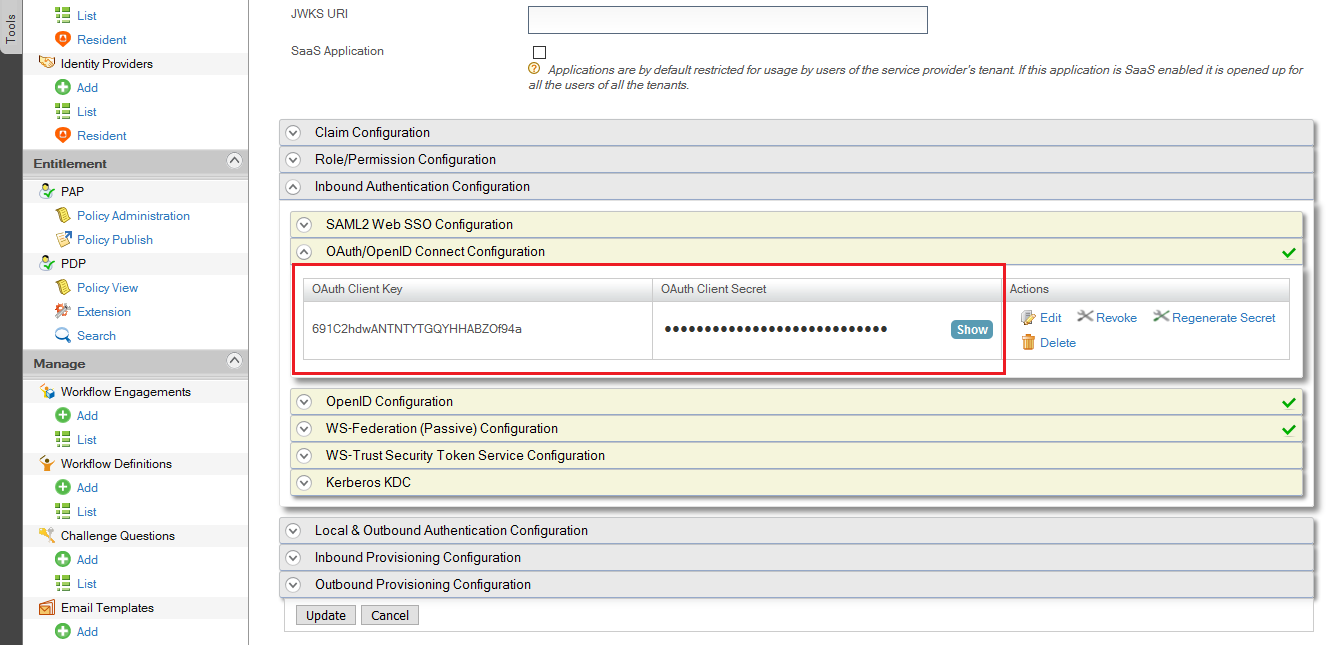
- When the app has been added, Client ID and Client Secret are generated for the application. Configure the WordPress OAuth SSO plugin with Client ID, Client Secret, Authentication and Access Token, Get User Info Endpoint of WSO2. Endpoints are provided at the bottom of this guide.
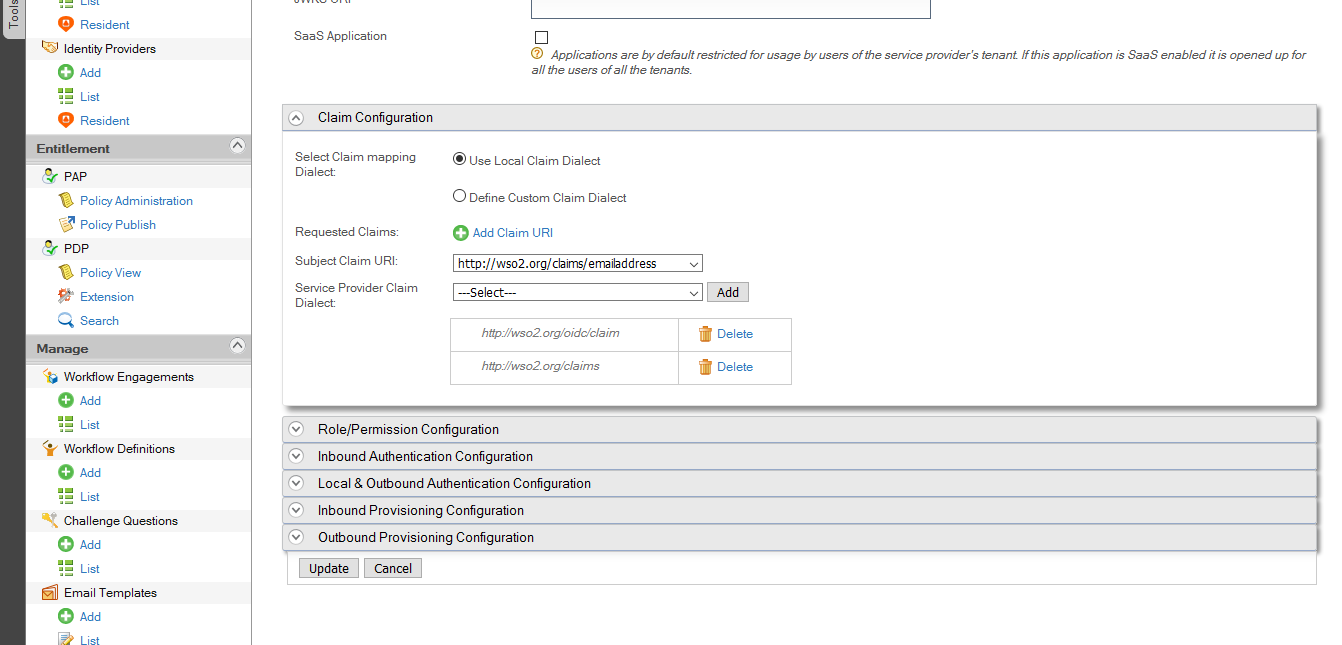
- Attribute Mapping: To get attributes from WSO2 you have to add following Claim URIs in your WSO2 application.
- Go to Service Provider->Claim Configuration.
- Select https://wso2.org/claims/emailaddress from Subject Claim URI dropdown.
- Add following URIs in Service Provider Claim Dialect: https://wso2.org/oidc/claim & https://wso2.org/claims
- You have successfully completed your WSO2 Server side configurations.
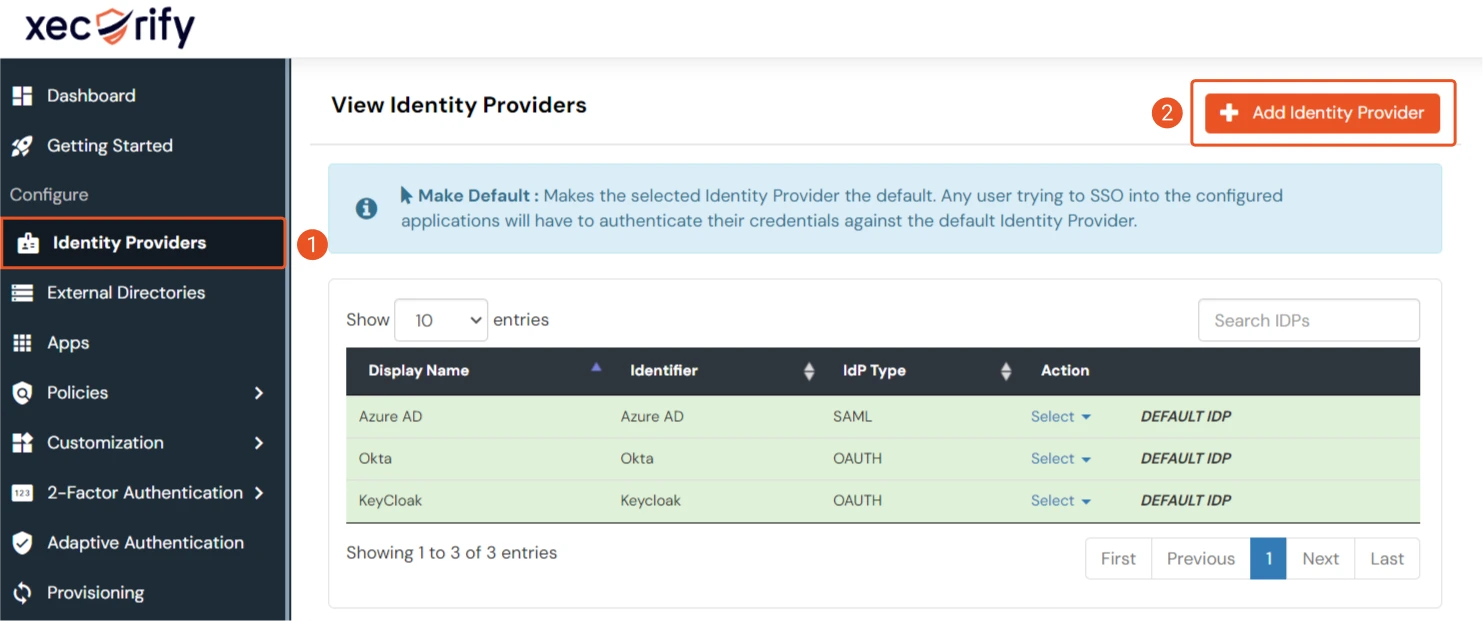
- Go to miniOrange Admin Console.
- From the left navigation bar select Identity Provider.
- Select OAuth tab.
- Enter the following values.
- Go to the miniOrange Admin Dashboard.
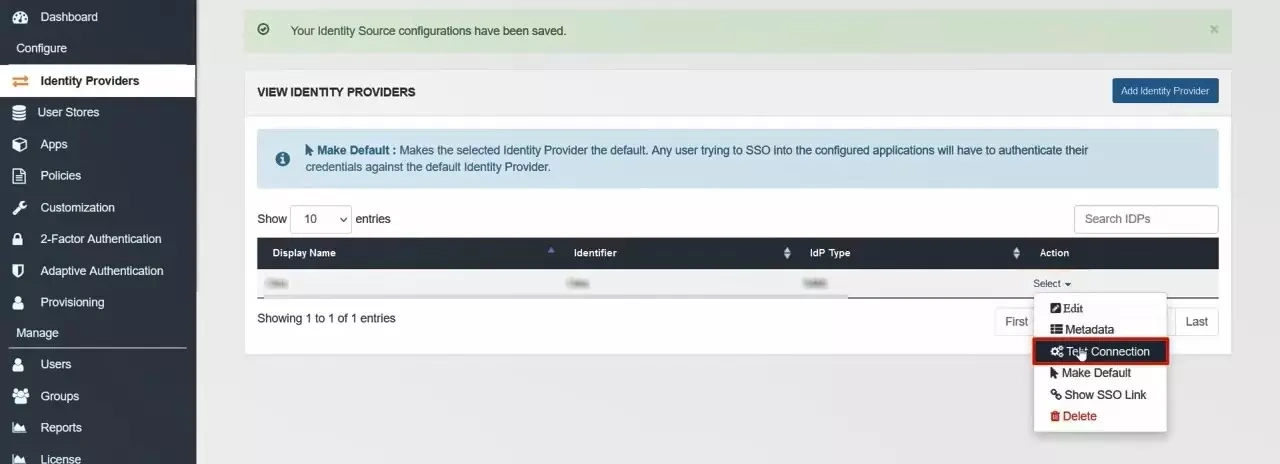
- Go to Identity Providers tab. Then click on select button under the app you just created. Then click on Test Connection.
- A new popup login window will open. Enter your credentials and login.
- Now you will see TEST SUCCESSFUL in a new popup window. If not, then check if you have missed any of the above step.
Step 2. Setup miniOrange as Service Provider
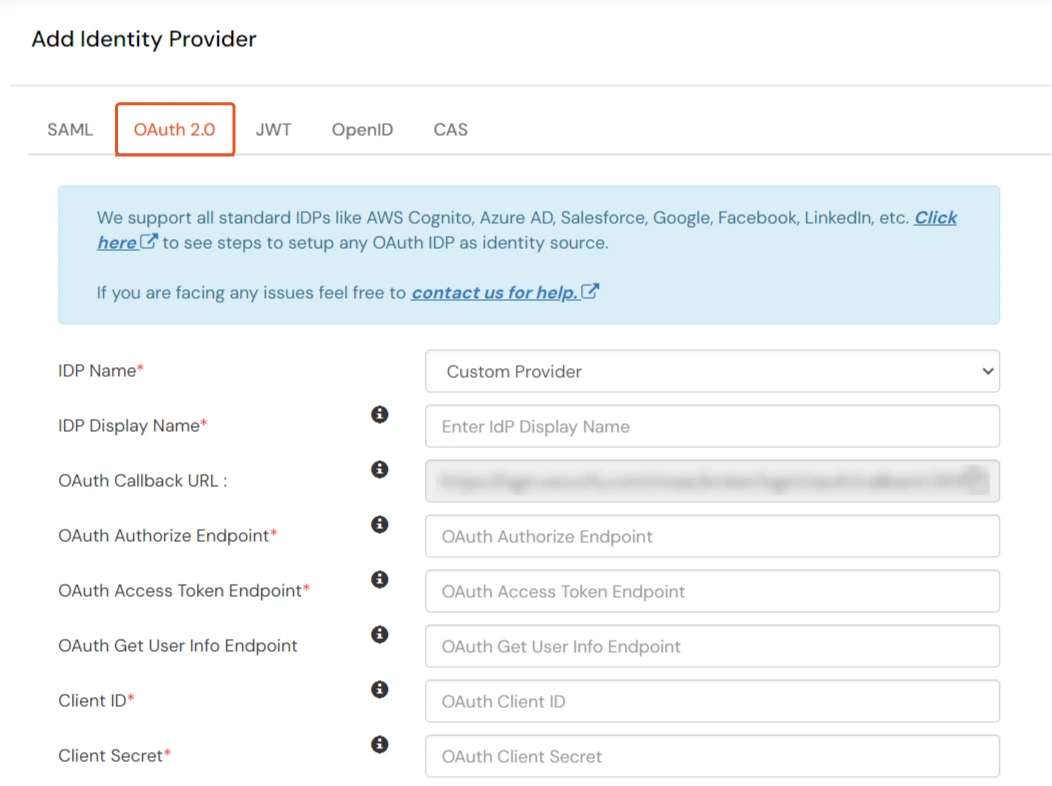
| IdP Name | Custom Provider |
| IdP Display Name | Choose appropriate Name |
| OAuth Authorize Endpoint | https://<wso2-app-domain>/oauth2/authorize | OAuth Access Token Endpoint | https://<wso2-app-domain>/oauth2/token | OAuth Get User Info Endpoint (optional) | https://<wso2-app-domain>/oauth2/userinfo |
| Client ID | From step 1 |
| Client secret | From step 1 |
| Scope | openid |
Step 3. Test connection between miniOrange and WSO2
