How to test OTP over SMS
Step 1: Configure SMS gateway and enable the 2FA method
- Navigate to the Basic Configurations tab and locate the settings icon of OTP Over SMS method to configure the SMS gateway.
- Choose one of the below options:
- miniOrange gateway - To configure the miniOrange gateway refer to the section - Configure miniOrange SMS Gateway.
- Custom gateway - Use this option if you already use an SMS gateway in your organization. To configure the Custom gateway refer to the section - Configure Custom SMS Gateway.
- Once configured the SMS gateway, enable OTP Over SMS as the primary or backup 2FA method.
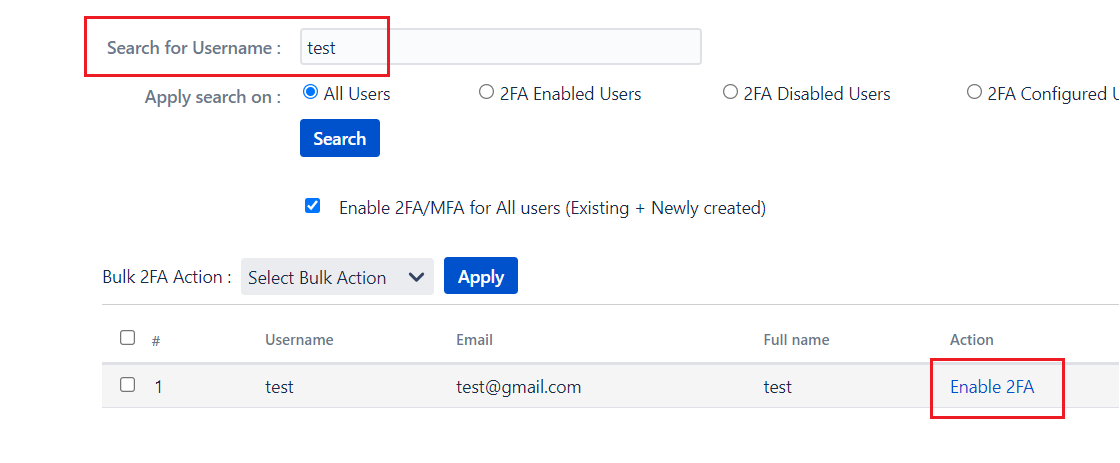
Step 2: Enable 2FA for a user
- Navigate to the 2FA for Users section in the User management tab.
- Search for the username and click on the Enable 2FA link given in the Action column.
Step 3: Enable 2FA
- Enable 2FA for your instance i.e. for Jira/Confluence/Bitbucket/Bamboo/Crowd (Step 3 of Basic Configurations tab) .
Step 4: 2FA configuration
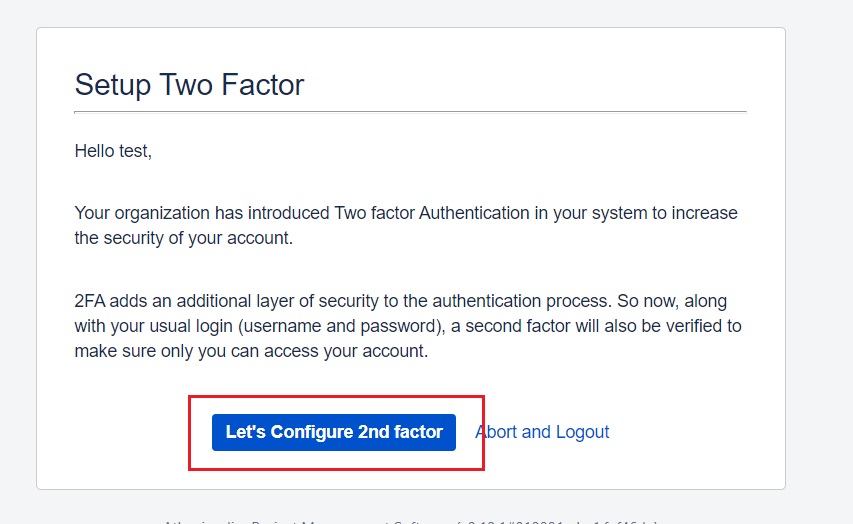
- Open an incognito window and log in with your user credentials for whom 2FA is enabled.
- The user will see the Setup Two Factor screen as below. Click on Let’s configure 2nd Factor.
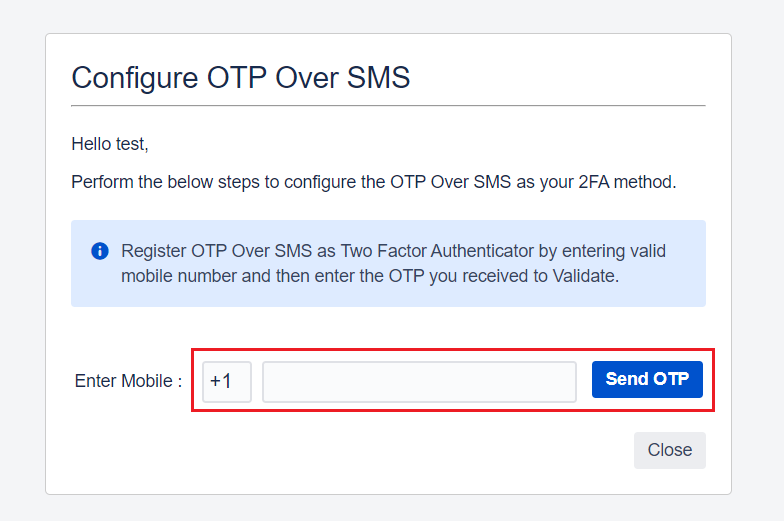
- Now users will see Configure OTP over SMS screen. Enter Country code and Mobile number then click on Send OTP.
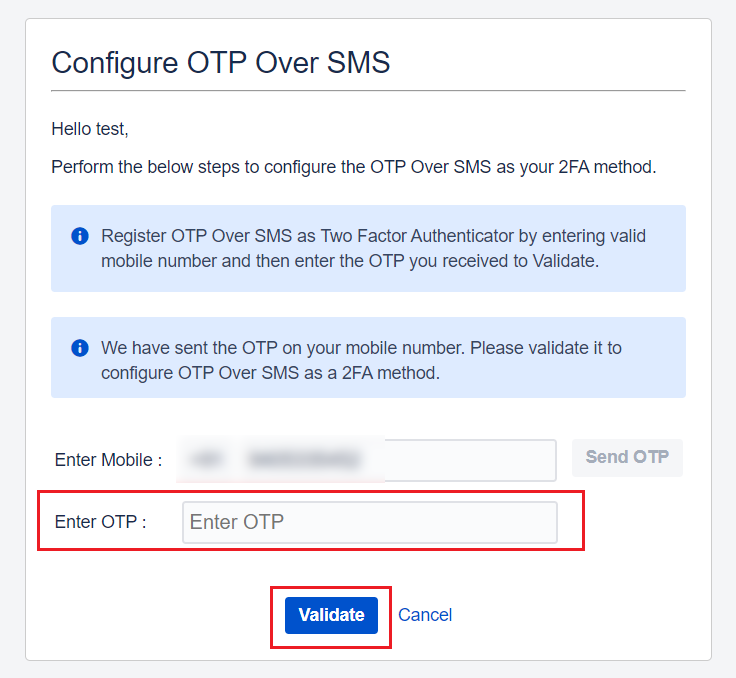
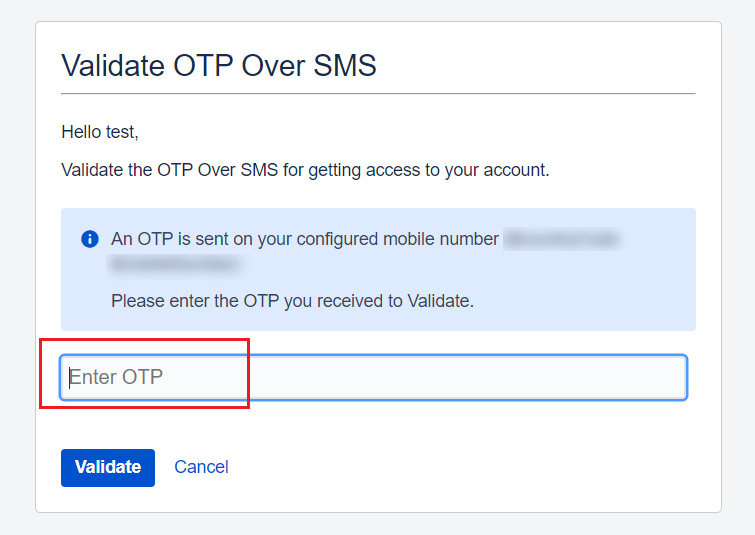
- Enter the OTP received on your mobile phone in the Enter OTP field and click on validate.
- On validating the OTP correctly, you will get redirected to the dashboard. With this you have successfully configured the 2FA.
Step 5: 2FA verification
- Now, whenever the user tries to log in again, an OTP will automatically be sent on your mobile number registered previously.
- Validate the sent OTP to login.
Configure miniOrange SMS Gateway
- Go to this link - https://www.miniorange.com/businessfreetrial.
- Select WordPress and then select OTP Verification from the dropdown.
- Enter Need to test OTP over SMS feature in 2FA on Jira in the write about your use case area.
- Enter your personal details and click on signup.
- Now your demo account is created in miniOrange IDP.
- Now Go to https://login.xecurify.com/moas/login and login with the credentials received on your email after signup.
- Go to https://login.xecurify.com/moas/admin/customer/showsmstemplate and change the SMS message template as below:
- Dear Customer, Your OTP is ##otp##. Use this Passcode to complete your transaction. Thank you.
- Click on the Settings icon in the top right corner. Note down the Customer Key and Customer API Key. We will need these to configure the miniOrange gateway in the 2FA plugin.
- Navigate to the Basic Configurations tab and locate the settings icon of OTP Over SMS method to configure the SMS gateway.
- Select miniOrange Gateway from the dropdown.
- Enter the Customer Key and the API Key we got from the Settings tab of the IDP and save the settings.
- Now you can test the OTP over SMS feature. You will get 10 free SMS with the signup. You can use them for testing. You can track your SMS transactions from here - https://login.xecurify.com/moas/login?redirectUrl=https://login.xecurify.com/moas/viewtransactions
- For further testing you can purchase more SMS transactions from here - https://login.xecurify.com/moas/login?redirectUrl=https://login.xecurify.com/moas/initializepayment&requestOrigin=wp_otp_verification_upgrade_plan
1. Sign up to miniOrange IDP :
2. Log in to miniorange :
3. Change the SMS template :
4. Copy Customer Key and API key :
5. Configure miniOrange gateway in the 2FA plugin :
6. You are good to go :
Configure Custom SMS Gateway
- Gateway API URL and type of request : Enter the URL used to make a request to your gateway and select its request type as GET/POST
- Authorization : Based on what type of authorization your gateway uses, select the authorization type as Basic Auth/Bearer Token/API Key Authorization and enter the necessary credentials to authenticate the requests made to the gateway
- Header : If the gateway requires some additional information to process the sent request, you may pass it in the header of the request. The header consists of key-value pairs. You may even pass ##phone## for adding the recipient's phone no. and ##message## for the message you want to send in the headers.
- Body : The body section defines the content to be passed in the body of the request made to the gateway. As per your gateway settings, you can use ##phone## for adding the recipient's phone no. and ##message## for the message you want to send. Based on the content, select the type as JSON/TEXT/XML appropriately.
- SMS Template : The content of the SMS Template is the one sent on the end-user's phone. You may modify this message as per your needs. Make sure to add $$username$$ and $$otp$$ where you wish to place the username & generated OTP respectively in this template.
Based on the SMS gateway your organisation uses, configure the following pre-requisites to have OTP on SMS functional using your own custom SMS gateway