- Home
- SCIM Provisioning
- SCIM Provisioning Documentation
- SCIM User And Group Provisioning For Microsoft Entra ID

Bitbucket Using SCIM User and Group Provisioning For Microsoft Entra ID
User Sync & Group Sync app provisions user and group information from Microsoft Entra ID (Previously known as Azure AD) to Jira, Confluence and Bitbucket. Users, groups and directory details can by provisioned using SCIM and REST API. SCIM provisioning works based on events performed on IDP. This way the administrator only needs to manage user accounts in Microsoft Entra ID (Previously known as Azure AD). This reduces the administration time required to create users and groups in Atlassian modules such as Jira, Confluence and Bitbucket.
 Try it for free
Download and Installation
- Log into your atlassian instance as admin.
- Navigate to the settings menu and Click Manage Apps.
- Click on Find new apps .
- Locate miniOrange User and Group Sync app.
- Click Try free to begin a new trial or Buy now to purchase a license.
- Enter your information and click Generate license when redirected to MyAtlassian.
- Click Apply license.
Step 1: Get SCIM Client Details
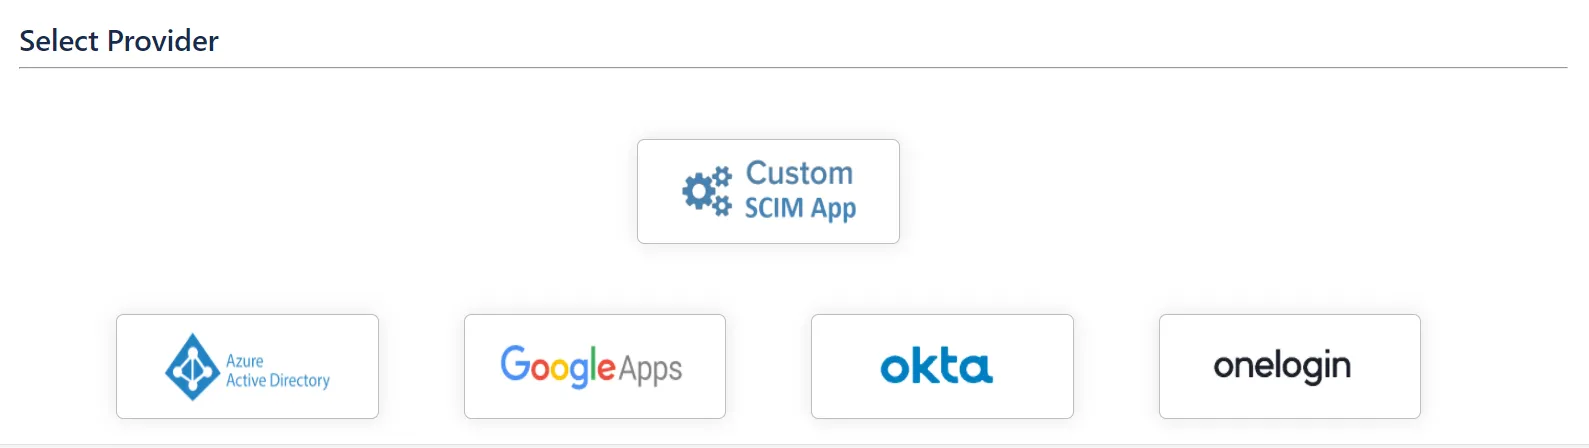
- In the Configuration tab, please select Microsoft Entra ID (Previously known as Azure AD) provider.
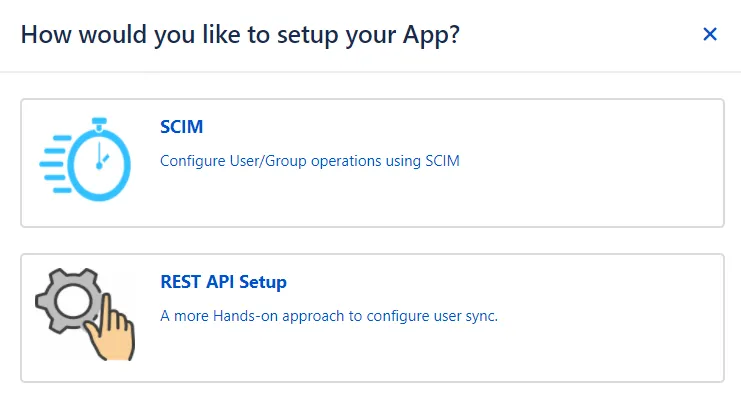
- In the popup, please select SCIM method to perform user and group synchronization.
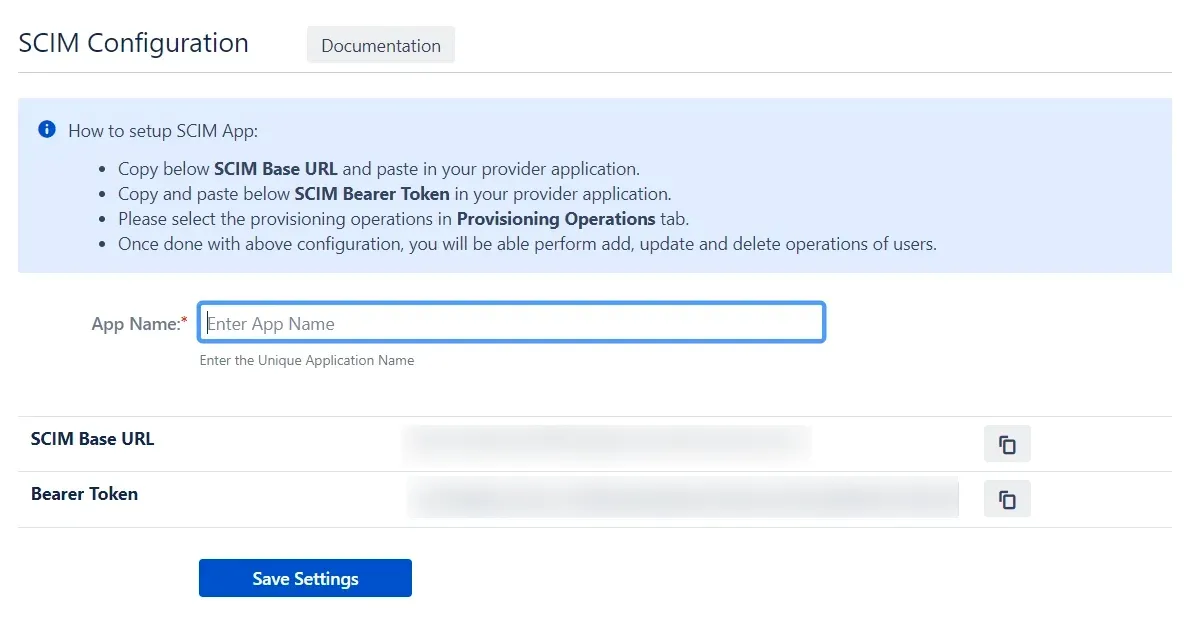
- In SCIM configuration, Please enter App Name and click on Save Settings button. Copy the SCIM Base URL and SCIM Bearer Token, these will be used later to configure SCIM application on Microsoft Entra ID (Previously known as Azure AD).
Step 2: Setup Microsoft Entra ID (Previously known as Azure AD) SCIM Configurations
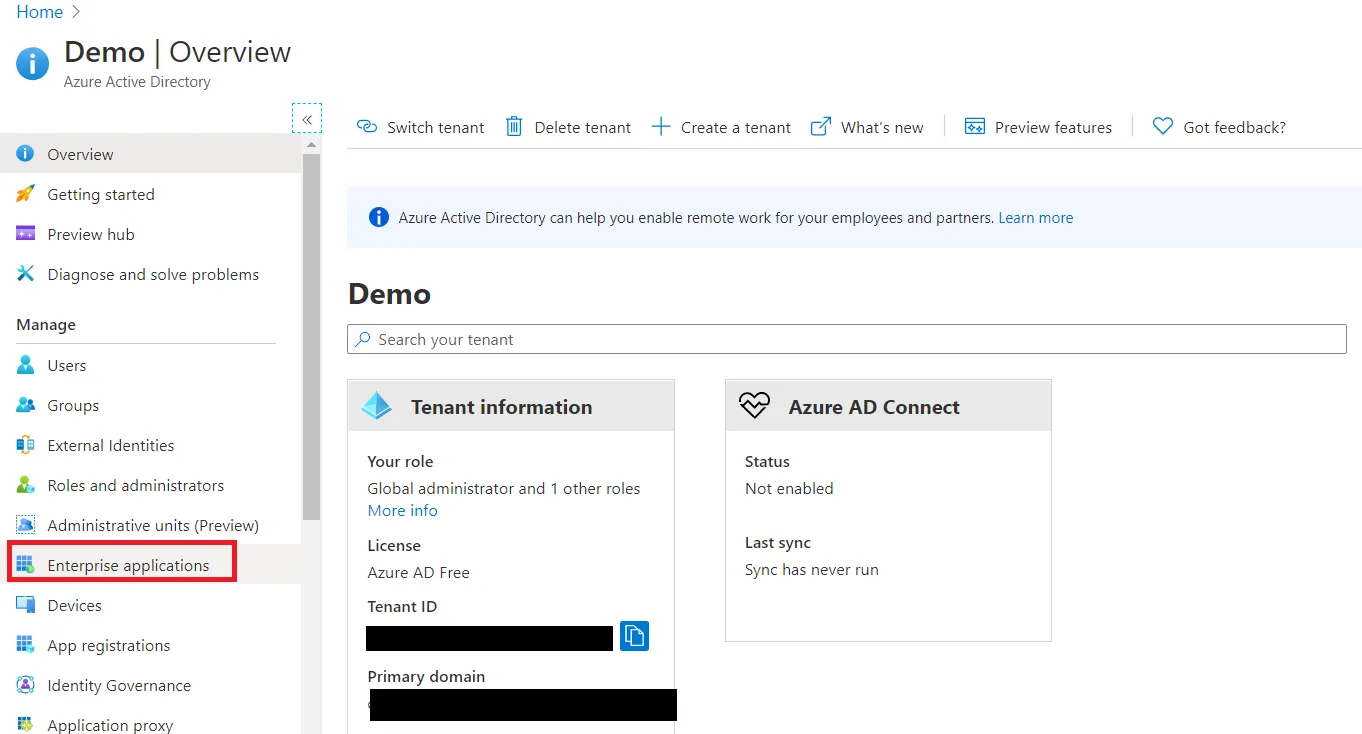
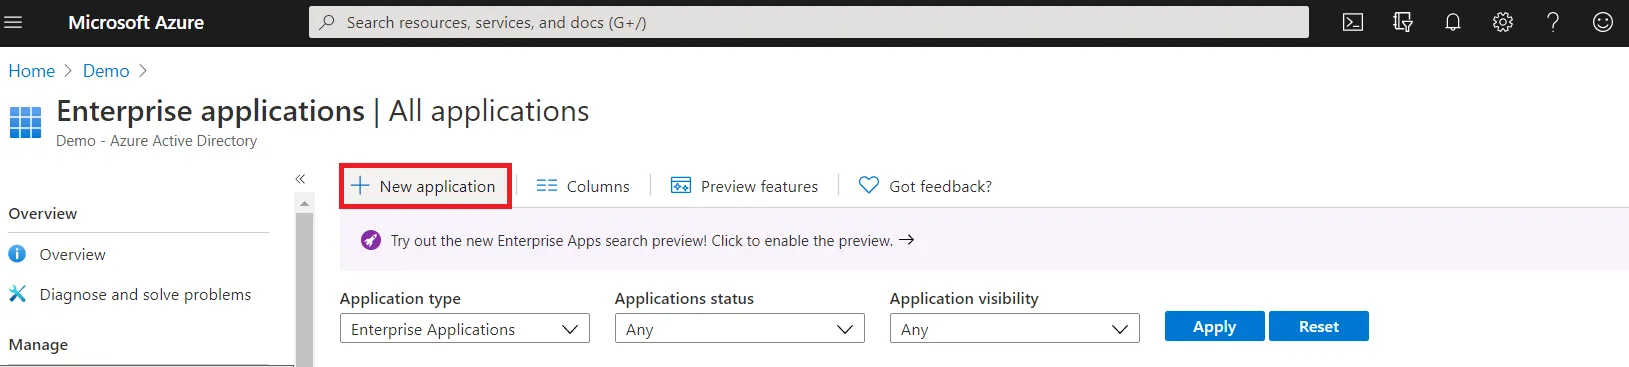
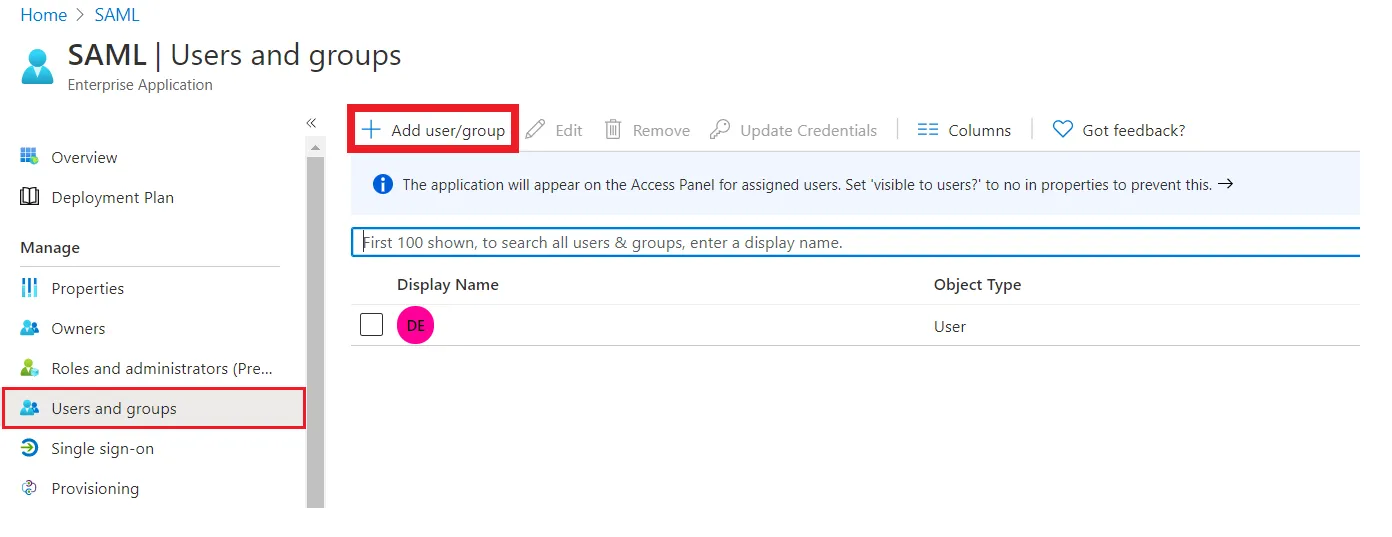
- Log in to your Microsoft Entra ID (Previously known as Azure AD) portal and select the Microsoft Entra ID Directory. Then create an Enterprise application.
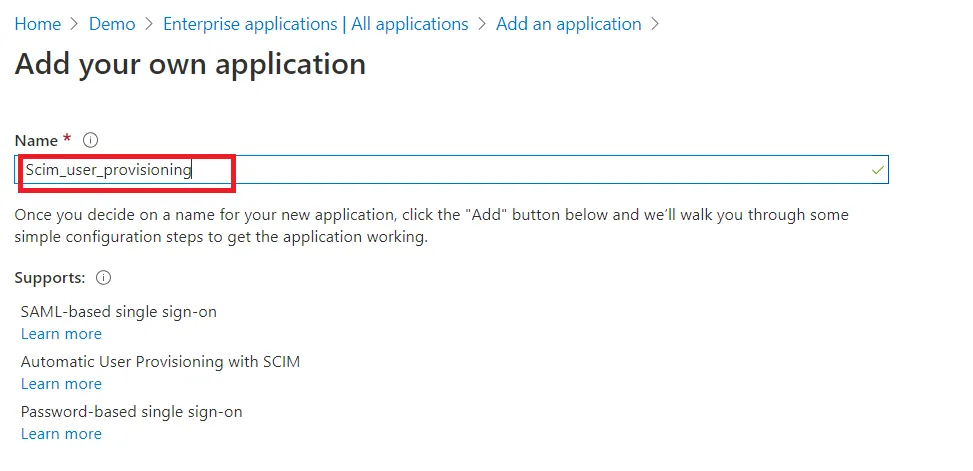
- Click on New Application and select non-gallery application.
- Give suitable name to your user provisioning application.
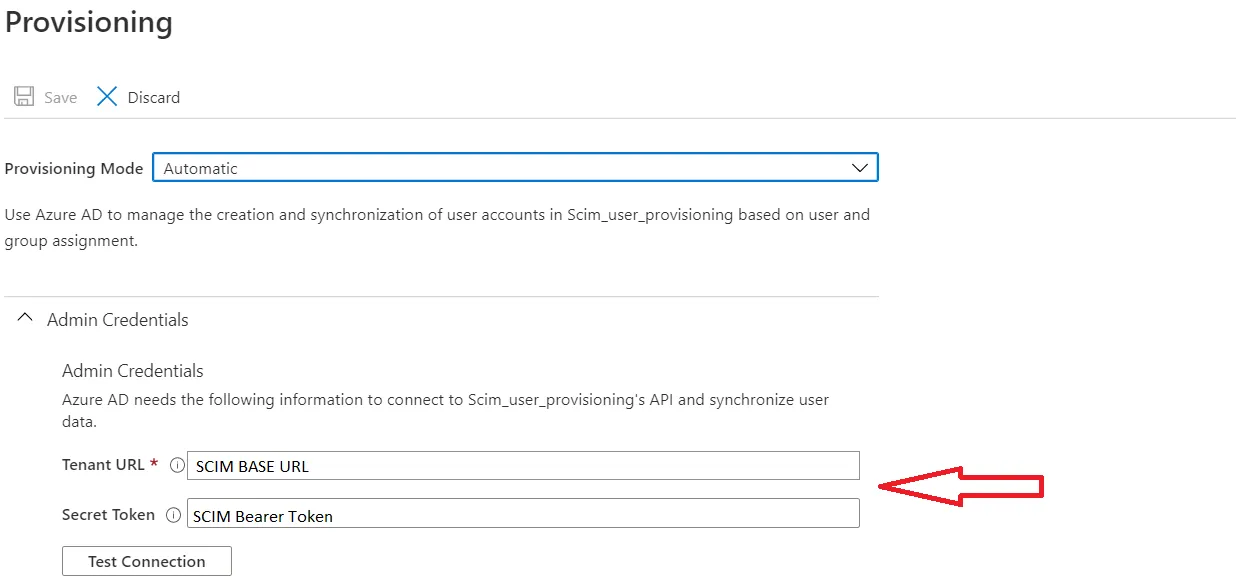
- Click on Provisioning in left menu and click on Get started.
- Select Automatic in Provisioning Mode and Enter SCIM Base URL, SCIM Bearer Token (which you will find in step 1) .
- Assign users to your applicartion. Assigned users will be created in your Atlassian module if they are not already present. You can also assign groups. Member of assigned groups will be provisioned for Atlassian module.
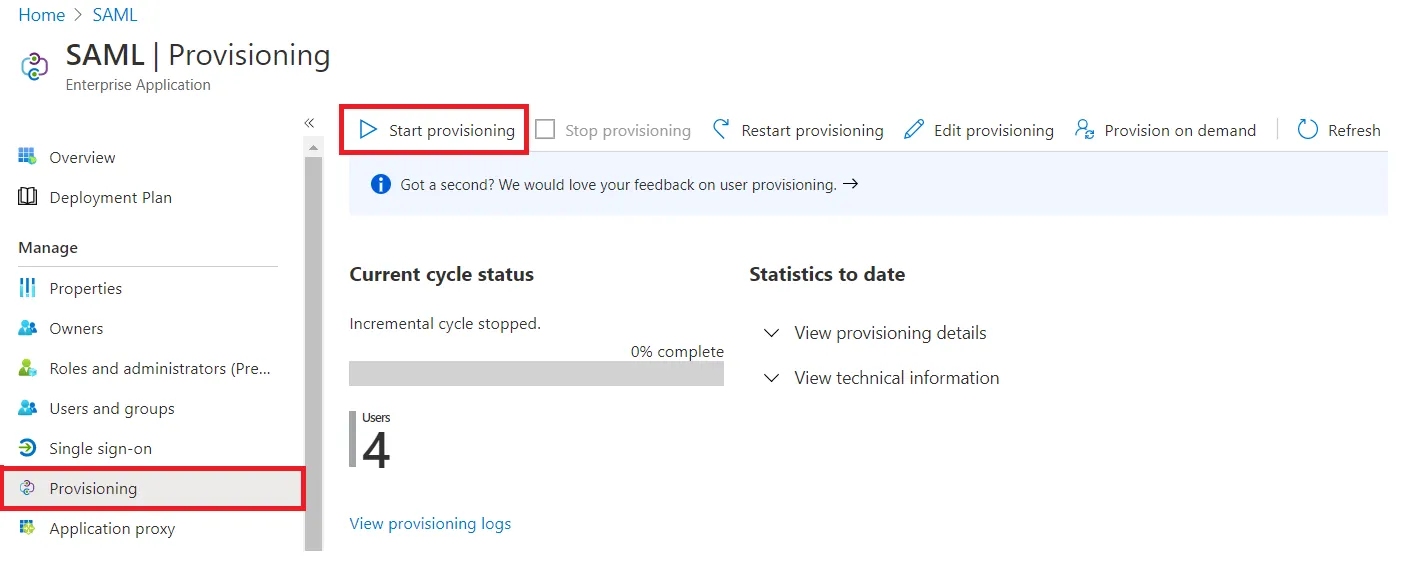
- Once done with configuration, Go back to application and click on Start provisioning.

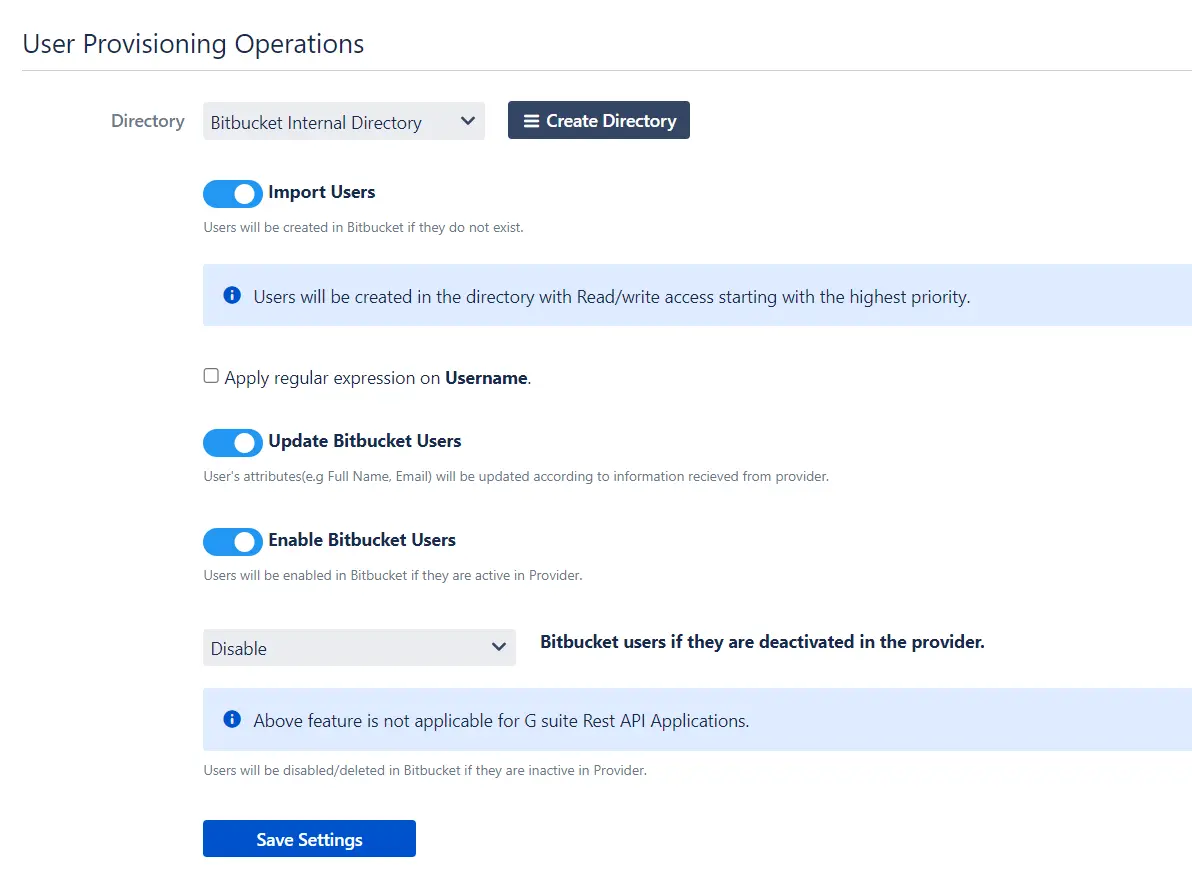
Step 3: Setup Provisioning Options
- In this step,We will proceed with the Provisioning Operations' Configuration in Atlassian module.
- Click on Save Settings.
- Automatic provisioning will work as per provisioning scheduler on Microsoft Entra ID (Previously known as Azure AD).
| Directory Selection | Select the directory in which you want SCIM Operations to be performed. The Users/Groups from the selected directory will be updated via SCIM. |
| Enable Import Users | To import all active Microsoft Entra ID (Previously known as Azure AD) Users. |
| Regex on Username | Enter the regex and replacement to change the username received from Cloud application. For eg: To transform demouser@gmail.com to demouser, enter (.*)@.* as regex and $1 as replacement. |
| Enable Update Users | If you wish to update existing User profile in Atlassian module. |
| Enable Users | If you wish to activate existing User in Atlassian module depending upon their status in Microsoft Entra ID (Previously known as Azure AD) |
| Disable Users | If you wish to deactivate existing User in Atlassian module depending upon their status in Microsoft Entra ID (Previously known as Azure AD) |
Additional Resources
Did this page help you?

×
![]()