- Home
- Workflow for Jira
- Set Up the Access Governance Automation App for Jira with Okta

How to Set Up the Access Governance Automation App for Jira with Okta
Welcome to the Access Governance Automation app for Jira — your go-to solution for automating access requests and approvals across enterprise systems.
This step-by-step guide will walk you through setting up the app with Okta, helping your organization streamline access provisioning, reduce manual effort, and ensure compliance — all within Jira Service Management (JSM).
App Overview
The Access Governance Automation app for Jira is an advanced solution built on Jira Service Management (JSM) to simplify and automate access request workflows across your organization.
It supports integration with major enterprise platforms, including:
- Okta
- Entra ID (Azure AD)
- AWS
- Google Workspace
- Jira, Confluence, Bitbucket, and GitHub
Instead of relying on manual request and approval steps, the app enables:
- End users to submit access requests through the JSM portal.
- Automated routing of approval workflows based on predefined rules.
- Instant provisioning actions once approvals are complete.
By automating these processes, the Access Governance Automation app for Jira ensures secure, policy-driven, and audit-ready access management across your tech ecosystem.
 Try it for free
Pre-requisites
Before you begin, make sure you have the following:
- Admin access to Jira Service Management (JSM): Required to configure workflows, custom fields, and automation rules.
- Admin access to Okta portal: Needed to authorize integrations and manage access provisioning.
- Access Governance Automation app for Jira: Ensure the app is installed from the Atlassian Marketplace and properly licensed via miniOrange.
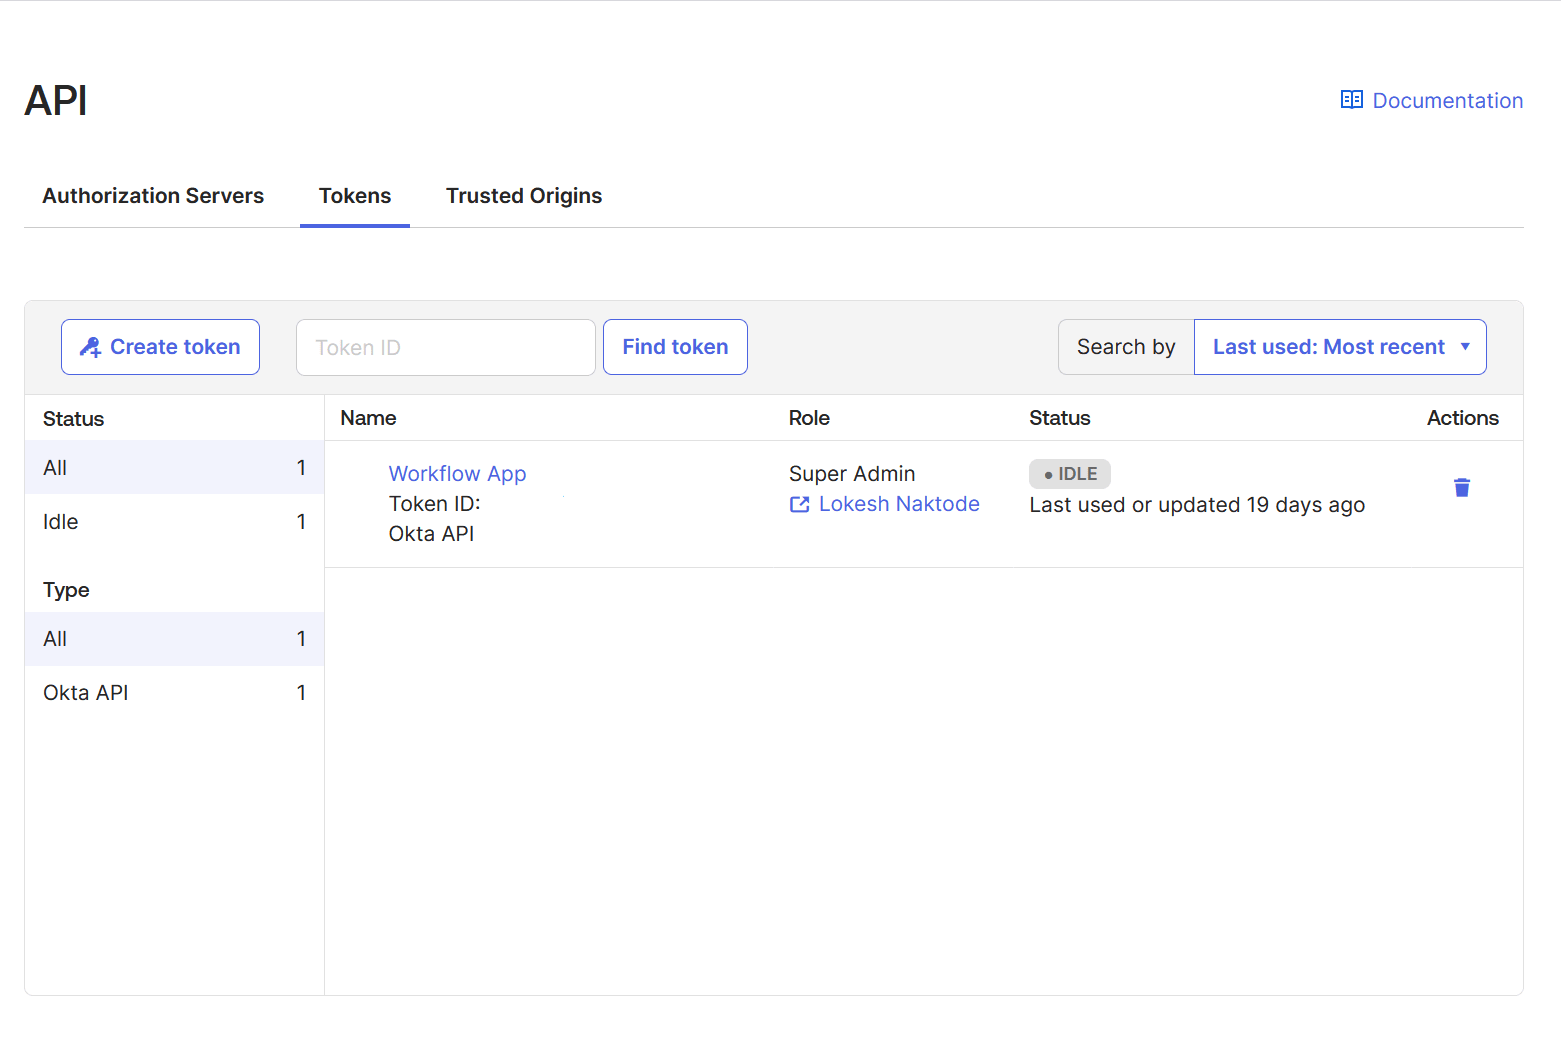
1: Retrieve Okta API Credentials
To connect Okta with the Access Governance Automation app for Jira, you’ll first need to generate an API token and retrieve your Okta domain.
Follow these steps:
- Log in to your Okta Admin Console.
- Navigate to: Security → API → Tokens.
-
Click Create Token.
- Enter a name (e.g., Access Governance Token).
- Copy and securely store the generated token — you won’t be able to see it again.
-
From the Okta dashboard, copy your Okta Domain URL.
Format: https://your-domain.okta.com.
2: Connect Okta to the Access Governance Automation App for Jira
Now that you have your Okta API credentials, it's time to integrate Okta with the Access Governance Automation app for Jira.
Steps to Integrate:
- In Jira, go to the miniOrange Access Governance app.
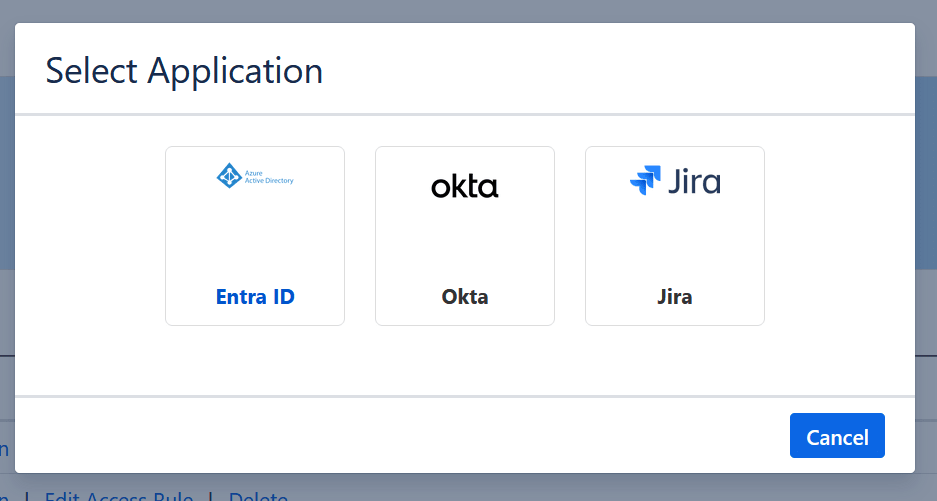
- Navigate to Application Integration.
- Click New Application and select Okta from the list.
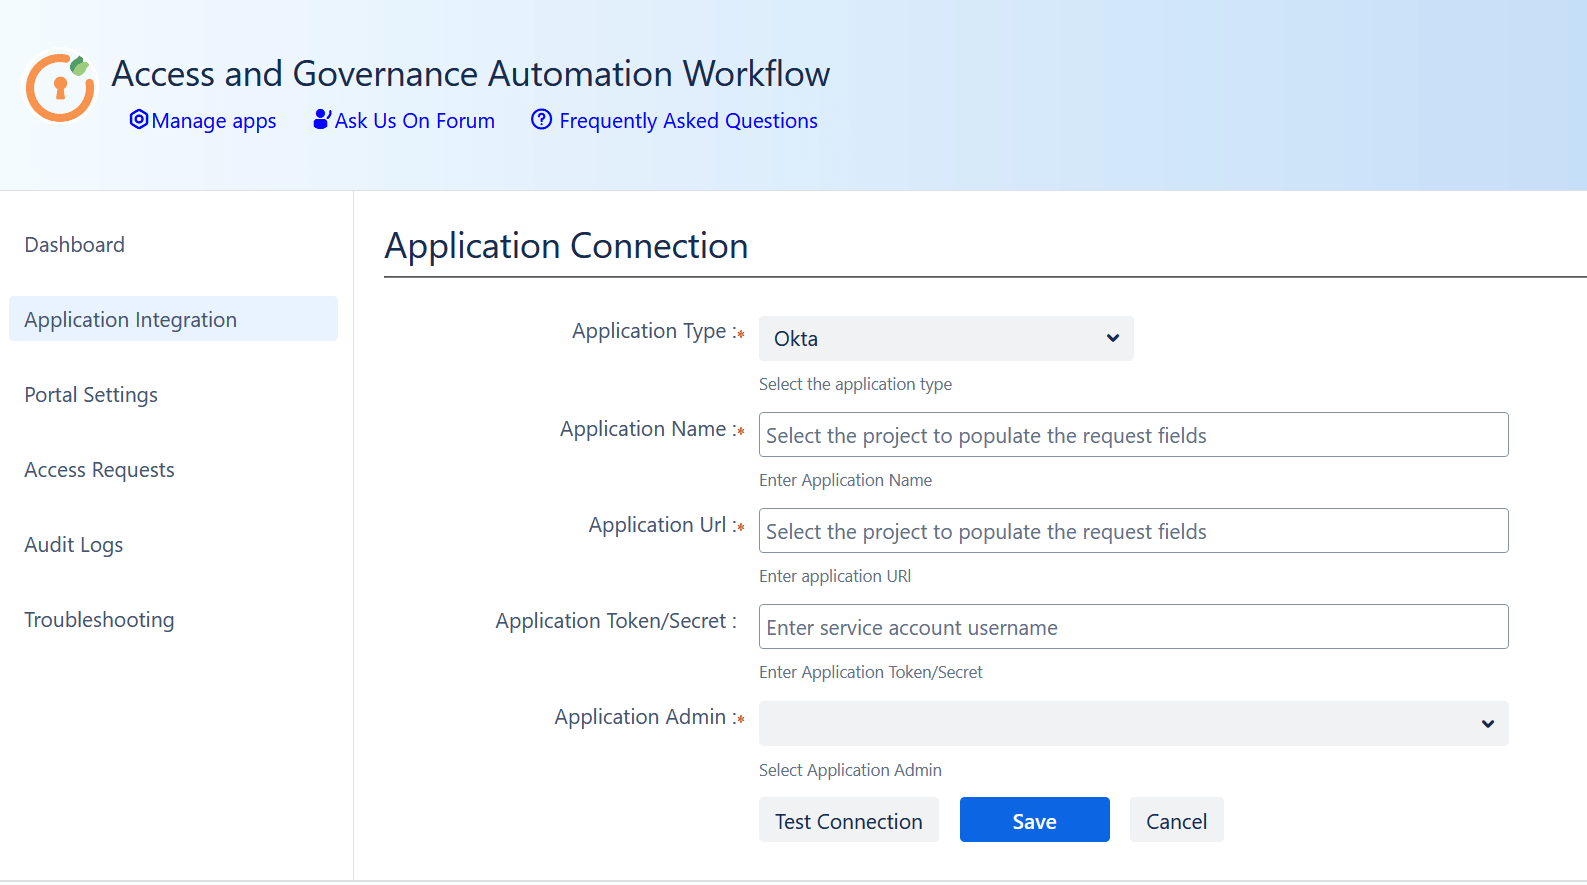
-
Fill in the required fields:
- Application URL: Your Okta Domain (e.g., https://your-domain.okta.com)
- Application Token: The API token you generated in Step 1
- Application Name: (e.g., Okta Integration)
- Application Owner: Name or email of the responsible admin
- Click Save, then click Test Connection to verify that the integration is successful.
3: Define Access Rules for Okta
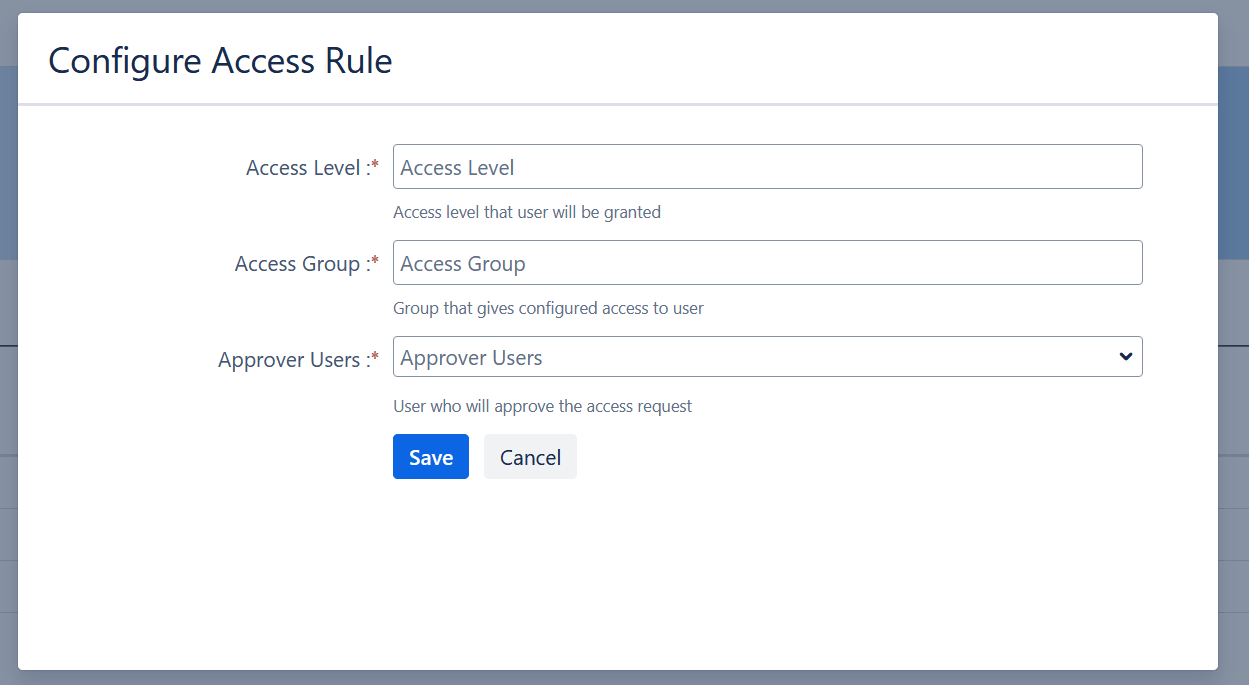
Once your Okta integration is connected, the next step is to define access rules within the Access Governance Automation app for Jira. These rules determine who gets access, what level, and who approves it.
How to Create Access Rules:
- Go to the miniOrange Access Governance app in Jira.
- Navigate to: Application Integration → Access Rules.
- Click Create New Rule.
-
Fill in the following fields:
- Access Level: Define the role (e.g., User, Admin).
- Access Groups: Specify the target group (e.g., jira-software-users).
- Approvers: Select the individual(s) or group responsible for approving access requests.
- Click Save to activate the rule.
Once saved, these rules will automatically trigger access provisioning in Okta upon approval through the Jira Service Management portal.
4: Set Up a Dedicated Access Request Portal in Jira Service Management
To keep access governance requests organized and separate from general IT support, it’s recommended to create a dedicated Jira Service Management (JSM) project for access requests.
How to Create the Access Request Portal:
- In Jira, go to Projects → Create Project.
- Choose the IT Service Management template.
- Name your project (e.g., Access Requests Portal).
Once the project is created, go to Project Settings → Request Types and create the following request types:
- Request Application Access
- Request Access Removal
- Request Access Change (optional based on your use case)
After creating request types, you need to add Custom Fields (List – Single Select):
-
Application: Lists all integrated applications
(e.g., Jira, Okta, AWS, Google Workspace) -
Access Type: Lists access levels
(e.g., User, Admin, Read-only)
These fields will power the automation rules and help route requests to the right approvers based on the selected app and access level.
5: Map JSM Fields and Statuses in the Access Governance Automation App
To fully automate access provisioning workflows, you'll need to map your Jira Service Management (JSM) fields and statuses with the Access Governance Automation app for Jira.
Follow these steps:
- In Jira, go to the miniOrange Access Governance app → Portal Settings.
- Select and map your dedicated JSM project and its relevant request types.
Link Custom Fields:
Map the following JSM fields to their corresponding fields in the app:
- Application → Maps to the integrated application name (e.g., Okta, AWS)
- Access Type → Maps to predefined access levels (e.g., User, Admin)
- Approver User Field → Typically maps to a JSM field like Assignee
Map Jira Ticket Statuses to App Statuses:
To automate the request lifecycle, link your Jira ticket statuses to the app’s internal workflow:
| App Status | Jira Ticket Status (example) | Purpose |
|---|---|---|
| Approved | e.g., "Approved by Manager" | Triggers access provisioning |
| Denied | e.g., "Rejected" | Marks the request as denied |
| Revoked | e.g., "Access Revoked" | Triggers deprovisioning |
| Declined | e.g., "Declined by User" | Marks the request as declined |

Troubleshooting Common Issues
Having trouble setting up the Access Governance Automation app for Jira with Okta? Here are a few steps to help you quickly identify and resolve common setup issues.
Check the following:
- API Credentials: Make sure your Okta token and domain URL are correct and haven’t expired. Confirm that the account used has sufficient permissions.
-
Workflow & Approver Configuration: Ensure that:
- Access rules are properly defined
- Approvers are mapped correctly
- The right request types and custom fields are linked
- Jira Logs: Check Jira’s system logs for detailed error messages or permission-related failures.
- App Status Mapping: Verify that ticket statuses in Jira are correctly mapped to app statuses (e.g., Approved, Denied, Revoked).
Need More Help?
- Refer to the official support documentation
- Or reach out to our support team for personalized assistance
Best Practices
Maximize the efficiency, security, and compliance of your access management workflows by following these recommended best practices:
- Define Clear Access Policies: Ensure that your approval workflows are aligned with your organization's security and compliance policies. Define who can approve which types of requests and under what conditions.
- Regularly Review Audit Logs: Enable and monitor audit logs to track every access request, approval, denial, or revocation. This supports compliance audits and helps identify potential misconfigurations or misuse.
- Implement Role-Based Access Control (RBAC): Configure role-based provisioning so users are granted access based on their job roles or departments. This reduces manual effort, ensures consistency, and prevents over-provisioning.
Did this page help you?
