- Home
- Identity Governance, Auditing & Access Control via JSM
- Set Up the Identity Governance, Auditing & Access Control via JSM with Okta

How to Set Up the Identity Governance, Auditing & Access Control via JSM with Okta
Here’s a step-by-step guide to walk you through how to set up the Identity Governance, Auditing & Access Control via JSM with Okta.
App Overview
The Identity Governance, Auditing & Access Control via JSM is an advanced solution that helps you to simplify and automate access request workflows across your organization.
Instead of relying on manual request and approval steps, the app enables:
- End users can submit access requests through the JSM portal.
- Automated routing of approval workflows based on predefined rules.
- Instant provisioning actions once approvals are complete.
By automating these processes, the Identity Governance, Auditing & Access Control via JSM ensures secure, policy-driven, and audit-ready access management across your tech ecosystem.
 Try it for free
Video Setup Guide
Pre-requisites
Before you begin, make sure you have the following:
- Admin access to Jira Service Management (JSM): Required to configure workflows, custom fields, and automation rules.
- Admin access to Okta portal: Needed to authorize integrations and manage access provisioning.
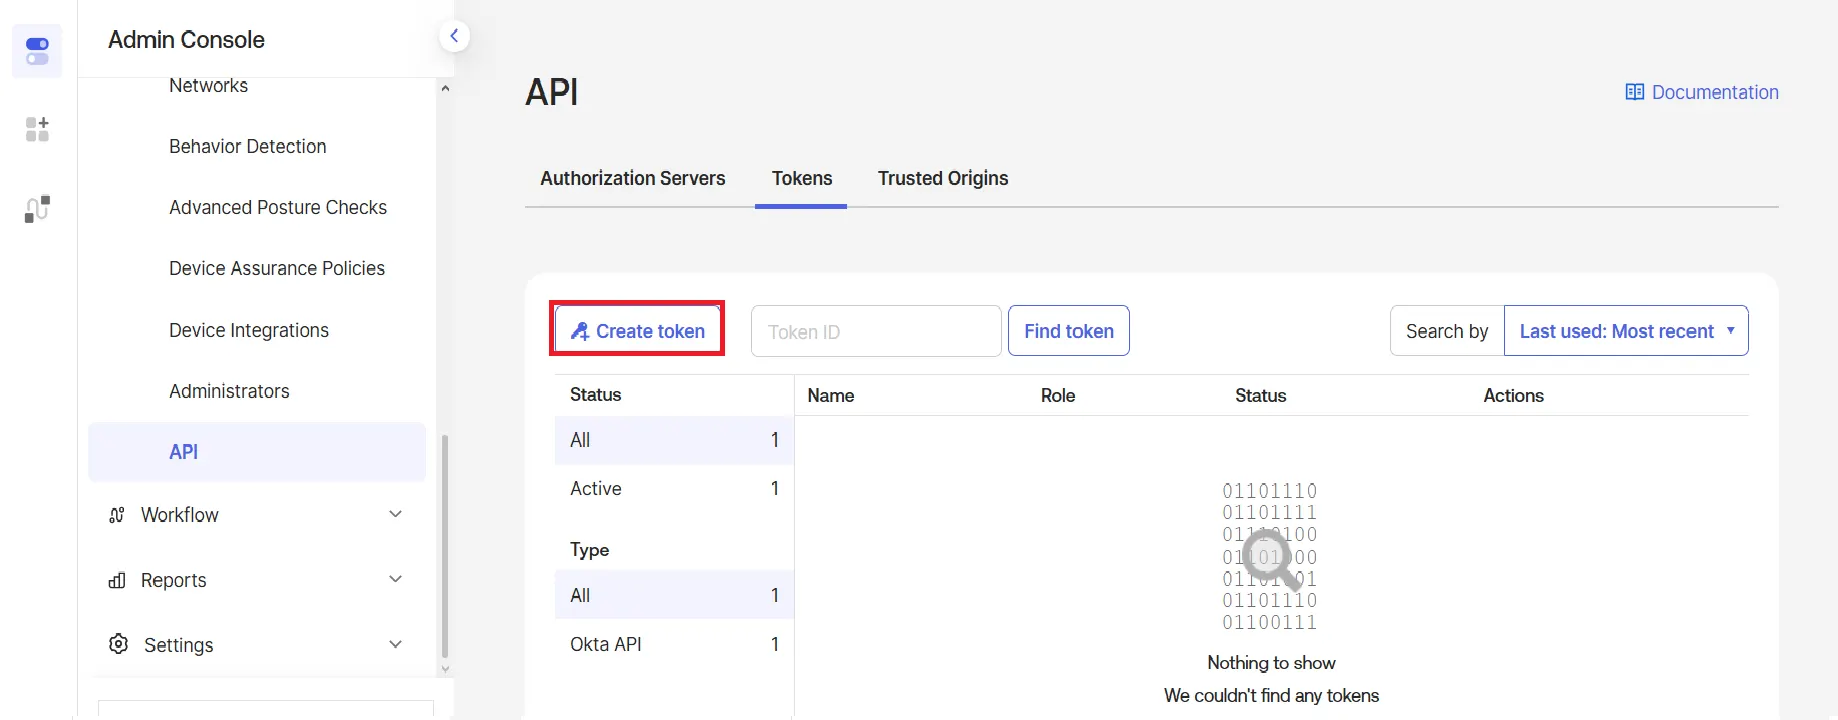
1: Retrieve Okta API Credentials
To connect Okta with the Identity Governance, Auditing & Access Control via JSM, you’ll first need to generate an API token and retrieve your Okta domain.
Follow these steps:
- Log in to your Okta Admin Console.
- Navigate to: Security → API → Tokens.
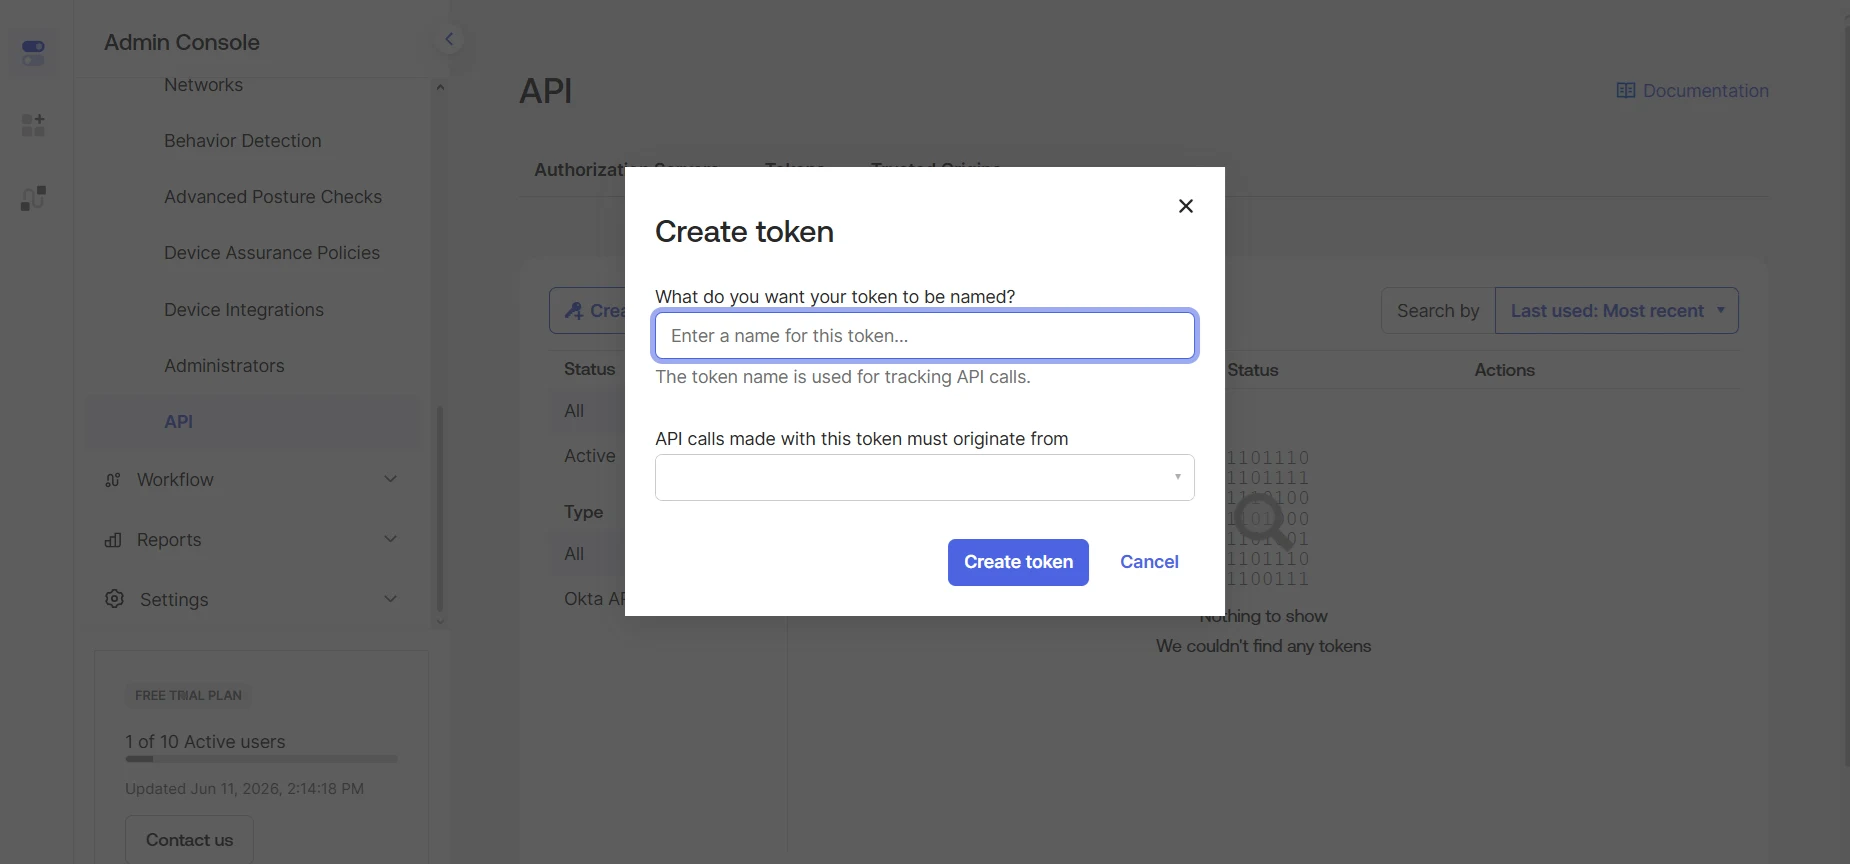
- Click Create Token.
- Enter a name (e.g., Access Governance Token).
- Copy and securely store the generated token — you won’t be able to see it again.
- From the Okta dashboard, copy your Okta Domain URL.

Format: https://your-domain.okta.com.
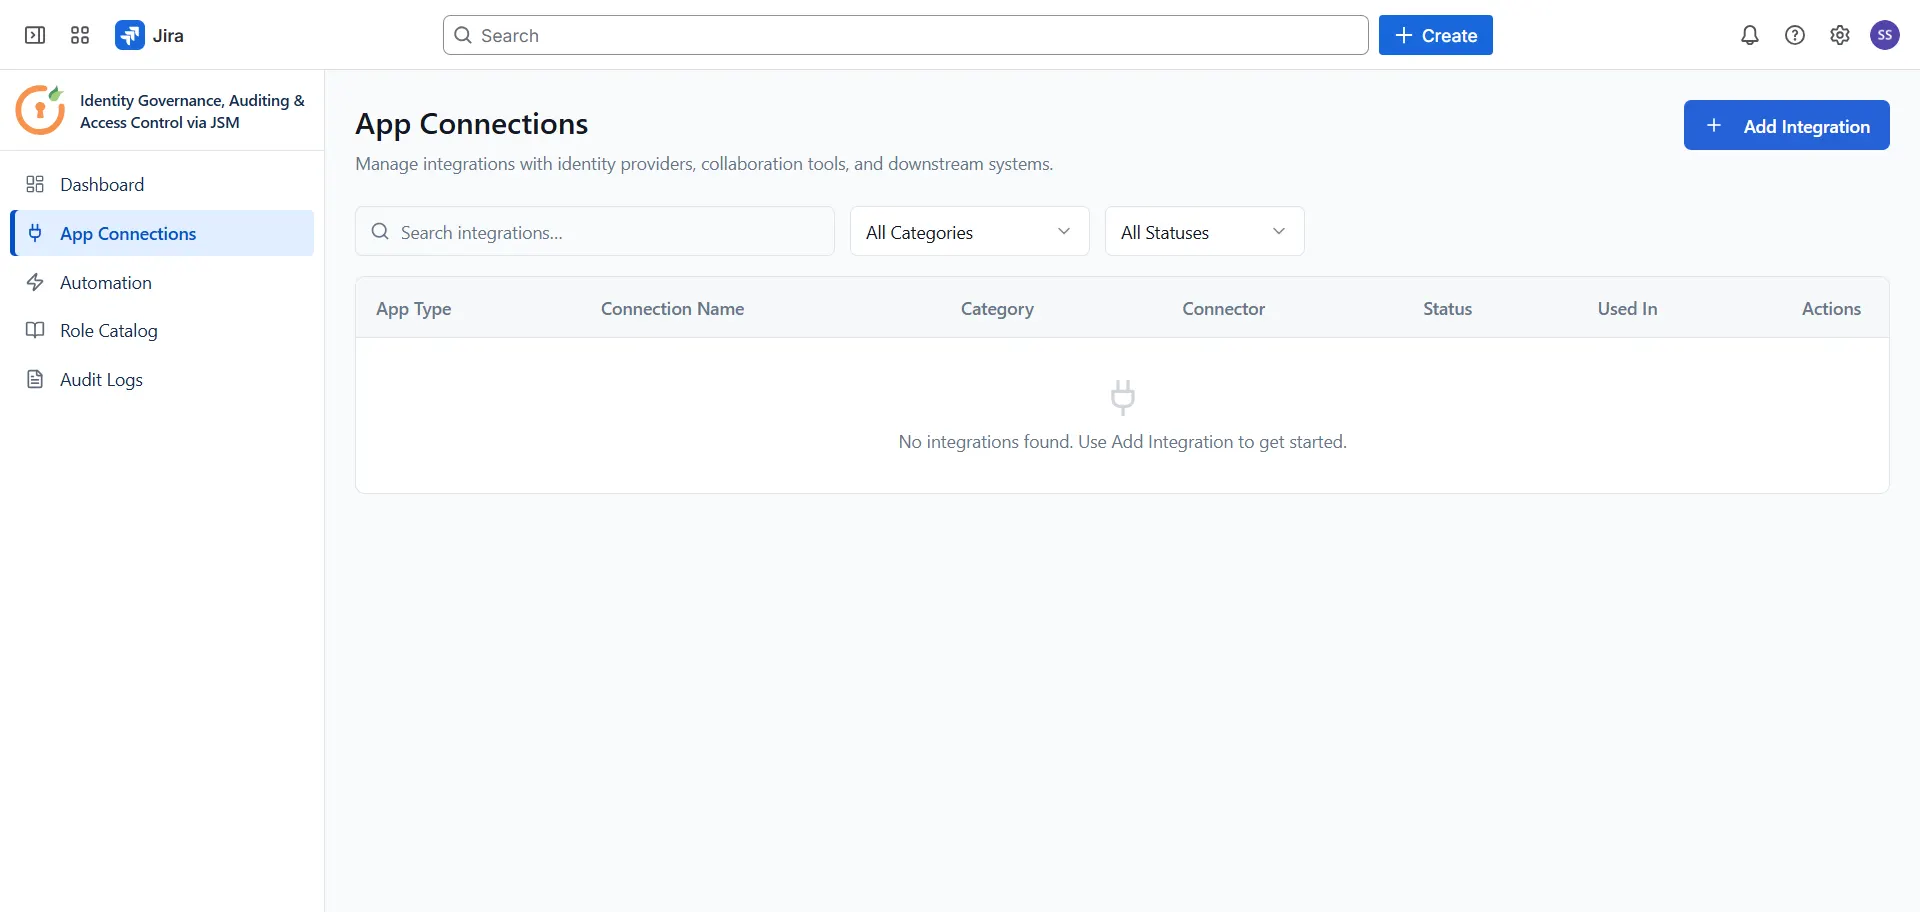
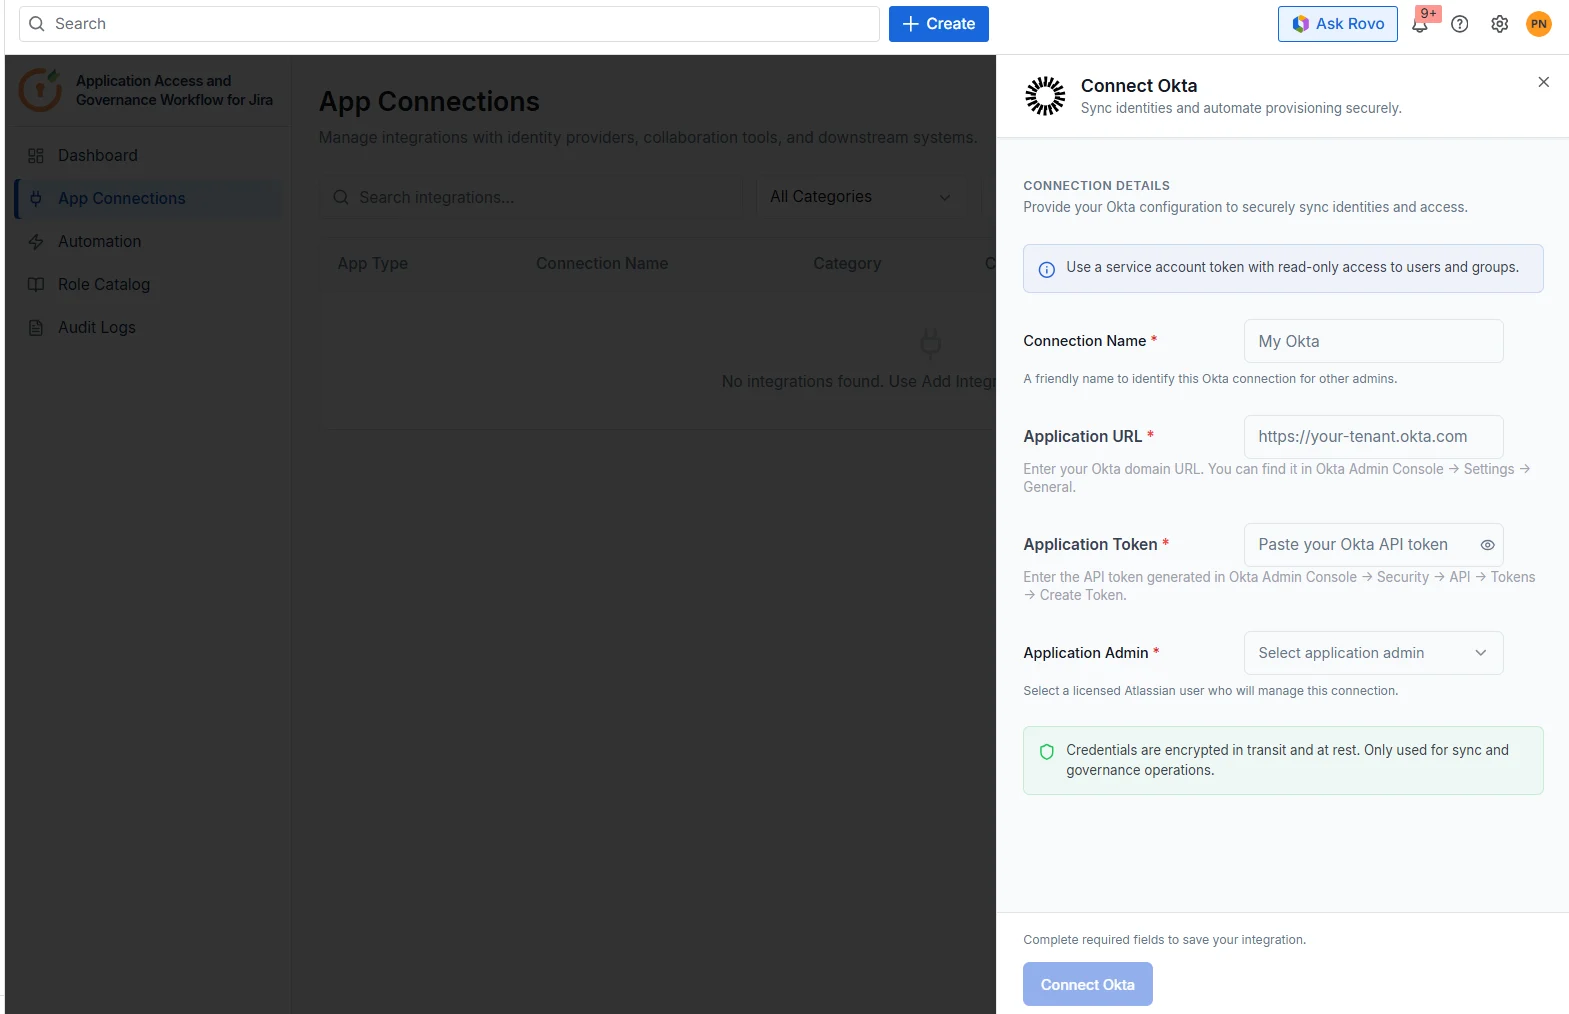
2: Connect Okta to the Identity Governance, Auditing & Access Control via JSM
Now that you have your Okta API credentials, it's time to integrate Okta with the Identity Governance, Auditing & Access Control via JSM.
Steps to Integrate:
- Open App Connections from the sidebar.
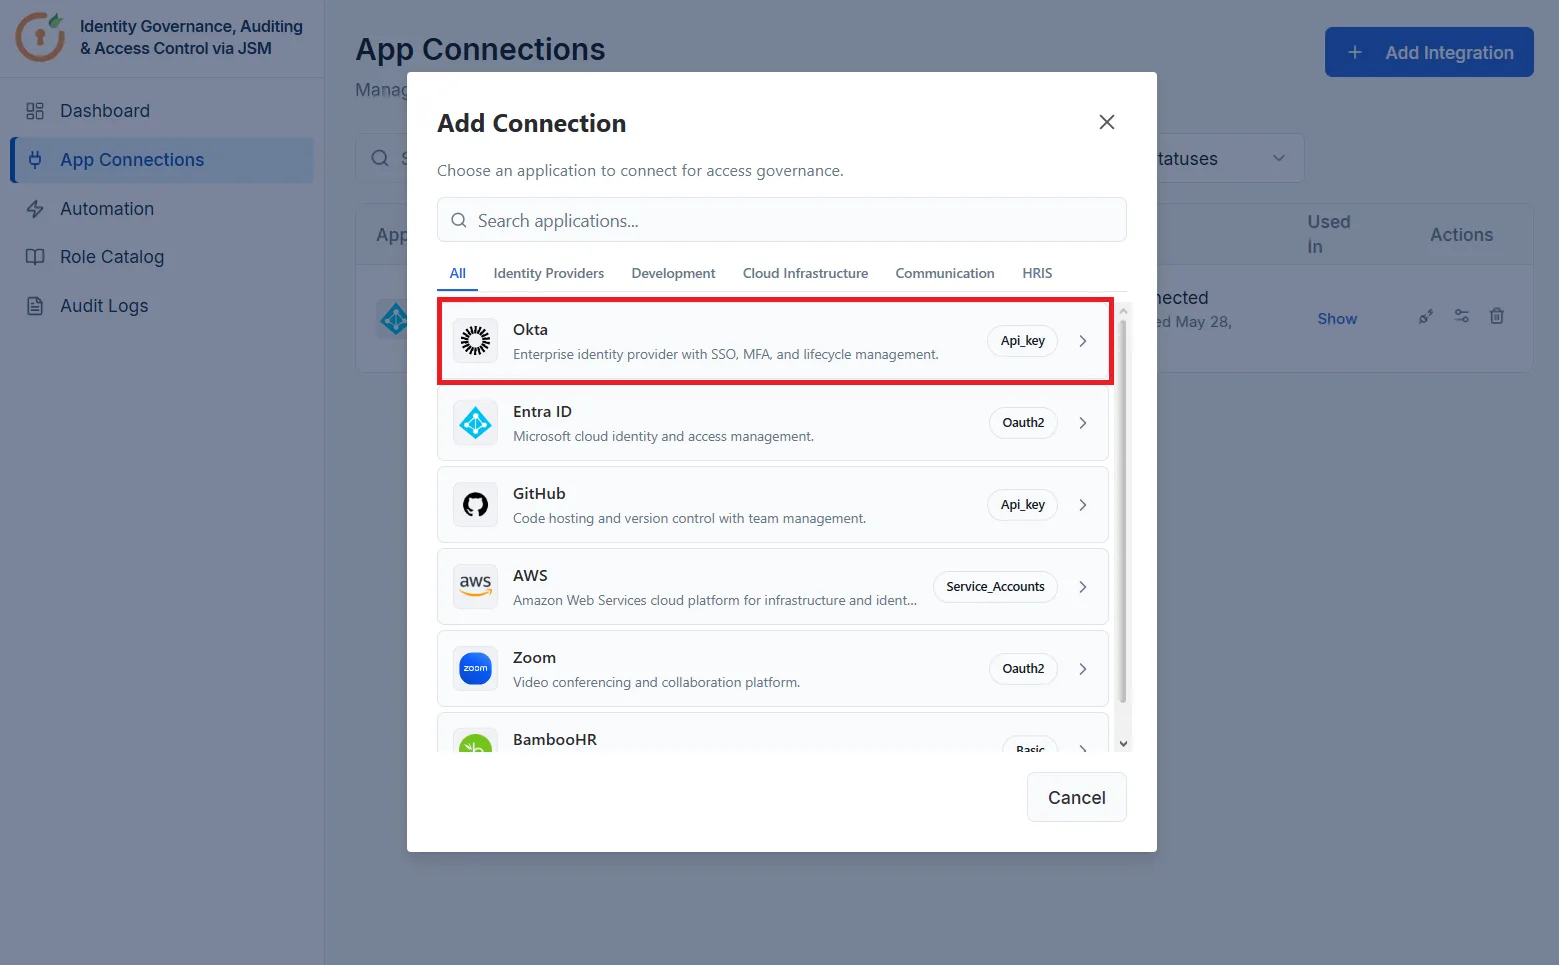
- Click + Add Integration and choose Okta from the list.
- Fill in the connection details for Okta:
- Connection Name: A friendly name to identify this Okta connection for other admins (e.g., "My Okta").
-
Application URL: Your Okta domain URL (e.g.,
https://your-tenant.okta.com). You can find it in Okta Admin Console → Settings → General. - Application Token: The API token generated in Okta Admin Console → Security → API → Tokens → Create Token.
- Application Admin: Select a licensed Atlassian user who will manage this connection.
- Click Connect Okta to save the integration.
Configure Automation Rules for Okta
Now that Okta is connected, configure automation rules to define how access requests are routed, approved, and provisioned in Okta. Follow the guides below to set up each rule type:
Did this page help you?
