- Home
- SSO for JSM Customers
- SSO for JSM Customers Documentation
- SSO for JSM Customers using Meetup

SSO for JSM Customers using Meetup as OAuth Provider
Our SAML/OAuth SSO for JSM Customers app offers the functionality to seamlessly integrate OAuth/OpenID Single Sign-On into the JSM customer portal, ensuring compatibility with all OAuth/OpenID Providers. This guide will outline the steps for configuring SSO between the JSM customer portal and your OAuth/OpenID Provider. By following these instructions, customers will undergo authentication via your OAuth/OpenID Provider prior to accessing the JSM customer portal. This integration facilitates a smooth customer experience while also mitigating spam ticket.
 Try it for free
Download and Installation
- Log into your Jira instance as an admin.
- Navigate to the settings and Click on Apps.
- Locate SAML/OAuth SSO for JSM Customers.
- Click on free trial to begin a new trial SAML/OAuth SSO for JSM Customers.
- On menu bar click on Apps. Locate SAML/OAuth SSO for JSM Customers .
Step 1: Set Up Meetup as OAuth Provider
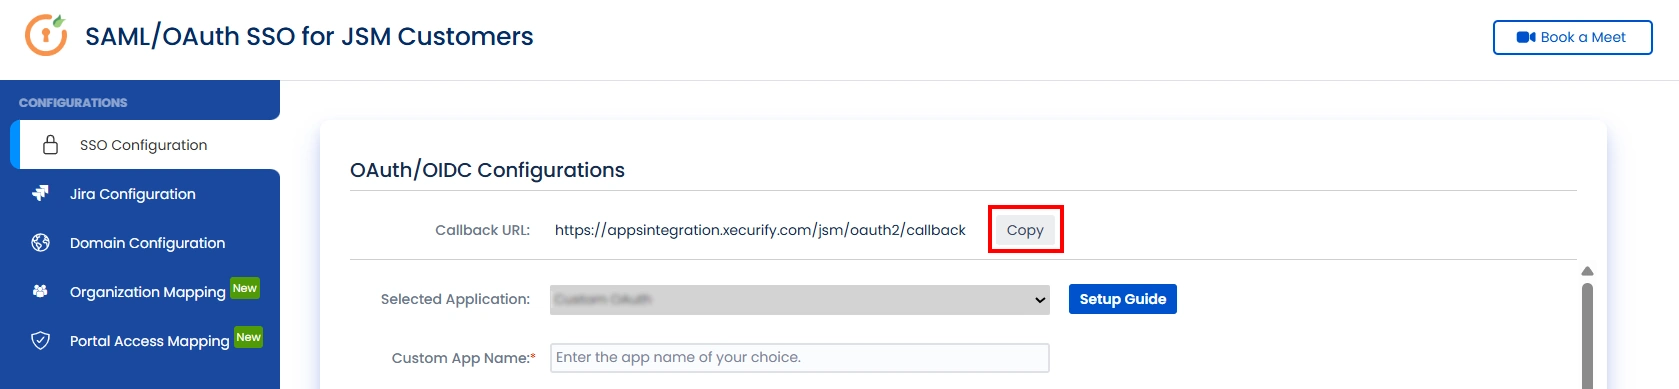
- Navigate to the SAML/OAuth for JSM Customers plugin configuration page, then go to "SSO Configurations" and copy the callback URL from the plugin and keep it handy, as you'll need it to configure Meetup as the OAuth provider.
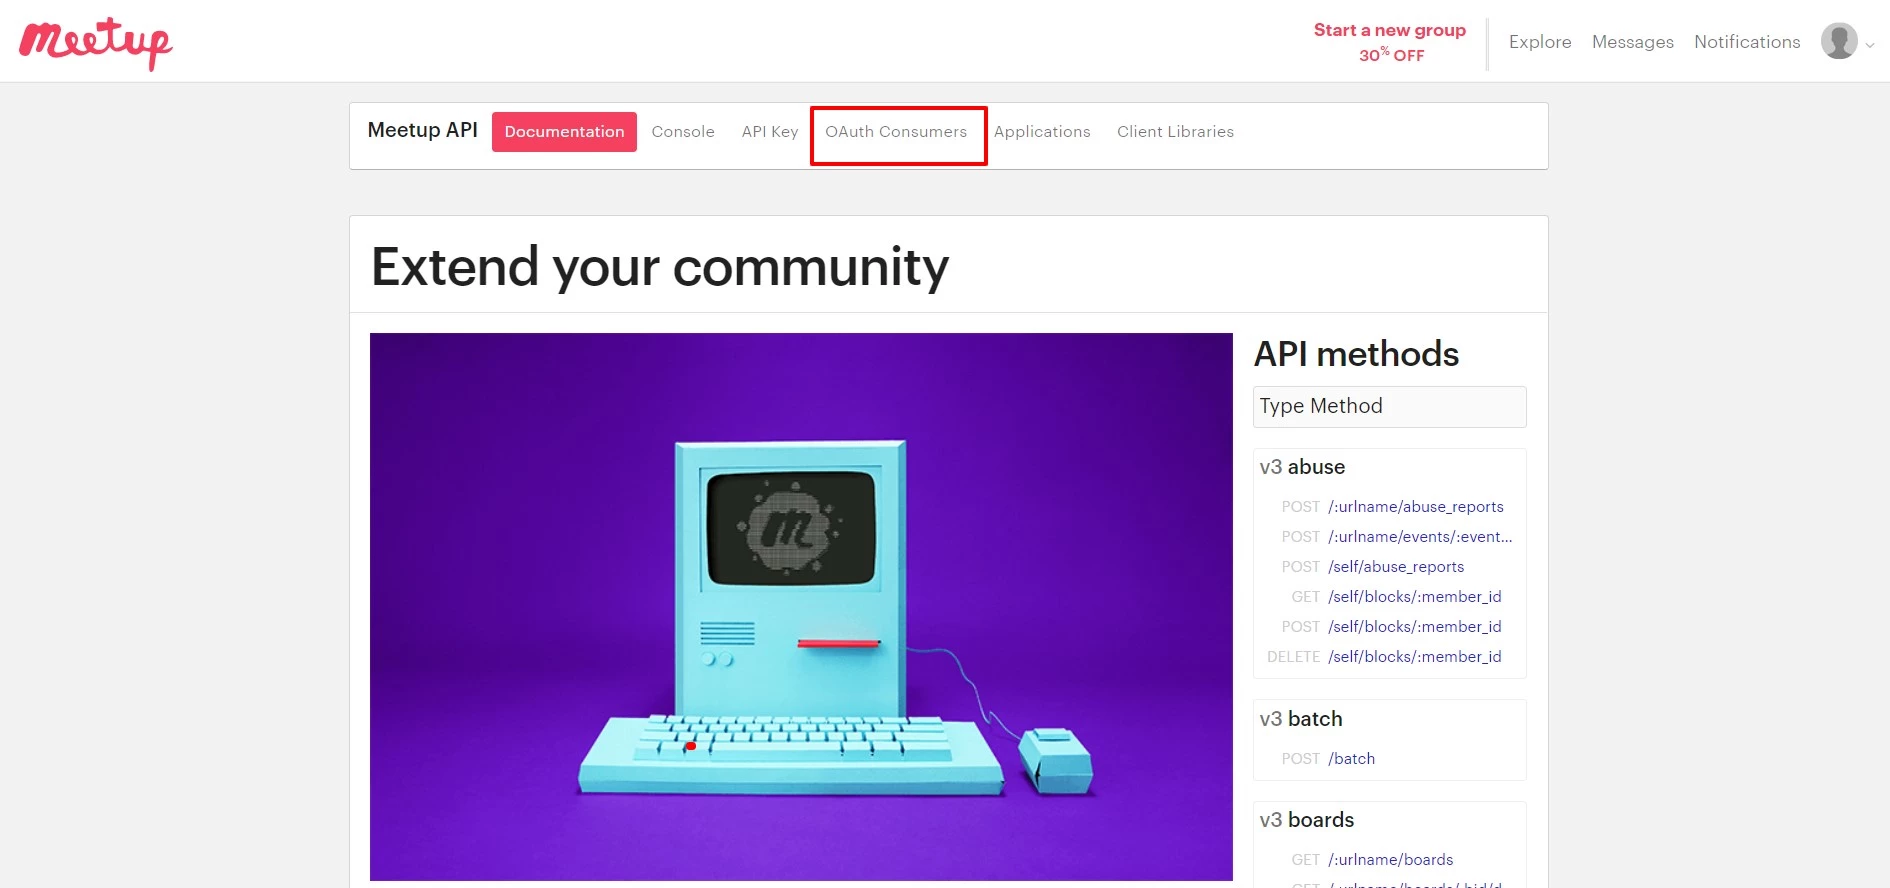
- Login to Meetup : Go to Meetup API and login to your account.
- Click on OAuth Consumers tab.
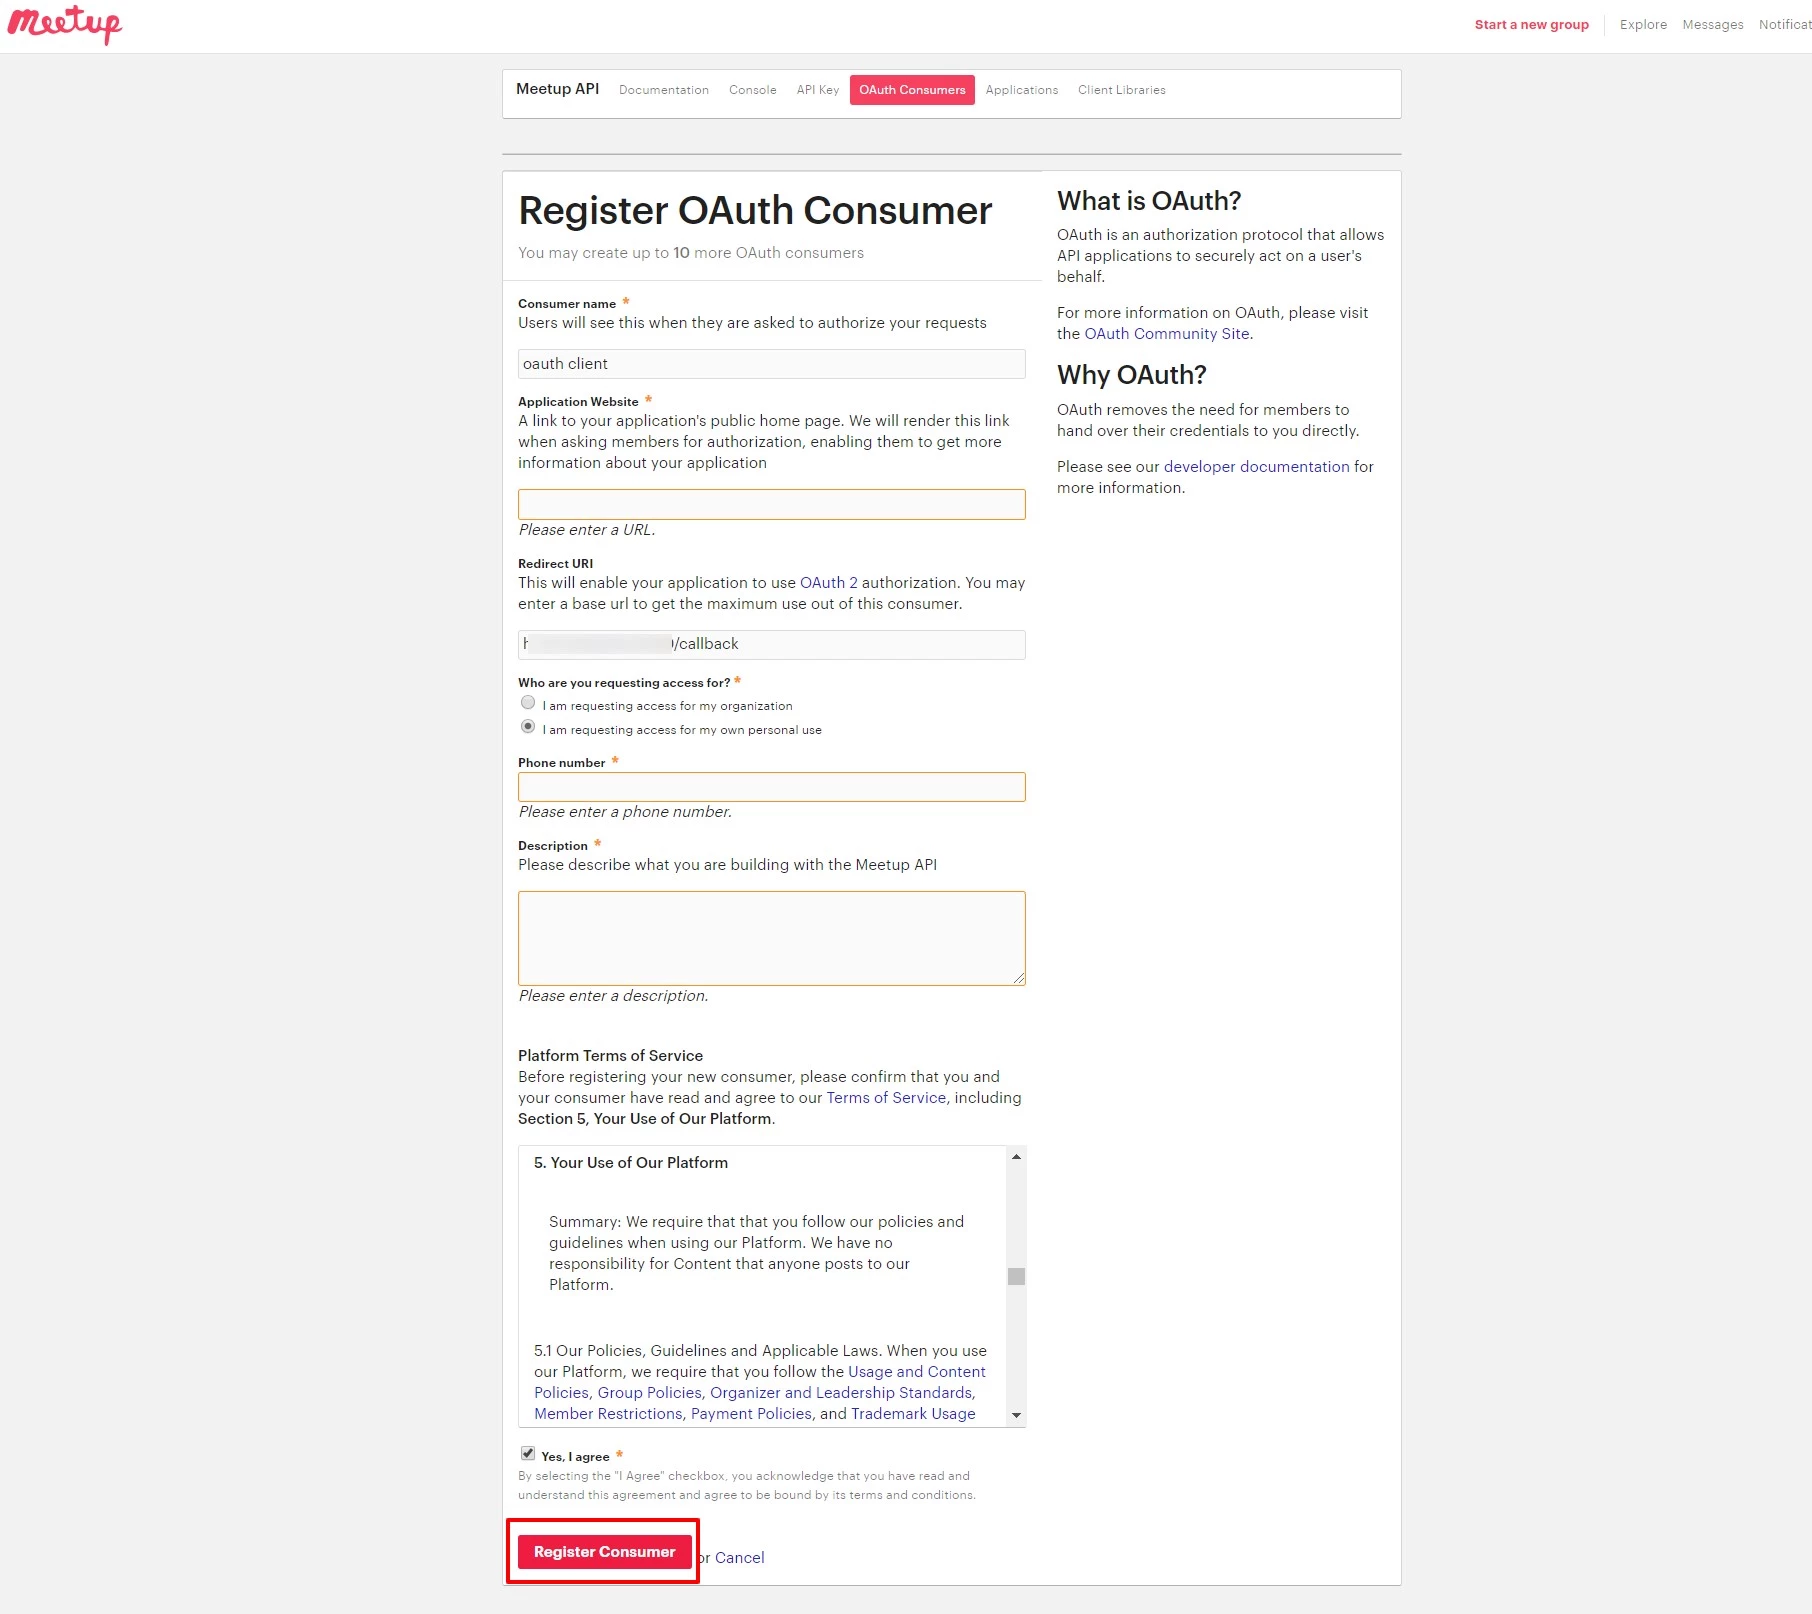
- Create application : Click on "Create New Consumer" or "Create one now".
- Consumer name : Name of your Meetupapp.
- Redirect URI : Copy Callback URL from plugin.
- Check "Yes, I agree" checkbox for Platform Terms of Service and click on "Register Consumer".
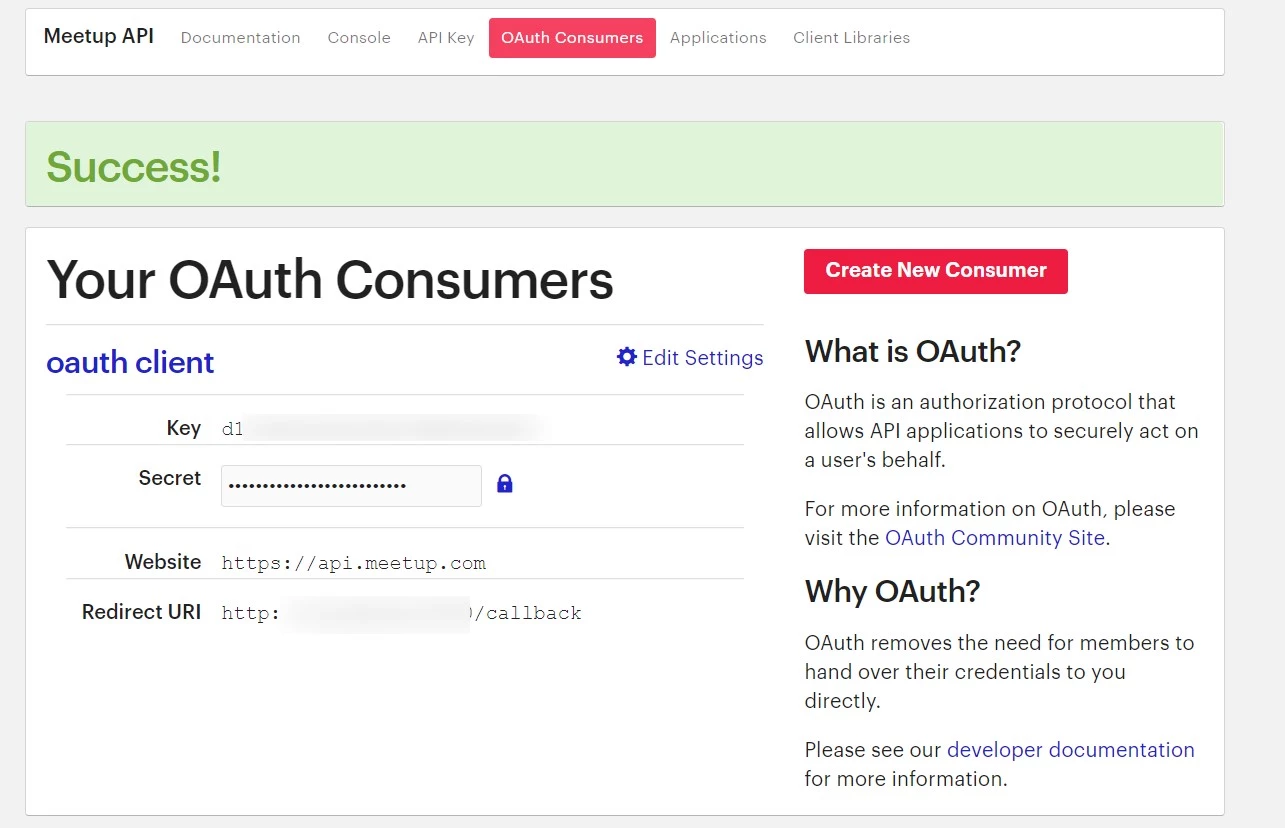
- Once App is created successfully, you'll see the key and secret of the app.
- Get Client ID and Client Secret : key is Client ID and secret is Client Secret.

NOTE: all the details on the Register OAuth Consumer page are mandatory and need to be filled before clicking on Register Consumer
Step 2: Setup JSM as OAuth Client
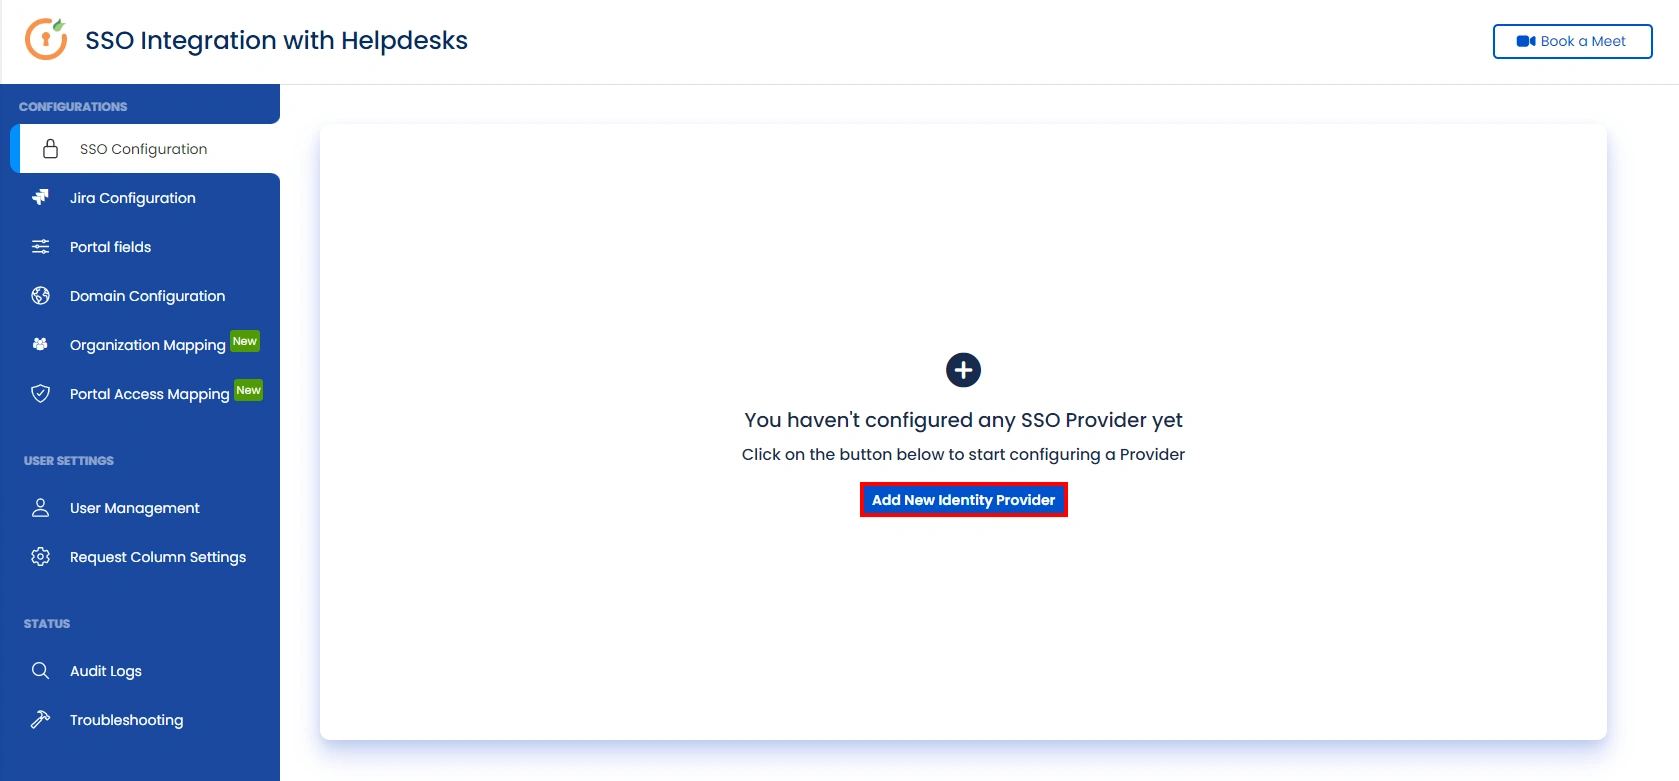
- Go to the Manage Apps -> click Getting started under SSO Integration with Helpdesk then click on the Add New Identity Provider.
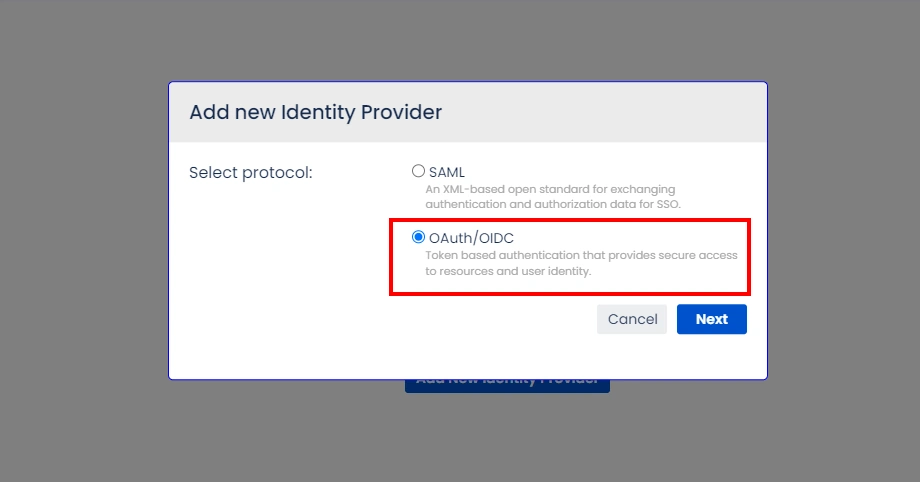
- Select OAuth/OIDC and click on the next button.
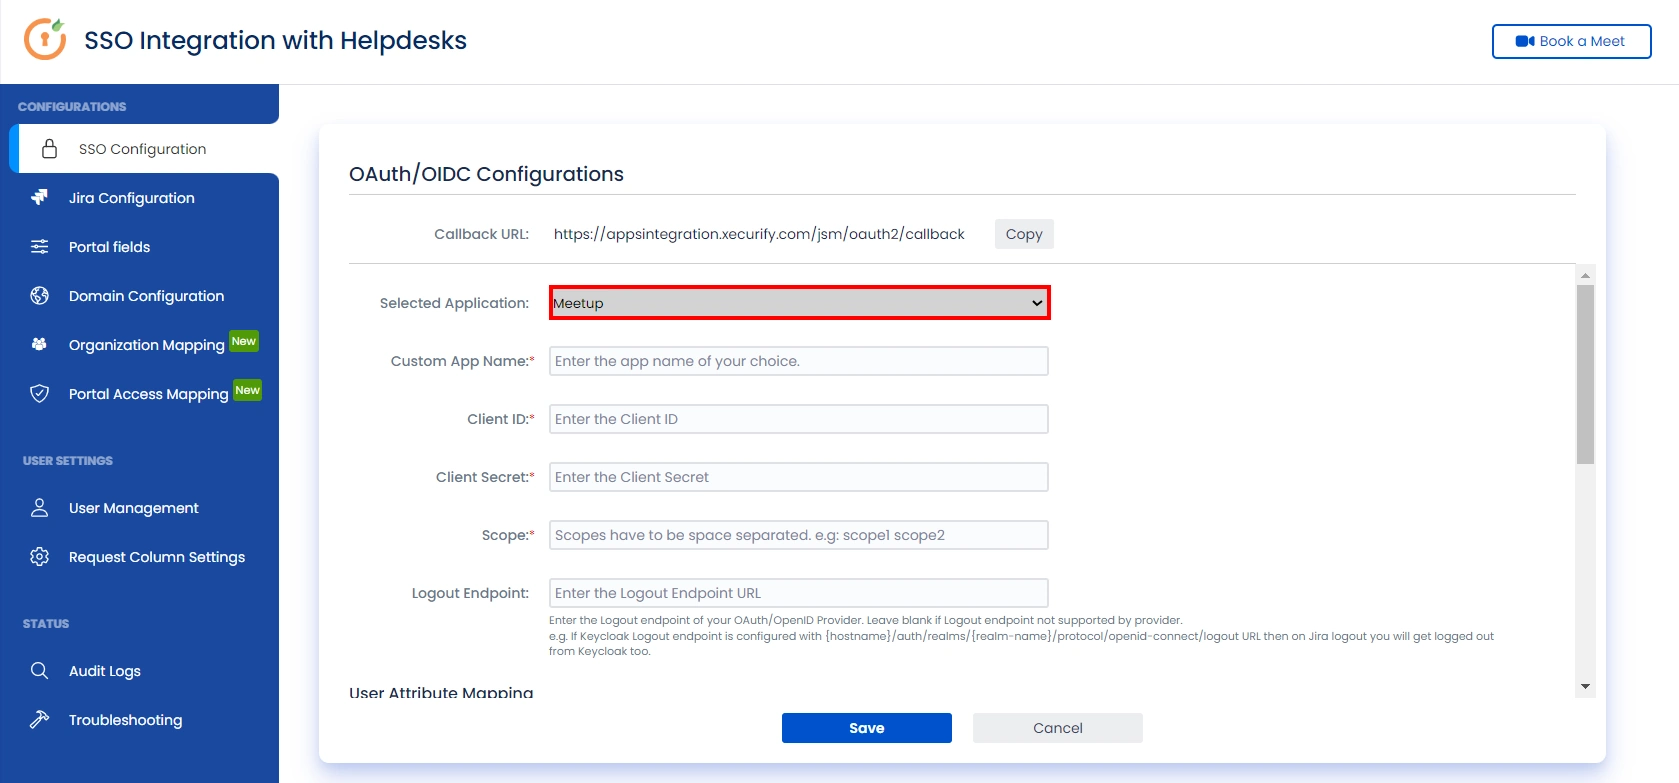
- Select Meetup from the Selected Application dropdown menu.
- Configure Client ID and Client Secret using key and secret value.
- All authorized clients and API keys are implicitly provided the basic scope.
- Click on Save button and then test connection for verifying the entered details.
Step 3: User Attribute Mapping
For filtering users, navigate to the Manage Users tab, where you will find filter users by section.
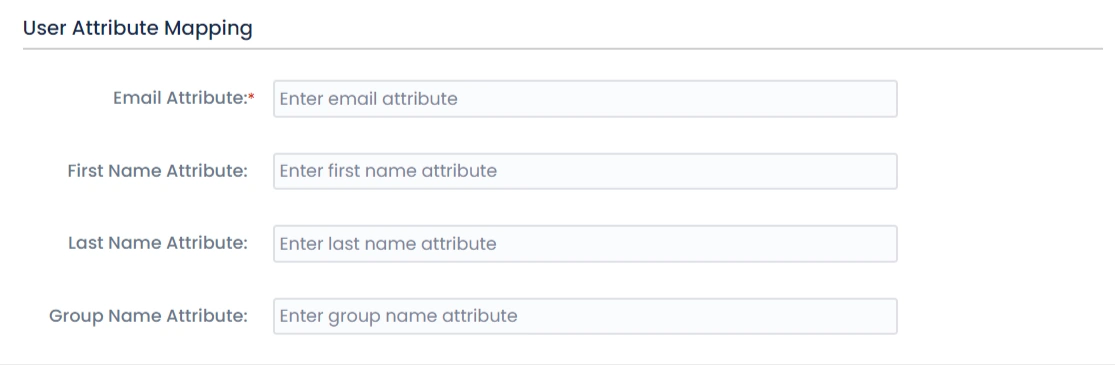
- Once you see all the values in Test connection, go to User Attribute Mapping. Map attributes like Email, firstname, lastname, etc. Click on Save.
Step 4: Integrate Atlassian HelpDesk with JSM SSO
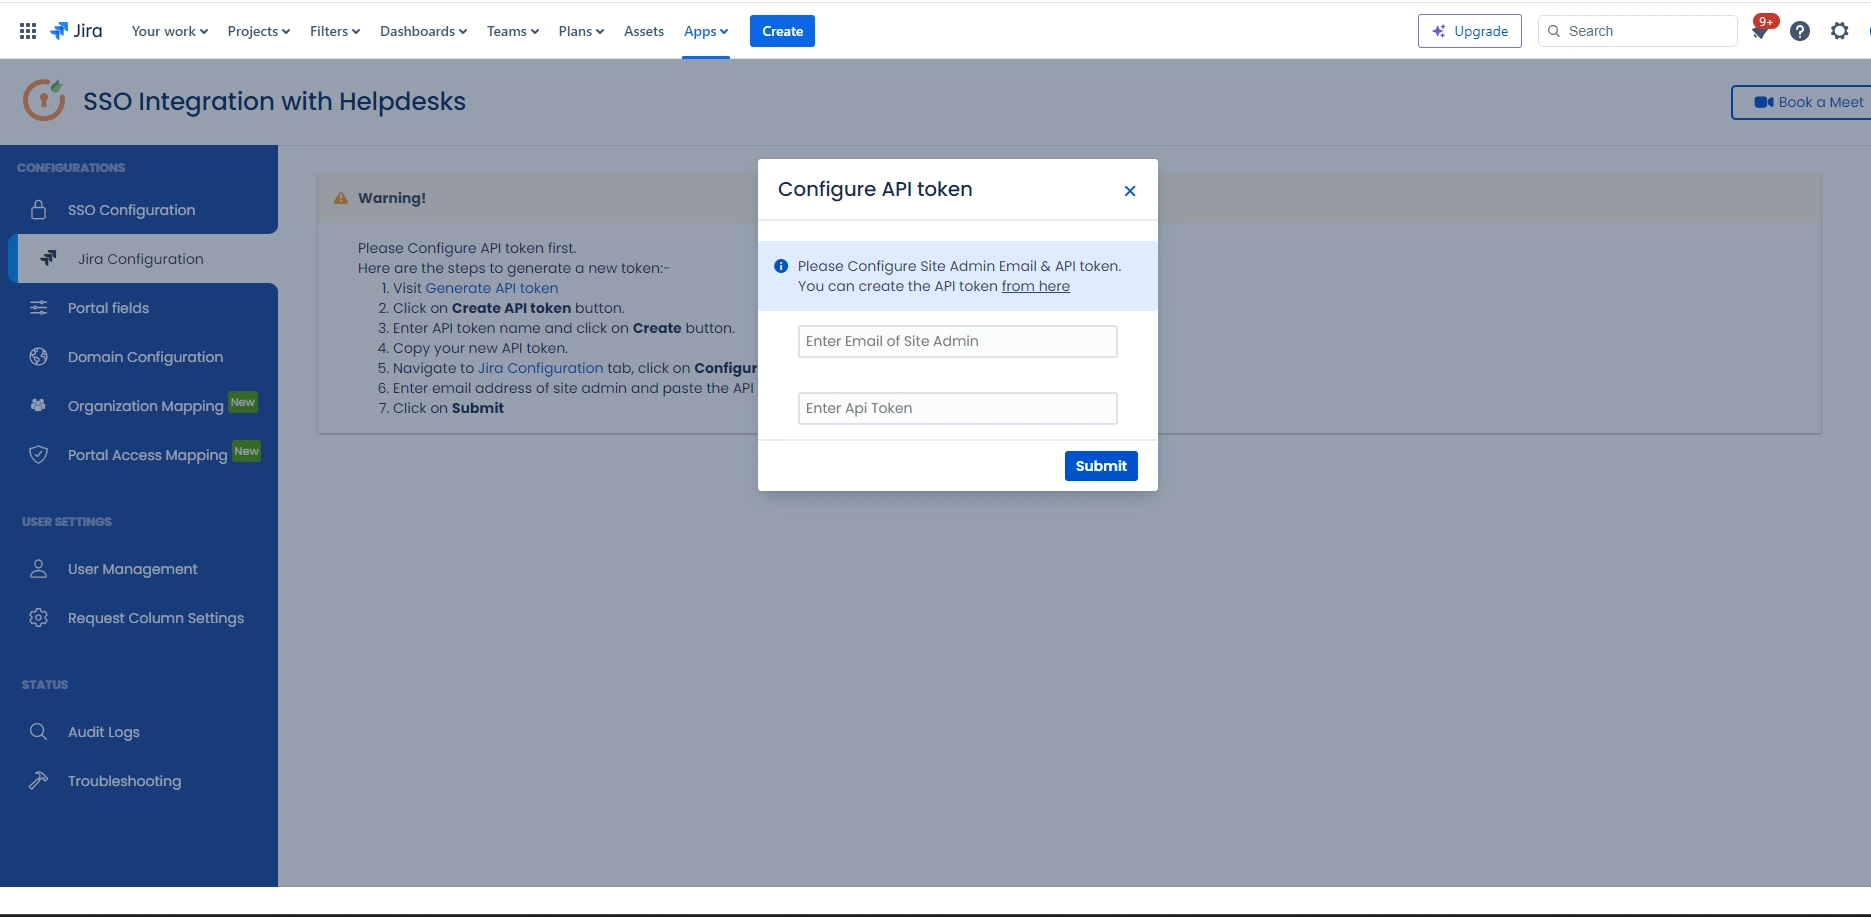
- Navigate to the Jira Configuration tab. Click on the Configure API Token and configure the Service Account API token with the email.
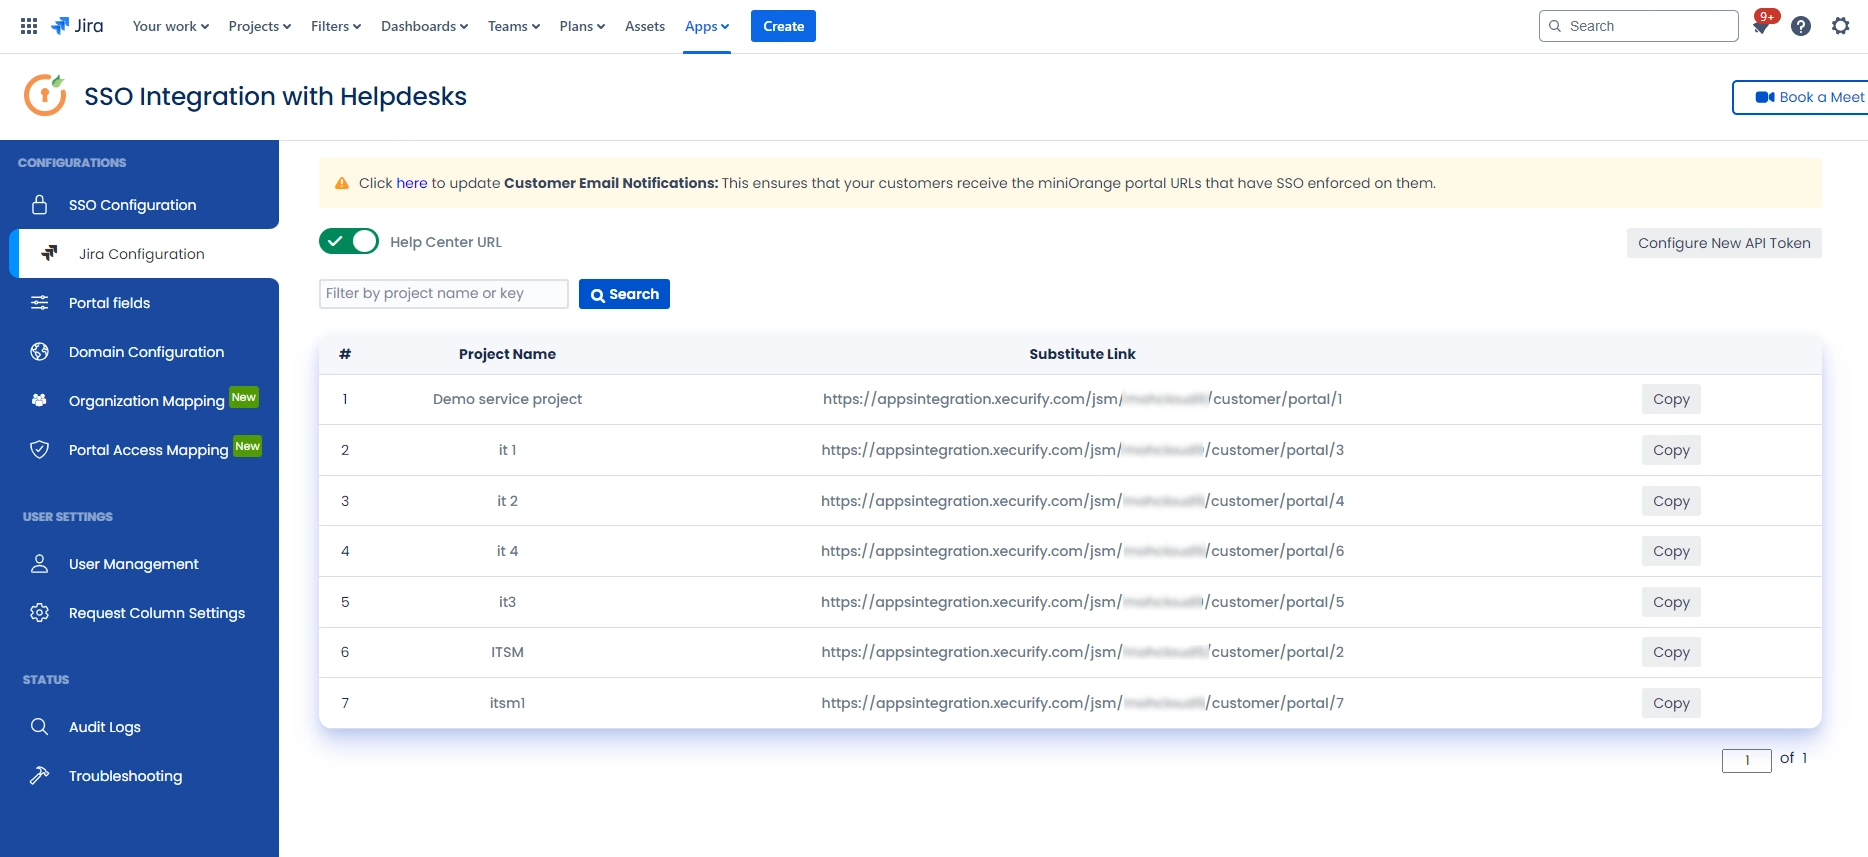
- After successful configuration of API token all the service desk projects with respective links will be displayed. These substituted links will be used by customers for accessing particular projects with SSO.
- Copy any of the substitute links you see for your portals and try accessing it in a private browser window. You would be automatically redirected to your Identity Provider for authentication and would be allowed access to the portal only after successful authentication.
Additional Resources
Did this page help you?
