- Home
- SSO for JSM Customers
- SSO for JSM Customers Documentation
- SSO for JSM Customers using Shibboleth2

SAML SSO for JSM Customers using Shibboleth2 as IDP
You can now allow External Customers to log in via SSO into Jira Service Management (previously Jira Service Desk or JSD). Integrate various customer portals like Atlassian Service Management and access tickets with the help of SAML SSO for JSM Customers.
 Try it for free
Download and Installation
- Log into your Jira instance as an admin.
- Navigate to the settings and Click on Apps.
- Locate SAML/OAuth SSO for JSM Customers.
- Click on free trial to begin a new trial SAML/OAuth SSO for JSM Customers.
- On menu bar click on Apps. Locate SAML/OAuth SSO for JSM Customers.
Step 1: Set Up Shibboleth2 as Identity Provider
- In conf/relying-party.xml, configure Service Provider like this
- Make sure your Shibboleth server is sending Email Address of the user in Name ID. In attribute-resolver.xml, get the email attribute as Name ID:
- In attribute-filter.xml, release the email attribute:
- Restart the Shibboleth server.
- You need to configure these endpoints in miniOrange plugin.
<MetadataProviderxsi:type="InlineMetadataProvider" xmlns="urn:mace:shibboleth:2.0:metadata" id="MyInlineMetadata">

  <EntitiesDescriptorxmlns="urn:oasis:names:tc:SAML:2.0:metadata">

    <md:EntityDescriptorxmlns:md="urn:oasis:names:tc:SAML:2.0:metadata" entityID="<ENTITY_ID_FROM_PLUGIN>">

      <md:SPSSODescriptorAuthnRequestsSigned="false" WantAssertionsSigned="true" protocolSupportEnumeration=

          "urn:oasis:names:tc:SAML:2.0:protocol">

        <urn:oasis:names:tc:SAML:1.1:nameidformat:emailAddress</md:NameIDFormat>

        <md:AssertionConsumerService Binding="urn:oasis:names:tc:SAML:2.0:bindings:https-POST"

          Location="<ACS_URL_FROM_PLUGIN>" index="1"/>

      </md:SPSSODescriptor>

    </md:EntityDescriptor>

  </EntitiesDescriptor>

</MetadataProvider>
<resolver:AttributeDefinitionxsi:type="ad:Simple" id="email" sourceAttributeID="mail">

   <resolver:Dependency ref="ldapConnector" />

   <resolver:AttributeEncoderxsi:type="enc:SAML2StringNameID" nameFormat="urn:oasis:names:tc:SAML:1.1:

    nameid-format:emailAddress"/>

</resolver:AttributeDefinition>
<afp:AttributeFilterPolicy id="releaseTransientIdToAnyone">

<afp:PolicyRequirementRulexsi:type="basic:ANY"/>

  <afp:AttributeRuleattributeID="email">

    <afp:PermitValueRulexsi:type="basic:ANY"/>

  </afp:AttributeRule>

</afp:AttributeFilterPolicy>
| IDP Entity ID | https://<your_domain>/idp/shibboleth |
| Single Login URL | https://<your_domain>/idp/profile/SAML2/Redirect/SSO |
| X.509 Certificate | The public key certificate of your Shibboleth server |
Step 2: Setup JSM as Service provider
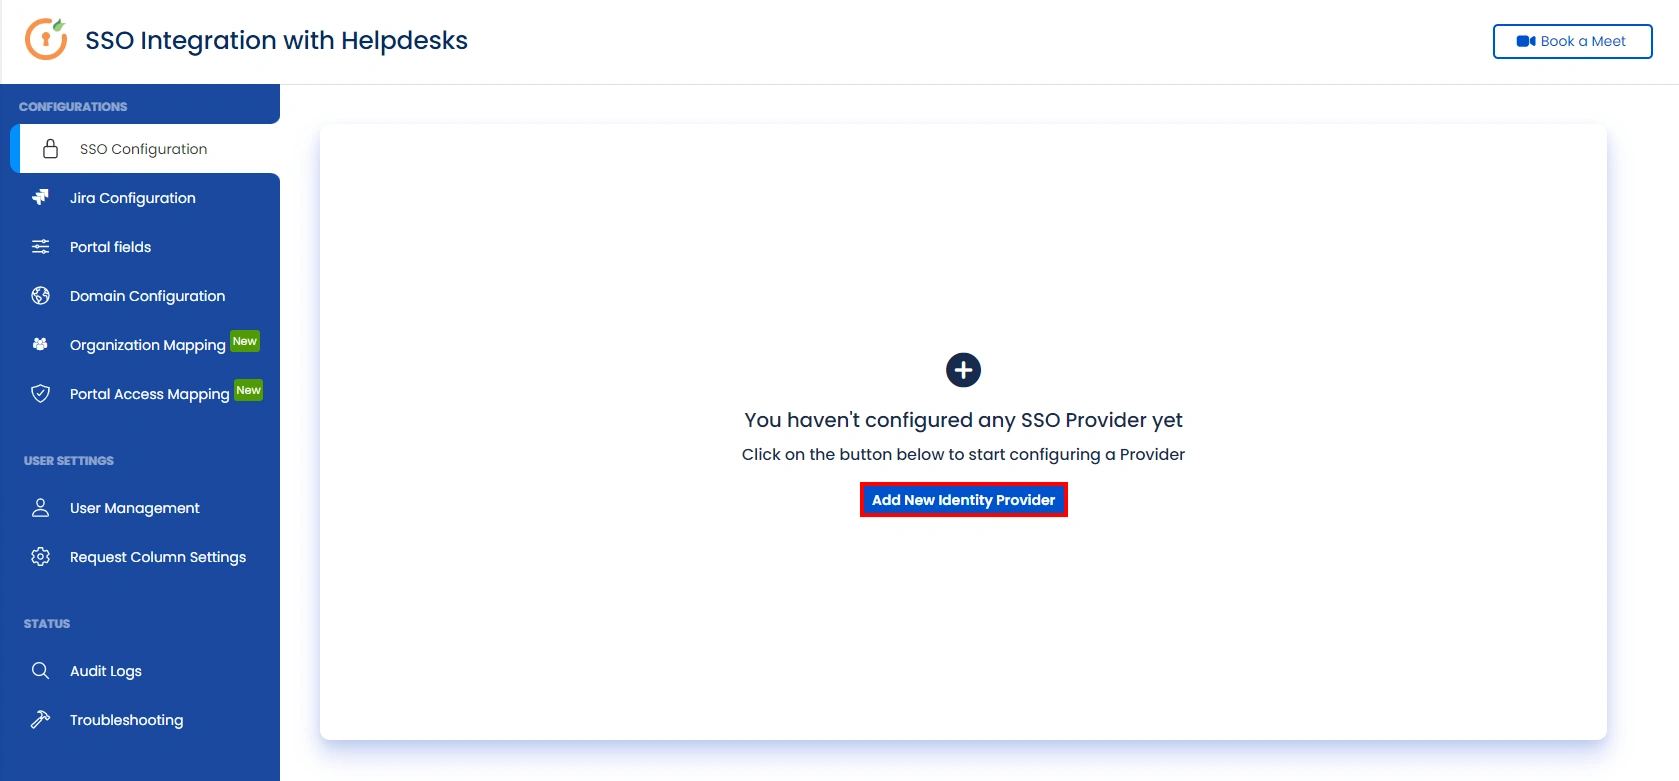
- Go to the Manage Apps -> click Getting started under SSO Integration with Helpdesk then click on the Add New Identity Provider.
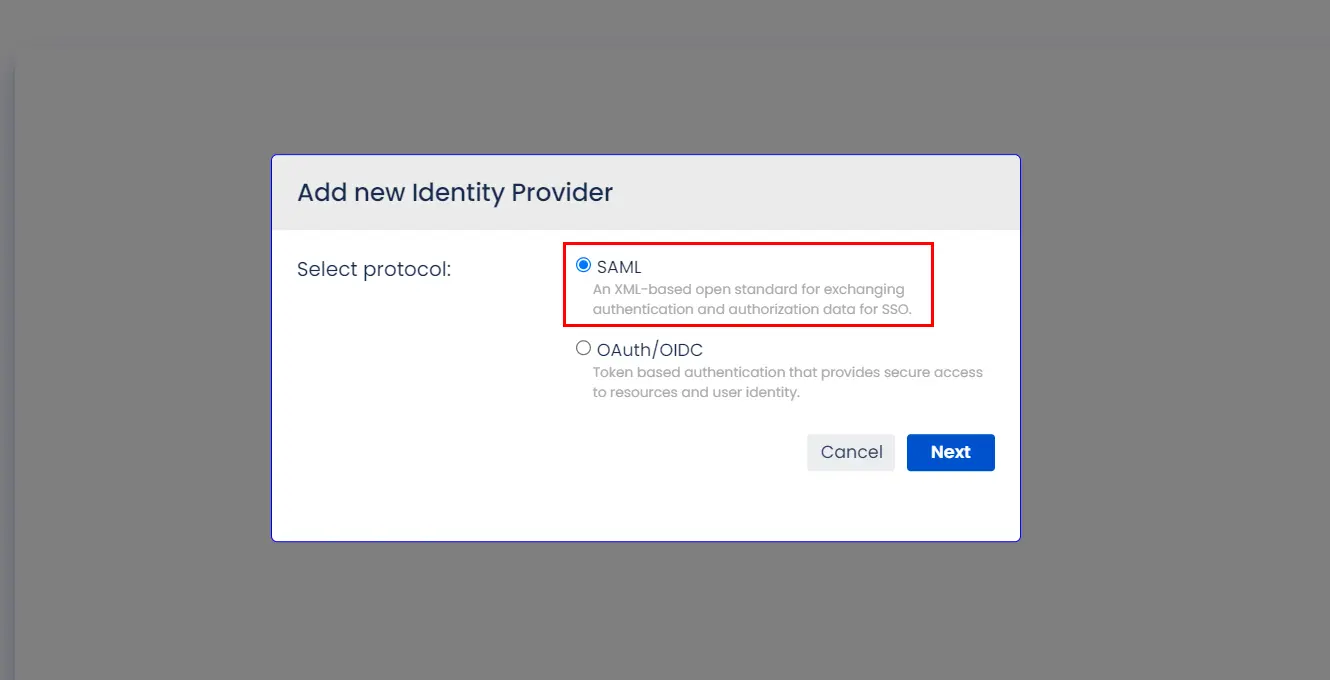
- Select SAML and click on the next button.
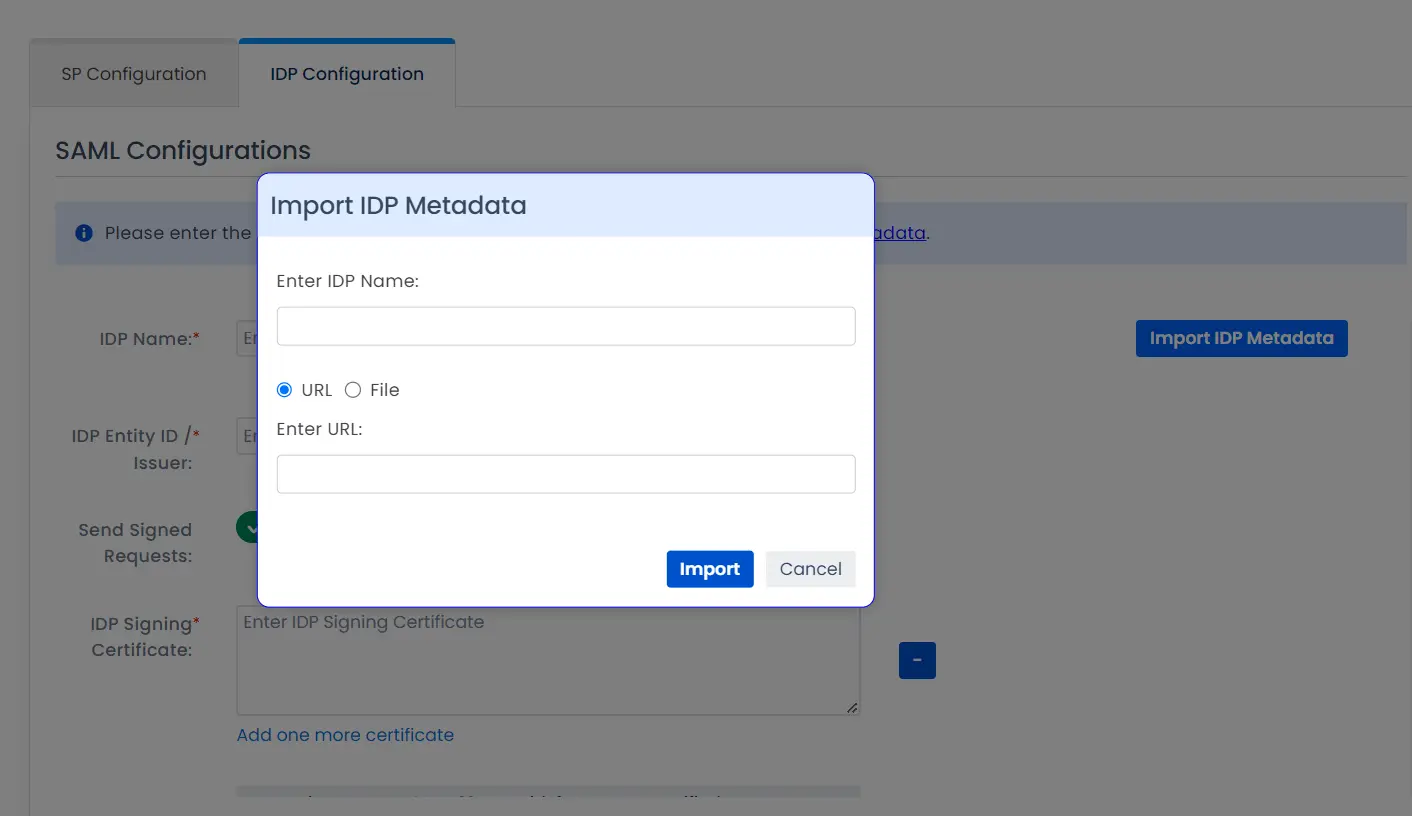
- Click on Import IDP Metadata.
- Enter IDP name.
- Choose IDP metadata URL / File: Enter your metadata URL / File
- Click Import
A. By Metadata URL :

To configure the IDP manually, you will need to have the following details from your IDP's metadata.
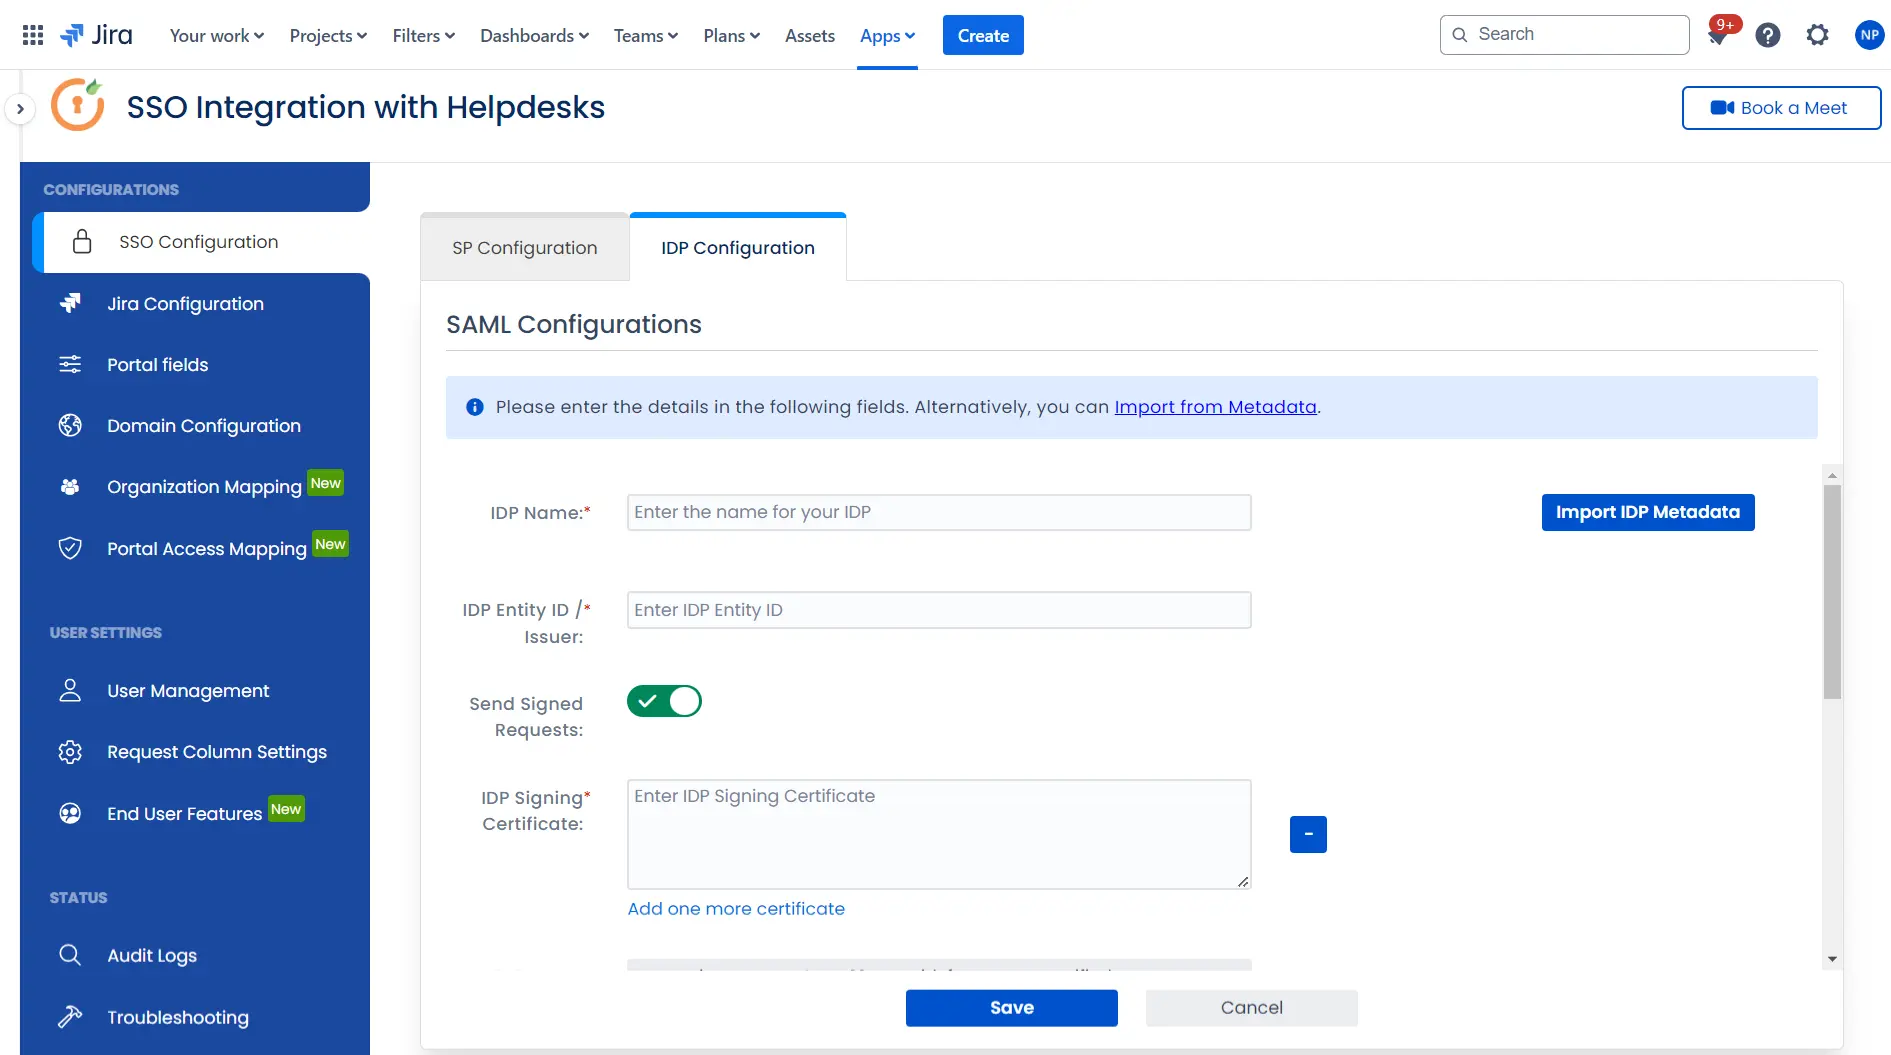
Once you have added the IDP metadata, click on Save. If the IDP has been added successfully, Click on the Test Configuration button to test if the IDP was added successfully.
Step 3: Integrate Atlassian HelpDesk with JSM SSO
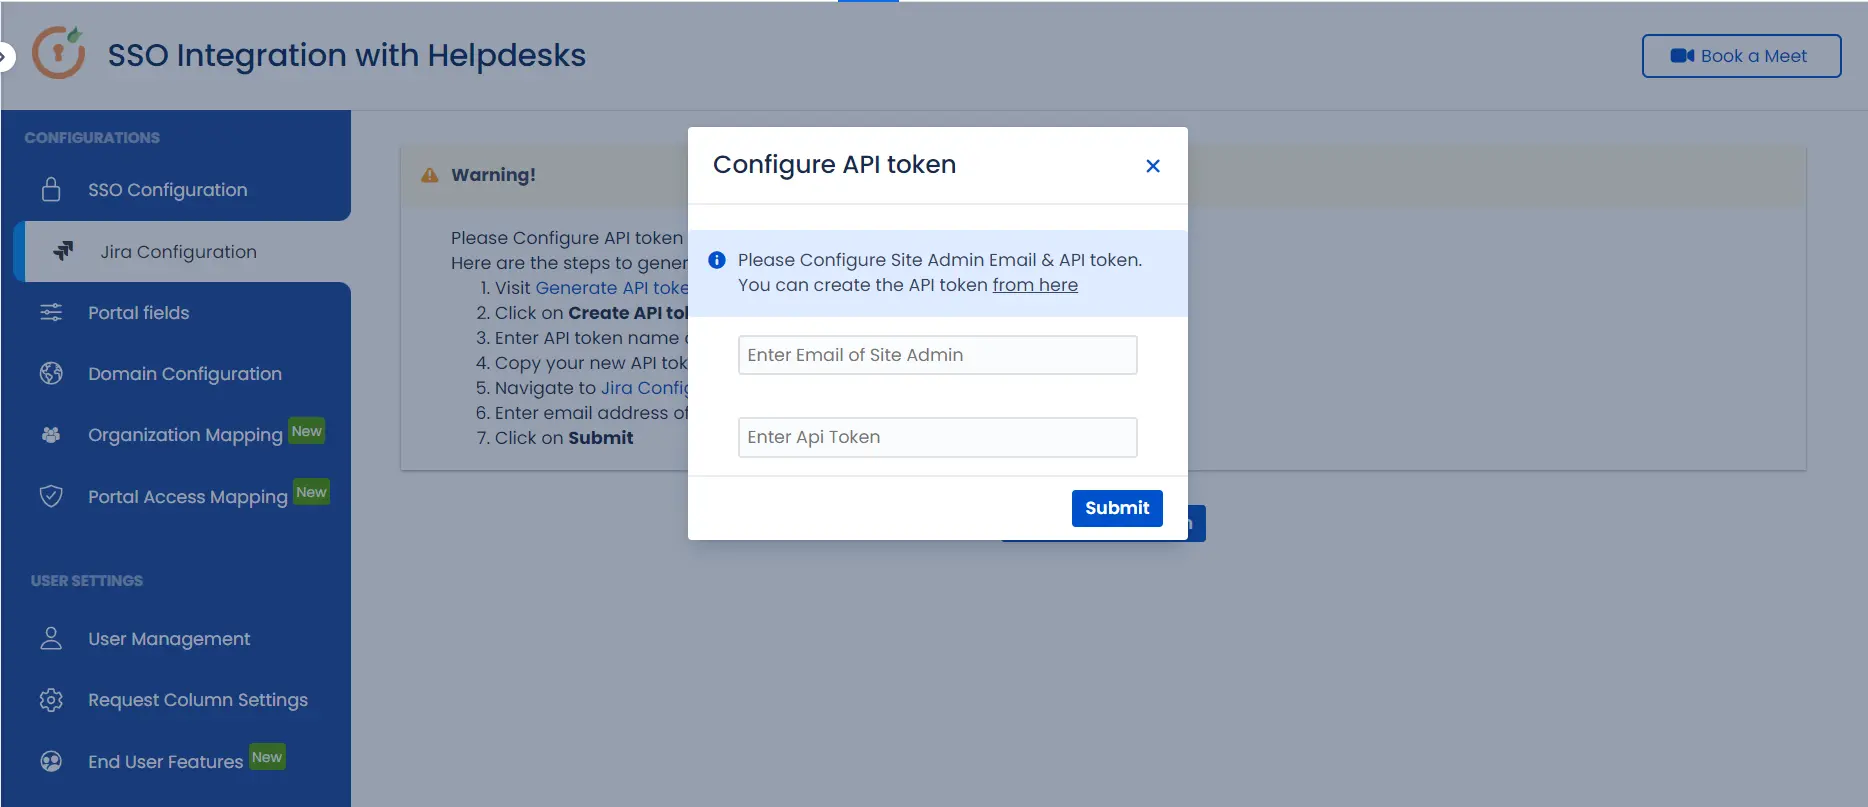
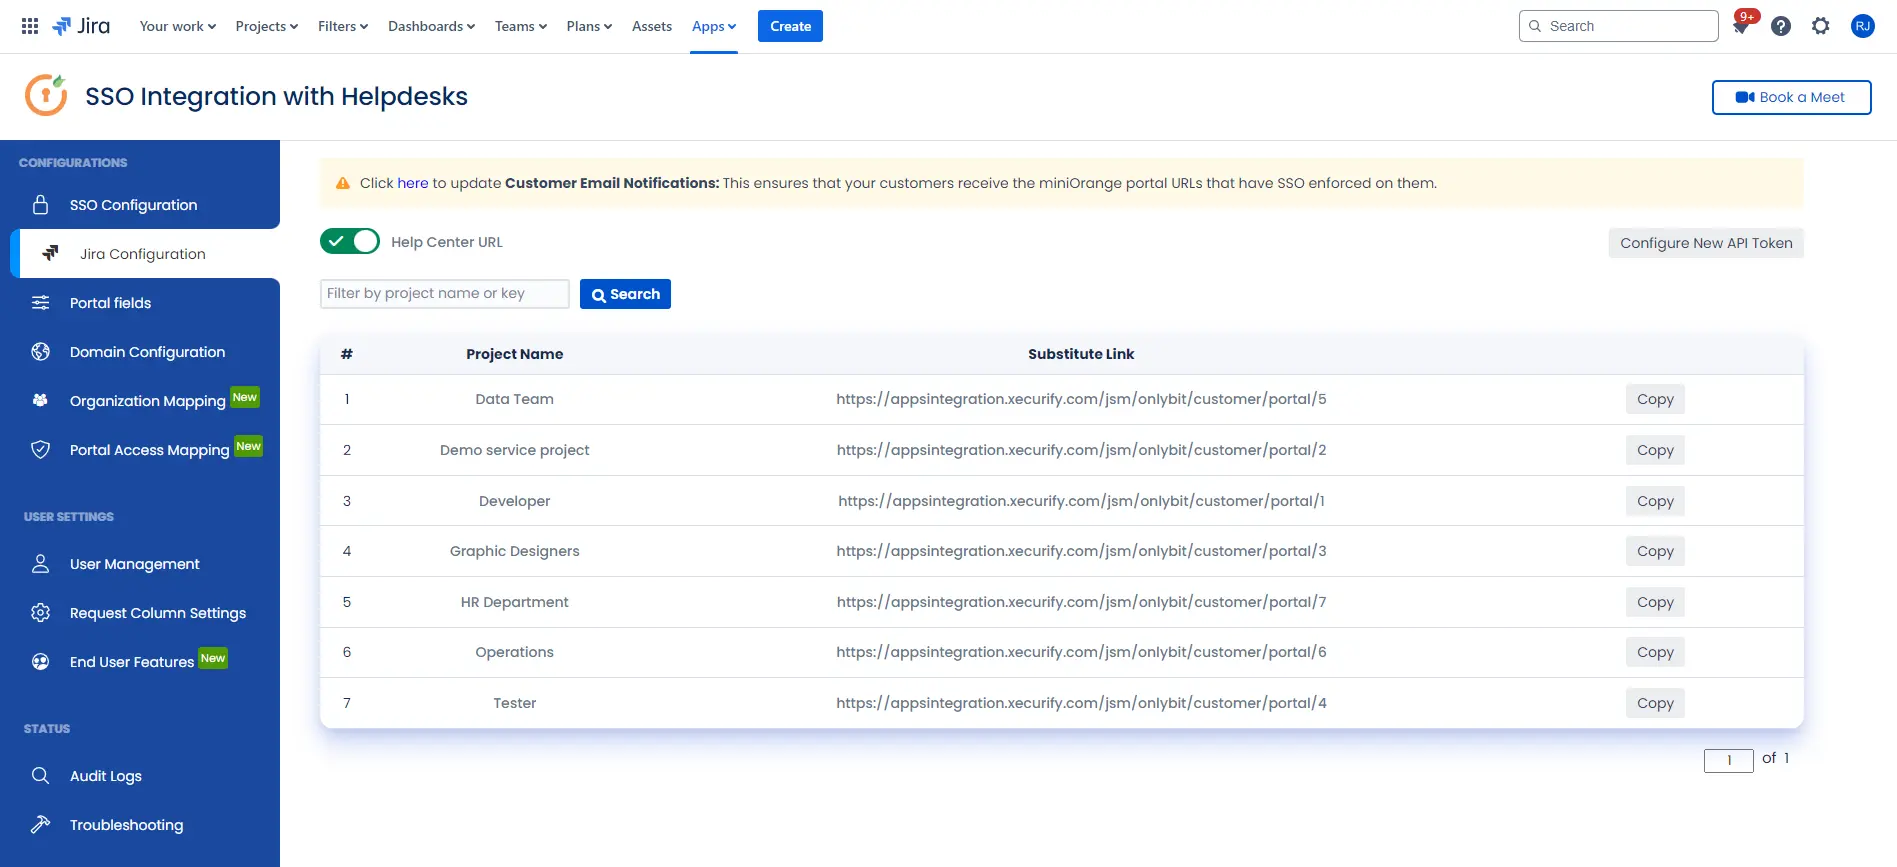
- Click on the Configure API Token and configure the Service Account API token with the email.
- After successful configuration of API token all the service desk projects with respective links will be displayed. These substituted links will be used by customers for accessing particular projects with SSO.
- Copy any of the substitute links you see for your portals and try accessing it in a private browser window. You would be automatically redirected to your Identity Provider for authentication and would be allowed access to the portal only after successful authentication.
It is necessary to have admin permissions for the service account.
×
![]()
Additional Resources
Did this page help you?
