- Home
- 2FA
- 2FA Documentation
- 2FA For Confluence

How to Set Up Two-Factor Authentication (2FA) for Confluence
The miniOrange Two-Factor Authentication (2FA) app is designed to help you enhance security for your Confluence. In this comprehensive guide, we will navigate you through the step-by-step process of configuring 2FA for Confluence. By the end of this walkthrough, you will have fortified your platform with an additional layer of security, safeguarding your registered end-users.
 Try it for free
Video Setup Guide
Pre-requisites
Before configuring the miniOrange Two-Factor Authentication (2FA) App for Confluence, ensure you have the following:
- Confluence is installed and configured on your system.
- Admin credentials are set up in Confluence.
- Confluence server is https enabled (optional).
- Valid Confluence Server and Data center Licence.
Download and Installation
Now, let’s look at how you can download and install the miniOrange 2FA plugin for your Confluence.
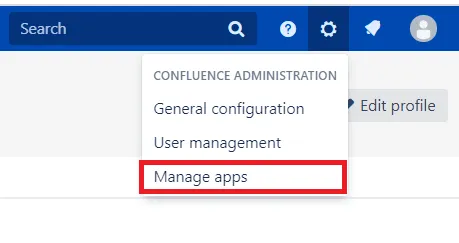
- Log into your Confluence instance as an admin.
- Navigate to the settings menu and Click Manage Apps.
- Click Find new apps or Find new add-ons from the left-hand side of the page.
- Use the search function to find mO Two-Factor Authentication (2FA) for Confluence.
- Click Try free to begin a new trial or Buy now to purchase a license for mO Two-Factor Authentication (2FA) for Confluence..
- Enter your information and click Generate license when redirected to MyAtlassian.
- Click Apply license.


 3.1 Brute Force Configuration
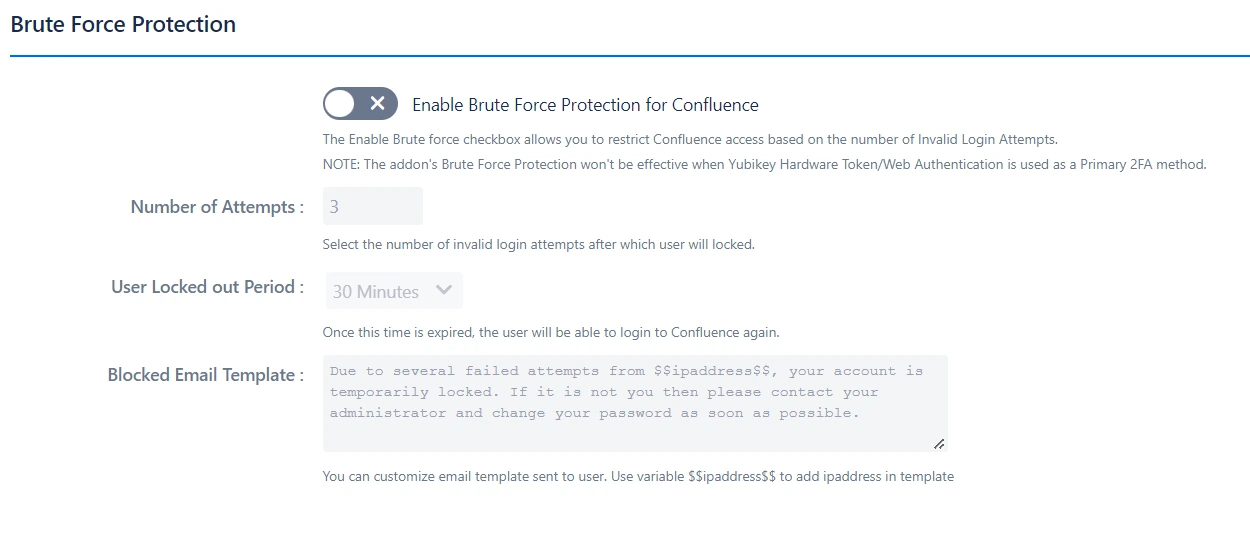


1: Configuring miniOrange 2FA
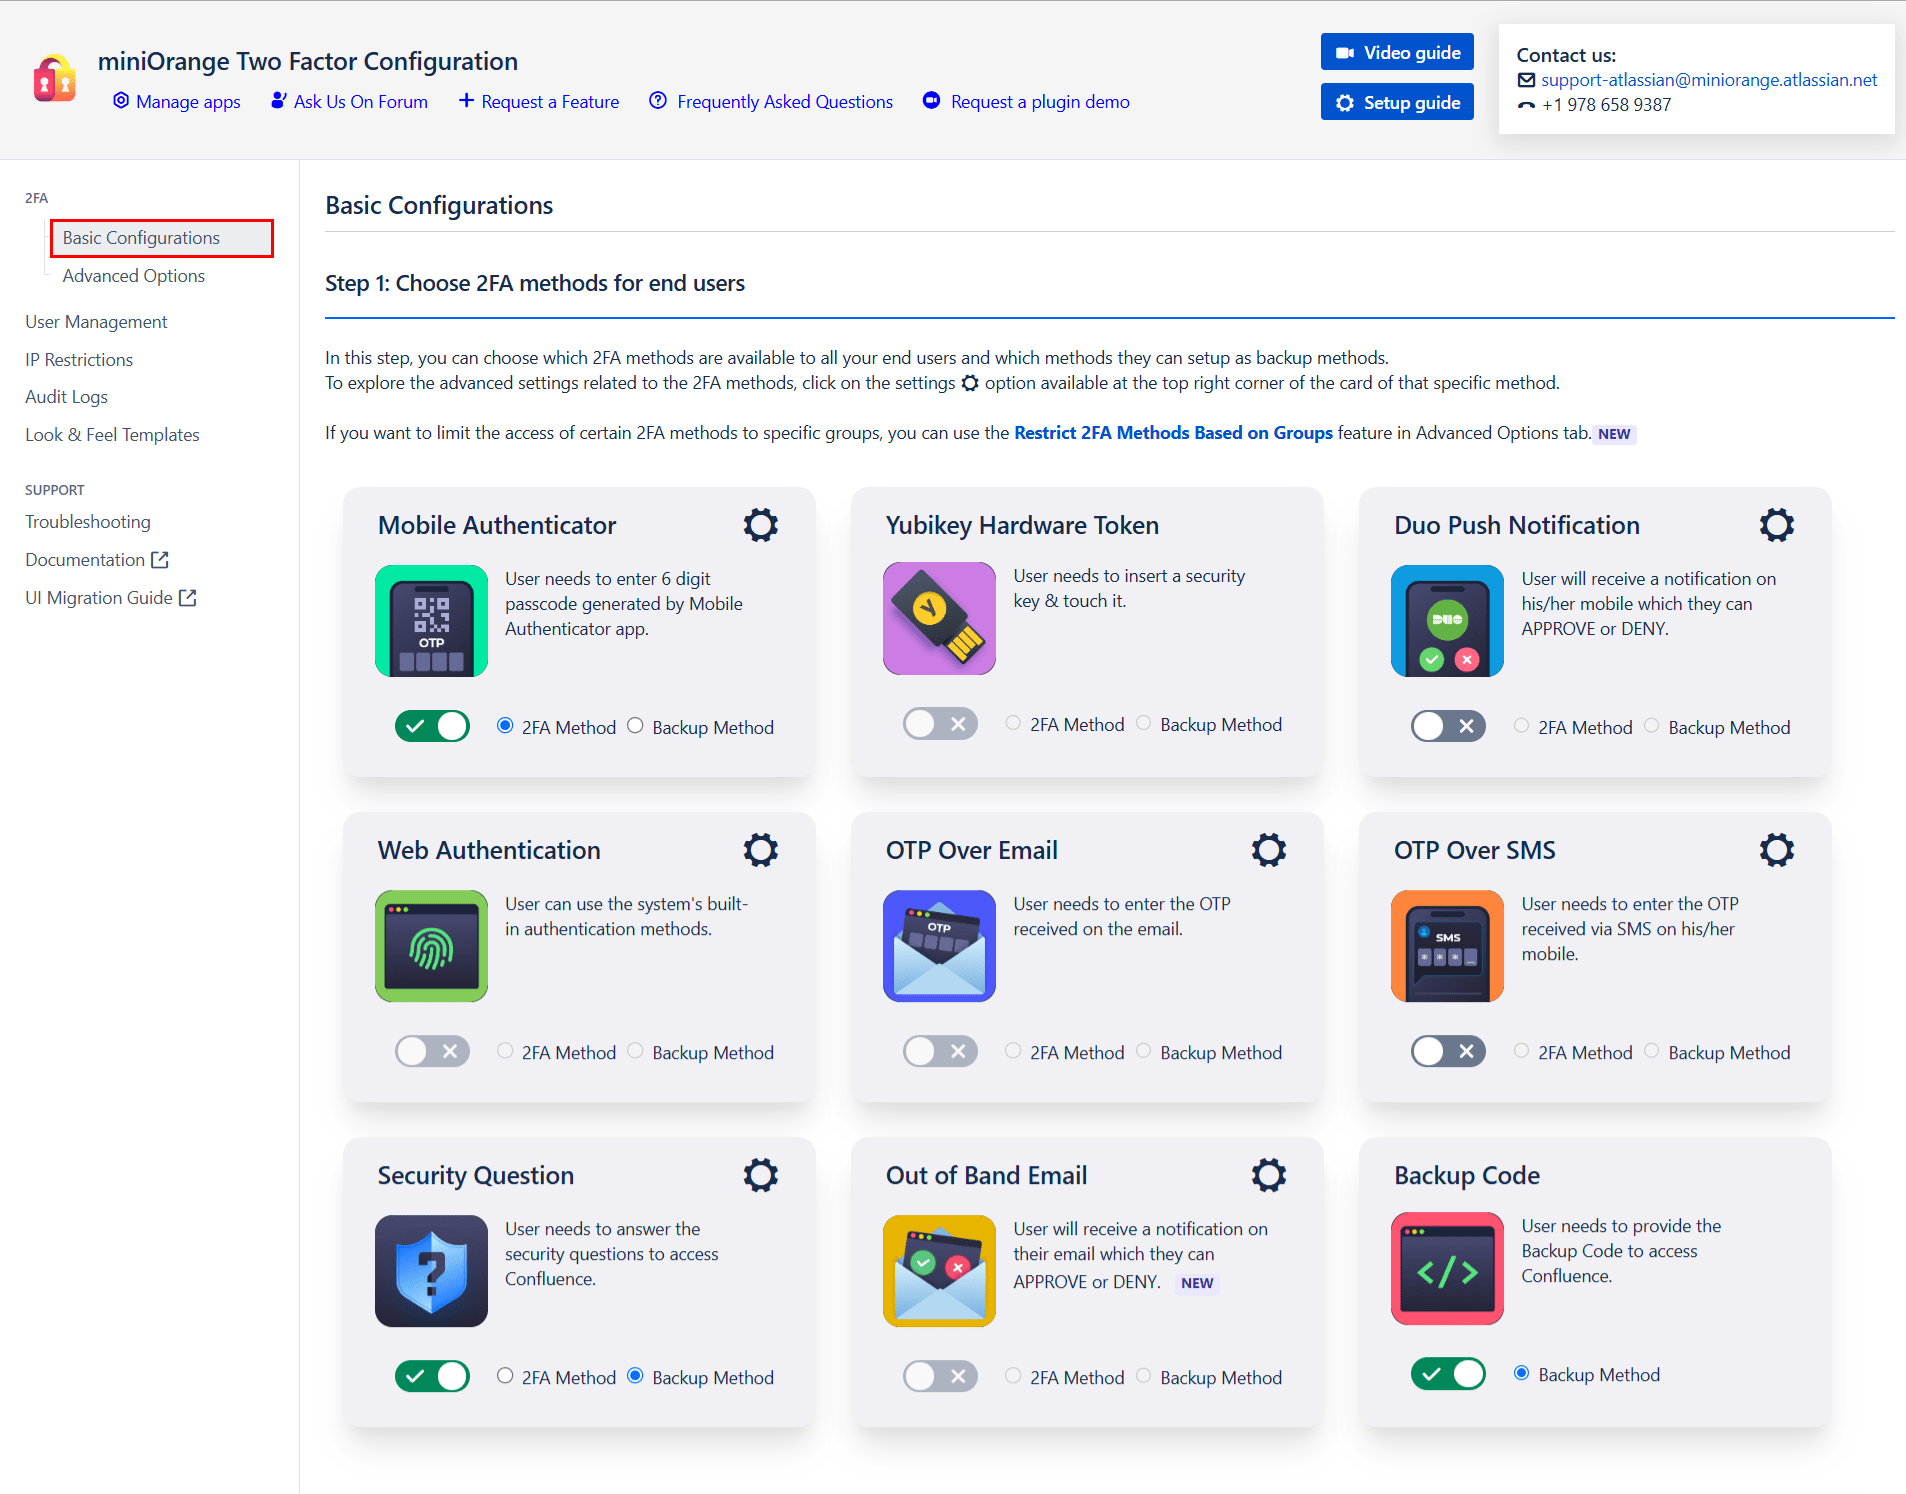
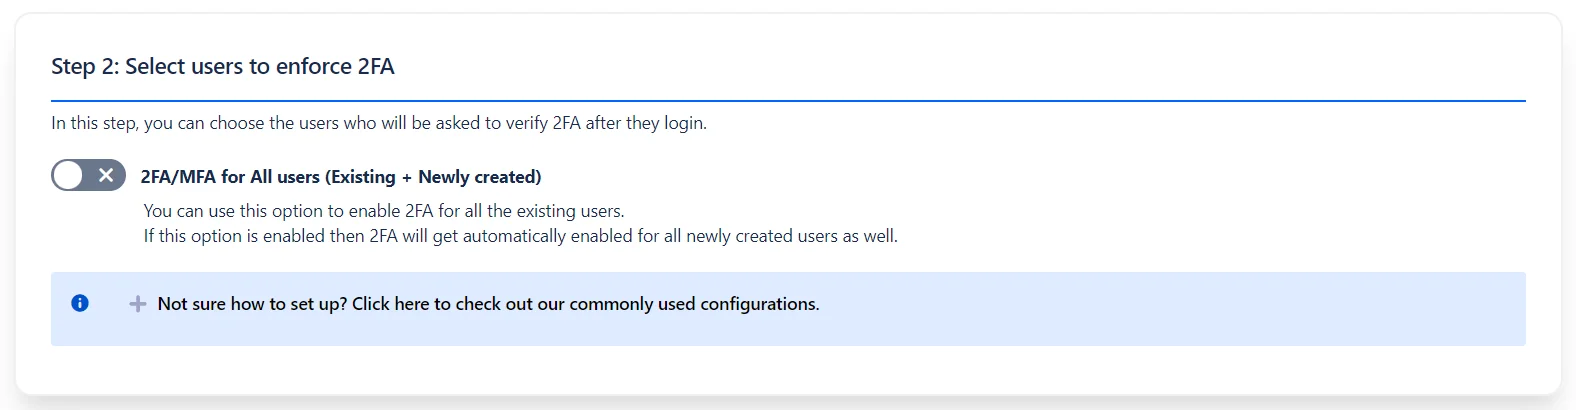
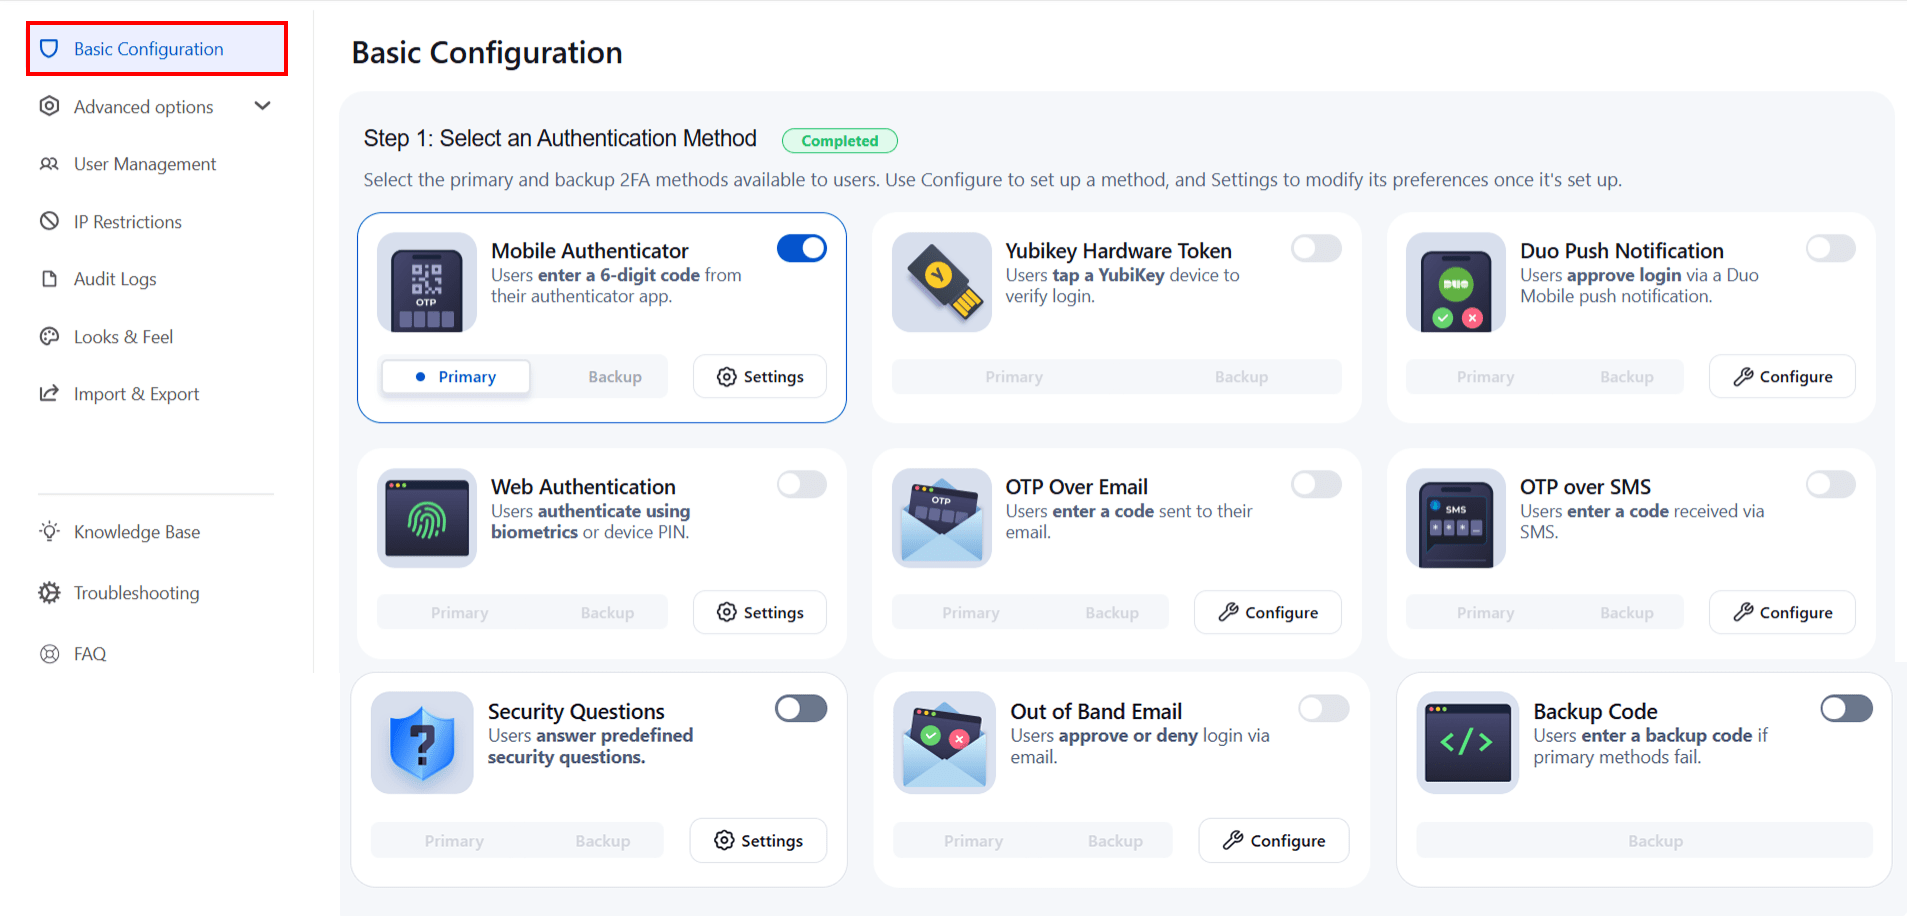
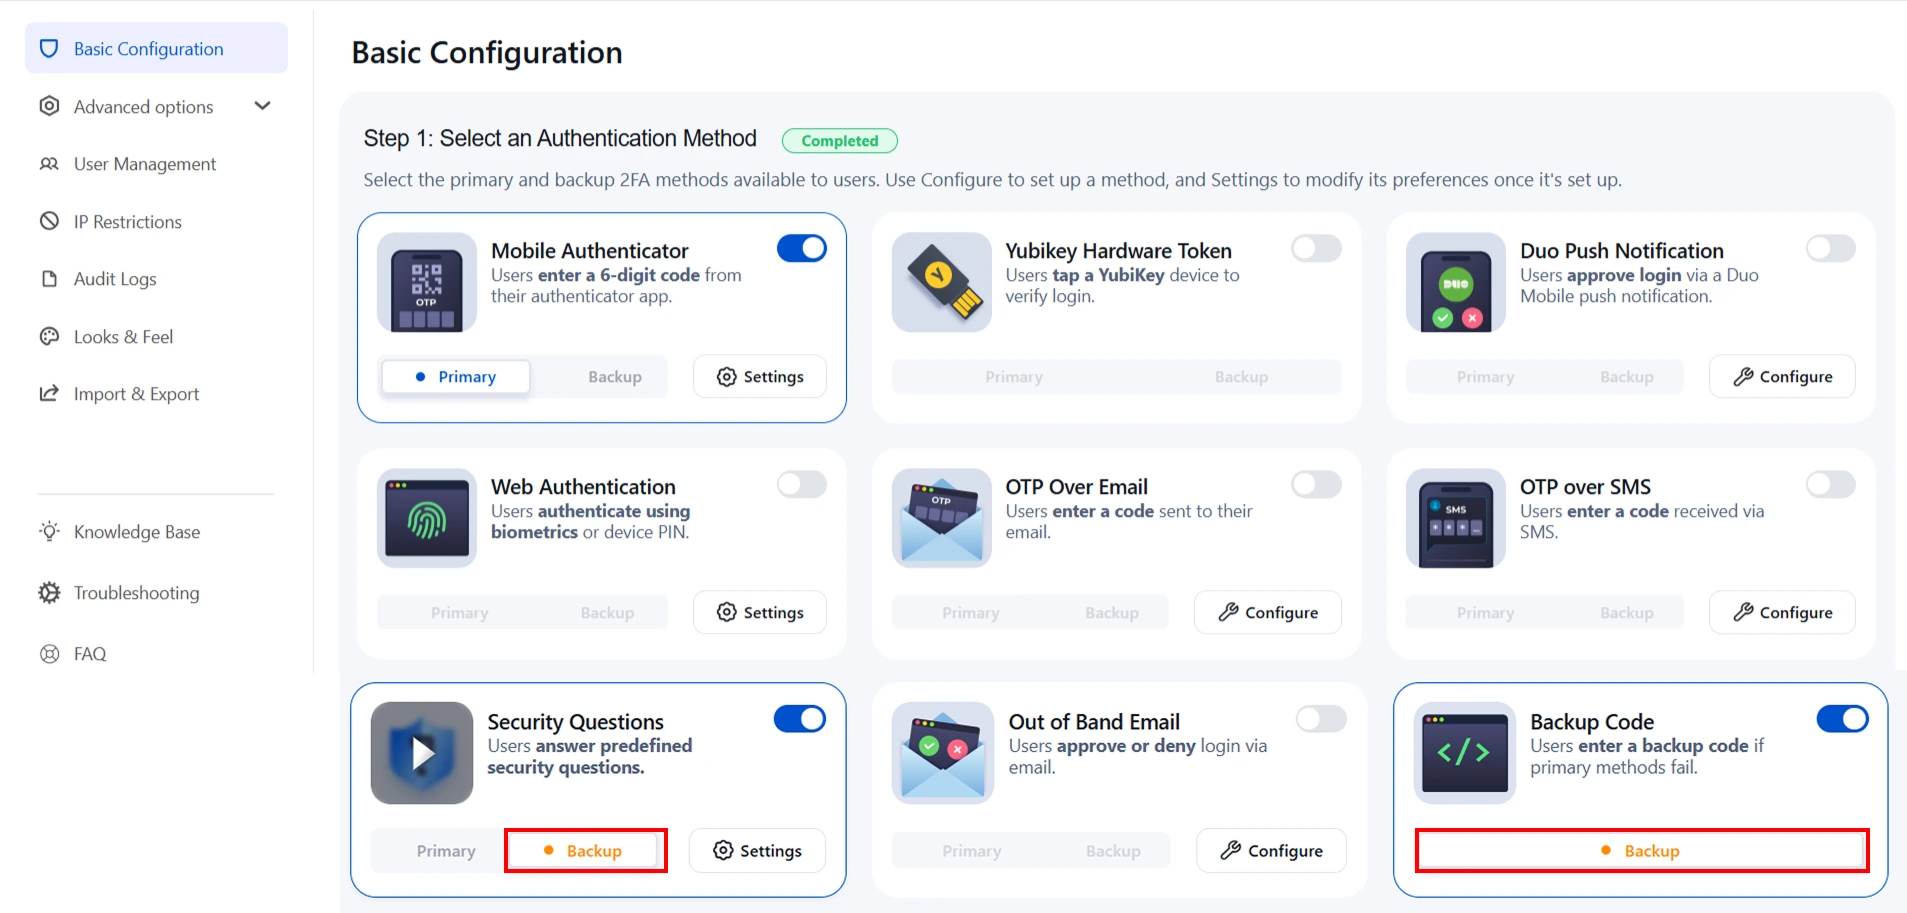
- Choose 2FA Methods: The miniOrange 2FA add-on offers users a range of 2FA methods, including OTP, KBA, TOTP, and more, for authentication. You can enable the desired 2FA methods from the provided list during plugin configuration. To enable the chosen methods for your users, you just have to select the 2FA Method option and toggle it active.
- Enable Backup Method:To ensure access during emergencies or when users cannot access their primary 2FA method, our app also provides you with a backup authentication method. You can choose any of the listed 2FA methods as your backup by selecting the Backup Method option and toggling it active.
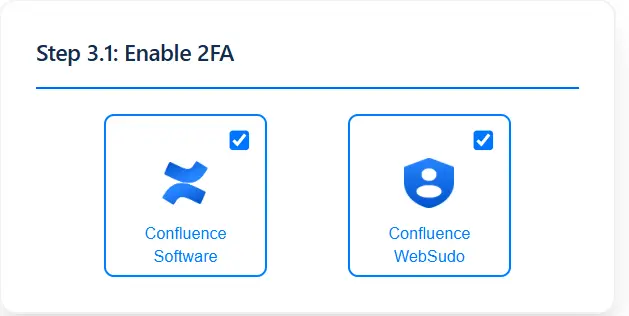
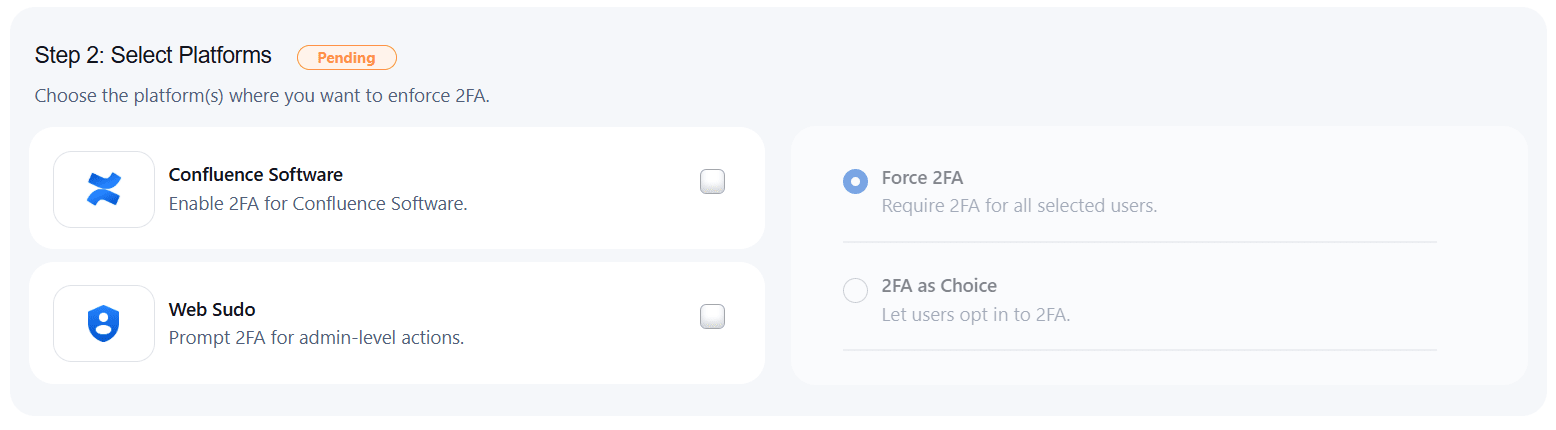
- Confluence: Enable 2FA for your Confluence instance to secure user access.
- WebSudo: Require 2FA verification when users perform admin-level actions for added protection.
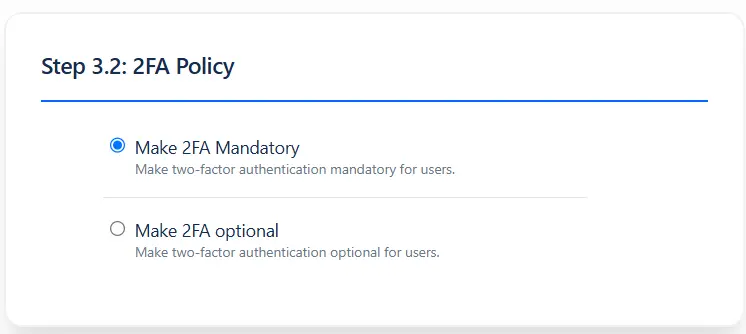
- Force 2FA: Mandate 2FA for all selected users to ensure consistent security enforcement.
- 2FA as Choice: Allow users to voluntarily enable 2FA for their accounts.
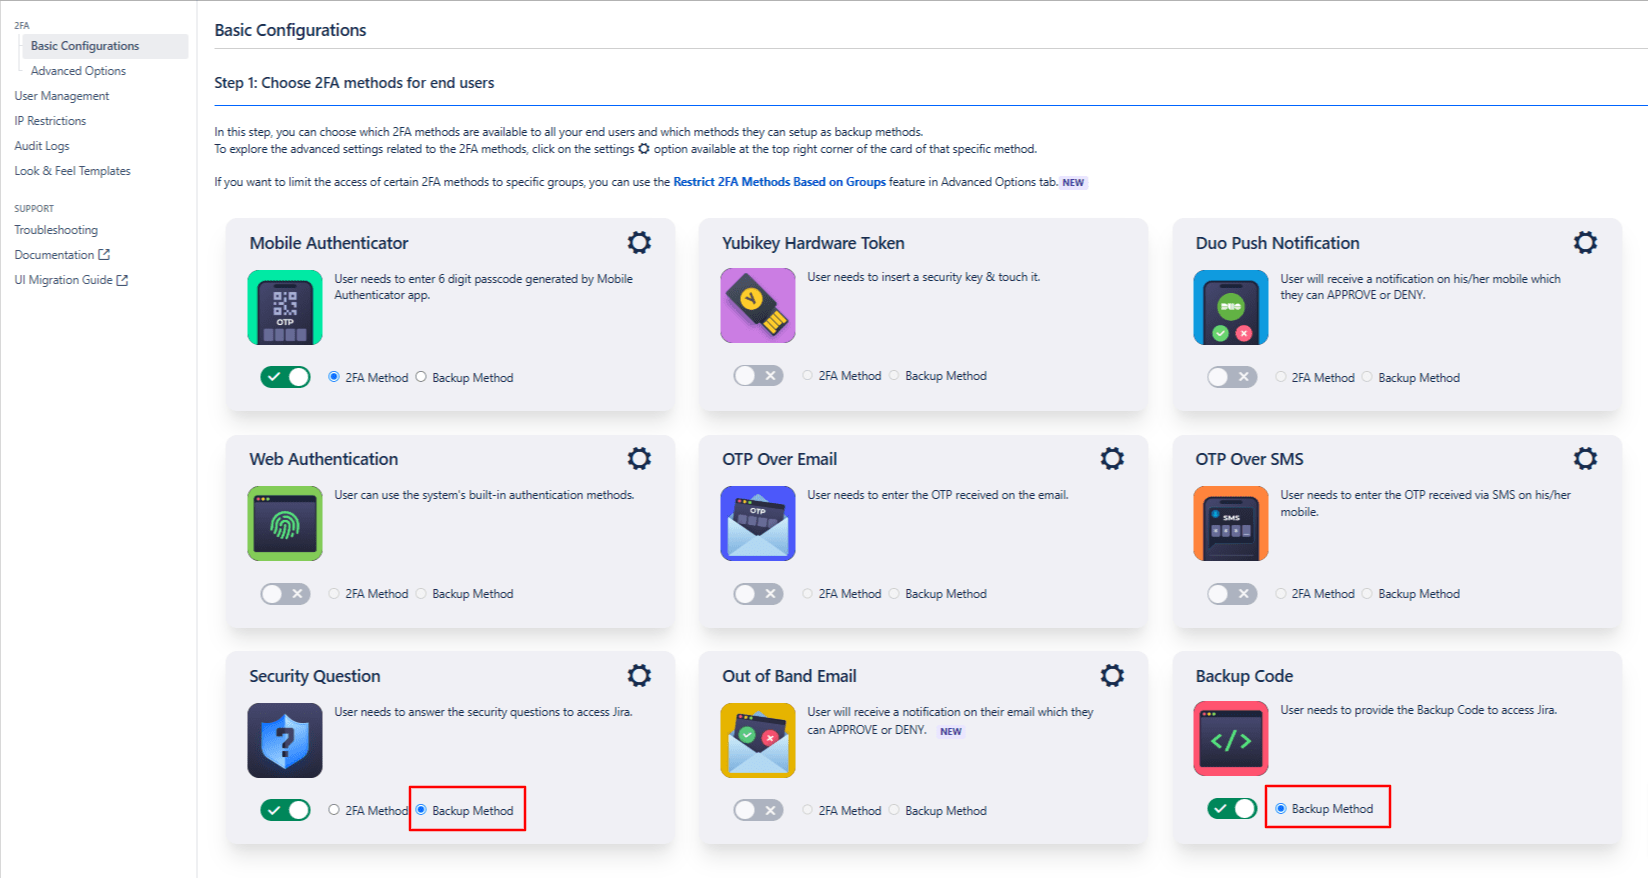
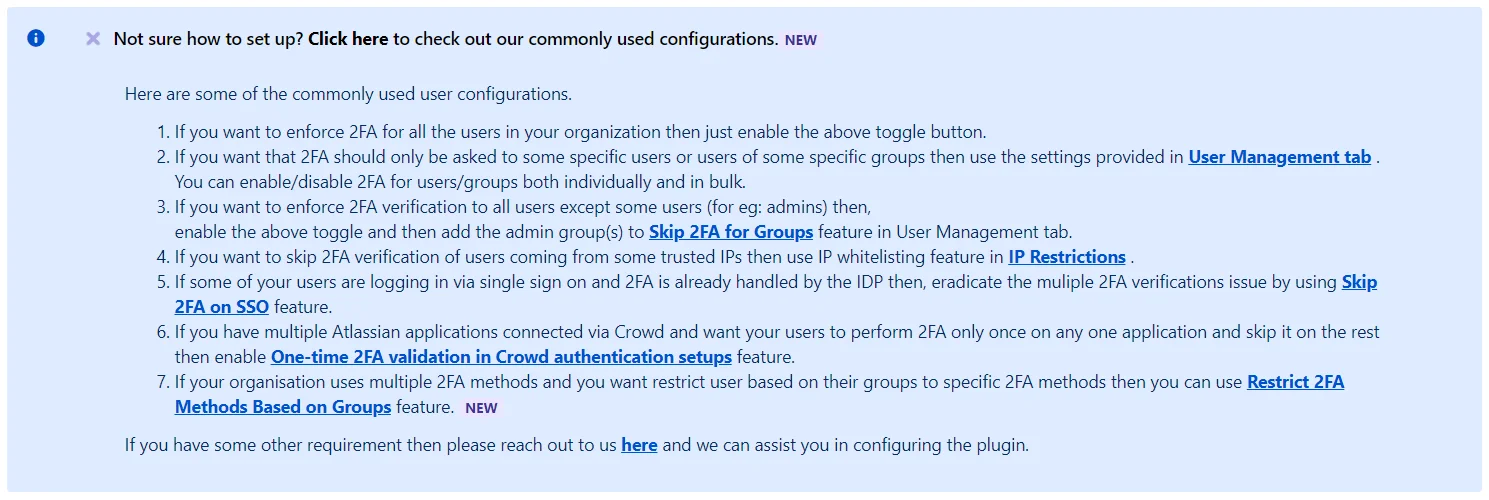
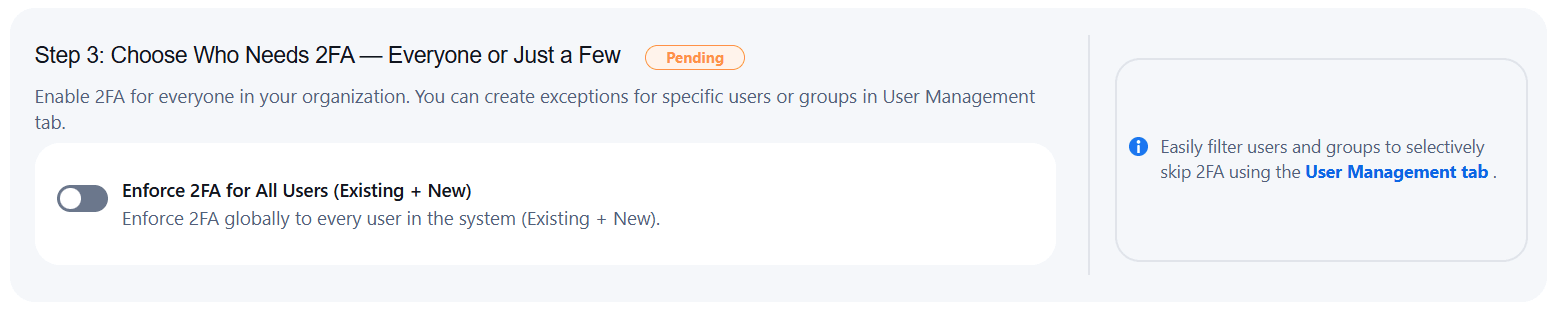
- Enable 2FA for All Users in Your Organization: Enable 2FA across your organization for enhanced security. You can create exceptions for specific users or groups in the User Management tab.
- Enforce 2FA for All Users (Existing + New): Apply 2FA globally to all users — both current and newly added — ensuring complete coverage and consistent protection.
- Tip: Use filters in the User Management tab to easily exclude selected users or groups from 2FA enforcement.
- You can customize the 2FA settings based on your requirements. Enable, disable, or skip 2FA for users or groups individually, in bulk, or based on their IP addresses.
Follow these steps to configure and enable the miniOrange 2FA app for your Confluence users:
Select Platforms
Choose where you want to enforce two-factor authentication. You can apply 2FA to specific platforms or actions based on your organization’s security needs.
Select Policies
Choose Who Needs 2FA — Everyone or Just a Few
Unique Use Cases

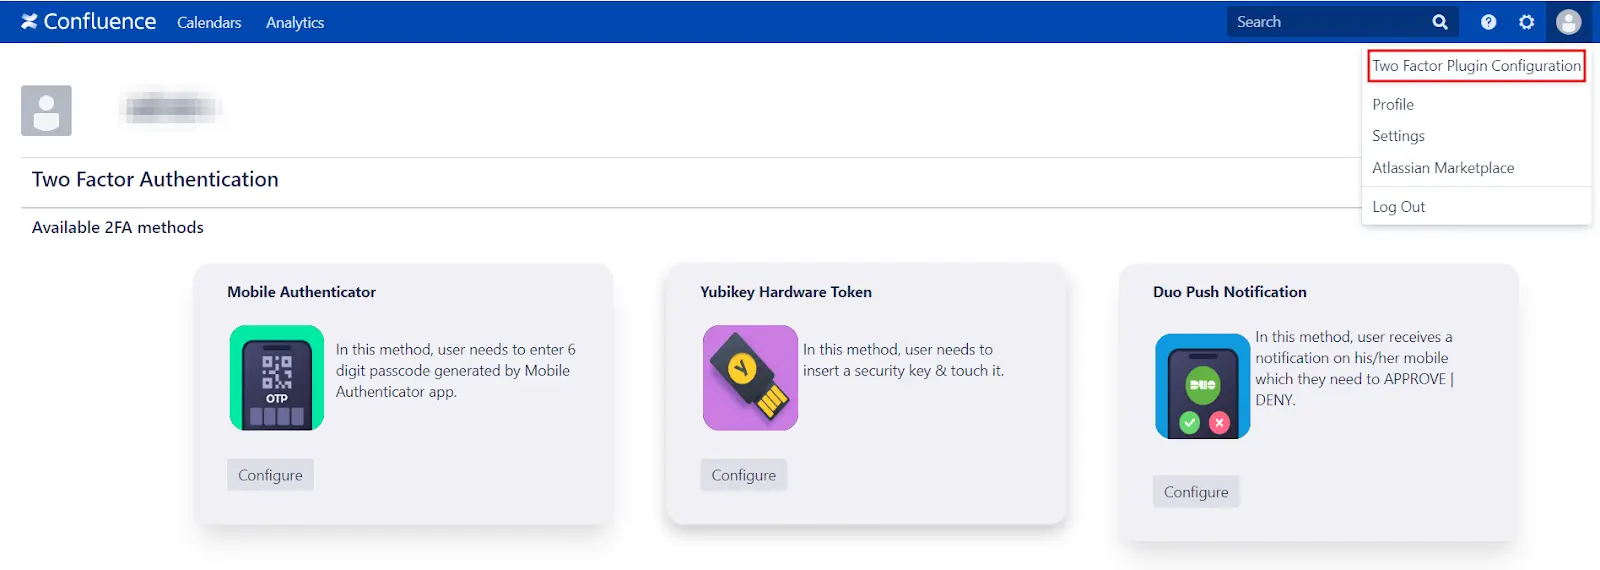
2: How the user can Configure the 2FA
Authentication Methods


3: Advanced Security Features
3.1 Security Settings:
a. 2FA Brute Force Protection:
Brute Force Configuration helps restrict access to your Confluence application after a specified number of invalid
2FA login attempts within a set period.
To enable this feature:
- Check the Enable Brute Force Protection for Confluence box.
- Set the number of invalid login attempts that will trigger a lockout.
- Define the duration for which the user will remain locked out and unable to access Confluence.

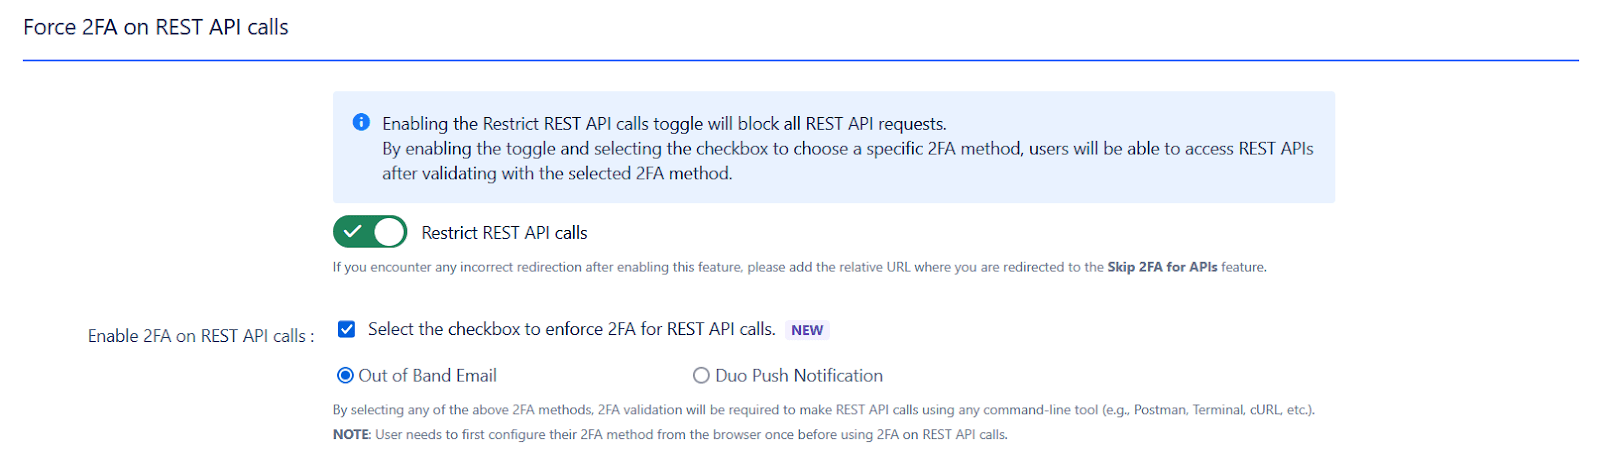
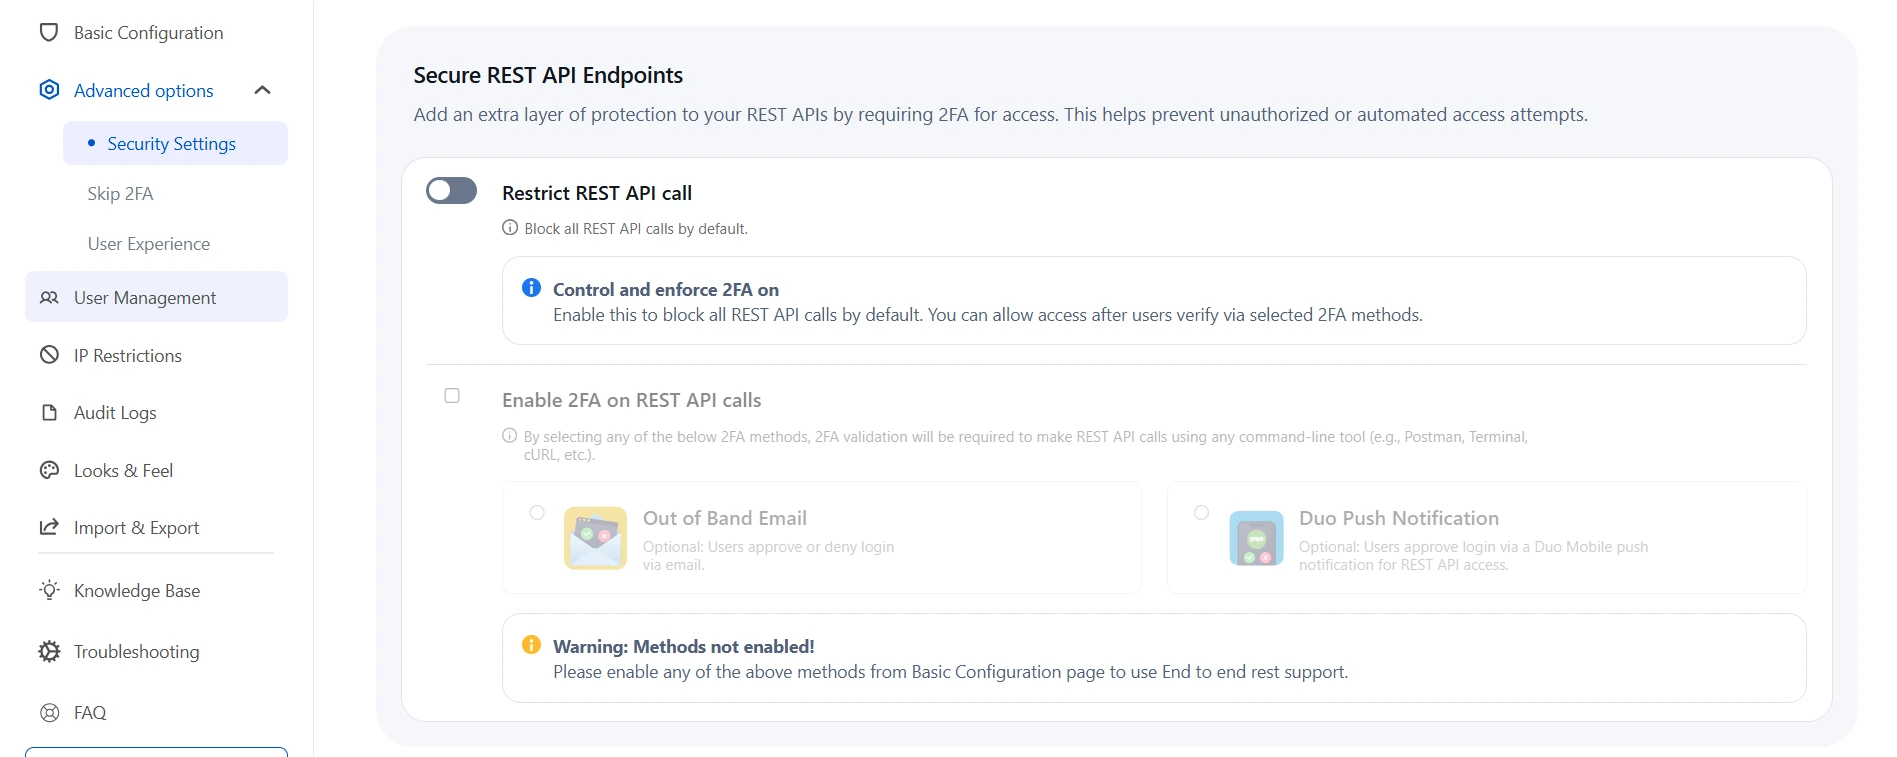
b. Secure REST API Endpoints:
This feature allows you to restrict all REST API calls and enforce Multi-Factor Authentication (MFA) for enhanced security. When the "Restrict REST API Calls" toggle is enabled, all API requests are blocked. To enforce 2FA, you must check the box and select a preferred verification method. Once enabled, every API request will require validation of the selected 2FA method, reducing the risk of unauthorized access and protecting sensitive data.
To enable this, admins need to:
- Navigate to the Advanced Options Tab.
- Click on Security Settings from the left panel.
- Under Secure REST API Endpoints, enable the toggle for Control and enforce 2FA on to restrict REST API calls and enforce two-factor authentication.
- To enable 2FA on REST API calls, select the Enable 2FA on REST API calls checkbox and choose your preferred 2FA method such as Out of Band Email or Duo Push Notification.
- Make sure the selected 2FA methods are enabled from the Basic Configuration page for proper REST API protection.
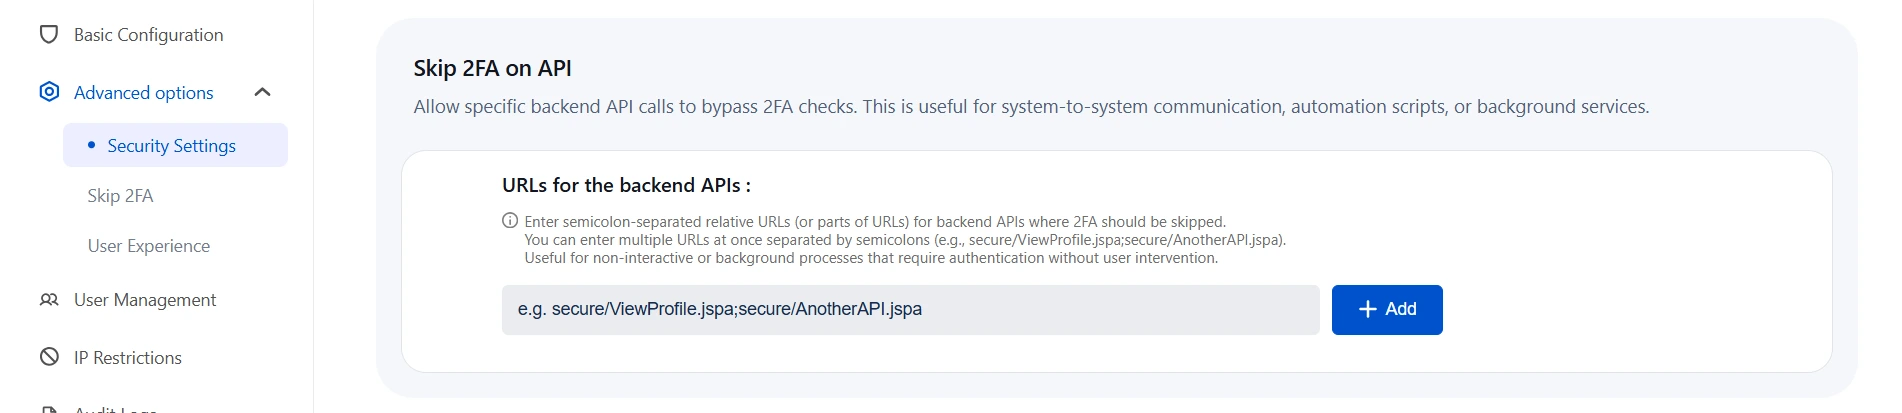
c. Skip 2FA on API:
- Navigate to the Advanced Options tab and go to Skip 2FA on API.
- This section allows you to bypass 2FA for specific backend API calls — useful for automation scripts, background services, or system-to-system communication.
- Enter the relative URLs (or parts of URLs) of the backend APIs where 2FA should be skipped.
- You can add multiple URLs separated by semicolons (e.g.,
secure/ViewProfile.jspa;secure/AnotherAPI.jspa). - Click the Add button to save your entries.
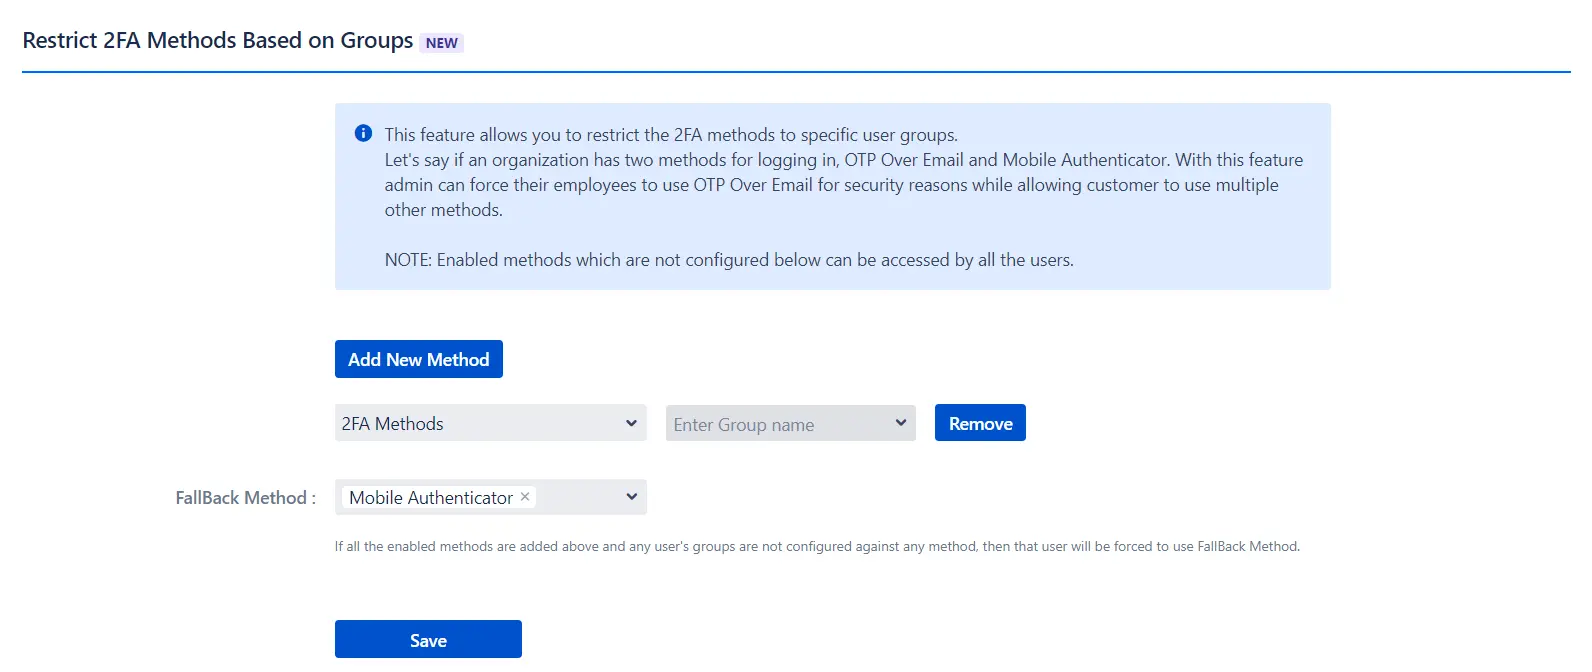
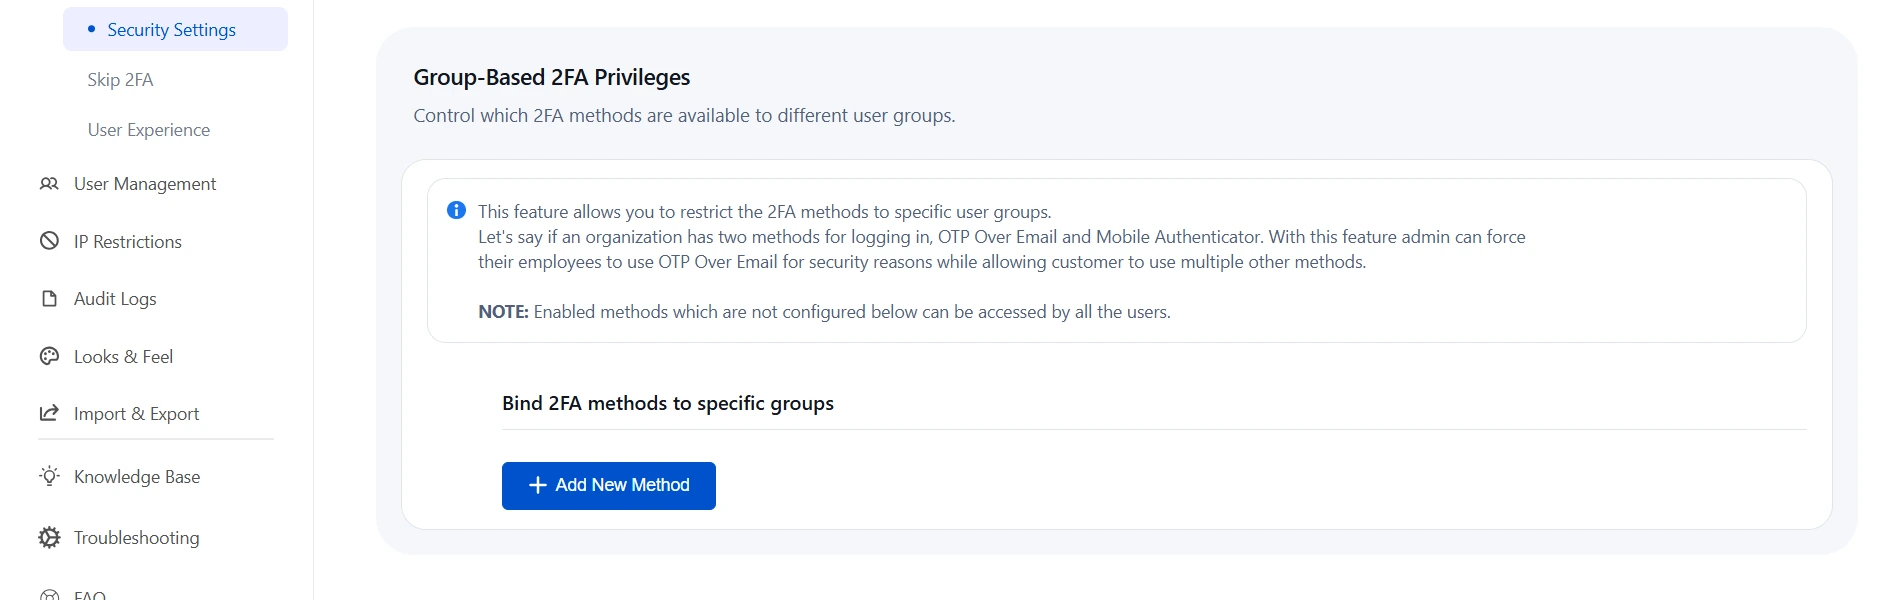
d. Group-Based 2FA Privileges:
- This feature allows administrators to limit specific 2FA methods to selected user groups.
- For example, an organization might offer two login methods — OTP Over Email and Mobile Authenticator. Admins can require employees to use OTP Over Email for enhanced security while allowing customers to choose their preferred method.
- Navigate to the Advanced Options tab, click on Security Settings from the left panel, and scroll down to the Restrict 2FA Methods Based on Groups section.
- Click on the Add New Method button.
- Specify the 2FA method and the user group for which it should be restricted.
- Select a Fallback Method for the group to use if no specific method is configured.
3.2 Skip 2FA:
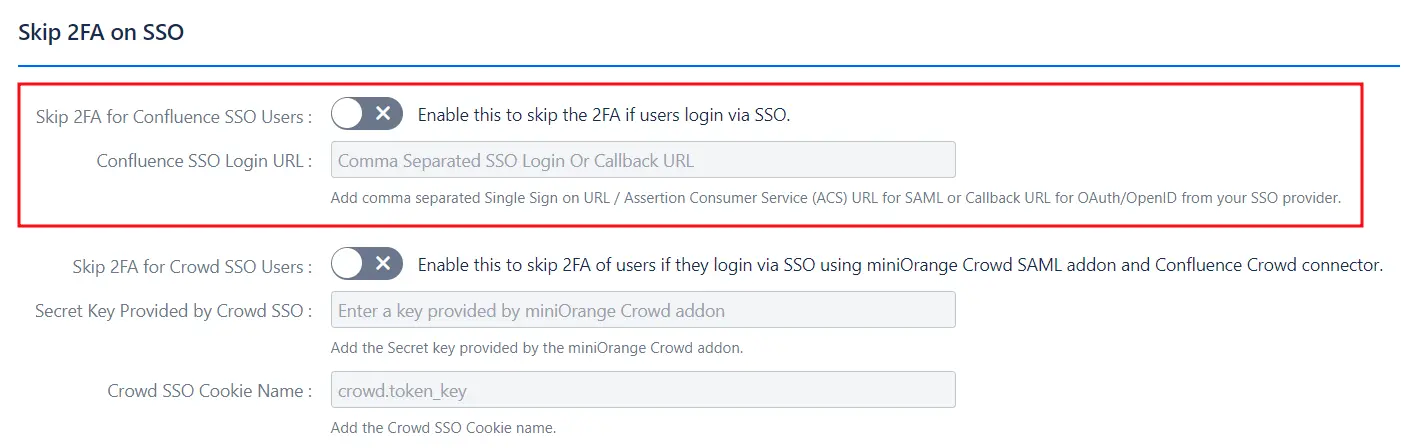
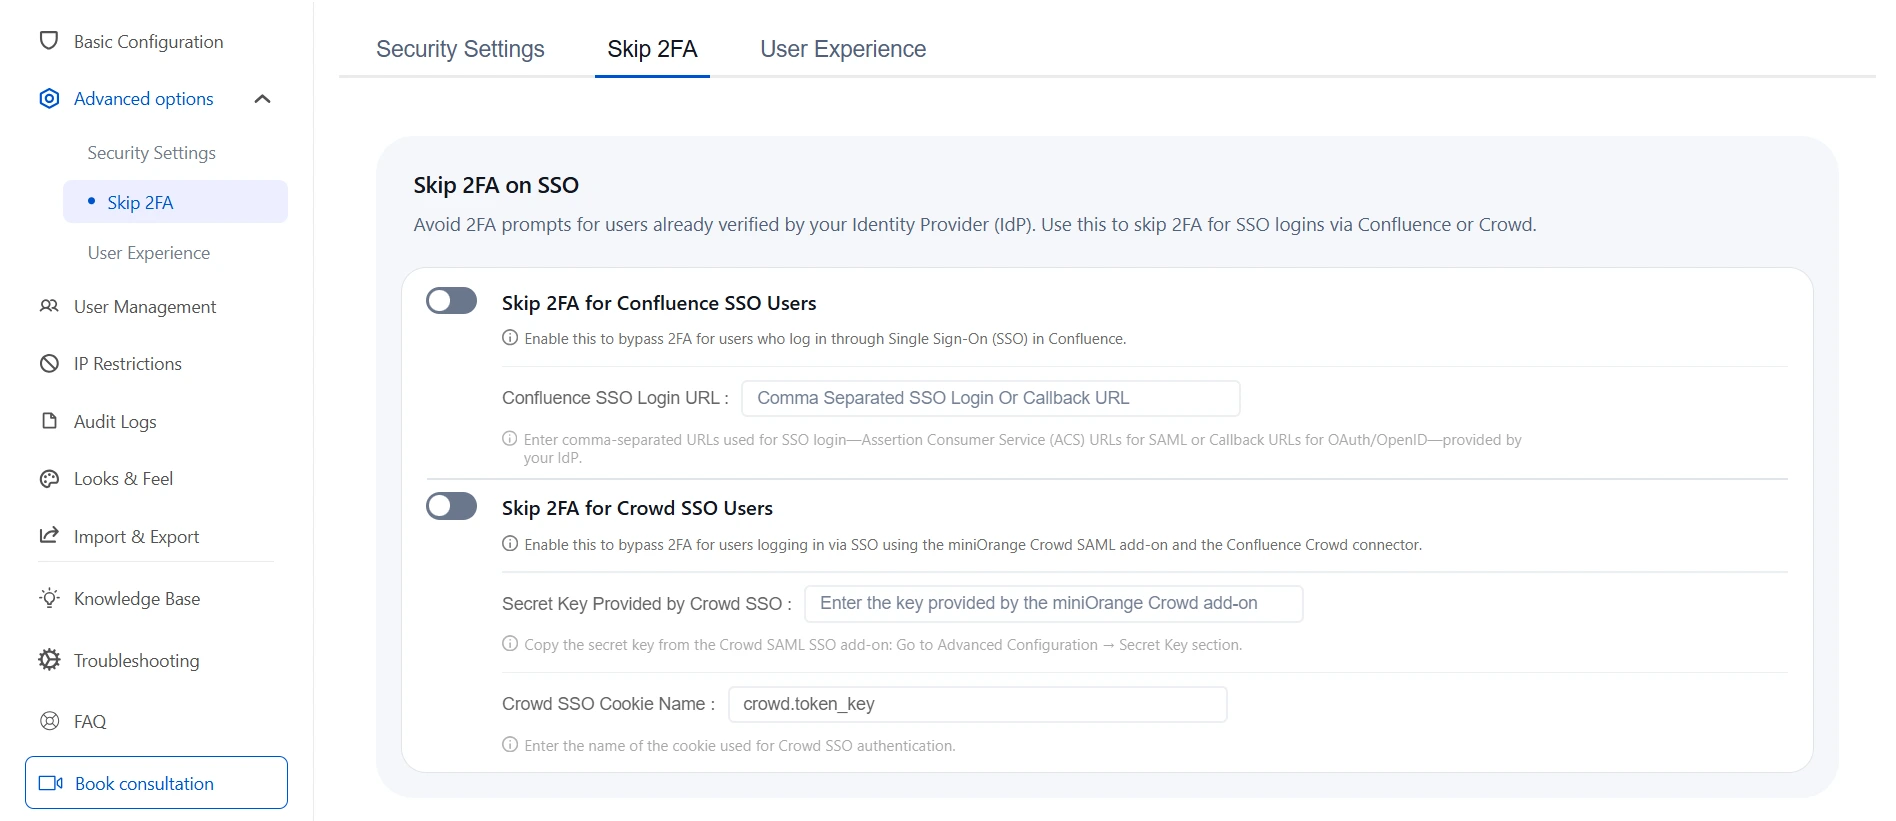
a. Skip 2FA on SSO:
- This feature allows users to skip 2FA if they log in via Single Sign-On (SSO) with any Identity Provider (IdP).
- To enable this for Confluence SSO users:
- Add the Single Sign-On URL for SAML.
- Add the Callback URL for OAuth/OpenID from the SSO Provider.
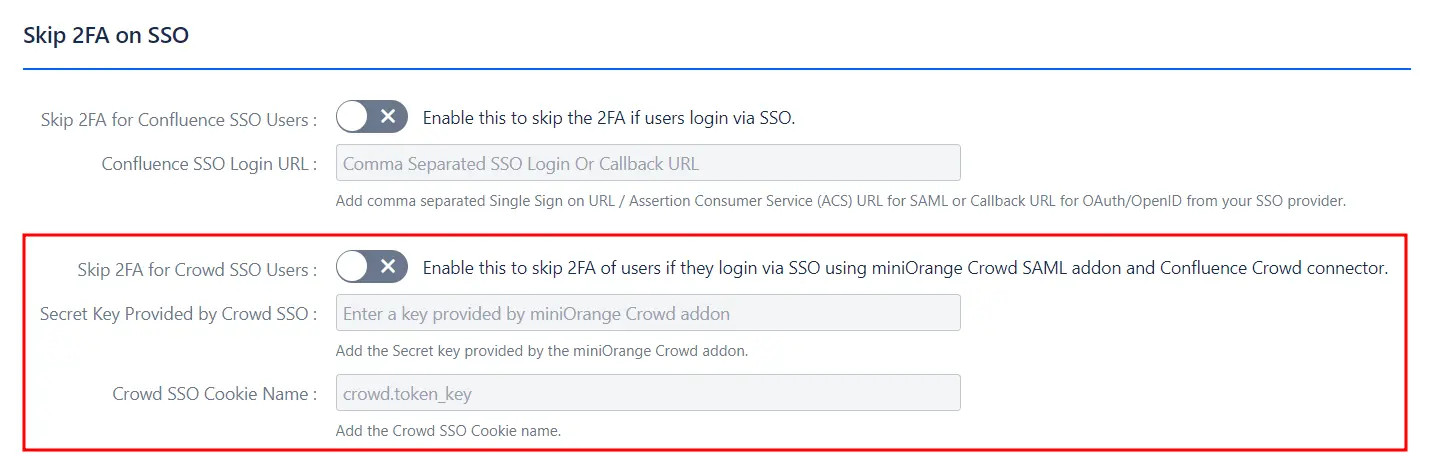
- This feature also allows users to skip 2FA when logging in via SSO using the miniOrange Crowd SAML add-on and the Confluence Crowd connector.
- To enable this for Crowd SSO users:
- Add the Secret Key provided by the miniOrange Crowd add-on.
- Add the Crowd SSO Cookie Name.
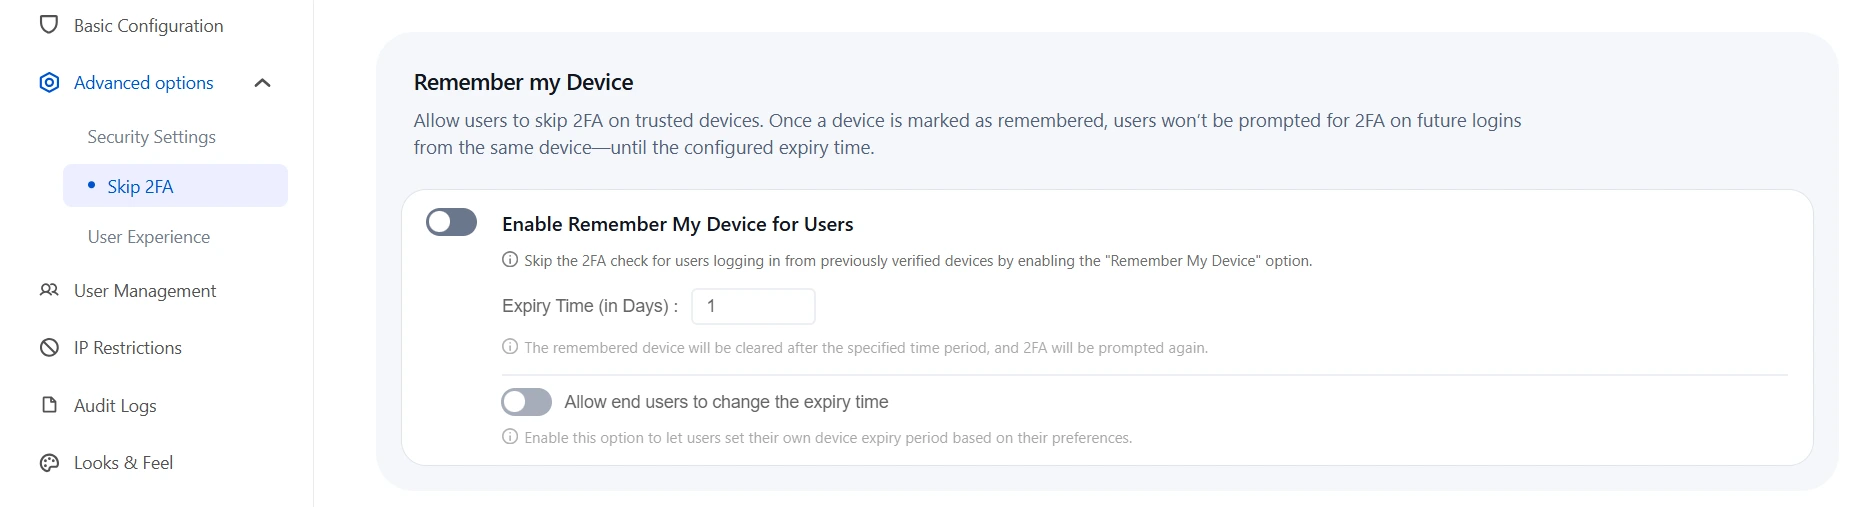
b. Remember My Device:
- This feature allows users to skip the 2FA check when logging in from the same device.
- To enable this feature:
- Check the Remember My Device box.
- Enter the number of days for which the device should be remembered in the Expiry Time (in Days) field.
- Optionally, allow end users to modify their own expiry times.
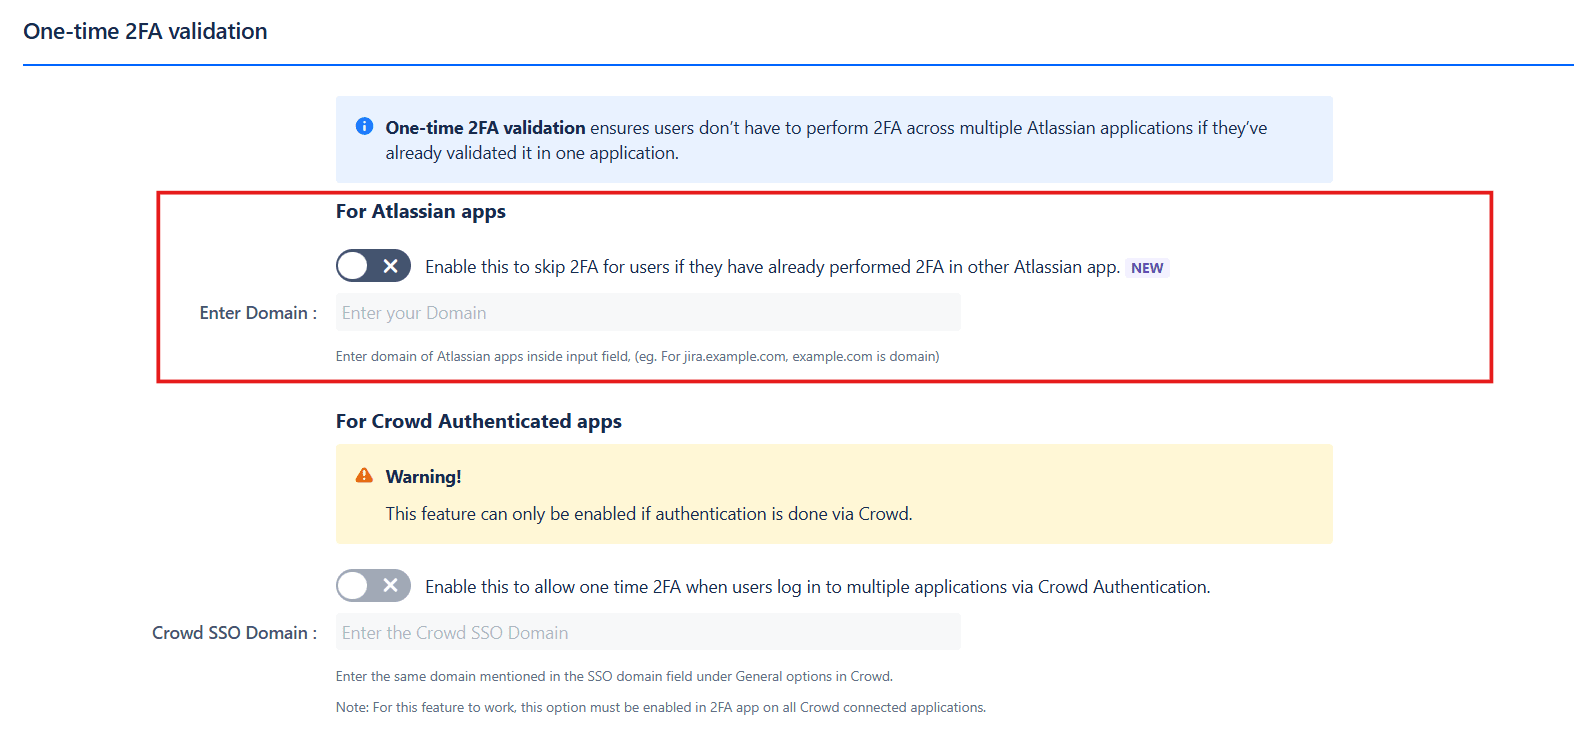
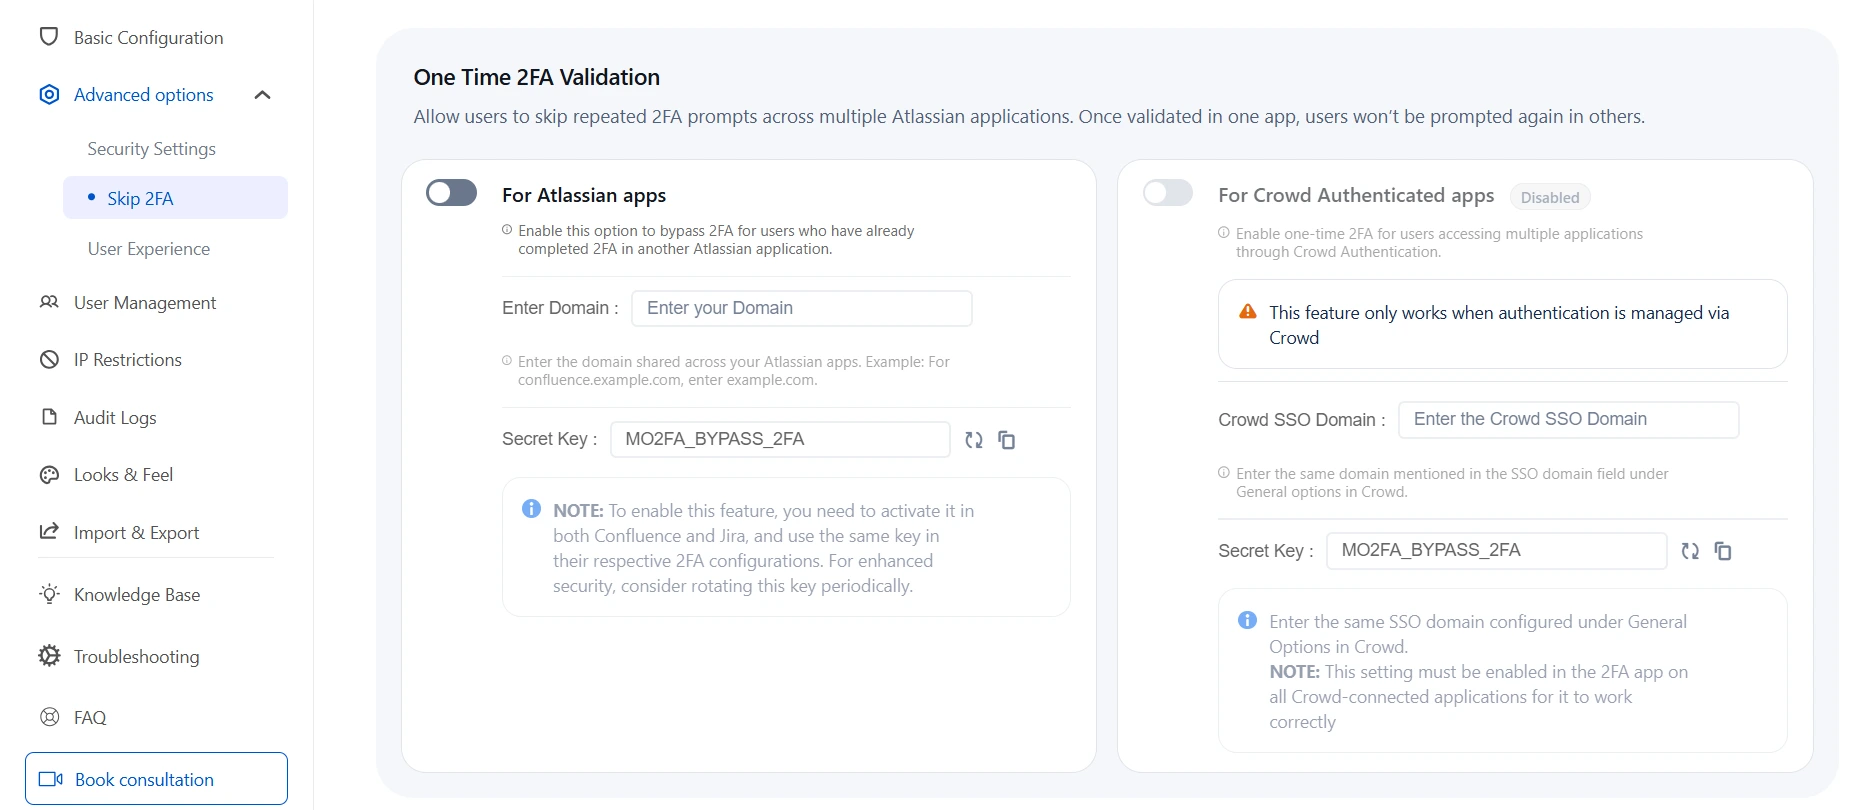
c. One-Time 2FA Validation:
1. For Atlassian Apps:
- This feature allows users to bypass 2FA in Atlassian applications after successful 2FA validation in any one of the applications.
- To enable this feature:
- Enable the toggle.
- Enter the parent domain and configure the secret key.
- Ensure the same configuration is applied across all Atlassian applications where you want this feature enabled.
- Once 2FA is validated in one application, it will be skipped in other Atlassian applications.
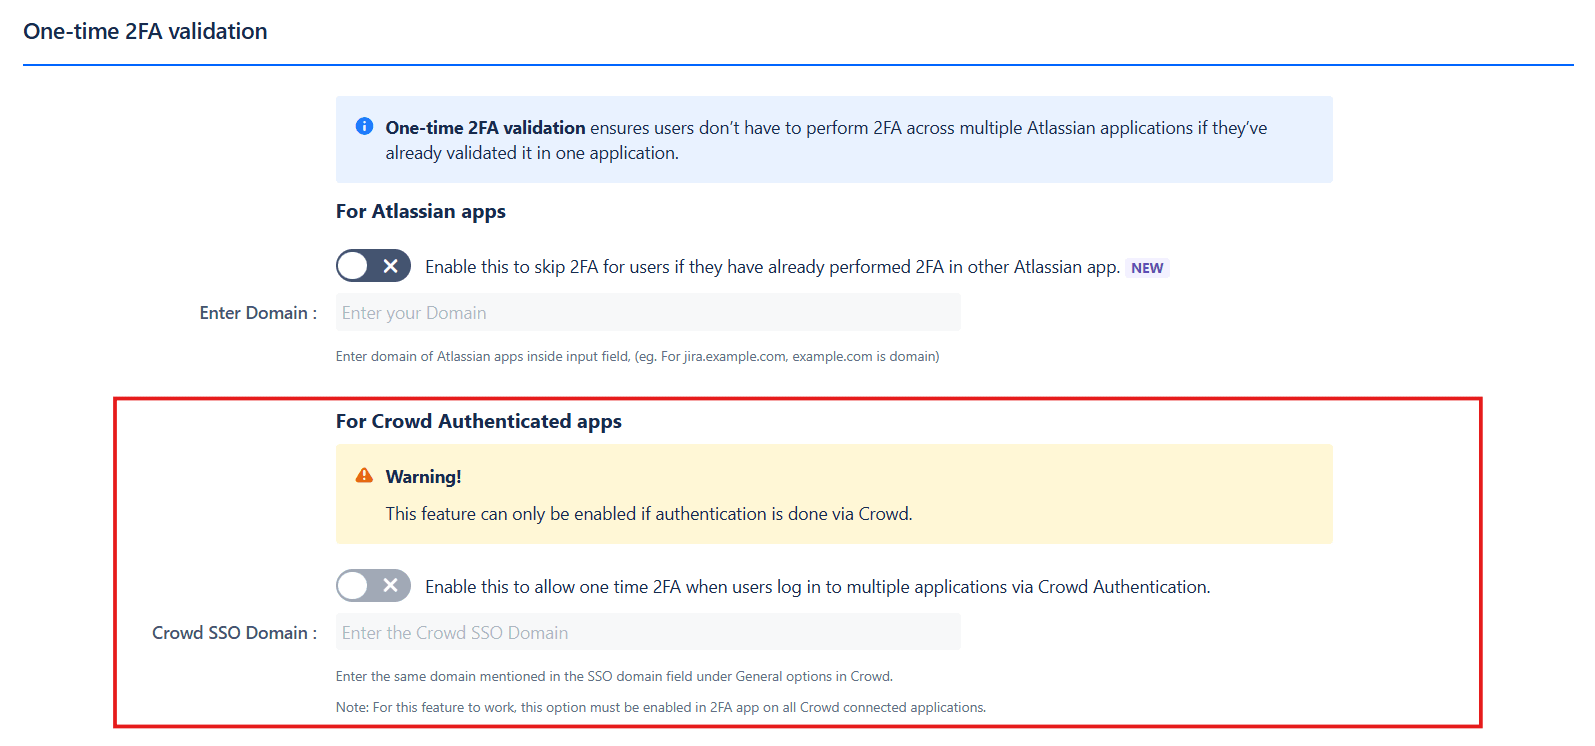
2. One-Time 2FA Validation (For Crowd Authenticated Apps):
- This feature allows users to skip 2FA in Crowd-connected applications after successful 2FA validation in any one Atlassian application.
- To enable this feature:
- Enable the toggle in the Crowd-connected applications where you want to bypass 2FA.
- Users will need to validate 2FA in one application, and it will be skipped in other connected applications.
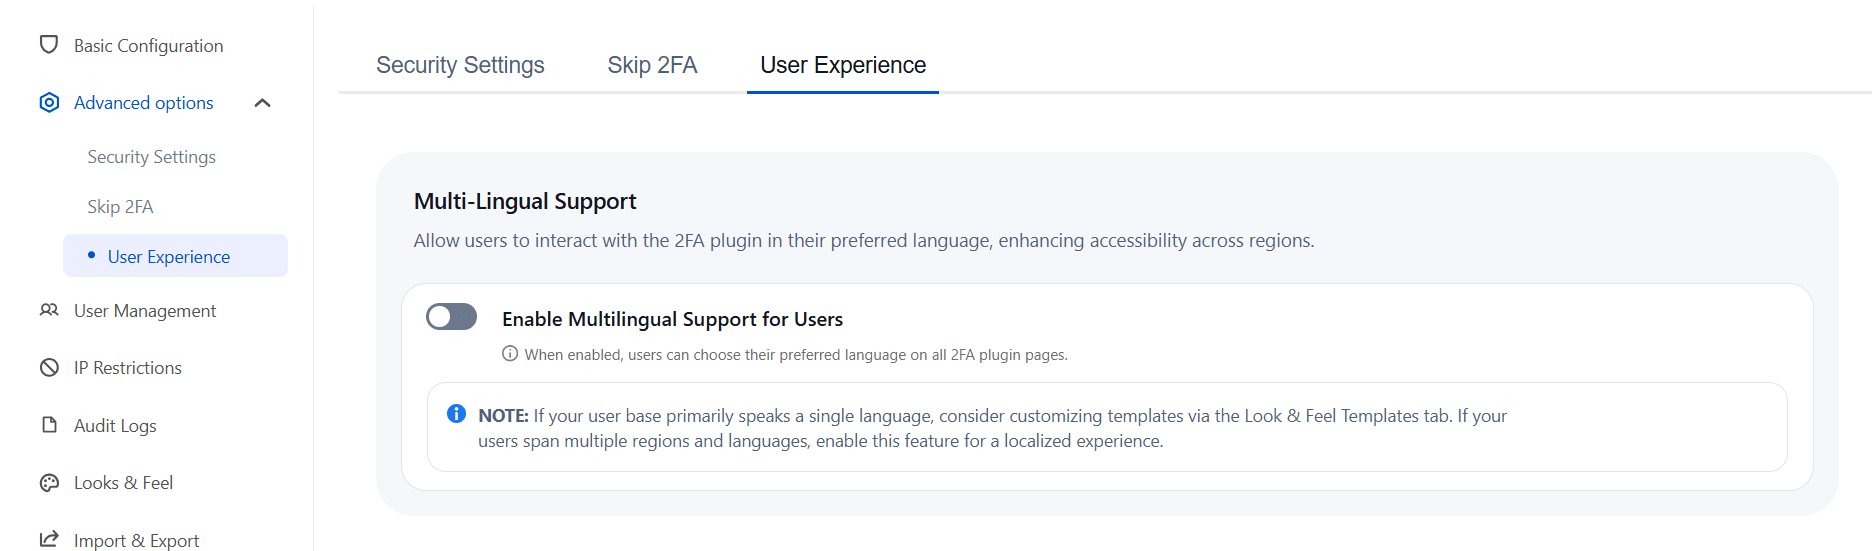
3.3 User Experience:
a. Multi-Lingual Support:
- With the Multilingual Support feature, users can choose their preferred language on all 2FA app pages, enhancing accessibility for diverse user bases. This is especially useful if your end users are from various regions and speak different languages, ensuring a smooth experience for everyone.
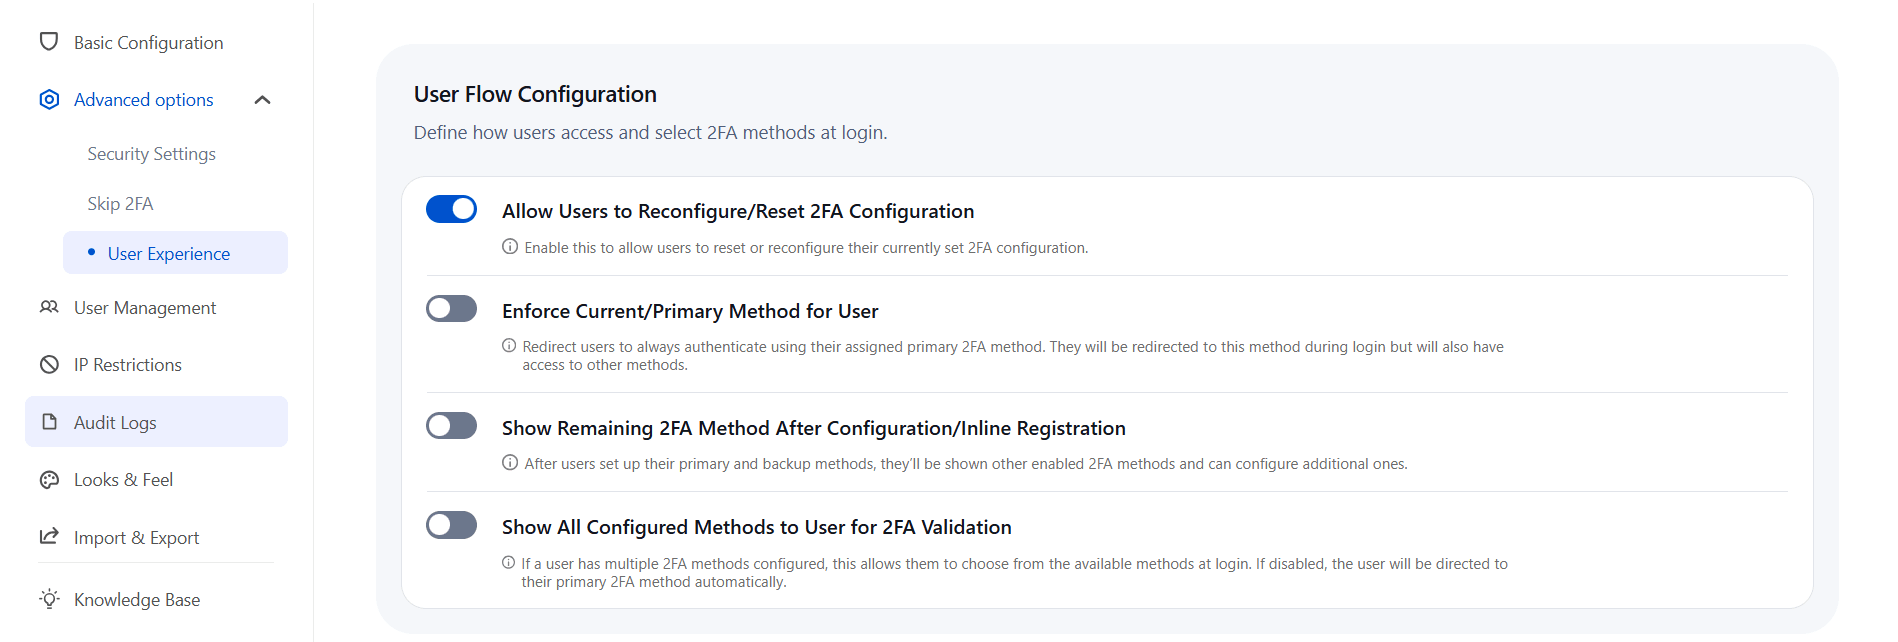
b. User Flow Configuration:
- Allow Users to Reconfigure or Reset 2FA: Enable this option to allow users to reset or modify their existing 2FA setup whenever needed.
- Enforce Primary 2FA Method for Users: Redirect users to always authenticate using their assigned primary 2FA method during login, while still allowing access to other configured methods.
- Show Remaining 2FA Methods After Setup/Inline Registration: After users configure their primary and backup methods, this option displays other available 2FA methods that can be added.
- Show All Configured Methods to User for 2FA Validation: Allows users with multiple 2FA methods configured to select their preferred method at login. If disabled, users are automatically directed to their primary method.
c. Select URL Type for Redirection:
- Enable Redirection based on your Absolute URL: When this option is enabled, the plugin performs redirection using your domain name and port. If disabled, redirection will rely on your configured base URL.

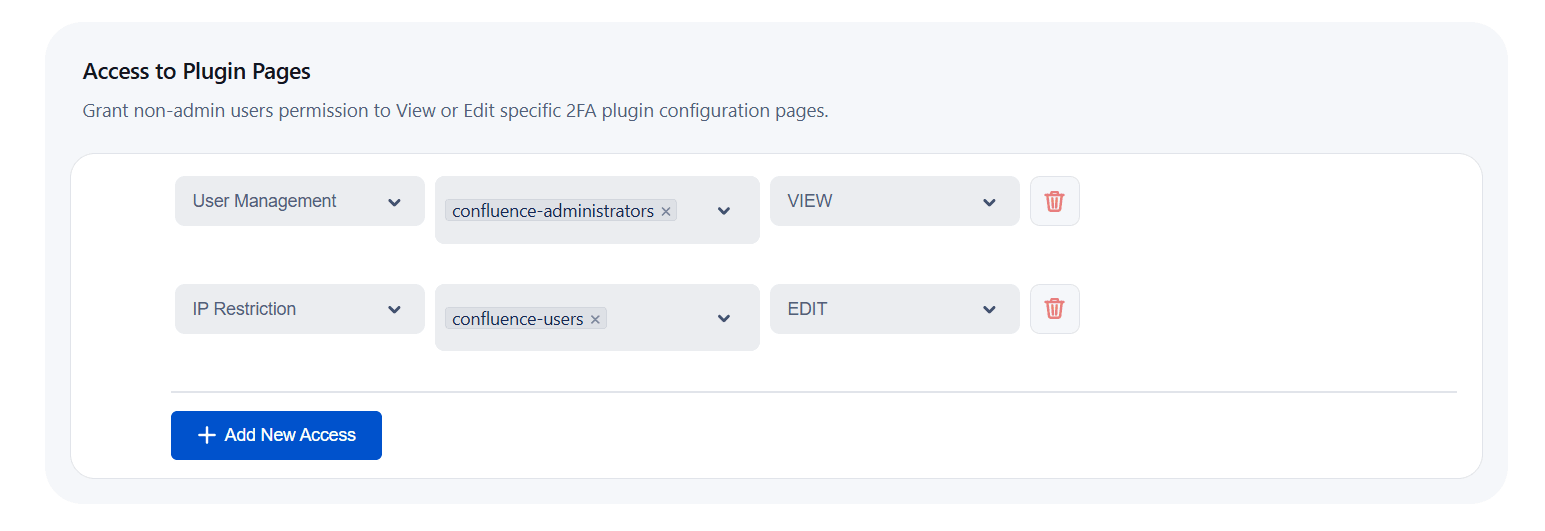
d. Access to Plugin Pages:
- By default, only administrators have access to the plugin pages. This feature allows you to define and customize access permissions for specific user groups, granting them the ability to view or manage designated plugin pages.
- Navigate to the Advanced Options tab under User Experience and scroll down to the Access to Plugin Pages section.
- Select the desired Page, Group Name, and Access Type from their respective dropdown menus.
- To add additional access permissions, click on Add New Access and repeat the process.
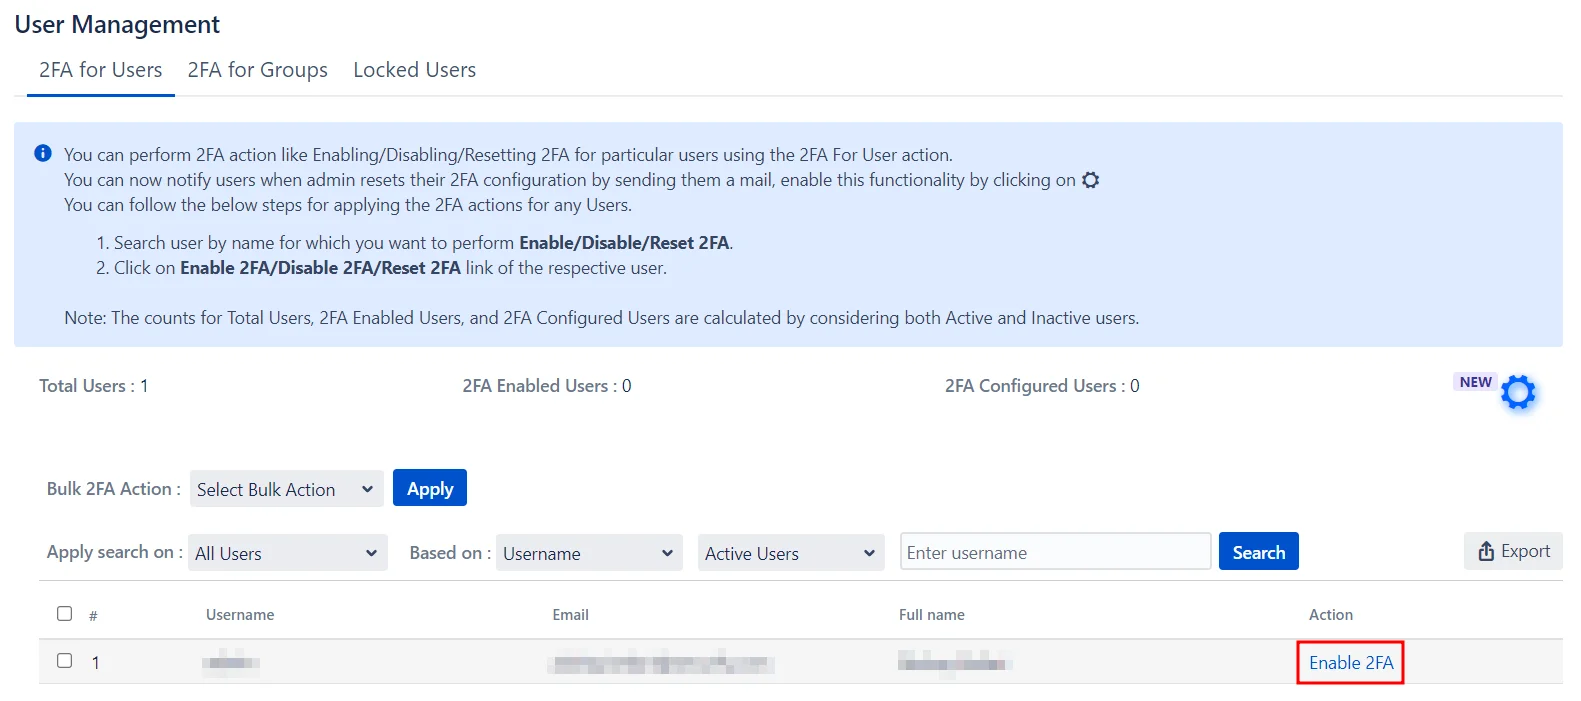
4: User Management
The miniOrange 2FA app has provisions for efficiently managing 2FA settings for individual users, multiple users,
single groups, and multiple groups.
Let's take a look at how you can manage 2FA for your users and groups.
Enabling 2FA for Single Users:
- Search for the user by their name in the search bar.
- Next, select the desired action from the Action column.
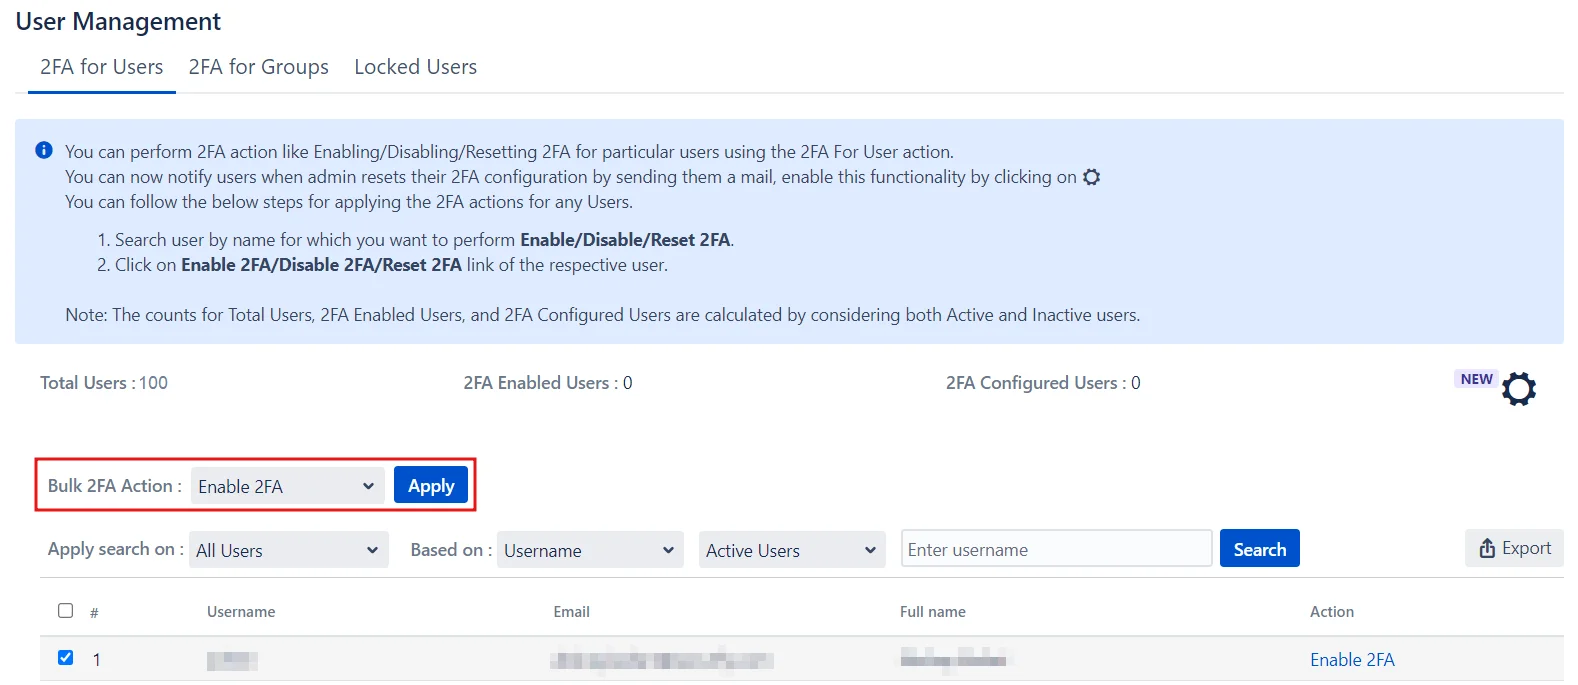
Enabling 2FA for multiple Users:
- Select the users from the list.
- Choose the desired action from the Bulk 2FA Action drop-down menu.
- Click Apply.
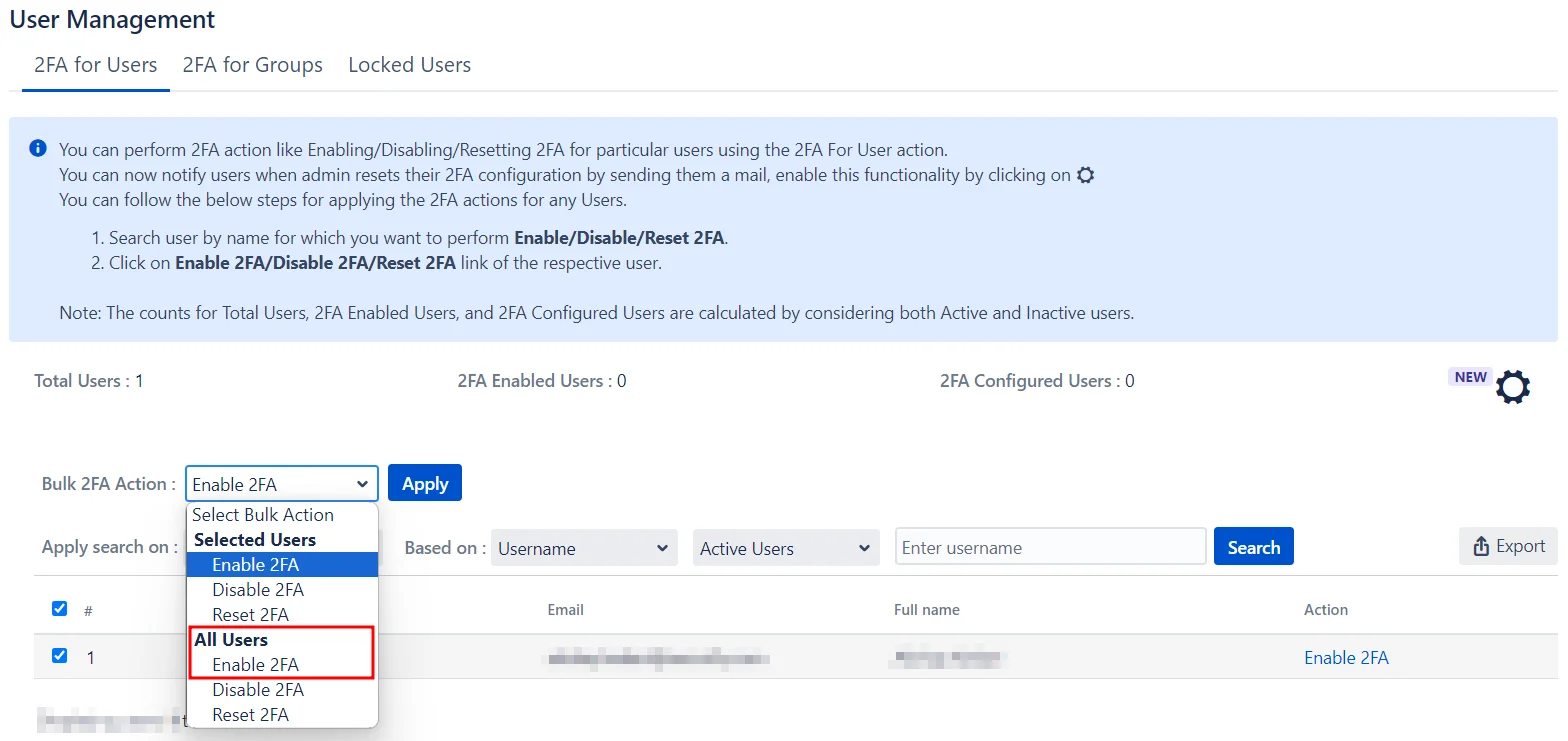
Enabling 2FA for All Users:
- Go to the Bulk 2FA Action drop-down menu under the All Users section.
- Select the required action.
- Click Apply.
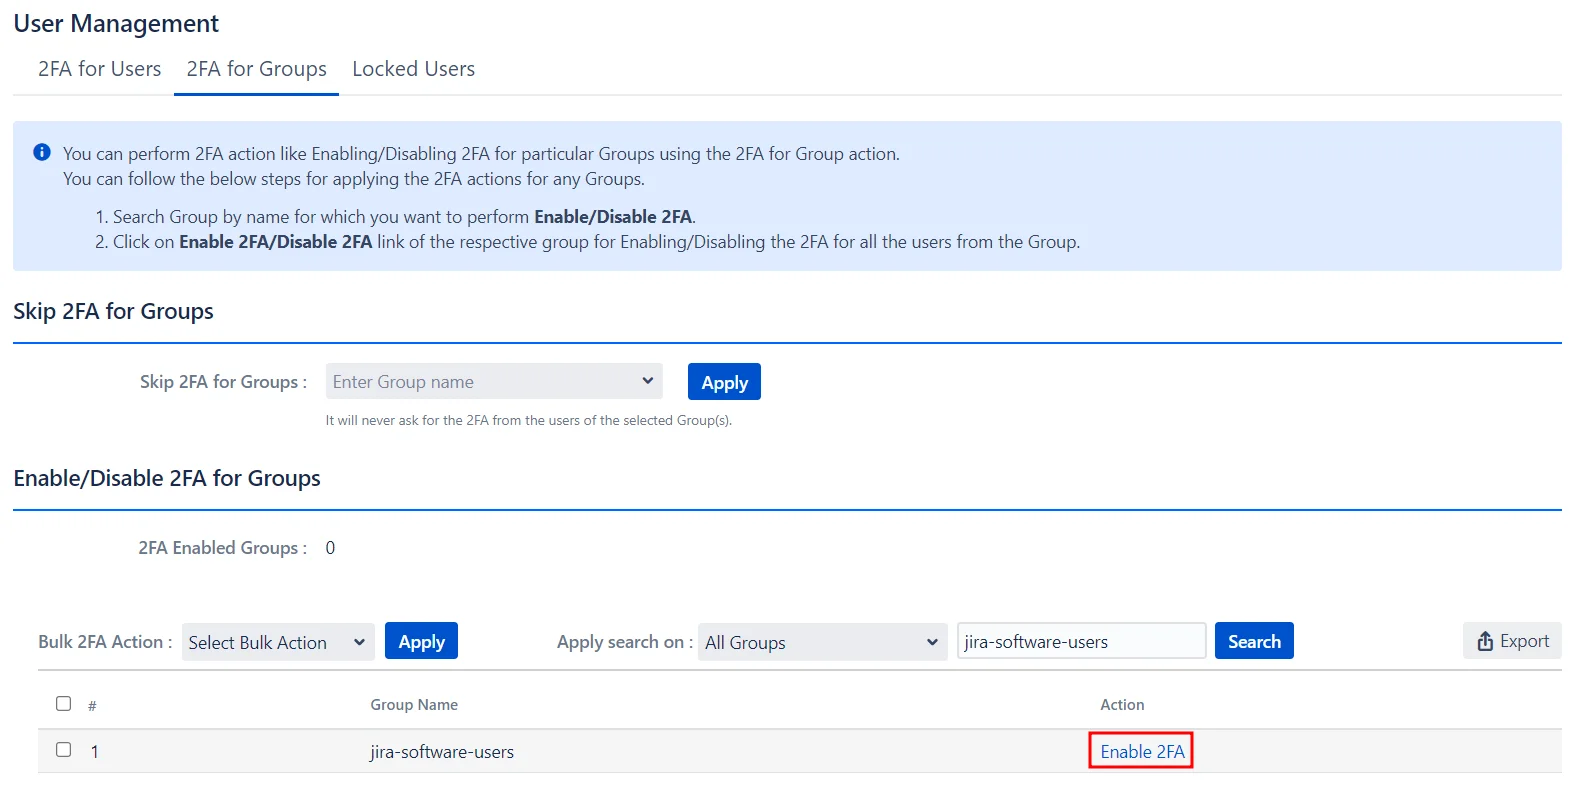
Enabling 2FA for Single Groups:
- Search for the group by its name in the search bar.
- Next, select the desired action from the Action column.
Enabling 2FA for Multiple Groups:
- Select the groups from the list.
- Choose the desired action from the Bulk 2FA Action drop-down menu.
- Click Apply.
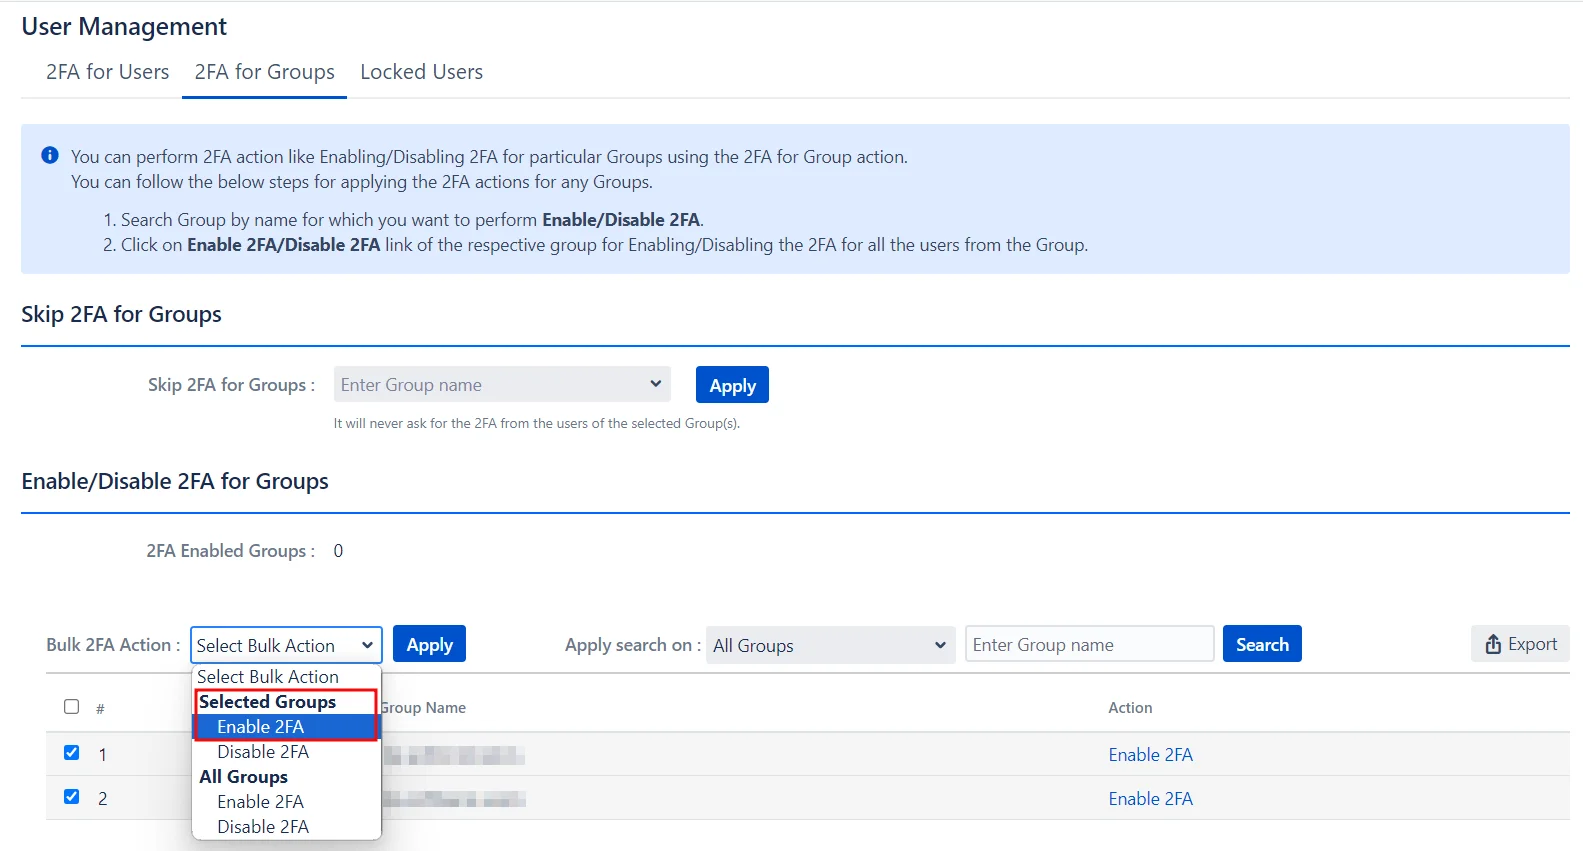
Enabling 2FA for All Groups:
- Go to the Bulk 2FA Action drop-down menu under the All Groups section.
- Select the required action.
- Click Apply.

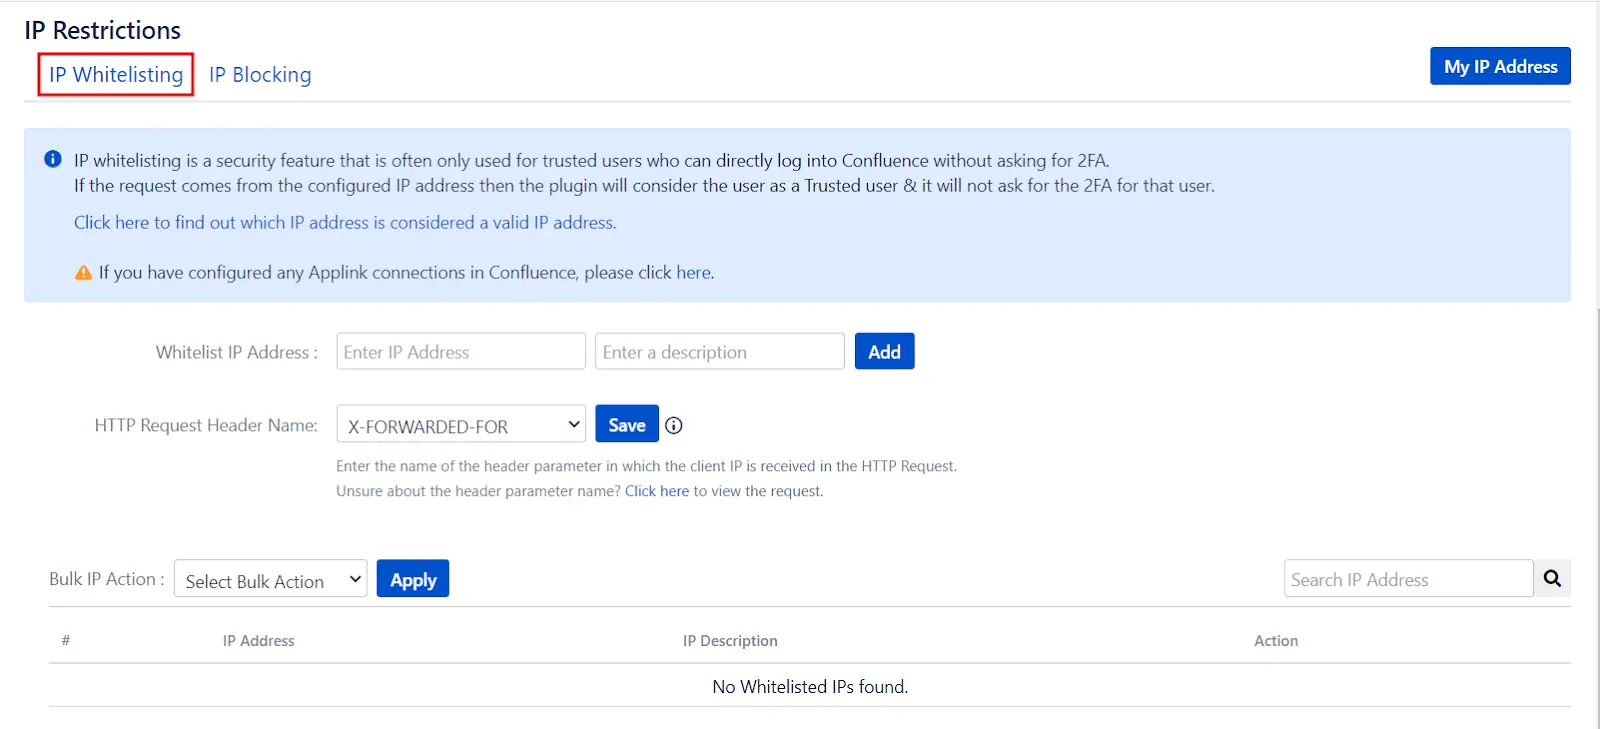
5: IP Restrictions
- IP Whitelisting is a security feature that allows trusted users to log into Confluence without 2FA. To enable IP Whitelisting, enter the trusted IP addresses in the Whitelist IP Address textbox and click Add.
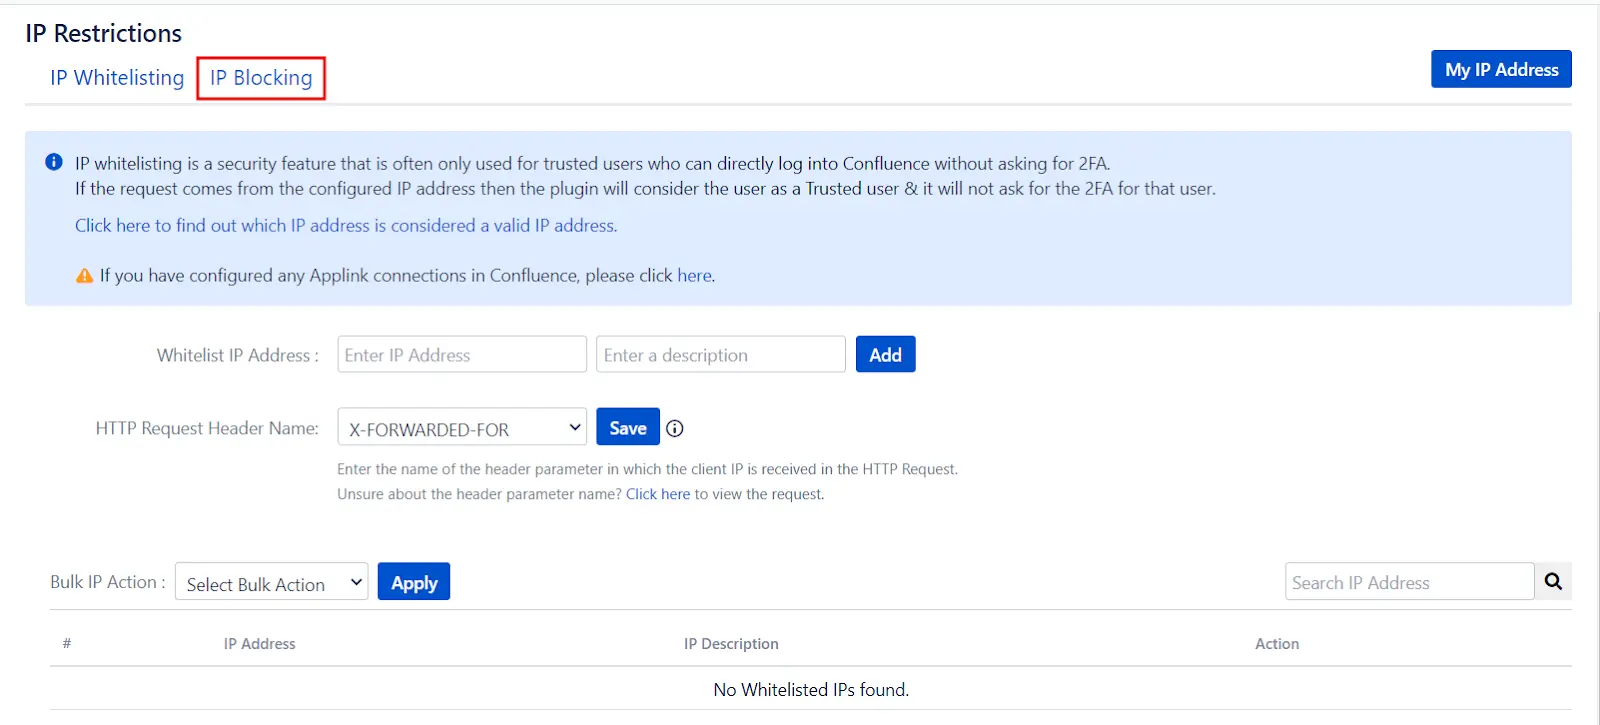
- IP Blocking is an access control mechanism that denies Confluence access to specified IP addresses. Enter the IP addresses you want to block in the Blacklist IP Address textbox, and customize the message for blocked users in the Blocked User Message textbox. Click Save once you’re done to apply these settings.
IP Whitelisting:
IP Blocking:
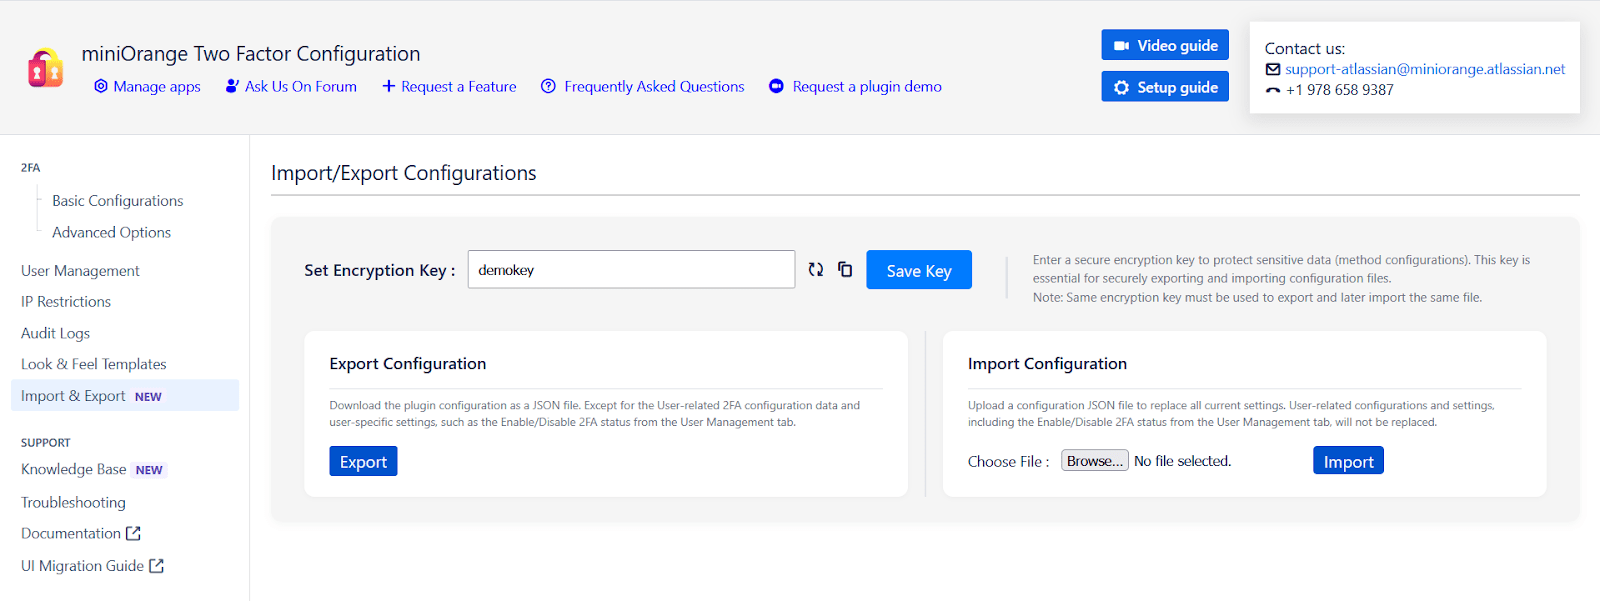
6: Import & Export
The Import & Export tab allows administrators to easily back up, transfer, and restore app configurations across instances. This feature simplifies environment setup and speeds up the troubleshooting process during support.
Use Cases
Here are a few common scenarios where the Import & Export feature proves especially useful:
- Environment Migration (Test ➝ Production): Seamlessly moving configurations from your Test instance to your Production instance without manually reconfiguring the app.
- Support & Troubleshooting: If you encounter any issues with the app, simply export the configuration file and share it with the support team to help diagnose and resolve the problem efficiently.
Important: Encryption Key Requirement
Import & Export Options
| Option | Description |
|---|---|
| Download App Configuration | Exports plugin settings to an encrypted .json file using the provided encryption key. |
| Import App Configuration | Imports a previously exported .json file. The correct encryption key must be entered to decrypt and apply the settings. |
7: Reconfigure 2FA
- End-users can reconfigure their 2FA by navigating to User Profile → Two-factor Plugin Authentication, and accessing the Configure Two Factor (2FA) window. Once inside, they can click on Reset to reconfigure the 2FA method. Users can also configure additional 2FA methods from this window if they haven't done so previously.
Additional Resources
Did this page help you?
