Step 1: Set Up WSO2 as Identity Provider
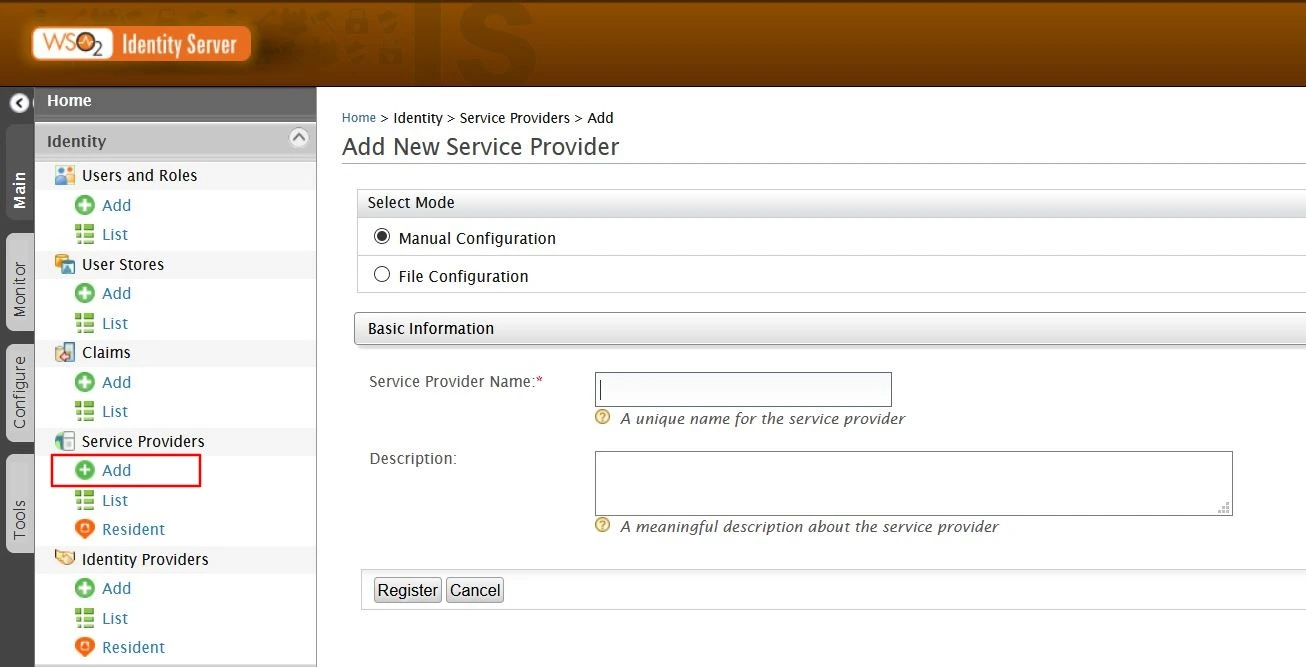
- Login to your WSO2 admin console.
- Select Add under the Service Providers tab.
- Select mode as Manual Configuration.
- Enter the Service Provider Name and click on Register button.
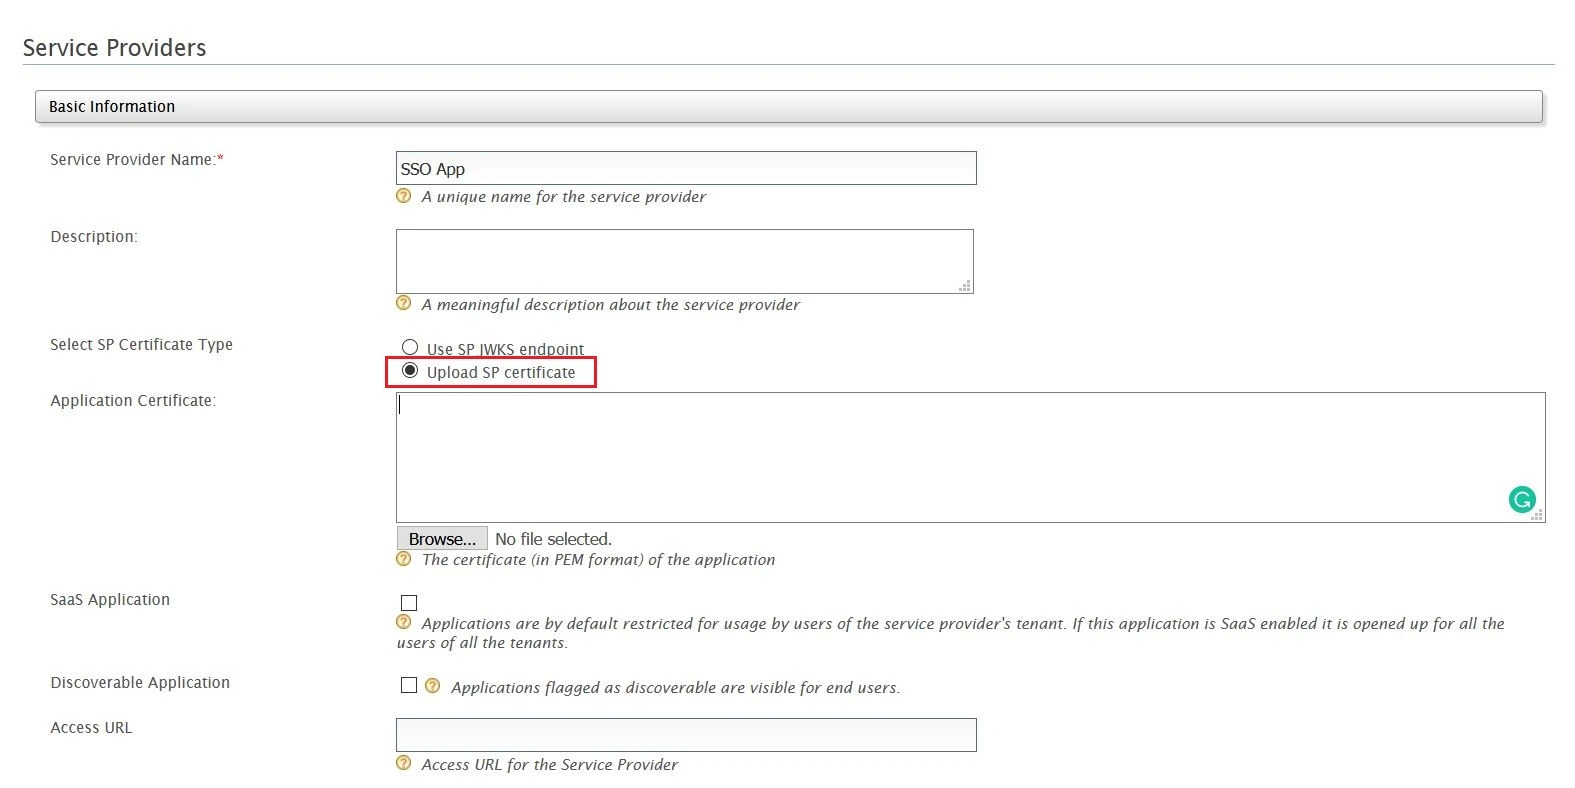
- Select Upload SP certificate option under SP Certificate Type.
- Copy the certificate from plugin and provide it into Application Certificate field.
- You can also download the certificate file and upload it through Browse file option.
- Under Claim Configuration, select Use Local Claim Dialect.
- For Requested Claims, add http://wso2.org/claims/emailaddress as a claim URI.
- Set Subject Claim URI to http://wso2.org/claims/nickname.
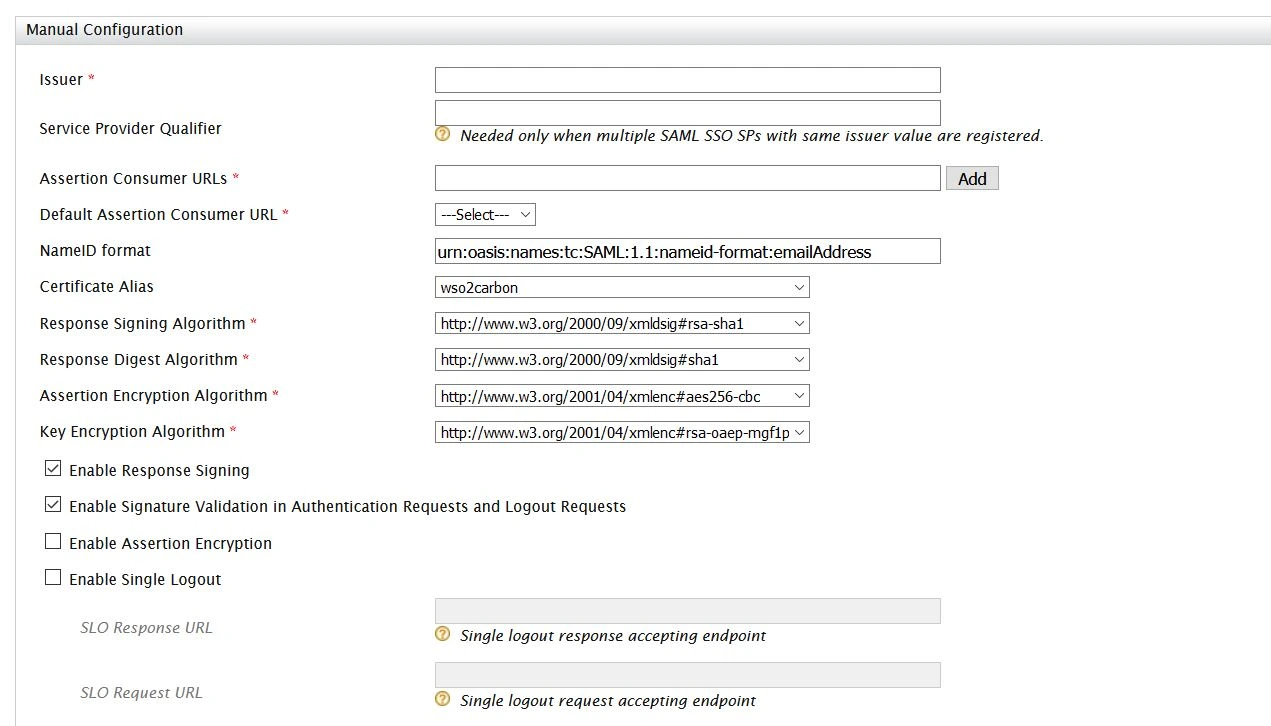
- Under Inbound Authentication Configuration > SAML2 Web SSO Configuration, click Configure.
- Enter Issuer value as provided under the Service Provider Info tab of the plugin.
- Enter Assertion Consumer URL (ACS) as provided under Service Provider Info tab and click on Add.
- Check Enable Response Signing.
- Check the Enable Attribute Profile and include attributes in the response always.
- Check the Enable Audience Restriction.
- Enter the Audience URL value provided under Service Provider Info tab of plugin and click on Add.
- Check the Enable Recipient Validation. Enter the Recipient URL value provided under Service Provider Info tab of plugin and click on Add.
- Click on Download IDP Metadata button save the IDP metadata file.
- Click on Register to save the configuration.
- Click on Update on Service Providers page to save the configuration.
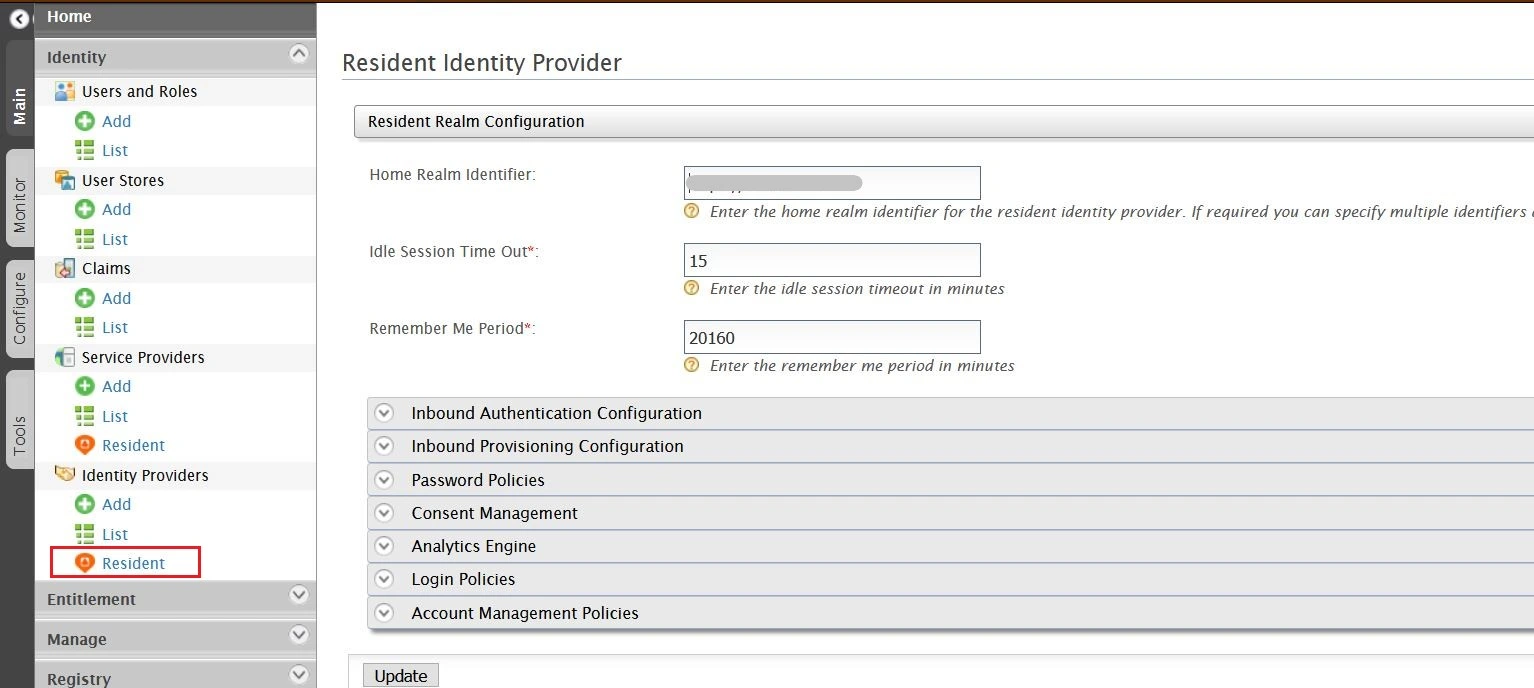
- Select Resident under Identity Providers tab from the menu.
- Enter Home Realm Identifier value that you want (usually your WSO2 server address).
- Click on Update to save the changes.