Company-Owned Device Enrollment
Company-owned Android devices are typically enrolled in Fully Managed (Device Owner) mode, allowing the organization to have complete administrative control over the device.
This enrollment method is recommended for corporate devices that are issued to employees for work purposes. With Fully Managed enrollment, IT administrators can enforce security policies, deploy applications, configure Wi-Fi and VPN settings, and manage the entire device lifecycle from the UEM/MDM console.
Prerequisite
Step 1: Configure enrollment in the UEM console
- In the UEM admin console, go to Manage Devices → Devices → Android and click Enroll Android Device.
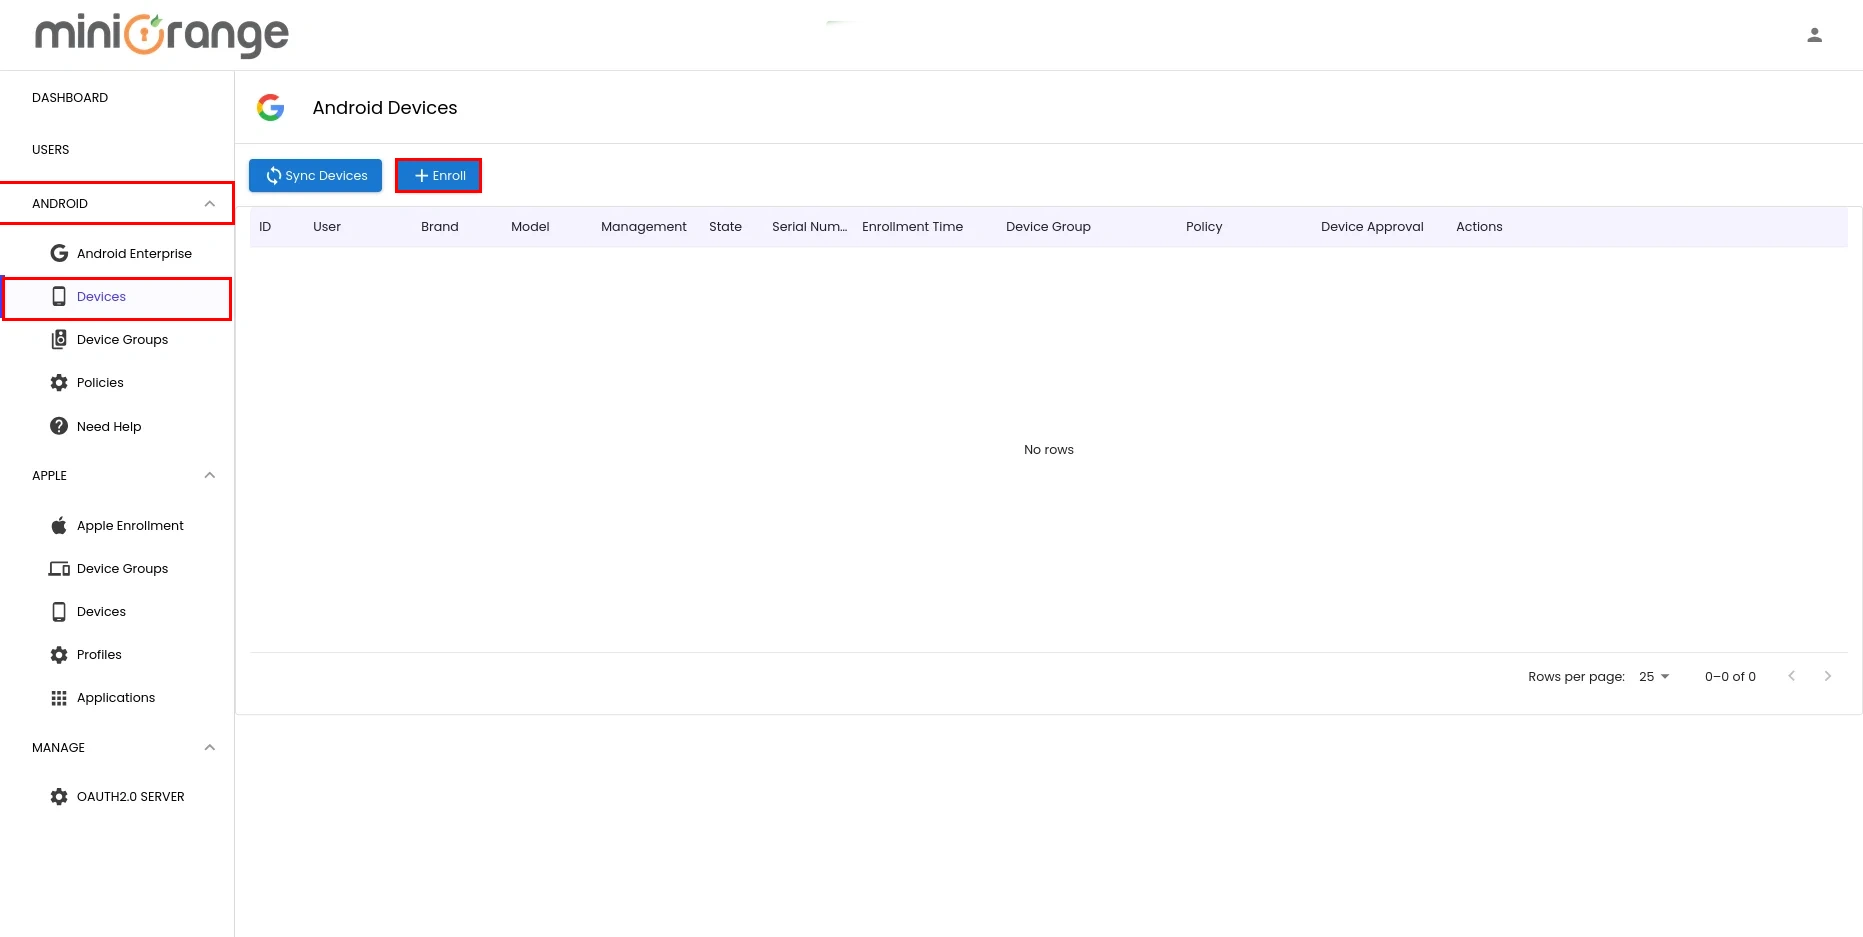
- In the Enroll Android Device panel, configure the following details:
- User: Search and select the user the device will be assigned to.
- Device Type: Select Corporate Device from the dropdown so the device is enrolled in fully managed (device-owner) mode.
- Assign to Group: Pick the device group that defines the policies, apps, and compliance rules to apply.
- Admin Device Approval: Enable this if an admin should manually approve the device before the actual policy is assigned.
- Enrollment: Choose By User Invite to email the QR code and enrollment token to the user, or By Myself if the IT admin will provision the device on-site.
- Enrollment Token Expiration: Set how long the generated token remains valid (e.g., 20 minutes).
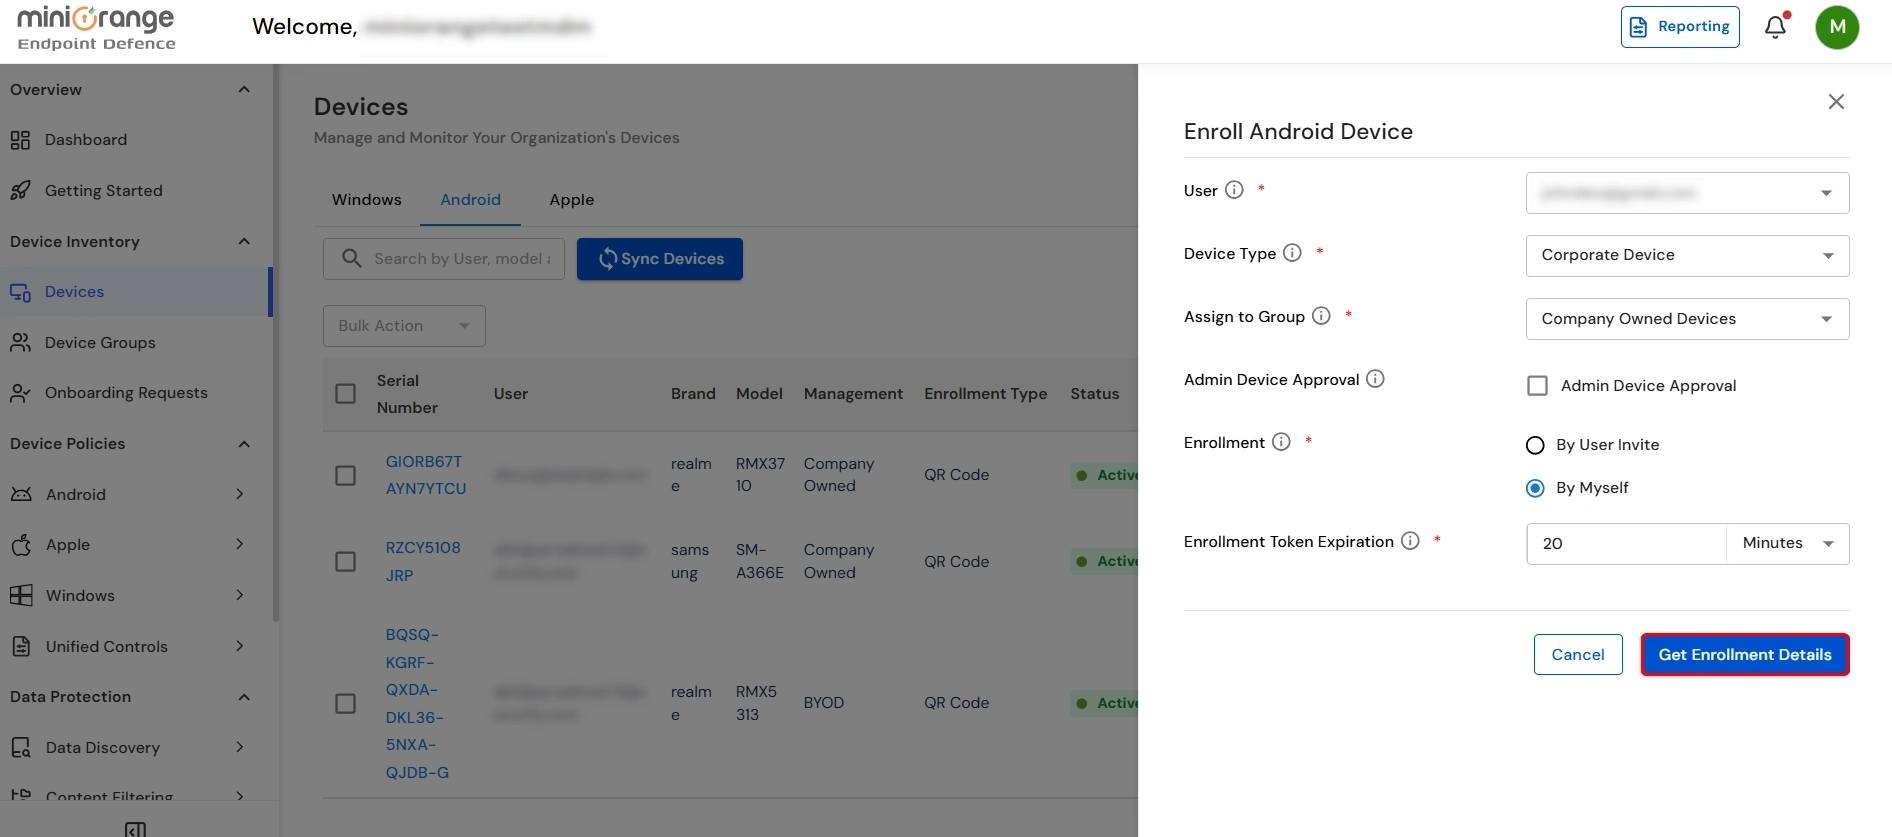
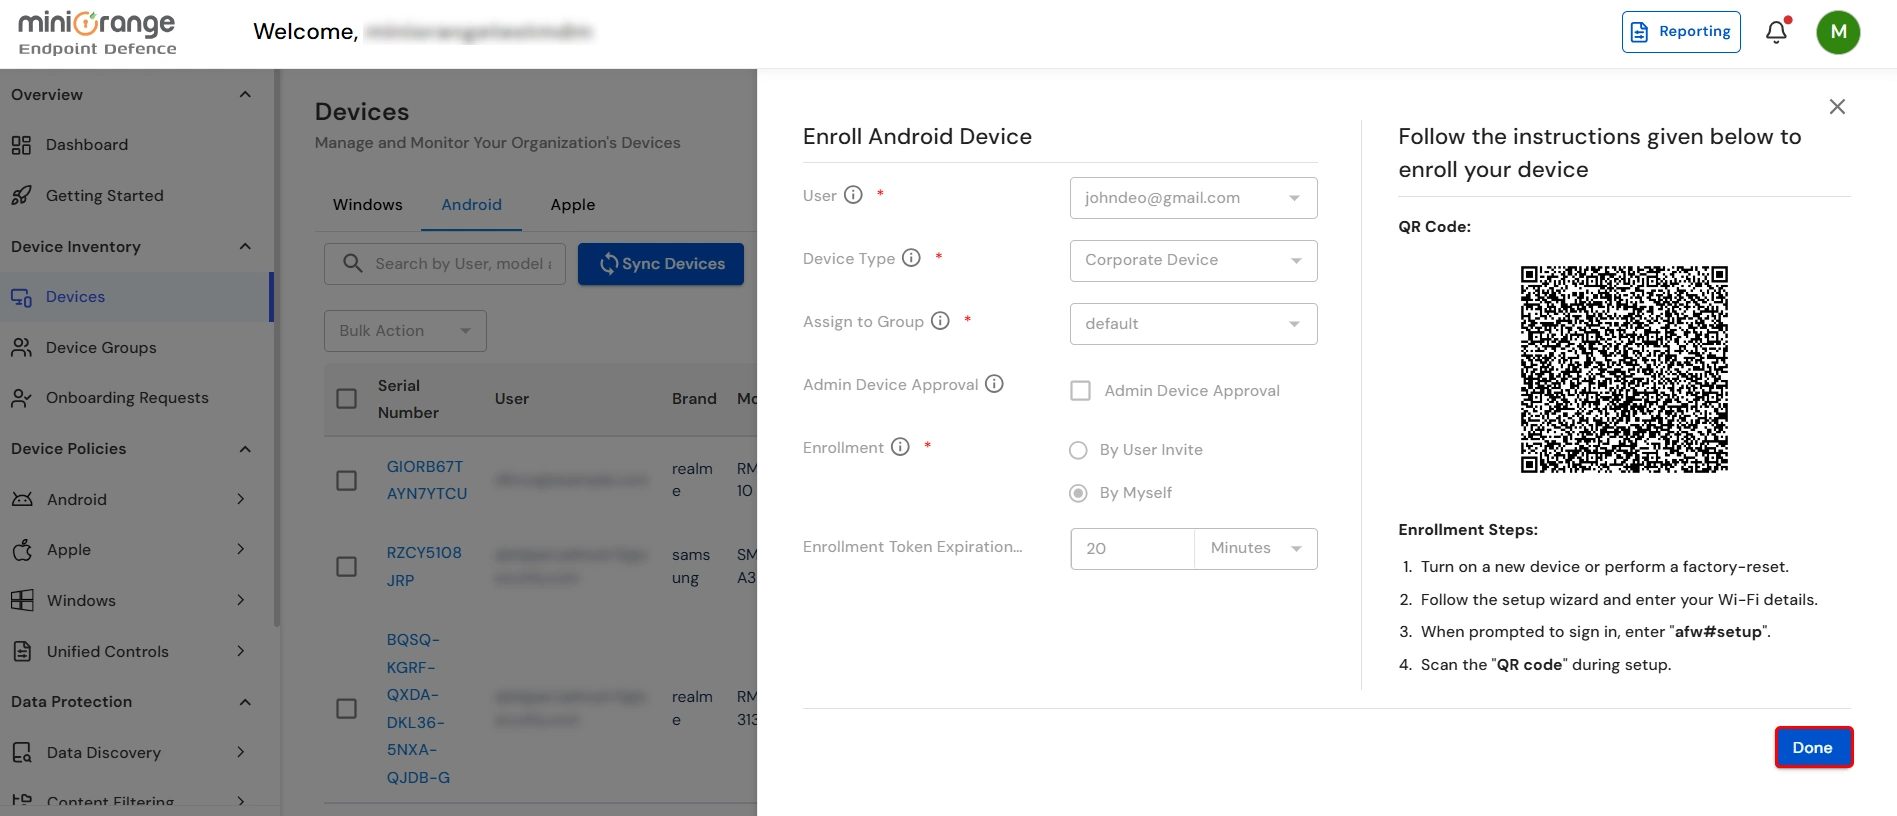
- Click Get Enrollment Details. A panel opens with a QR code and the Enrollment steps for fully managed (device owner) provisioning.
Step 2: Complete fully managed setup on the device
- Reset the device (if it is not already new / out of the box):
- Open Settings on the phone.
- Use the Settings search bar and type reset, or browse manually:
- On many phones: Settings → System → Reset options → Erase all data (factory reset).
- On many Samsung phones: Settings → General management → Reset → Factory data reset.
- Choose Erase all data / Factory data reset, read the warning, confirm with your PIN or password if asked, and tap Erase all data / Delete all. The device will wipe itself and reboot into the welcome / setup wizard (out-of-box experience).
- When the phone finishes rebooting, you will see the Android Welcome screen. Tap Start to begin setup.

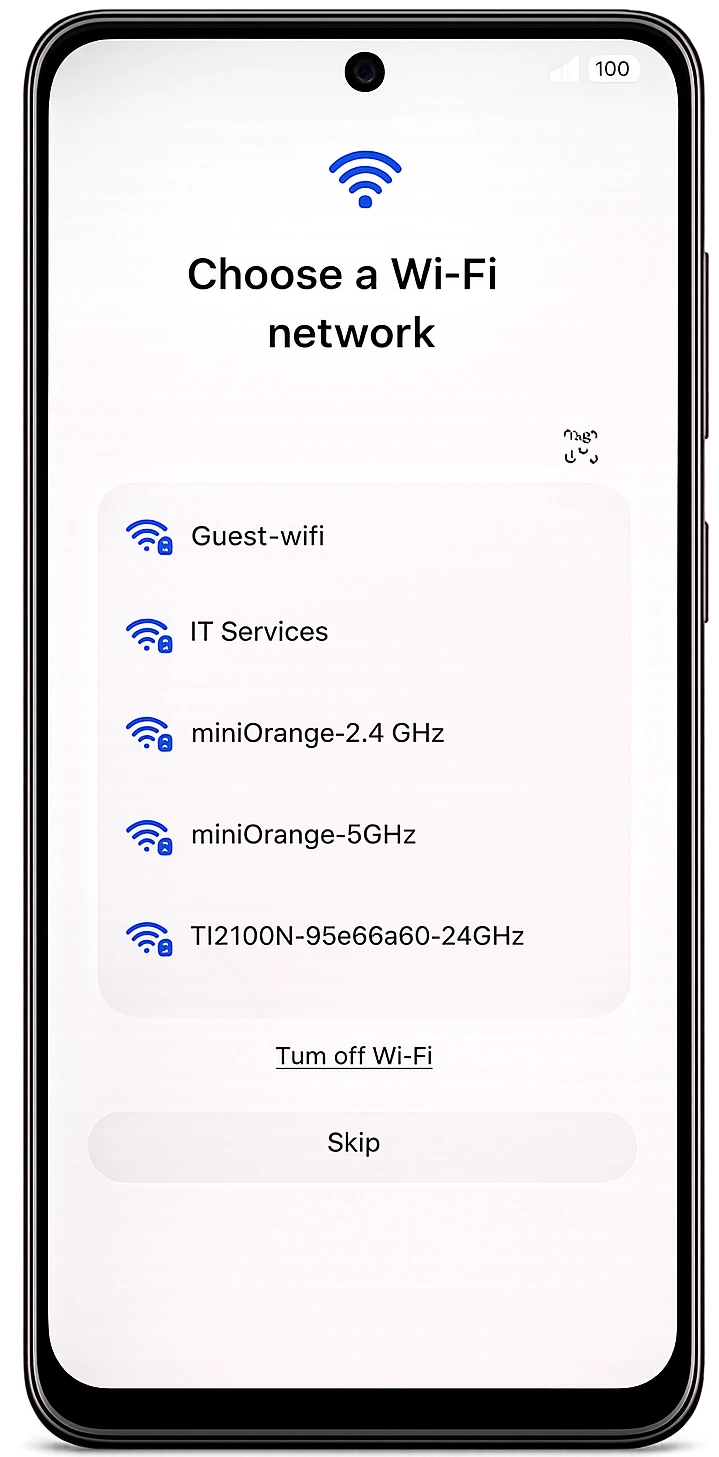
- Connect the device to Wi‑Fi on the Choose a Wi-Fi network screen.
- After Wi‑Fi connects and the device finishes preparing, if you see Copy apps & data tap Don’t copy so setup continues without restoring from another device.
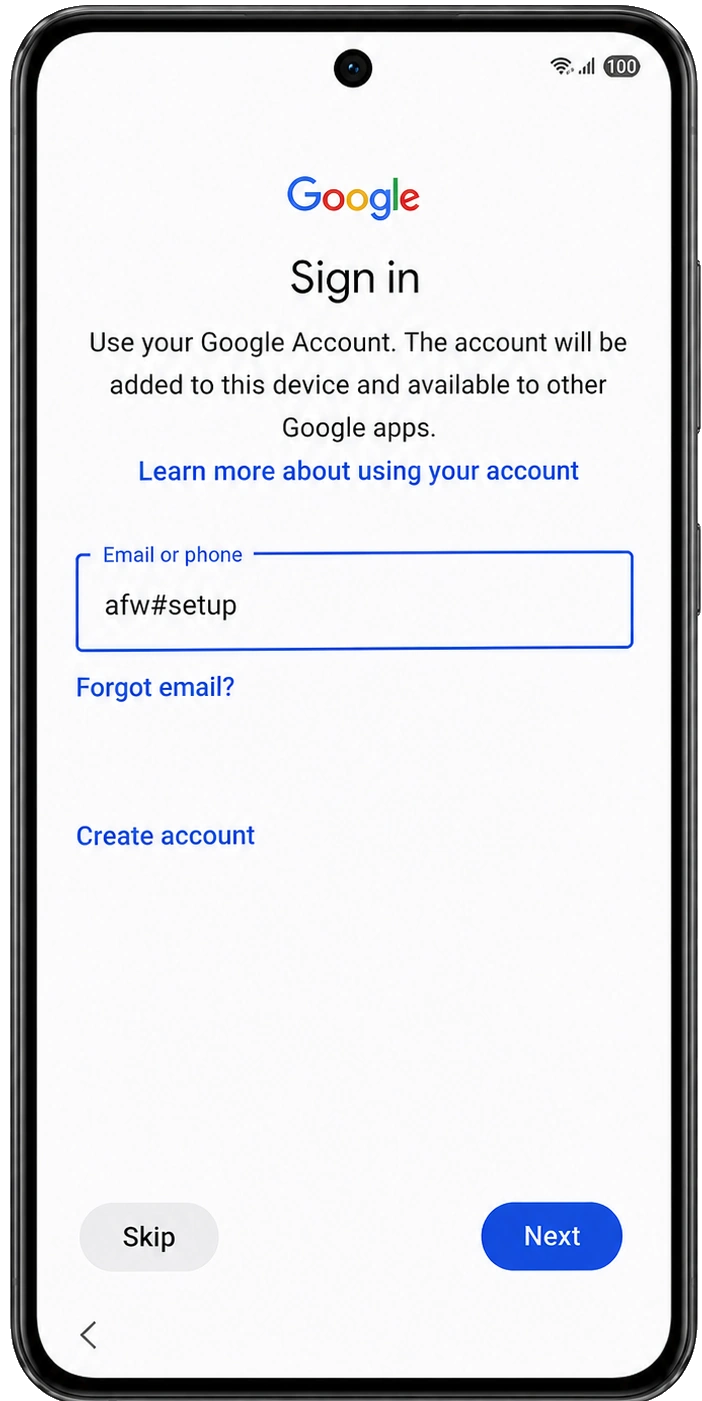
- On the Google Sign in screen, in the Email or phone field, type afw#setup exactly then tap Next. The device should begin installing Android Device Policy.
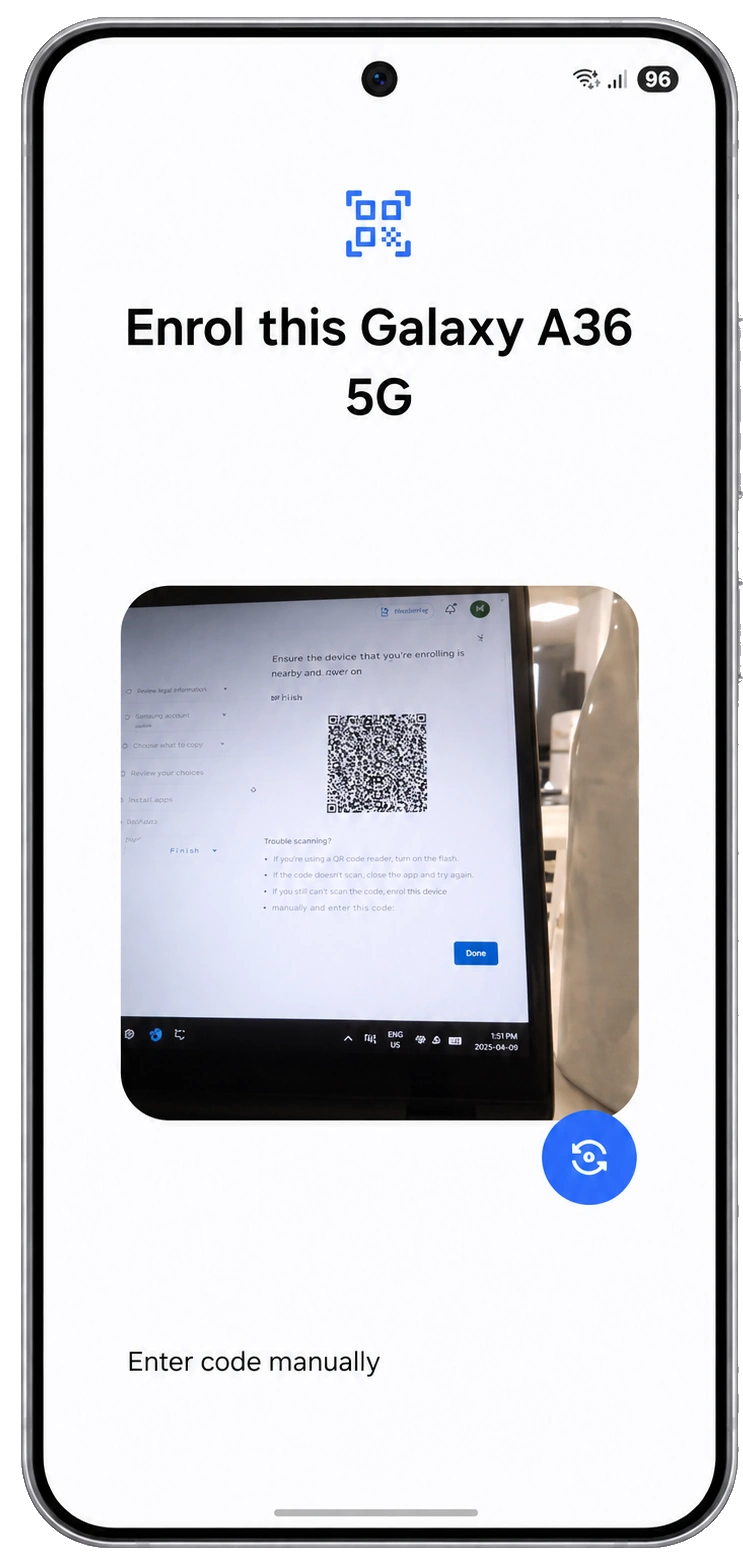
- Now, scan the QR code as shown in the below screen.
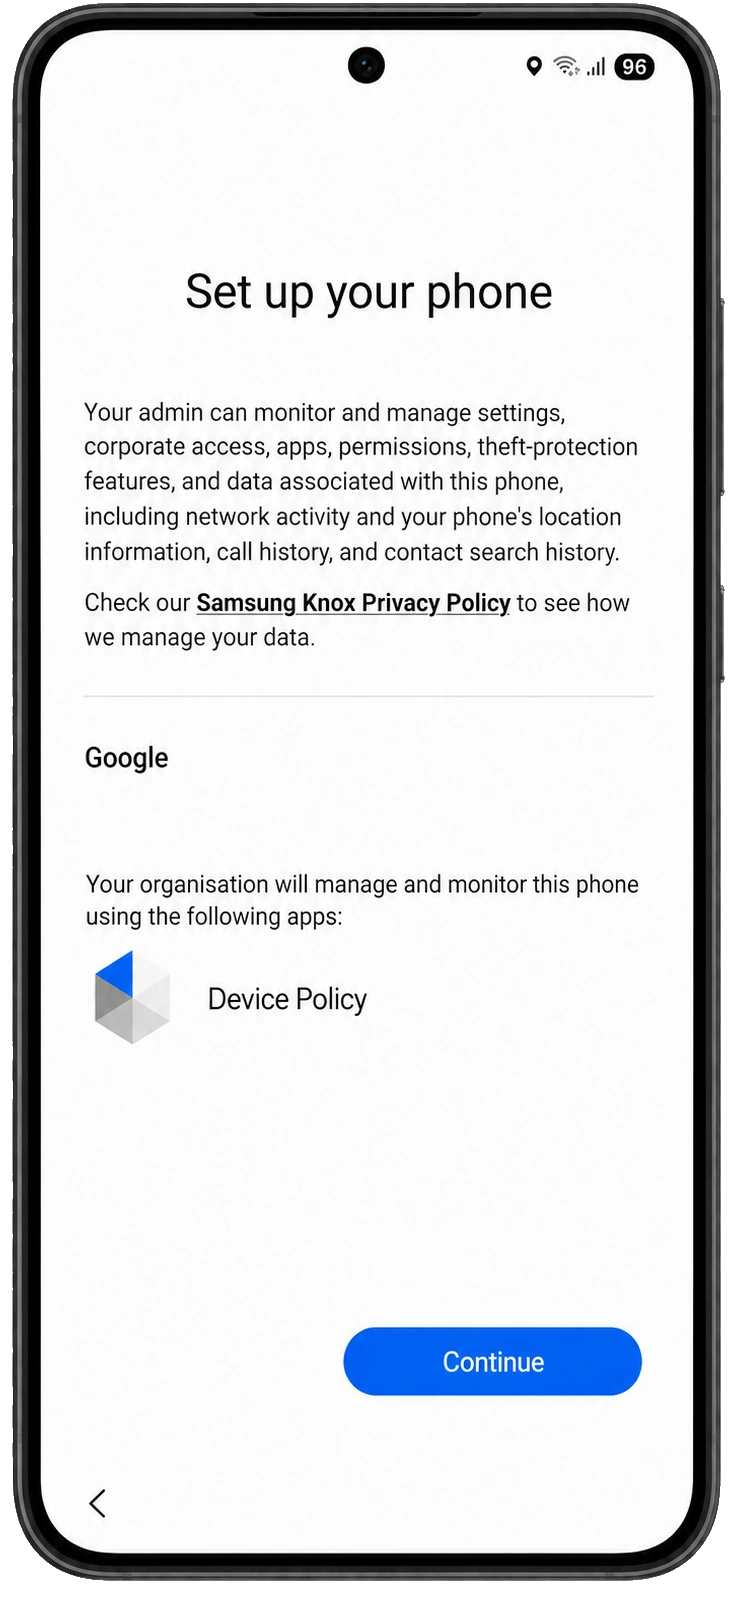
- On the Set up your phone screen, read the notice about your organisation managing the device and the listed apps (including Device Policy), then tap Continue.
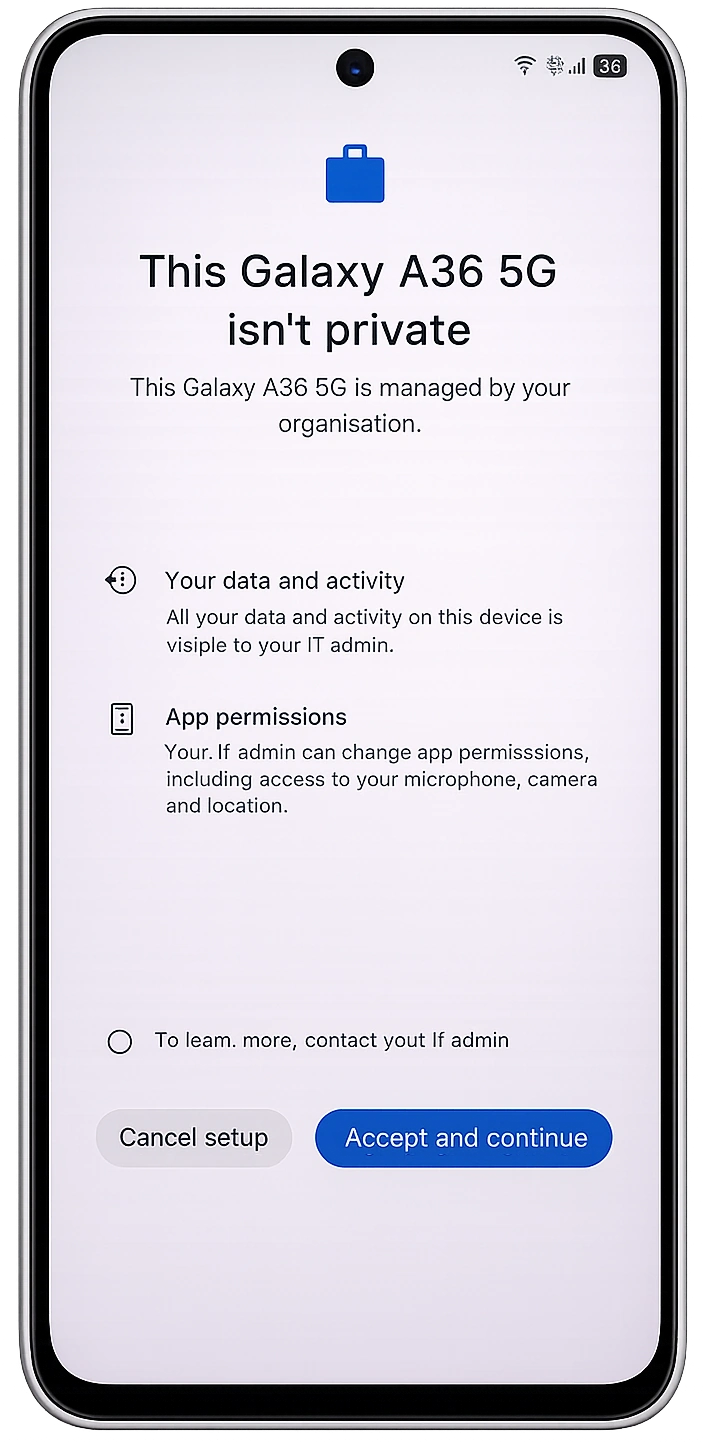
- Review the organisation management prompt and tap Agree or Continue as shown on the screen below.
- Wait while the device shows Registering device (or similar) and completes enrollment with your organisation.

- On the Set up your password (or lock screen) screen, create a device PIN, pattern, or password as required, then confirm and continue.
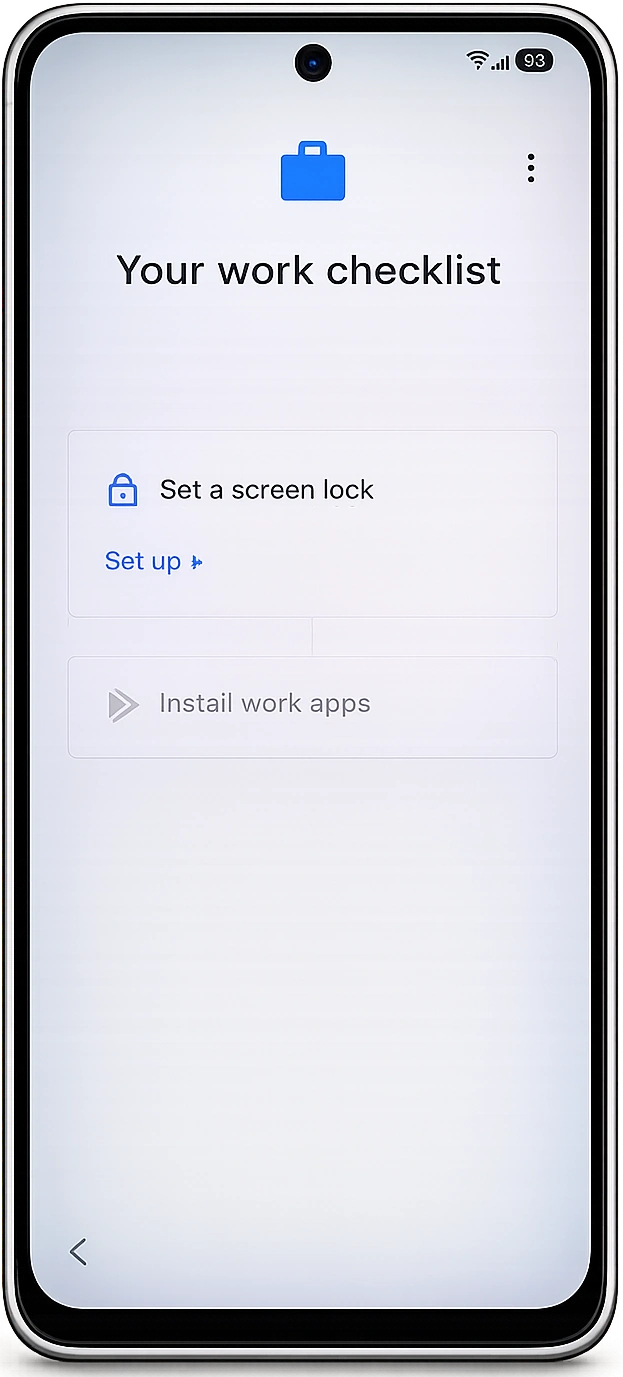
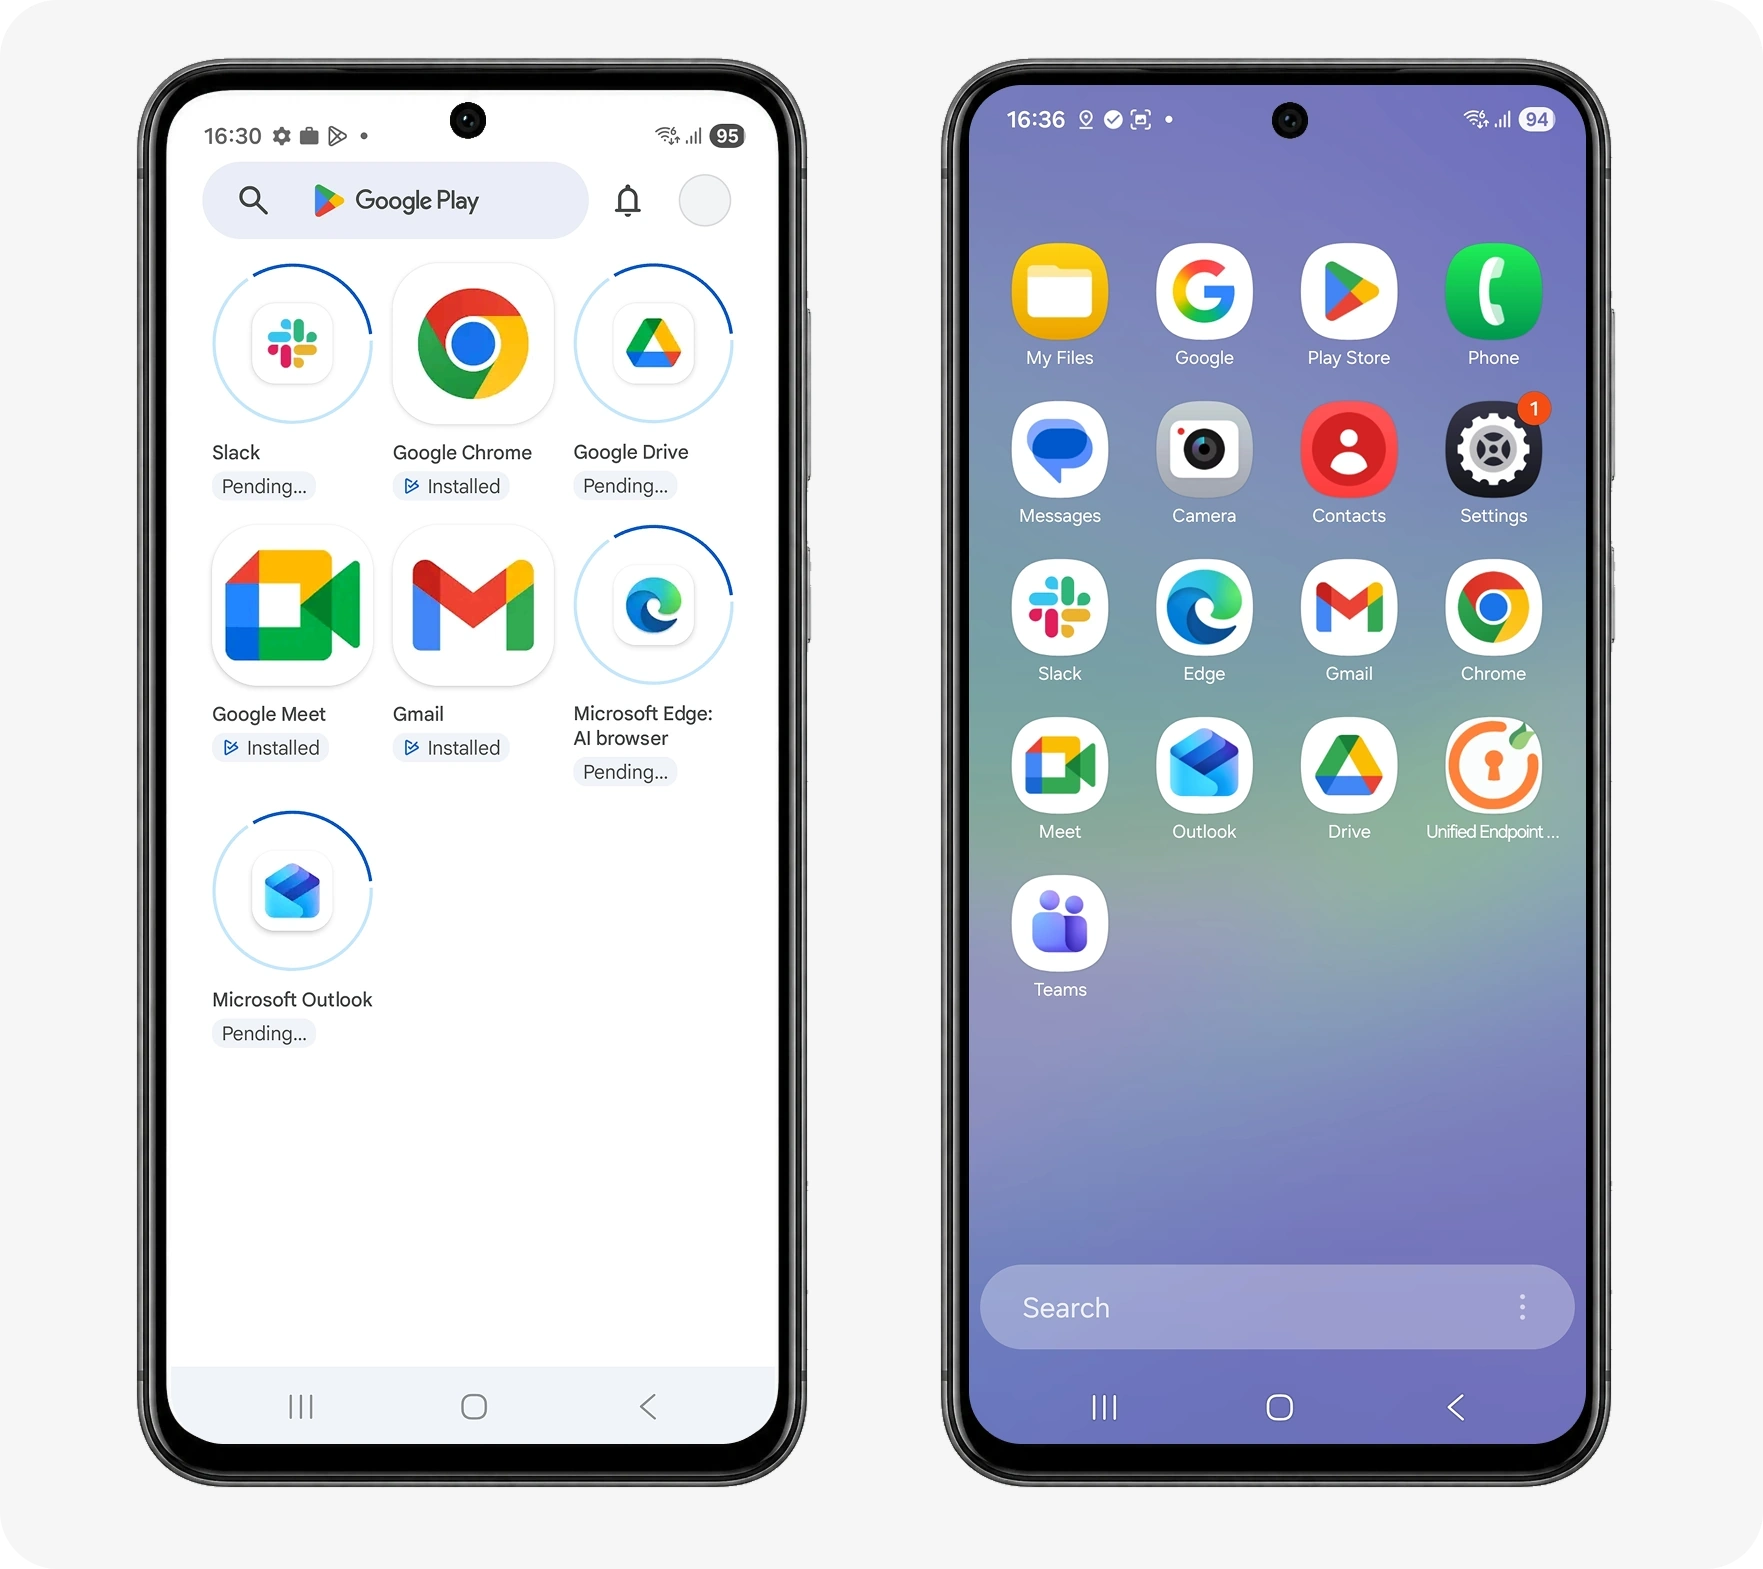
- When you see Install work apps, tap Install so the device can finish installing the managed work apps your organisation requires.

- Once app installation is complete, you will see all your organisation’s work apps on the device. You are now ready to go.
For employee-owned devices with only a work container, see BYOD enrollment. For COPE (work profile on corporate hardware), see COPE.