- Home
- SCIM Provisioning
- SCIM Provisioning Documentation
- User and Group Sync for Keycloak

User and Group Sync for Keycloak
The User & Group Sync app syncs user and group information from Keycloak to Jira, Confluence, and Bitbucket. Syncing user group attributes will sync user details such as groups, users, and directories. Sync can be performed manually or scheduled to run after set time intervals. By doing so, the administrator only has to manage user accounts in Keycloak. As a result, Atlassian modules such as Jira, Confluence, and Bitbucket require less admin time to create users and groups.
 Try it for free
Download and Installation
- Log into your atlassian instance as admin.
- Navigate to the settings menu and Click Manage Apps.
- Click on Find new apps.
- Locate miniOrange User and Group Sync app.
- Click Try free to begin a new trial or Buy now to purchase a license.
- Enter your information and click Generate license when redirected to MyAtlassian.
- Click Apply license.
1: Setup Keycloak
- Log in to your Keycloak Admin Console, and select the realm you want to use.
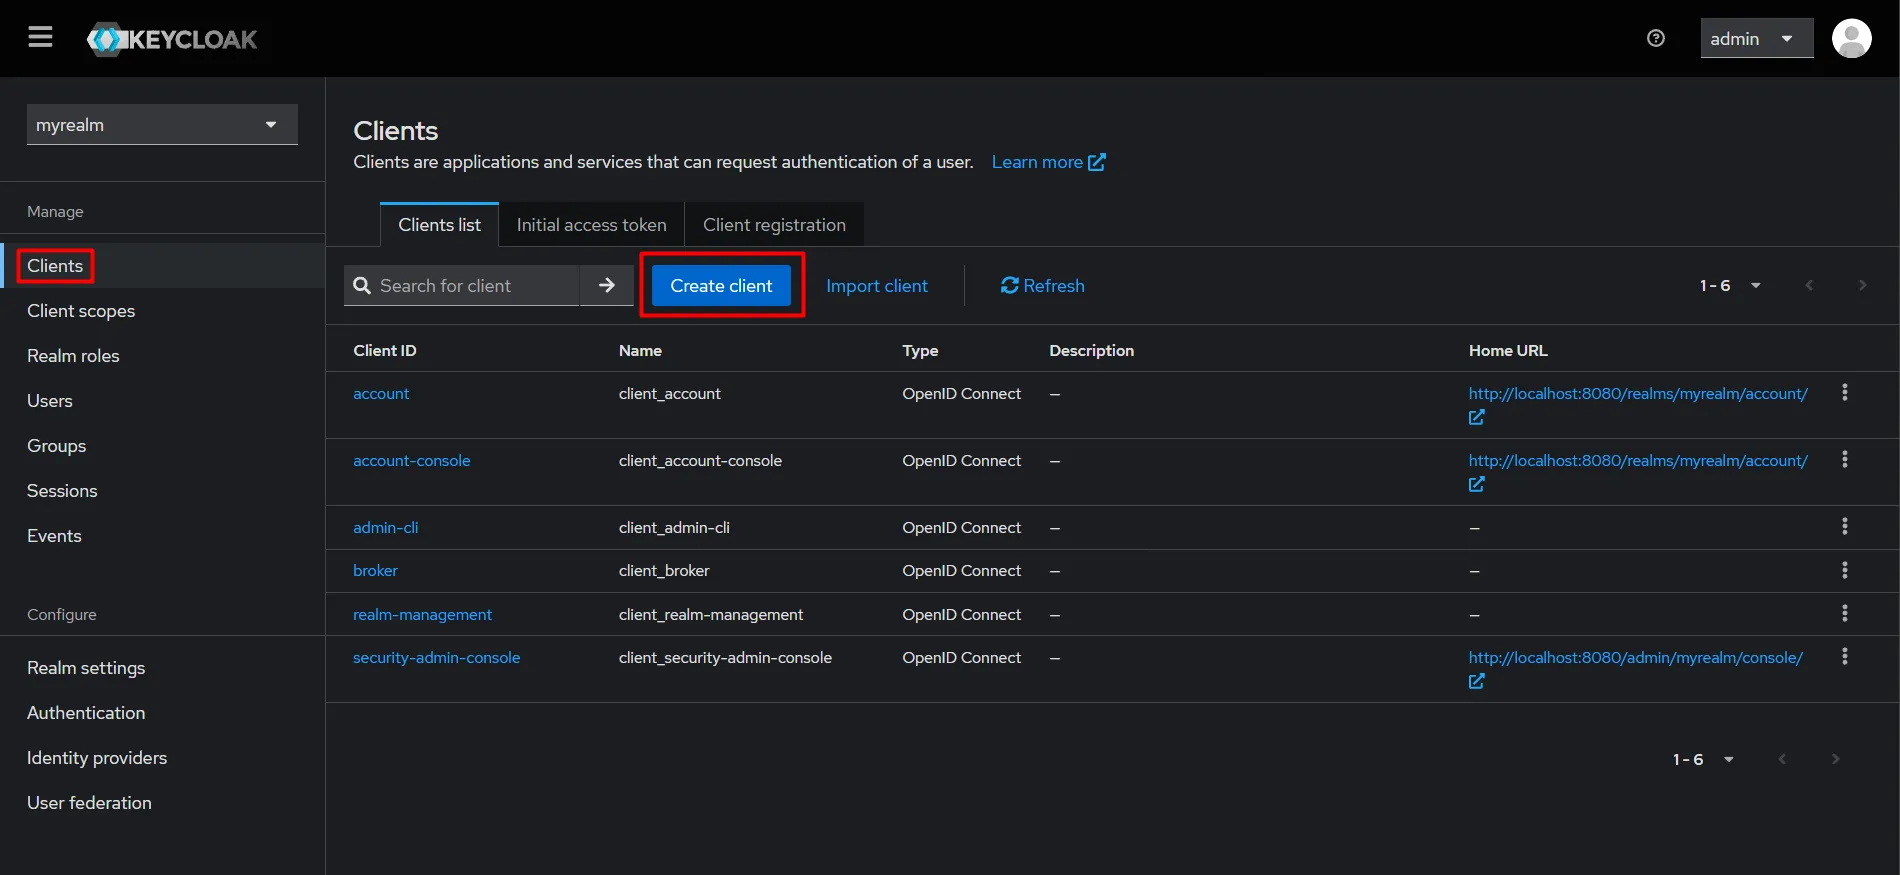
- From the sidebar navigate to clients, and click on create client button to create a new client/ application.
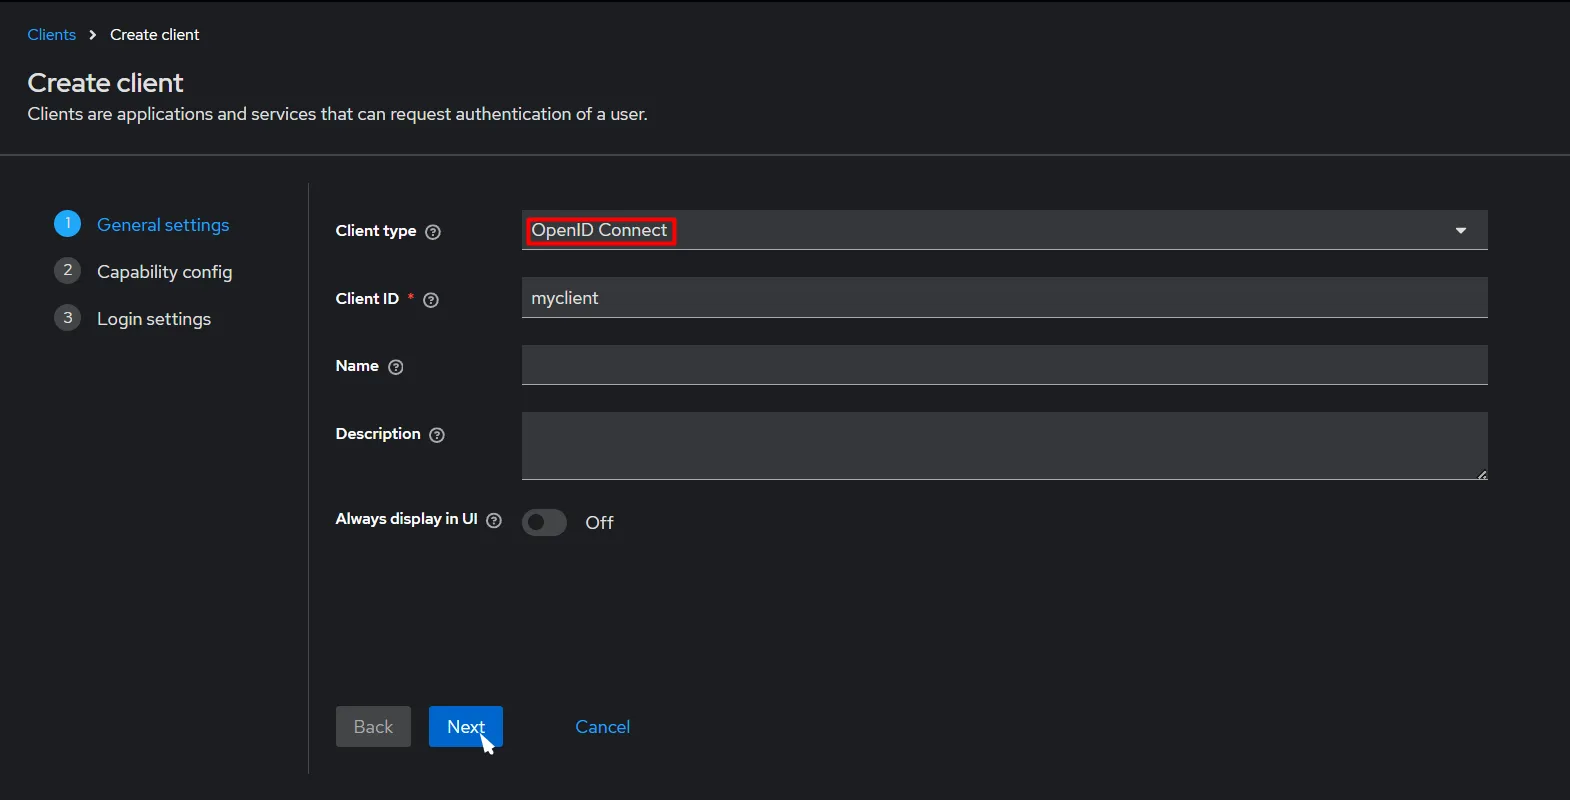
- Now under General Settings make sure you set the client type as OpenID Connect and also give a Client ID, and click on next.
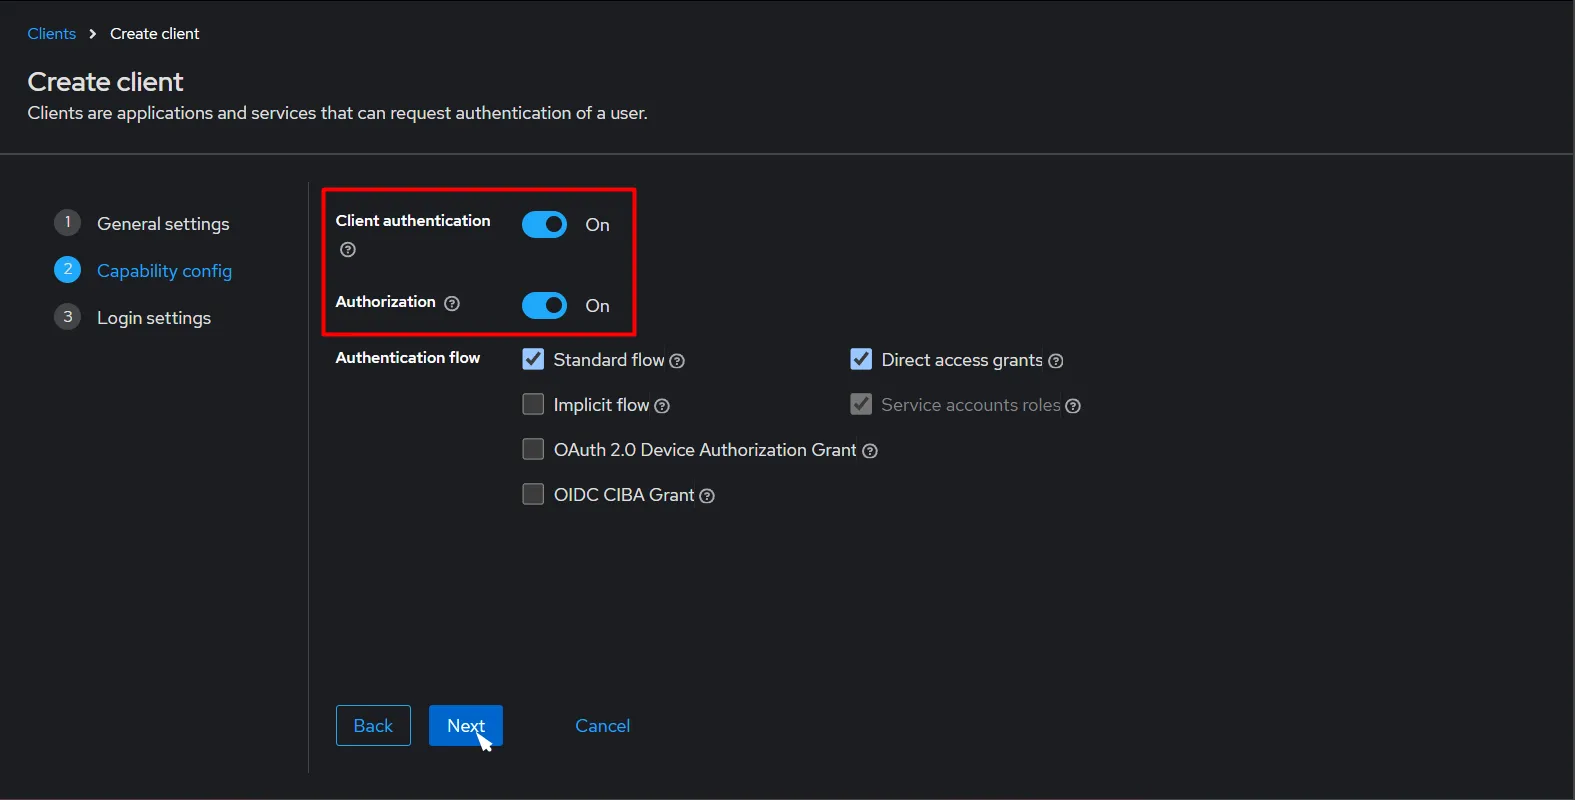
- Inside the capability config section, make sure to toggle on the Client Authentication and Authorization toggles and click Next.
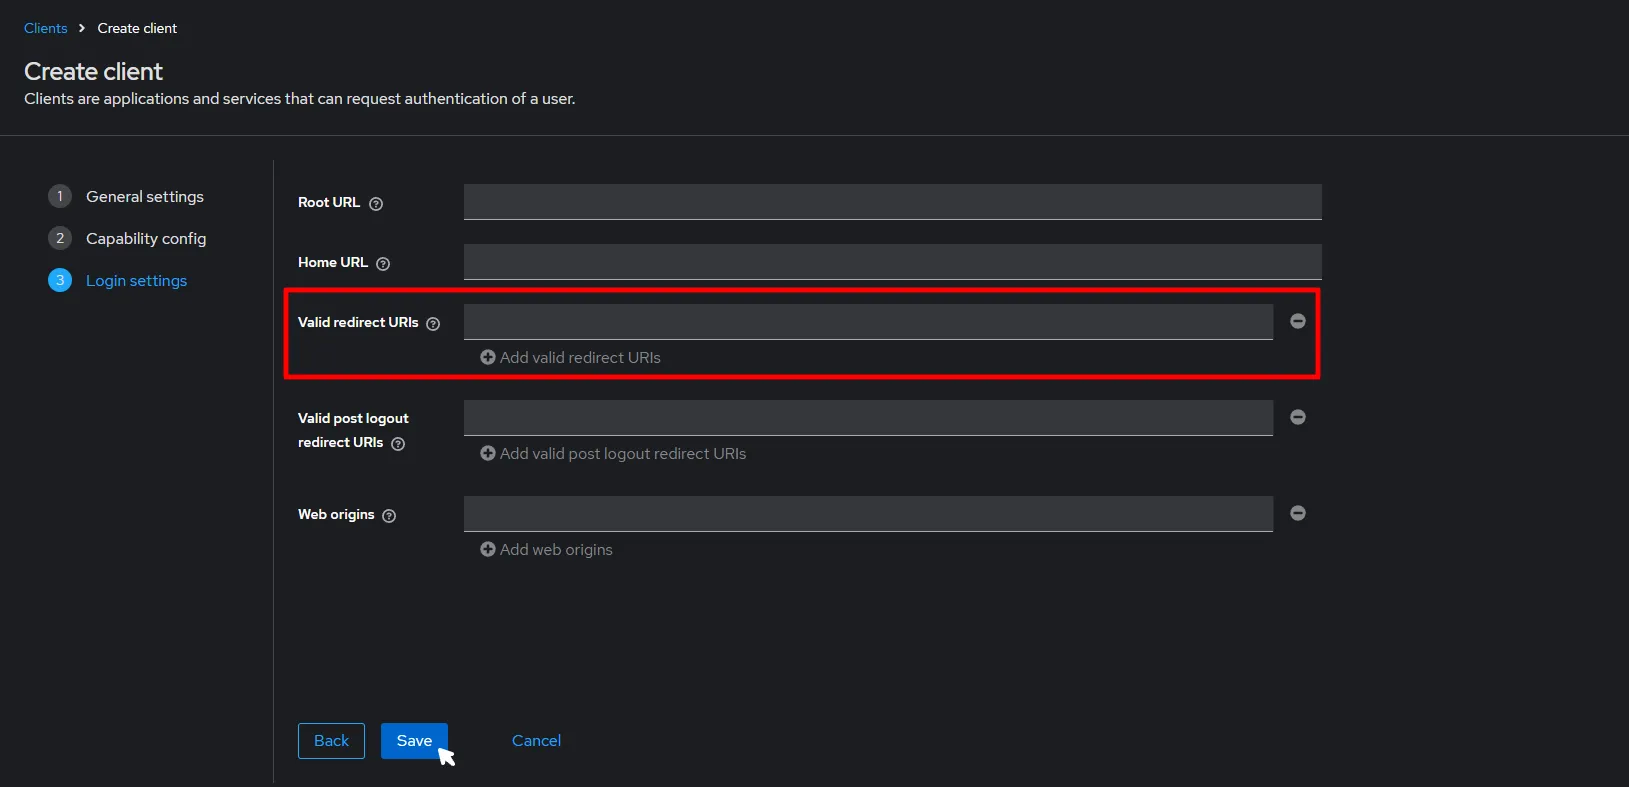
- After landing on the Login Settings, provide the required URL values in which a valid redirect URL should contain the value of your Jira Base URL and click on save.
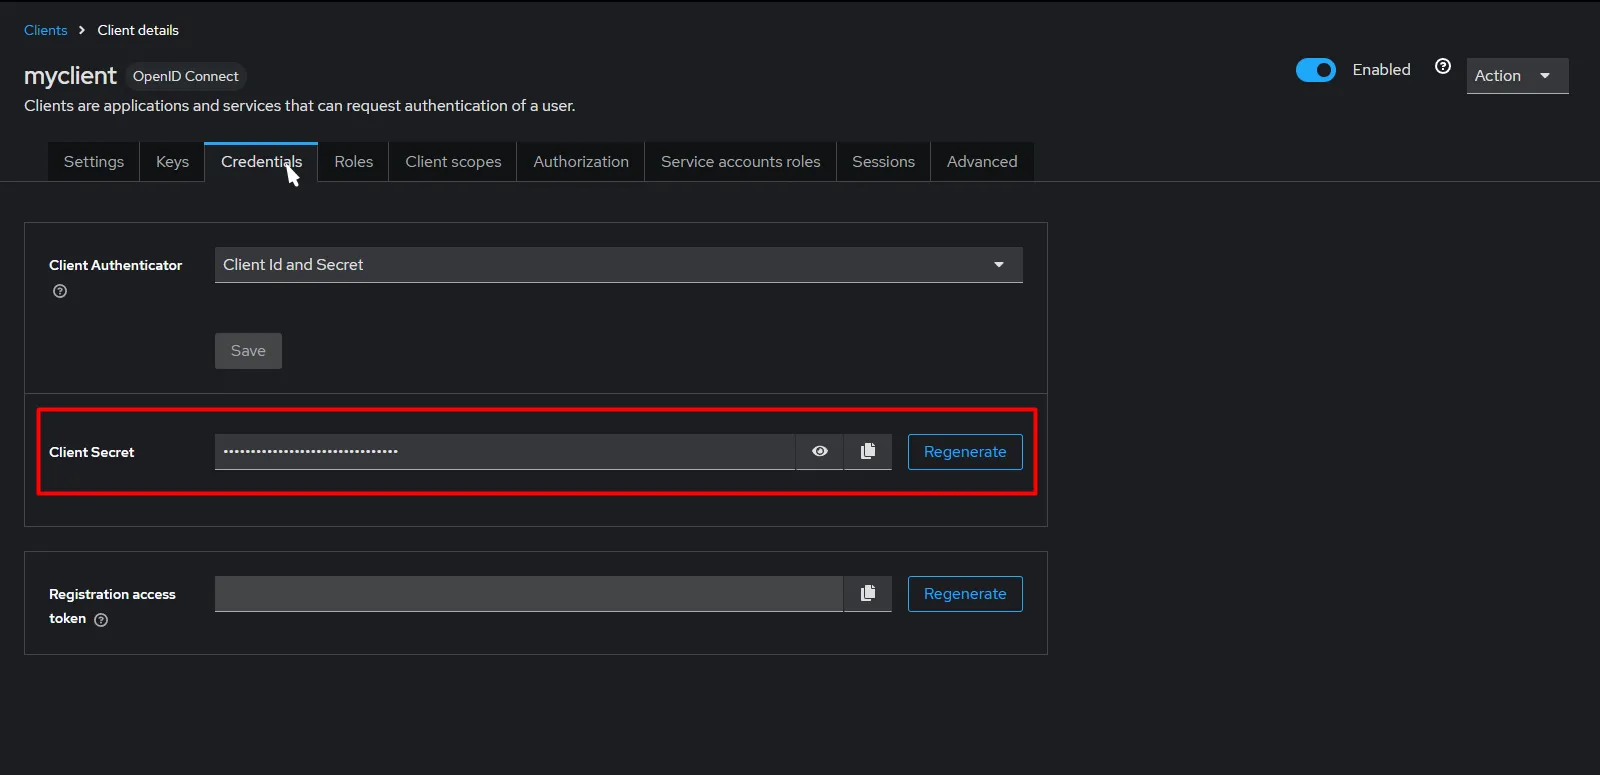
- After saving the client configuration navigate to the credentials tab and save the client secret to configure the application.
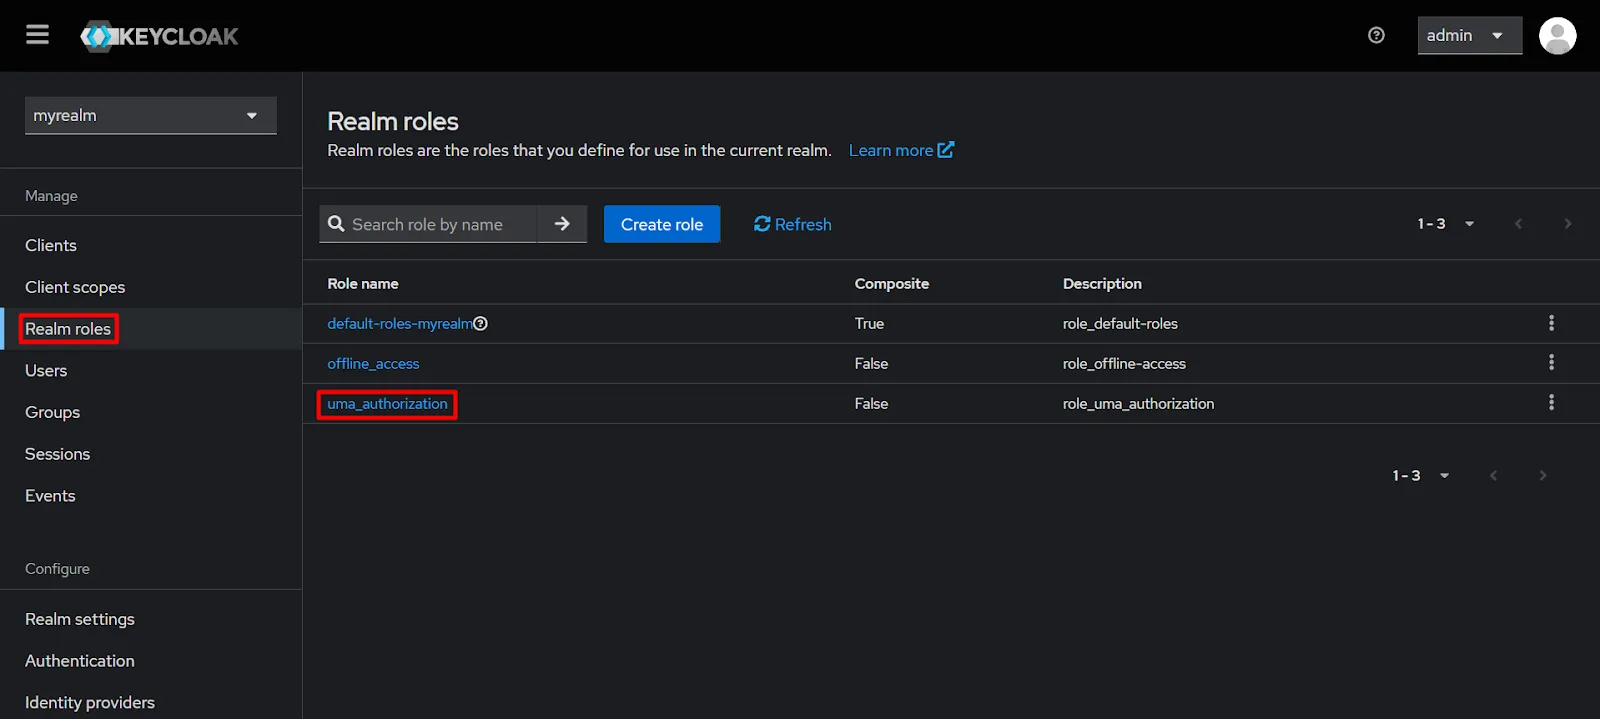
- Navigate to the Realm roles section from the sidebar, and select uma_authorization role.
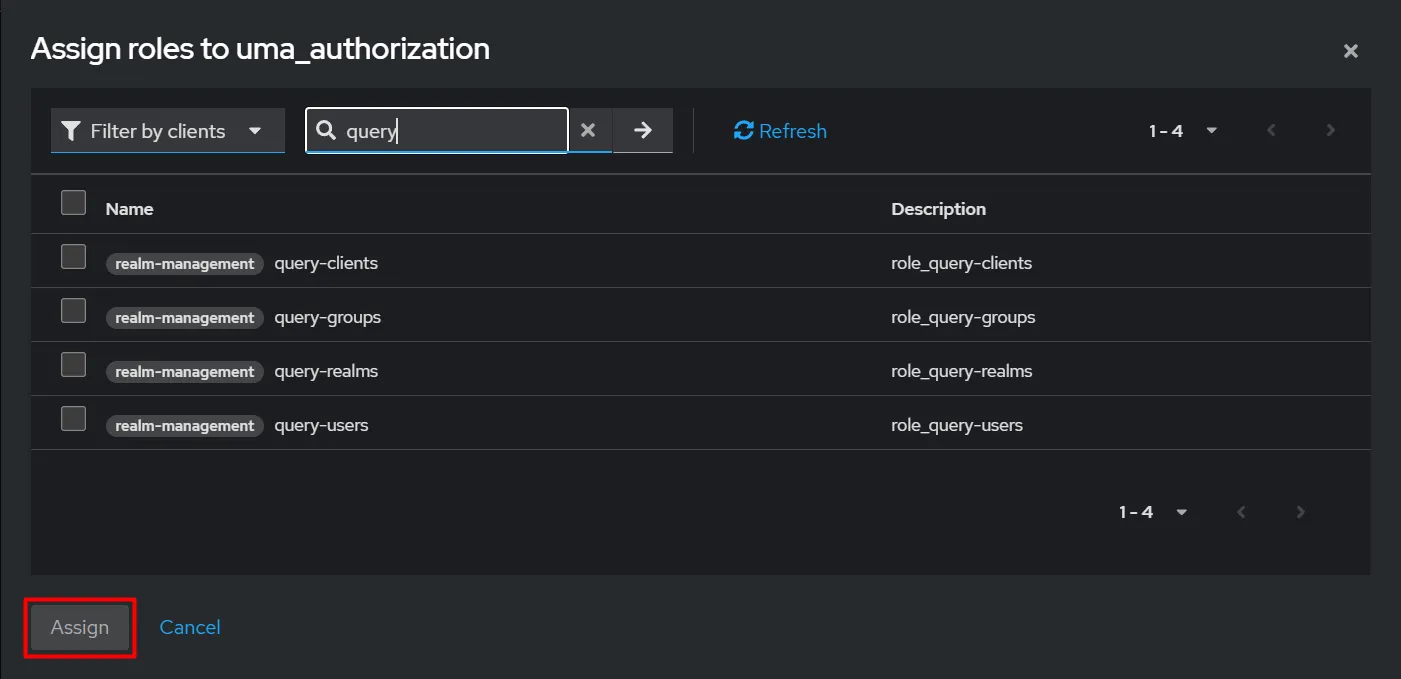
- Move to the associated roles tab and click on Assign roles.
- Assign the required roles from the available roles. for Ex: query-users, manage-users, manage-realm, query-groups, query-realms, etc;.
You have now successfully configured Keycloak and using Client Secret and Keycloak Base URL configure User & Group Sync App.
2: Setup User Sync & Group Sync app
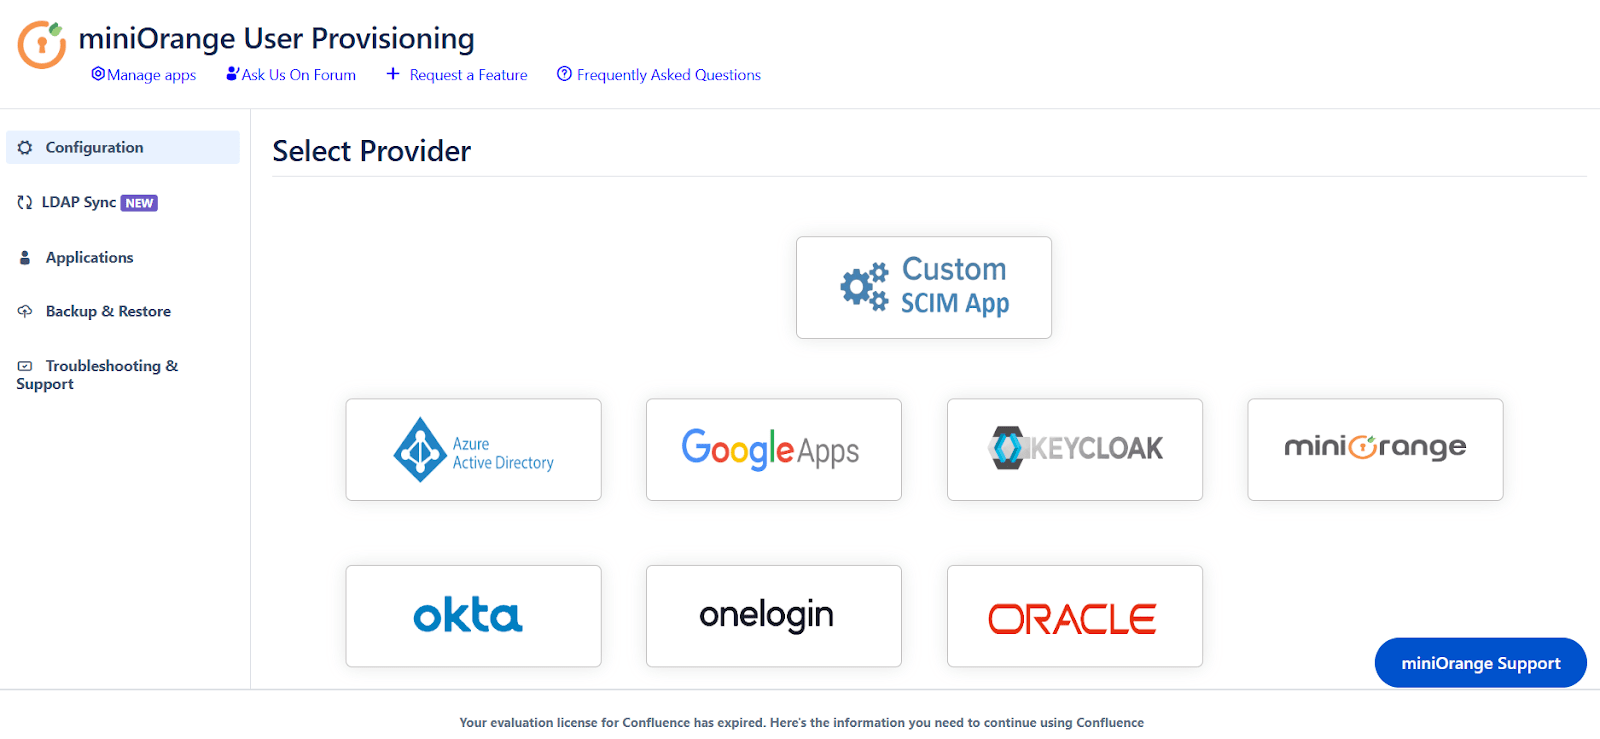
- Open User Provisioning/Sync for Jira plugin configuration. Go to the Configuration tab. Select Keycloak from the options.
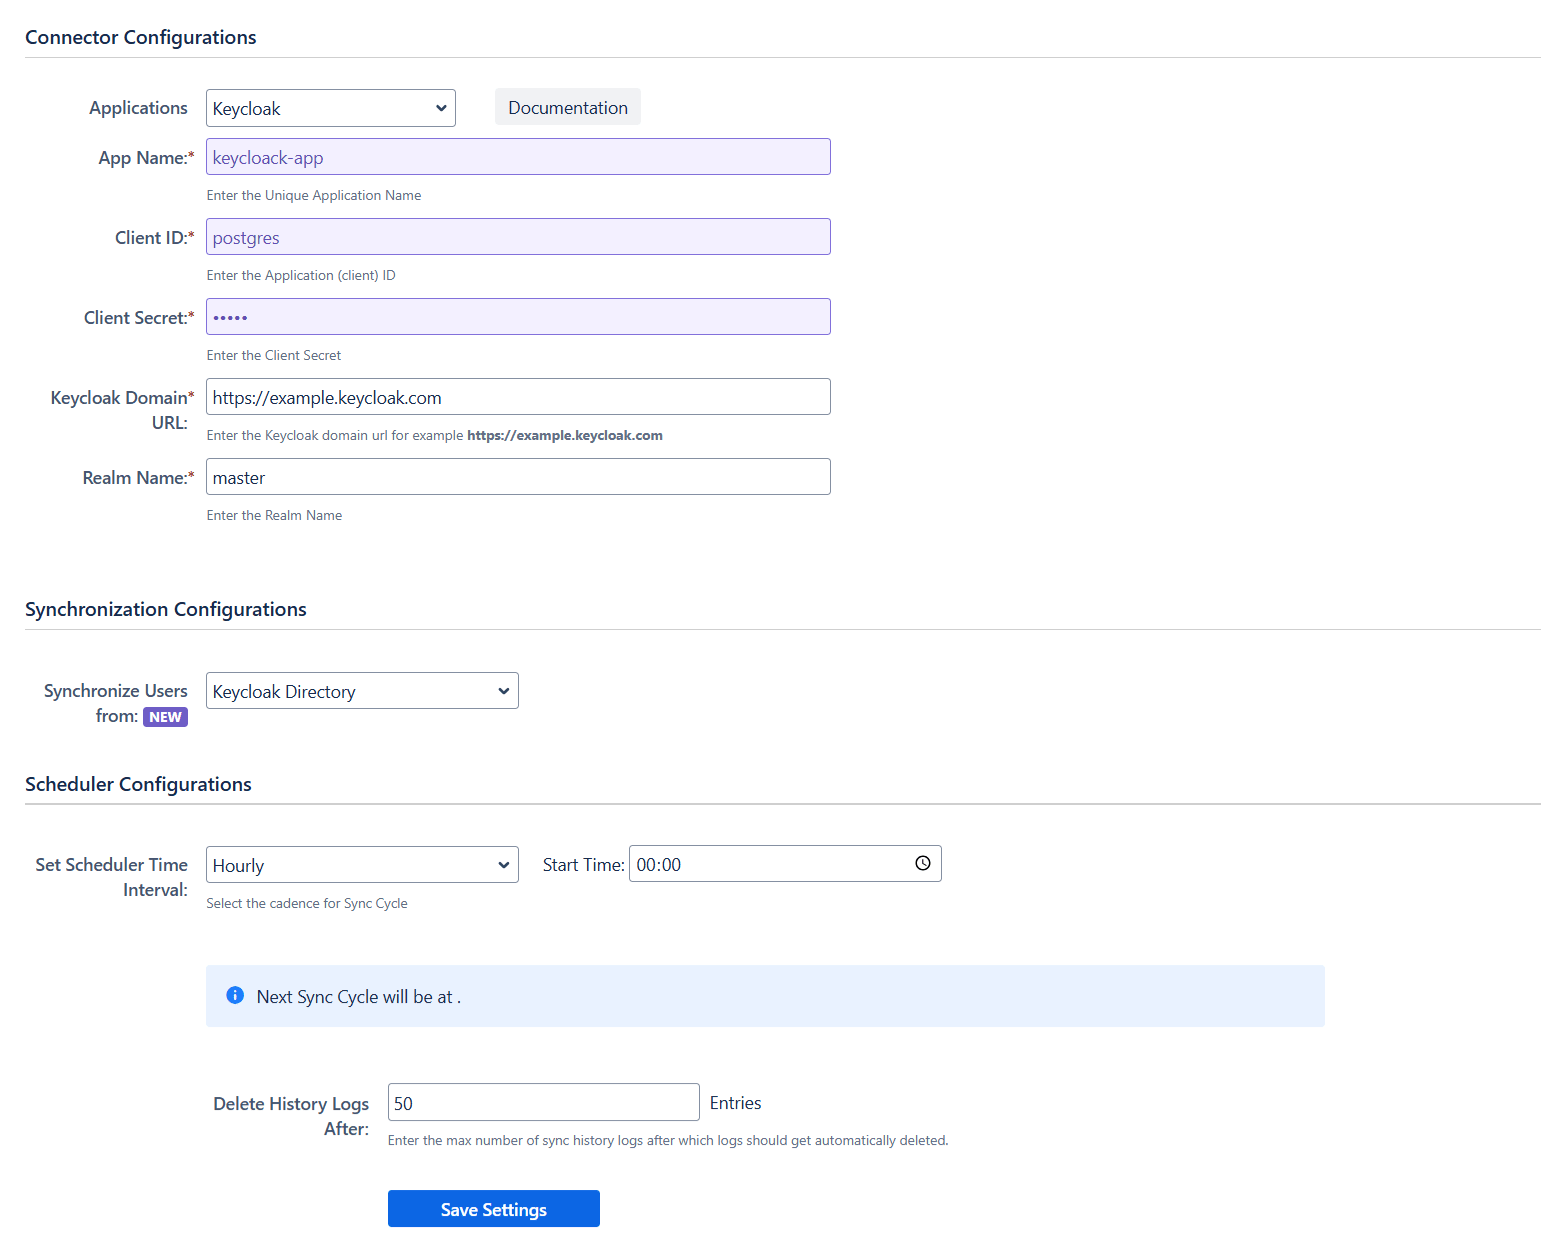
- Enter custom App name, Client ID, Client secret, Keycloak base url and realm name. You will get Client ID and secret details in the Keycloak credentials tab. Also enter App name, base URL and realm name accordingly from Keycloak. You can schedule the synchronization process by using Set Scheduler Time Interval. Click on Save Settings.
3: Role Based Sync
- You can select any option from the Synchronization Configuration to sync users from Keycloak to Confluence, such as Keycloak Directory, Keycloak Groups and Keycloak Roles.
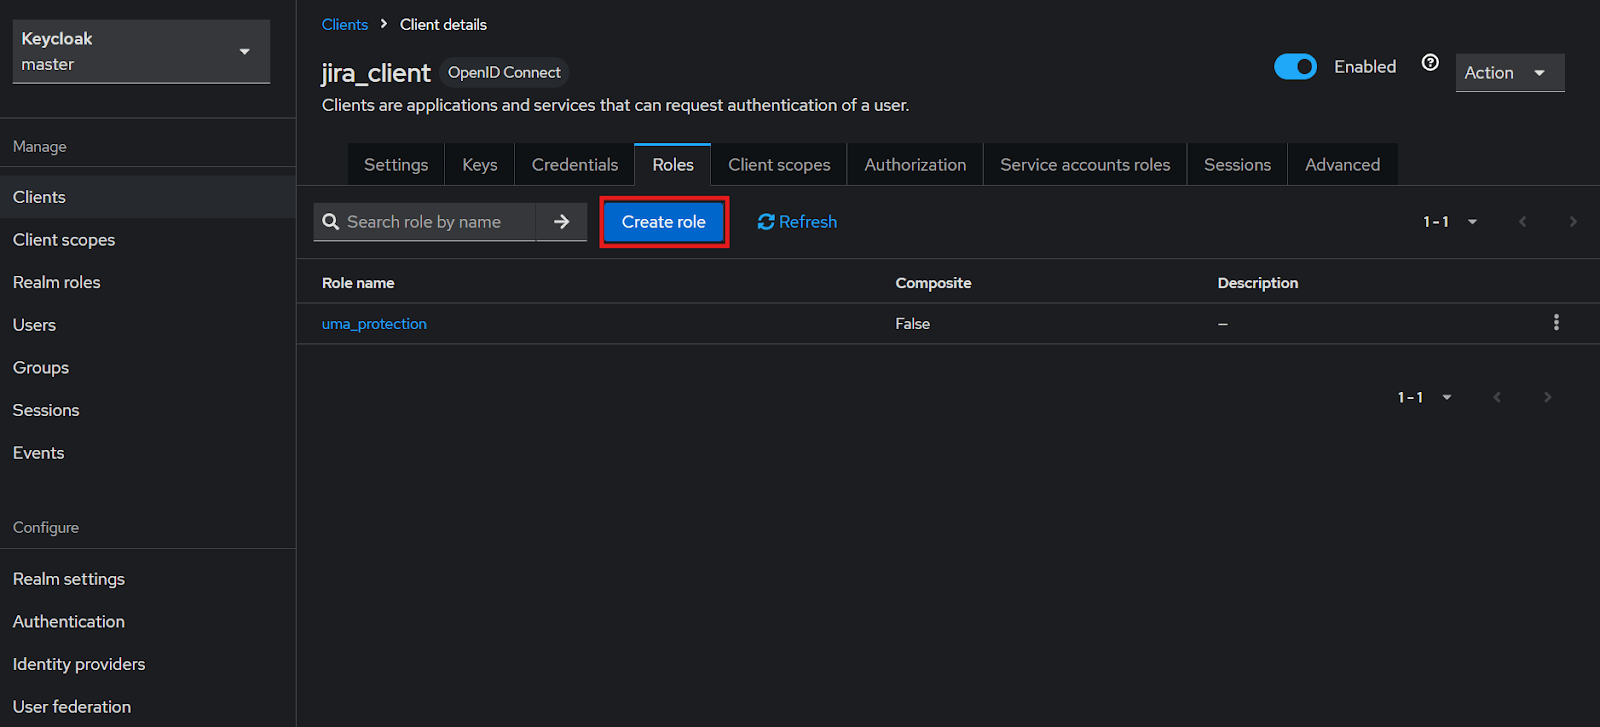
- For Role-Based Sync, go to the Roles tab of the client in keycloak and click on 'Create Role'.
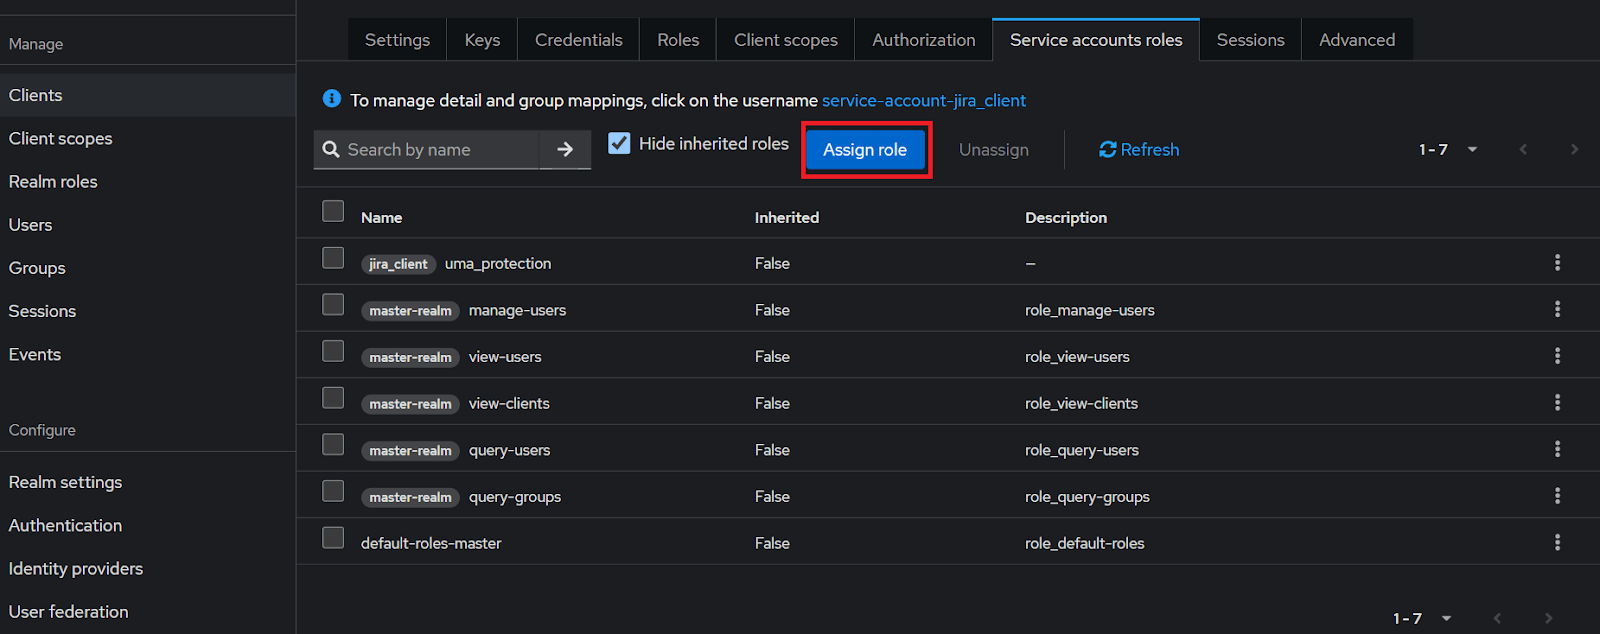
- Move to the 'Associated Roles' tab of the client and click on 'Service Account Roles'. Assign the required roles from the available options. for Ex: view-users, view-clients, etc.

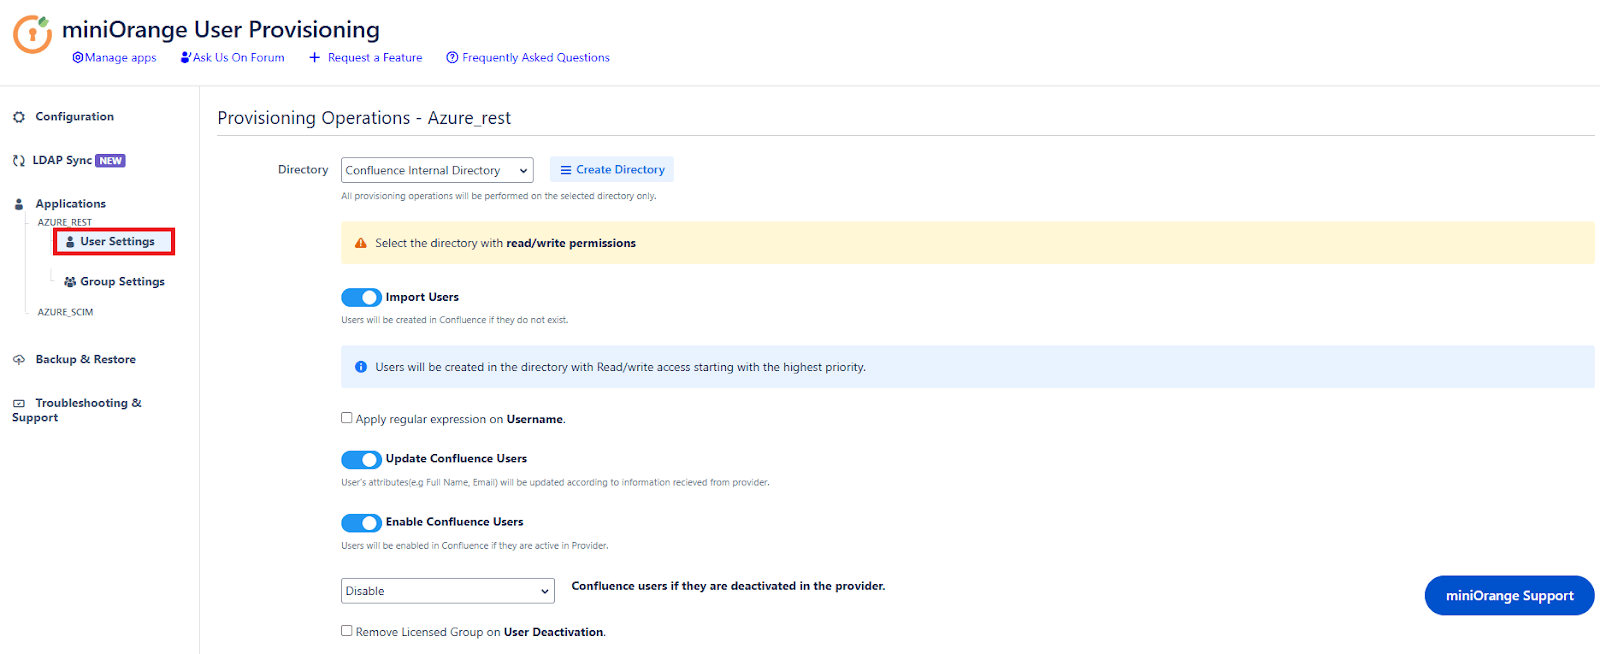
4: User Sync Settings
- Select the User Sync Settings tab from the left sidebar. Here you can configure different settings about user creation and updation.
- You can select the directory or can create a new one. Furthermore, you can choose from the following operations for provisioning users.
- You also have an option to set Default Project Lead and Default Component Lead.
 4.1 Attribute Mapping
- Attribute mapping enables you to map your attributes sourced from the IDP to Jira attributes. Through this section you can map your jira attributes to the attributes coming from IDP. By default, username attribute corresponds to the username/userPrincipalName attribute, email corresponds to the email/mail attribute, and displayName corresponds to the full name attribute. However, if you want to map these jira attributes with other attributes coming from IDP, you can use this feature to change the attribute mapping configurations.

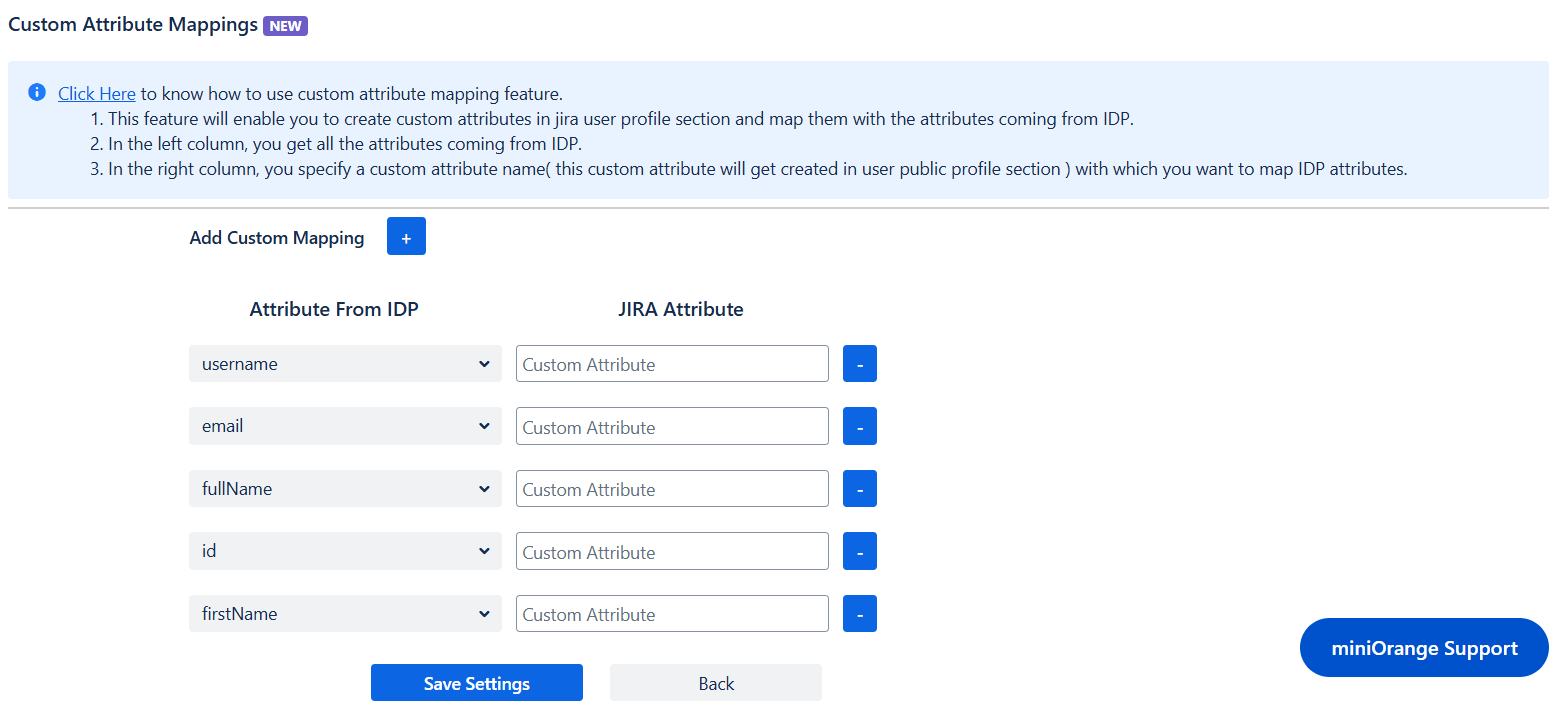
4.2 Custom Attribute Mapping
- User sync also supports mapping of custom attributes. Here, you can create custom attributes and automatically assign values to them from the IDP (Identity Provider). Select the desired attributes from the IDP that you want to display in Jira and provide a name for the custom attributes to be shown in Jira.
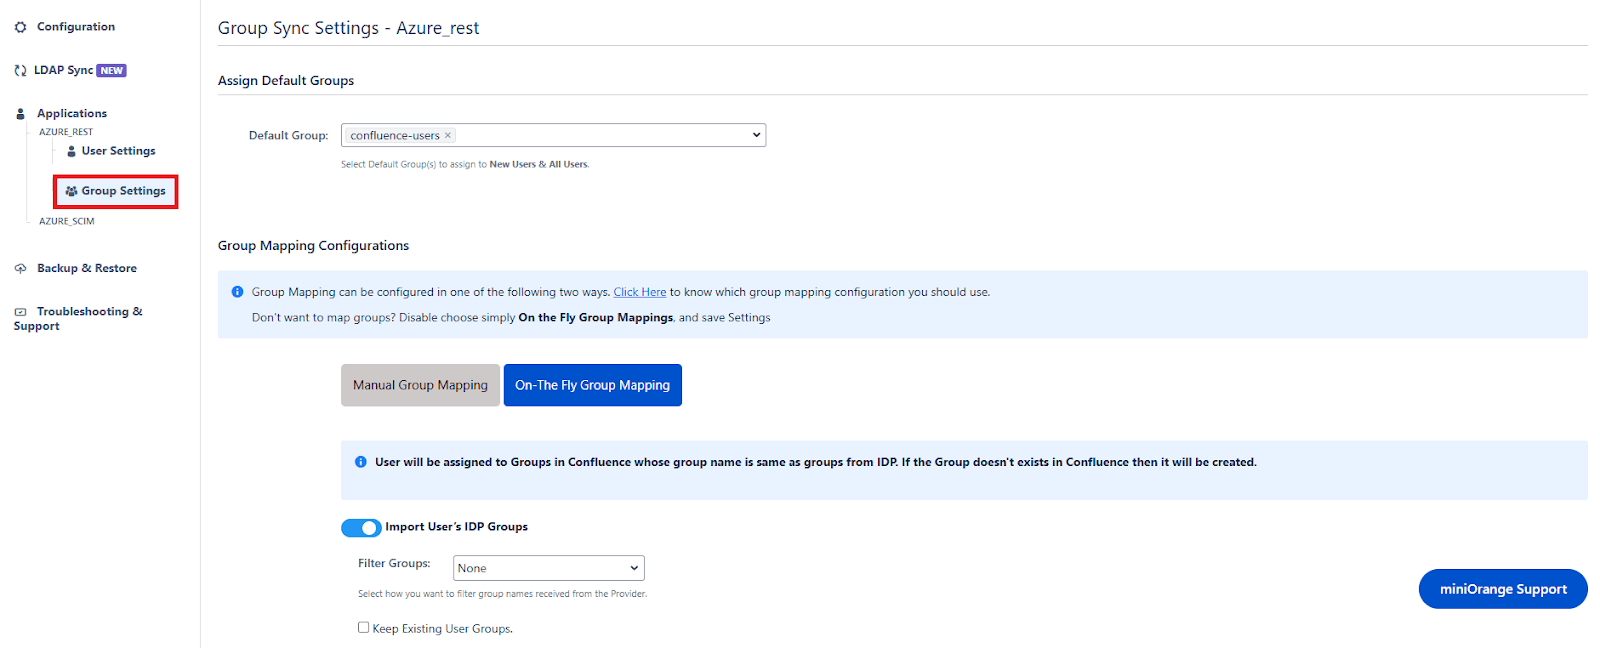
5: Group Sync Settings
- Select the Group Sync Settings tab from the left sidebar. Here you can configure different settings about group creation and group mapping.
- Here you can configure Default groups for new and all users.
- You can set Manual Group Mapping or On-The Fly Group Mapping.
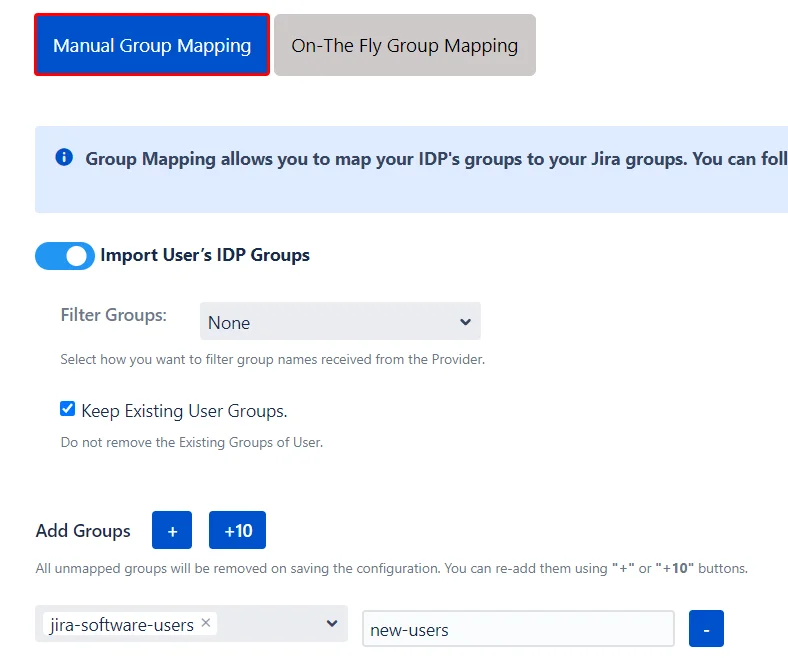
5.1 Manual Group Mapping
- Here you can manually map Jira groups with the groups from IDP.
- You can also configure to import IDP groups, filter groups and whether to keep existing users or not.
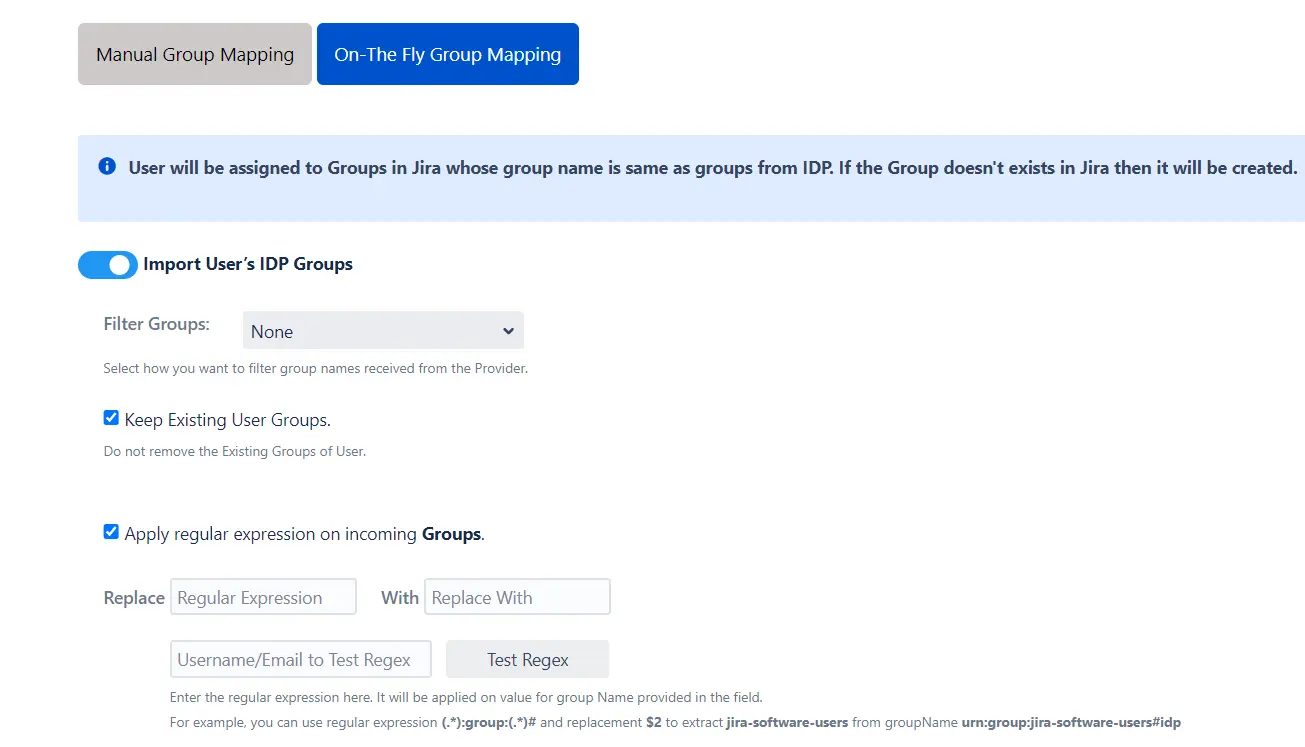
5.2 On-The Fly Group Mapping
- Here users will be assigned to groups in Jira whose group name is the same as groups from IDP. If the group doesn't exist in Jira then it will be created.
- You can configure to keep the existing user groups, filter groups and apply regular expressions on the groups.
6: Synchronization Process
- To perform user sync, click on the Synchronize option of your newly created app.
- When the synchronization is complete, you will be able to view newly created and updated user information in Jira's User Management section.

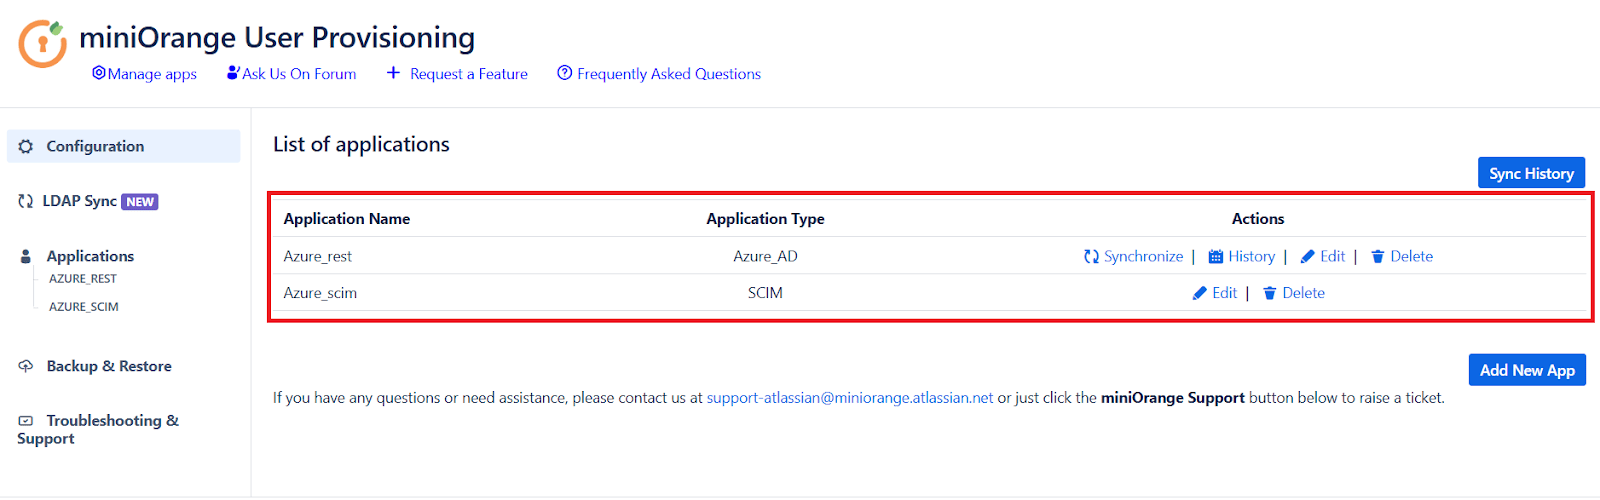
7: Multiple IDPs
- The plugin allows for configuring SCIM provisioning on your SP (Service Provider) to accommodate your specific use case. To add another IDP, simply navigate to the "Configured IDPs" section. Select on Add new App to configure multiple provisioning connections.
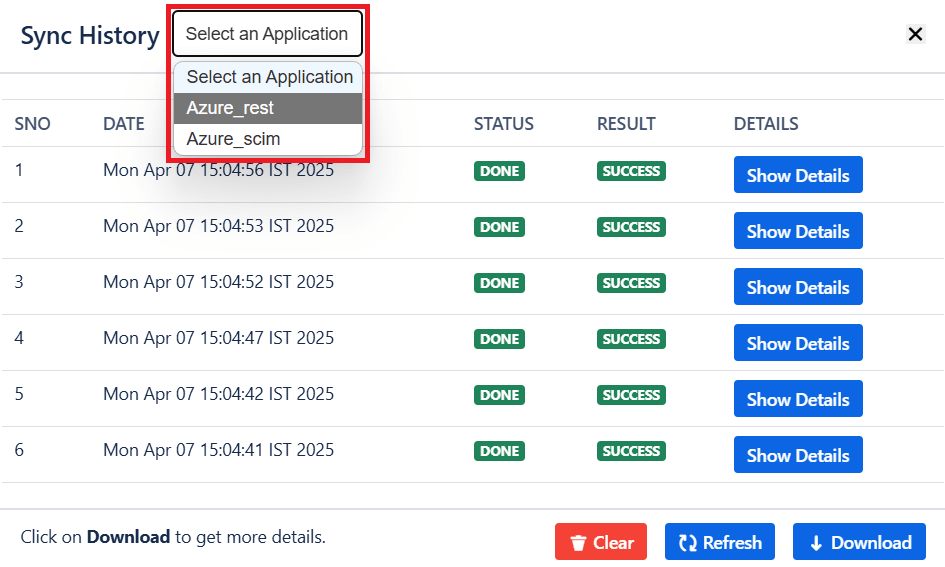
8: Sync History
- When the synchronization is complete, you will see the logs under the 'Sync History' button. Here, you can select your specific application to view the logs.
Did this page help you?
