- Home
- REST API Authentication
- REST API Authentication Documentation
- REST API Authentication using Third Party Provider

REST API Authentication In Atlassian using Client Credentials from OAuth Provider
Unlike traditional approaches, utilizing client credentials in OAuth
2.0 facilitates authorization without the need to disclose the user's
email address or password to an external application. This is suitable
for server-to-server communication or machine-to-machine interactions
where there is no end-user to grant consent. This means that accessing
Jira/Confluence content through APIs becomes more straightforward and
secure.
This guide will walk you through the steps to configure authentication
through a third-party OAuth token provider, through a Client
Credential Grant.
 Try it for free
Download and Installation
- Log into your Atlassian instance as an admin.
- Navigate to the settings menu and click Manage Apps.
- Click Find new apps or Find new add-ons from the left-hand side of the page.
- Locate API Token/OAuth Authentication app.
- Click Try free to begin a new trial or buy now to purchase a license.
- Enter your information and click Generate License when redirected to MyAtlassian.
- Click Apply License.
Authentication Methods


1: Configure Authentication through a third-party OAuth token provider
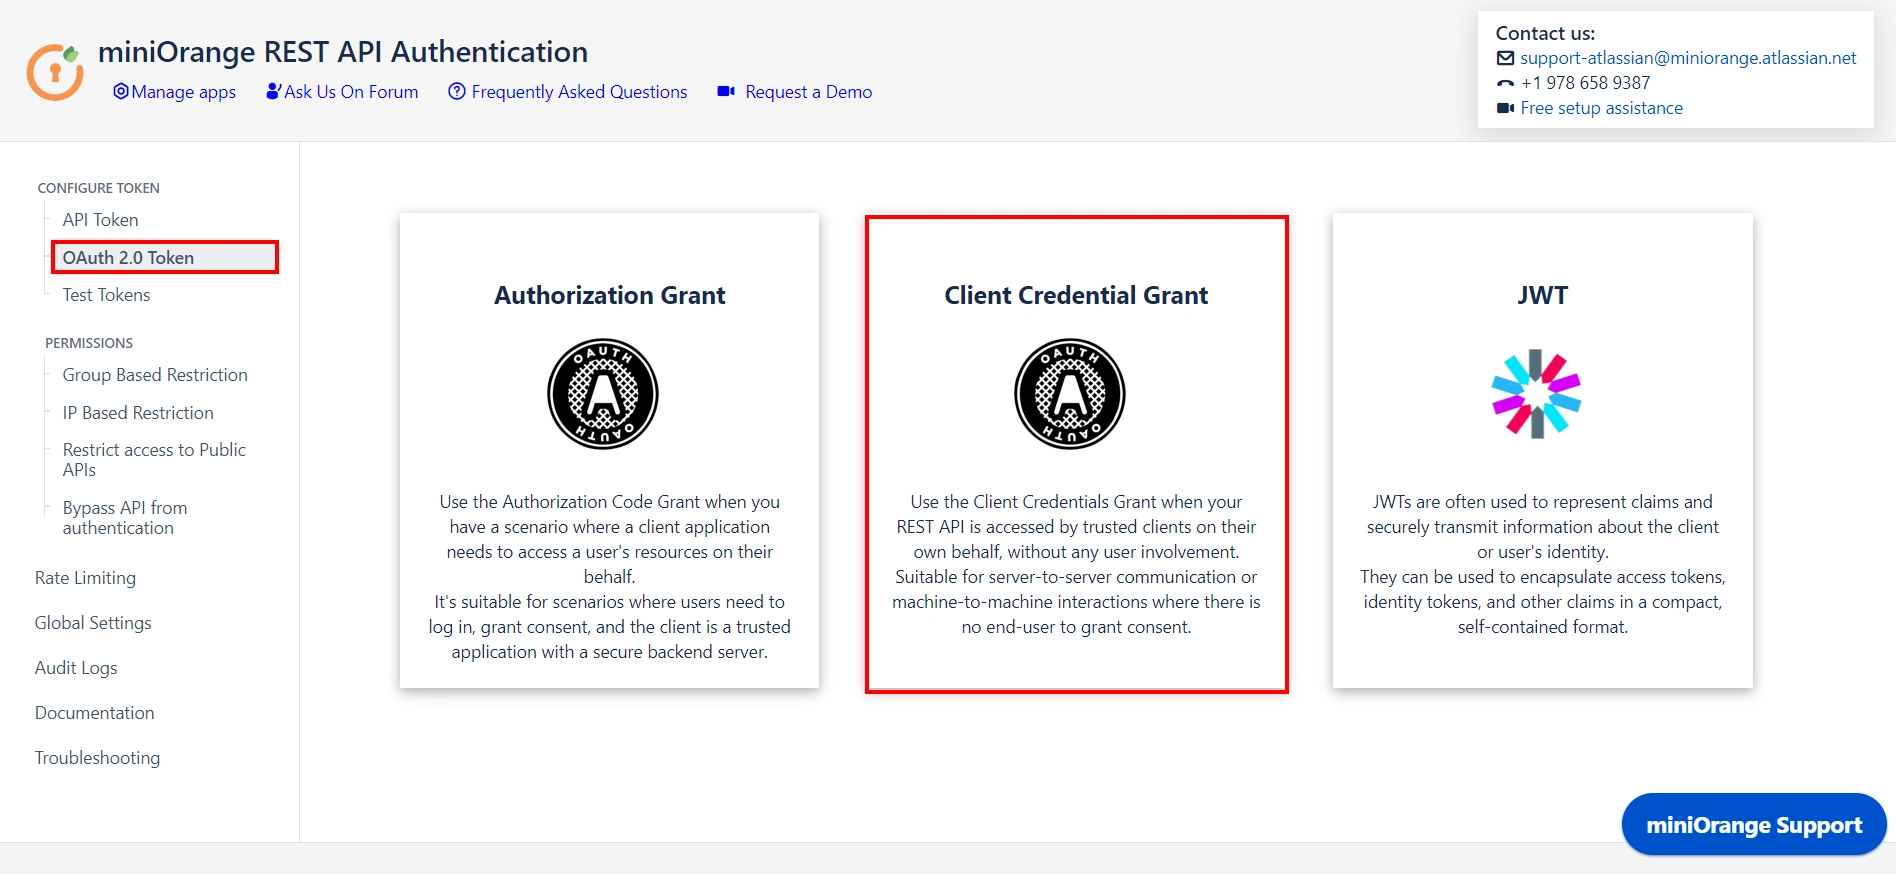
1.1 Configure Client Credentials Grant for Authenticating the tokens
- Click on the OAuth 2.0 Token from the menu and then select Client Credentials Grant.
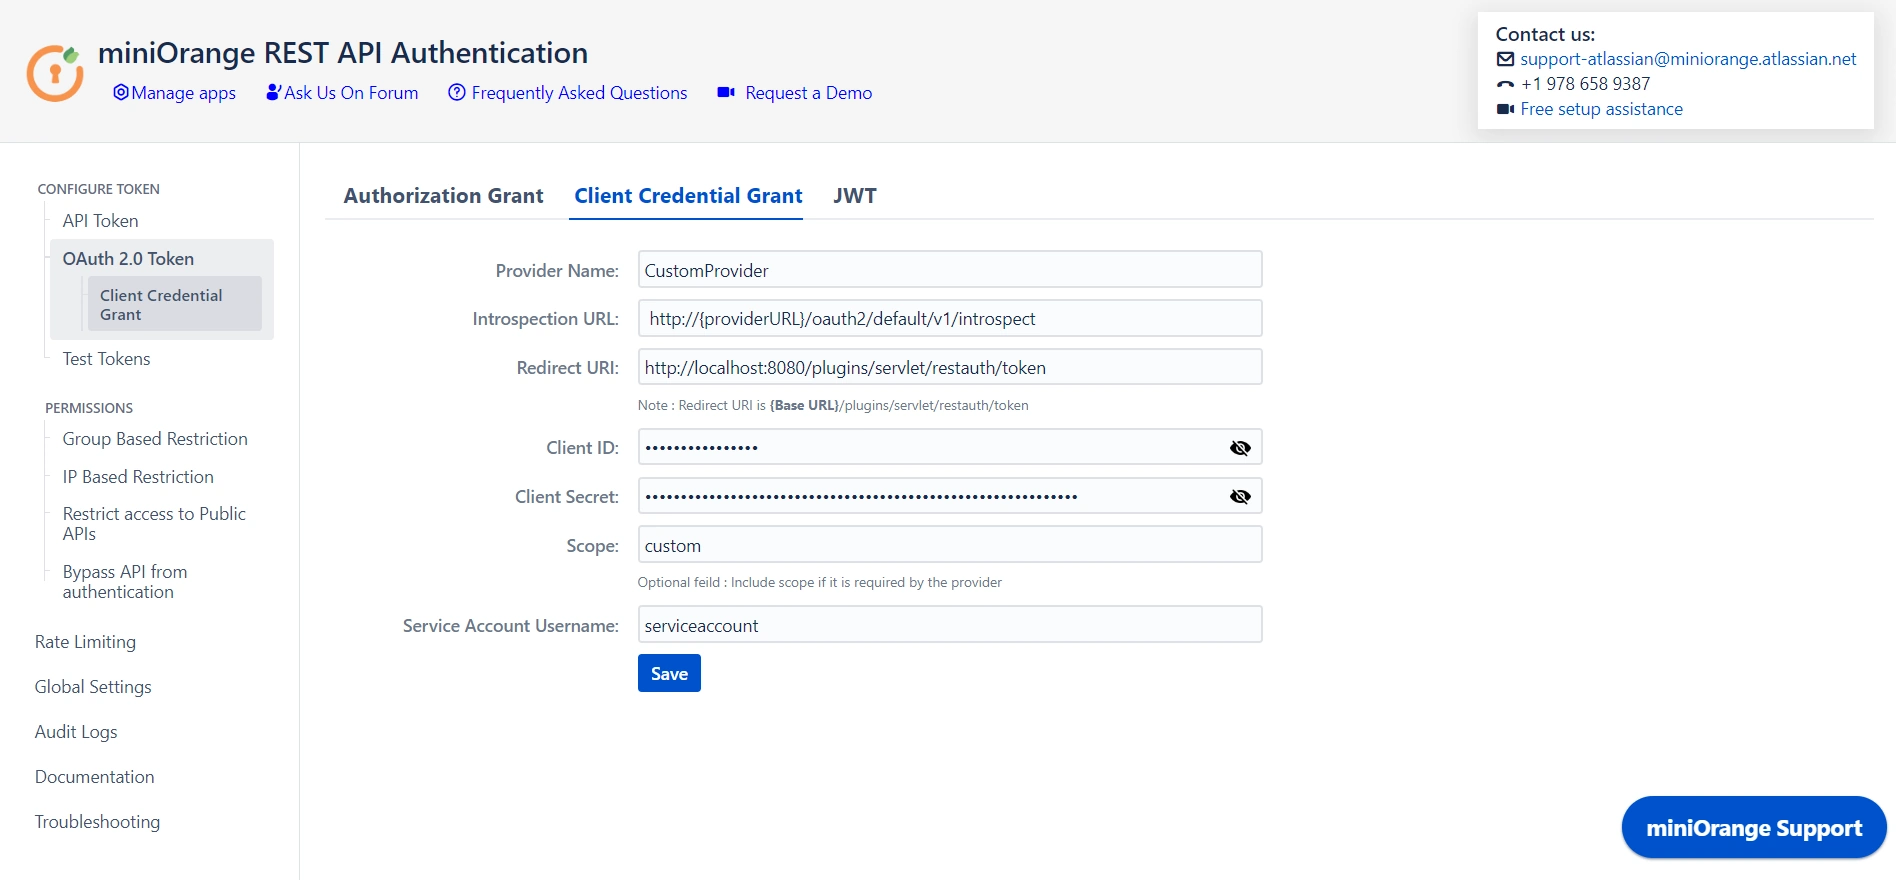
1.2 Configuring the provider details in Client Credential Grant
- Add the provider details.
- Refer to the table below for more information:
- Click on Save Button to save the settings.
| Field | Value |
|---|---|
| Provider Name | Enter the OAuth provider name. |
| Introspection Endpoint |
Enter the introspection endpoint using which the token
will be validated. Eg. http://{providerURL}/oauth2/default/v1/introspect Note: URL pattern might change for different providers. |
| Redirect URI |
Enter the redirect URI where the OAuth provider will
redirect the response after validating the token. Eg. http://localhost:8080/plugins/servlet/restauth/token Note: Redirect URI is {Base URL}/plugins/servlet/restauth/token |
| Client ID | Enter the Client ID given by the provider. |
| Client secret | Enter the Client Secret given by the provider. |
| Scope |
Include scope if required by the provider. Eg. ‘openid email profile’ for okta as the provider. |
| Service Account username | Enter the username of the service account What is a service account? (on-click slide the info) [API calls are made on behalf of the user. However, when it comes to client credentials we do not want any user to get involved. Thus a new user account is created in the current directory that will be authenticated when a token is authenticated using client credentials.] |
Now that you have configured the details, you can retrieve the token from the provider.
2: Test Configurations
- Select the appropriate token type.
- Paste the token and click on Test Token.
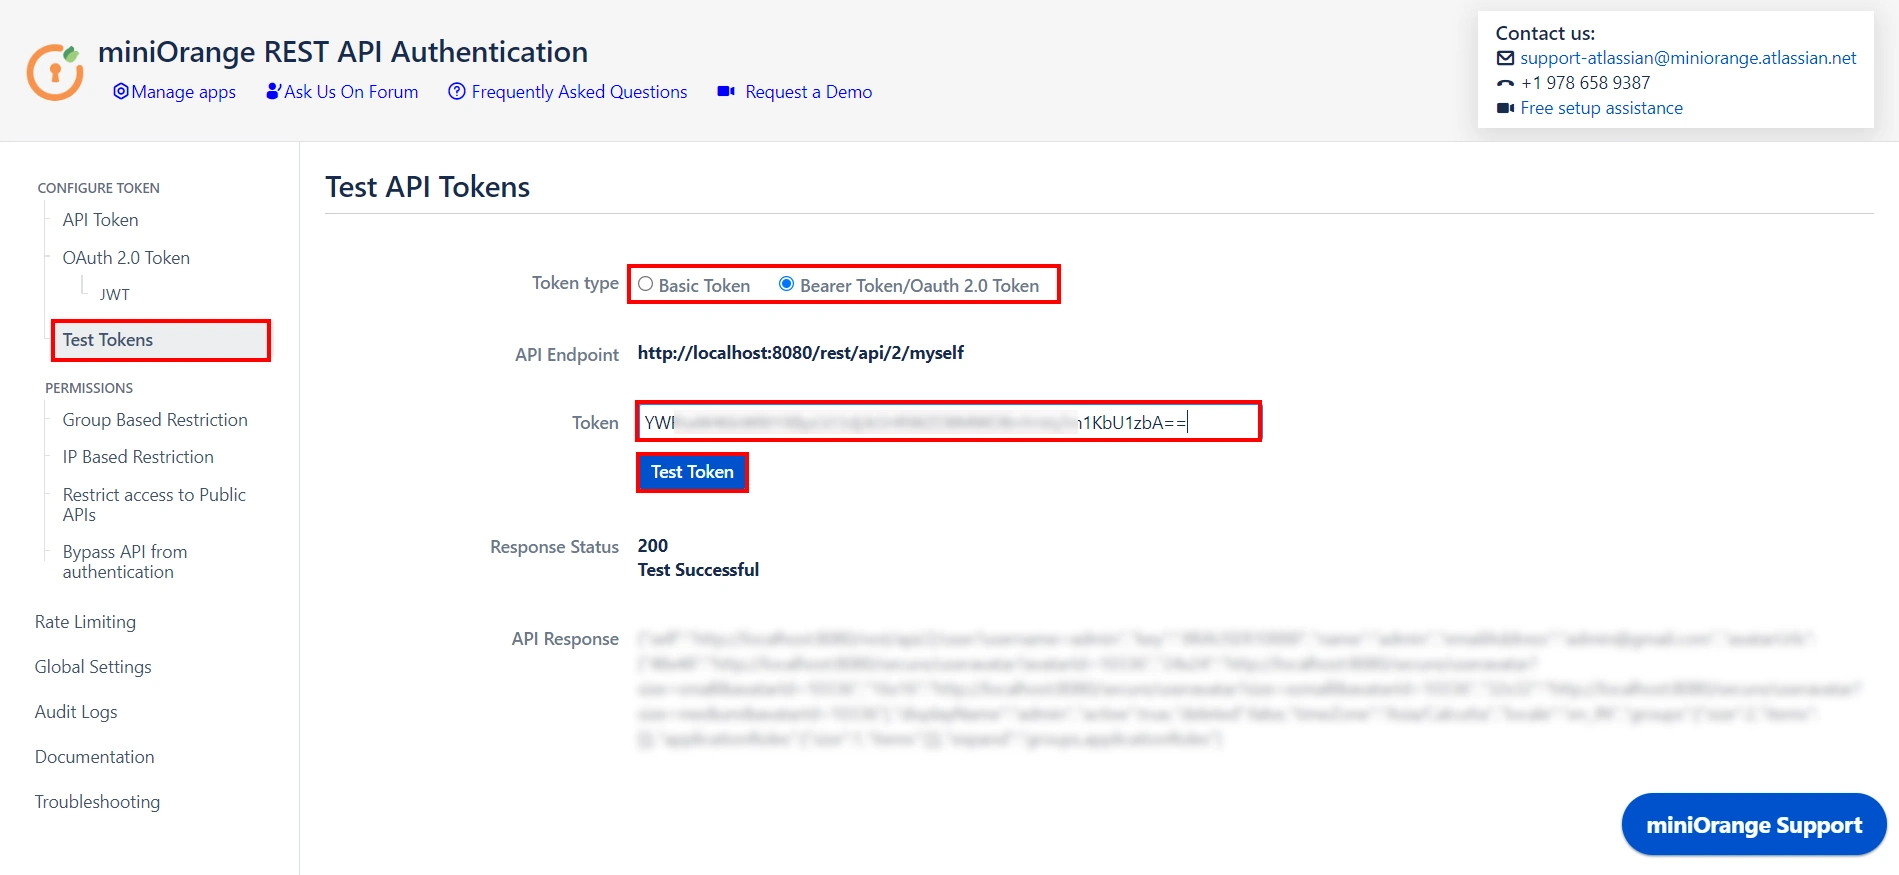
Test Successful! You can proceed further.
If you encounter any difficulties configuring add-ons, please contact us at atlassiansupport@xecurify.com or raise a support ticket here.
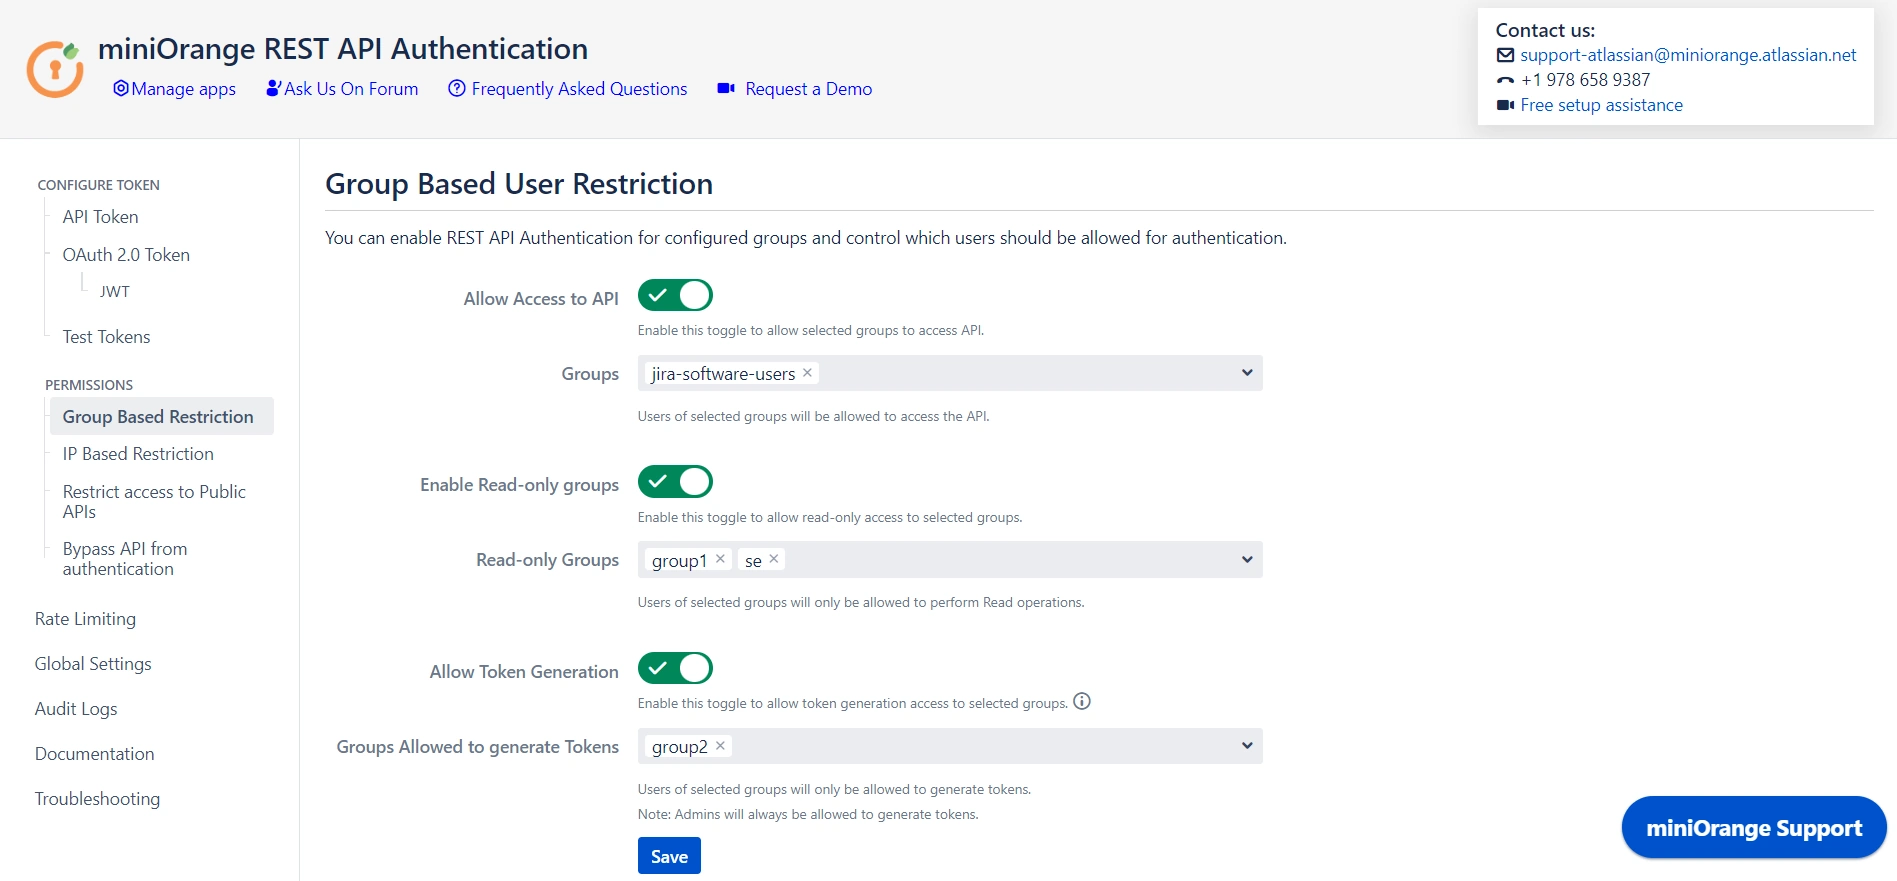
3: Adding Group and IP-Based Restriction
3.1 Group Based Restrictions
- You can Enable Allow API access and select groups who can access the APIs. Users who will not be part of selected groups cannot access the APIs.
- You can Enable Read-only Groups and allow selected groups to only access READ APIs. Users of selected groups will not be able to perform WRITE operations.
- You can Enable Allow Token Generation and select groups that can generate tokens. Users who will not be part of selected groups cannot generate tokens.
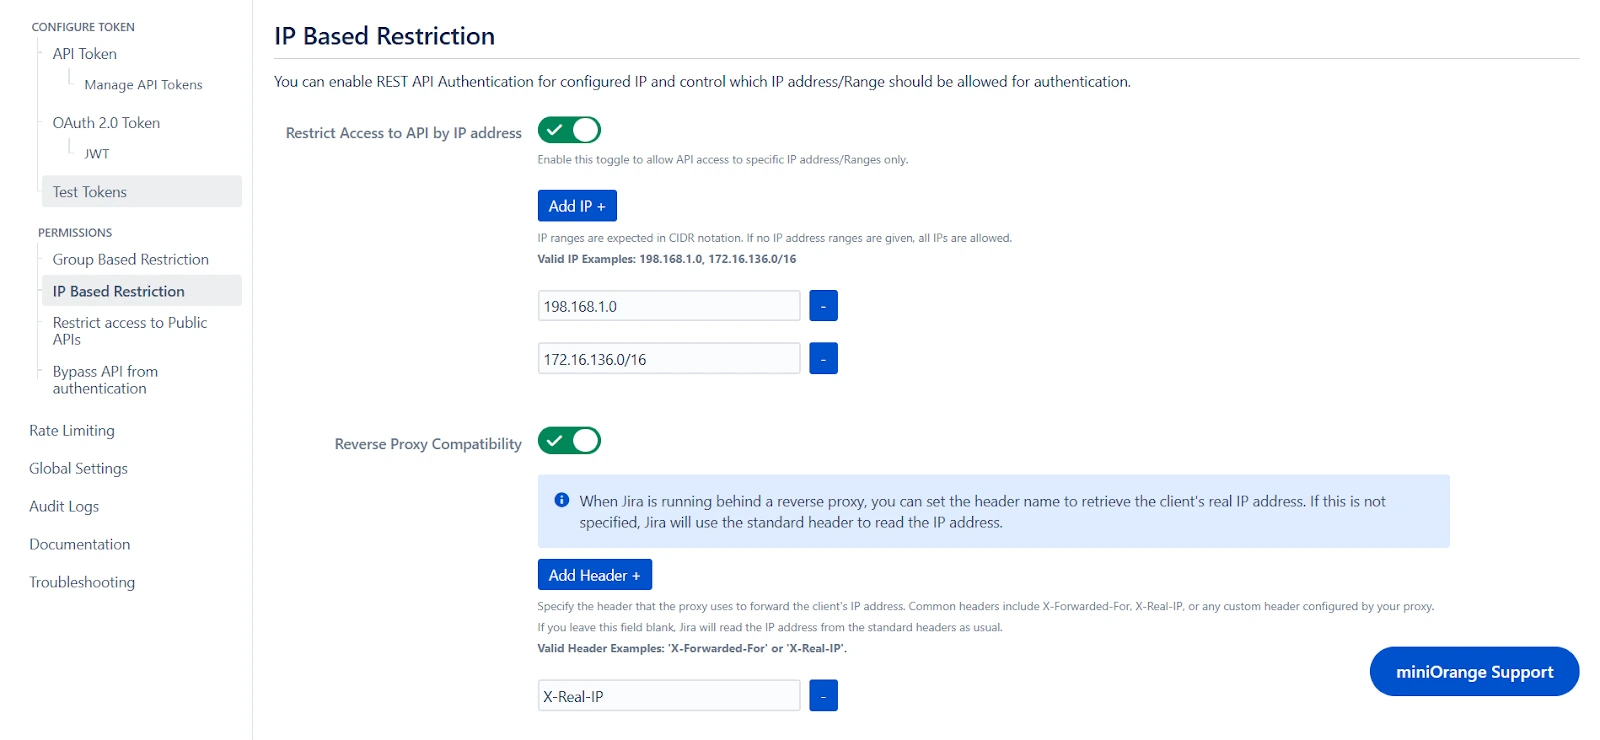
3.2 IP Based Restrictions
- You can enable Restrict Access to API by IP Address to allow API access from a specified network.
- You can add the specific IP address or IP range in CIDR notations; this will block all calls that do not belong to the configured values.
- You can enable Reverse Proxy Compatibility if your instance is running behind a reverse proxy and specify the header name to retrieve the client’s real IP address.
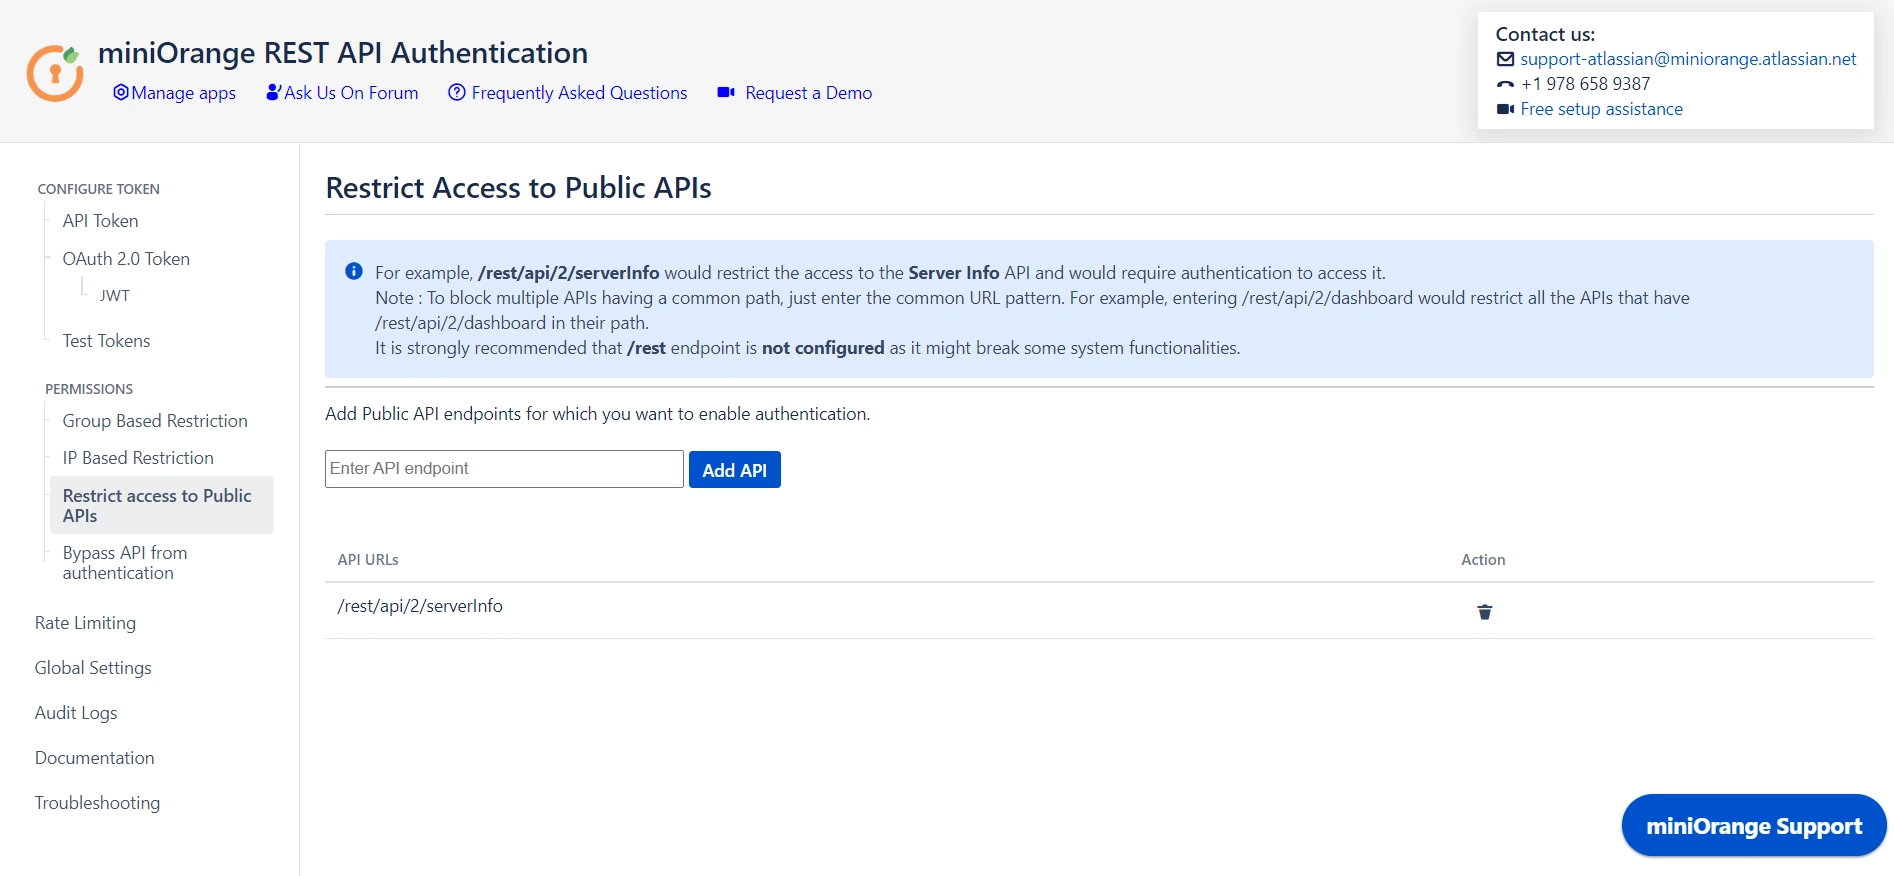
4: Public API Access
4.1 Restrict Access to Public APIs
- Public APIs do not require authentication and can be accessed anonymously. However, you can configure the API in Restrict Access to Public APIs and force authentication.
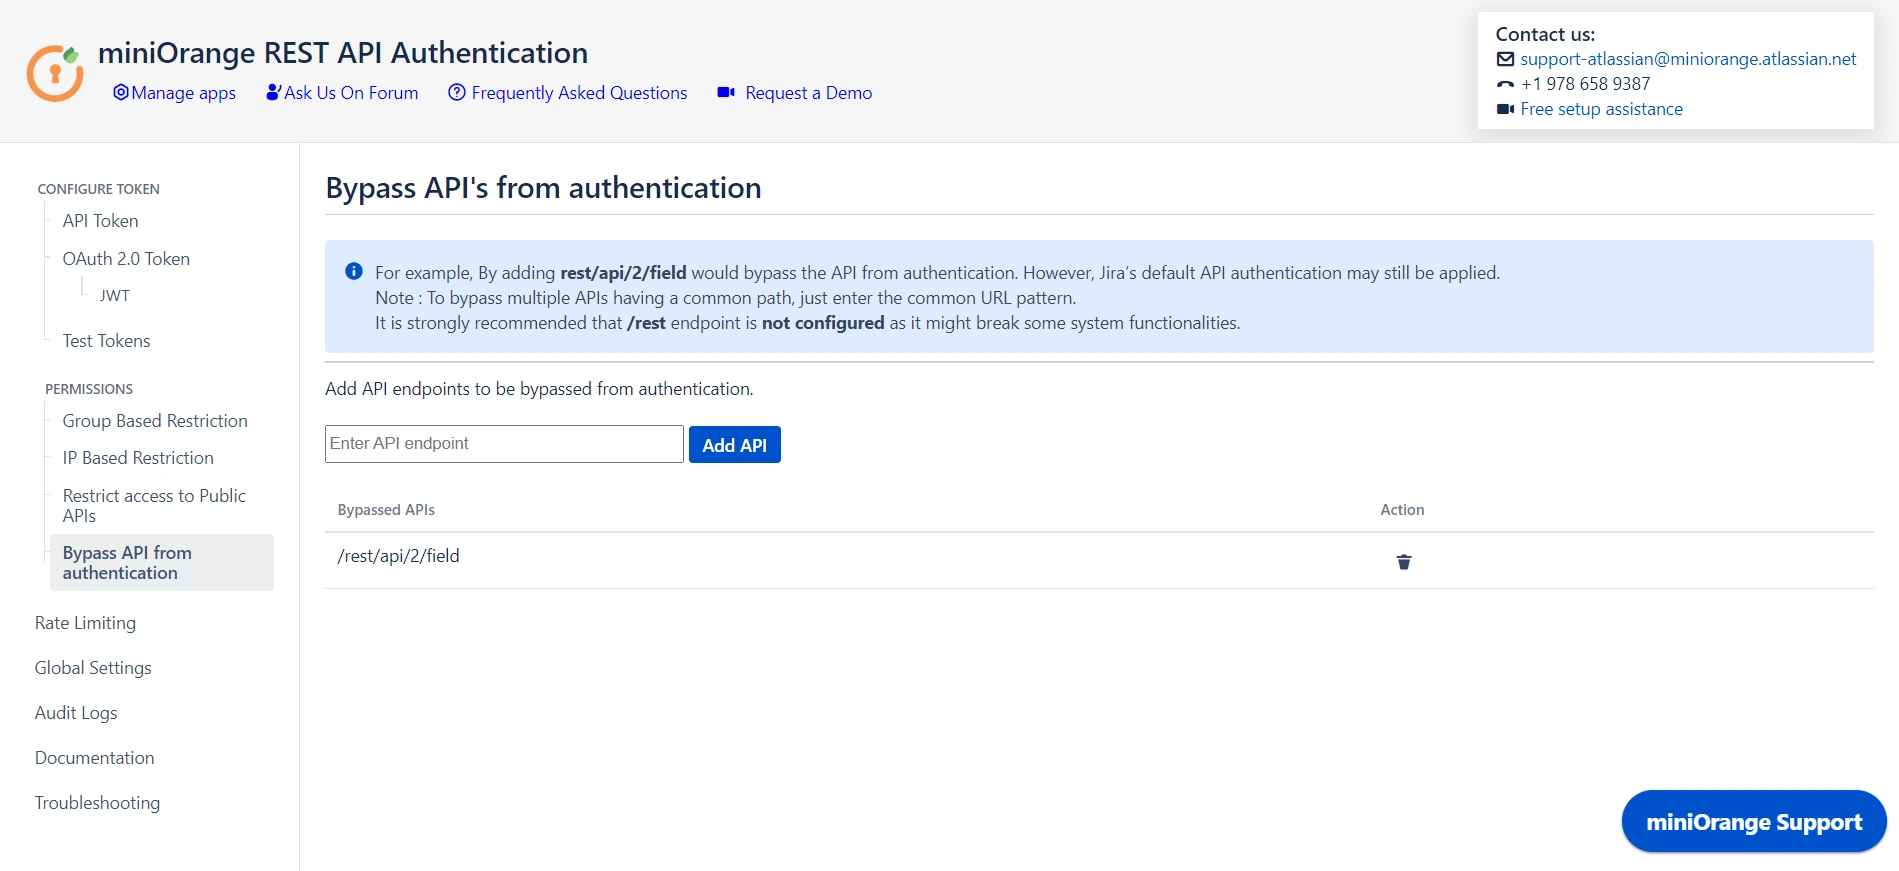
4.2 Bypass API from Authentication
- You can disable authentication through the plugin for specified APIs by adding them under Bypass API Authentication. However, default authentication might still be applicable.
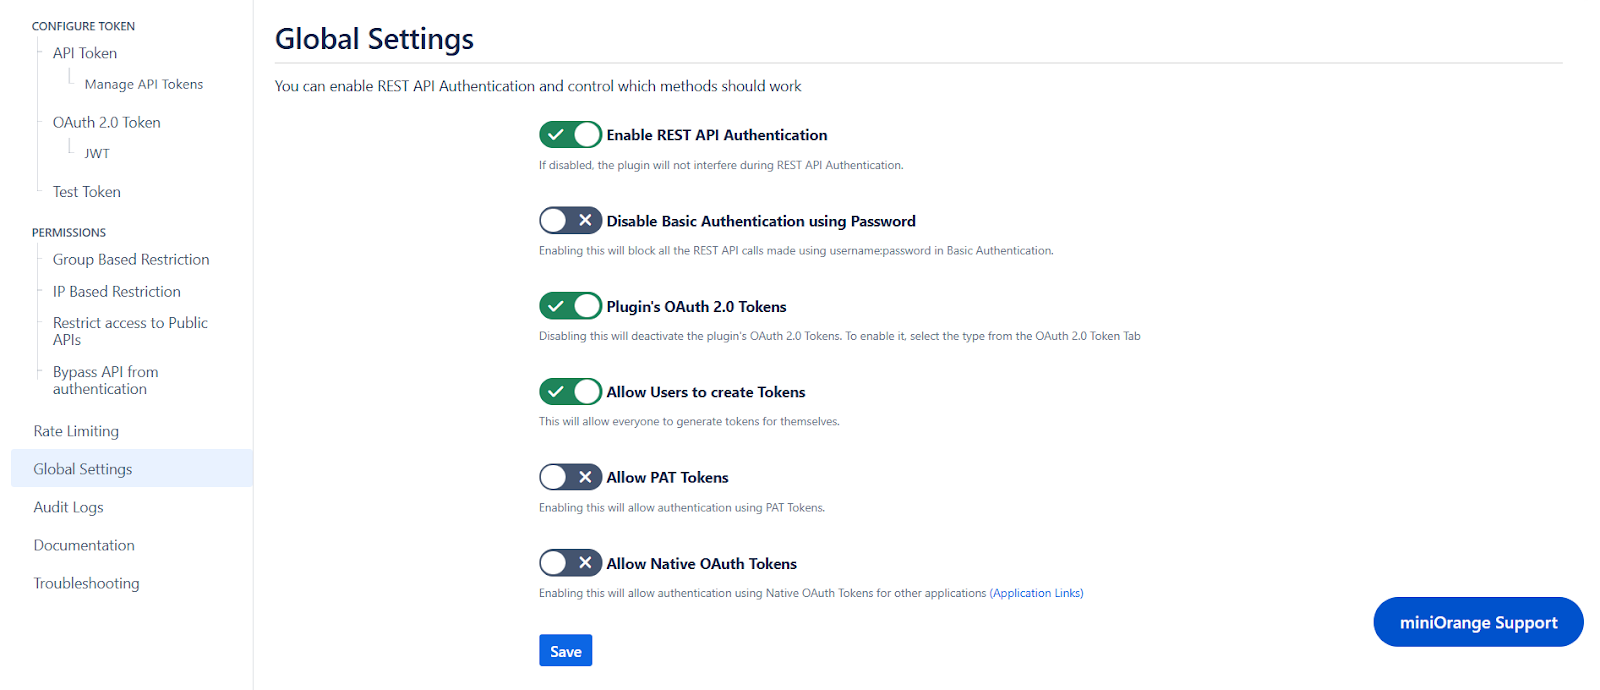
5: Global Settings
- The Enable REST API Authentication toggle ensures API authentication through the plugin. If disabled, the plugin will not be involved in API authentication.
- The Disable Basic Authentication toggle allows you to enforce authentication through the plugin. Basic authentication using username and password will be restricted.
- You can use the Plugin's OAuth 2.0 Tokens toggle to disable OAuth 2.0 tokens if not in use.
- The Allow PAT Tokens will allow users to use PAT tokens generated by Jira/Confluence to access the API. To restrict the use of PAT tokens and enforce authentication through the plugin you can disable the toggle.
- The Allow users to create Tokens toggle will allow all other users to generate tokens. If disabled, only admins will be able to generate tokens. However, if you have enabled Allow groups to generate tokens from group-based restrictions, you need to keep the toggle on.
- The Allow Native OAuth Tokens toggle enables Jira integration via Application Links, bypassing requests to Jira to authenticate Native OAuth 2.0 tokens. Disabling this toggle will enforce authentication through the plugin instead.
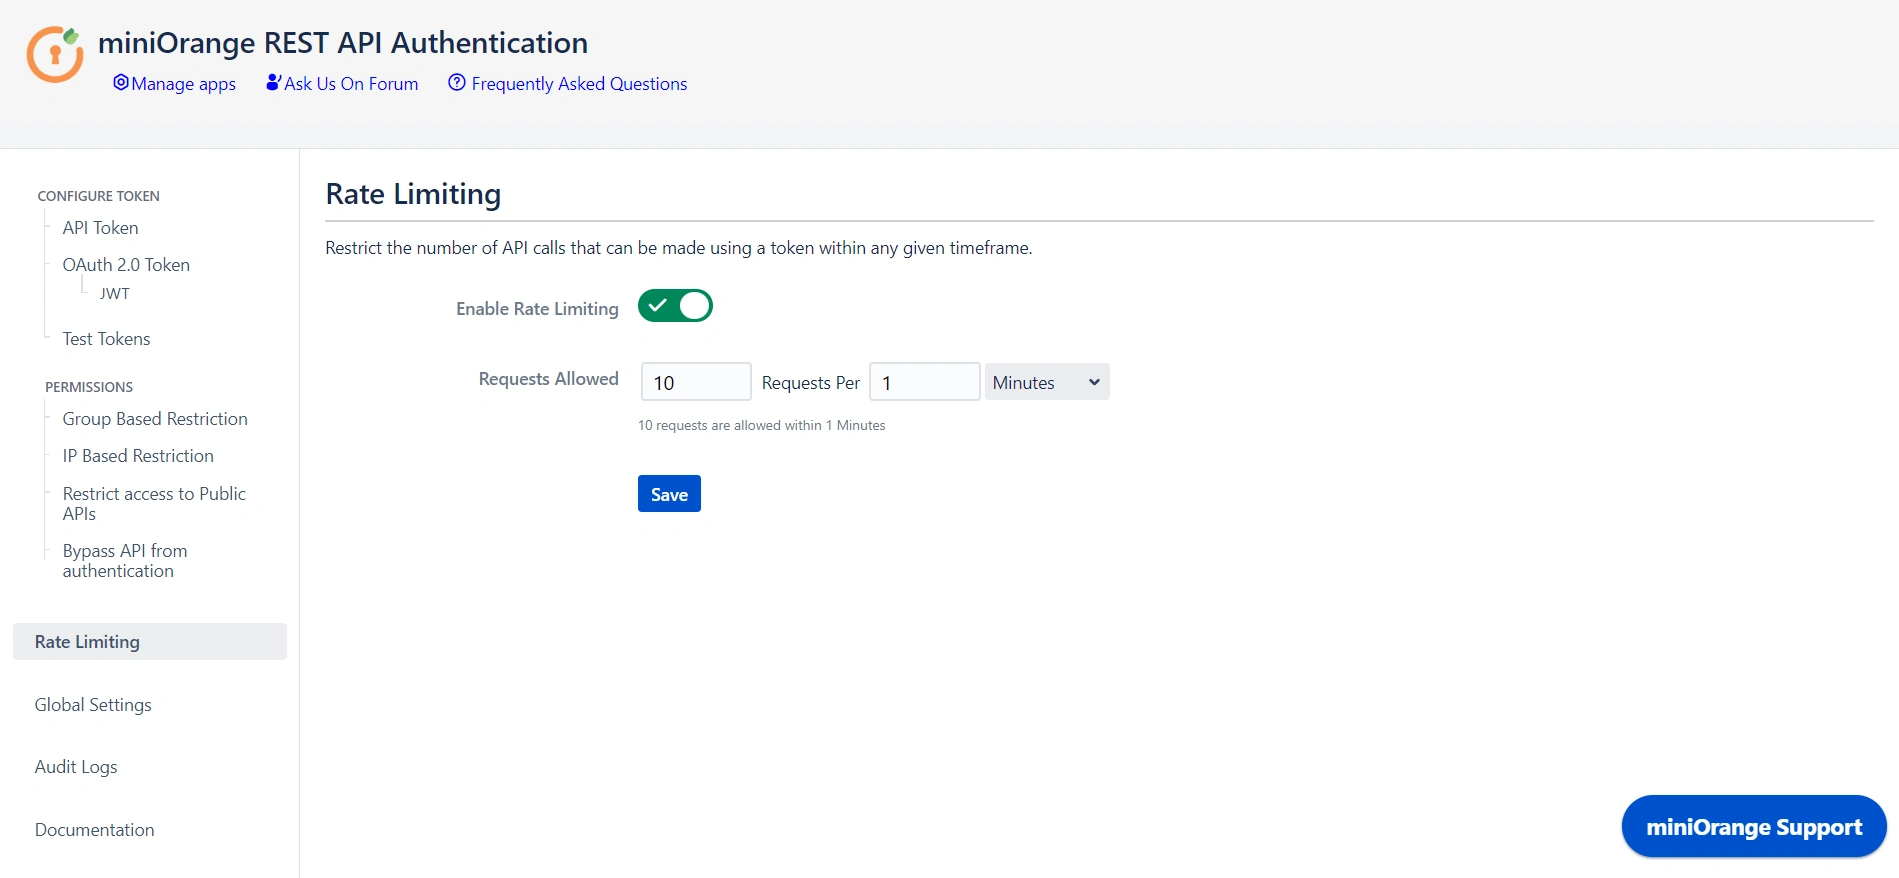
6: Rate Limiting
- Enable rate limiting to restrict the number of requests made by a token within the specified time frame.
- Then select the number of requests to be allowed and the time frame.
- This will enforce rate limiting on the API tokens generated through the plugin.
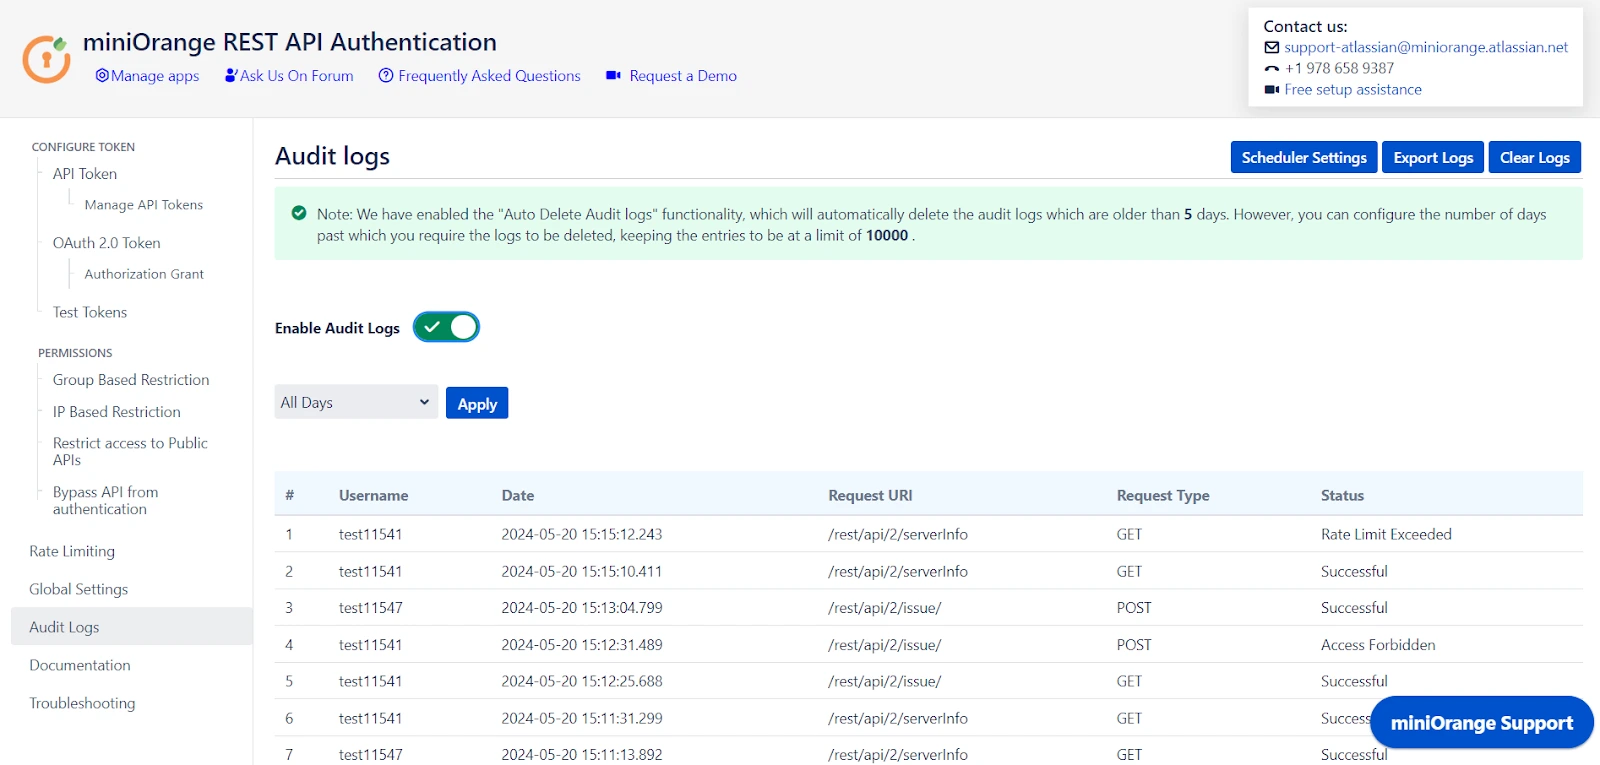
7: Audit Logs
- You can Enable Audit Logs to log the activity with REST APIs. This will help you monitor the REST API access.
- You can also update the Scheduler settings that automatically delete logs after a specific number of days or entries.
Additional Resources
Did this page help you?
