- Home
- DLP
- How to configure File Fingerprinting using miniOrange DLP
Configure File Fingerprinting with miniOrange DLP Solution
File Fingerprints help identify and protect specific files based on their unique content. By creating file fingerprints, administrators can detect protected files and help prevent unauthorized sharing or transfer of sensitive data across the organization. They provide an additional layer of data protection by enabling organizations to monitor and control the movement of identified files across managed endpoints.
Prerequisites
There are a couple of things you need to check before you start with the setup:
- You must have the required privileges to create and configure File Fingerprints in the miniOrange DLP dashboard.
Configuration Steps
Step 1: Configure File Fingerprints
- Sign in to your DLP Admin dashboard.
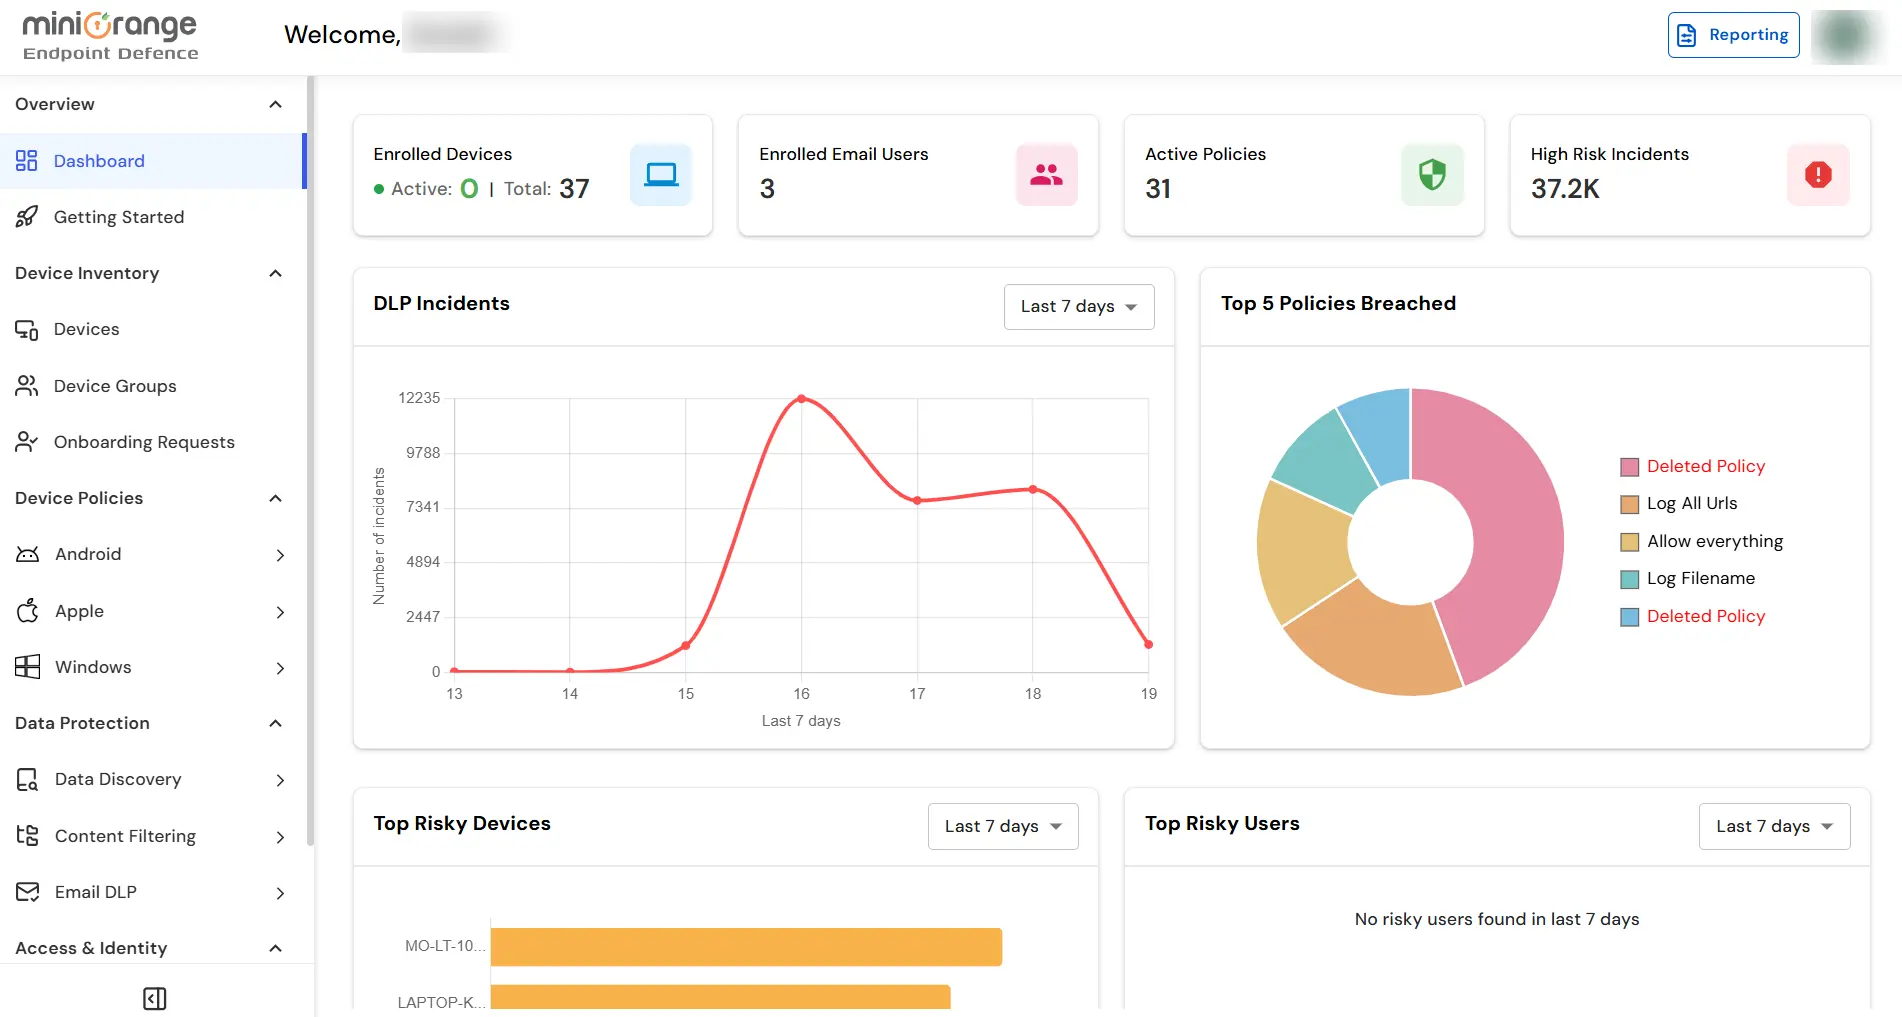
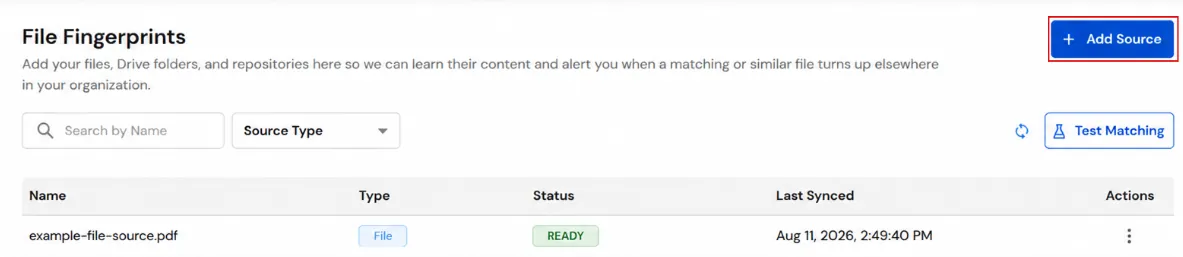
- On the dashboard, navigate to the left menu panel and click Content Filtering → File Fingerprints.
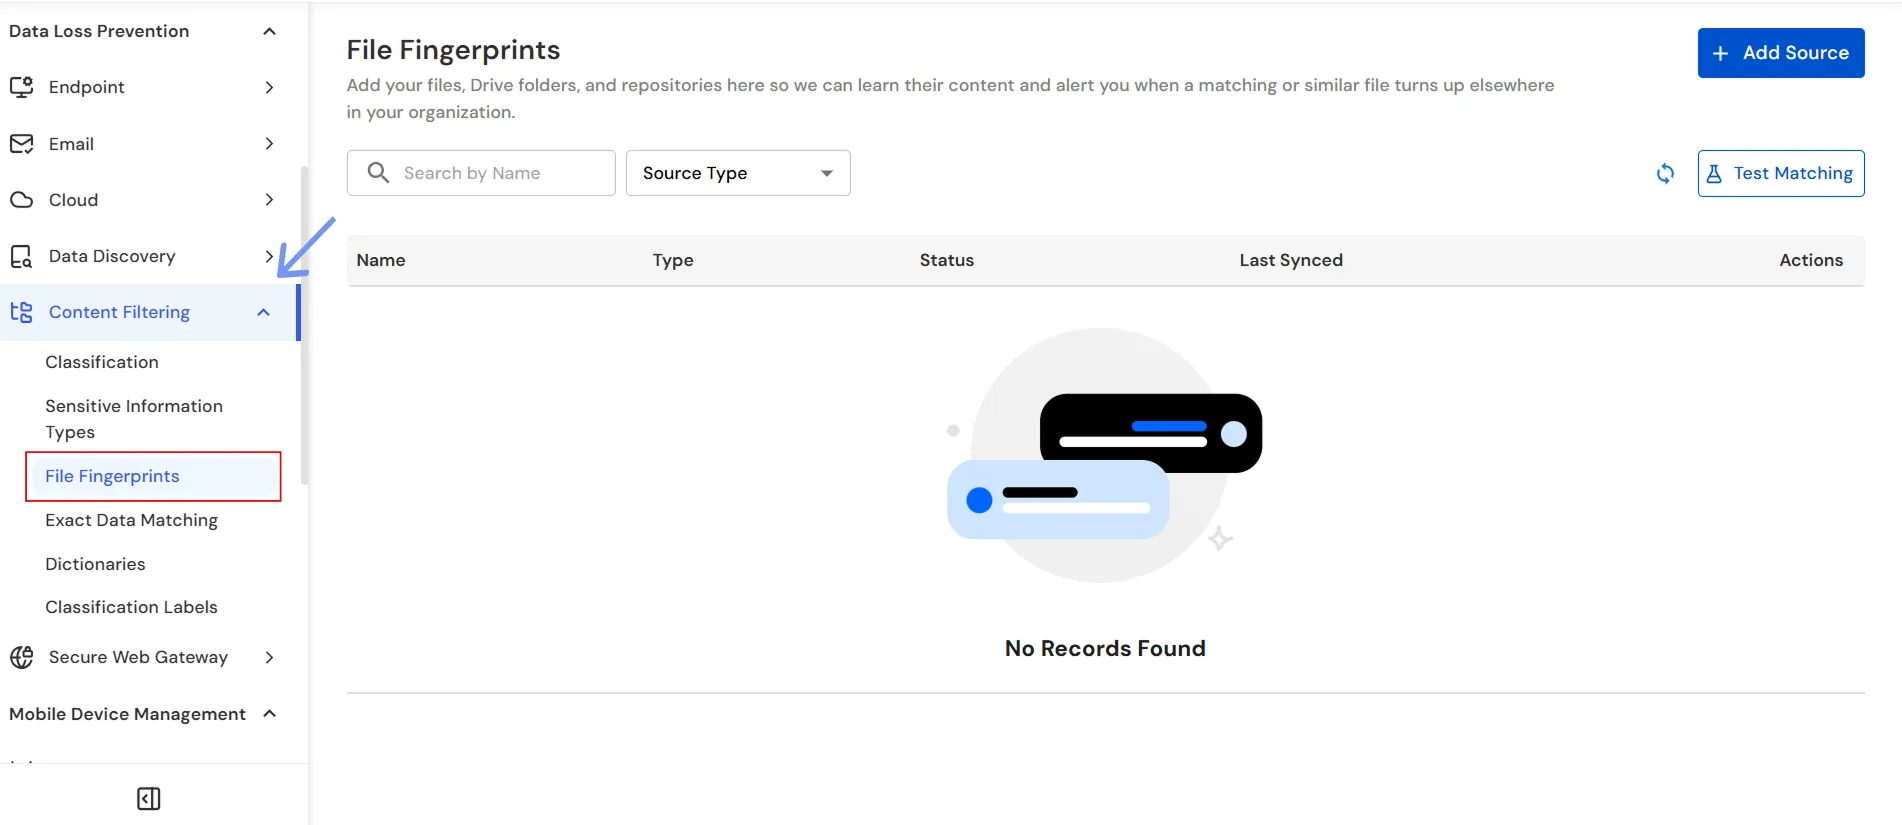
- Click the Add Source button to add a file, folder, or repository as a source for creating a File Fingerprint.

- In the Add Source window, select the required source type from the available options: File, Drive Folder, or GIT Repo.
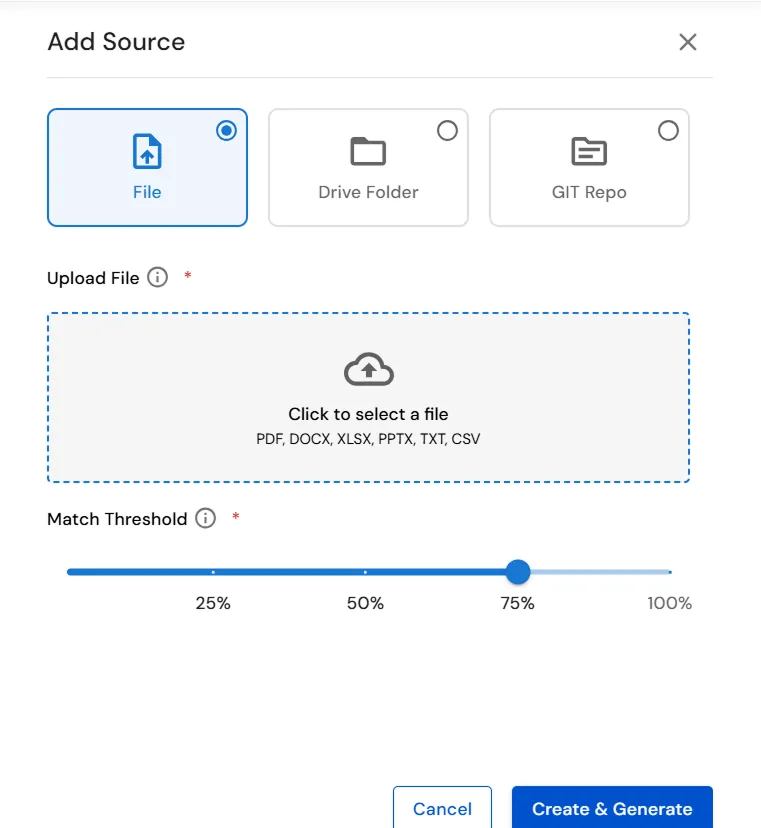
- In the Add Source window, select the File source type.
- Under Upload File, click Click to select a file and upload the file that you want to use as the source for the File Fingerprint.
- The supported file formats include PDF, DOCX, XLSX, PPTX, TXT, and CSV.
- Under Match Threshold, set the required percentage to determine how closely a file must match the source file to be detected.
- For example, set the Match Threshold to 75% to use a 75% content similarity threshold for matching.
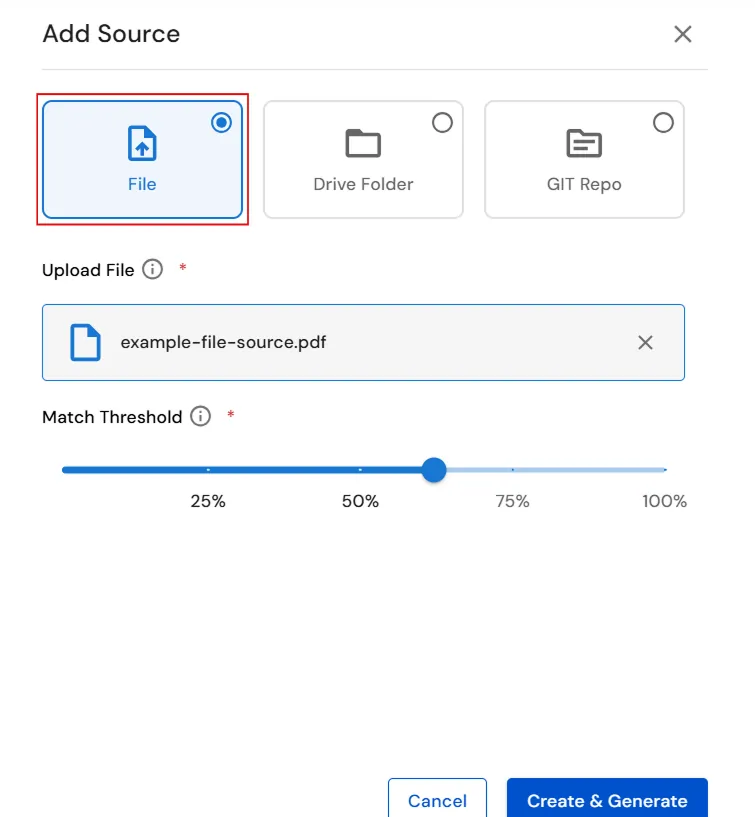
- Click Create & Generate to create the File Fingerprint from the uploaded file.
- In the Add Source window, select the Drive Folder source type.
- Under Folder ID, enter the Folder ID or Drive URL of the folder that you want to use as the source for the File Fingerprint.
- Under Match Threshold, set the required percentage to determine how closely files must match the source files to be detected.
- For example, set the Match Threshold to 75% to use a 75% content similarity threshold for matching.
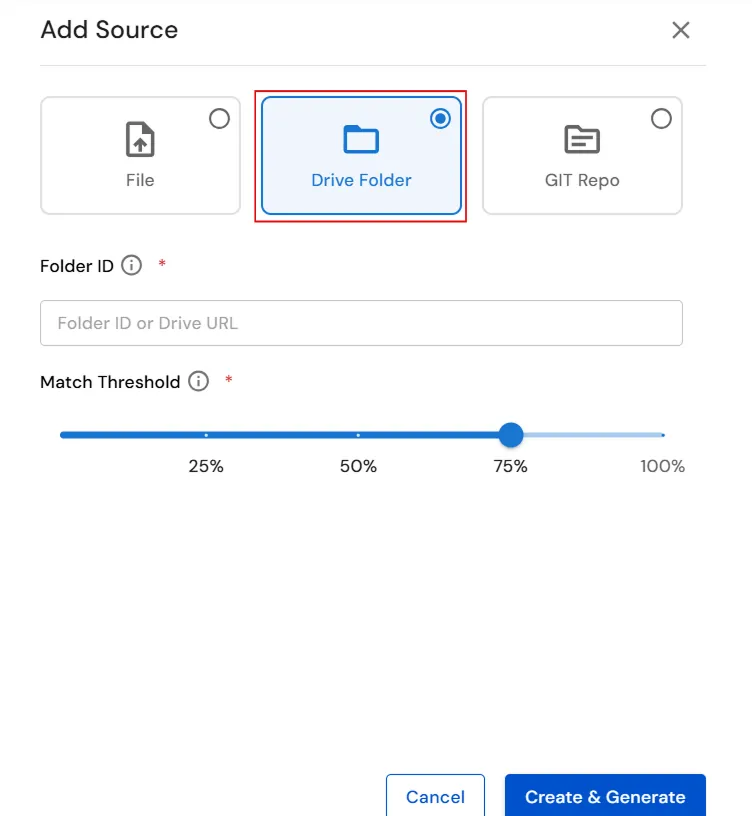
- Click Create & Generate to create the File Fingerprint from the specified Drive folder.
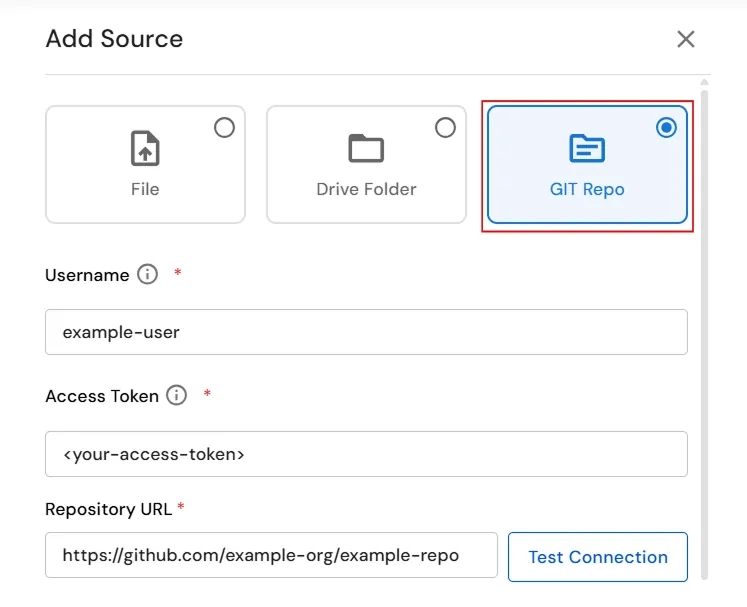
- In the Add Source window, select the GIT Repo source type.
- Under Username, enter the username associated with the Git repository.
- Under Access Token, enter a valid access token that has permission to access the repository.
- Under Repository URL, enter the URL of the Git repository that you want to use as the File Fingerprint source.
- Click Test Connection to verify the connection to the specified Git repository.
- (Optional) Under Branch, enter the name of the Git branch that should be used as the source. For example, enter main.
- Under Excluded Paths, specify the repository paths that should be excluded from File Fingerprint processing. The interface provides default excluded paths such as node_modules, build, dist, .git, target, vendor, out, and public.
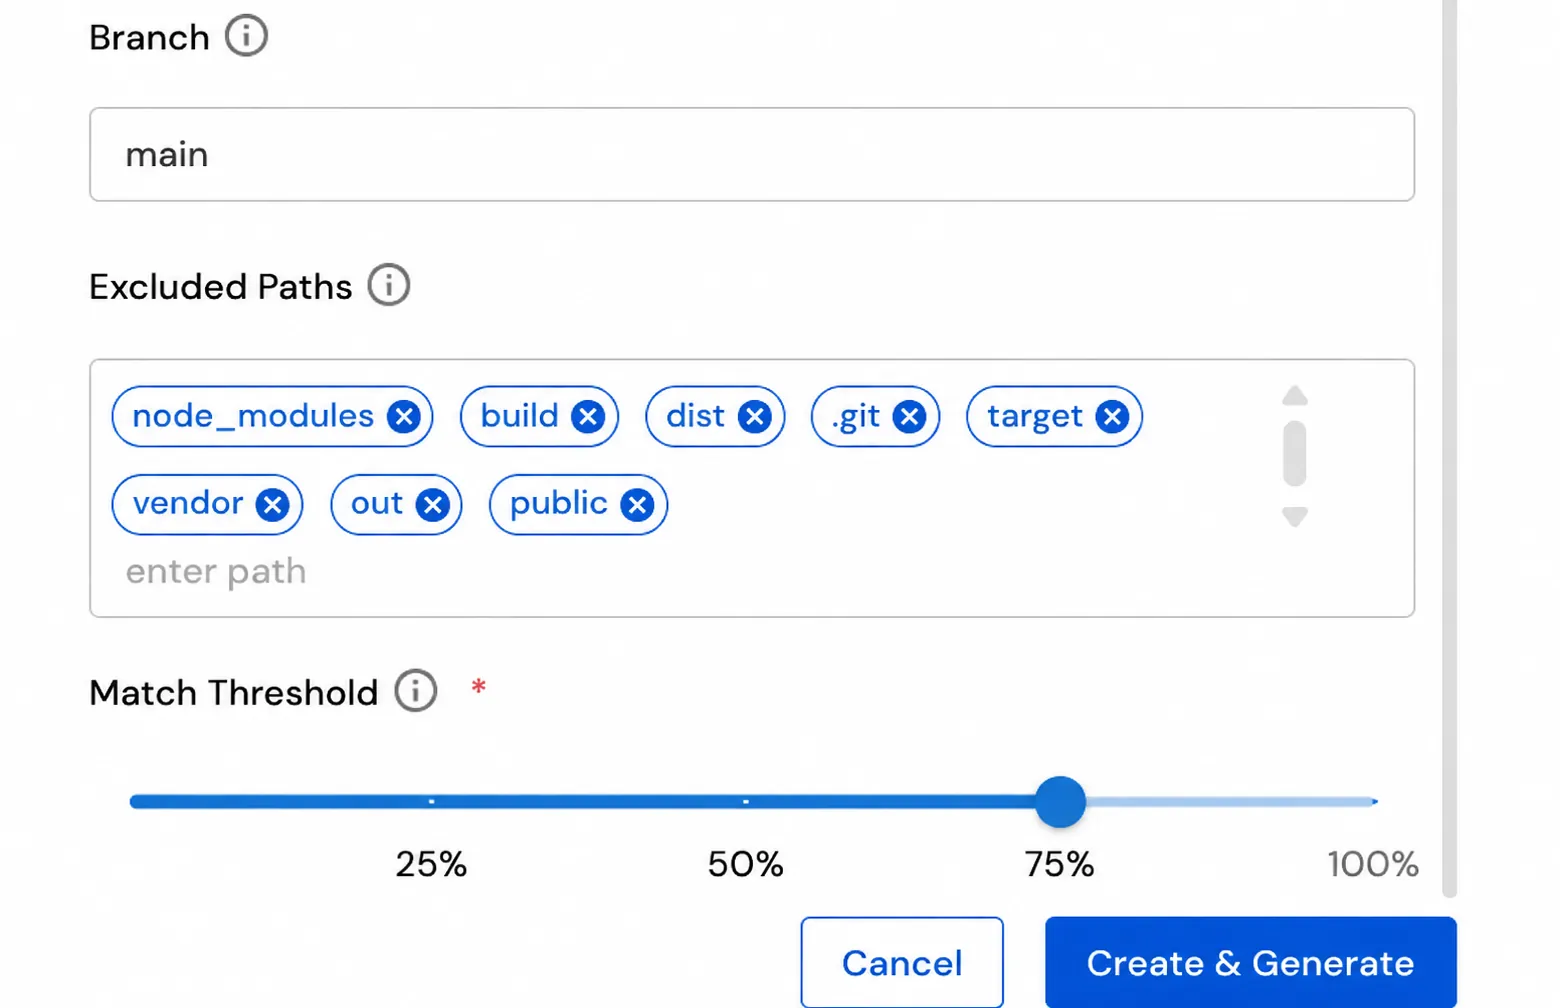
- Under Match Threshold, set the required percentage to determine how closely files must match the source files for them to be detected.
- For example, set the Match Threshold to 75%.
- After configuring the required settings, click Create & Generate to create the File Fingerprint from the Git repository.
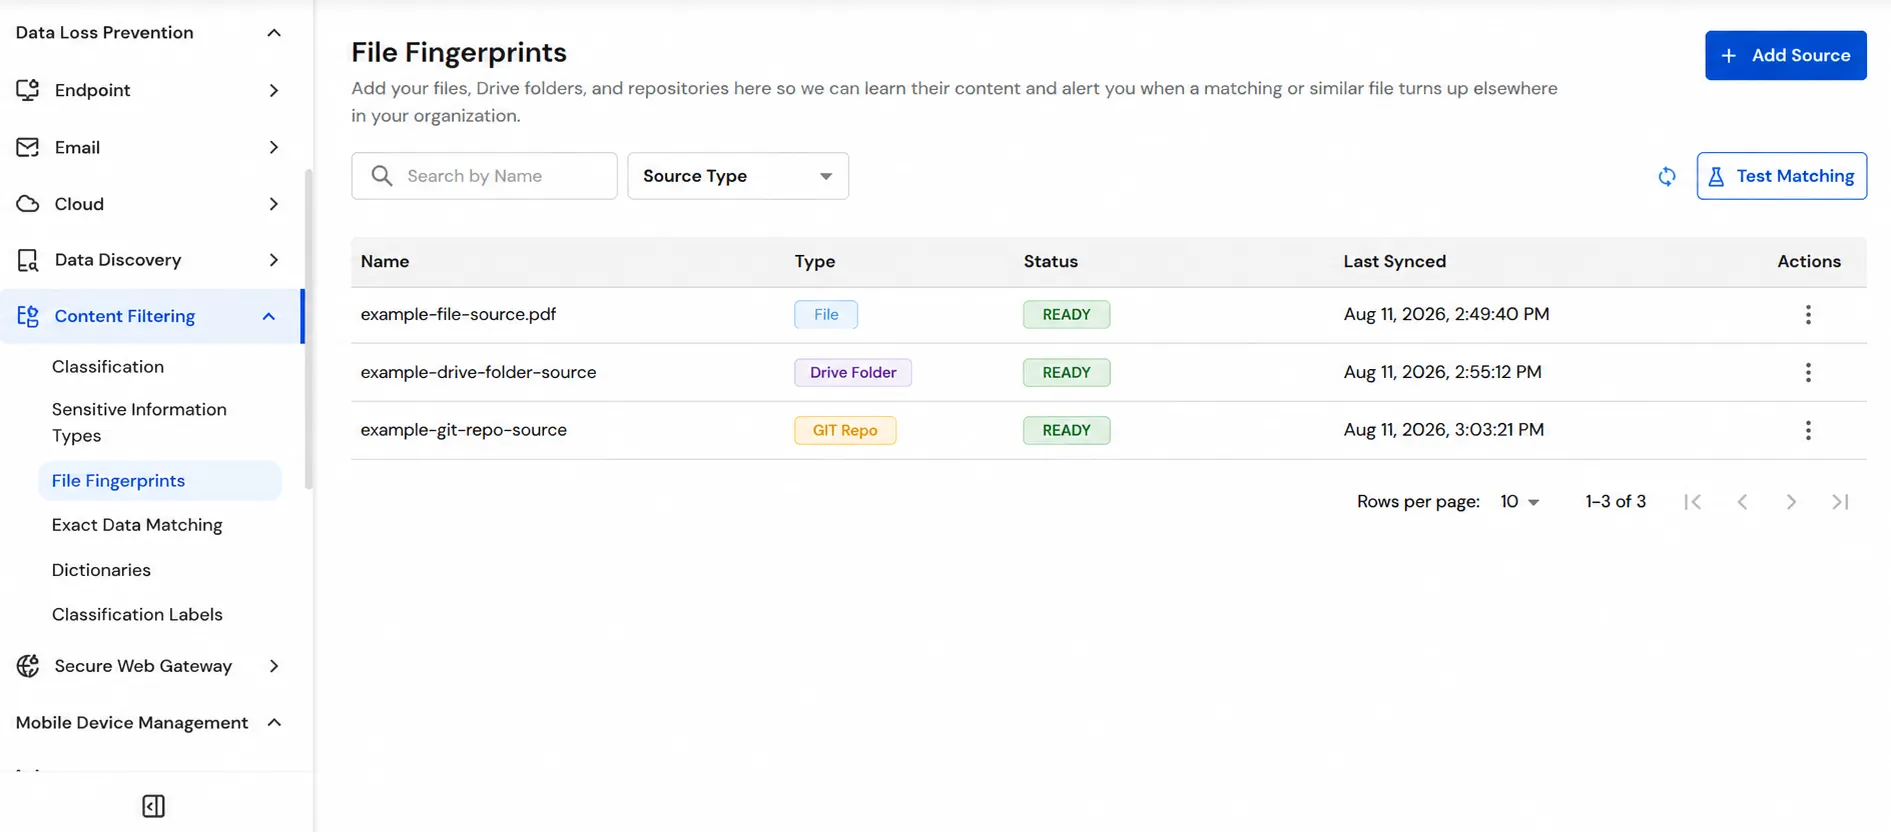
- Verify that the newly added source appears in the File Fingerprints list with the configured Name, Type, and Status.
- (Optional) Use the Source Type dropdown to filter the File Fingerprints list by File, Drive Folder, or Repo.
Step 2: Test Matching
- Click the Test Matching button to test whether a file matches any of the configured File Fingerprints.
- In the Run Fingerprint Test window, under Select Fingerprints, select one or more File Fingerprints that you want to use for the test.
- Under Test File, click Click to select a file and upload the file you want to test against the selected File Fingerprints.
- Make sure the test file is in one of the supported formats: PDF, DOCX, XLSX, PPTX, TXT, or CSV, and does not exceed 5 MB.
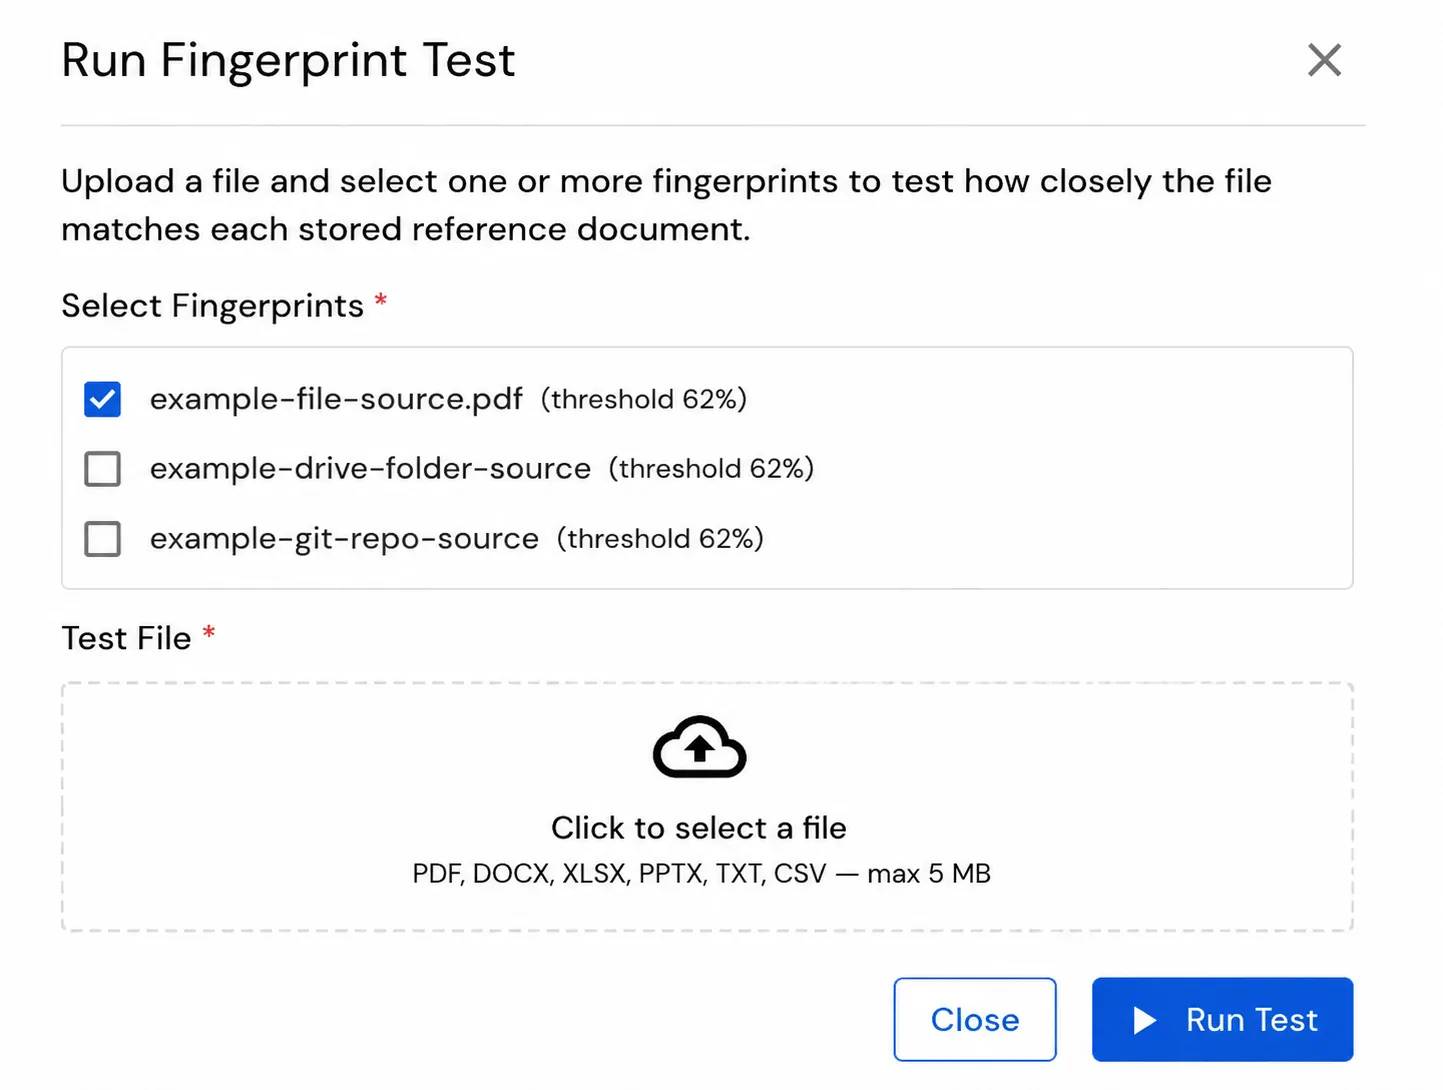
- After selecting the required File Fingerprint and uploading the test file, click Run Test to start the fingerprint matching test.
- Review the Test Results to verify whether the uploaded test file matches the selected File Fingerprint.
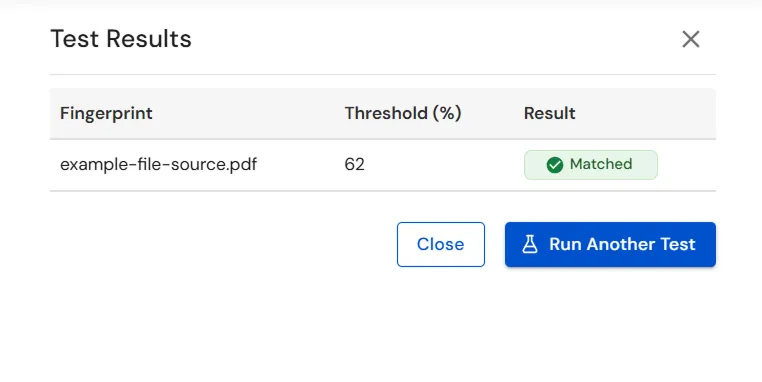
- Verify the Fingerprint, configured Threshold (%), and Result displayed for the test.
- If the result shows Matched, the uploaded test file meets or exceeds the configured similarity threshold for the selected File Fingerprint.
- Click Run Another Test to test another file or fingerprint, or click Close to exit the test results window.
You have successfully configured and tested a File Fingerprint using our DLP solution. If you encounter any issues during the configuration, please feel free to contact us at uemsupport@xecurify.com.