- Home
- DLP
- How to configure SMTP and FTP Policies using miniOrange DLP
Configure SMTP and FTP Policies with miniOrange DLP
SMTP and FTP policies help monitor, manage, and control file transfer traffic across these protocols. By configuring SMTP and FTP policies, administrators can define how file transfers are handled, helping prevent unauthorized data movement and maintain better control over sensitive information across managed endpoints.
Prerequisites
There are a couple of things you need to check before you start with the setup:
- You must have the required privileges to create and configure SMTP and FTP in the miniOrange DLP dashboard.
Configuration Steps
Step 1. Configure SMTP and FTP
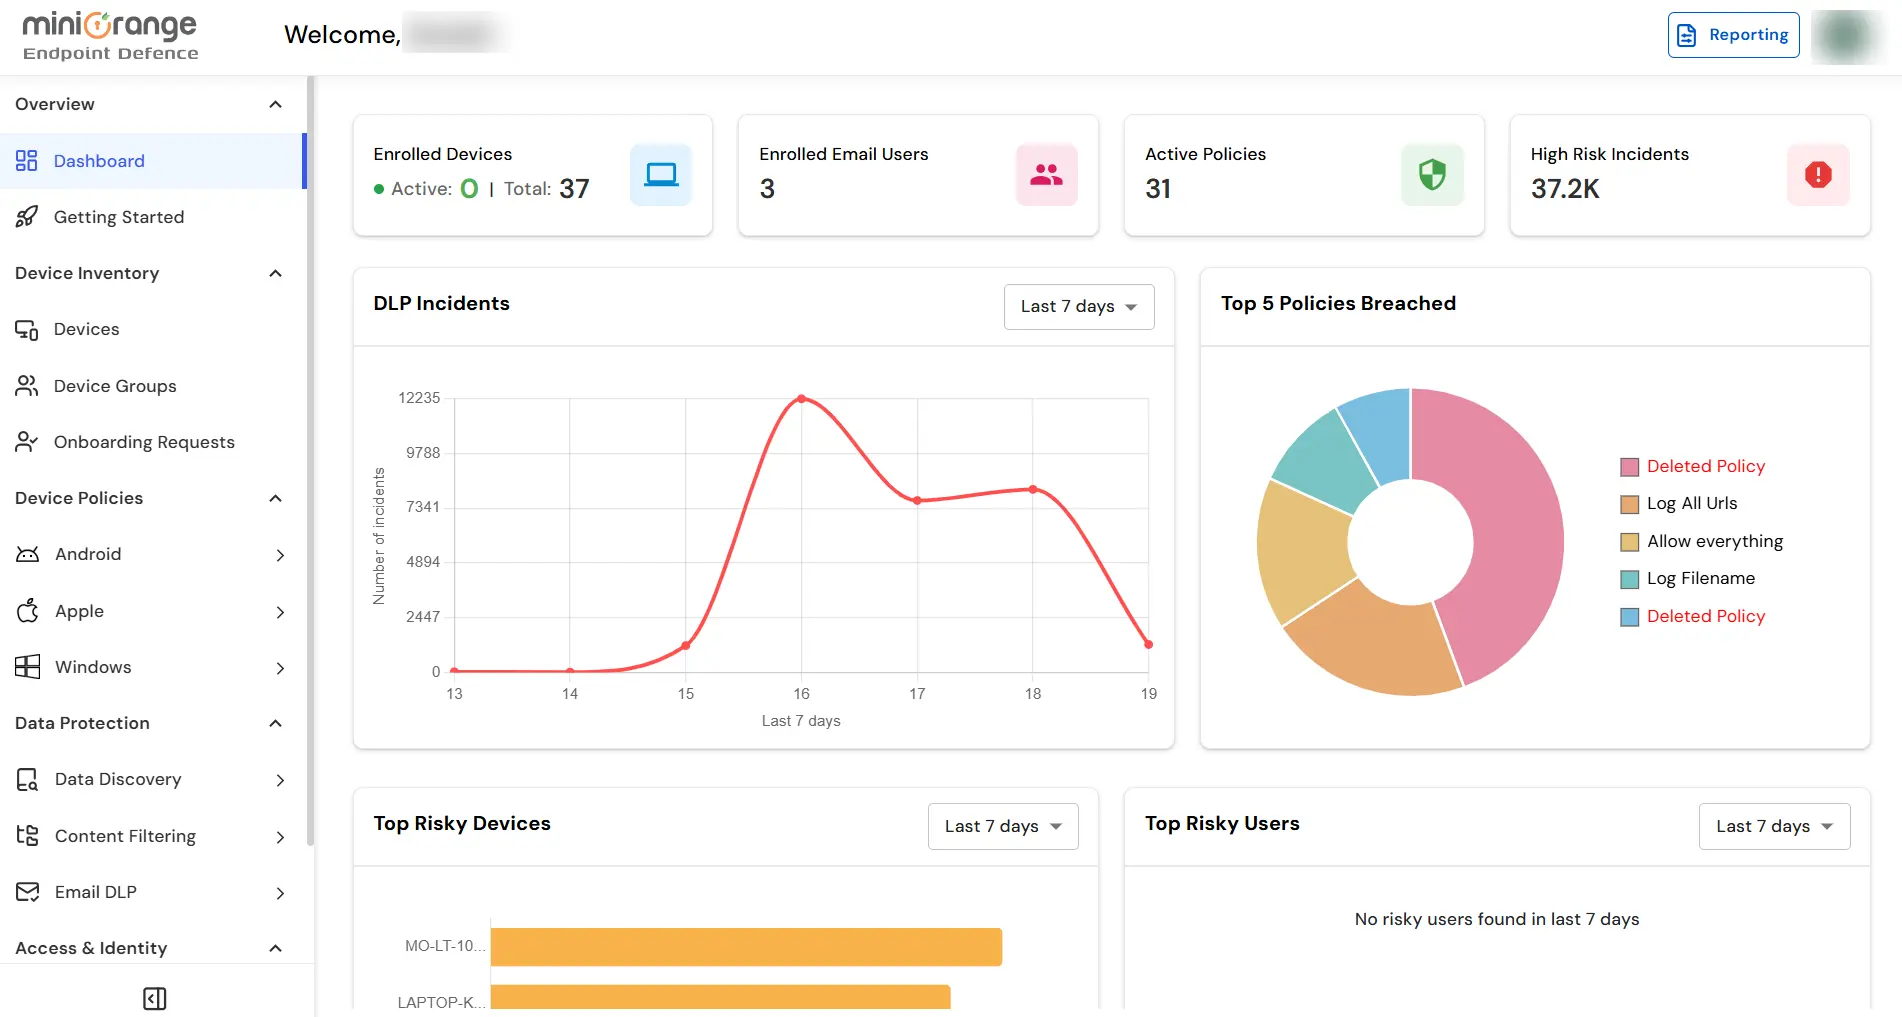
- Sign in to your DLP Admin dashboard.
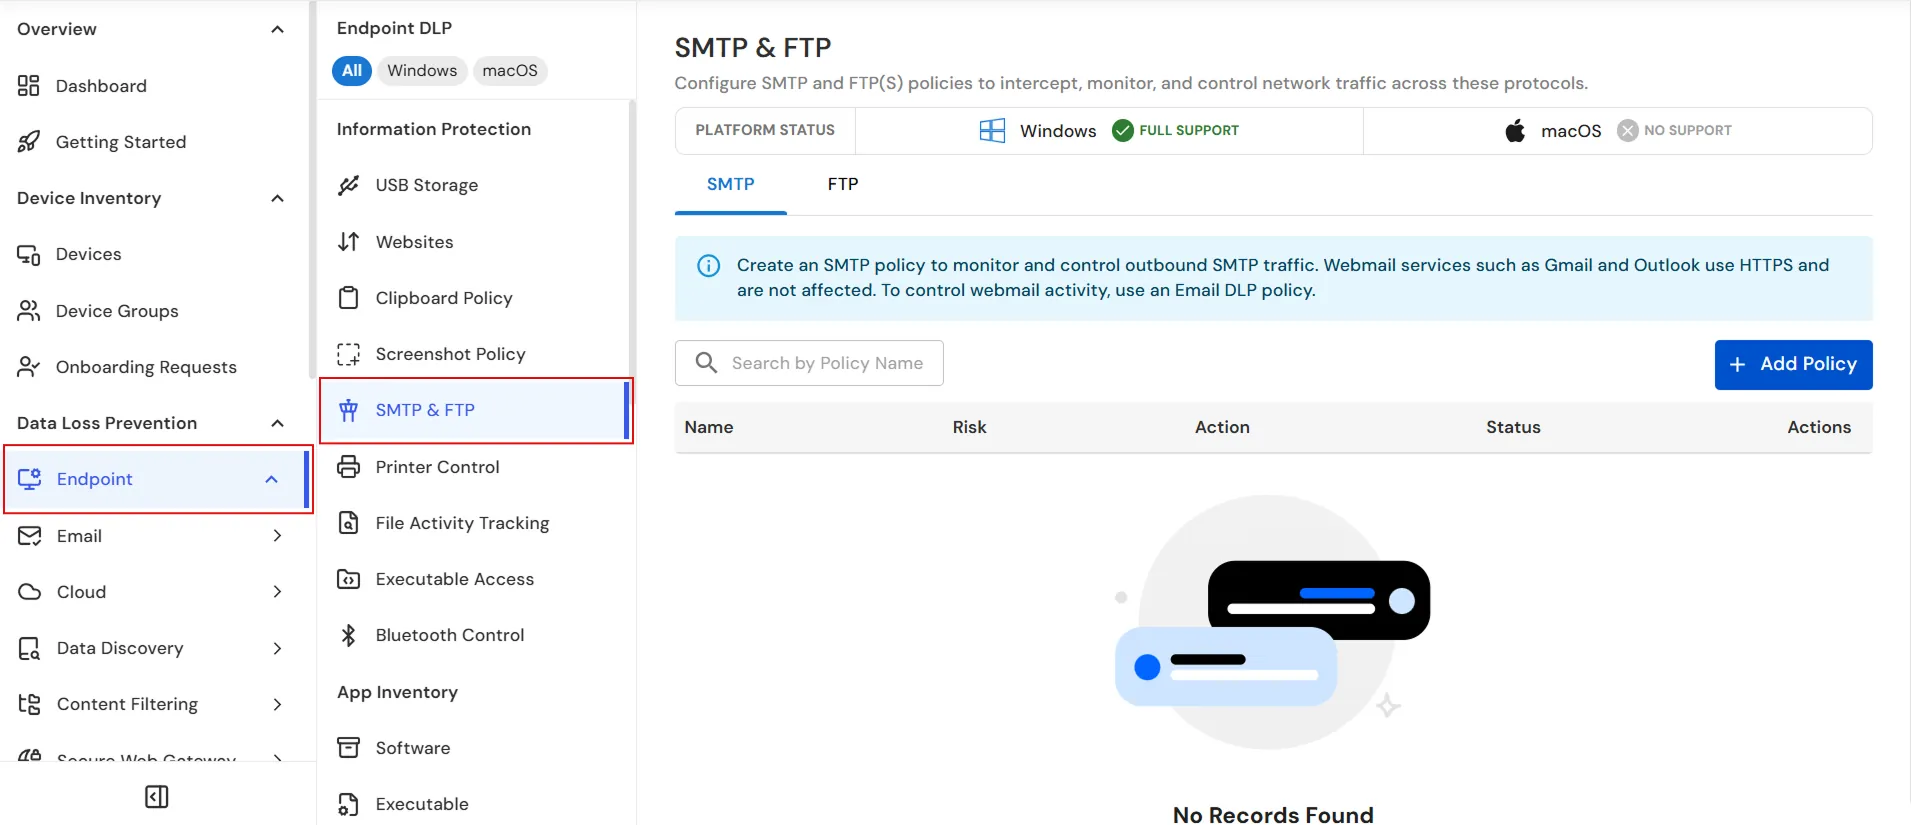
- On the dashboard, navigate to the left menu panel and click Endpoint → SMTP and FTP.
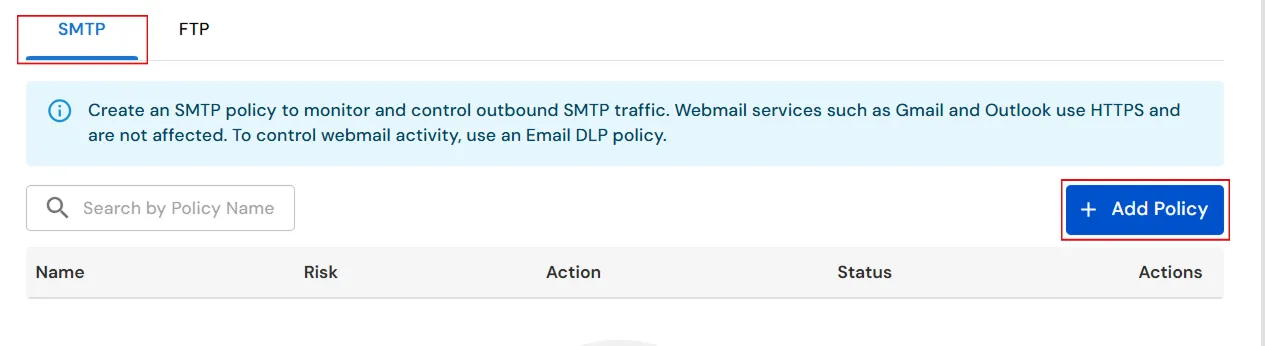
- Under the SMTP tab, click the Add Policy button to create a new SMTP policy.
- In the General tab, note that files larger than 70 MB are blocked from being sent when the Block action is selected.
- In the Policy Name field, enter a unique name for the SMTP policy.
- Under Action, select the action to take when an SMTP policy violation is detected. The available actions are Block, Log, and Notify.
- Under Risk, select the risk level associated with the policy. For this example, keep the Risk set to High.
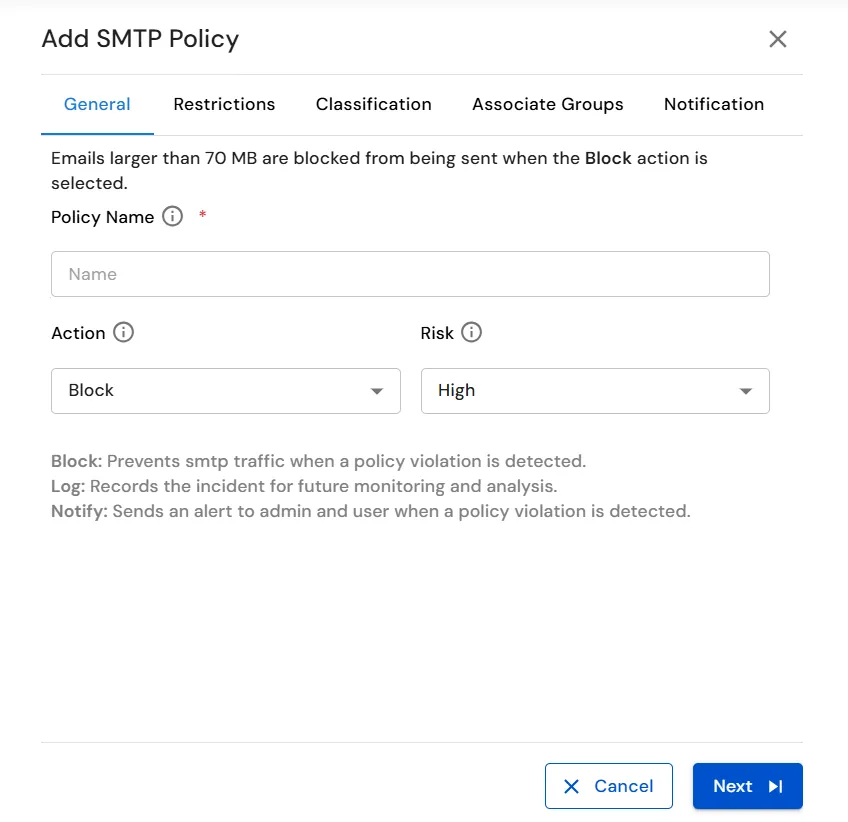
- After configuring the general SMTP policy settings, click Next to configure the policy restrictions.
- In the Restrictions tab, configure the restrictions that should apply to the SMTP policy.
- Under SMTP Host Restriction, select the required option: No Restriction, Allow Hosts, or Block Hosts.
- If you select Allow Hosts or Block Hosts, click Configure List to specify the SMTP hosts to which the restriction should apply.
- In the SMTP Host List panel, enter the required SMTP host values in the input field. Paste multiple values on separate lines or press Enter after each entry.
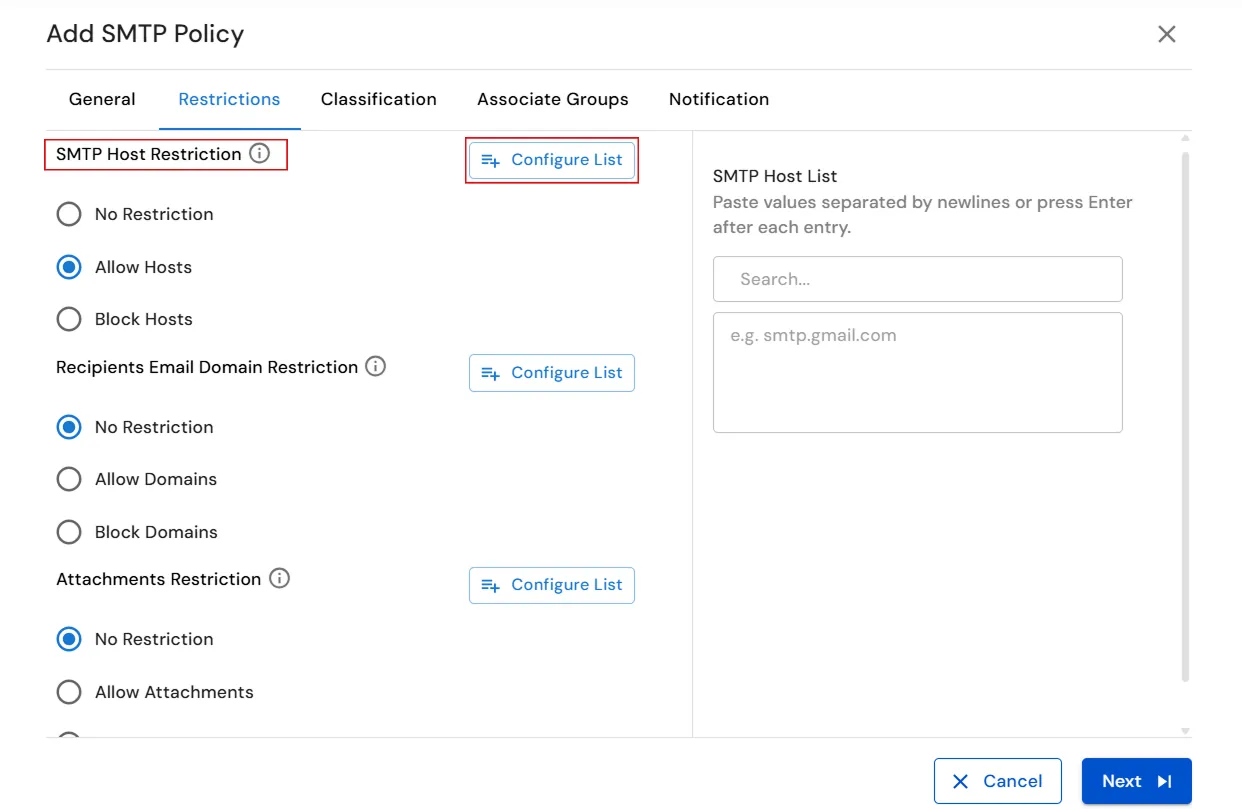
- Under Recipients Email Domain Restriction, select the required option: No Restriction, Allow Domains, or Block Domains.
- If you select Allow Domains or Block Domains, click Configure List to specify the email domains to which the restriction should apply.
- In the Recipient Domain List panel, enter the email domains to which the selected restriction should apply.
- Enter one domain per line or press Enter after each domain.
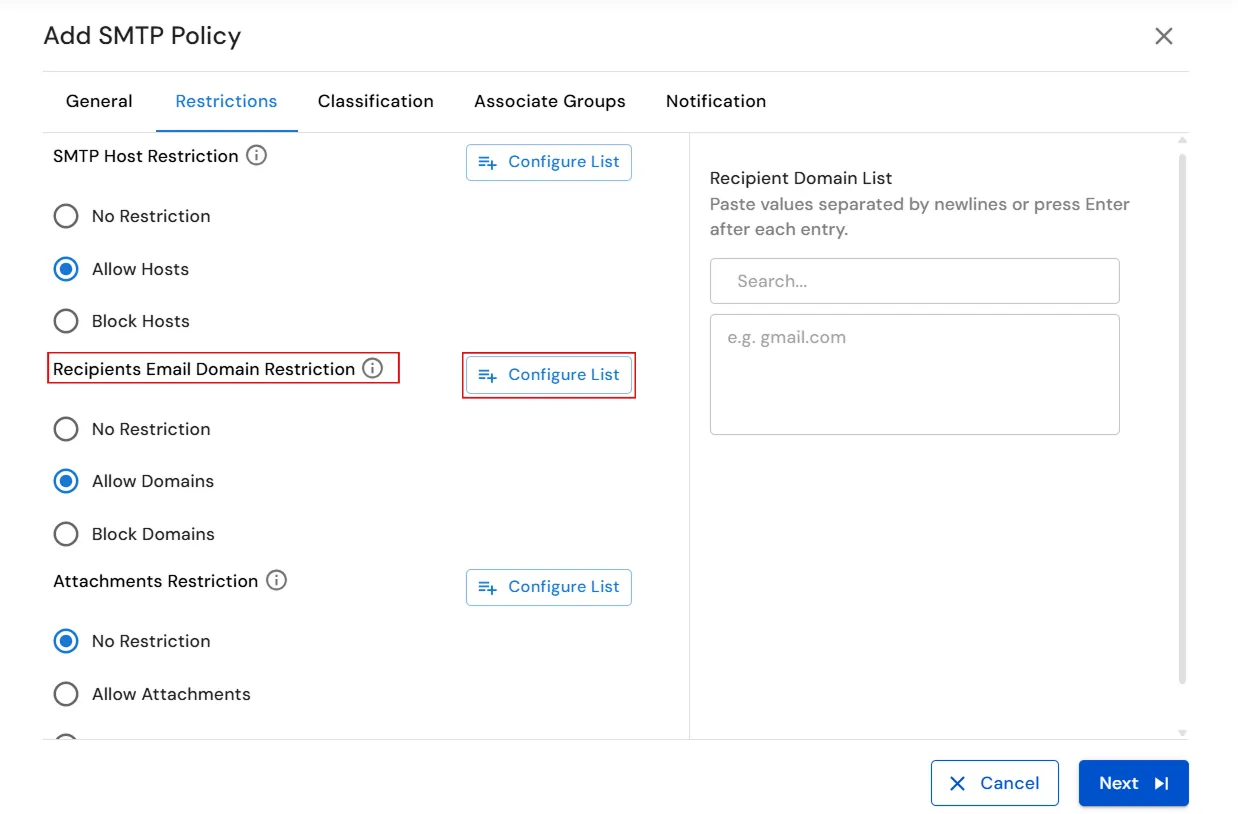
- Under Attachments Restriction, select the required option: No Restriction, Allow Attachments, or Block Attachments.
- If you select Allow Attachments or Block Attachments, click Configure List to specify the file types that the restriction should apply to.
- In the attachment list, use the Search field to find a specific file extension, or select Select All to select all available file types.
- Select the required file extensions from the list. Available file types include .txt, .docx, .xlsx, .csv, .pdf, .pptx, .img, and .zip.
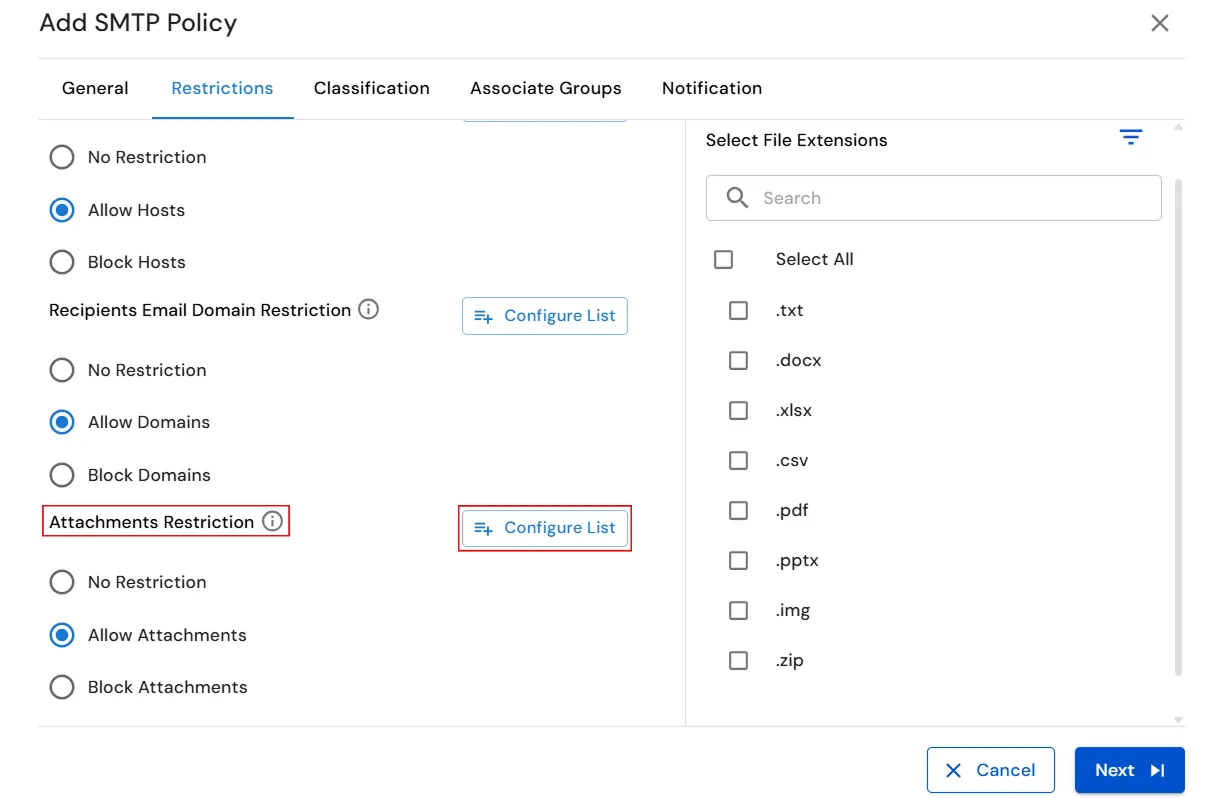
- Review the configured SMTP Host Restriction, Recipients Email Domain Restriction, and Attachments Restriction settings, and then click Next to configure the classification settings.
- Under Label Triggers, select the classification labels that should trigger the policy when they are already present on a file. Available labels include Confidential, Internal, PII, Public, and Restricted.
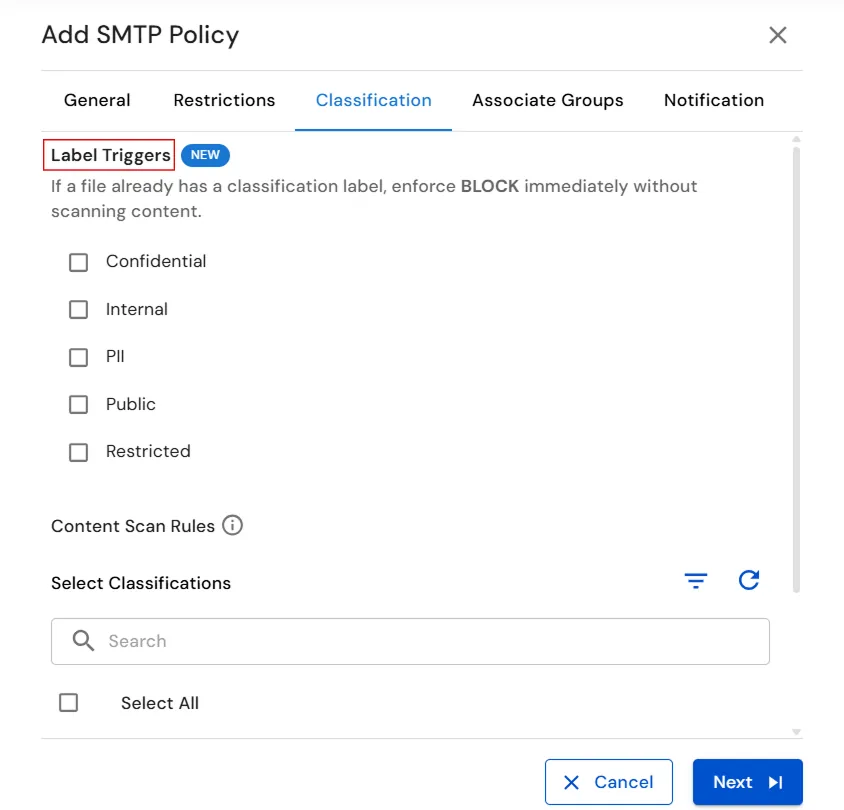
- Under Content Scan Rules, use the Select Classifications section to choose the classifications that should be scanned by the SMTP policy.
- Use the Search field to find a specific classification, or select Select All to select all available classifications.
- Select the required classifications, such as test or Indian PII, from the available list.
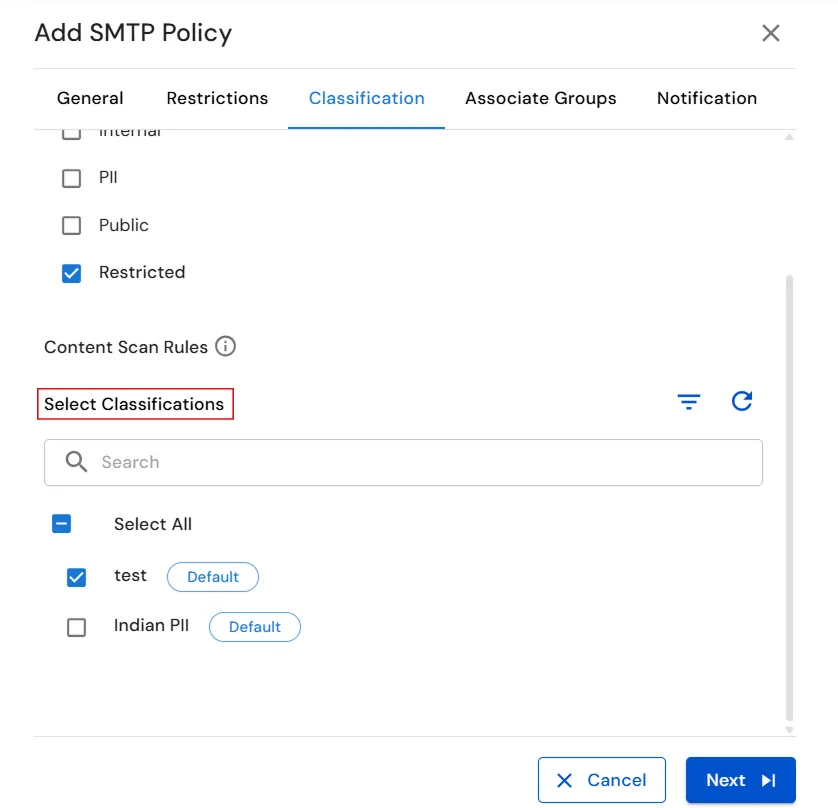
- After configuring the required Label Triggers and Content Scan Rules, click Next to configure the policy's associated groups.
- Under the Associate Groups tab, select the Windows platform to configure the device groups to which the SMTP policy will apply.
- Use the Search field to find a specific device group.
- Select the required device groups from the list, or select Select All to apply the policy to all available Windows device groups.
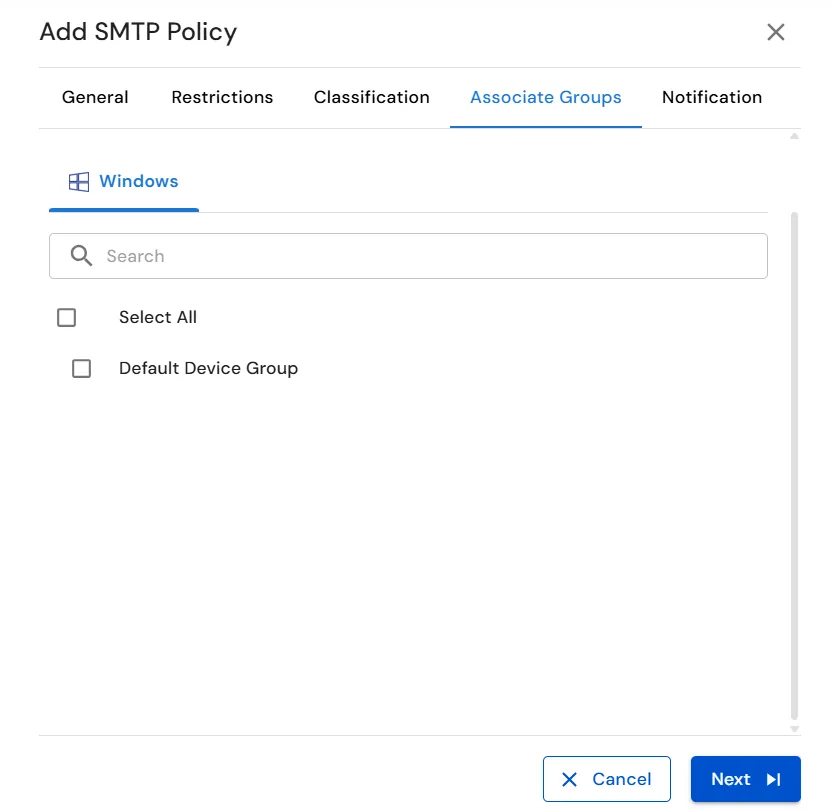
- After selecting the required device groups, click Next to configure the notification settings.
- Under the Notification tab, configure whether you want to receive alerts when the SMTP policy is triggered.
- To enable notifications for the SMTP policy, turn on the Create Alert for this Policy toggle.
- Under Send Notification To, enter the email address that should receive alerts when the policy is triggered. Press Enter after entering each email address to add multiple recipients.
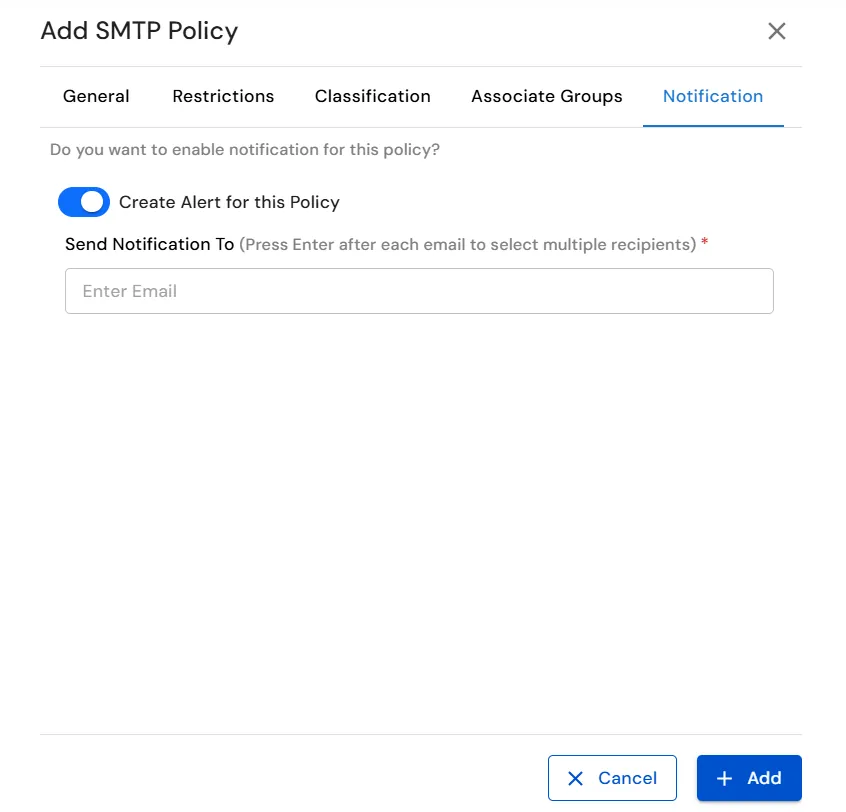
- After configuring the notification settings, click Add to create the SMTP policy.
- Verify that the newly created SMTP policy appears in the policy list with the configured Policy Name, Risk, and Action.
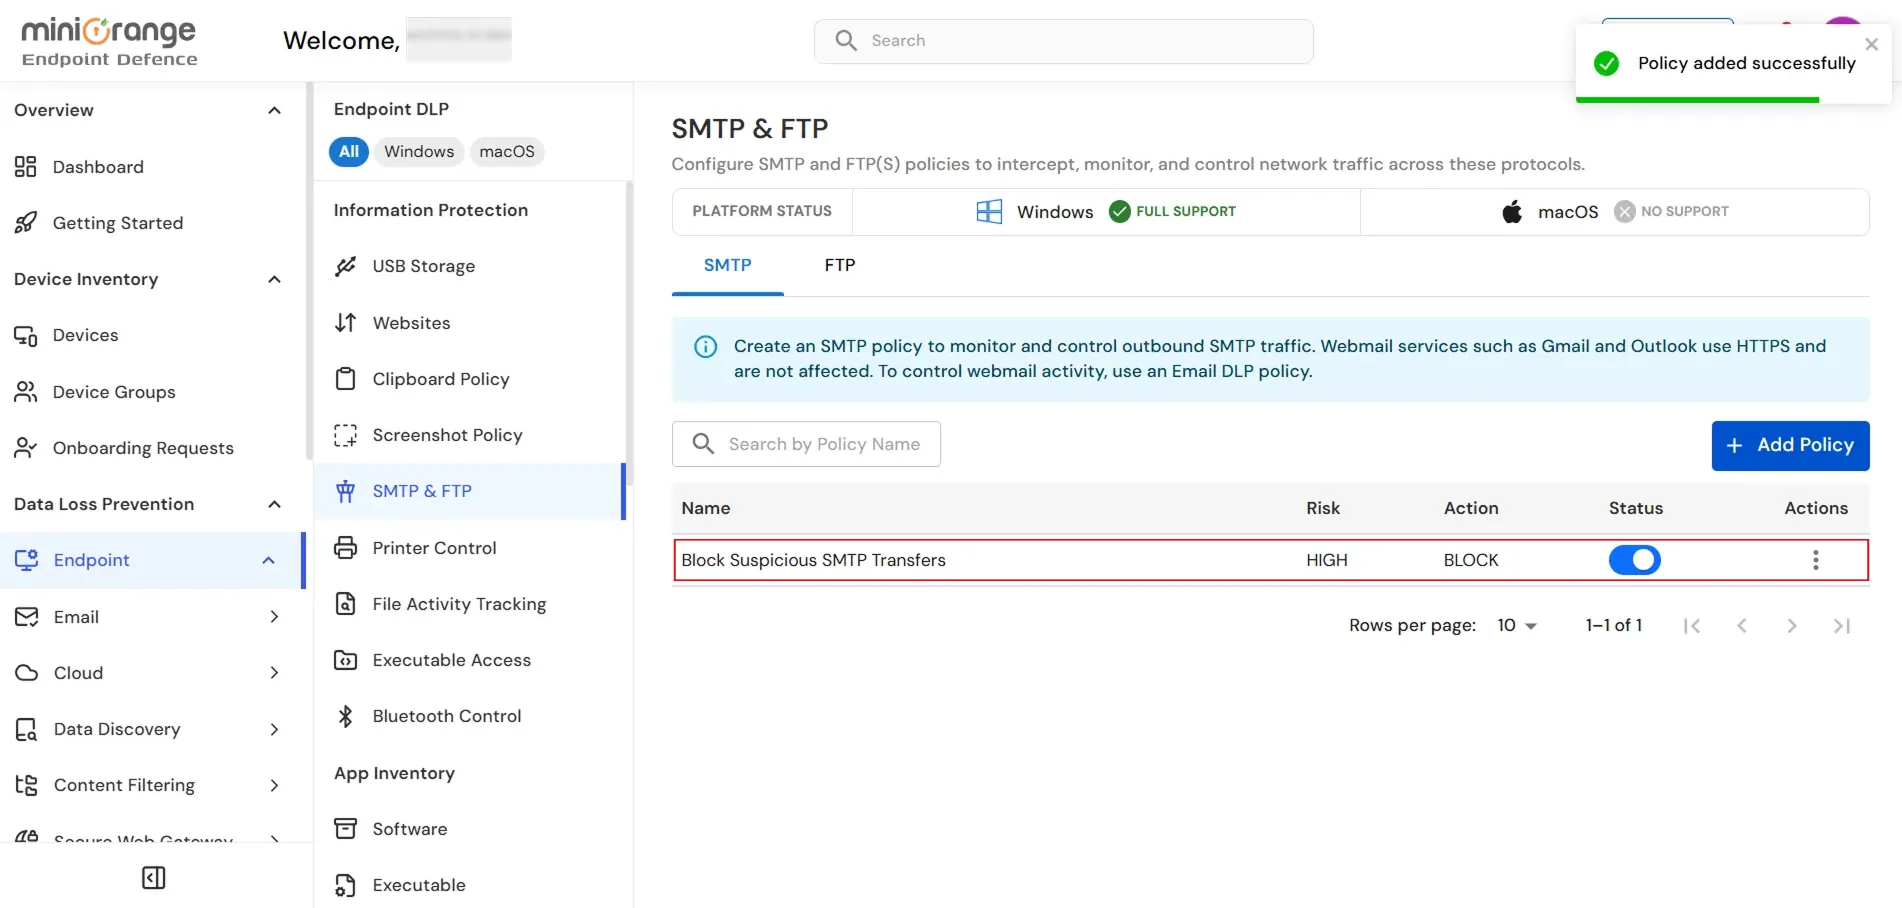
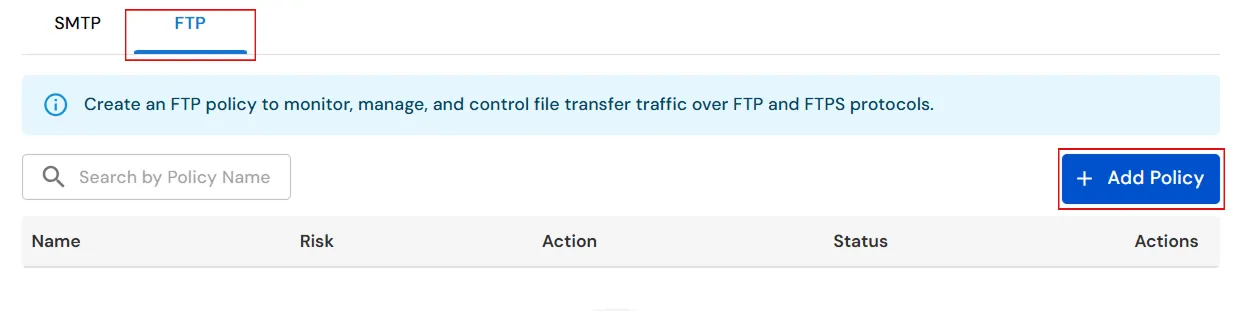
- To configure an FTP policy, click the FTP tab.
- Click the Add Policy button to create a new FTP policy.
- Under the General tab, note that files larger than 70 MB are blocked from being sent when the Block action is selected.
- In the Policy Name field, enter a unique name for the FTP policy.
- Under Action, select the action to apply when an FTP policy violation is detected. The available actions are Block, Log, and Notify.
- Under Risk, select the appropriate risk level for the policy.
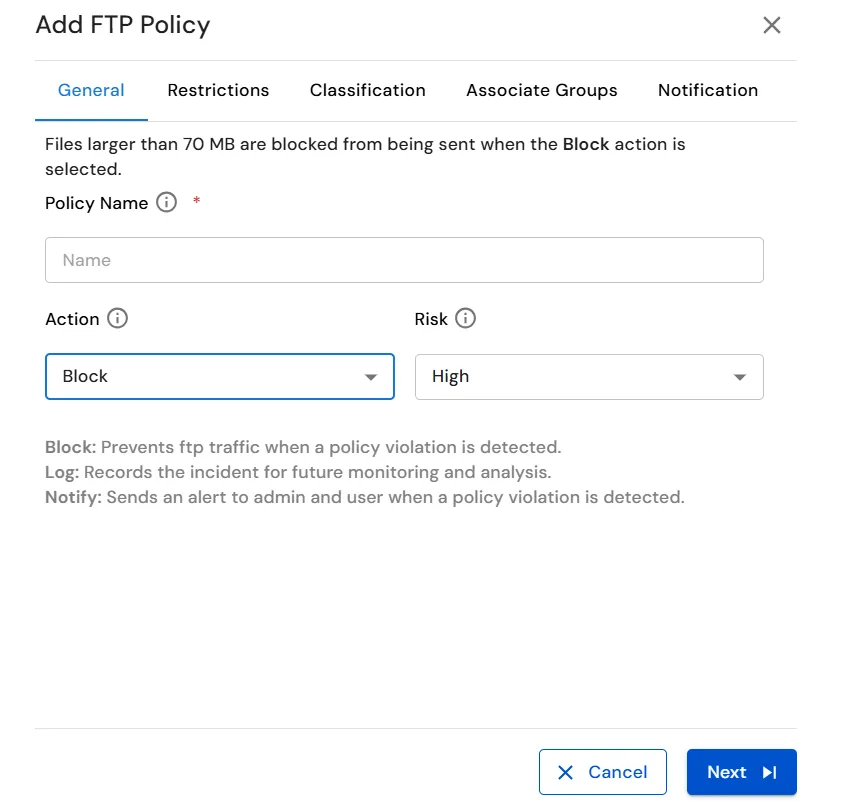
- After configuring the Policy Name, Action, and Risk under the General tab, click Next to continue configuring the FTP policy.
- Under the Restrictions tab, configure the FTP Host Restriction by selecting No Restriction, Allow Hosts, or Block Hosts, as required.
- If Allow Hosts or Block Hosts is selected, click Configure List and enter the required FTP hostnames in the FTP Host List.
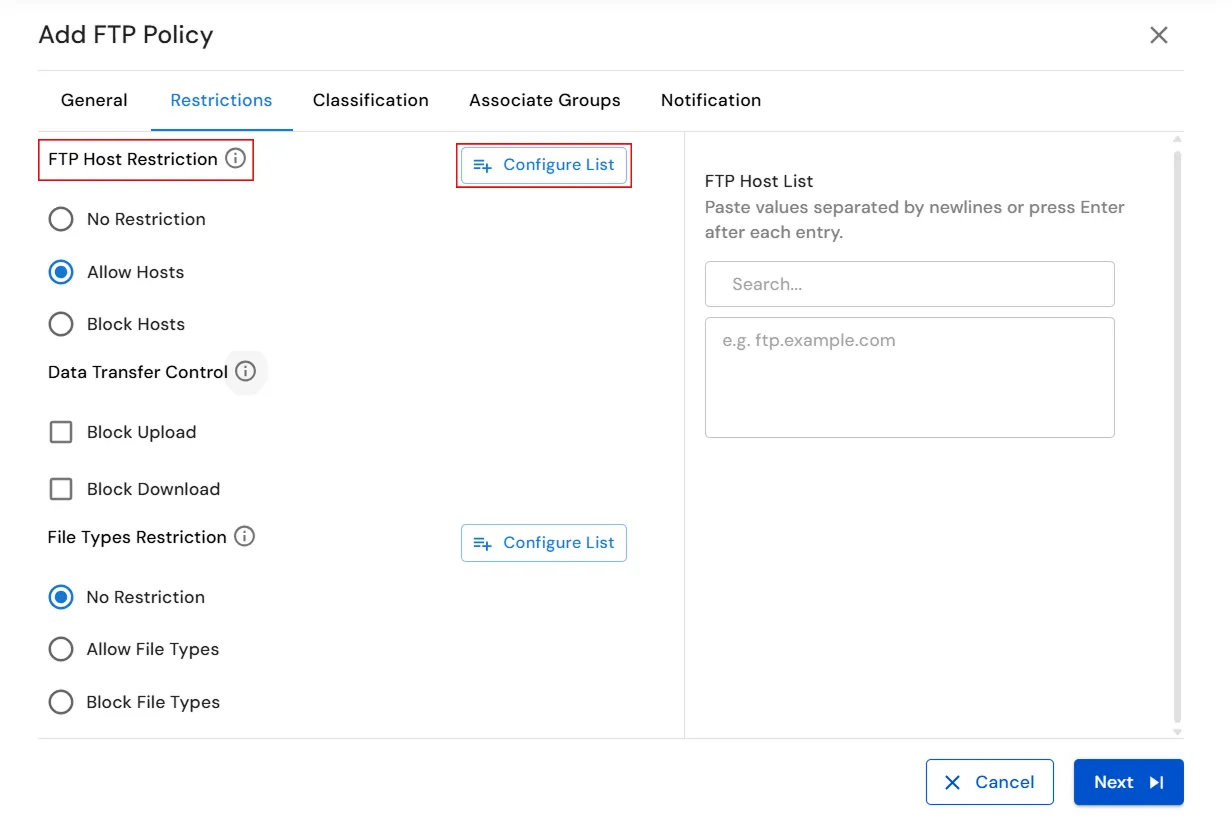
- Under Data Transfer Control, enable Block Upload and/or Block Download to control FTP file transfers.
- Under File Types Restriction, select No Restriction, Allow File Types, or Block File Types based on the required file transfer restrictions.
- If Allow File Types or Block File Types is selected, click Configure List and select the required file types from the available list.
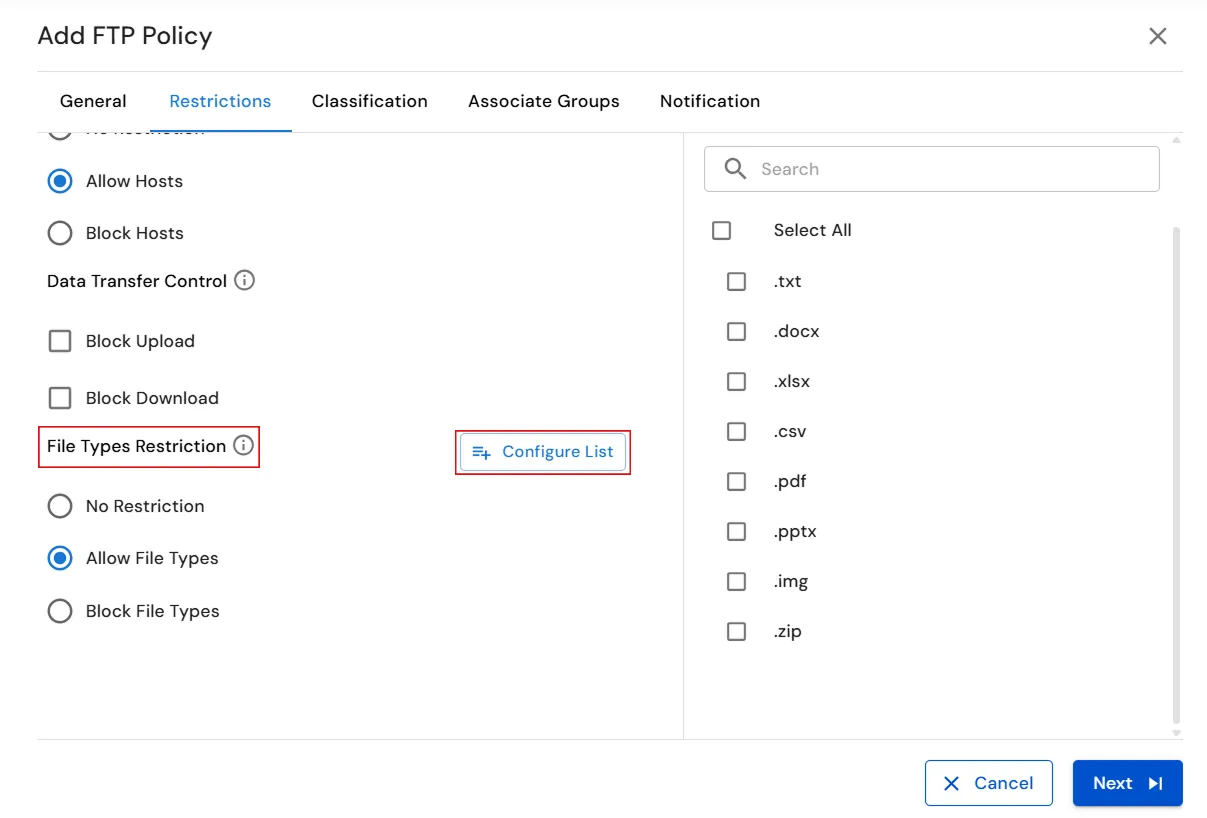
- After configuring the required restrictions, click Next to continue to the Classification tab.
- Under the Label Triggers section, select the classification labels for which the policy should immediately enforce the Block action when a file already has the selected classification label.
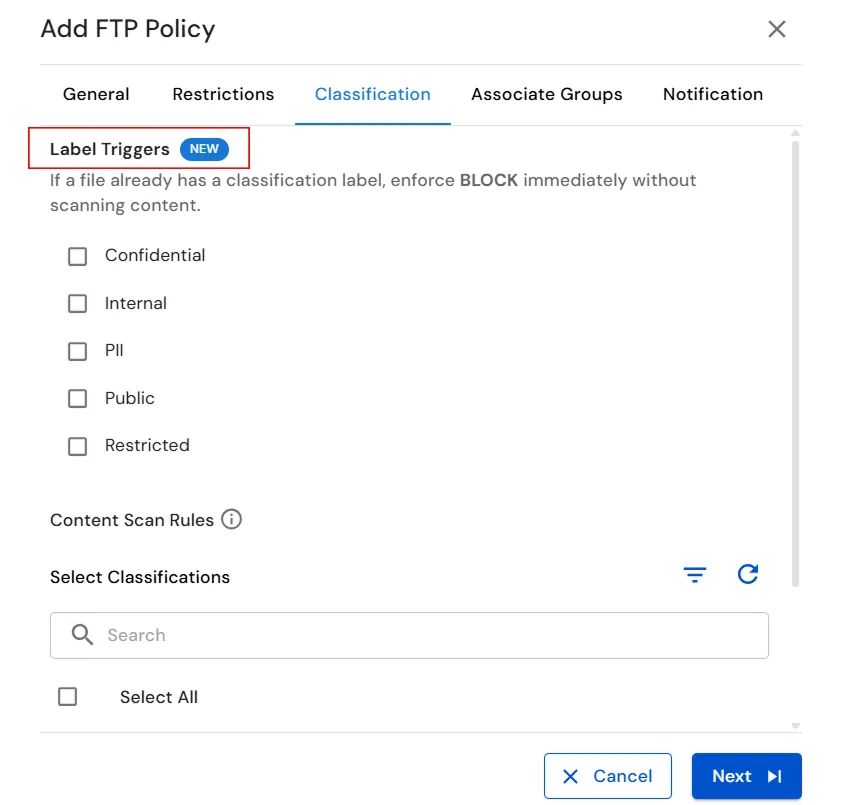
- Under Content Scan Rules, review the available classifications under Select Classifications and select the classifications that should be scanned for sensitive content.
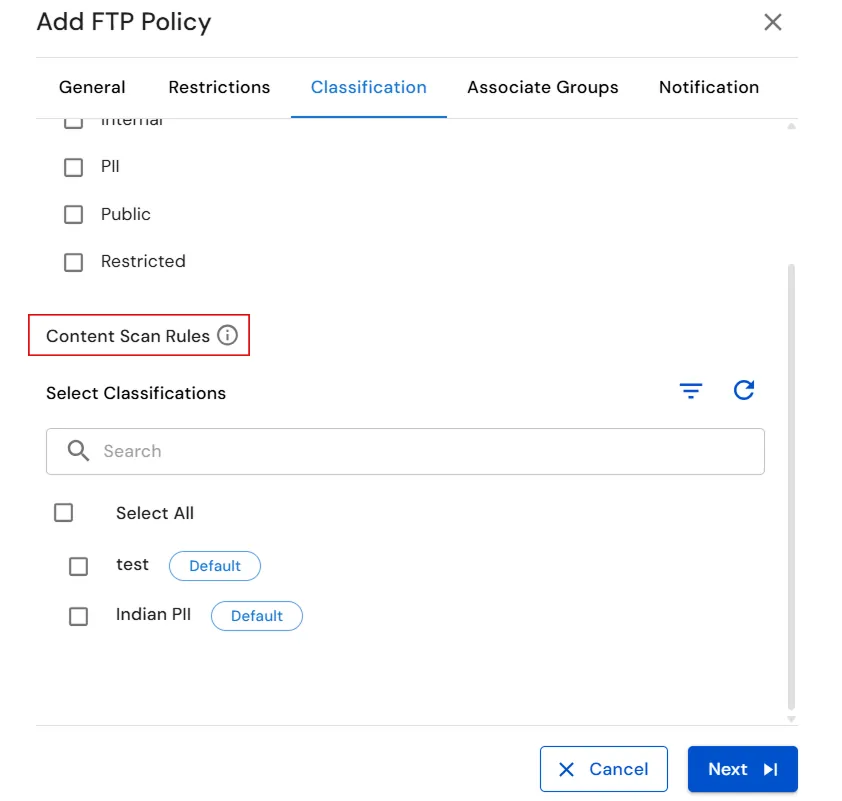
- Use the Search field to find a specific classification, or select Select All to include all available classifications.
- After configuring the required Label Triggers and Content Scan Rules, click Next to continue to the Associate Groups tab.
- Under the Associate Groups tab, select the Windows platform to view the available device groups.
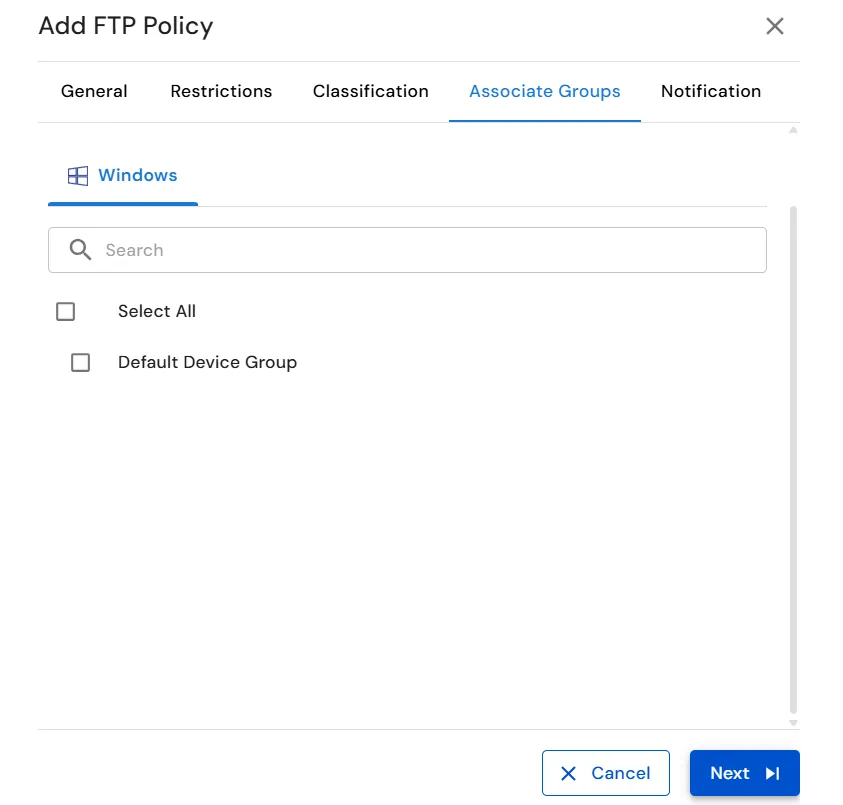
- Select the device group to which the FTP policy should be applied. For example, select Default Device Group.
- Alternatively, select Select All to associate the policy with all available Windows device groups.
- After selecting the required device group, click Next to continue to the Notification tab.
- Under the Notification tab, enable Create Alert for this Policy to receive notifications when the FTP policy detects a policy violation.
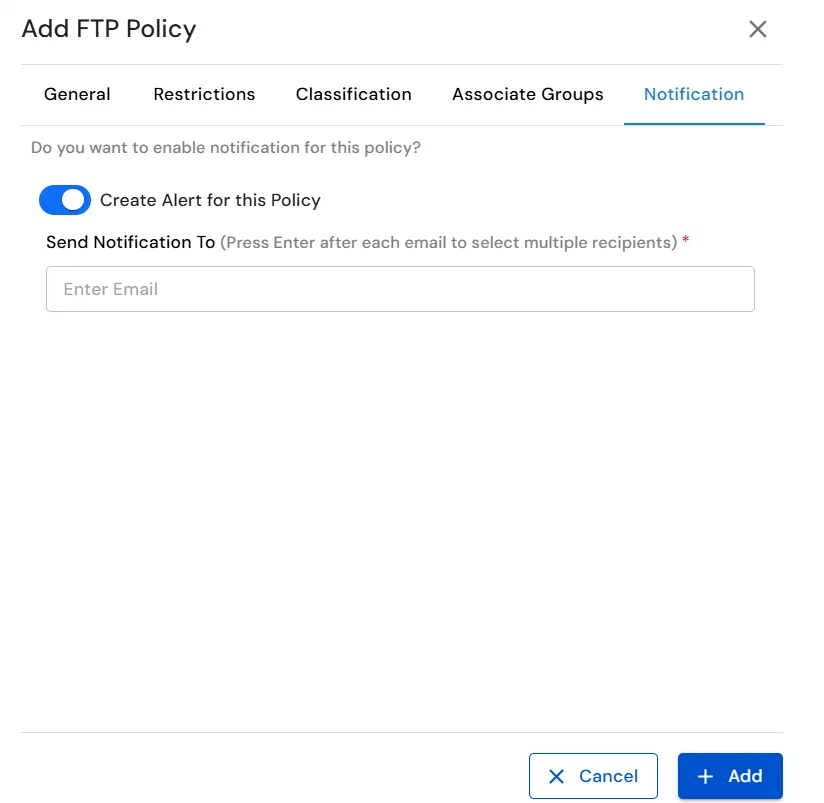
- Under Send Notification To, enter the email address of the administrator or other recipients who should receive policy violation alerts. Press Enter after each email address to add multiple recipients.
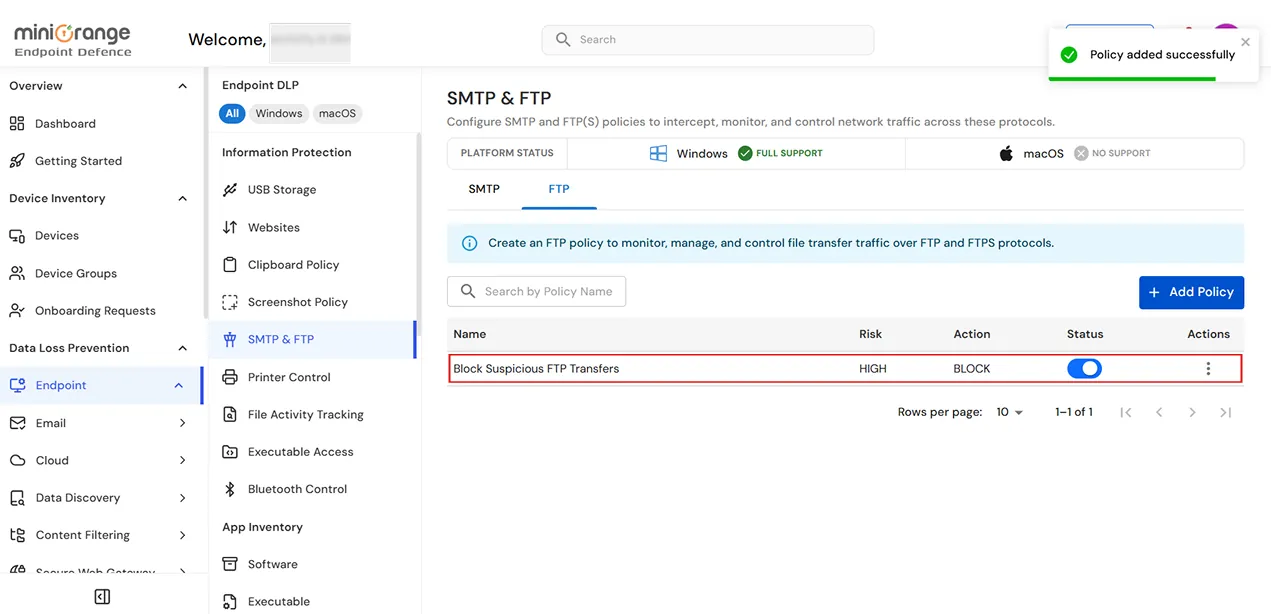
- Verify that the required recipient email addresses are added, and then click Add to create the FTP policy.
- Verify that the newly created FTP policy appears in the policy list with the configured Name, Risk, Action, and an active Status.
Step 2: Reporting
- Click Reporting from the top navigation to view the SMTP and FTP policy violation reports.
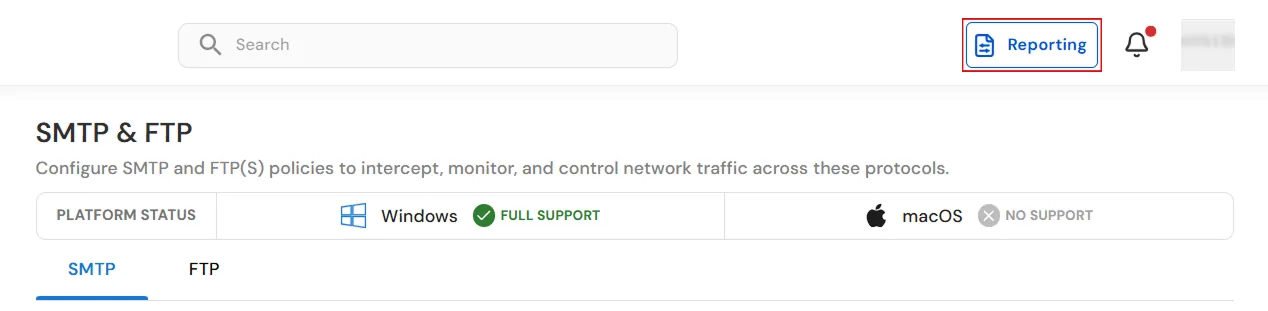
- After clicking Reporting, expand the Reports section in the left navigation menu and click SMTP & FTP Reporting to view the SMTP and FTP policy violation reports.
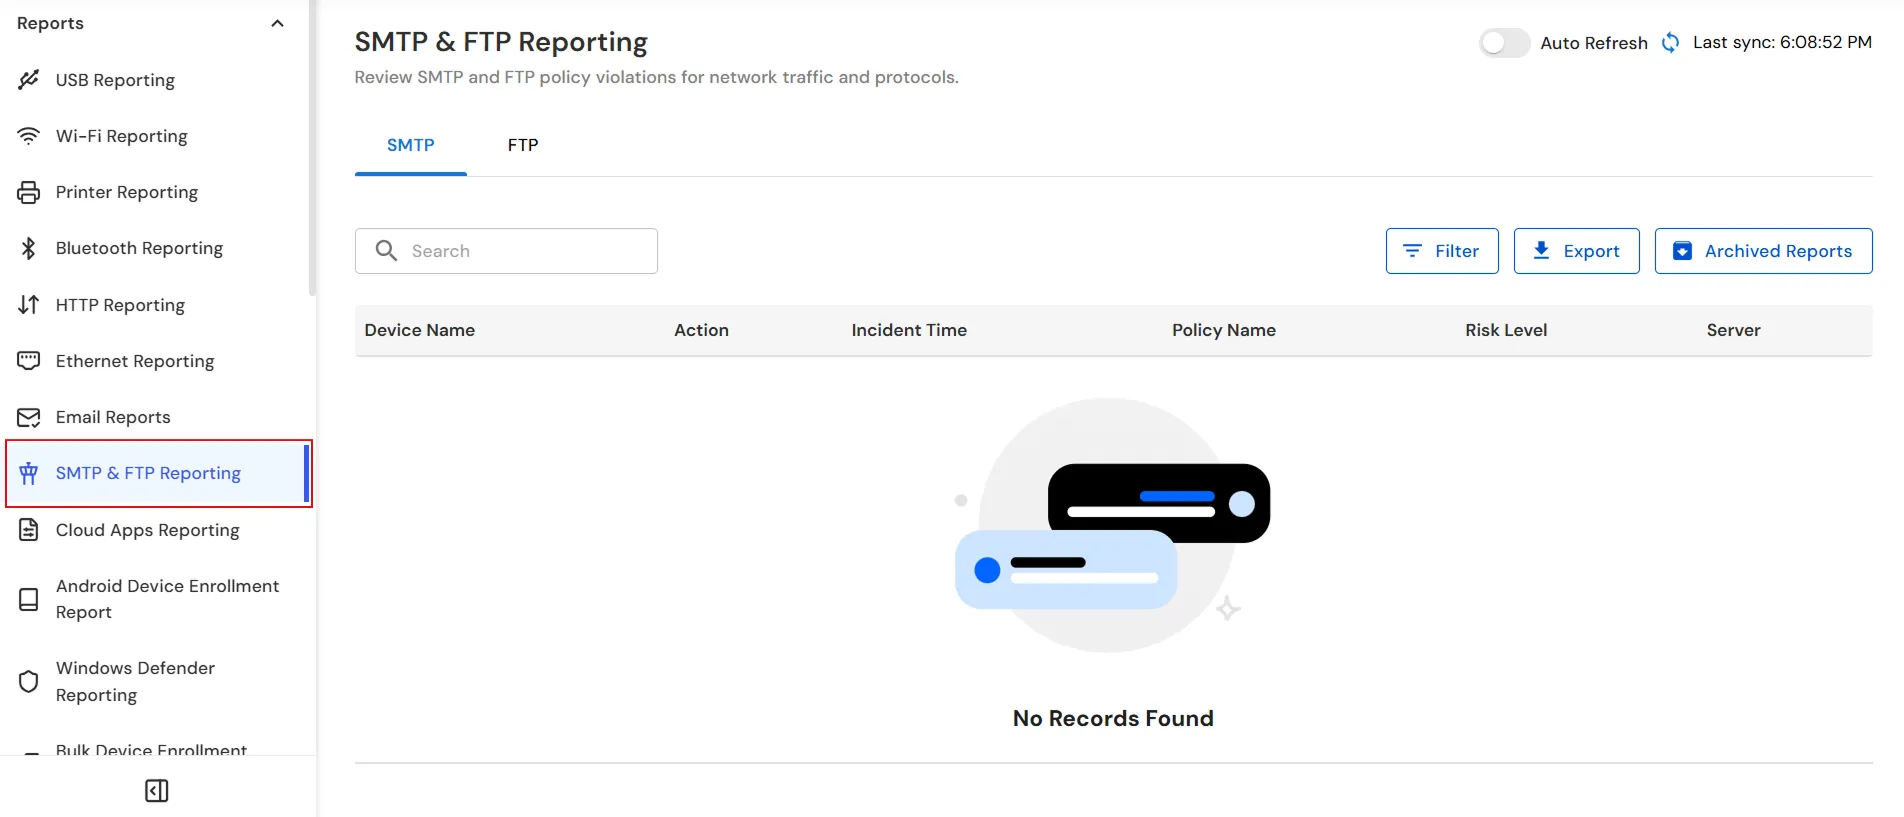
- Under the SMTP tab, review the policy violation reports for SMTP traffic. The report displays details such as Device Name, Action, Incident Time, Policy Name, Risk Level, and Server.
- Use the Search field to search for specific SMTP policy violation reports.
- Click Filter to narrow down the displayed reports based on the available filtering options.

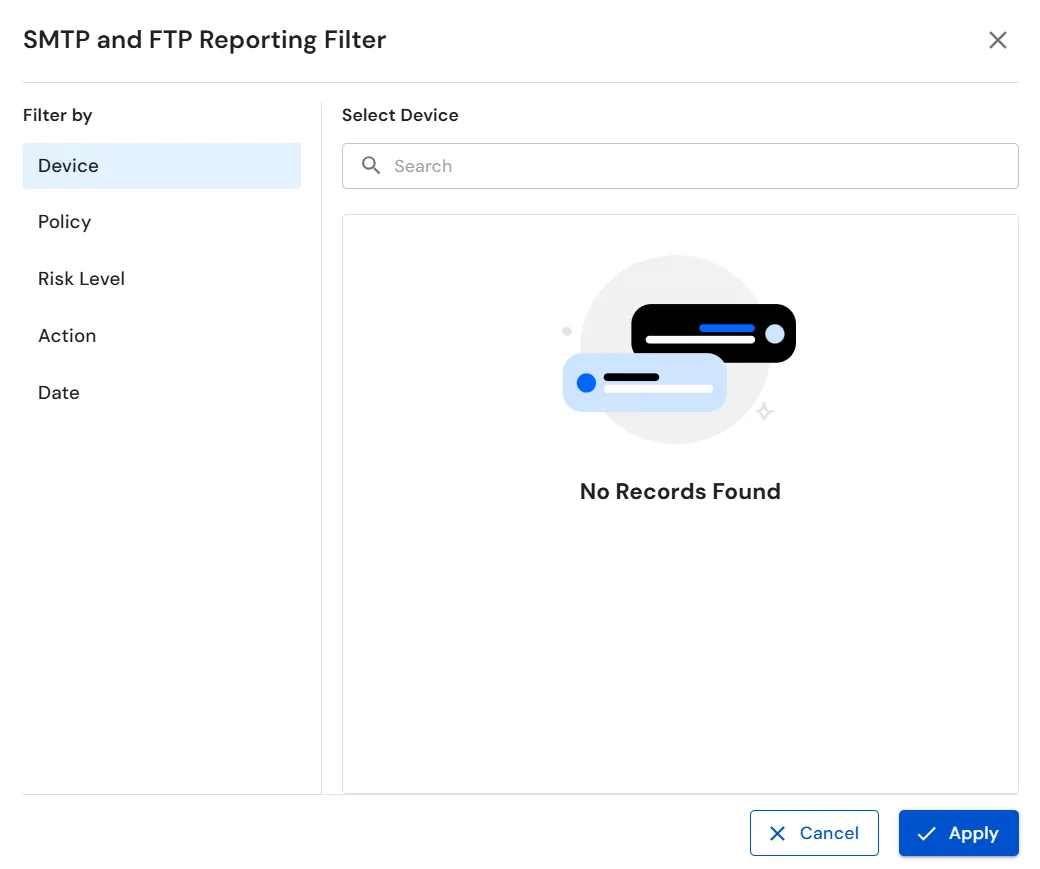
- Under Device, search for and select a specific device to view reports associated with that device.
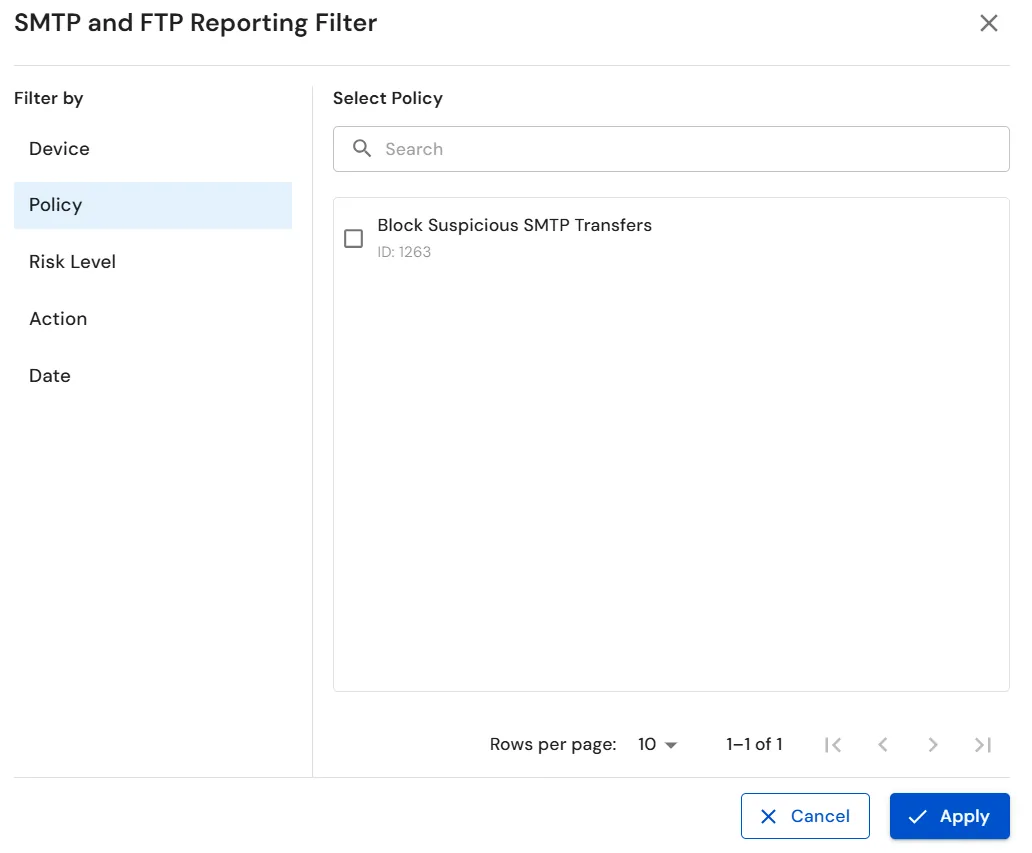
- Under Policy, search for and select a specific policy to view reports generated by that policy.
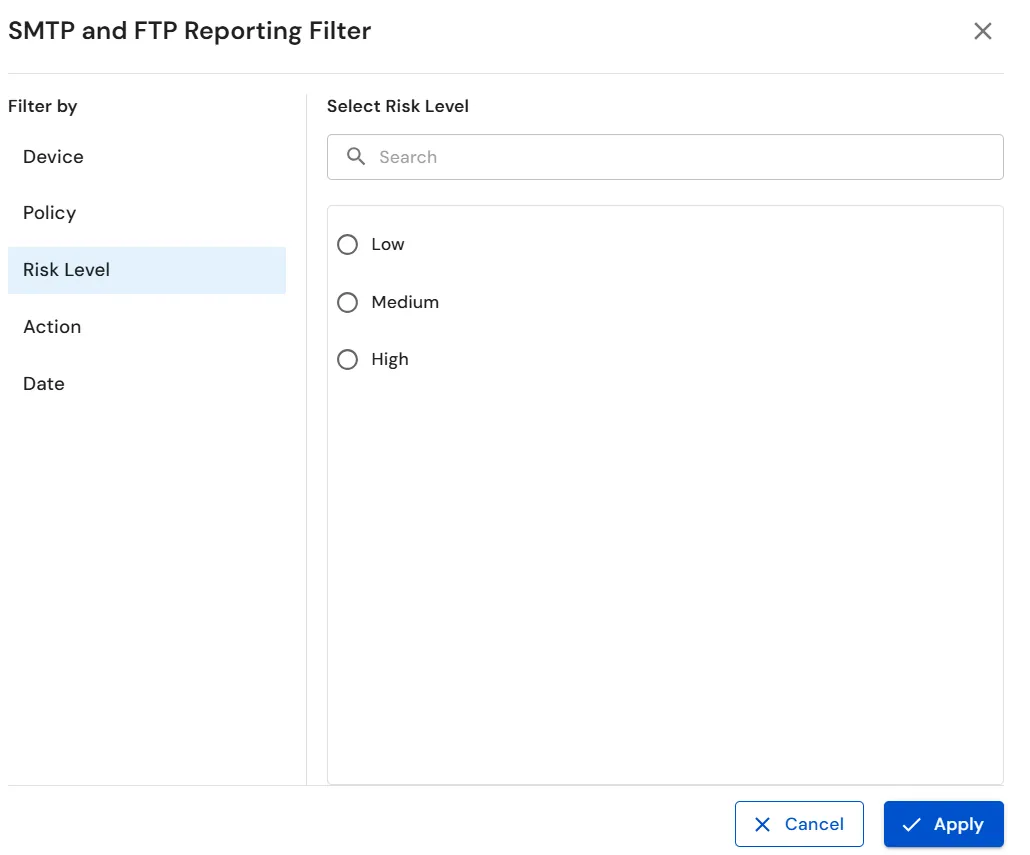
- Under Risk Level, select Low, Medium, or High to filter reports based on their assigned risk level.
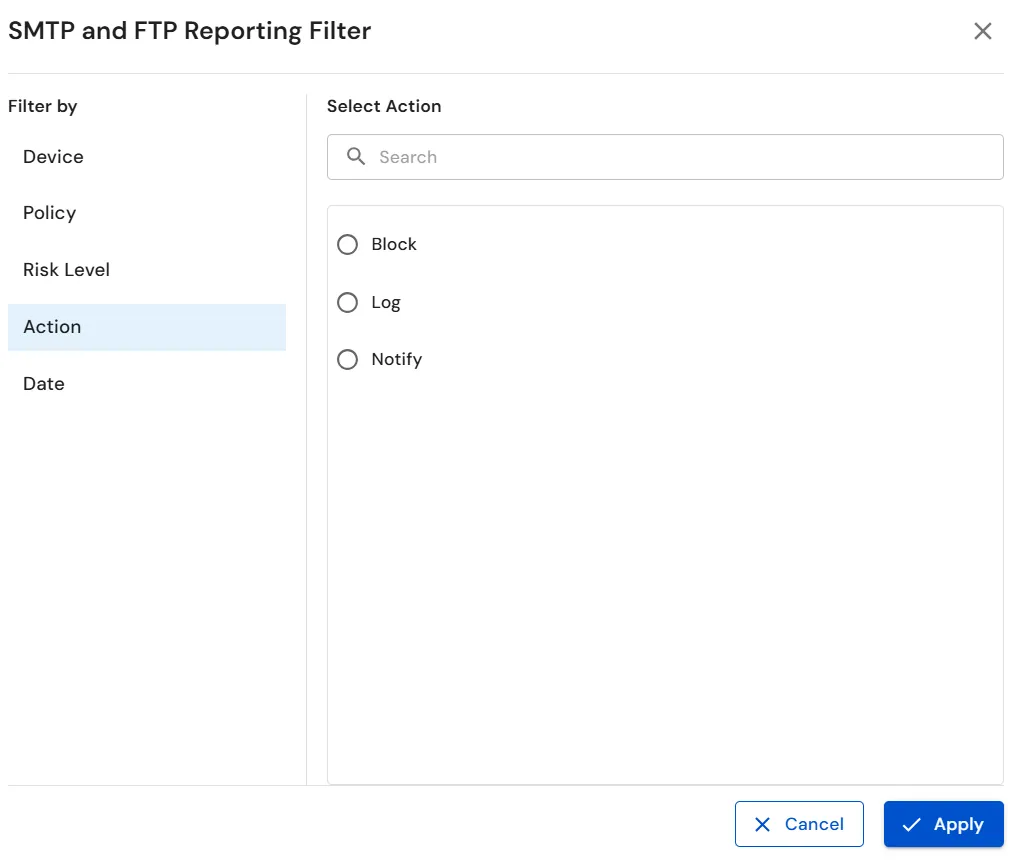
- Under Action, select Block, Log, or Notify to filter reports based on the action taken by the policy.
- Under Date, specify a From and To date and time to filter reports within a specific time range.
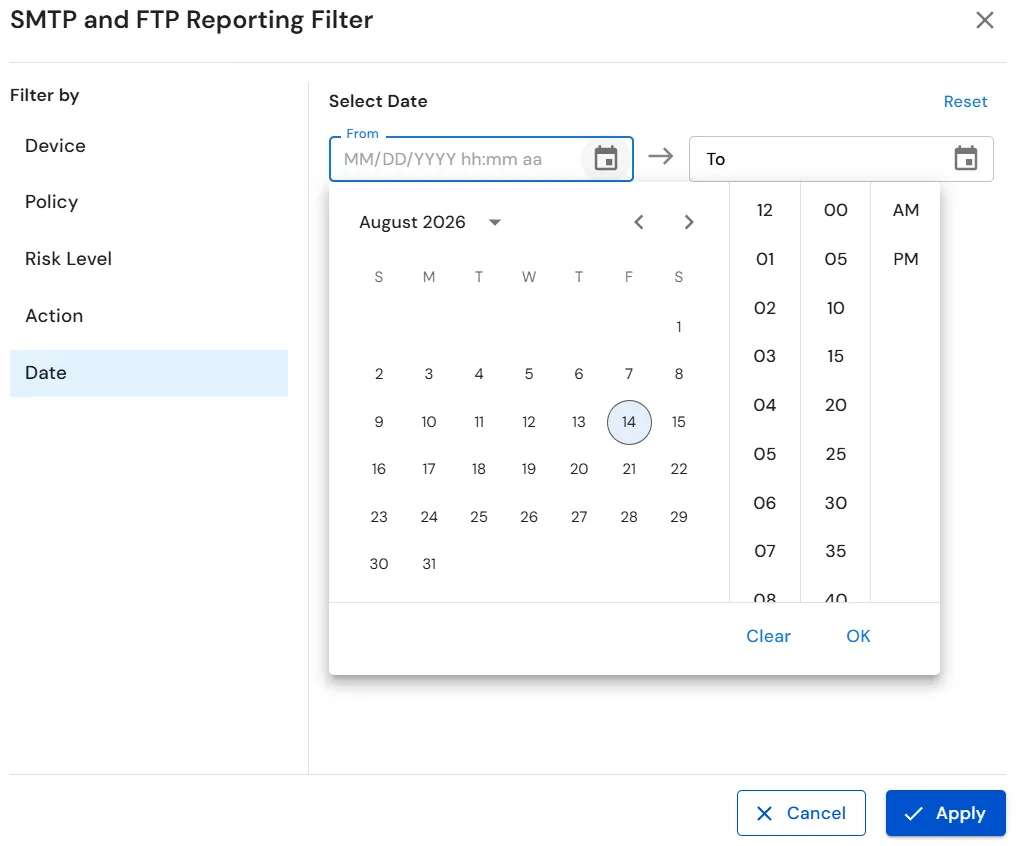
- Click Apply to apply the selected filters and display the matching reports.
- Click Export to download the SMTP reporting data for further analysis or record keeping.
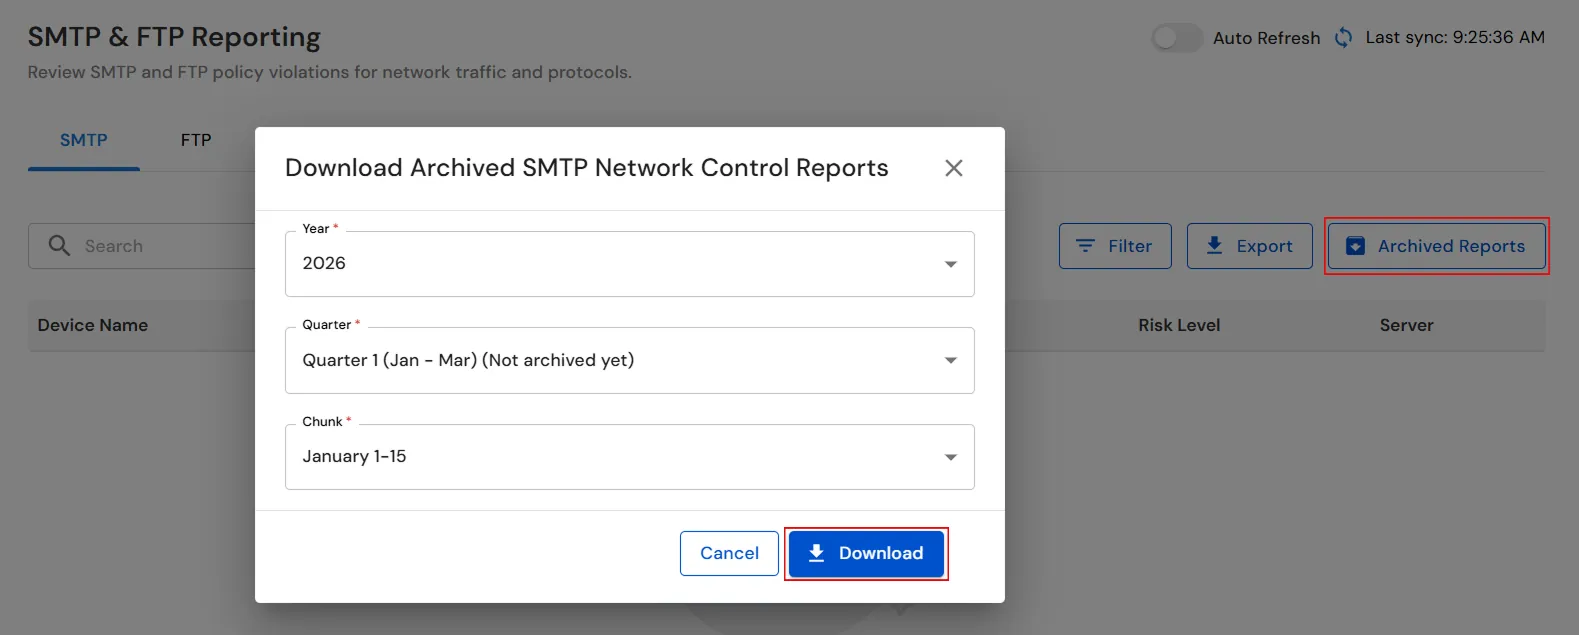
- Click Archived Reports to download archived SMTP reports. In the Download Archived SMTP Network Control Reports window, select the required Year, Quarter, and Chunk, and then click Download.
- Under SMTP & FTP Reporting, click the FTP tab to view FTP policy violation reports.
- Review the FTP policy violation reports. The report displays details such as Device Name, Action, Incident Time, Policy Name, Risk Level, and Server.
- Use the Search field to search for specific FTP policy violation reports.
- Click Filter to narrow down the displayed reports based on the available filtering options.

- Under Device, search for and select a specific device to view reports associated with that device.
- Under Policy, search for and select a specific policy to view reports generated by that policy.
- Under Risk Level, select Low, Medium, or High to filter reports based on their assigned risk level.
- Under Action, select Block, Log, or Notify to filter reports based on the action taken by the policy.
- Under Date, specify a From and To date and time to filter reports within a specific time range.
- Click Apply to apply the selected filters and display the matching reports.
- Click Export to download the FTP reporting data for further analysis or record keeping.
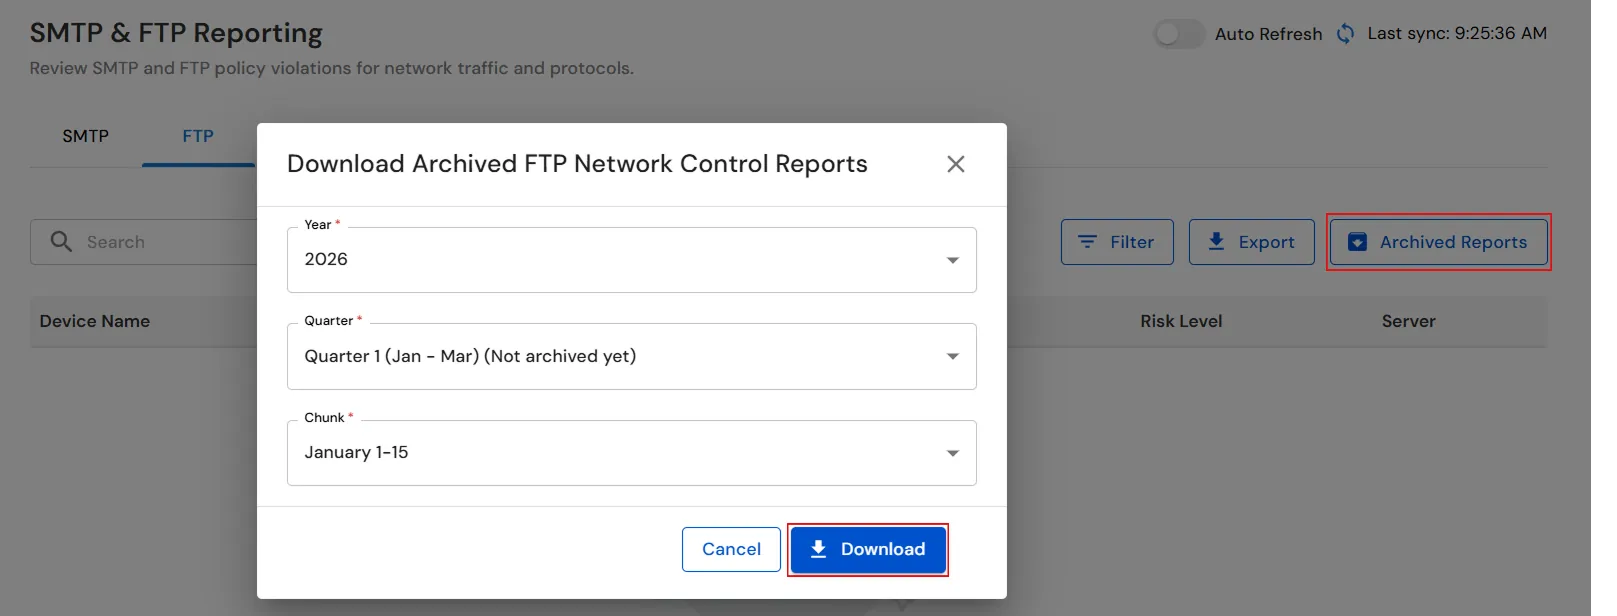
- Click Archived Reports to download archived FTP reports. In the Download Archived FTP Network Control Reports window, select the required Year, Quarter, and Chunk, and then click Download.
You have successfully configured SMTP and FTP policies and reviewed the corresponding reports using our DLP solution. If you encounter any issues during the configuration, please feel free to contact us at uemsupport@xecurify.com.