Configure miniOrange Email DLP for Outlook
In today's digital age, securing sensitive information is crucial for any organization. With the increasing reliance on email communication, especially through platforms like Outlook, protecting against unauthorized data transmission is more important than ever. miniOrange Email DLP (Data Loss Prevention) offers a robust solution to monitor outbound emails, manage quarantined emails, and establish rules to detect and prevent unauthorized data transmission. By integrating miniOrange Email DLP with Outlook, organizations can ensure comprehensive email security, safeguard valuable data, and maintain regulatory compliance.
Prerequisites
Configuration Steps
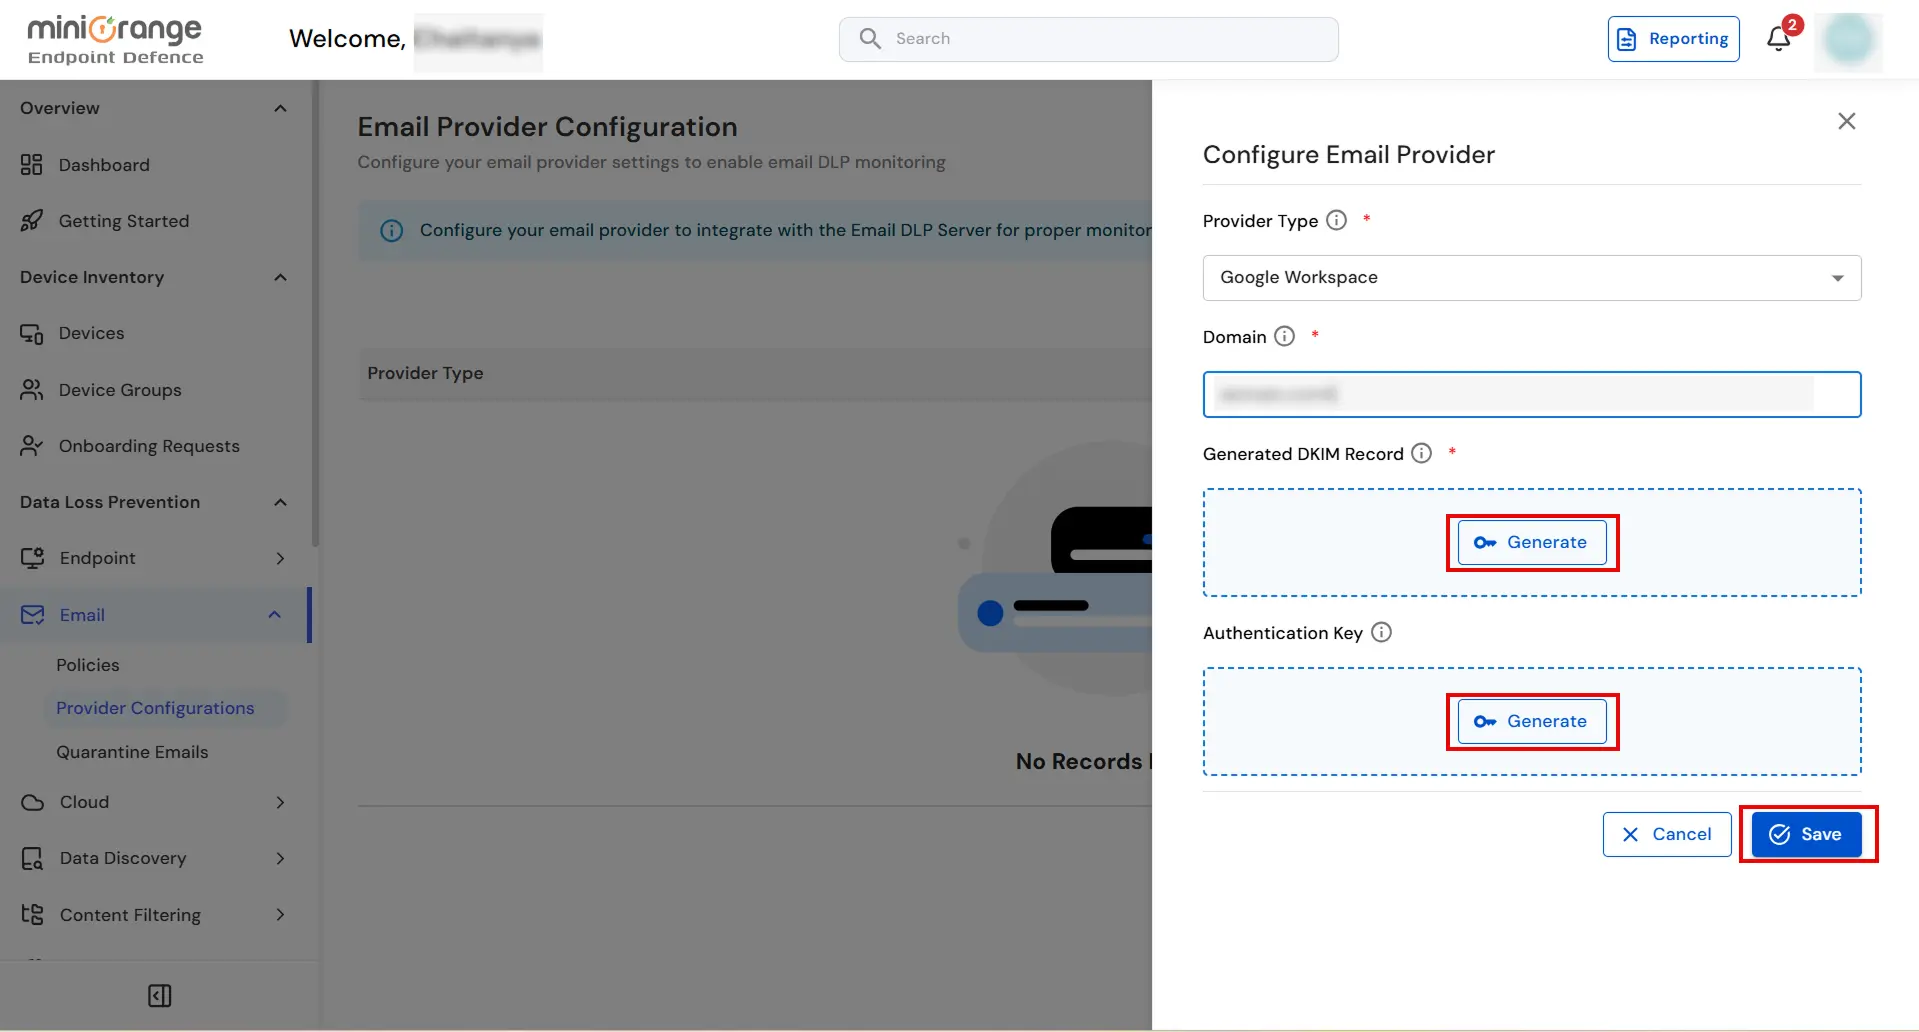
Step 1: Generate your DKIM and Authentication keys
- Sign in to the miniOrange UEM dashboard and open the Email Provider Configuration page. Enter the required details, then generate your DKIM and Authentication keys. Save both keys somewhere safe — you will need them later.
Step 2: Configure the Outbound Connector in Outlook
Complete the following steps to create an outbound connector and configure a transport rule in Microsoft Outlook.
2.1 Add an outbound connector in Outlook
- Sign in to your Exchange Admin console.
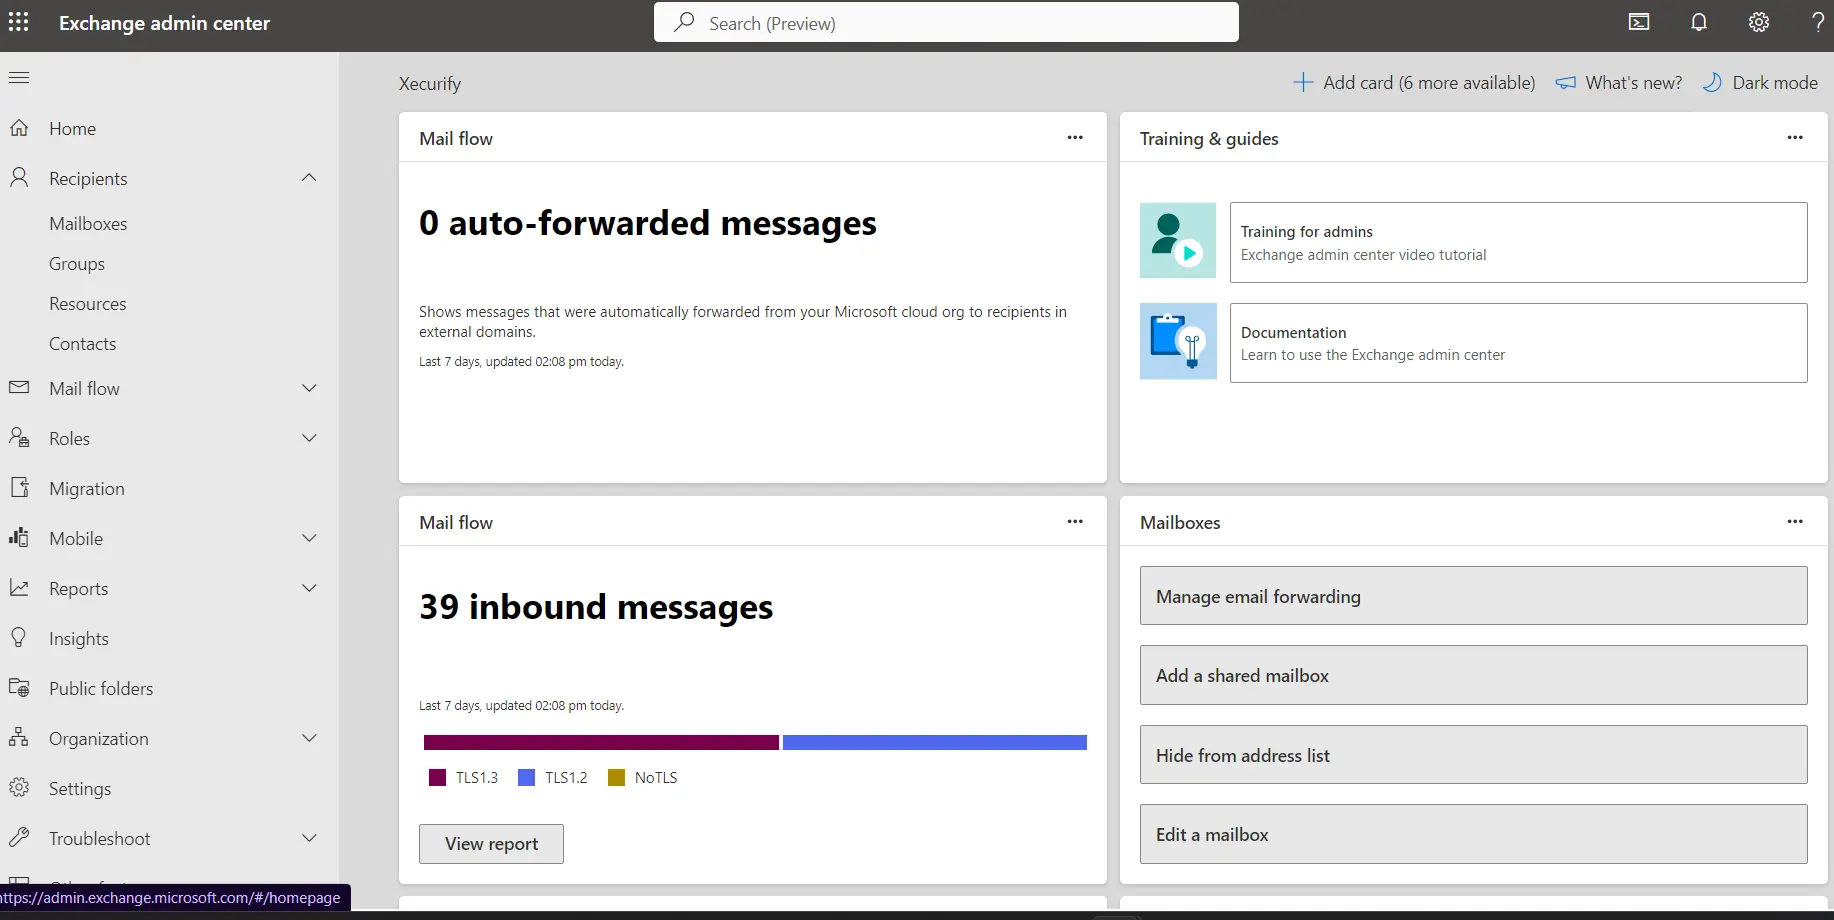
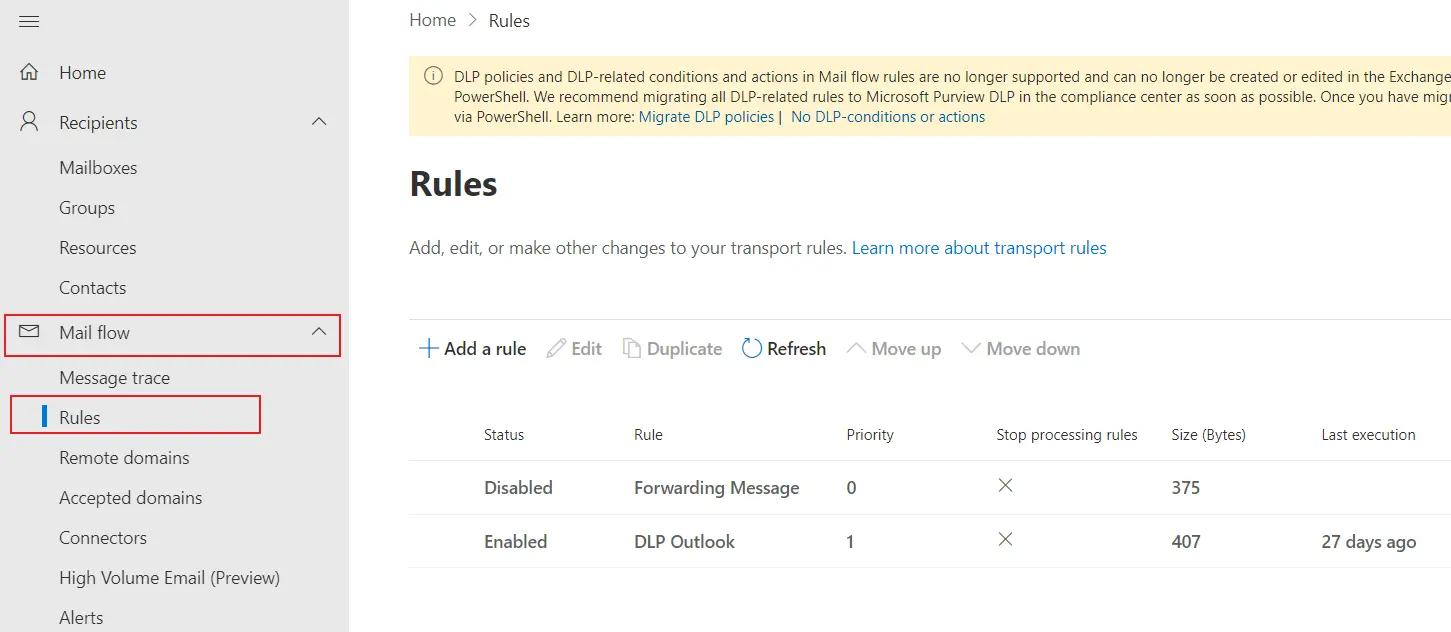
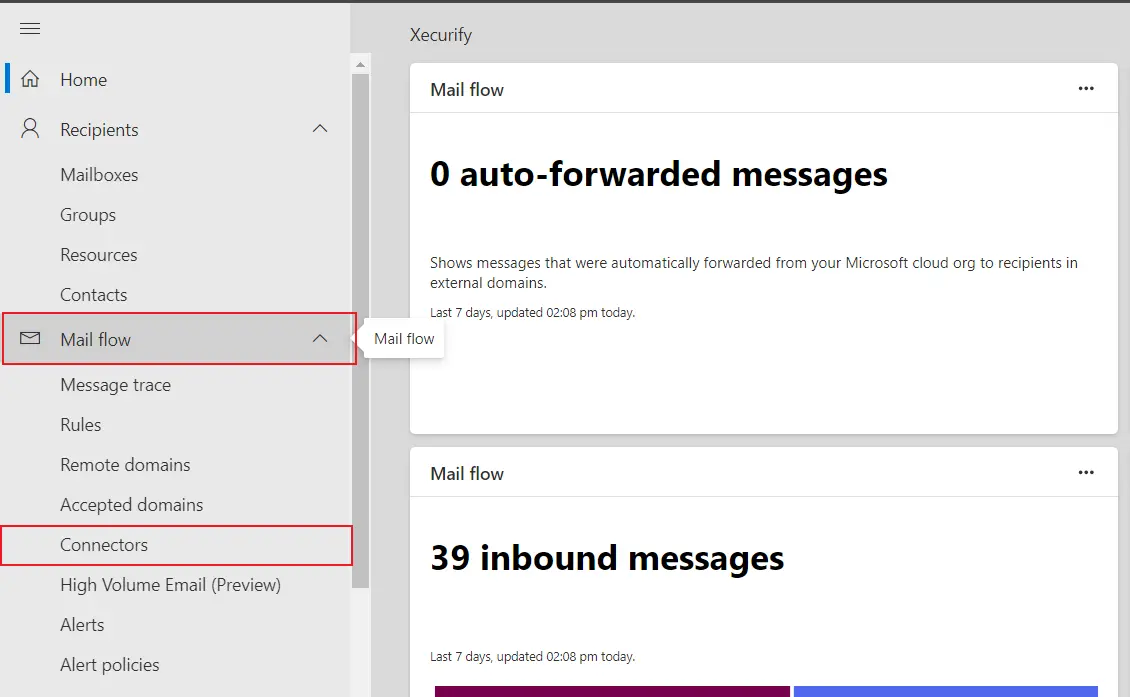
- In the left menu panel, go to Mail Flow › Connectors.
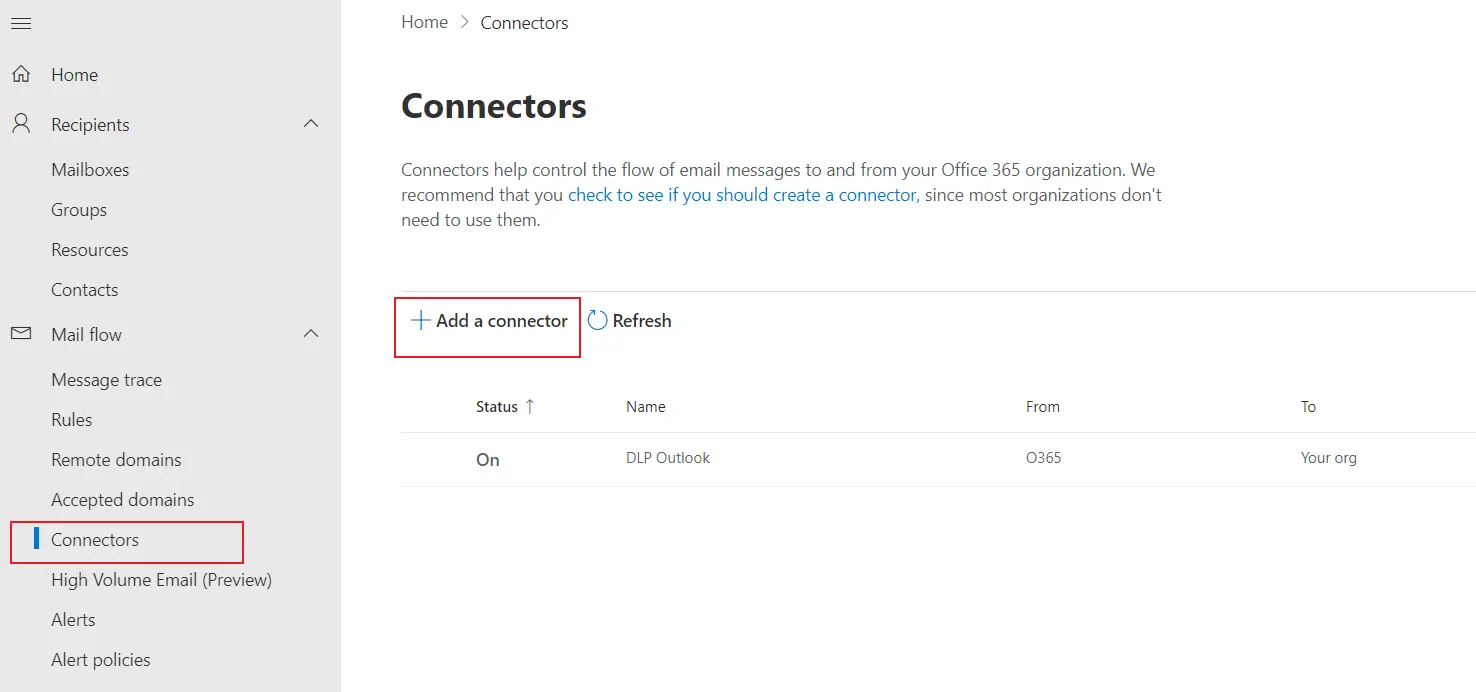
- On the Connectors tab, click Add a connector.
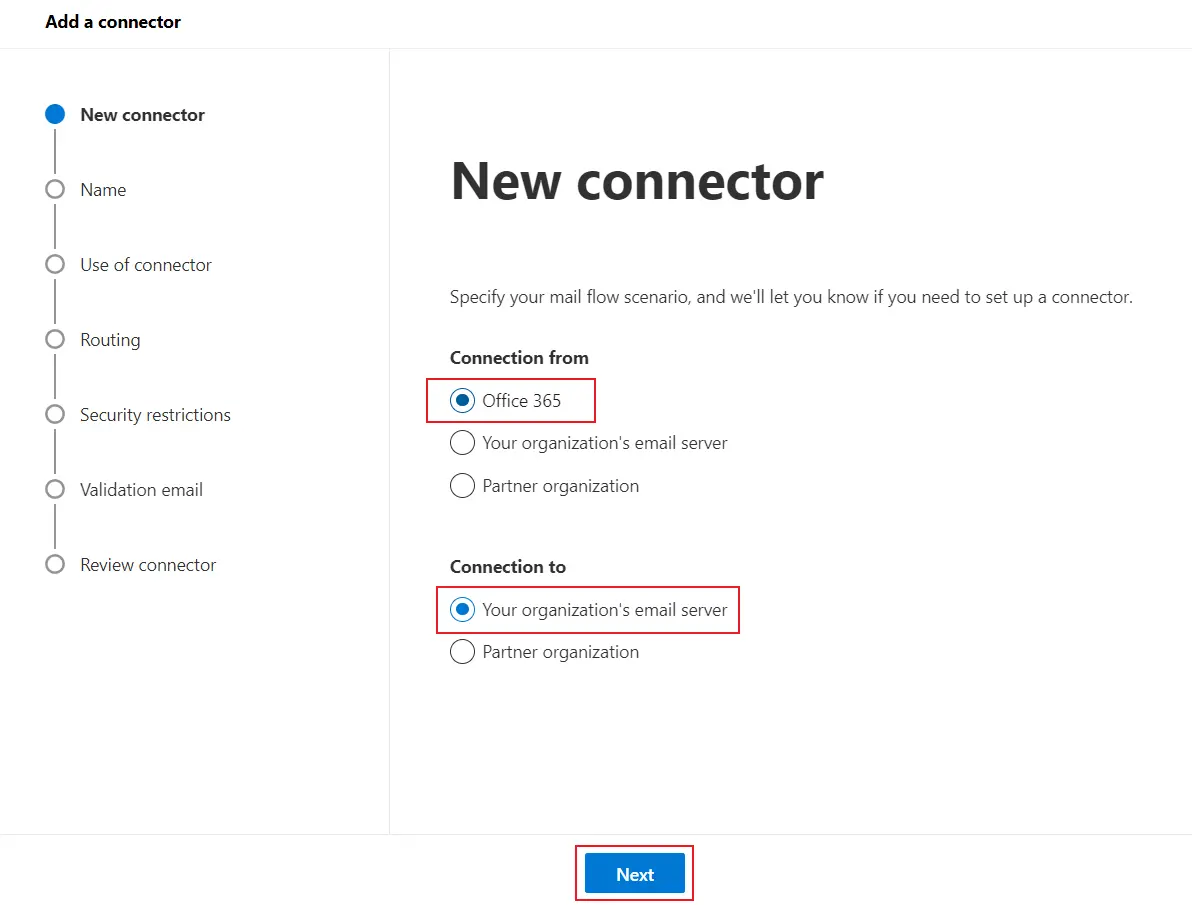
- Under Connection from, select Office 365. Under Connection to, select Your organization’s email server. Click Next.
- Enter a Name and Description then click on Next.
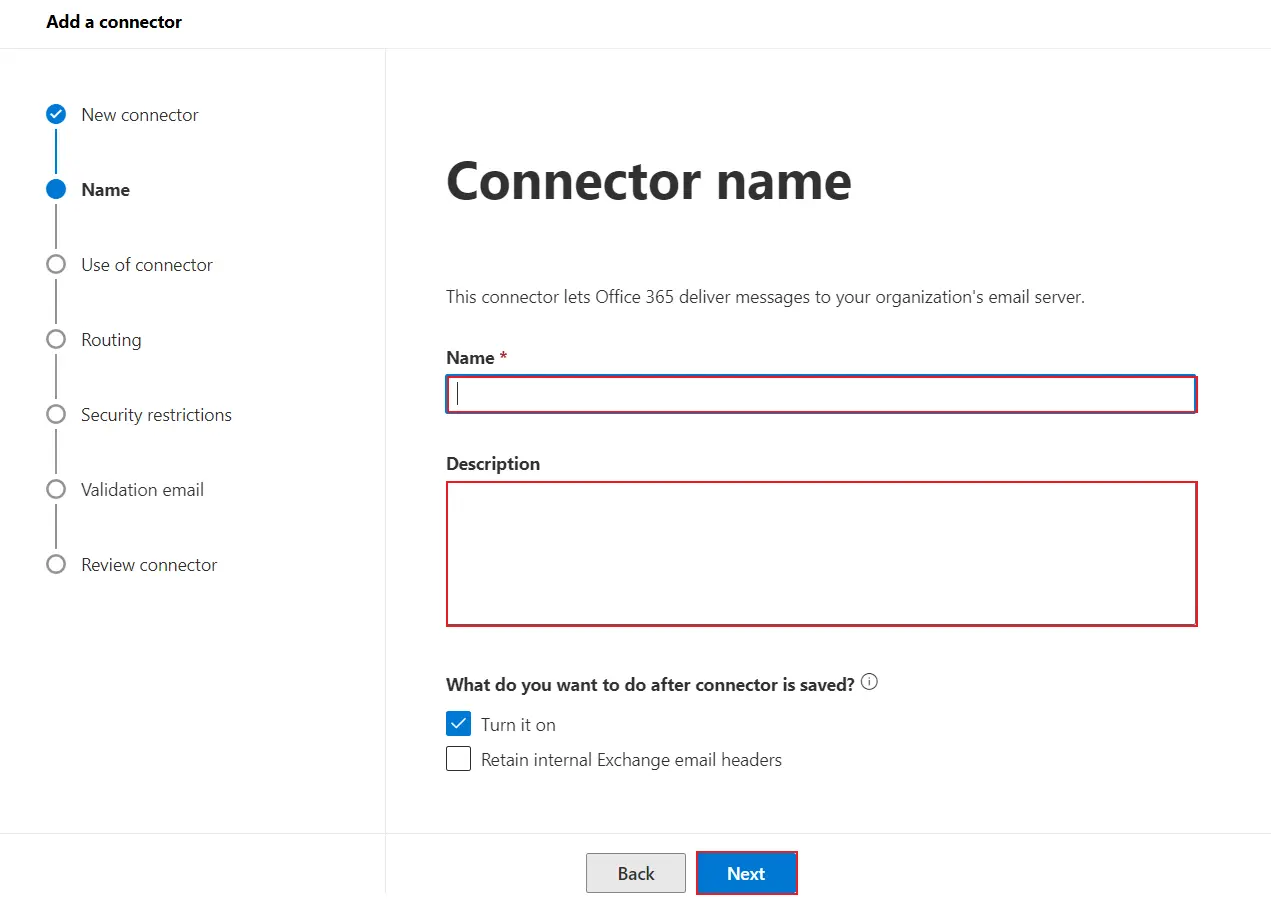
- For Use of connector, select Only when I have a transport rule set up that redirects messages to this connector, then click Next.
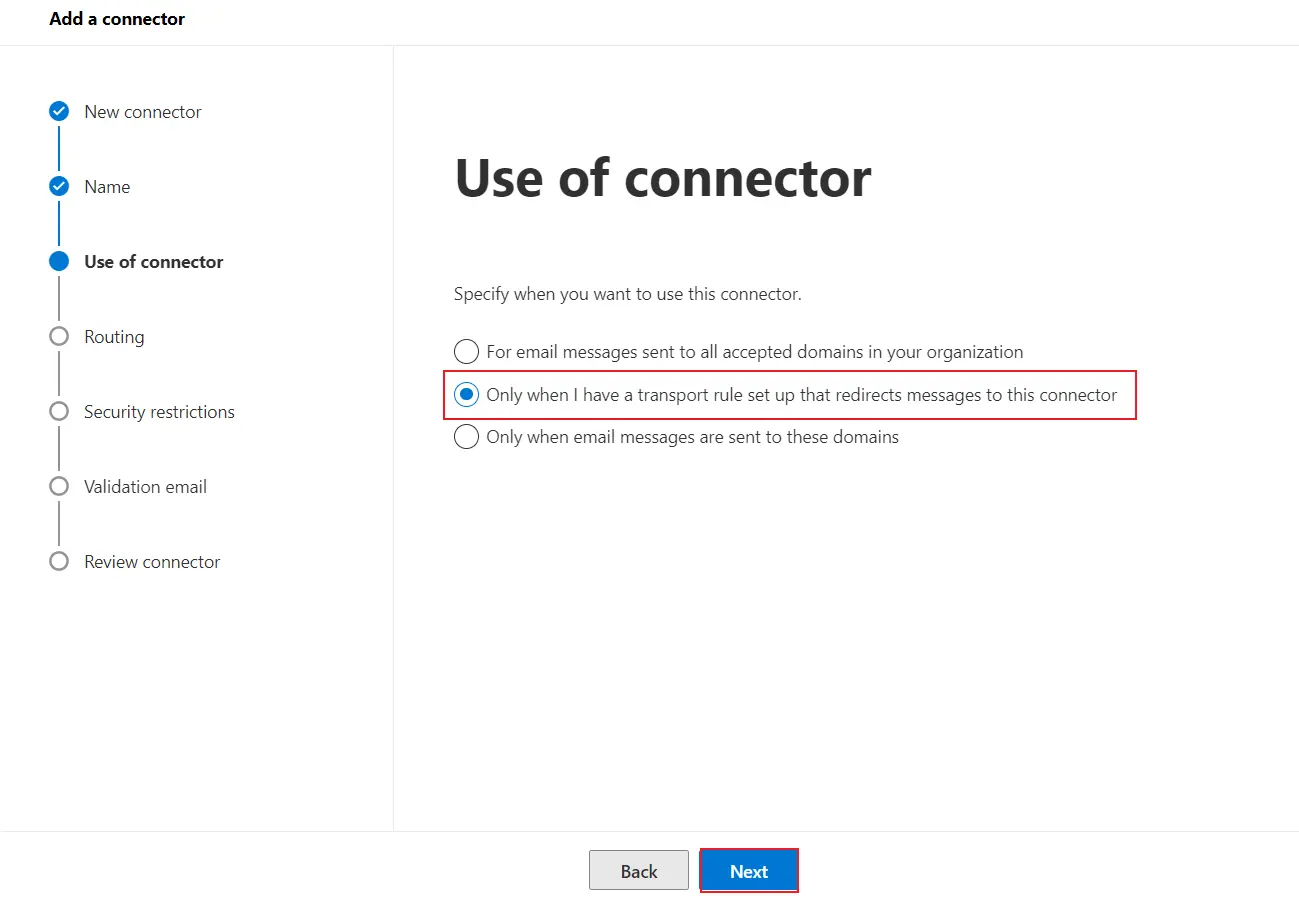
- Enter the miniOrange Email DLP server-side IP address, click the + button to add it, then click Next.
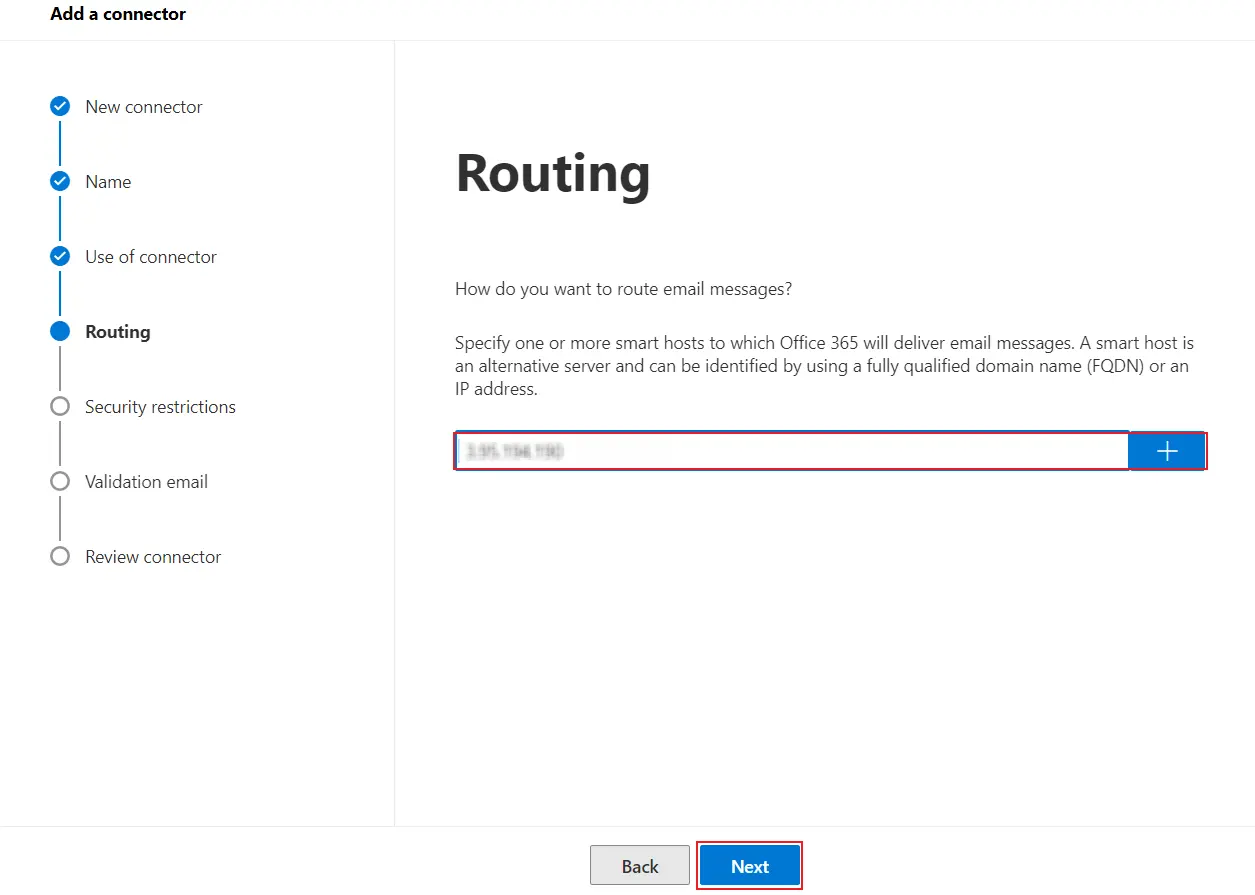
- Ensure Always use Transport Layer Security (TLS) is enabled when operating on a production site, then click Next.
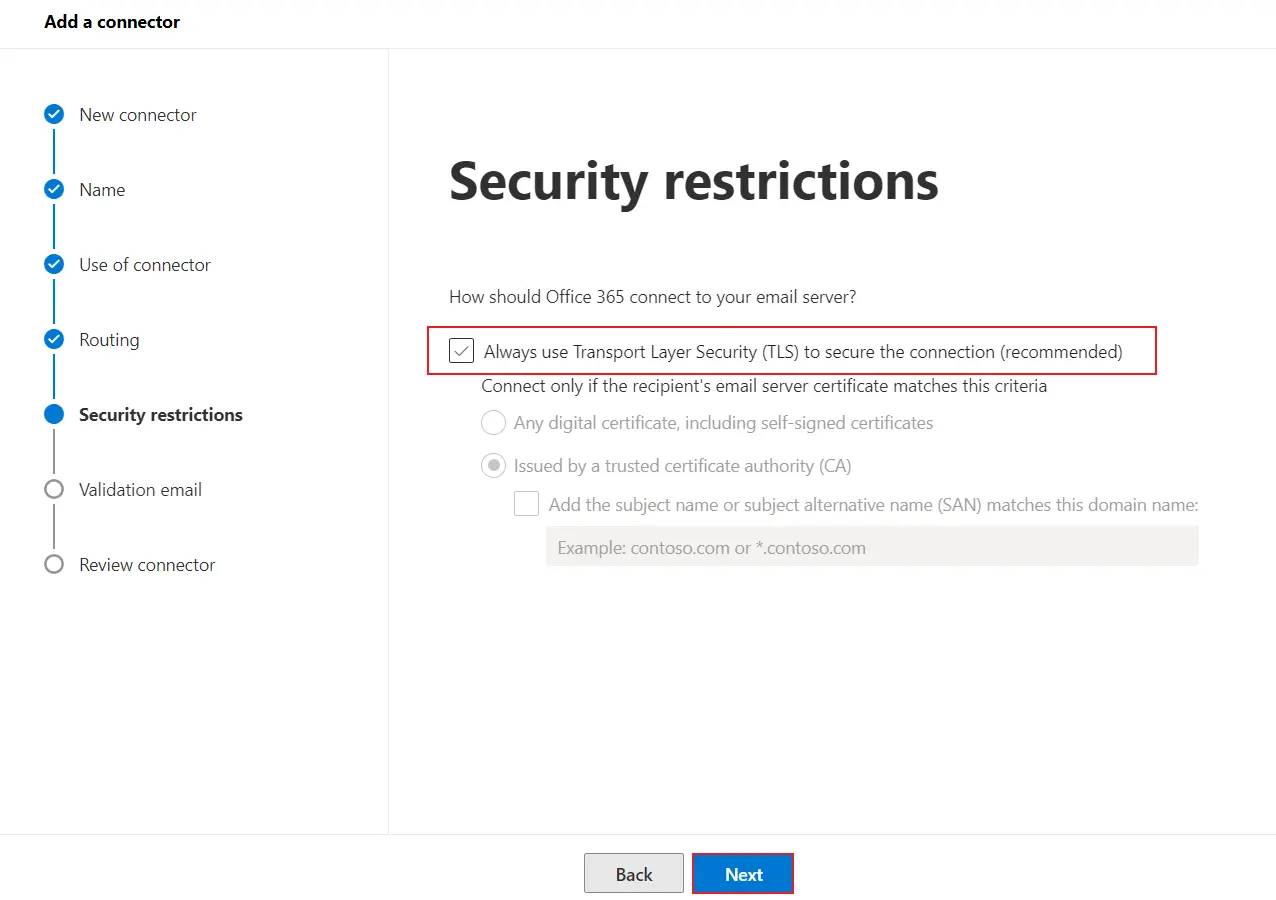
- Enter any valid email address to validate the connector, then click Validate.
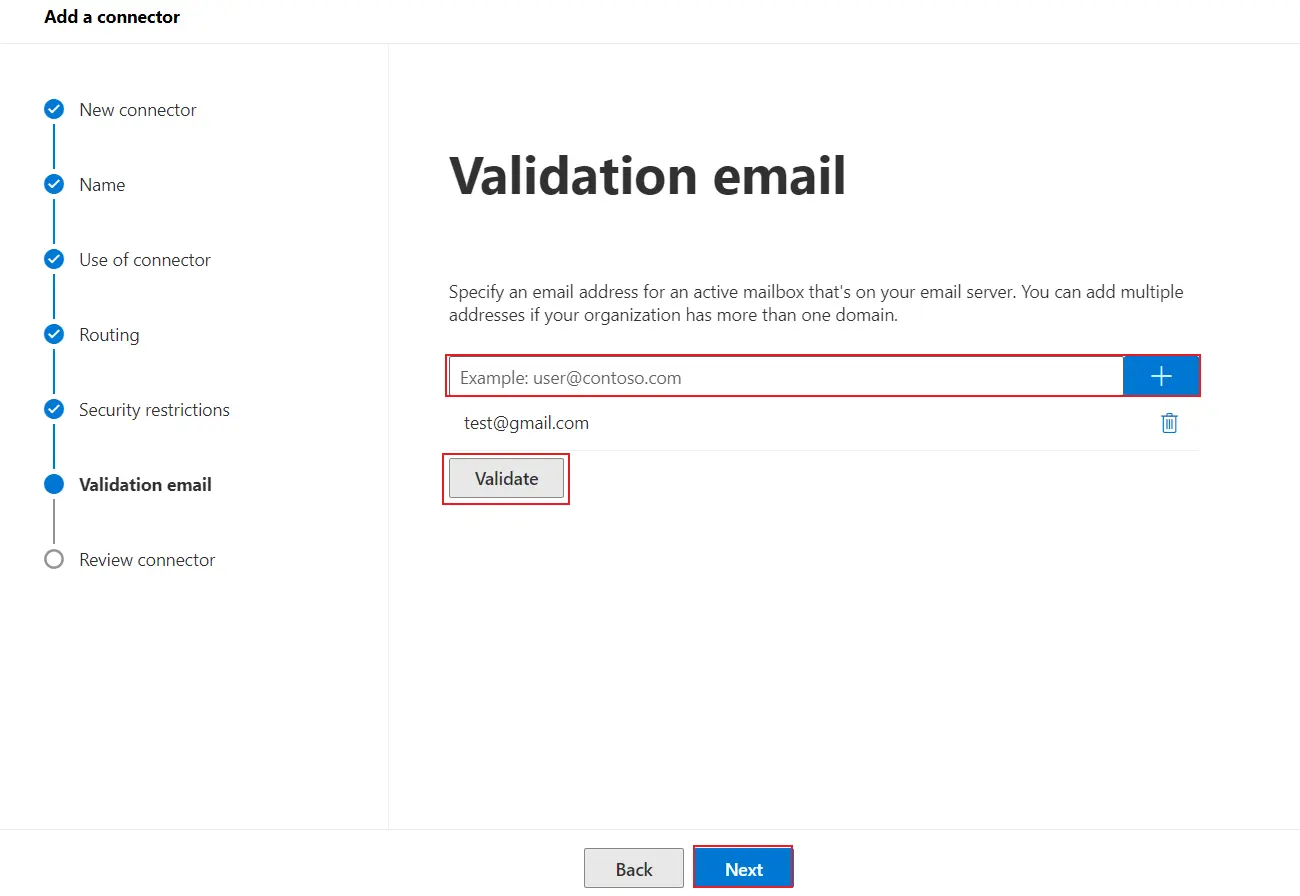
- Once validation succeeds, click Next, review all the settings, and save the connector.
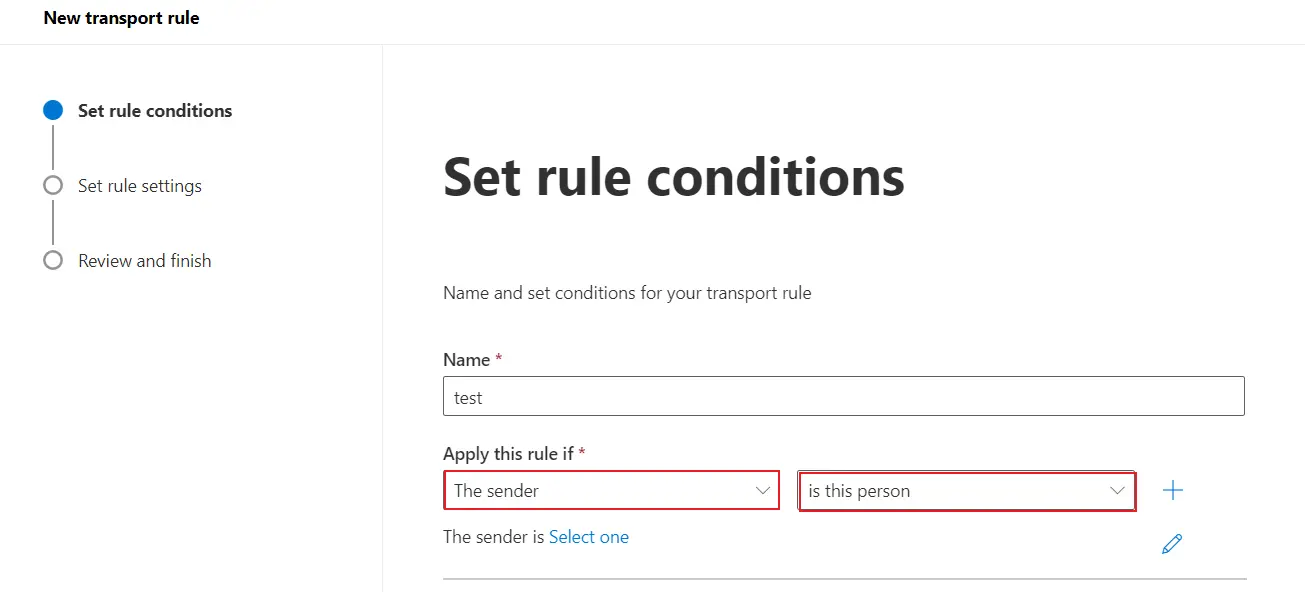
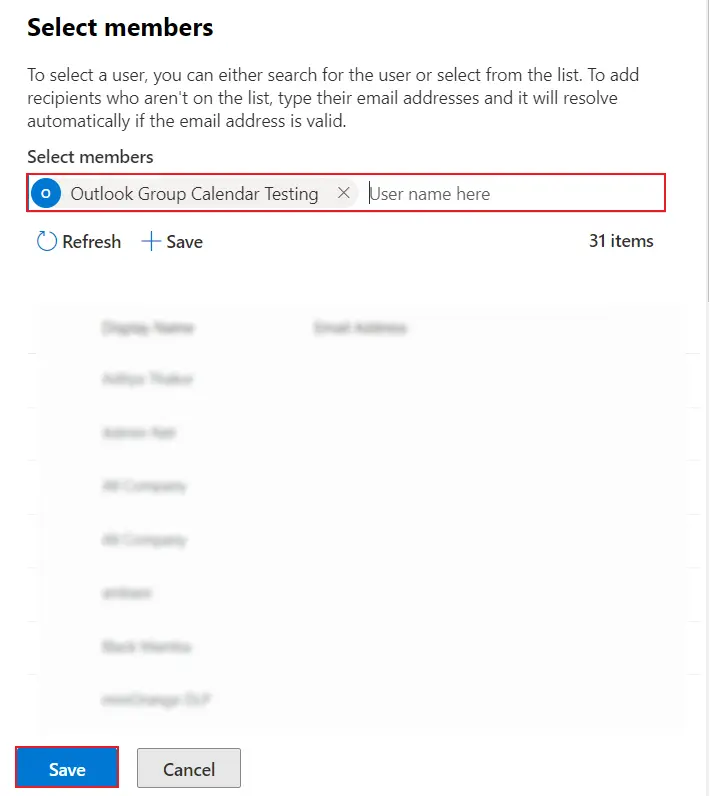
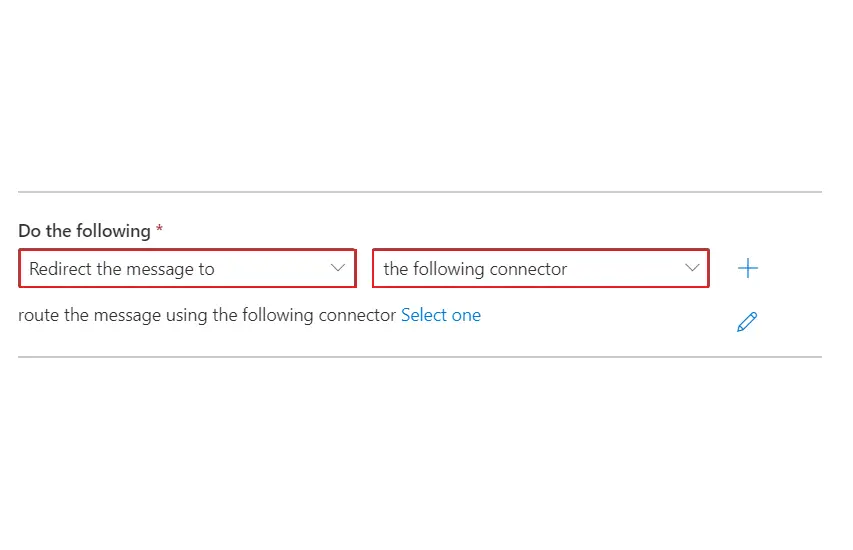
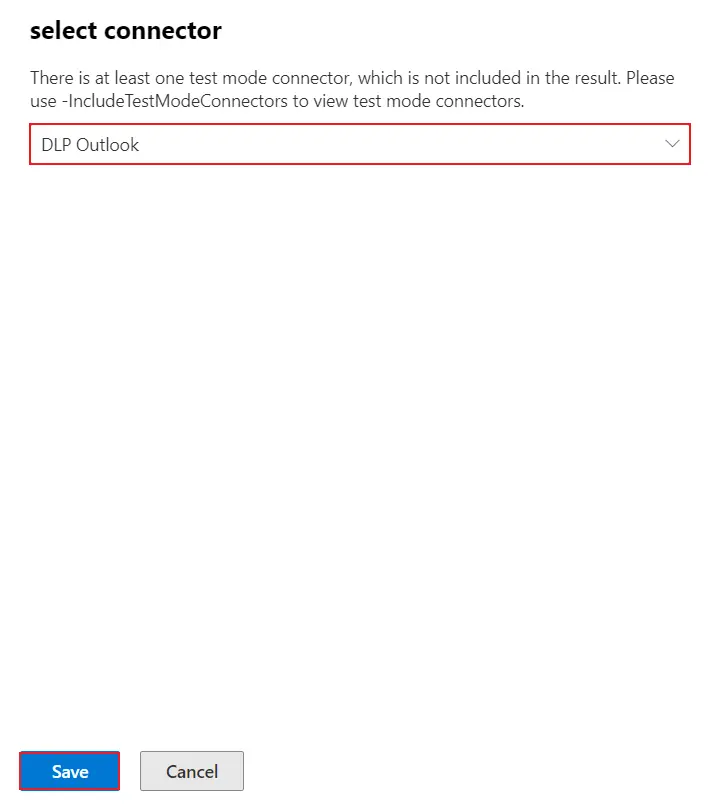
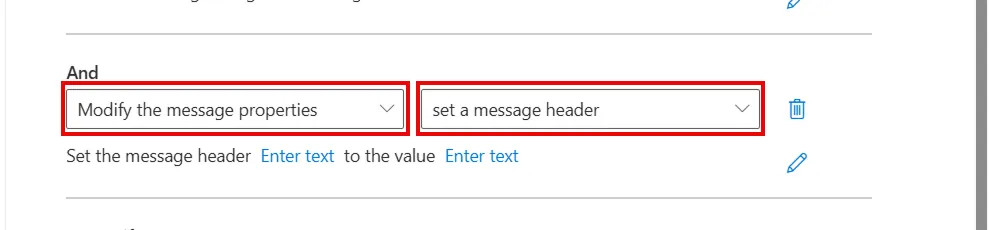
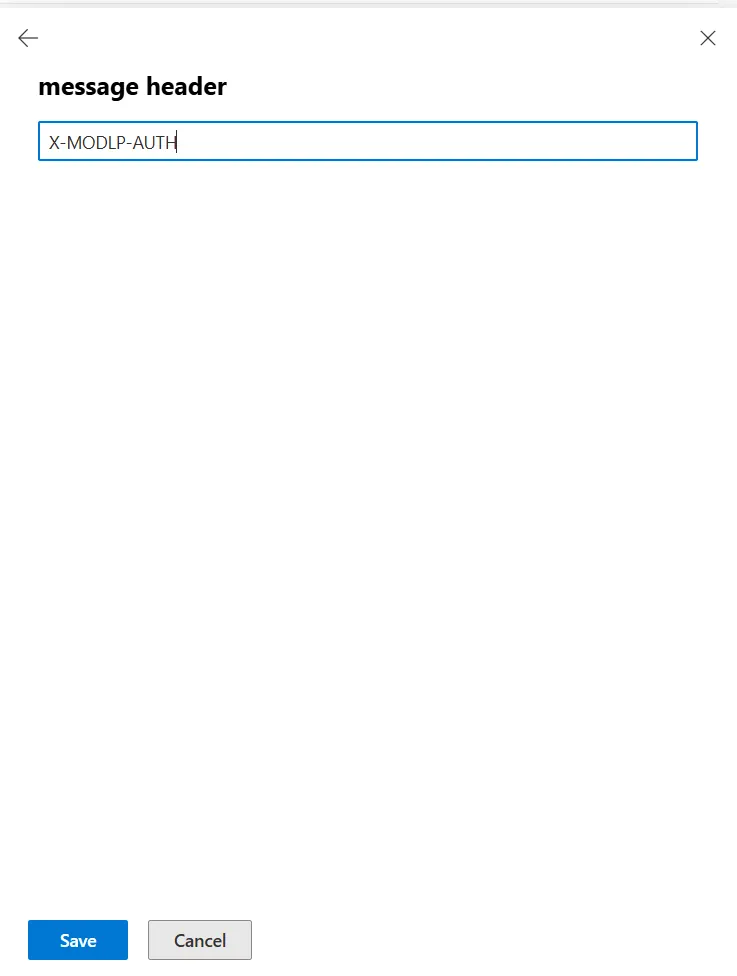
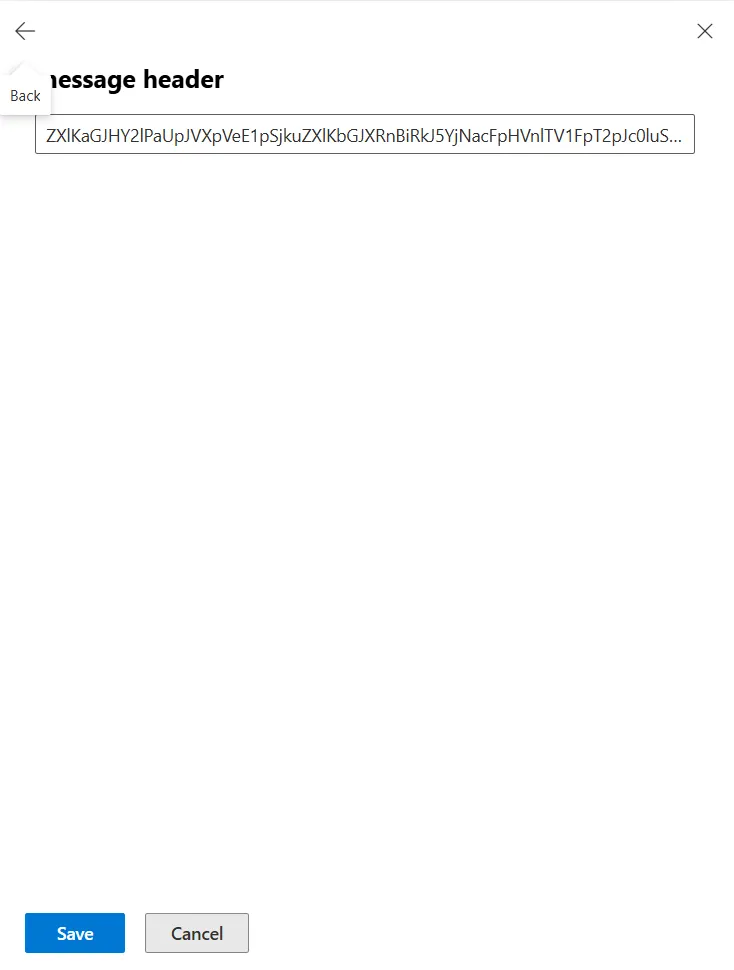
2.2 Set up the transport rule
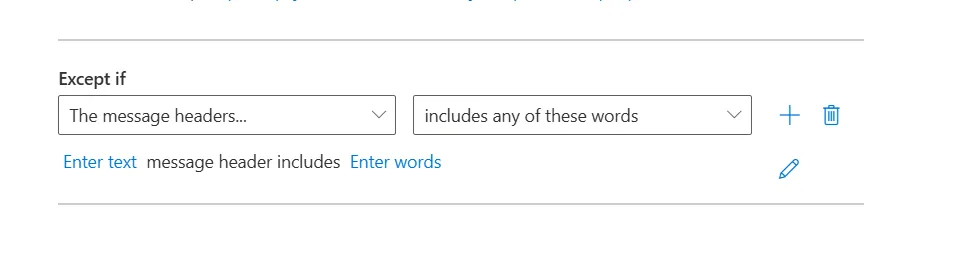
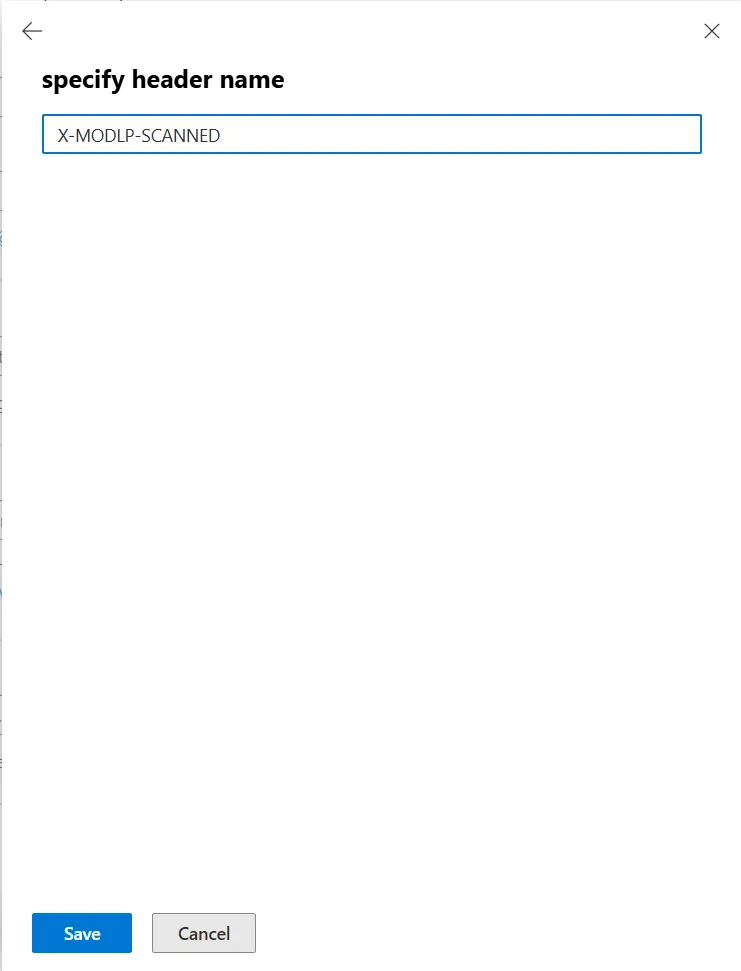
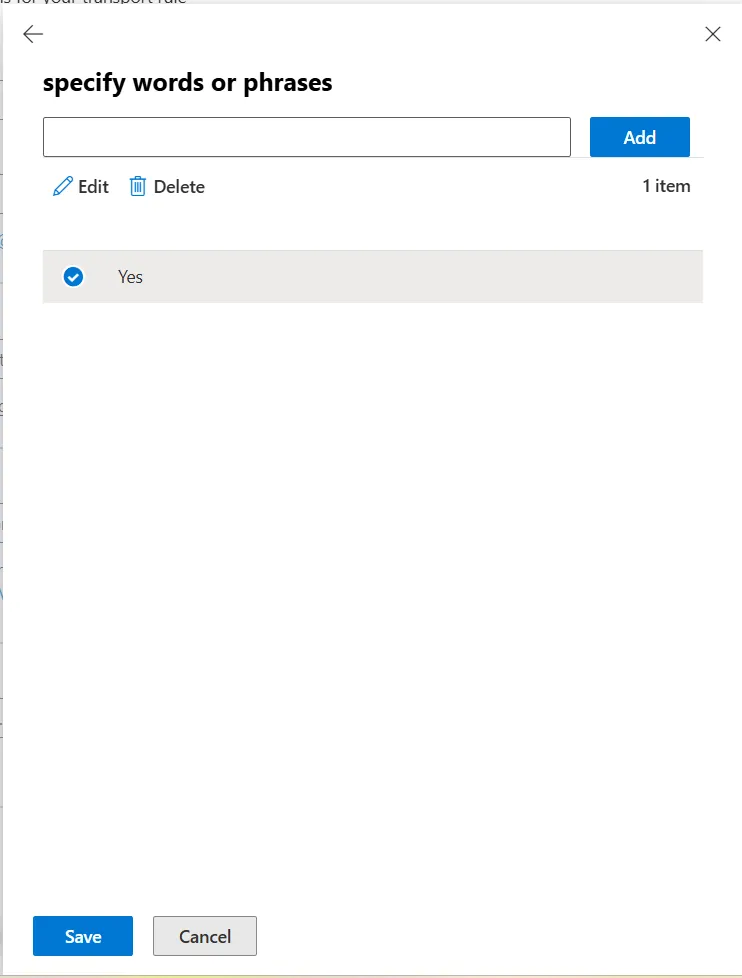
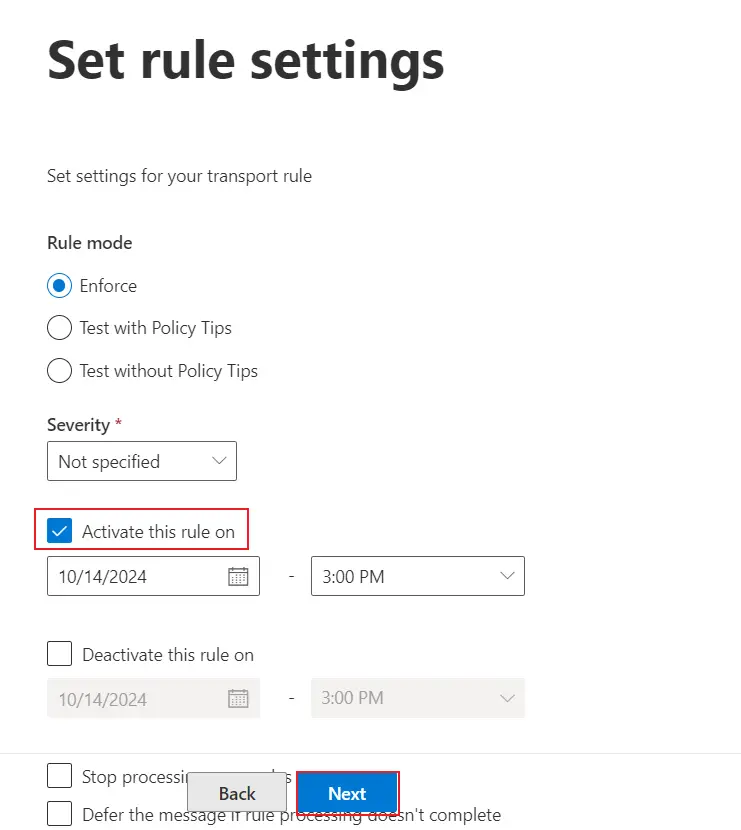
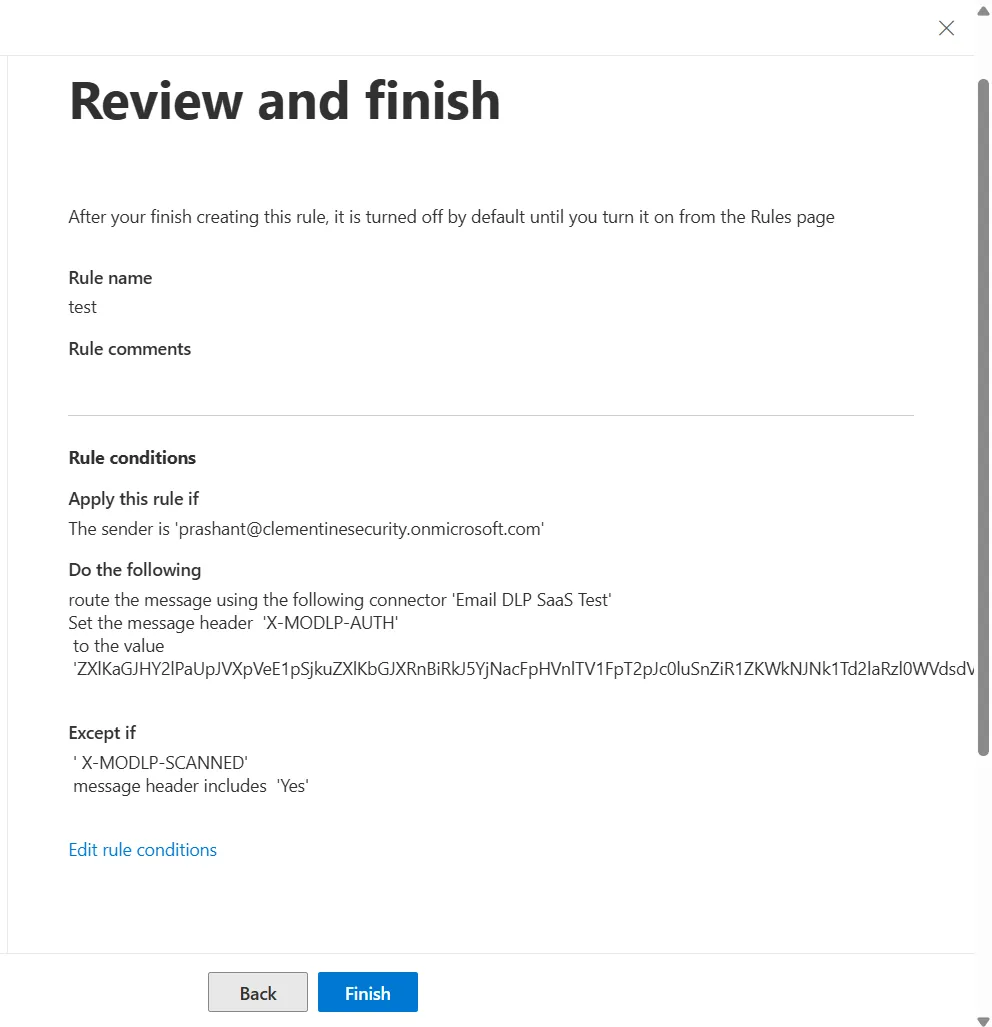
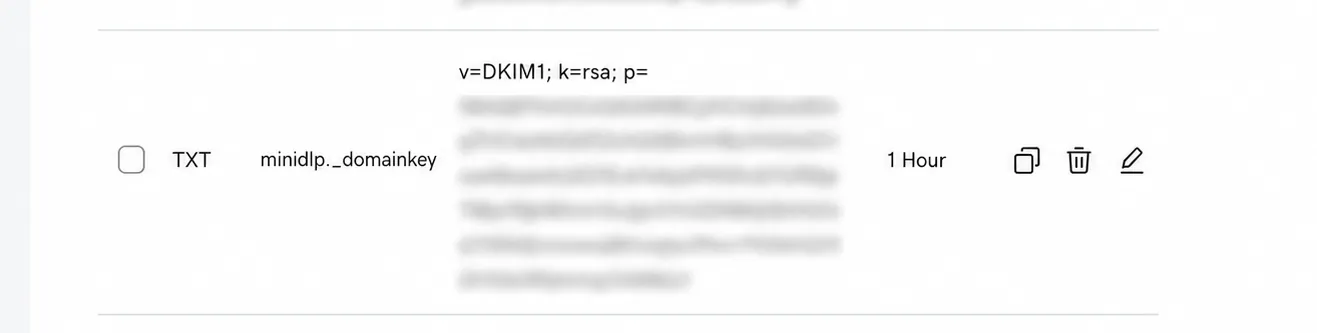
2.3 Add SPF & DKIM records in your DNS console
Step 3. Configure Email Policy using DLP Solution.
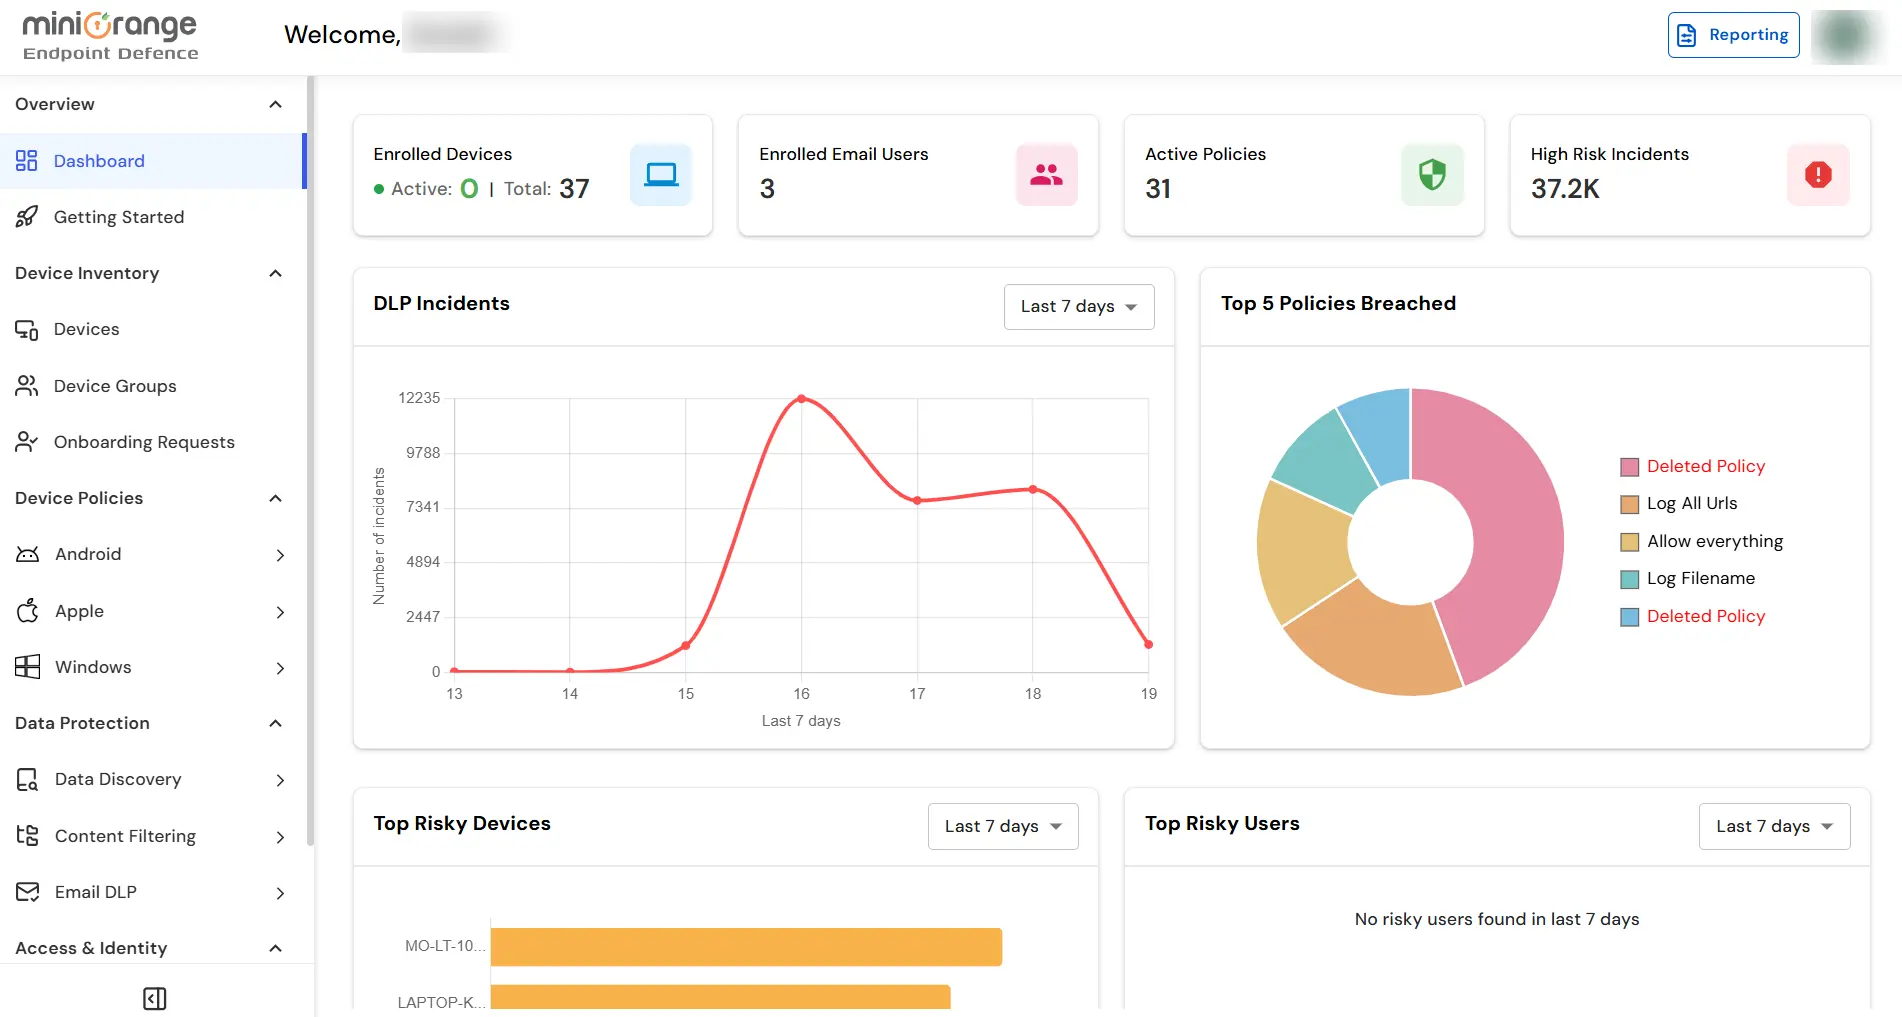
- Sign in to your DLP dashboard.
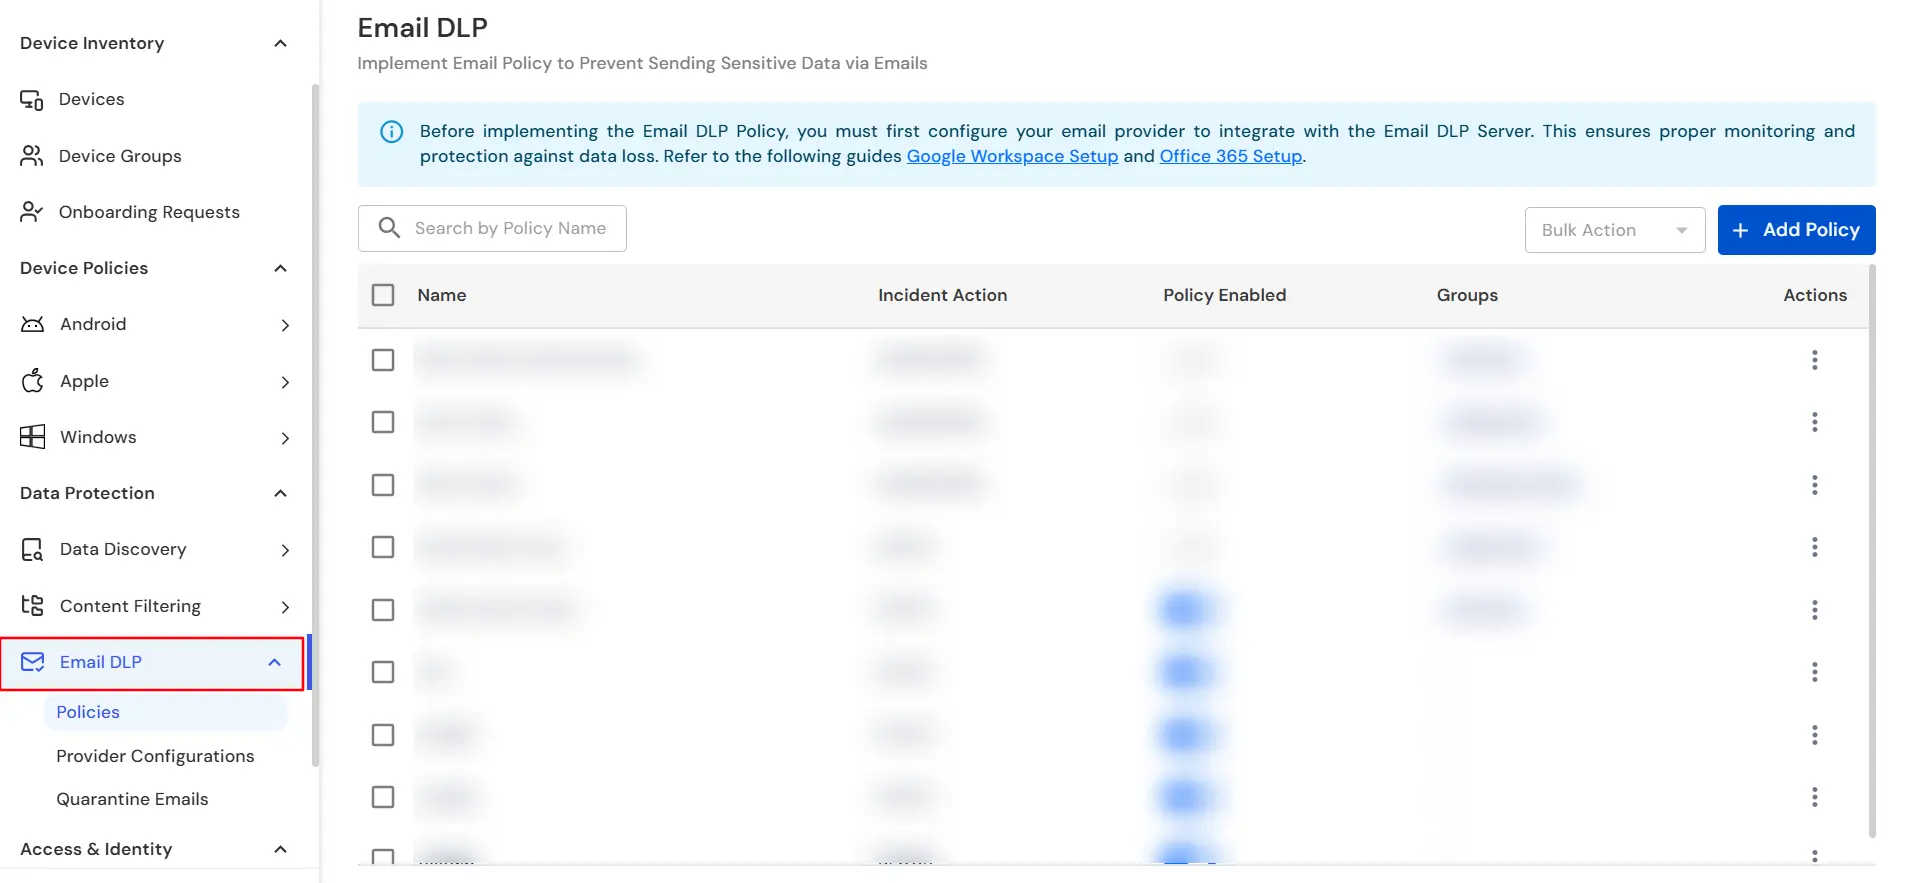
- On the dashboard, navigate to Email DLP tab and click on the Add Policy button to open the policy form.
- Now under the General tab, provide a meaningful Policy Name.
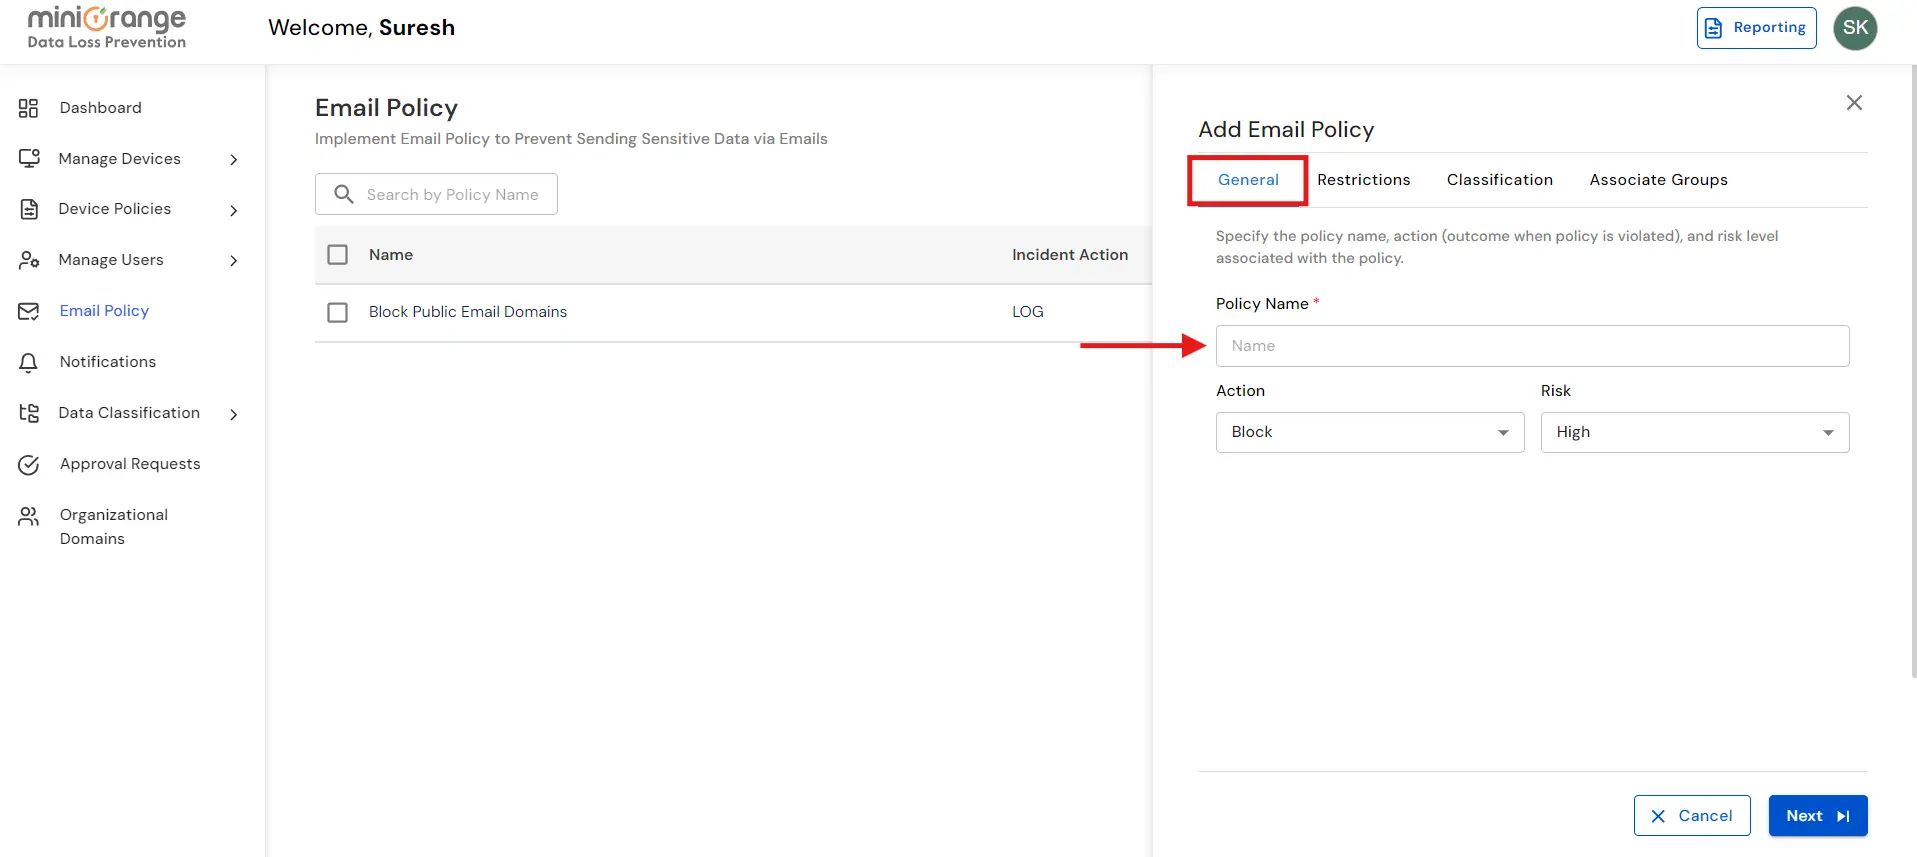
- Then select an Action for the policy from the dropdown.
- Block: If the email violates the policy, it will be blocked, and a report will be generated.
- Log: If the email violates the policy, it will be sent, but the incident will be logged in the reports.
- Quarantine: If the email violates the policy, it will be quarantined for review and the reviewer will be notified over email.
- Redact: If the email violates the policy, sensitive content will be automatically redacted before the email is sent.
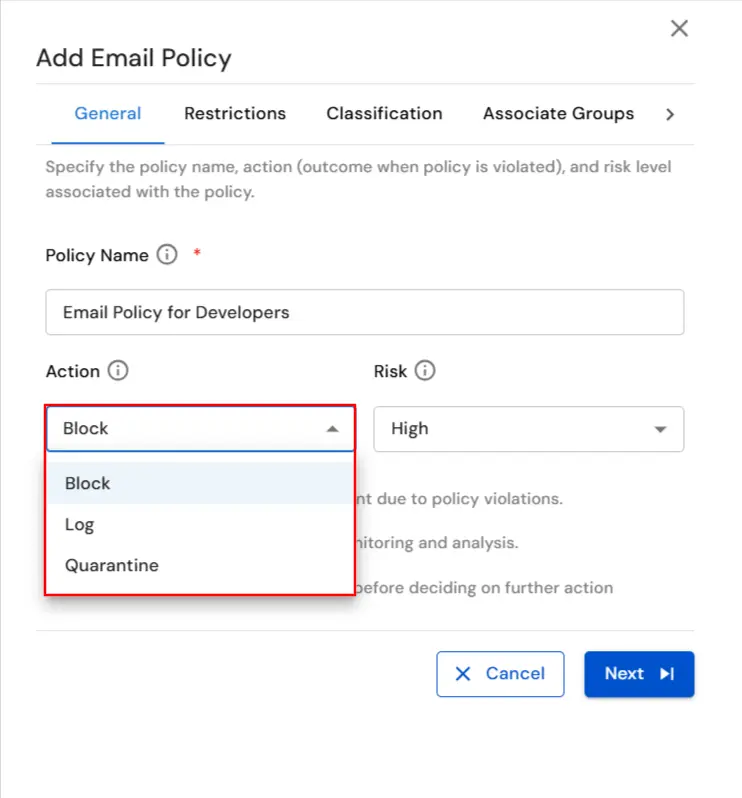
- Now choose the appropriate Risk level.
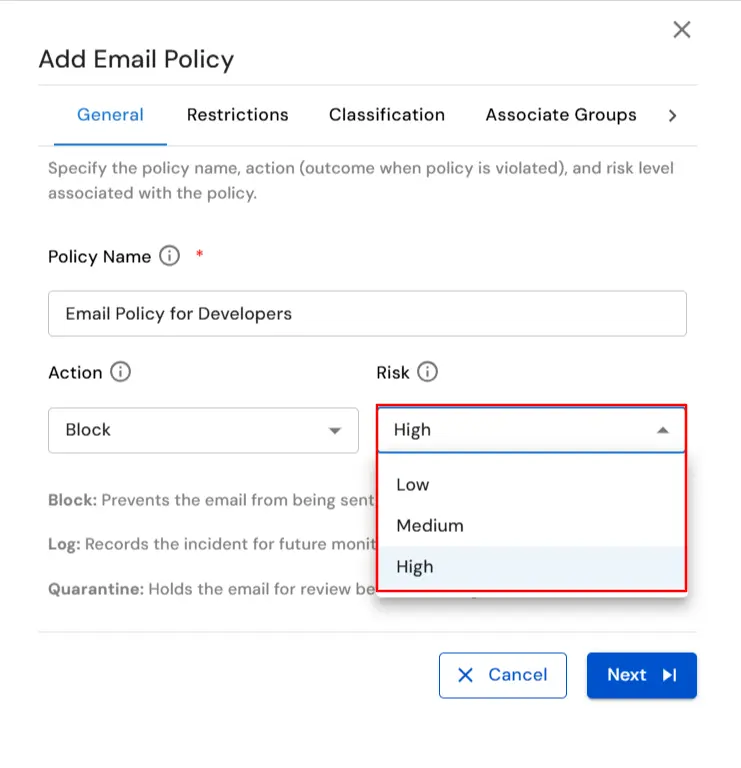
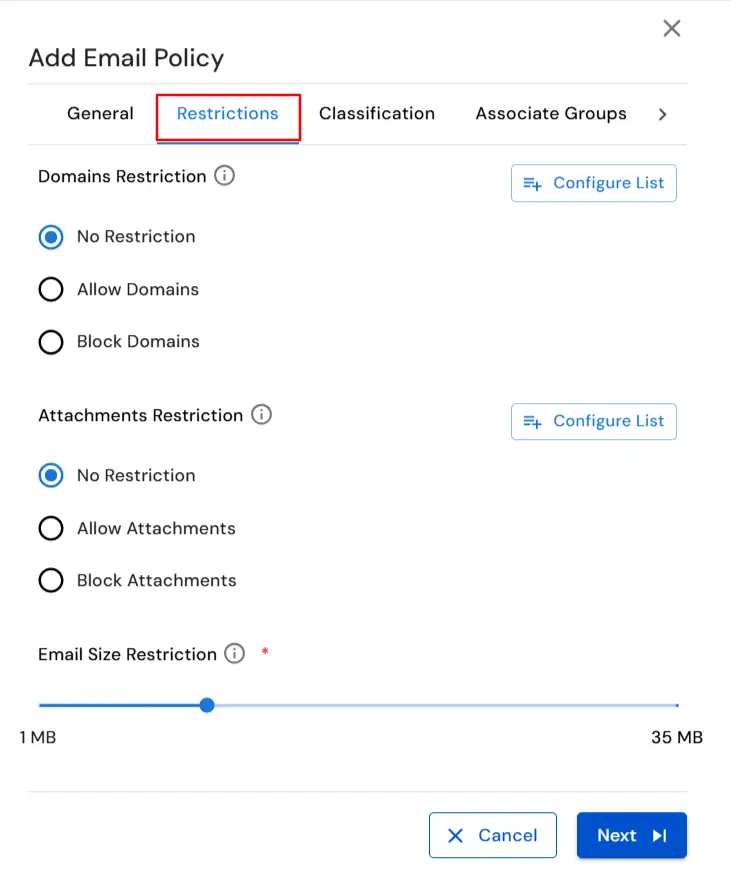
- Click on Next to proceed to the Restriction tab where Domain and attachment-based restrictions can be set.
- Select the type of Domain Restriction you want to apply.
- No Restriction: No restrictions will be applied.
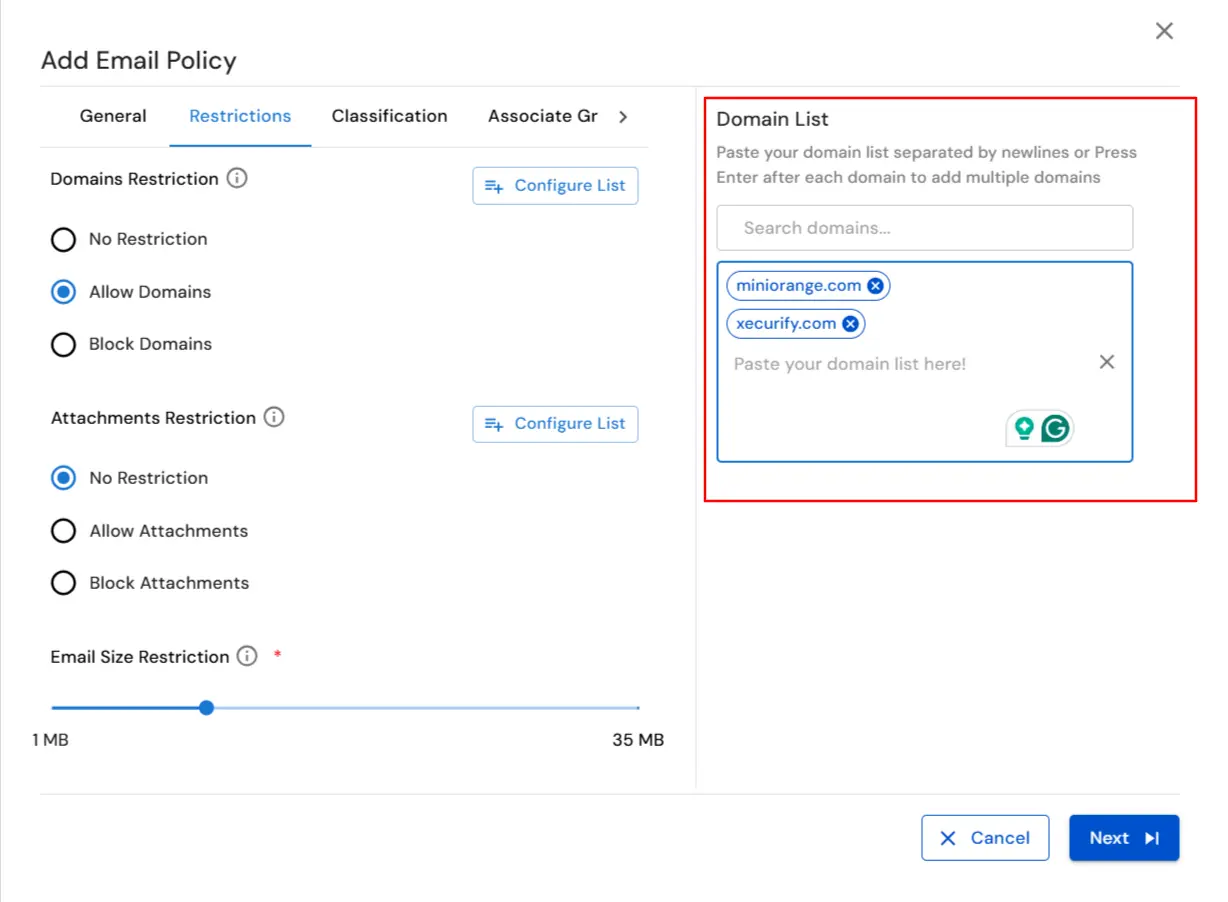
- Allow Domains (Whitelisting): Emails can only be sent to whitelisted domains, while all others are blocked.
- Block Domains (Blacklisting): Emails to blacklisted domains will be blocked, with all other domains allowed.
- Email Size Restriction: You can set a maximum size limit for emails to be sent.
- For example, if we select the Allow Domains option, we need to specify a domain list to which all the emails will be sent.
- In the next step, you can set restrictions on file uploads based on their attachements.
- To allow all file types, select the No Restriction option.
- If you want to permit only specific file types, choose Allow Attachements and then select the desired attachement from the list.
- Alternatively, if you wish to block certain file types, select Block Attachements and choose the attachement to be restricted.
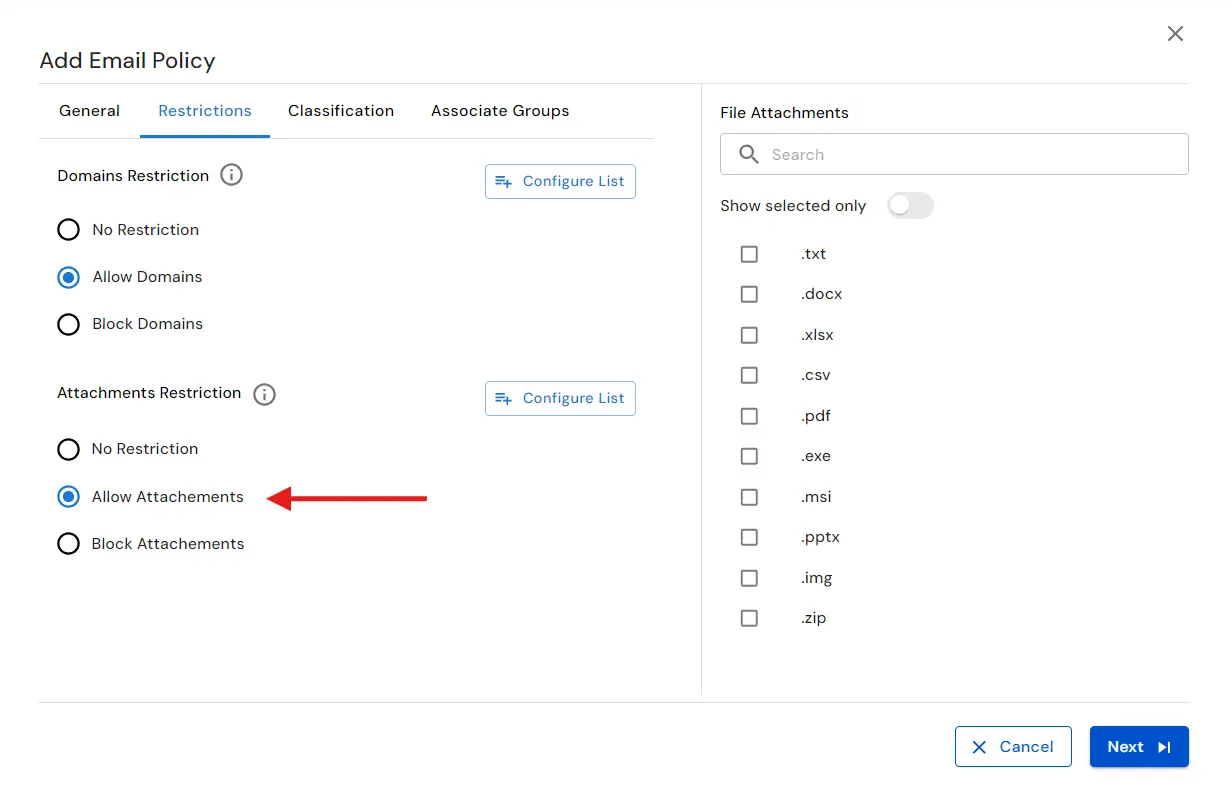
- For example, we have selected the Allow Attachments option to allow specified file types to be sent as email attachments.
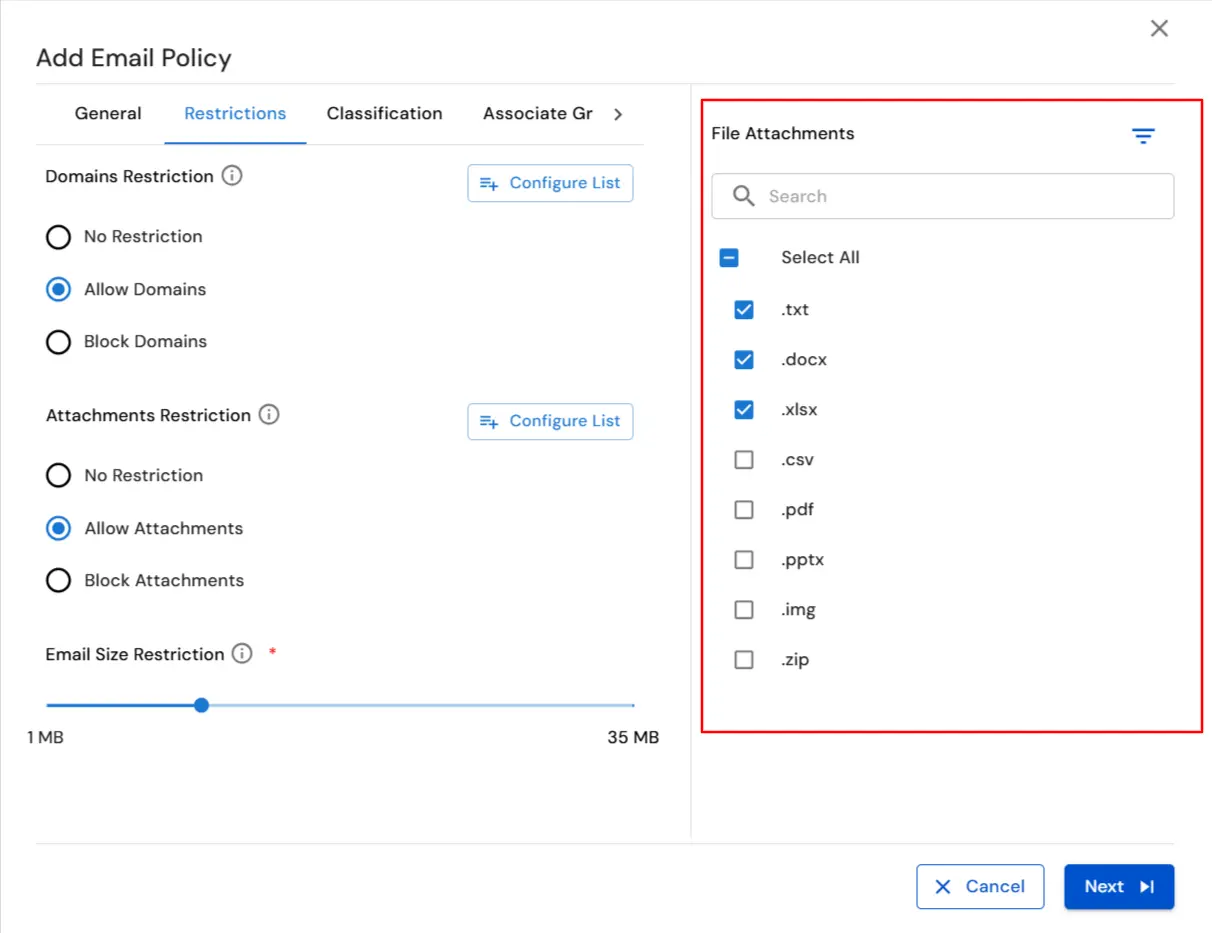
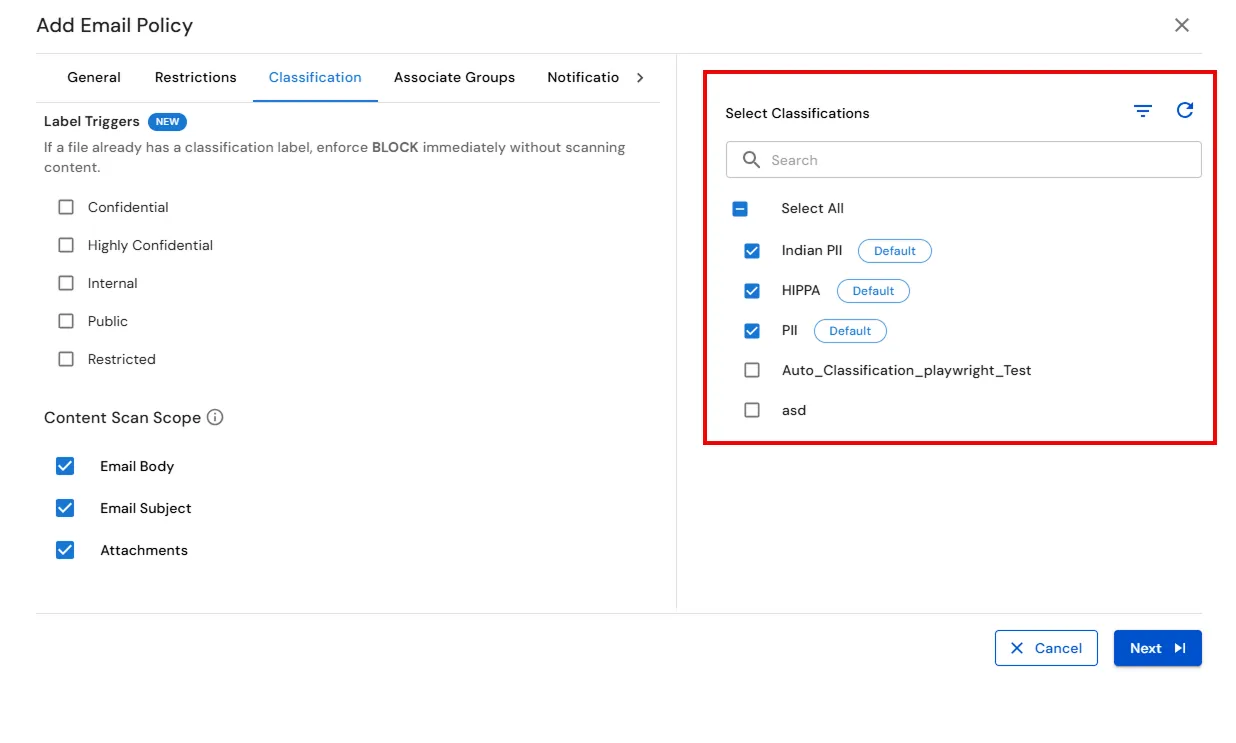
- Proceed to the Classification tab and configure the label triggers by selecting the predefined labels. This enables the system to classify email data automatically based on the selected labels.
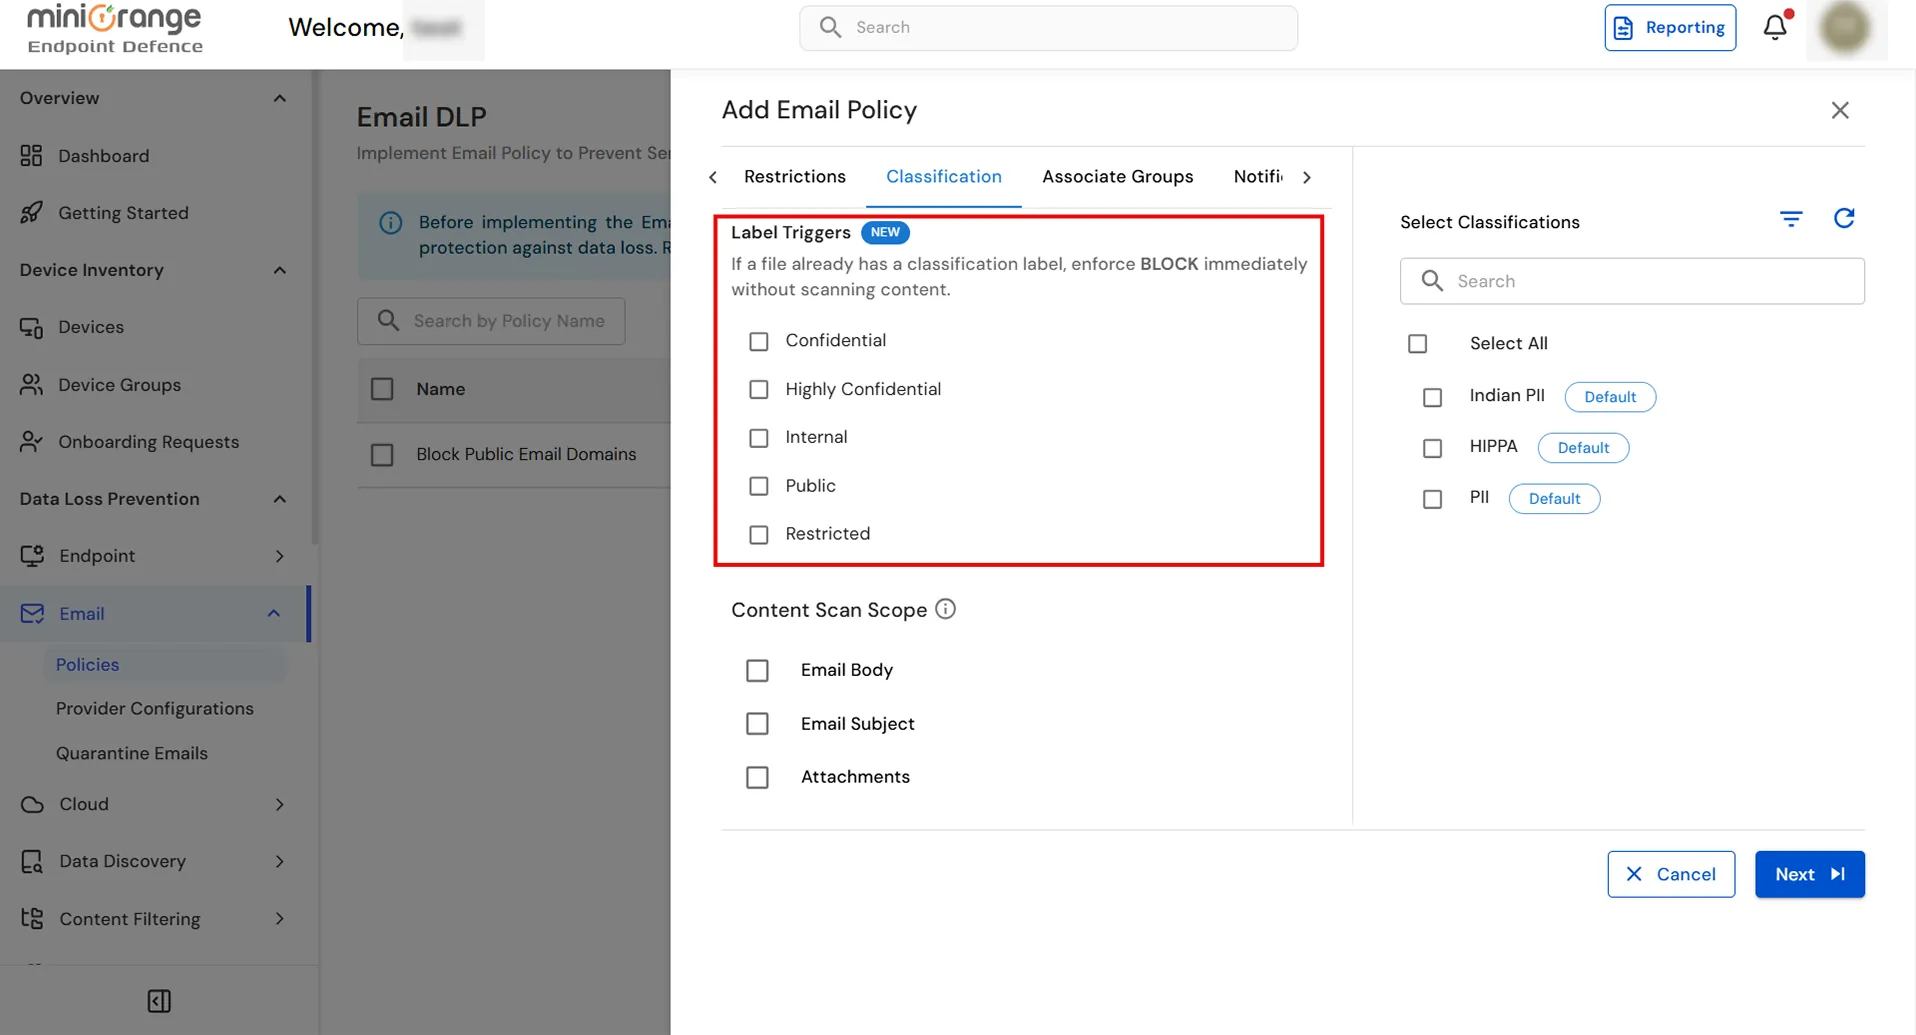
- Next, navigate to the Content Scan Scope section to specify which parts of the email should be scanned and classified.
- Email Body: Classifies sensitive data present in the email body.
- Email Subject: Classifies sensitive data present in the email subject.
- Attachments: Classifies sensitive data contained within email attachments.
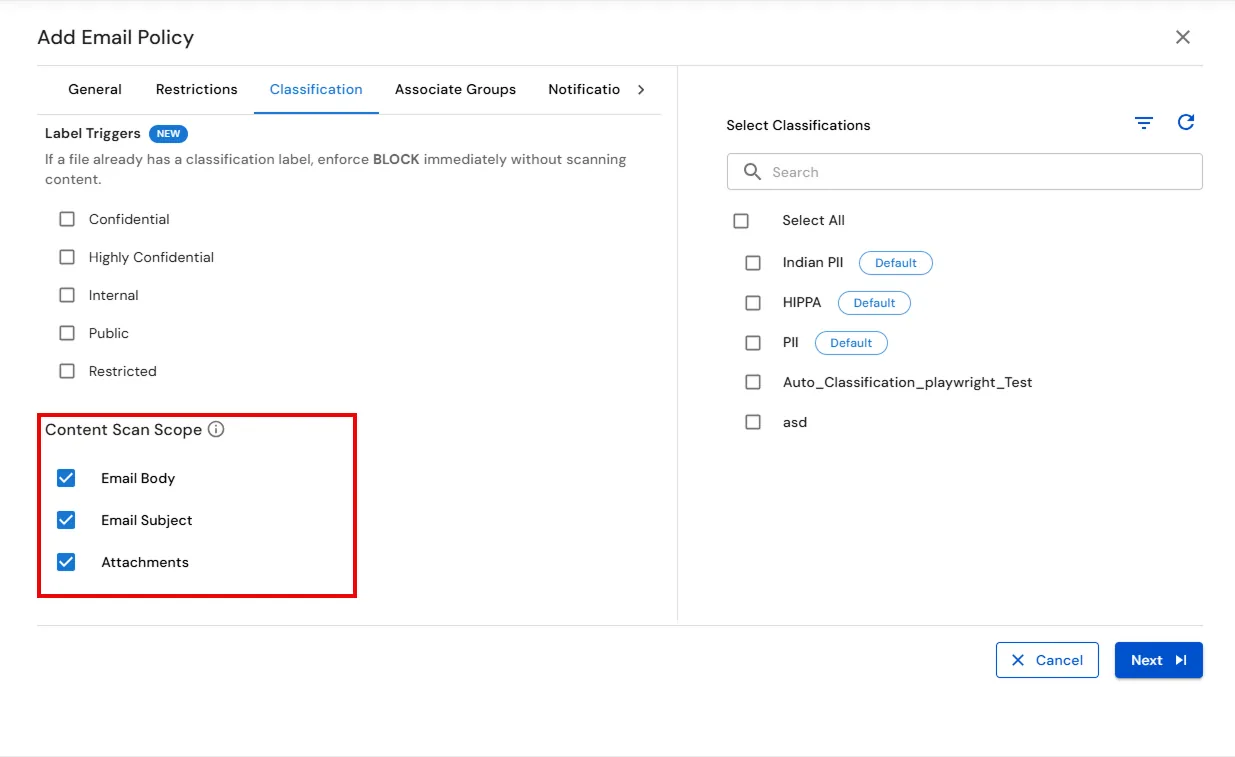
- For example, we have applied classifications to all the three options.
Note: Classifications can be created under the Data Classifications > Classifications option.
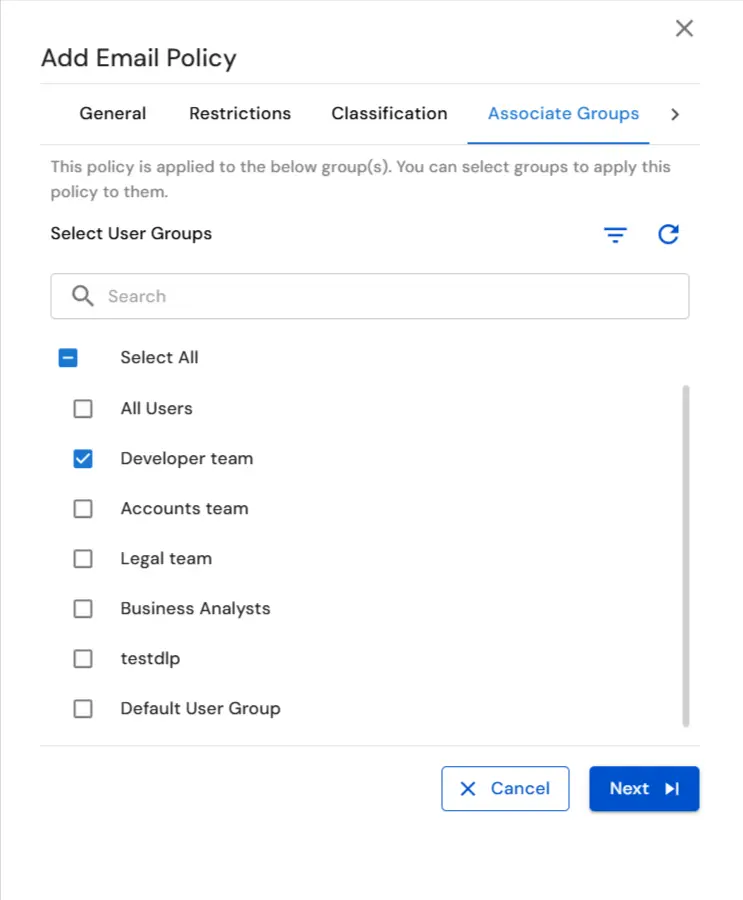
- In the next step, you'll associate groups with the policy. Start by searching for the User Groups and selecting it. If you want to apply the same policy to multiple groups, you can select additional groups as well.
- In the Notification tab enable the Create Alert for this Policy toggle and then specify the email addresses to which you want to notify policy breaches.
Note: You can enter multiple email addresses by pressing the Enter key after each one.
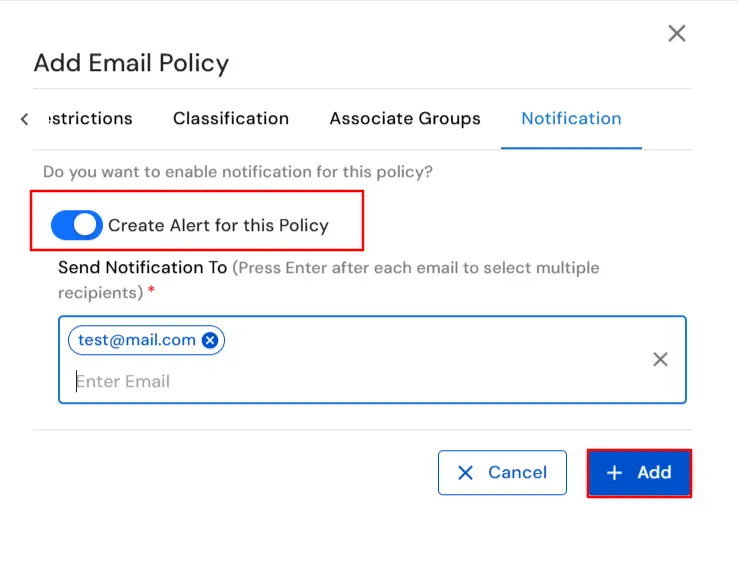
- Finally, click on the Add button to save the policy.
- You have successfully configured the miniOrange Email DLP dashboard and implemented your email policies.
If you are facing any issues that you are not able to resolve please feel to reach out us uemsupport@xecurify.com