- Home
- DLP
- How to Configure Clipboard Policy using miniOrange DLP
Configure Clipboard Policy for Windows using miniOrange DLP
The Clipboard Policy in miniOrange DLP (Data Loss Prevention) helps organizations control clipboard operations across managed Windows devices. It restricts unauthorized copy, cut, and paste operations involving sensitive information, reducing the risk of accidental or intentional data leakage. The policy can be assigned to Device Groups and monitored through the Reporting dashboard for improved visibility and compliance.
Prerequisites
There are a couple of things you need to check before you start with the setup:
- You must have the required Policy Creation privileges to create and configure Clipboard Policies in the miniOrange DLP dashboard.
Configuration Steps
Step 1: Configure Clipboard Policy
- Sign in to your DLP Admin dashboard.
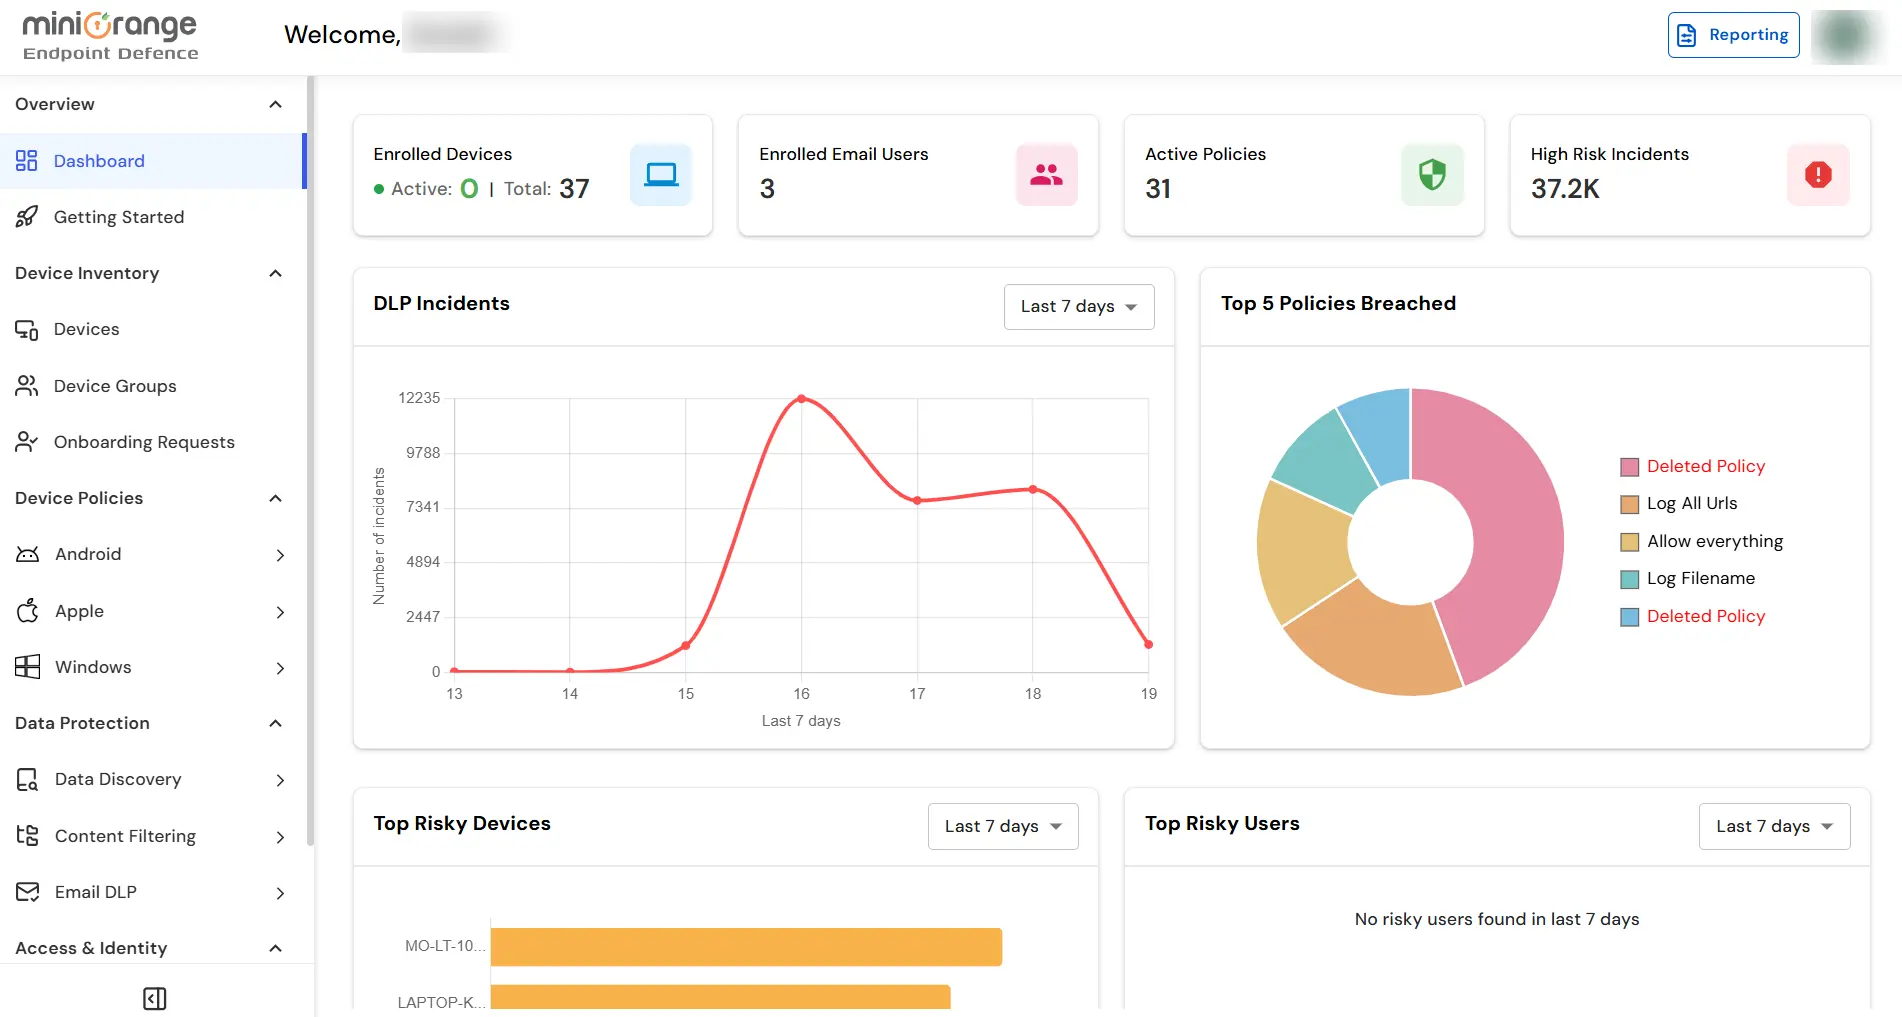
- On the dashboard, navigate to the left menu panel and then click on Endpoint Tab → Clipboard Policy tab.
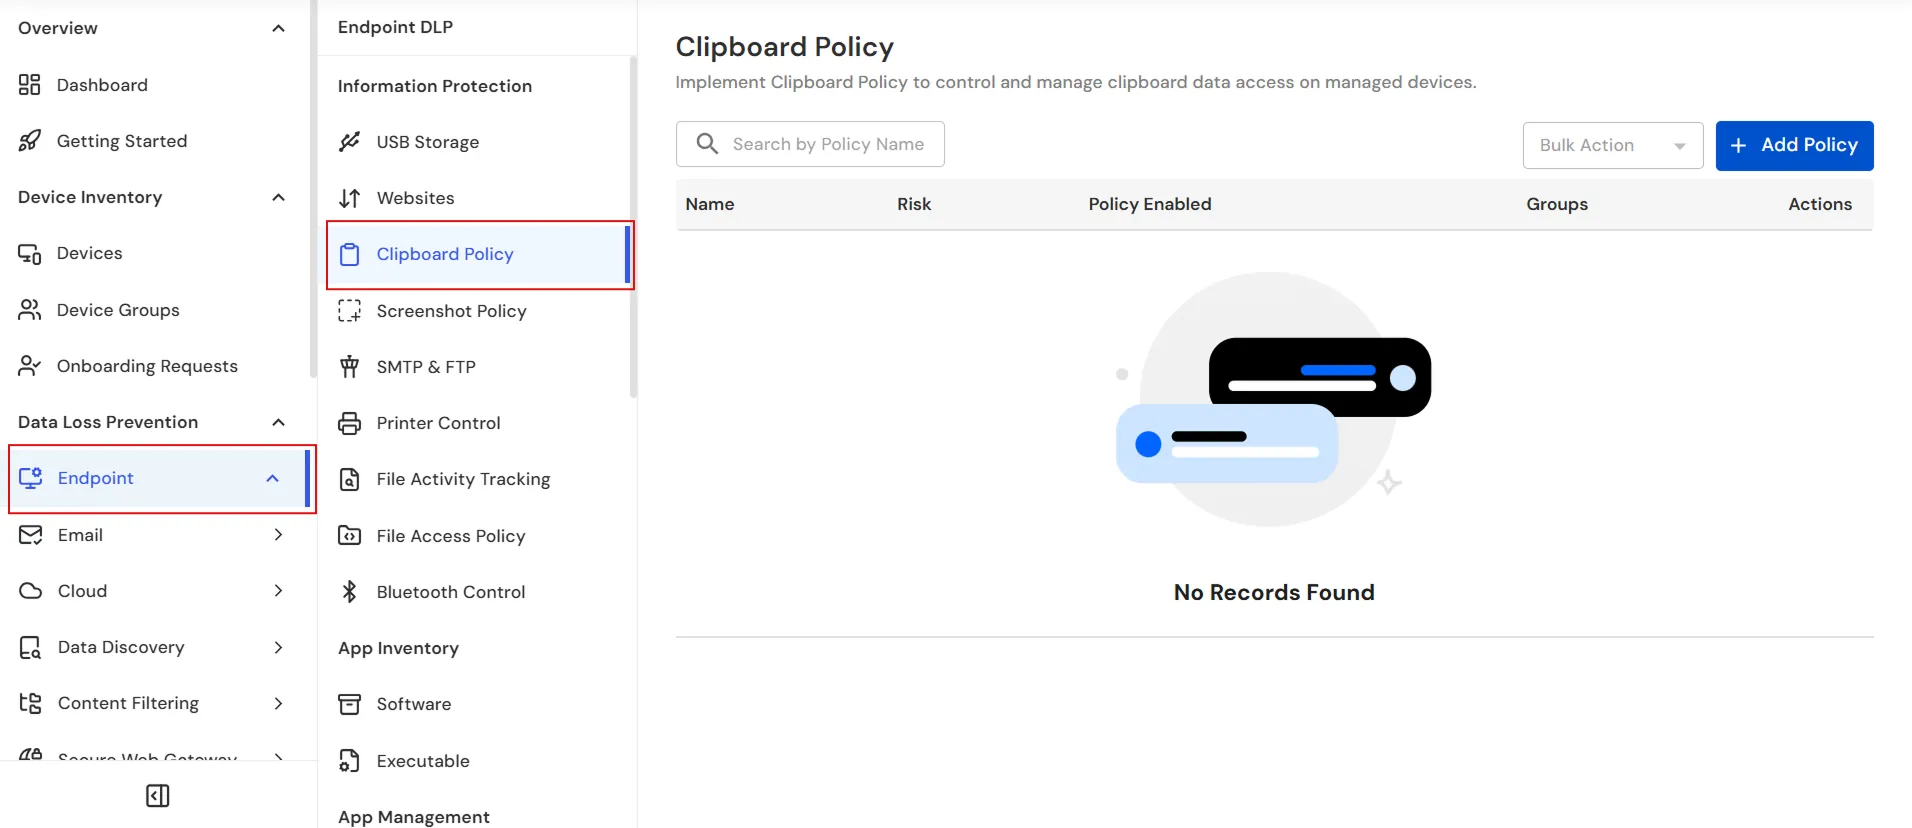
- Click the Add Policy button to create a new Clipboard Policy.
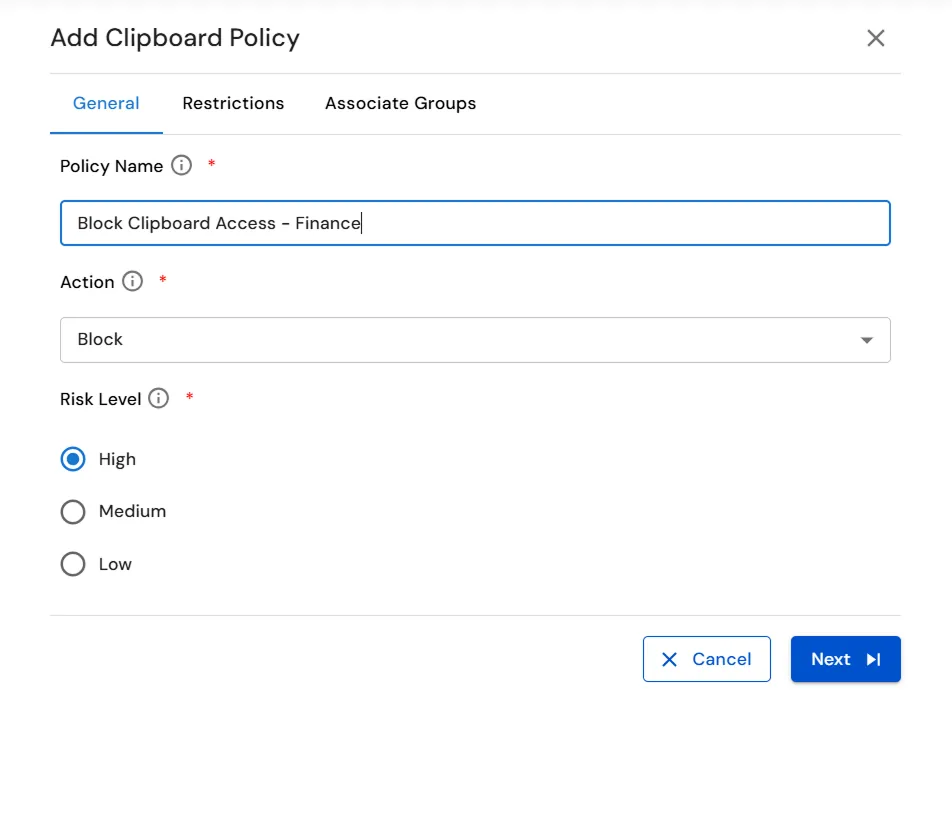
- Under the General tab, enter a unique Policy Name, select the appropriate Action, choose the desired Risk Level, and then click Next.
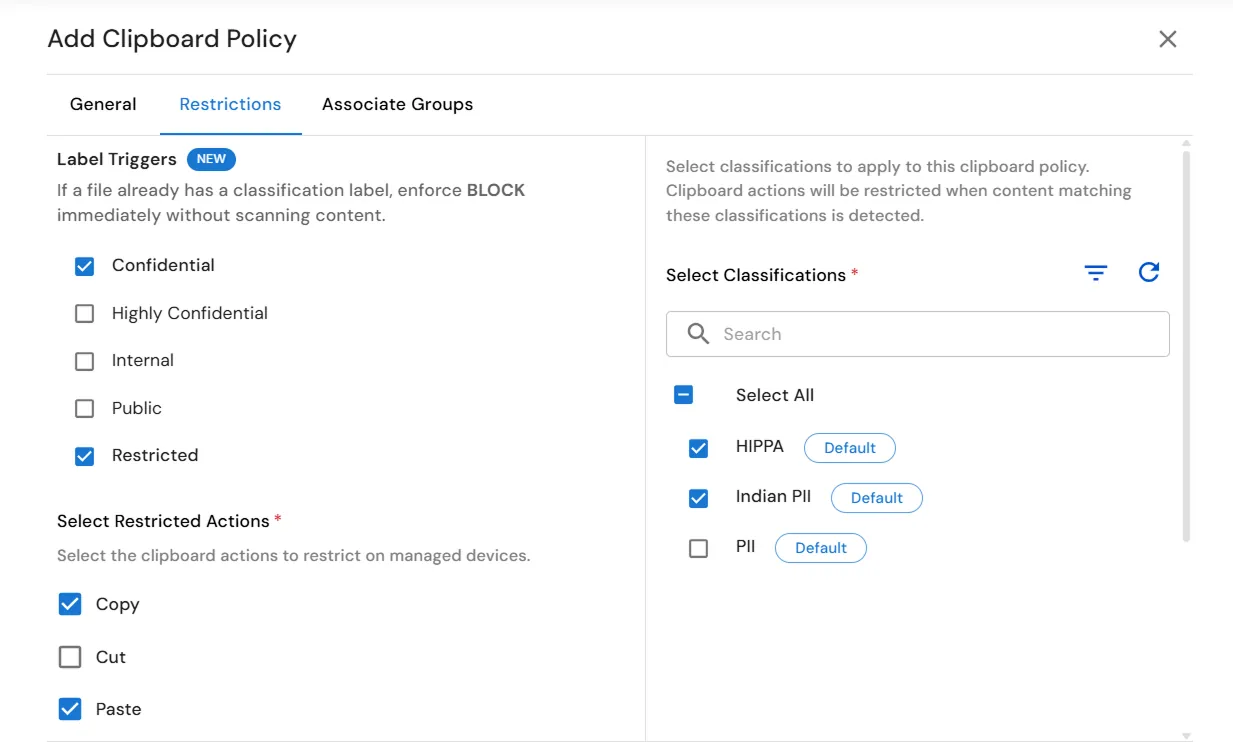
- Under the Restrictions tab, configure the Clipboard Policy settings as follows:
- Label Triggers: Select one or more sensitivity labels to automatically block clipboard actions when content with those labels is detected. For example, selecting Confidential and Restricted will block clipboard operations whenever content marked with these labels is copied, cut, or pasted.
- Select Restricted Actions: Choose the clipboard operations you want to restrict. For example, selecting Copy and Paste will prevent users from copying sensitive data from protected applications and pasting it into other applications.
- Select Classifications: Choose one or more data classifications to apply the Clipboard Policy. For example, selecting HIPPA and Indian PII will enforce clipboard restrictions whenever protected healthcare or personally identifiable information is detected.
- Scroll down to configure the remaining Clipboard Policy settings.
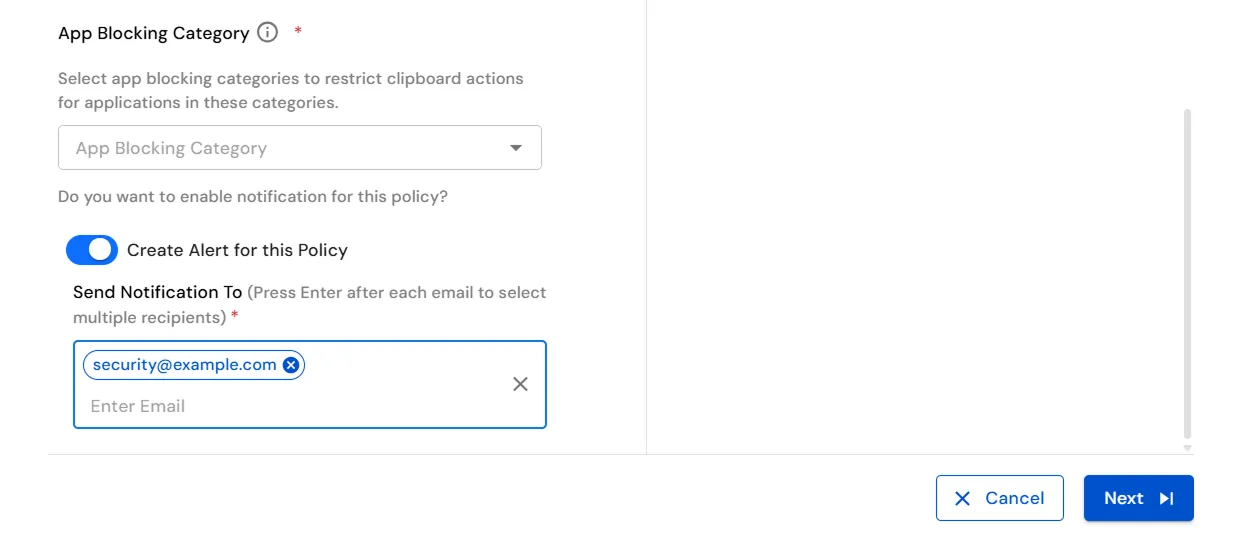
- Select the appropriate App Blocking Category to apply clipboard restrictions to applications in that category.
- (Optional) Enable Create Alert for this Policy and enter one or more recipient email addresses. For example, if you enter security@example.com, that recipient will receive an email notification whenever a user attempts a restricted clipboard action that triggers the policy.
- Once you have configured the restrictions, click Next.
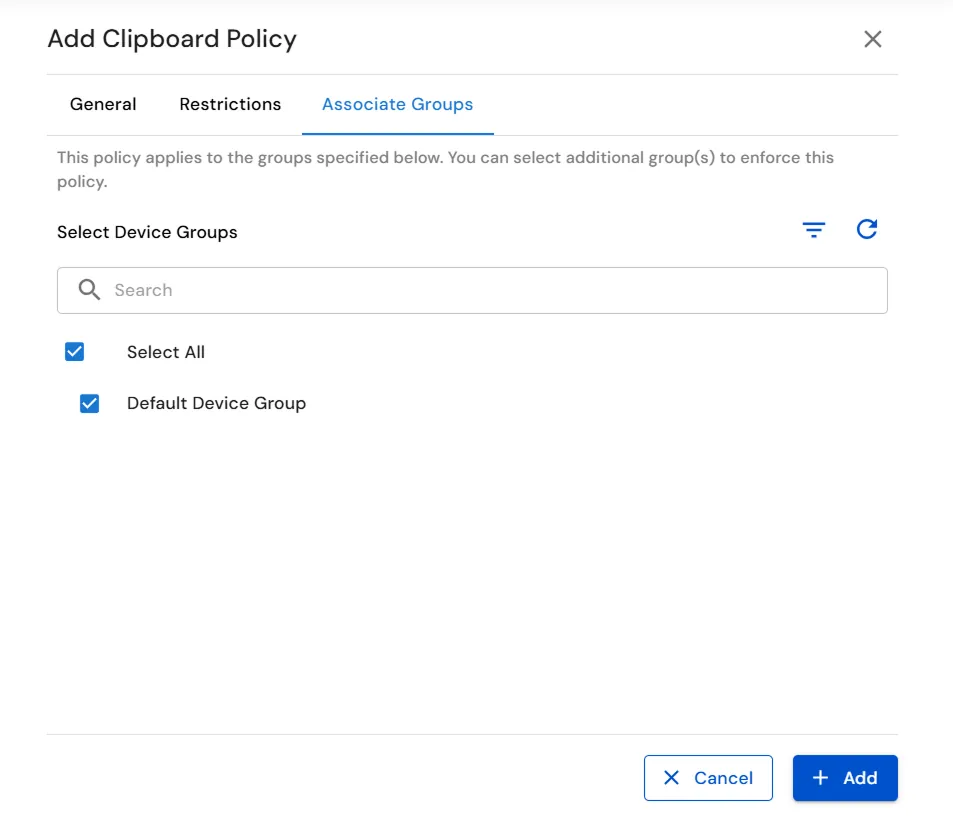
- Under the Associate Groups tab, select the Device Group(s) to which the Clipboard Policy should be applied.
- Select the Default Device Group (or any other required Device Group) from the list.
- Click Add to create and apply the Clipboard Policy to the selected Device Group(s).
- After clicking Add, verify that the Clipboard Policy has been created successfully and appears in the policy list.
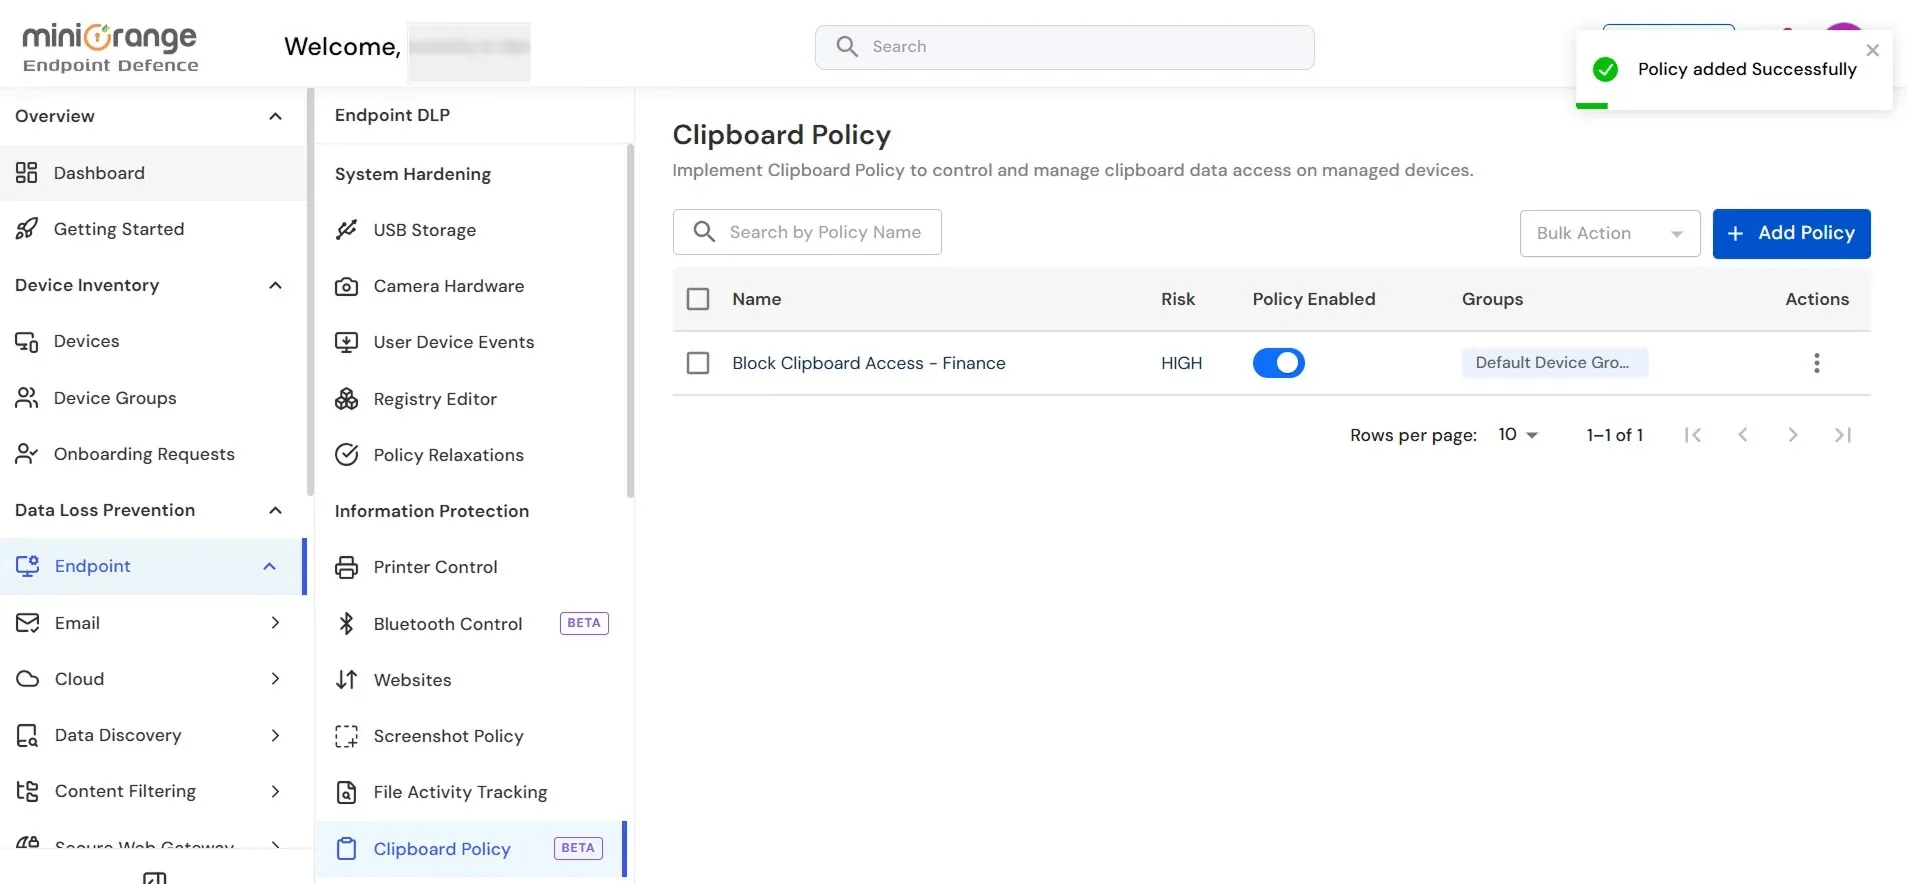
- Ensure the configured Policy Name, Risk Level, assigned Device Group(s), and the Policy Enabled toggle are displayed correctly.
In this way you have succesfully setup the Clipboard Policy by using our DLP Software. Also if you are facing any issues that you are not able to resolve please feel to reach out us uemsupport@xecurify.com.