- Home
- DLP
- How to Configure Ethernet Policy using miniOrange DLP
Configure Ethernet Policy with miniOrange DLP Solution
The Ethernet Policy feature in miniOrange Endpoint Defence enables administrators to restrict Ethernet connections on managed Windows devices. It allows administrators to configure connection blocking, assign risk levels, and apply policies to specific device groups. This helps organizations control Ethernet connectivity and strengthen endpoint security.
Prerequisites
Before you begin the configuration, ensure you have the required access:
- You need Administrator access to your DLP dashboard.
Configuration Steps
Step 1: Configure an Ethernet Policy
- Sign in to your DLP Admin dashboard.
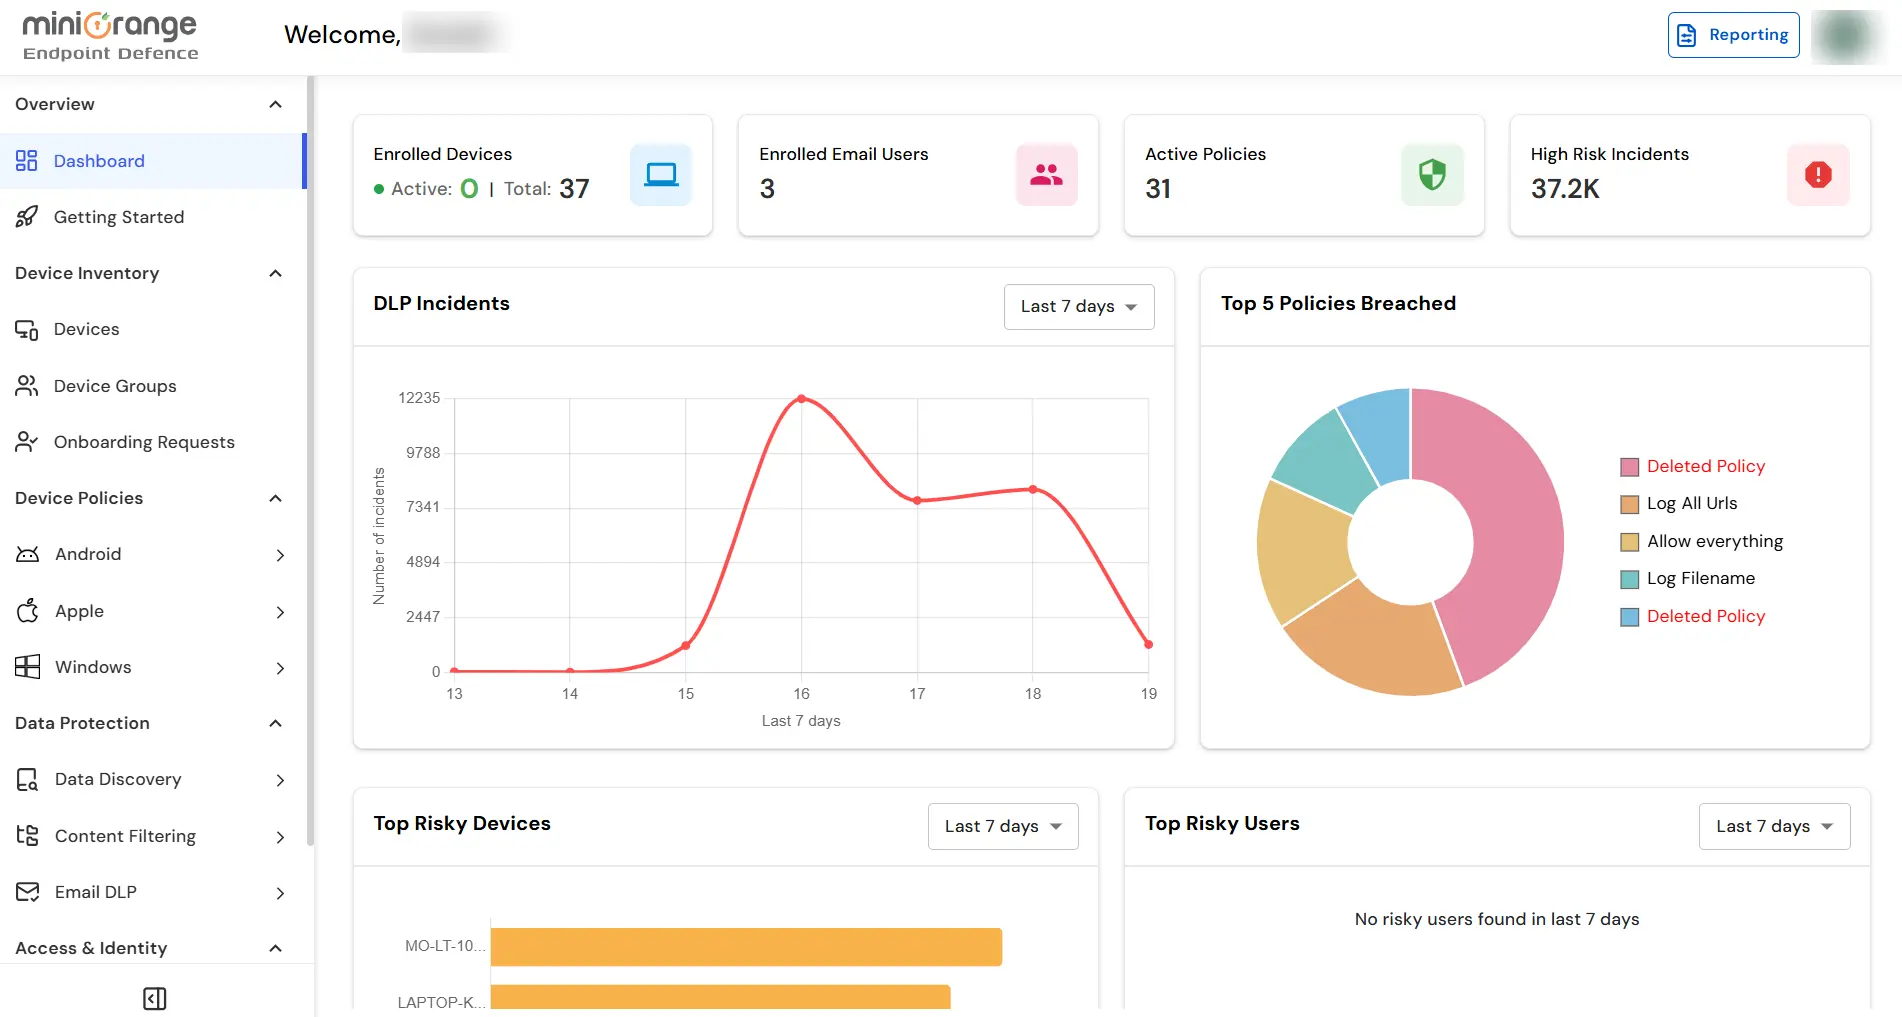
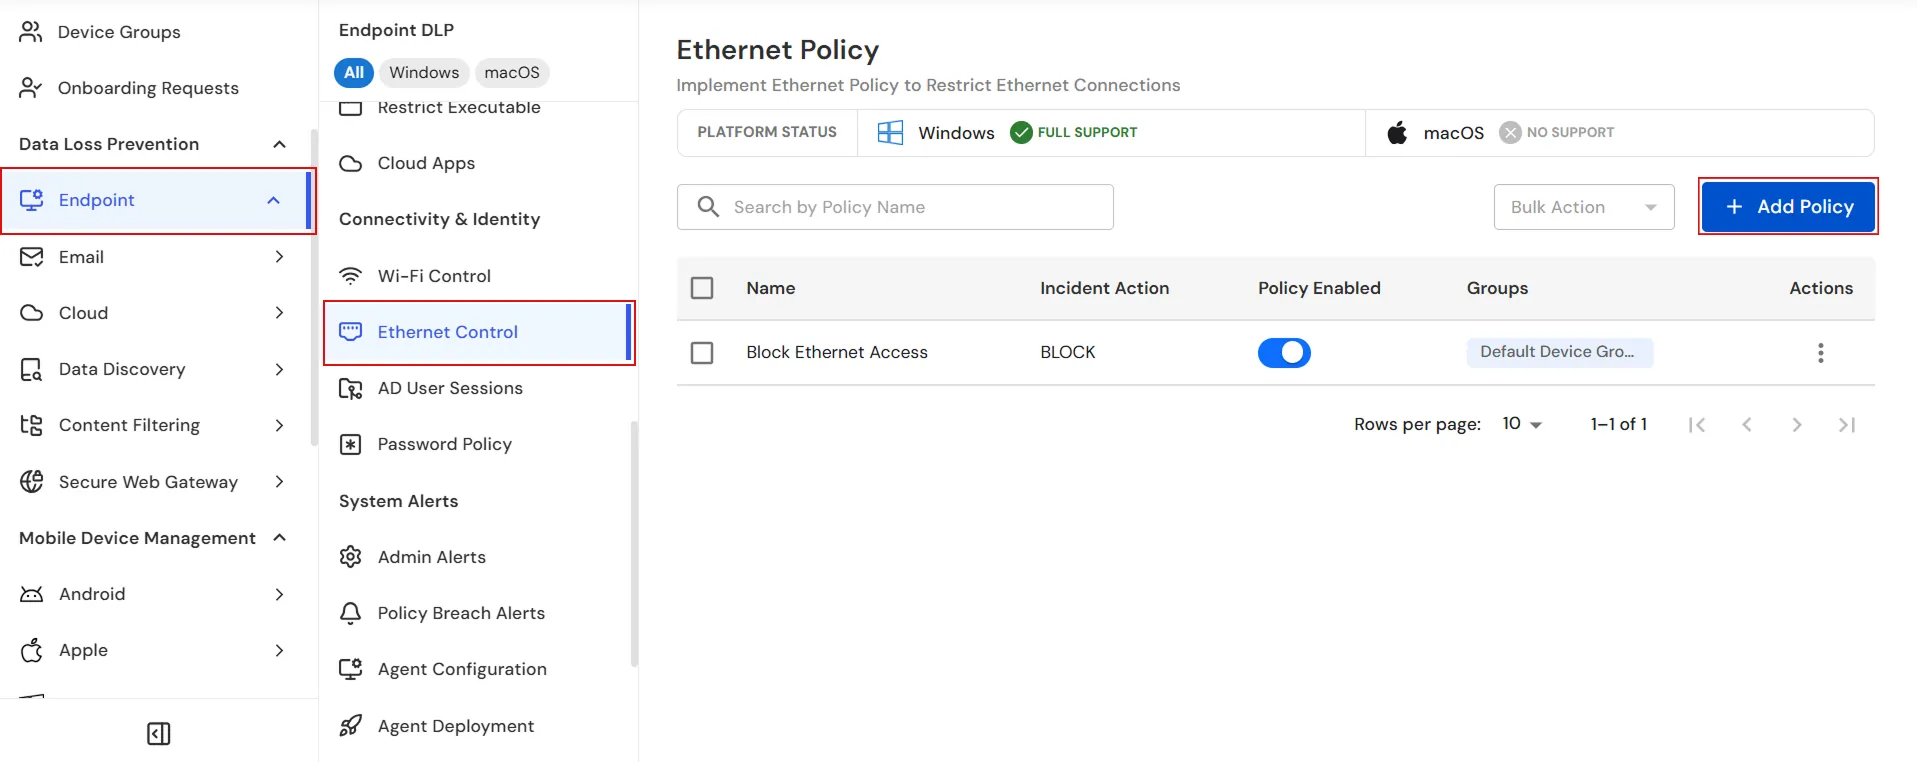
- On the dashboard, navigate to the left menu panel and click Endpoint → Ethernet Control.
- Click Add Policy to create a new Ethernet Policy.
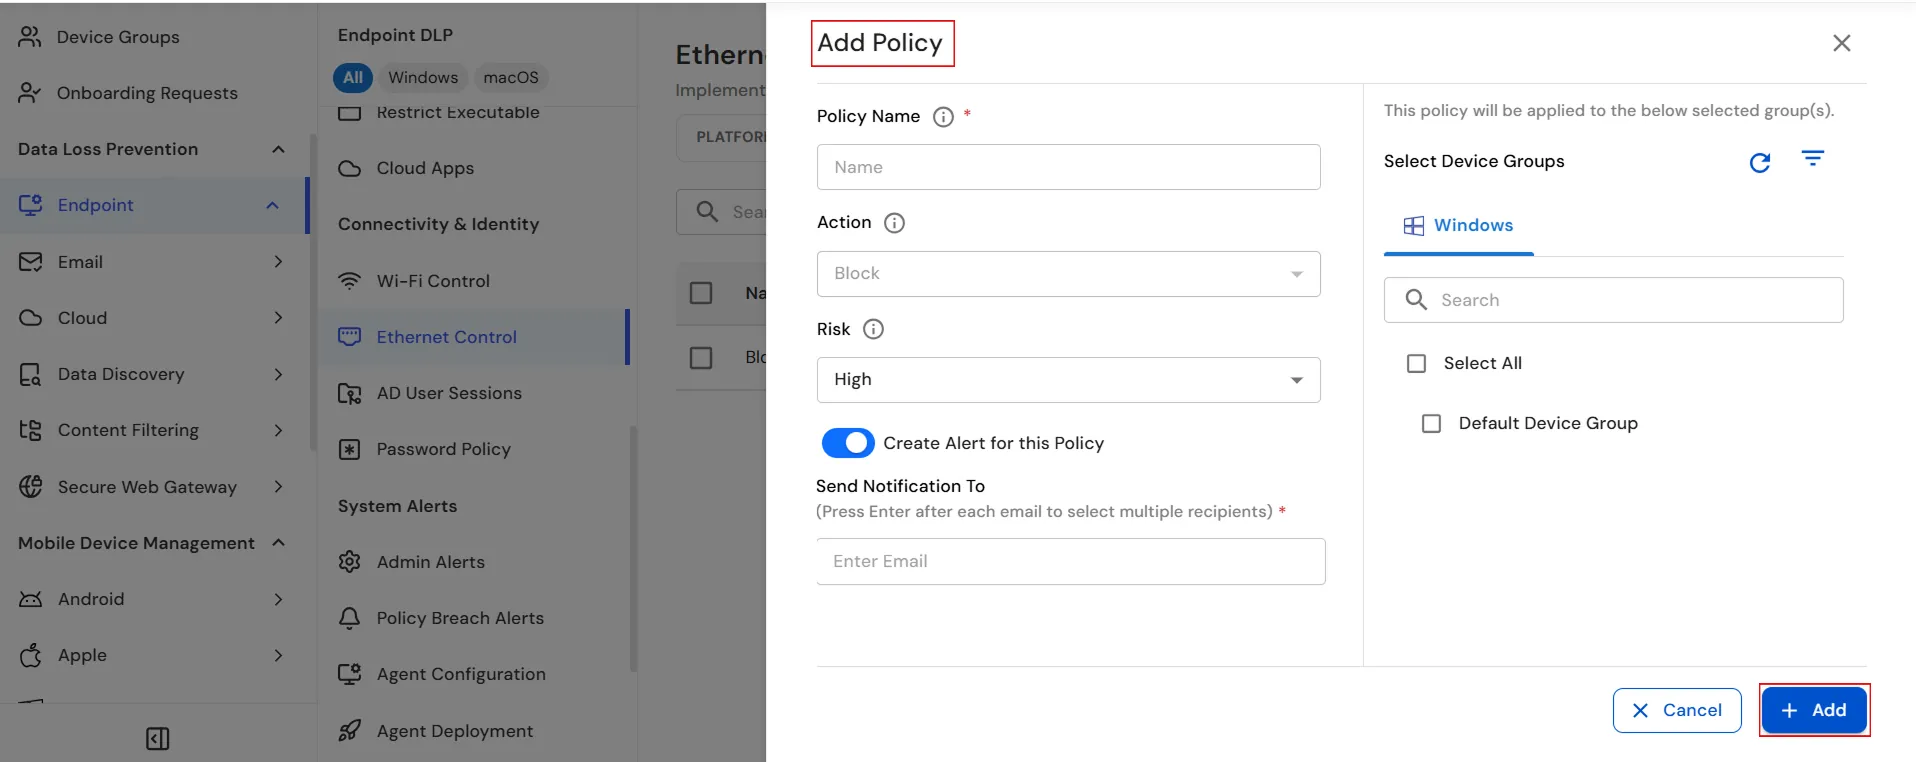
- In the Policy Name field, enter a name for the Ethernet Policy.
- The Action is set to Block by default and cannot be changed.
- Select the appropriate Risk level (Low, Medium, or High) based on the severity of the Ethernet connection attempt.
- If required, enable the Create Alert for this Policy toggle and enter the email address(es) that should receive alerts when the policy is triggered.
- Under Select Device Groups, select the required device group, such as Default Device Group.
- To apply the policy to all available device groups, select the Select All checkbox.
- Click Add to create the Ethernet Policy.
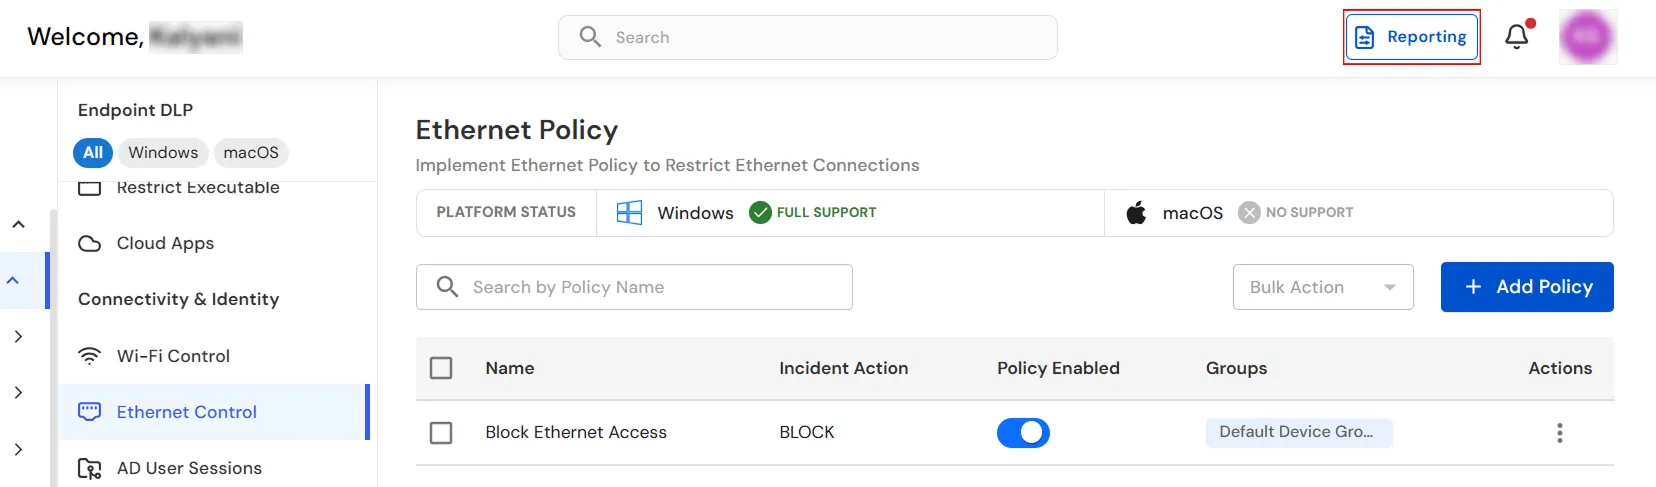
- Verify that the newly created Ethernet Policy appears in the policy list with the Incident Action set to BLOCK and the policy enabled.
Step 2: Reporting
- Click Reporting in the top-right corner to access the reporting dashboard.
- From the left navigation panel, select Reports → Ethernet Reporting to review Ethernet connection events recorded across managed devices.
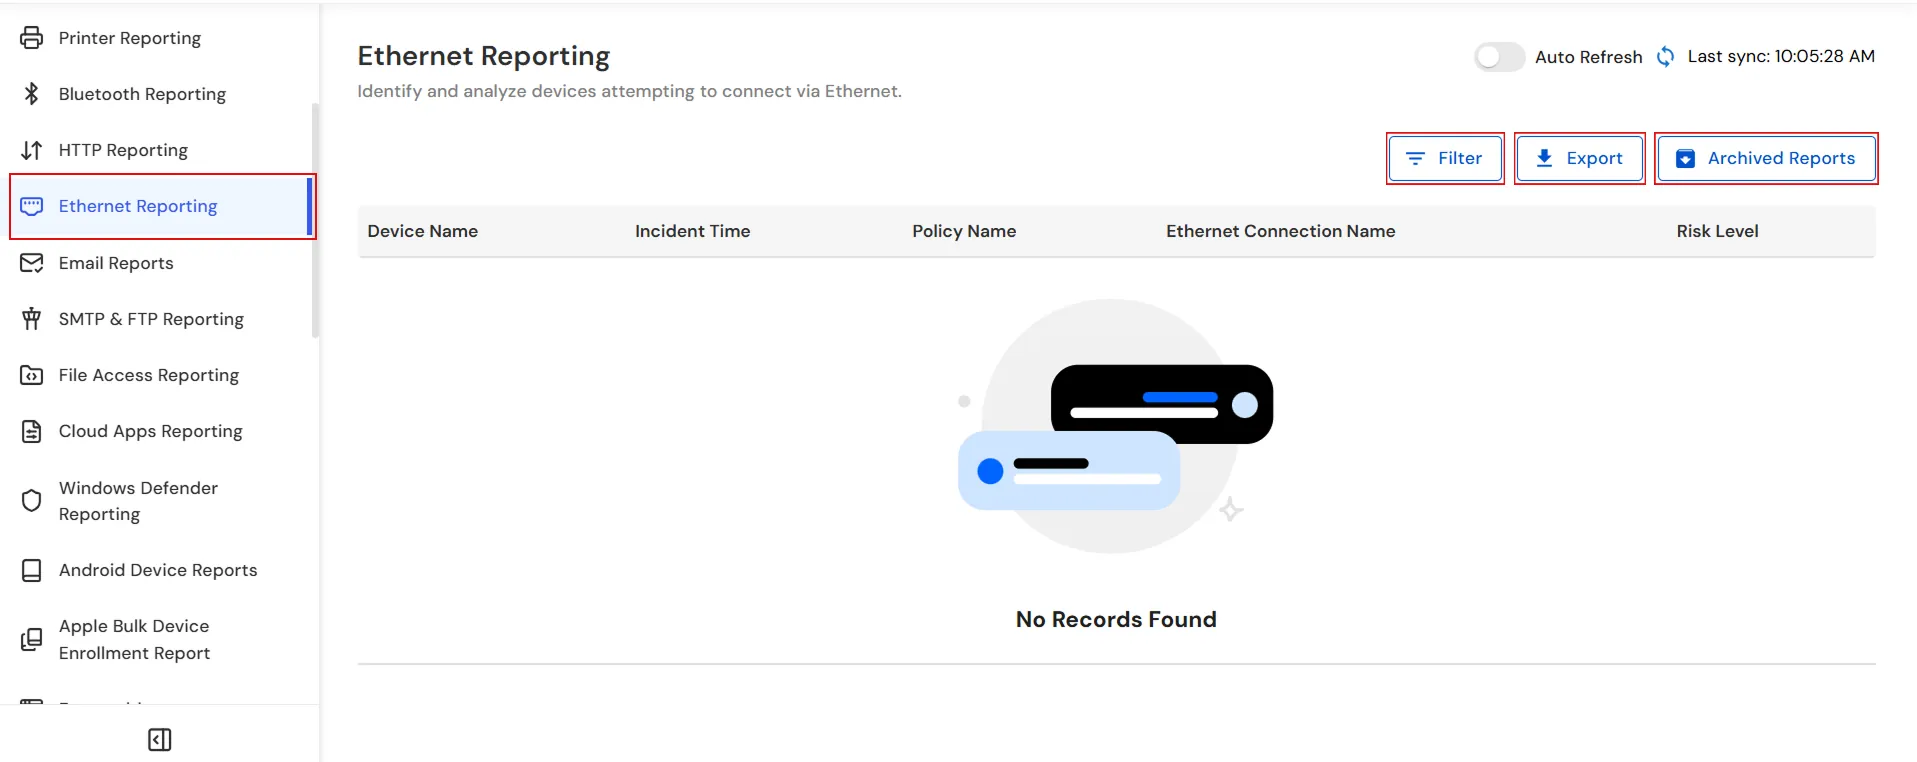
- Use the Filter option to narrow down Ethernet connection events by Device, Policy, or Date.
- You can also click Export to download the Ethernet connection report for auditing, investigation, and compliance purposes.
- Use Archived Reports to download previously archived Ethernet reports by selecting the required Year, Quarter, and Chunk.
You have successfully configured the Ethernet Policy and reviewed the corresponding reports using our DLP Software. If you encounter any issues during the configuration, please feel free to contact us at uemsupport@xecurify.com.